Highlight Text Patterns Via a Text Search
AutoBookmark™ plug-in for Adobe® Acrobat®
- Introduction
- In this tutorial, we will look at how to highlight text in a PDF that matches one or more unique patterns. This is achieved by executing a text search that uses regular expression syntax. All matching text is highlighted with a user-specified color. This method is much faster than manually highlighting individual items of text. For example, it may be necessary to highlight the same line in each document - such as address components, identification numbers, or phone numbers etc.
- In the steps below, we will configure a search pattern that matches with "totals" figures in a collection of invoices:
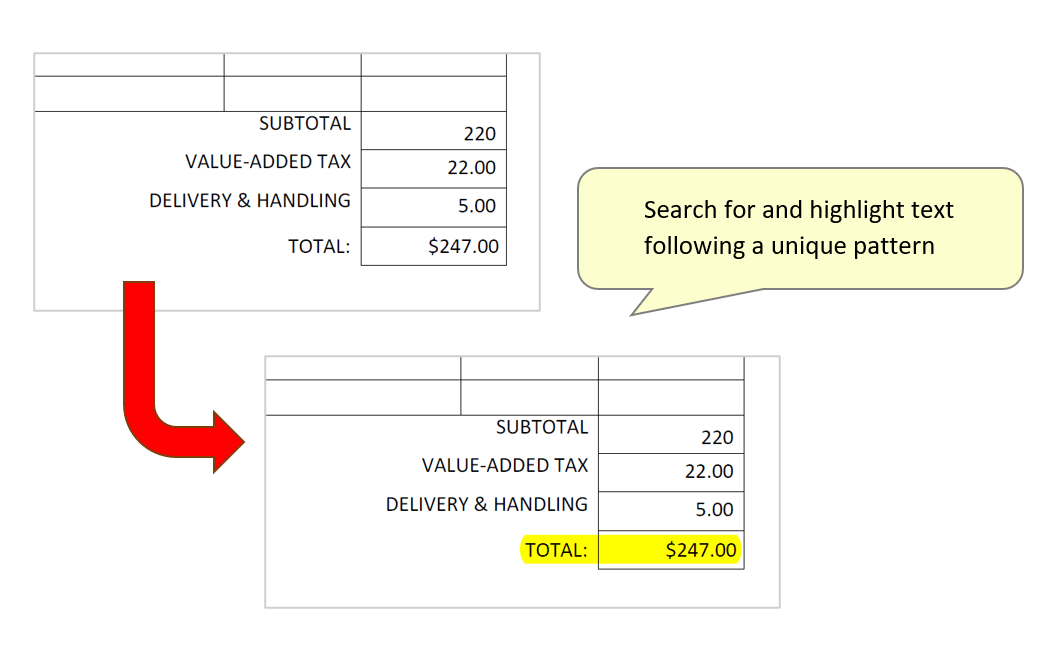
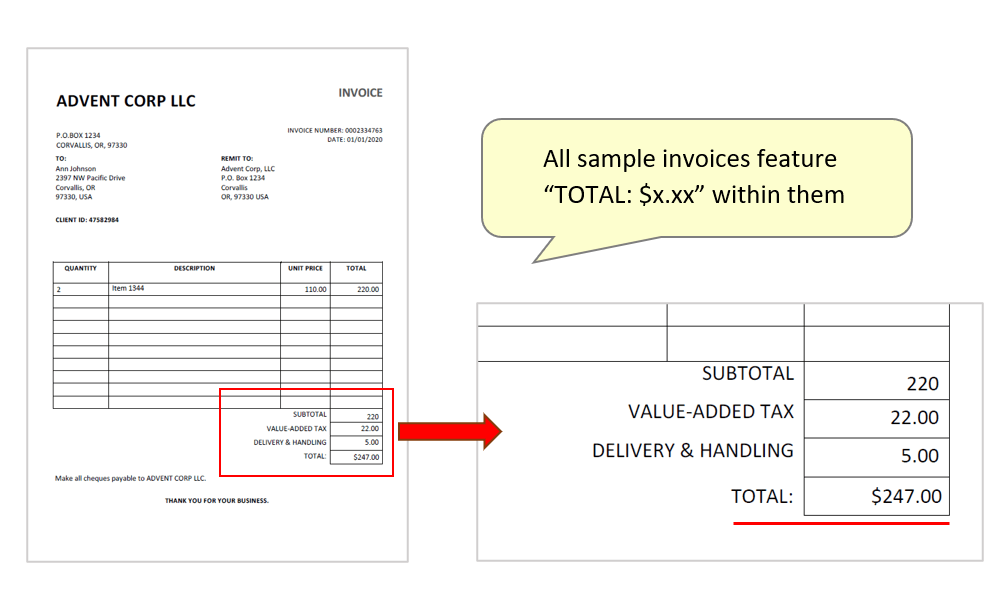
- The input document used here features four separate sample invoices - one per page. At the end of each invoice is a 'total' figure, that always follows a "TOTAL: $x.xx" format. The goal is to highlight this text in each document.
- Prerequisites
- You need a copy of Adobe® Acrobat® along with the AutoBookmark™ plug-in installed on your computer in order to use this tutorial. Both are available as trial versions.
Text Pattern Overview
- What is a Text Pattern?
- A text pattern is an expression that you can use to find text that contains a particular pattern of characters. Text patterns consist of metacharacters, which have special meaning, and characters (non-metacharacters). Examples of the text patterns: email addresses, phone numbers, account numbers, SSN (social security numbers), mailing addresses etc. Text patterns are very common in business documents that often use fixed form-like layouts where information is typically preceded with various text labels. AutoBookmark uses widely popular regular expression syntax to define text patterns. For example, please see the following site for in-depth coverage of the regular expression syntax.
- Examples of Text Patterns
-
Text patterns (regular expressions) can range from a simple search text that stands for itself (for example, “John Doe”)
to complex expressions that
use various rules that look for a very specific sequence of characters.
Here are few examples of commonly used text patterns:
- \d{10} - searches for a 10-digit number. This pattern will match text strings such as "0987654321".
- Account number: \d{10} - searches for "Account number: " that is followed by a 10-digit number. This pattern will match text strings such as "Account number: 0987654321".
- \b\d{3}-\d{2}-\d{4}\b - searches for a 9 digit SSN number. This pattern will match text strings such as "505-22-1234".
- \b[A-Z]{2}\d{4}\b - searches for a pattern that starts with 2 letters and is followed by 4 digits. For example, AB2312 or XY3487.
Step-by-Step Instructions
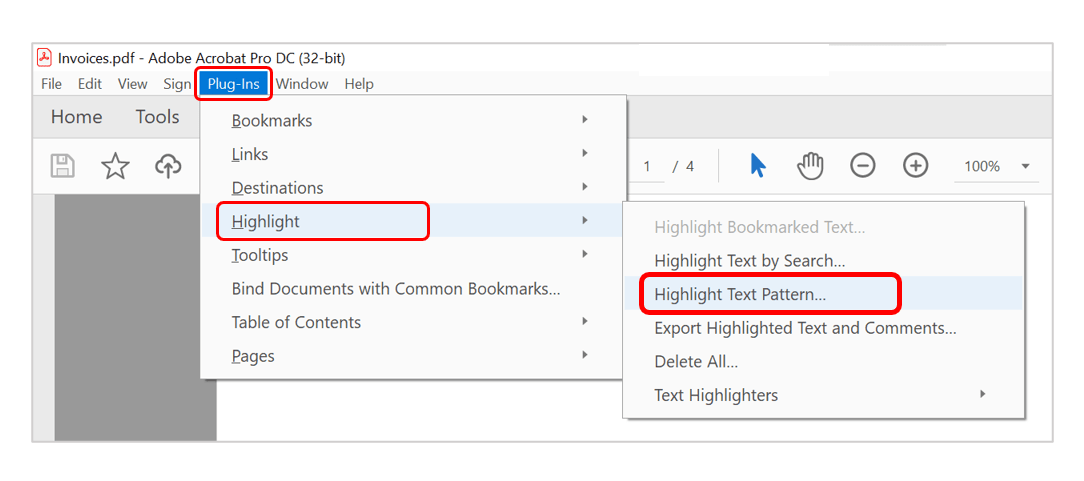
- Step 1 - Open the Text Search Dialog
- Open the document that you want to add text highlights to in Adobe Acrobat, and press "Plug-ins > Highlight > Highlight Text Pattern...".
- Step 2 - Type a Pattern to Search For
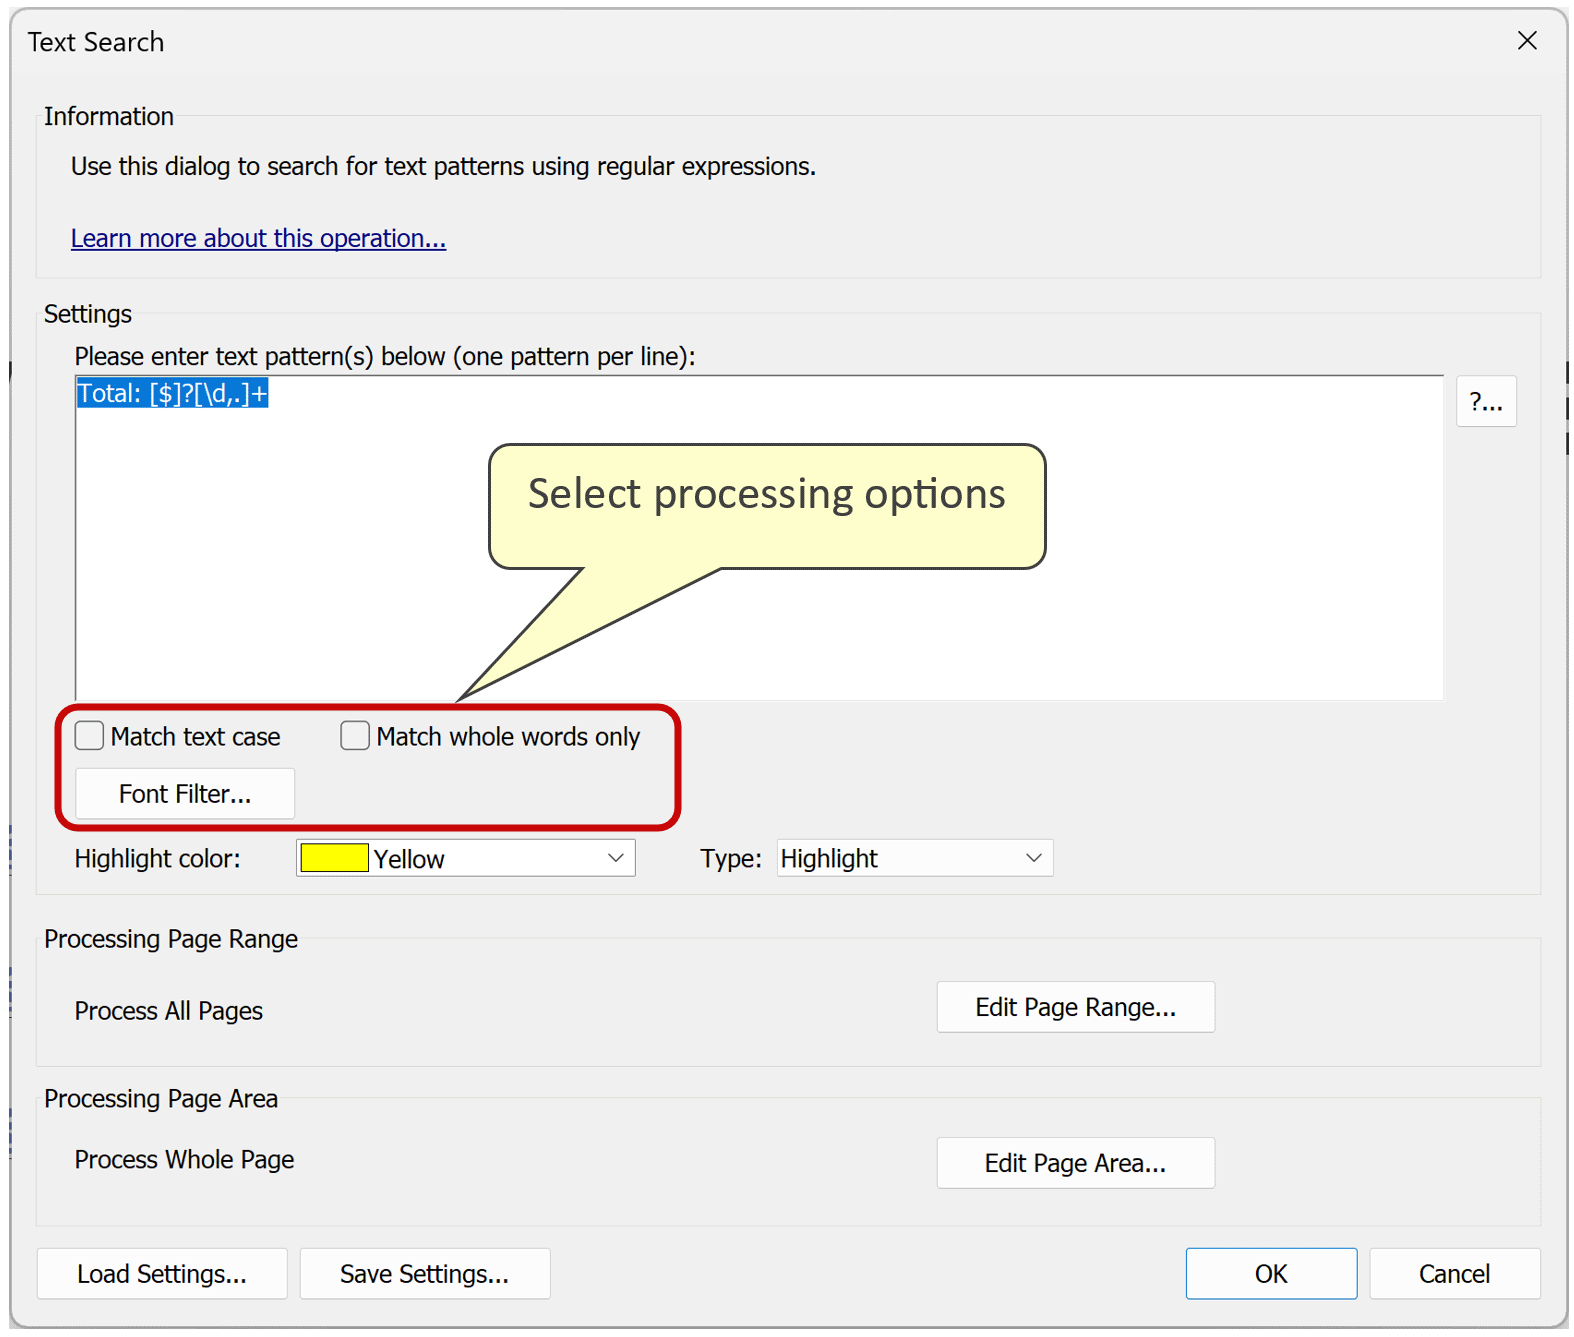
- Type the text pattern to search for in the entry box next to "Find text pattern:". In this example, we will use Total: [$]?[\d,.]+ to search for and highlight any totals within the input document.
- Search expression breakdown:
- "Total: - matches any occurrences of this text.
- [$] - matches a single $ symbol.
- ? - indicates that previous item in the regex ($) is optional (matches would still occur if totals were displayed as "TOTAL: 100.00").
- [\d,.]+ - matches with one or more digit, including a comma or period (,/.).

- Using Multiple Patterns
- It is possible to use up to 100 text patterns in this operation. Enter each pattern on a separate line. However, processing speed gets slower with each additional pattern. It is recommended to use as few search patterns as possible. Note that it is possibe to combine multiple search patterns into a single one by using the following syntax: (Search Pattern1)|(Search Pattern 2)|(Search Pattern 3). For example, (XY\d{4}\b)|(ABC\d{5}\b) will match letters XY that are followed by 4 digits or ABC followed by 5 digits. Using a combined pattern is much faster than using two separate ones.
- Step 3 - Select Processing Options
- Use the checkboxes below to select any necessary processing options. Check "Match case" to make the text search case sensitive (with this unchecked, any occurences of "total:" or "TOTAL:" would match). Use "Match whole words only" so that only complete words match. This avoids partial matches where search words may appear as part of larger words.
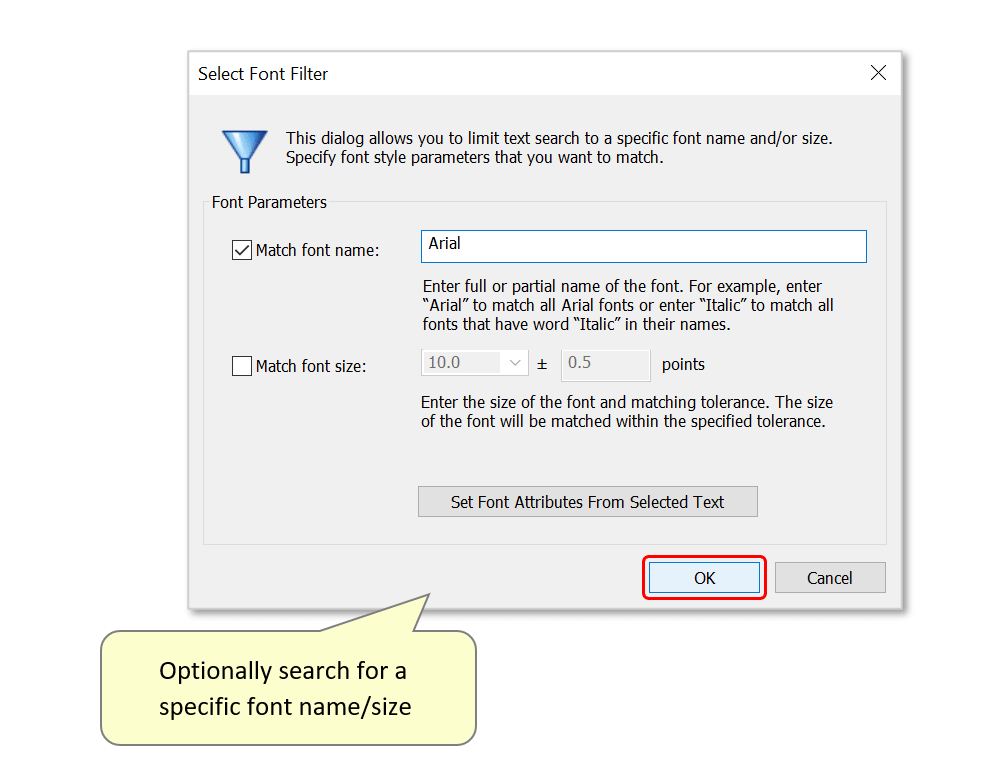
- Optional: press the "Font Filter..." button to filter the text search to match only specific fonts or text size.
- Use this dialog to configure the search to match a specific font or font size. Check "Match font name:", and type the desired font name into the box next to it (e.g.: "Arial"). Check "Match font size:" and configure a pt unit size and a tolerance boundary (e.g.: 0.5 pt above or below) to narrow the search to specifically-sized text.
- Optionally use the cursor to highlight some text in the opened PDF document before beginning step 1, in order to use the "Set Font Attributes..." button. This feature will examine the currently selected text, identify the font type and size used, and add it to the text search configuration.
- Press "OK" to use these settings.
- Step 4 - Select a Highlight Color and Annotation Type
- By default, matching text will be highlighted in yellow. Use the drop-down list next to "Highlight color:" to select another option.
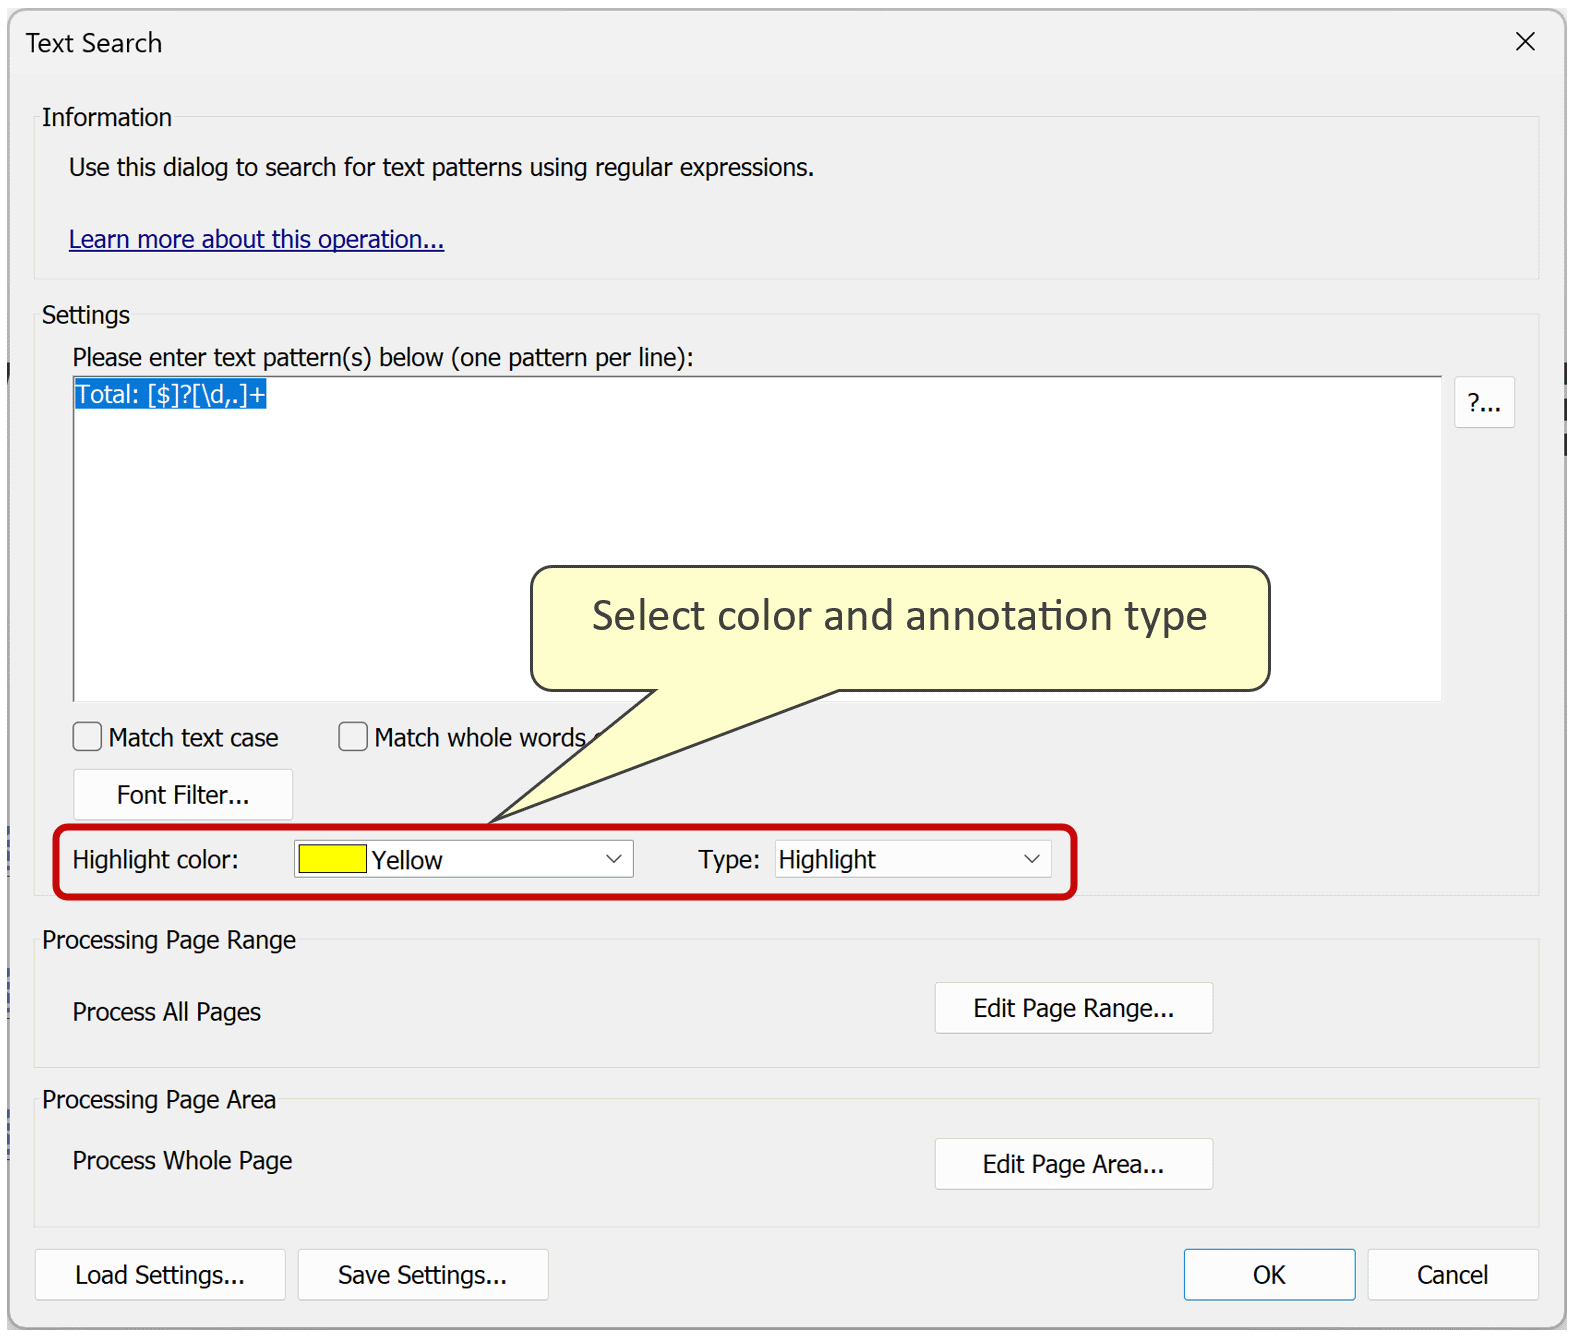
- There are 4 different annotations types that can be used: text highlight, underline, cross-out, and squiggly.
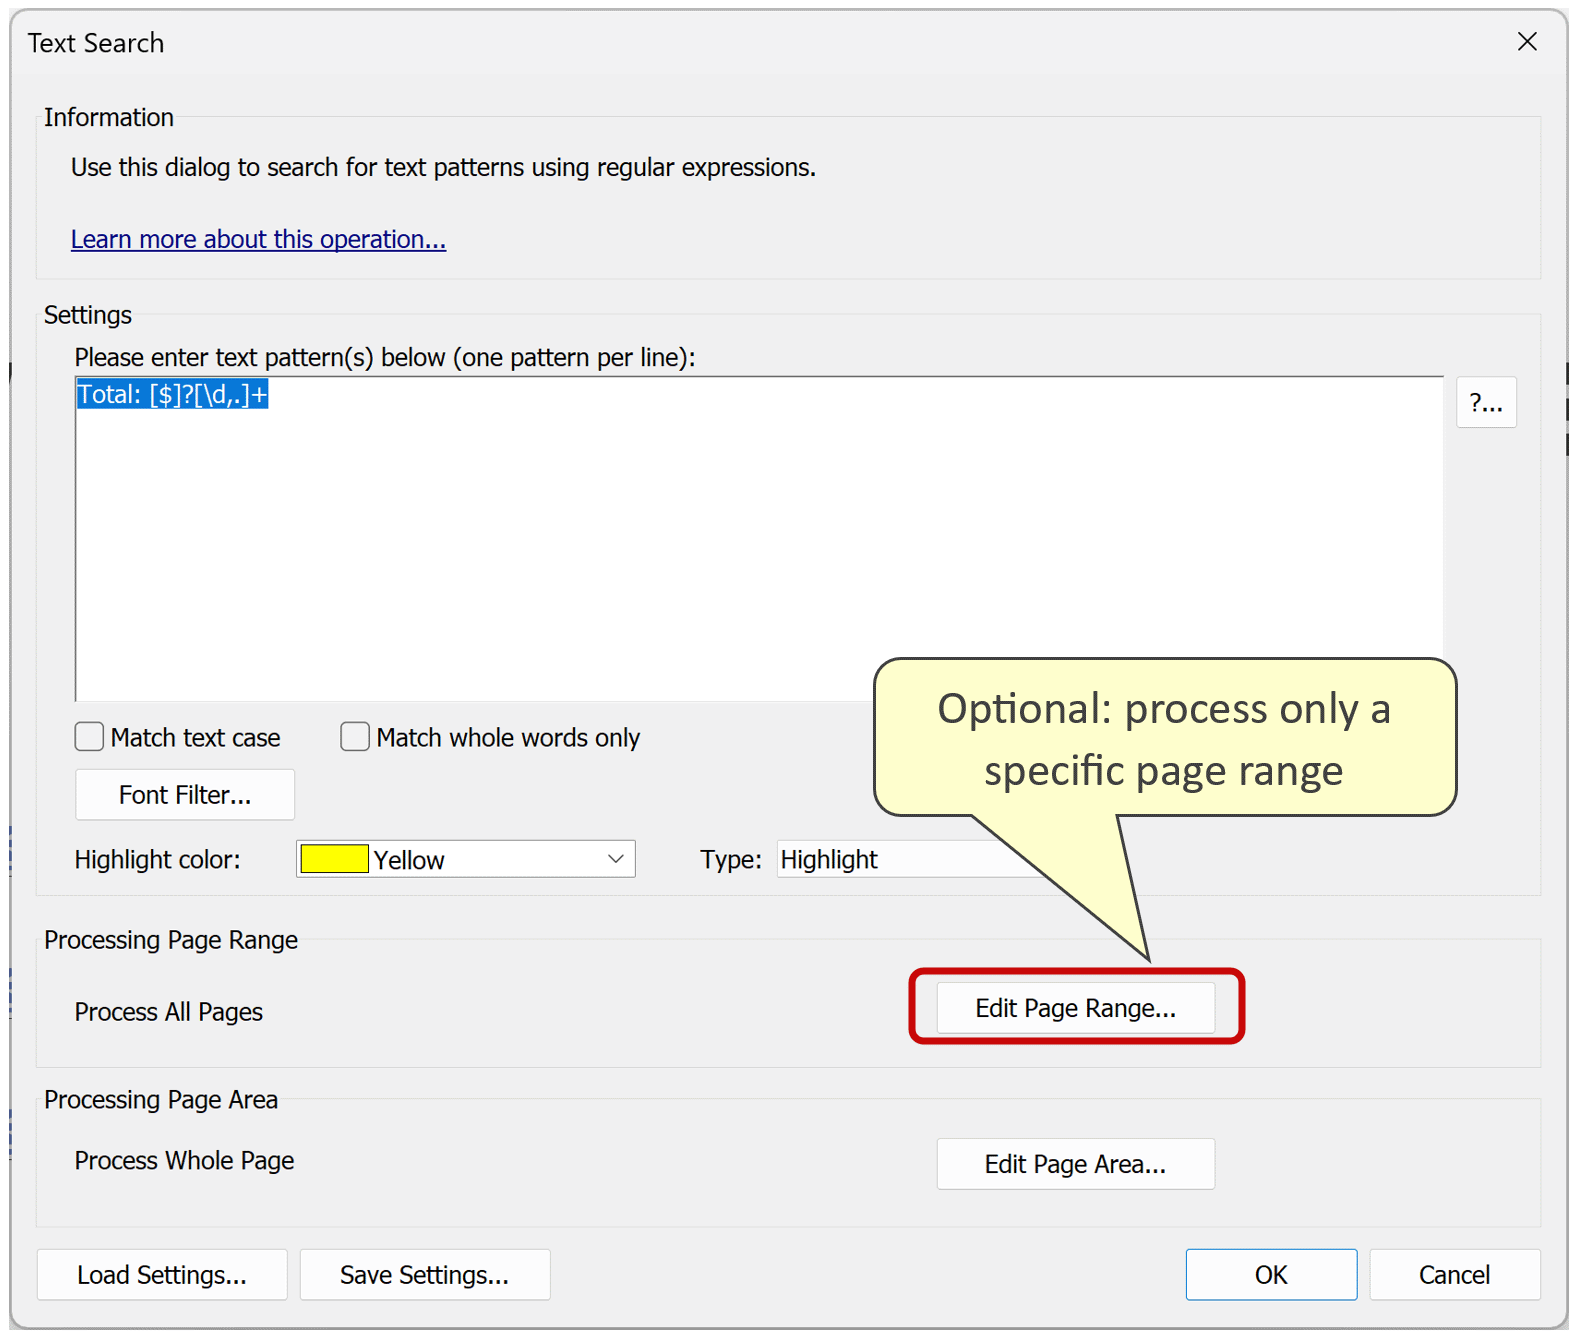
- Step 5 - Optional: Process Specific Pages
- Press "Edit Page Range..." to select pages for processing.
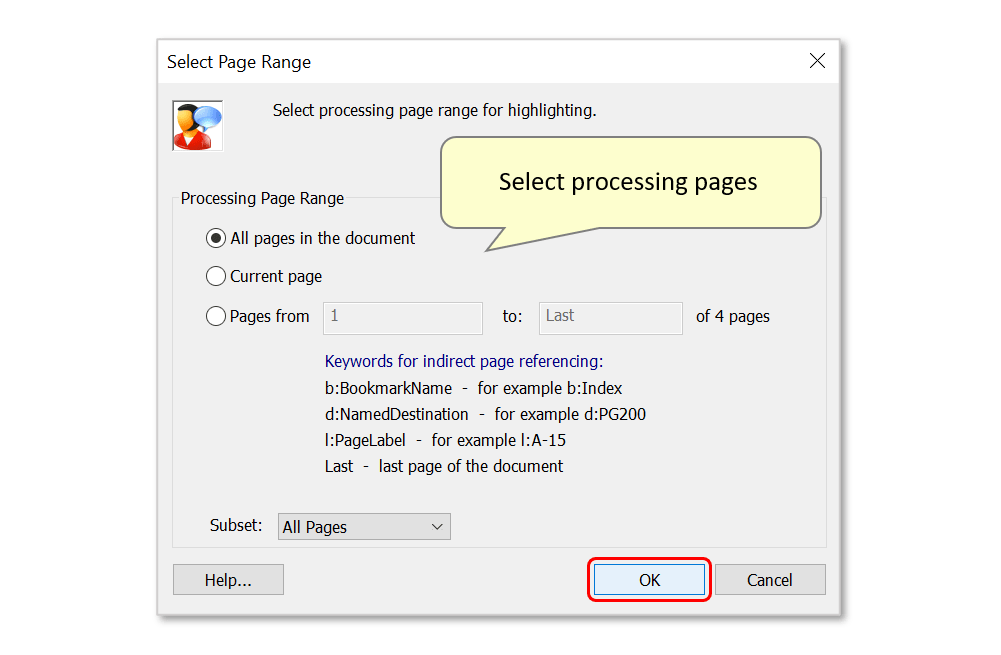
- Select the page(s) to be processed. Choose between: processing all pages of the document (default); only the currently open page; or a specific range of pages.
- Optionally process only a specific page subset by using the drop-down list (e.g. odd/even pages).
- Press "OK" to use these settings.
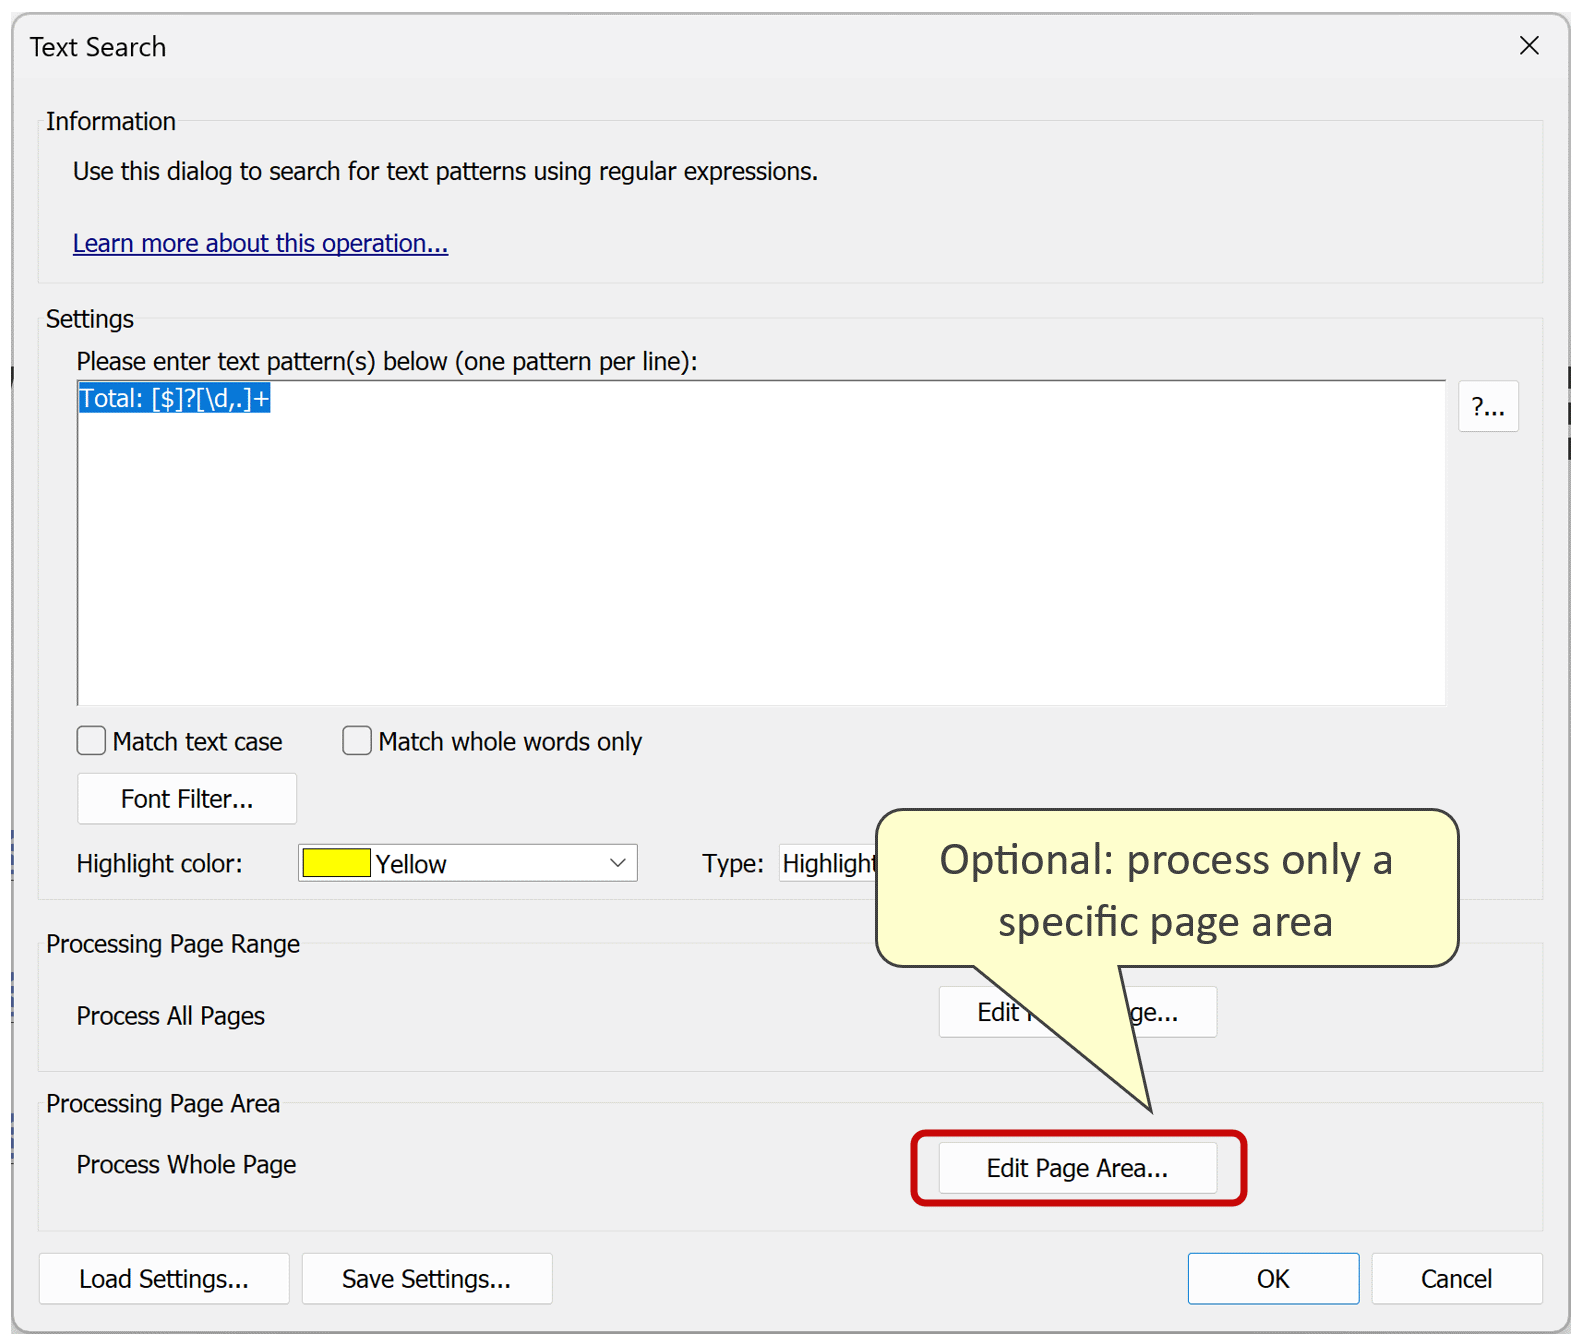
- Step 6 - Optional: Process a Specific Page Area
- It's also possible to search only a specific page area for text to highlight. To configure one, press "Edit Page Area...".
- Step 7 - Add Highlights
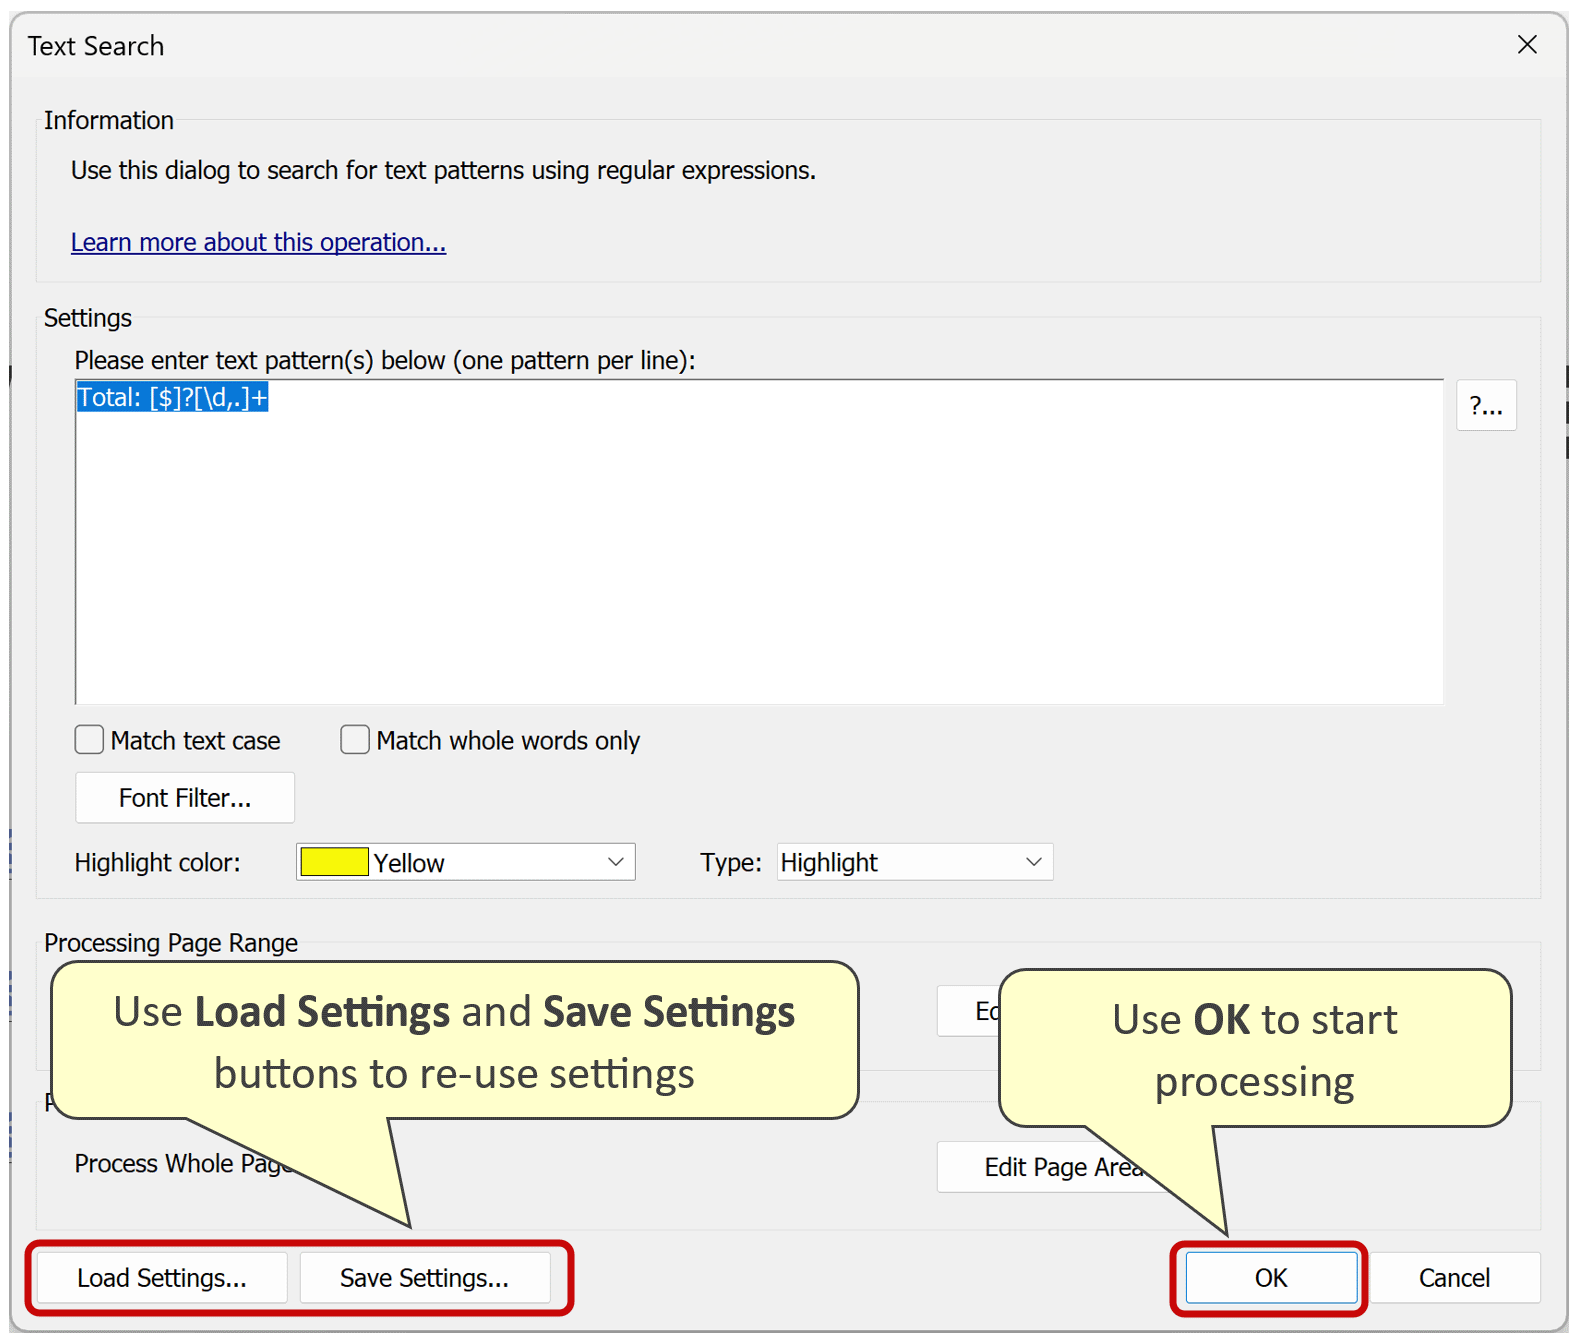
- Optional: press "Save Settings..." to save the configuration for future reuse. Settings will be saved as a "Highlighting Settings" file with a *.hltpattern file extension, and can be loaded via the "Load Settings..." button.
- Press "OK" to run the procedure.
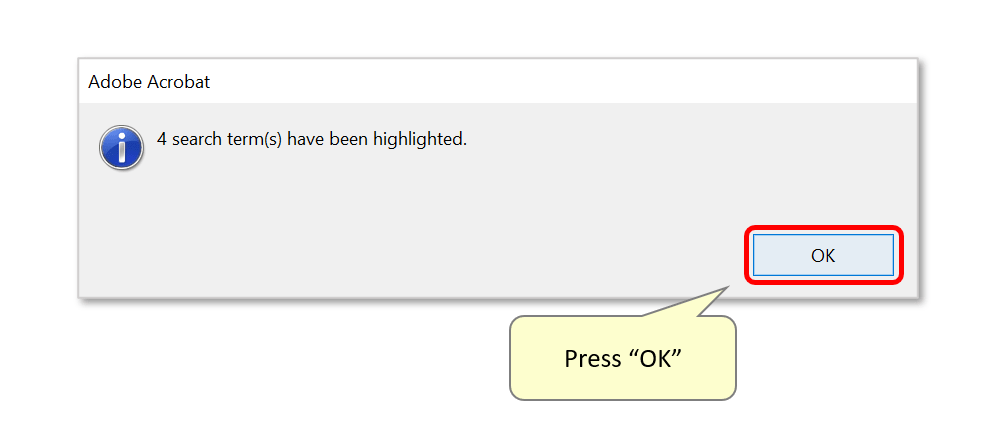
- A report box shows the number of highlights added to the selected page(s). Press "OK" to close it.
- Step 8 - Inspect the Results
- Check that all the text matching the search has been highlighted in the document:

- Step 9 - Optional: Delete Text Highlights
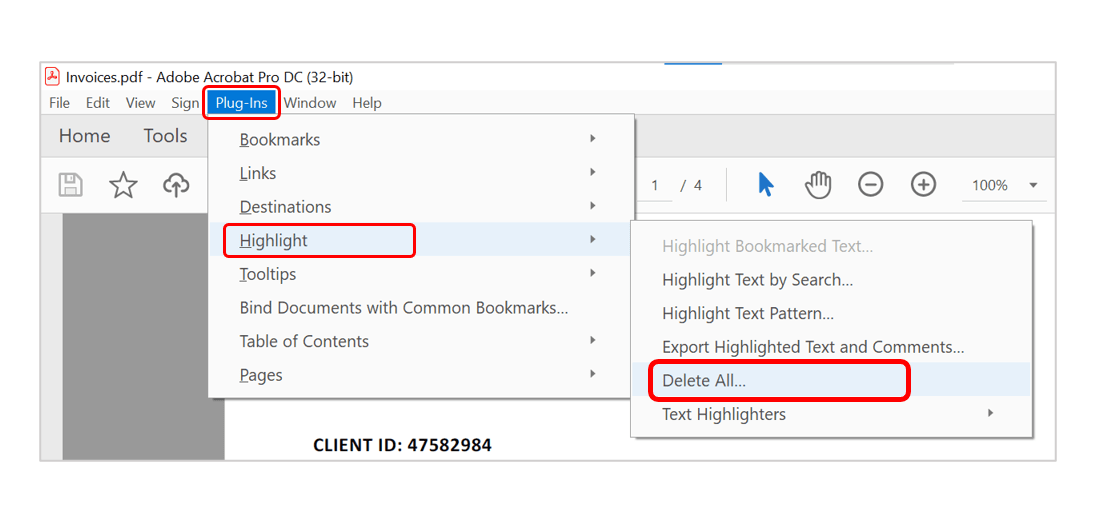
- IMPORTANT: if text is already highlighted in one color, it is not possible to repeat the procedure to highlight it in another color. Highlights will need to be deleted first.
- To remove highlights from an entire document, press "Plug-ins > Highlight > Delete All...".
- Click here for a list of all step-by-step tutorials available.