Use 2-Step Verification to Send Emails and Attachments via Gmail's SMTP Server
- Introduction
- Distributing large numbers of emails and attachments using AutoDocMail’s SMTP server option helps save time and reduce security-related complications. Many organizations have an internal SMTP server you can use, and hosting companies often provide one as well.
- Gmail provides its own SMTP server that you can use to send up to 2,000 messages a day. This tutorial tells you how to use Gmail as an SMTP server when your Google account is configured with 2-step authentication.
- To begin, we look at how to activate 2-step verification for increased security. When enabled, you must log in to Gmail with both your password and your phone. This prevents hackers’ success as although they may get your password for your account, they will not get the security code that is sent to your phone.
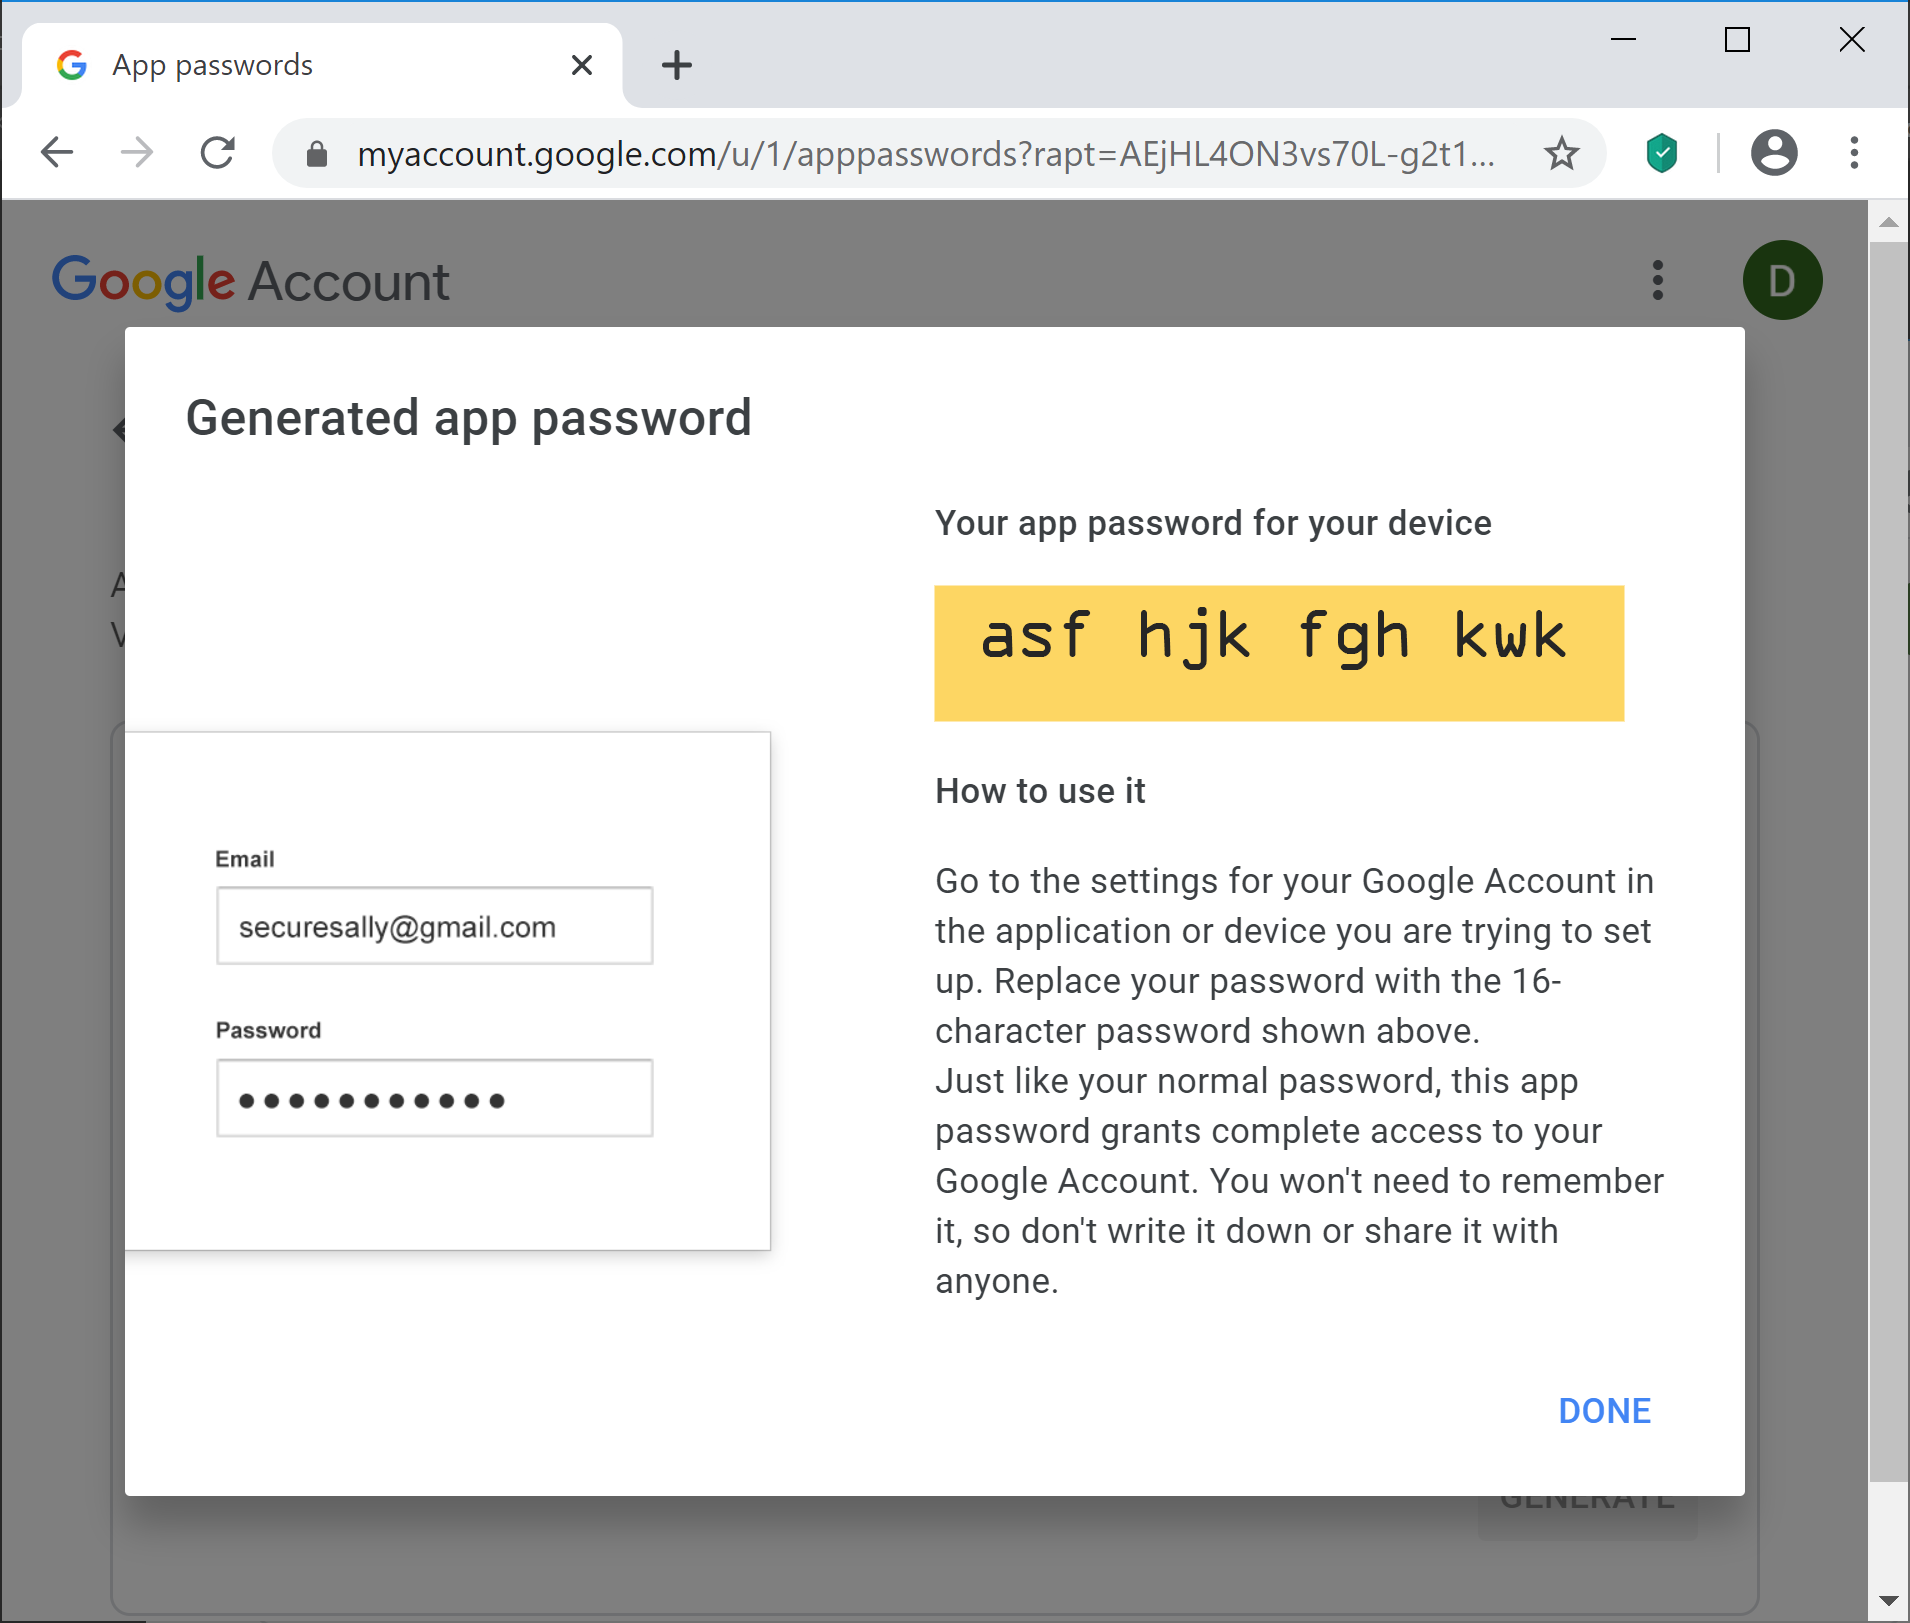
- This method requires App Passwords to be used to send emails from the plug-in. An App Password is a unique 16-digit passcode that gives a non-Google app or device permission to access your Google Account. App Passwords can only be used with accounts that have 2-Step Verification turned on.
- Prerequisites
- You need a copy of Adobe® Acrobat® along with the AutoDocMail™ plug-in (both available as trial versions) installed on your computer, as well as an existing Google account in order to use this tutorial.
- Step 1 - Enable 2-Step Authentication in Your Google Account
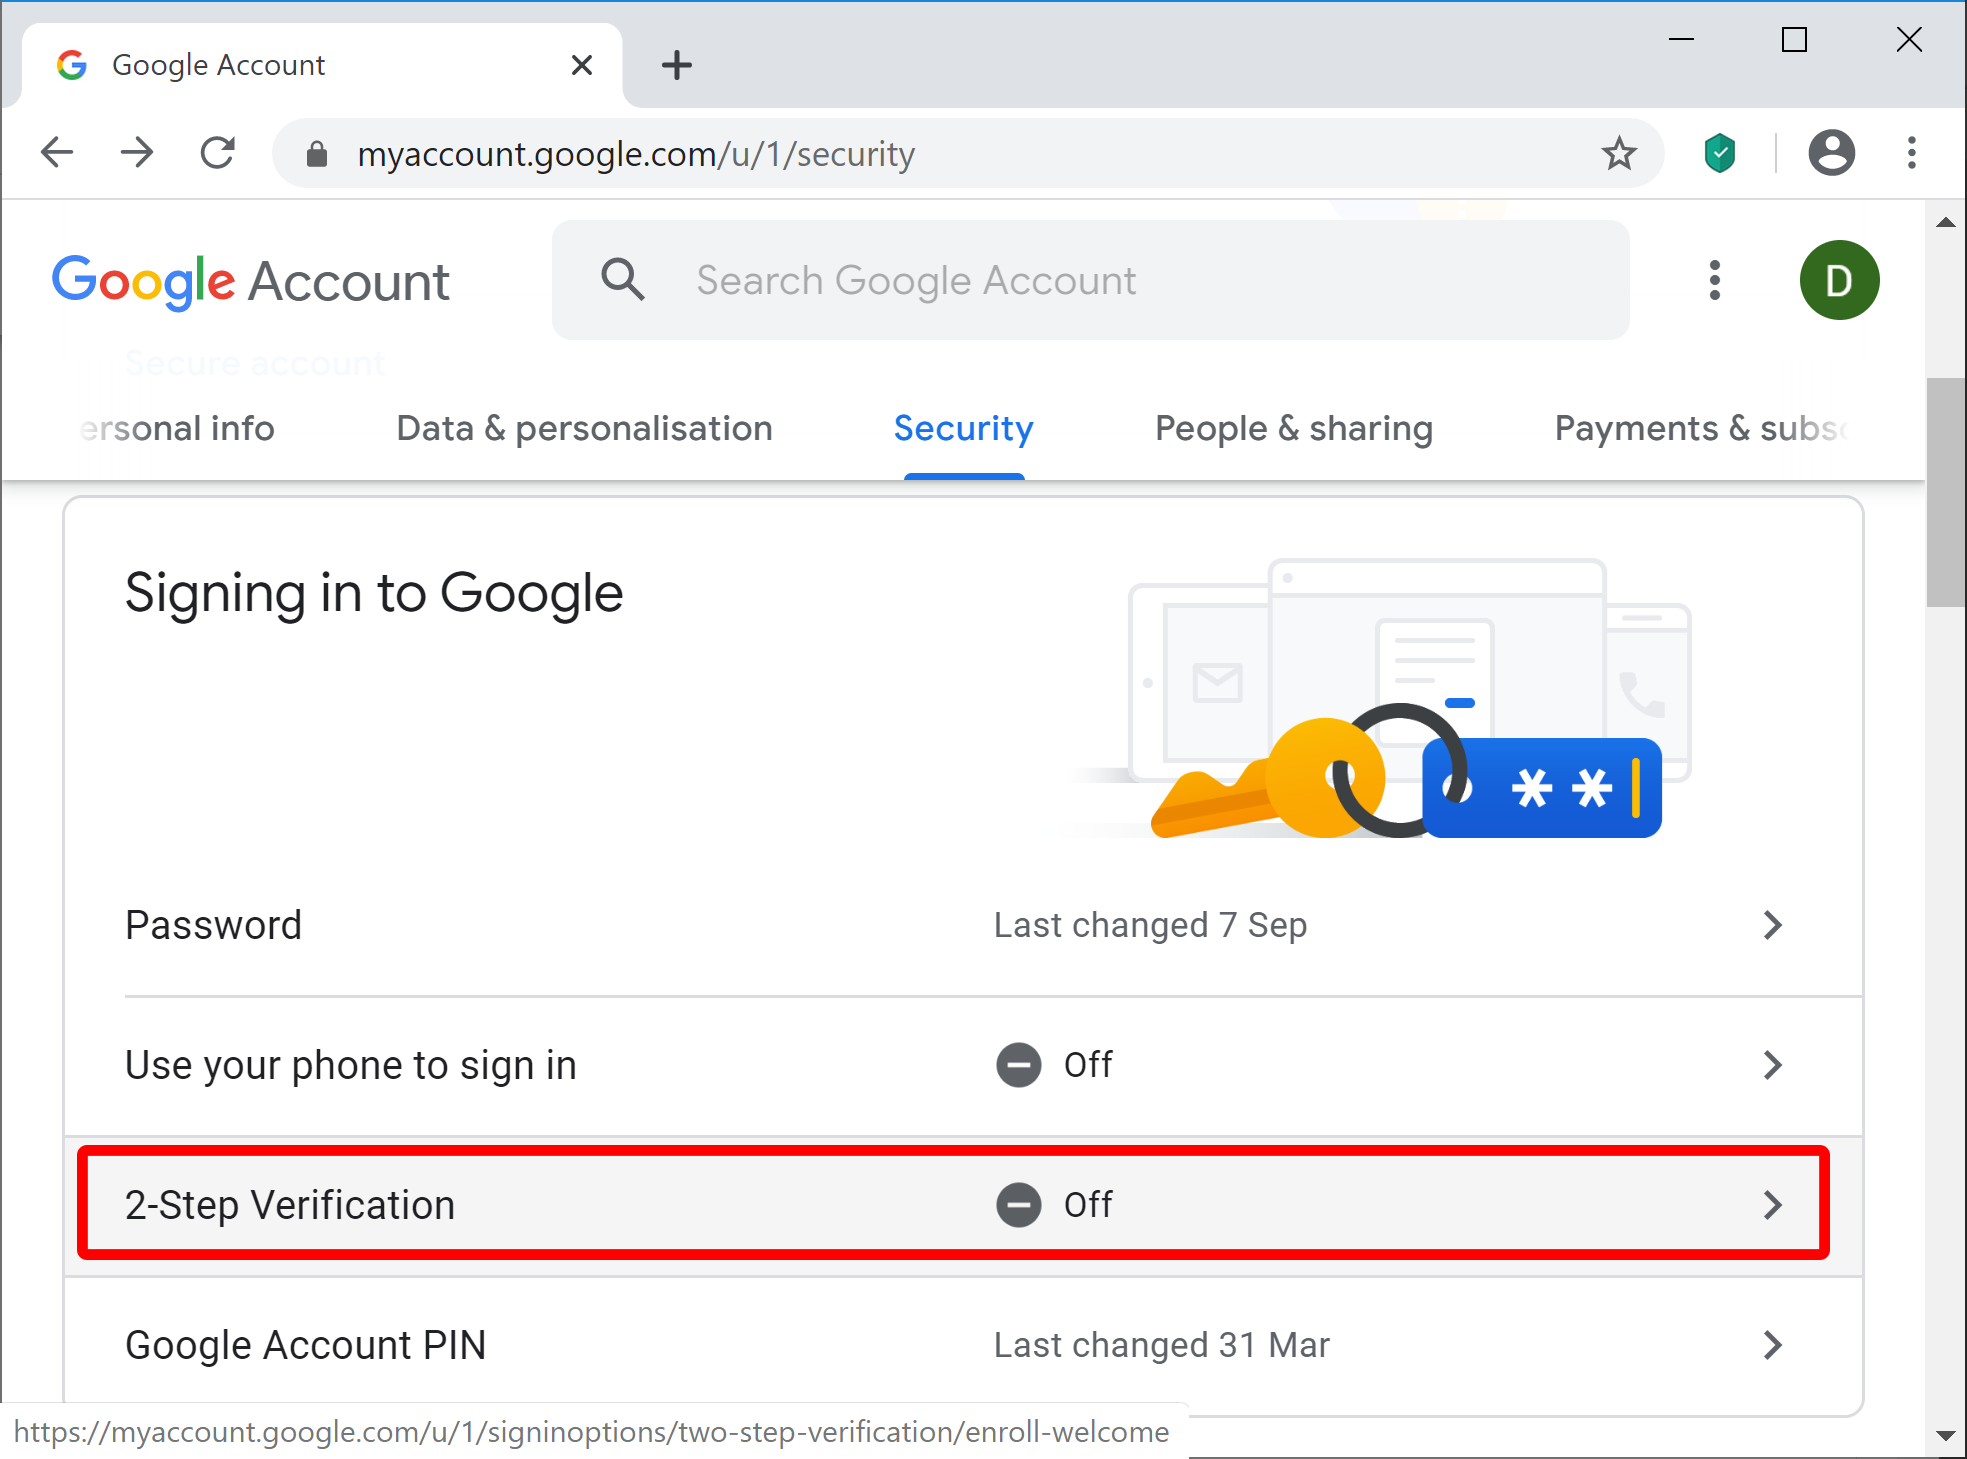
- Open a web browser and log on to your Google account. Click on the "Security" option in the menu (it could be located on the left or at the top of the webpage).

- Step 2 - Select "2-Step Verification"
- If "2-Step Verification" is not turned on, click on it to enable it.
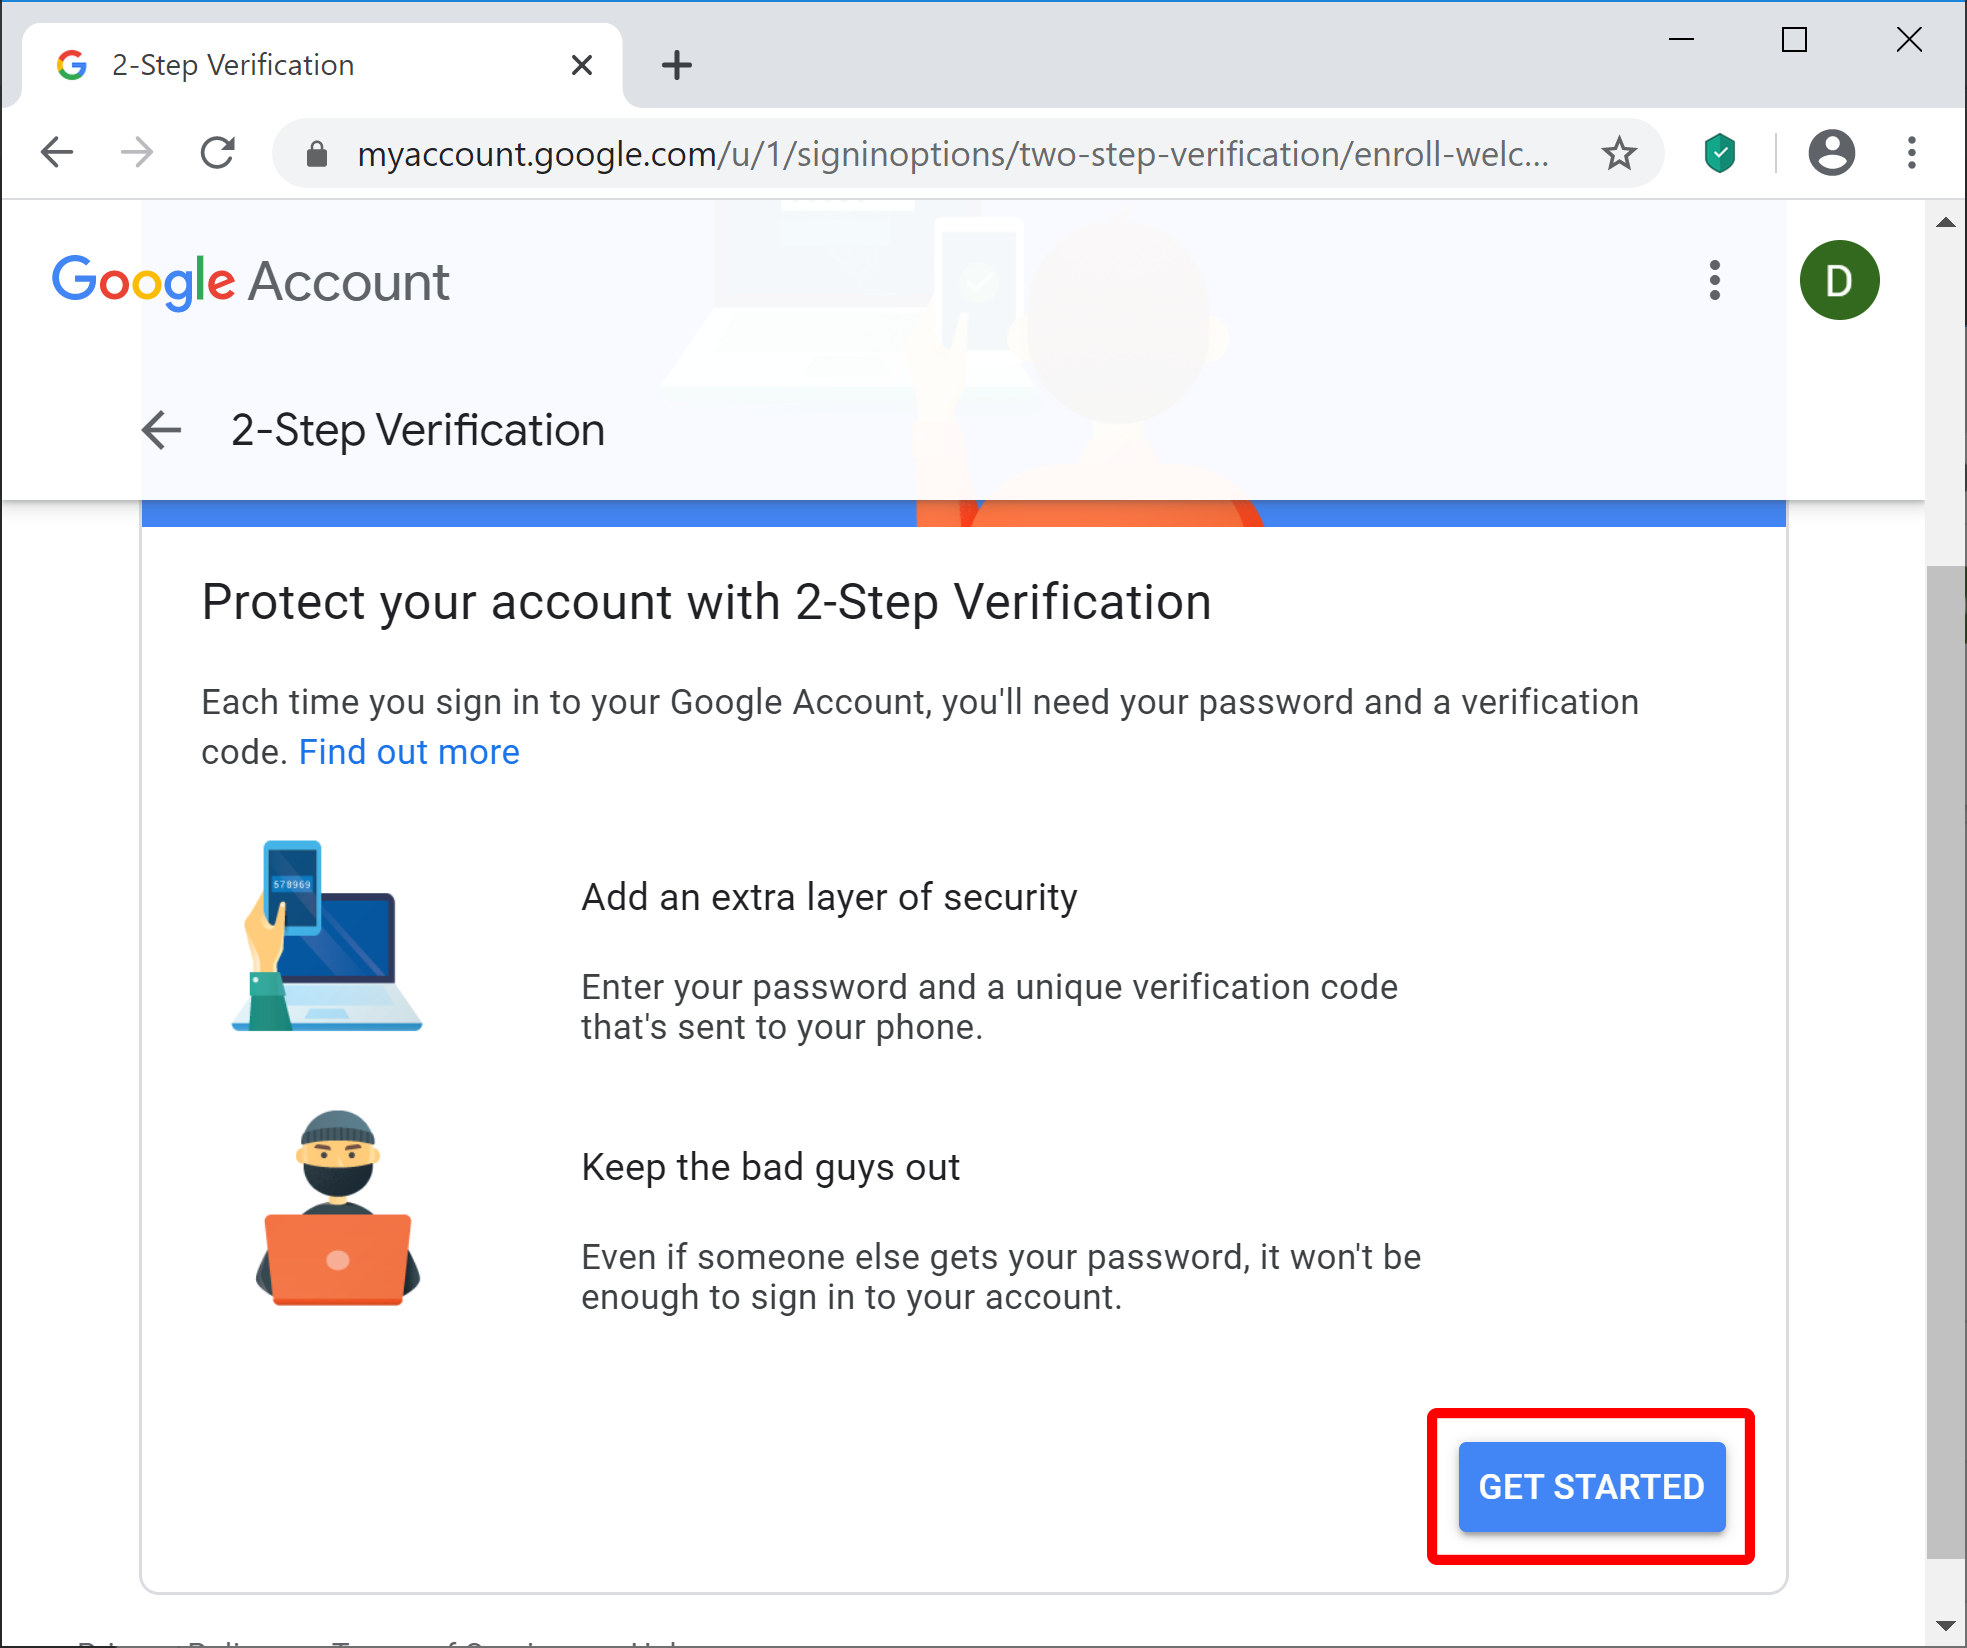
- Step 3 - Configure 2-Step Verification
- Click the "Get Started" button to start configuring the 2-step verification options.
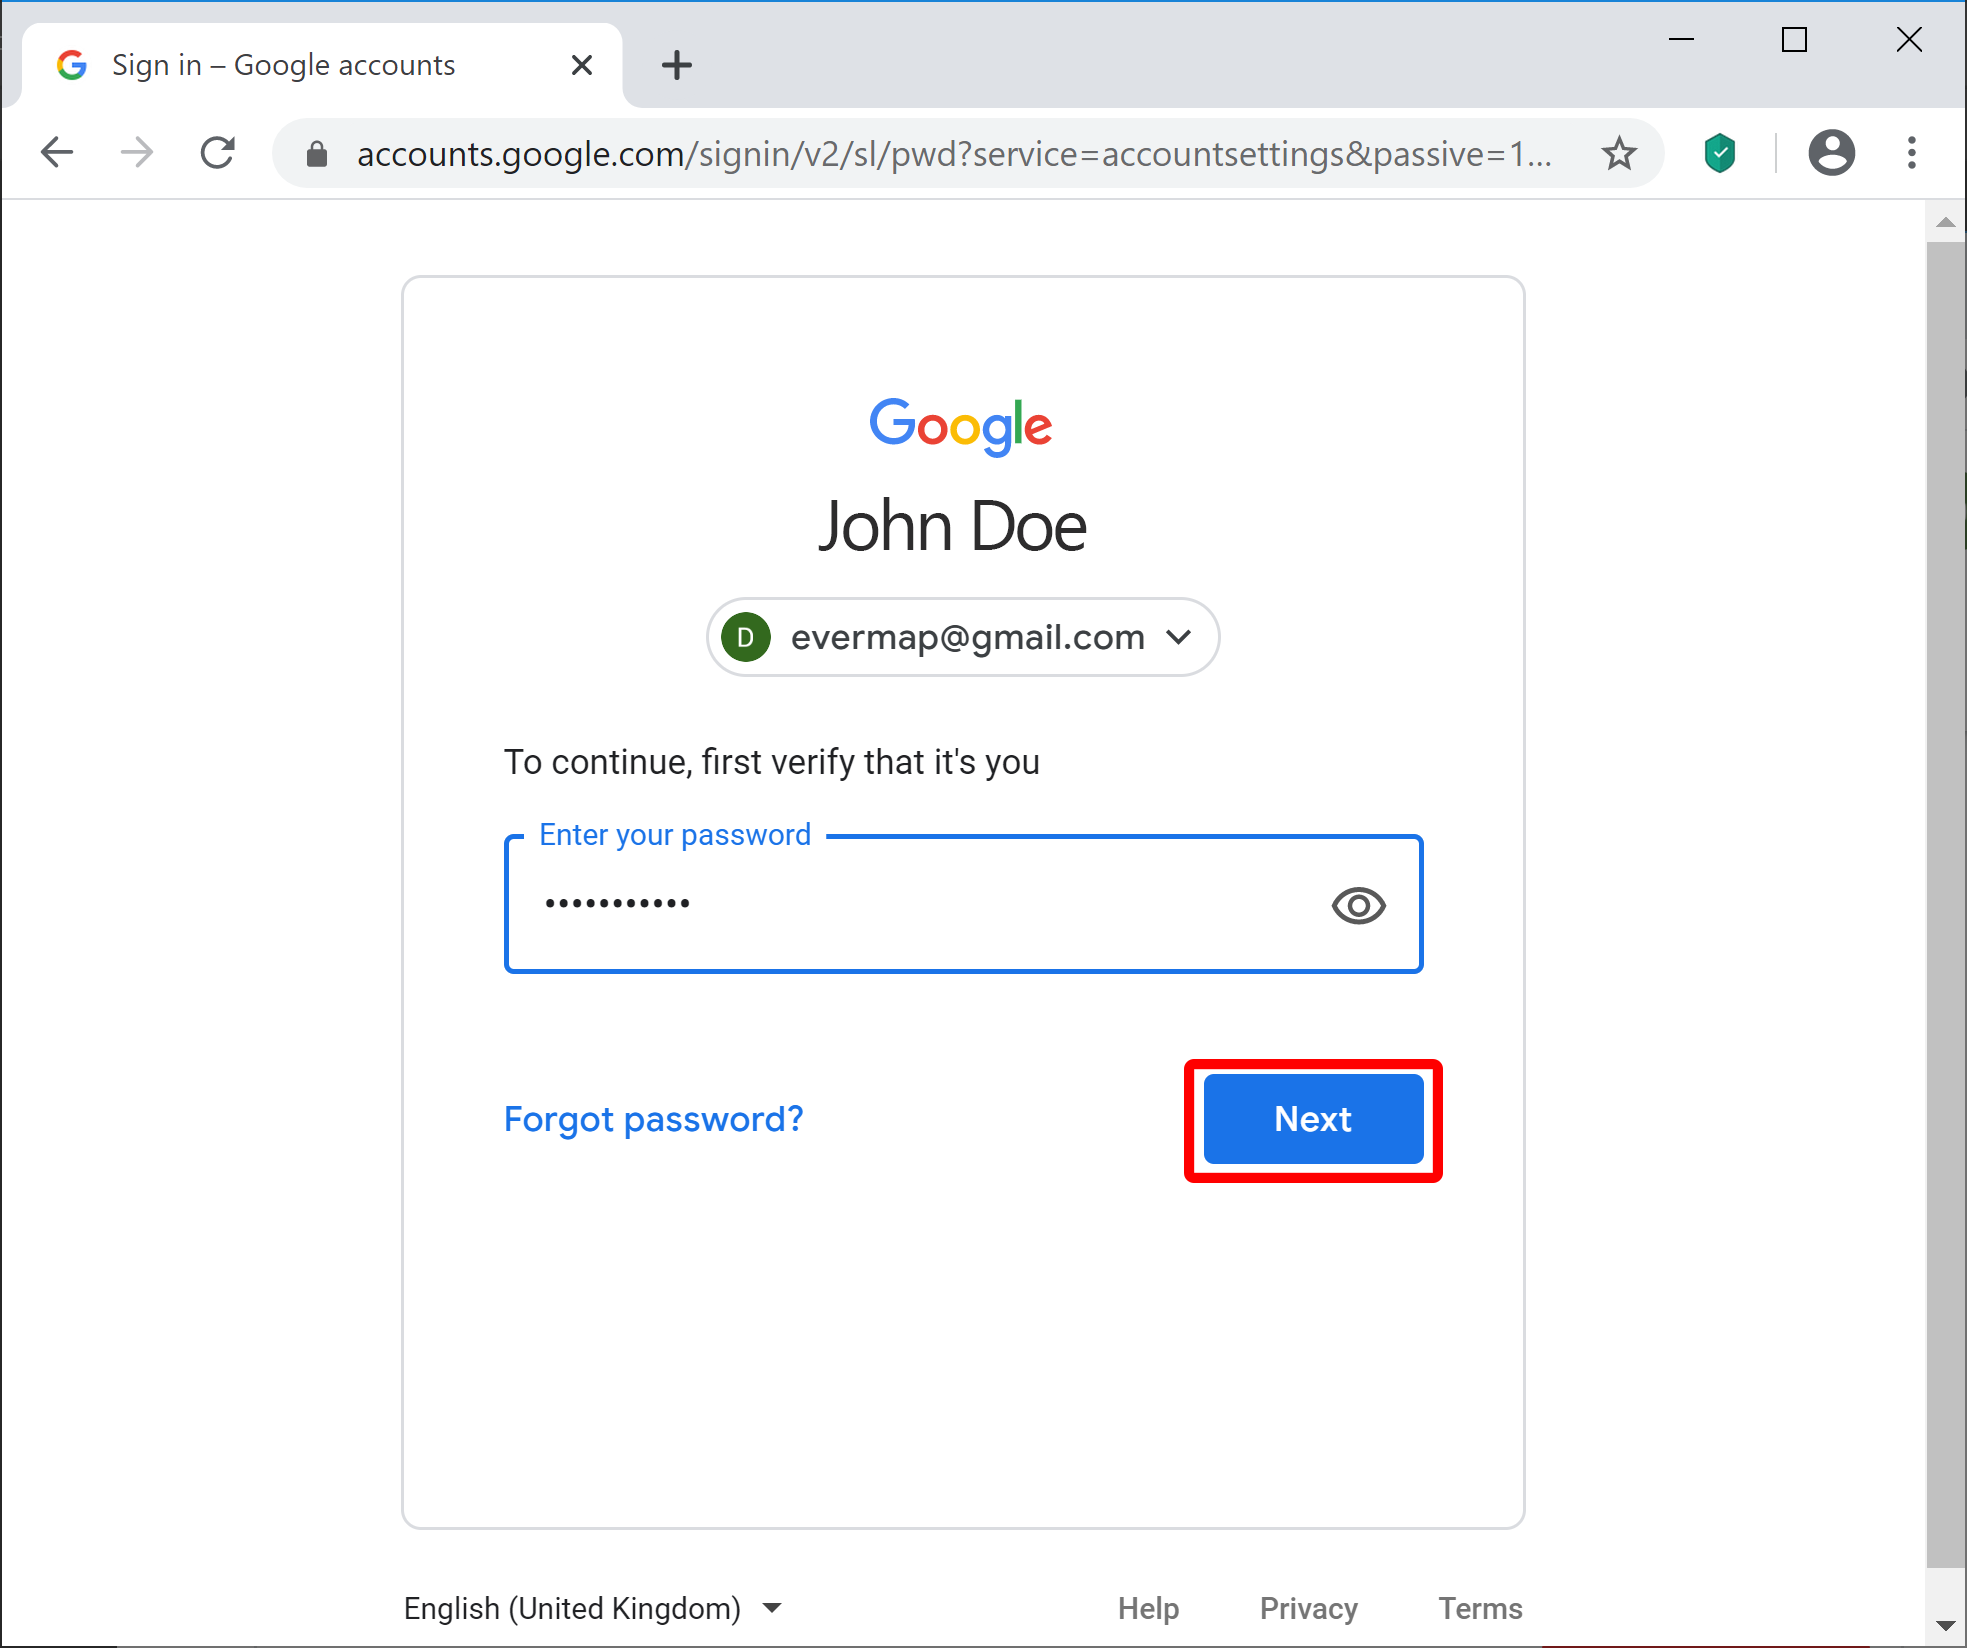
- You may be prompted to log in to your Google account one more time to confirm your identity:
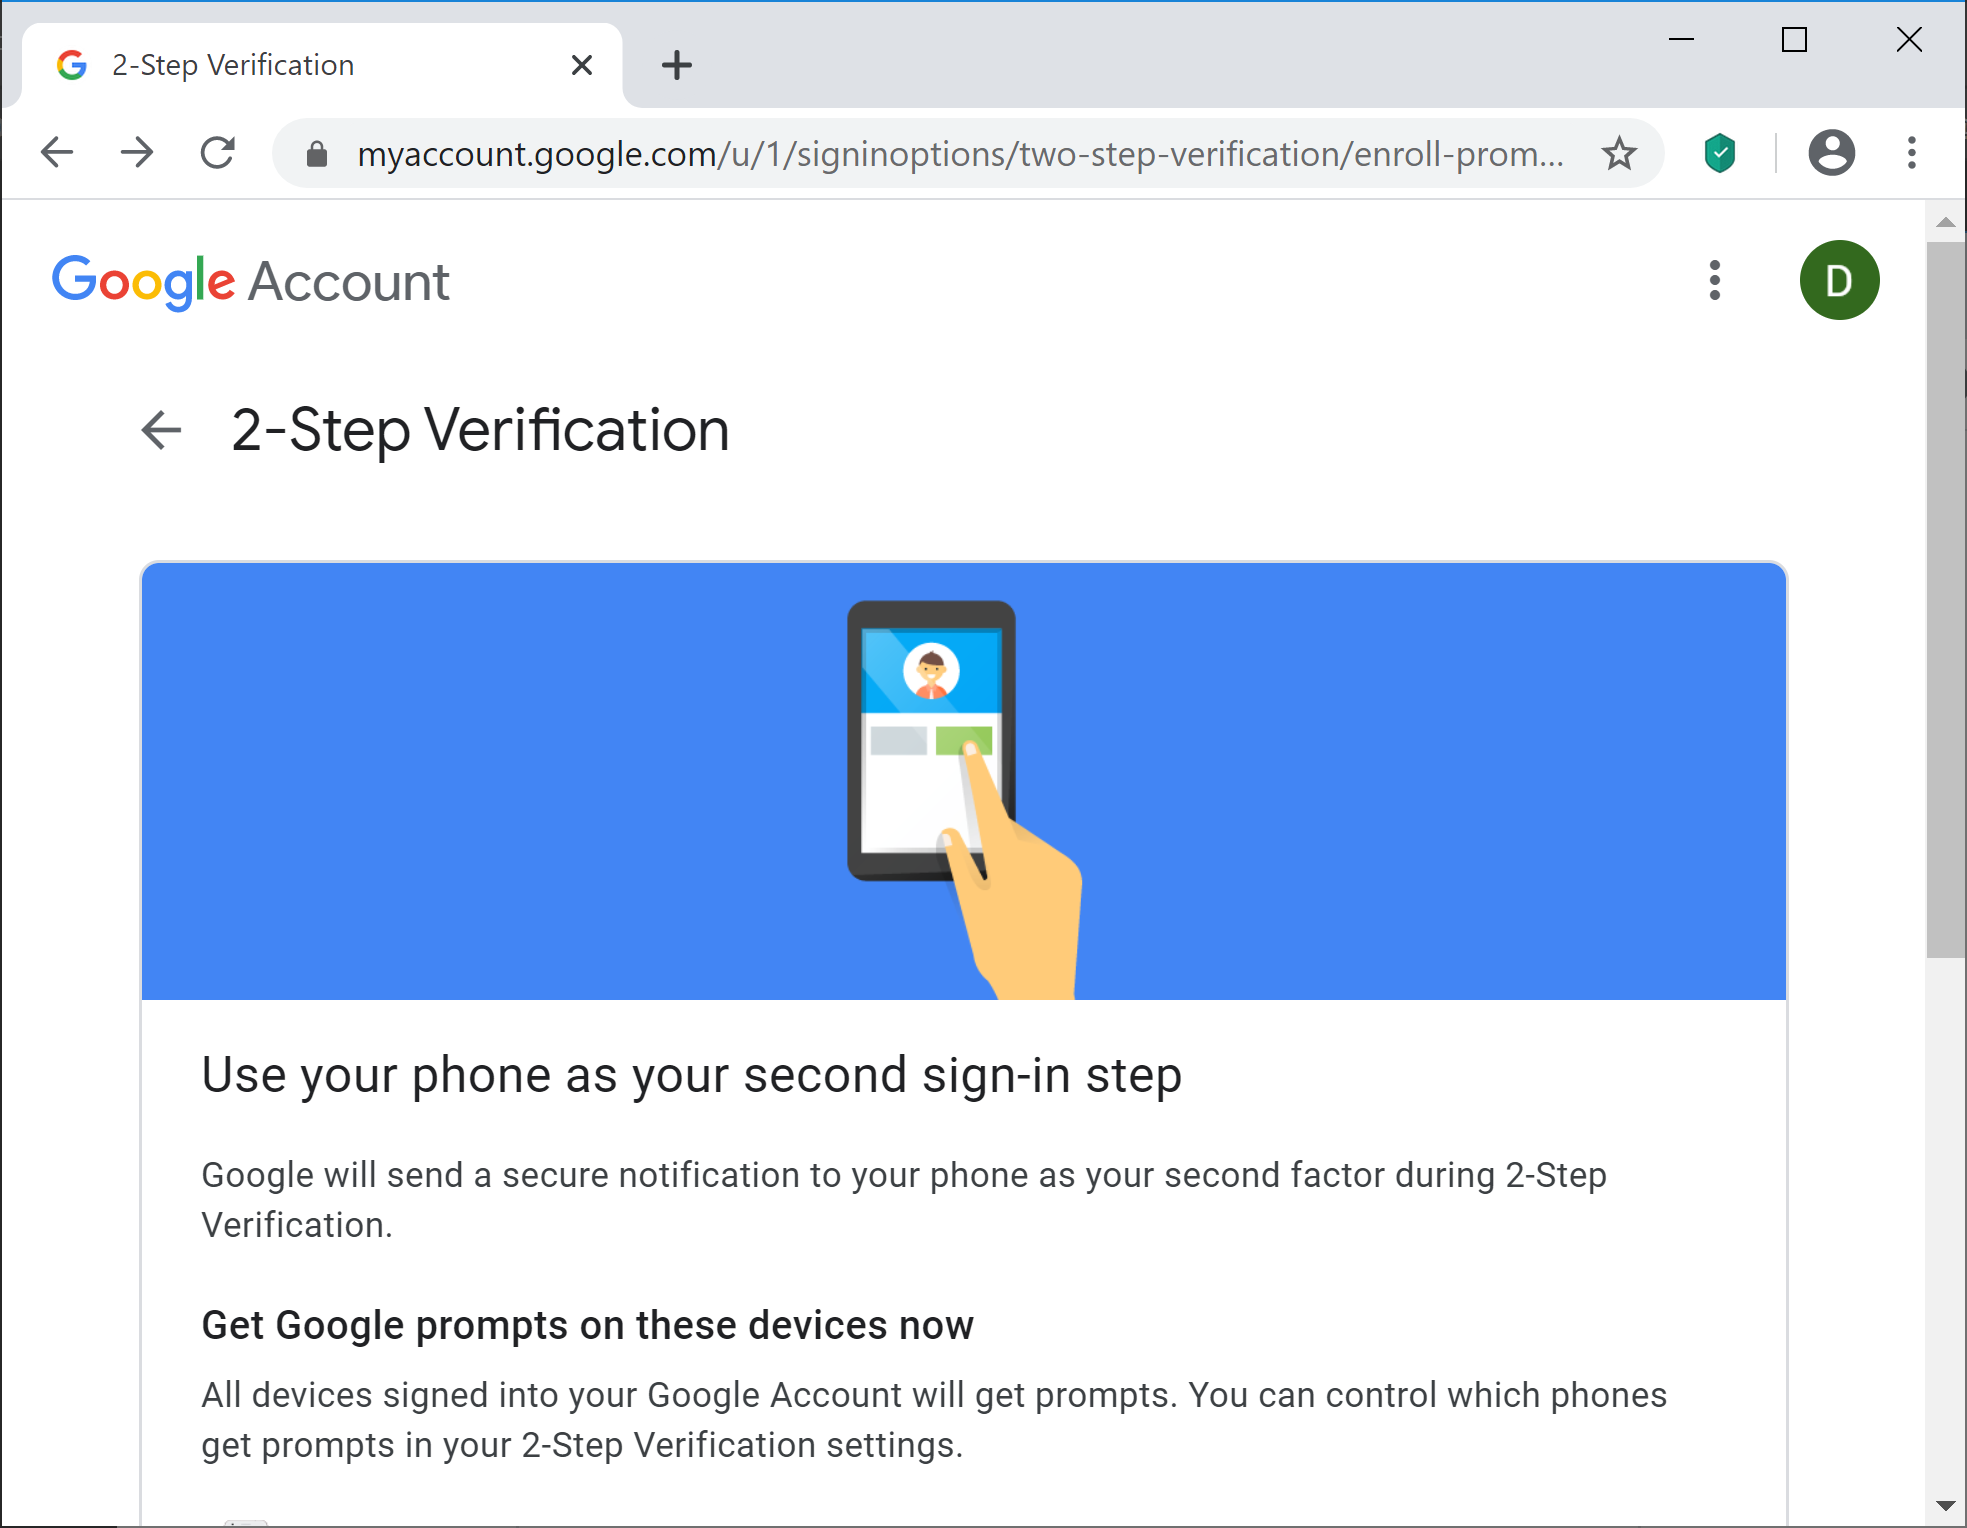
- Step 4 - Use your Phone to Complete the Configuration
- Use the on-screen instructions and available options to complete the 2-Step verification using your phone.
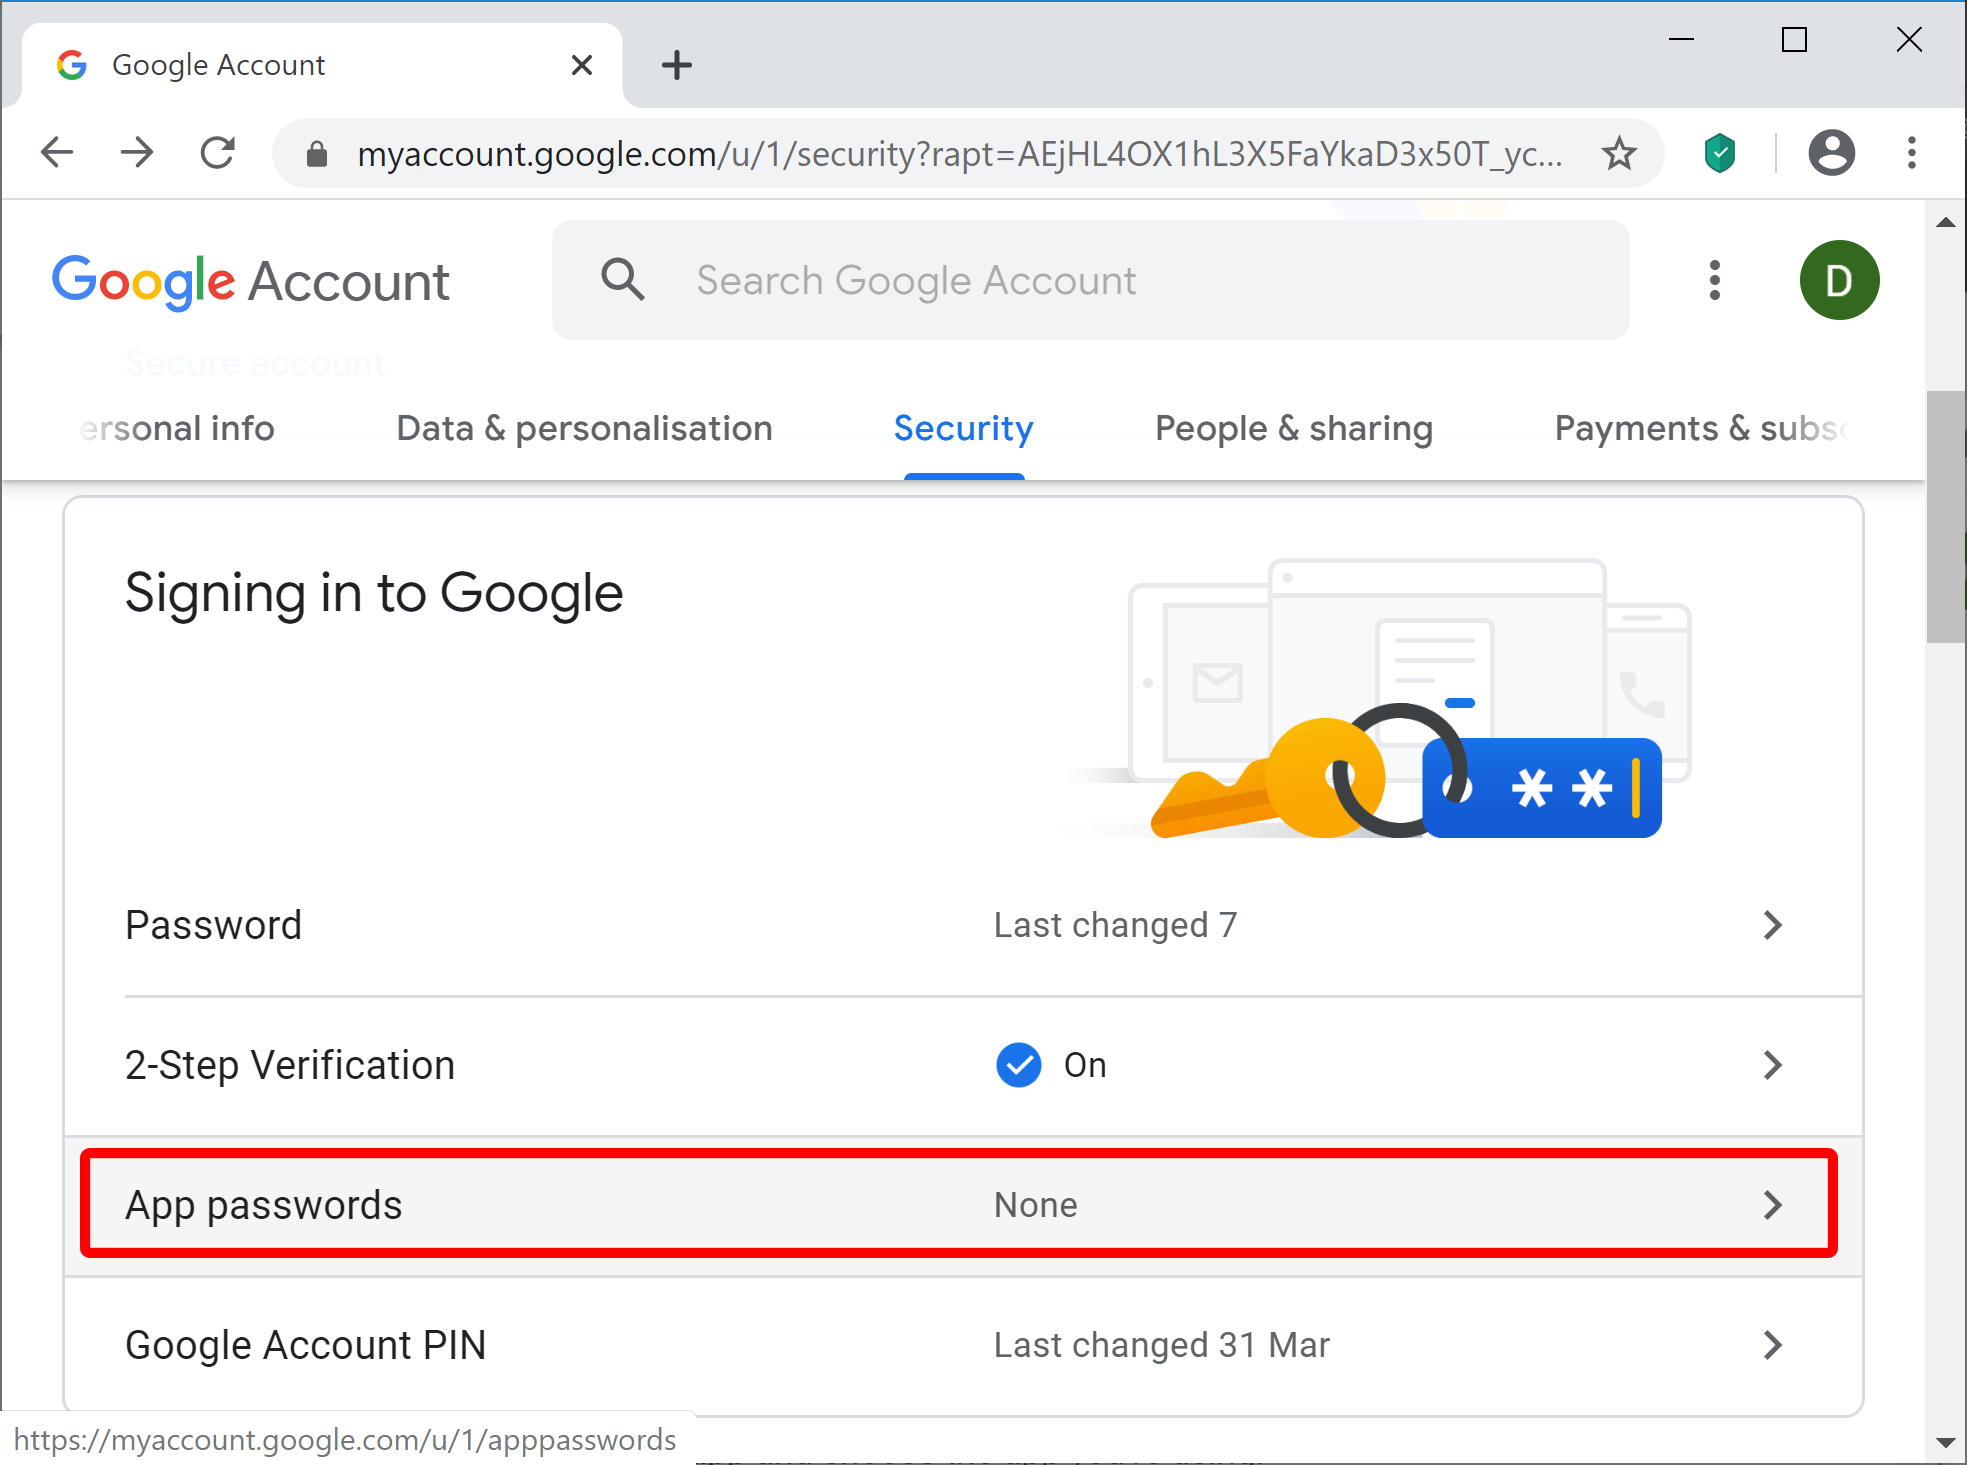
- Step 5 - Create the App Password
- Click on the "App Password" option to create a new application password for use with AutoDocMail.
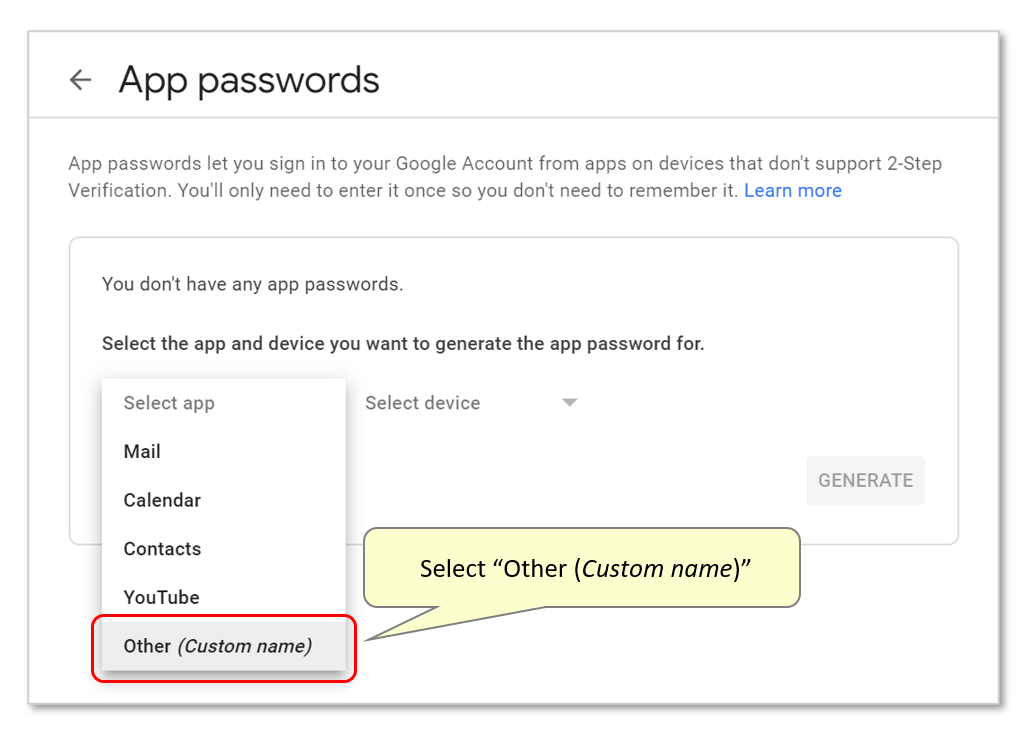
- Step 6 - Add New App Name
- First, open the "Select App" drop-down list.

- Select the "Other (Custom name)" option from the list.
- Enter AutoDocMail as an app name (it does not really matter what name is used in this field). Next, press the "Generate" button:
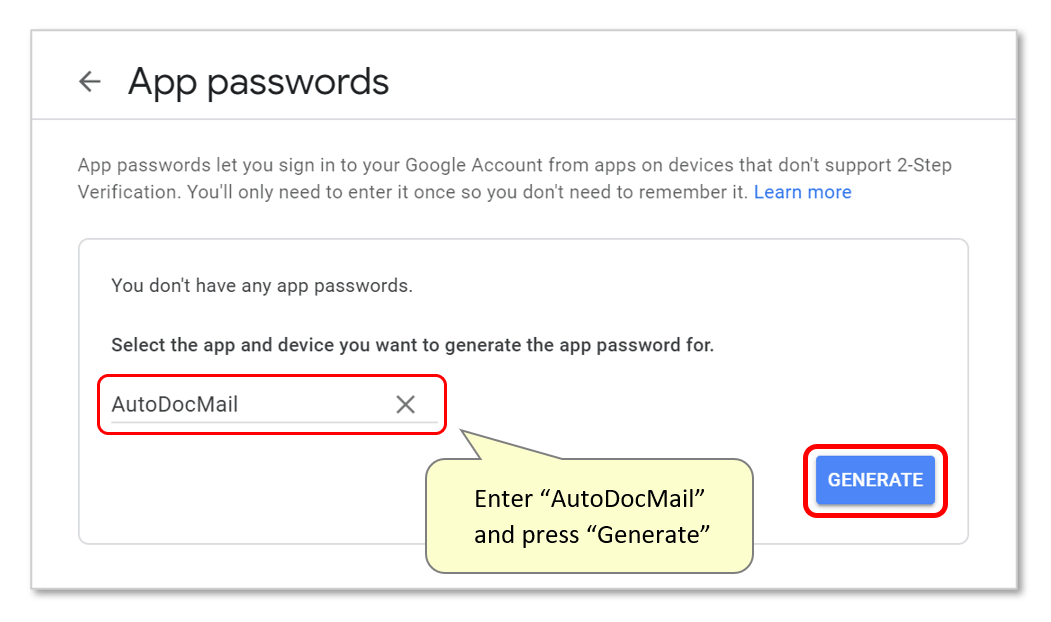
- Record the auto-generated app password or simply select it and copy it to the clipboard to be used later.
- Step 7 - Enter the App Password into AutoDocMail Settings
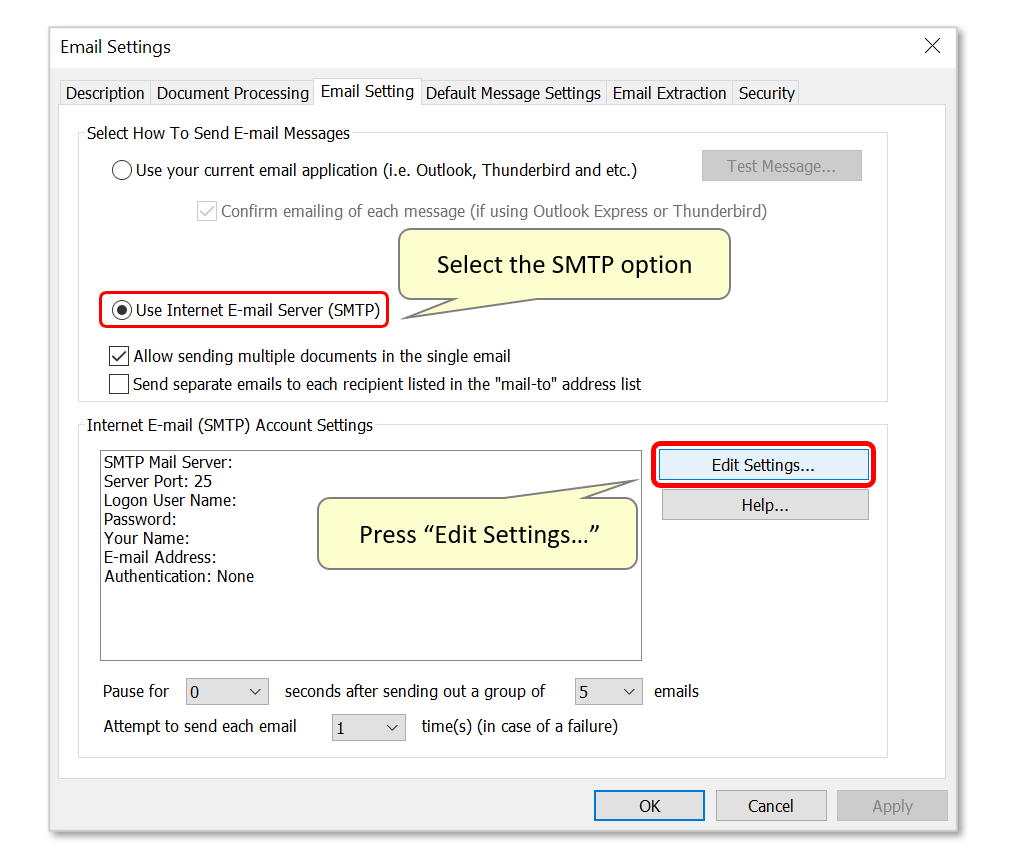
- Start Adobe Acrobat and select "Plug-ins > Auto-Email Documents..." in the main menu to open the 'Auto-Email Documents' dialog. Press the "Settings" button and proceed to edit an existing settings profile - or create a new one. In the settings configuration window, open the "Email Settings" tab to access SMTP server options.
- Select the "Use Internet E-mail Server (SMTP)" option and press "Edit Settings..." to configure it.
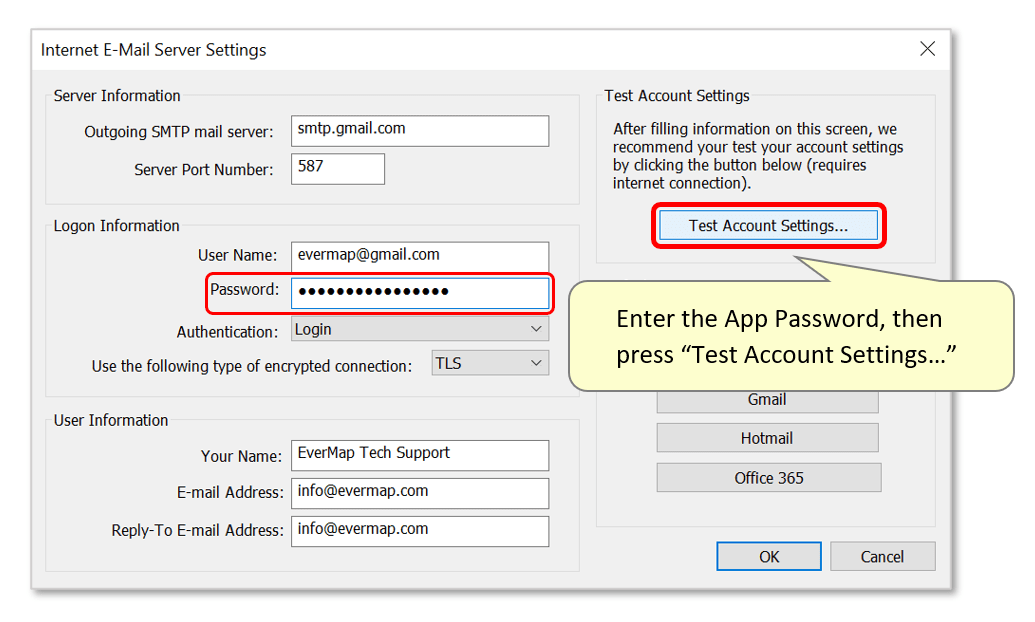
- Use the "Gmail" button under 'Default Settings" to auto-fill the 'Server Information' section. Continue to fill-in the required information on the left.
- Type (or copy/paste) the app password generated in step 6, into the "Password" field under 'Logon Information'.
- When ready, press "Test Account Settings..." to check if you can connect to the Gmail SMTP server.
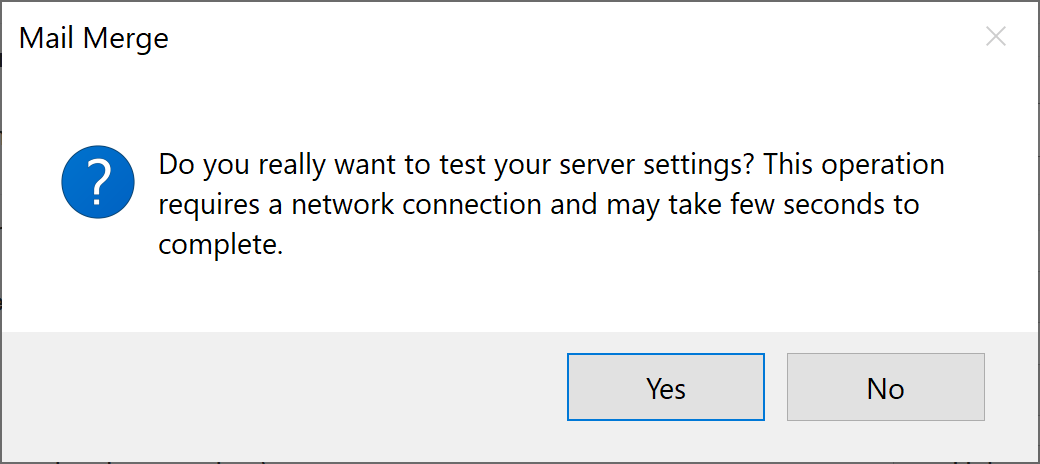
- Step 8 - Test Server Settings
- A confirmation box will appear - press "Yes" to continue.
- If the connection was successful, the following confirmation message appears on the screen.
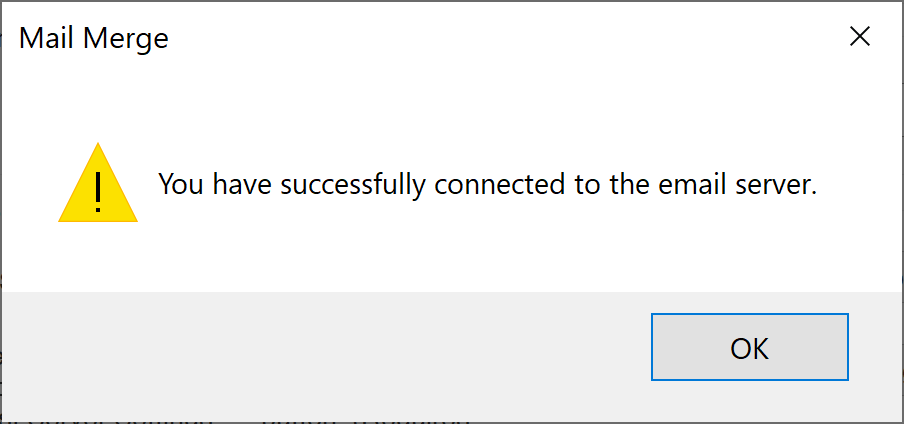
- Now you have succesfully configured AutoDocMail to use 2-step verification and App Passwords.
- Click here for a list of all step-by-step tutorials available.