Using PDF Checkboxes, Radio Buttons and List Boxes in PDF Forms
Tutorial for Adobe® Acrobat®
- Introduction
- This tutorial shows how to create, edit and populate checkboxes, radio buttons, list and dropdown list boxes in PDF forms via a mail merge process. These fields work differently than text form fields and require a special approach. The tutorial explains how to automatically populate these form fields using data from a spreadsheet via AutoMailMerge™ Plug-in for the Adobe® Acrobat®.
- This tutorial covers the following topics:
- How to Check a Box or Select an Item from a List Box using Mail Merge?
- Using "Yes/No" Fields from Microsoft Access or Excel Files
- How to Create a Checkbox and Edit its Export Value?
- How to Create a Radio button and Edit its Export Value?
- How to Create or Edit List of Choices?
- How to Create or Edit a Dropdown List?
- Populating a PDF form with checkboxes, radio buttons and list boxes using the AutoMailMerge™ Plug-in
- Read more about creating interactive PDF forms in Adobe Acrobat.
- How to Check Boxes or Select an Item from a List of Choices Using Mail Merge?
- Actually, there is no such thing as "checking" a PDF checkbox field or making selection from the list. You have to fill checkbox field with a value in the very same way as a text form field. Every checkbox/radio button/list box has a special property called "export value". It is used to determine if the checkbox needs to be displayed in checked or unchecked state. The "export value" is assigned at the time the field is placed on the form. It can contain any text as desired by the form designer. If a checkbox's "value" matches its "export value", then the checkbox appears as "checked". If these two values do not match, then checkbox appears as "unchecked". The "Export value" can be set or modified using "Field Properties" dialog in the Adobe Acrobat "Prepare Form" tool. Both "value" and "export value" are always treated as text. Here are the examples of the "Export Value:" field for check boxes and for list boxes:
.png)
- The "export value" of "Yes" is used as a defaut value for all checkboxes created in Adobe Acrobat. However, depending on the project requirements, it can be virtually anything such as "Male", "Female", "Dependent" and etc. The export value is typically selected based on the way filled PDF forms are going to be processed. The value of the checkboxes should be selected to match the way the corresponding values are listed in the data source that will be used for the mail merge.
- Using "Yes/No" fields from Microsoft Access or Excel Files
- For example, by default, the Adobe® Acrobat® defines export value for a new checkbox as "Yes". See the example image above. Please note that this value is case-sensitive, filling a checkbox with "YES" or "yes" will have no effect. If you want to make a PDF checkbox appear checked using a Yes/No field value from MS Access/Excel or any other database, then you need first to figure out what values those field are "exporting". By default, these fields export 1 (if Yes/No field is checked in the Access) or 0 (if Yes/No field is unchecked in MS Access). However, it is possible to change those values in MS Access. This is important to check what "actual" values are stored in corresponging data fields. If using AutoMailMerge, navigate to "Data Source" tab in the Settings, and click "View and Filter Records..." button to preview data.
.png)
- Look at Yes/No fields and see what text is displayed for these values. If database has 1 and 0 for Yes/No fields, then you have to edit the PDF form and set checkbox`s "export value" to 1 in order to match the database. Alternatively, if PDF form cannot be edited, then use "Yes/No" text in the data source to match export values of the PDF form. In the example below the "Yes/No" text is used in the data source to fill the checkboxes:
.png)
- How to Create a Checkbox and Edit its Export Value
- Check boxes present yes-or-no choices for individual items. If the form contains multiple check boxes, then user can typically select as many or few of these as wanted. Start the Adobe® Acrobat® application and open a PDF document you want to edit.

- Open "Prepare Form" Tool (New Acrobat Interface)
- Prepare Form tool is used in Adobe® Acrobat® to create and edit interactive PDF forms. Use it to add text fields, checkboxes, buttons and other interactive elements to the PDF documents.
- If you are using a "new" Adobe® Acrobat® interface, then expand All tools and find Prepare Form tool located towards the bottom of the list. Depending on your screen size you may need to click on “View more” link to find it.
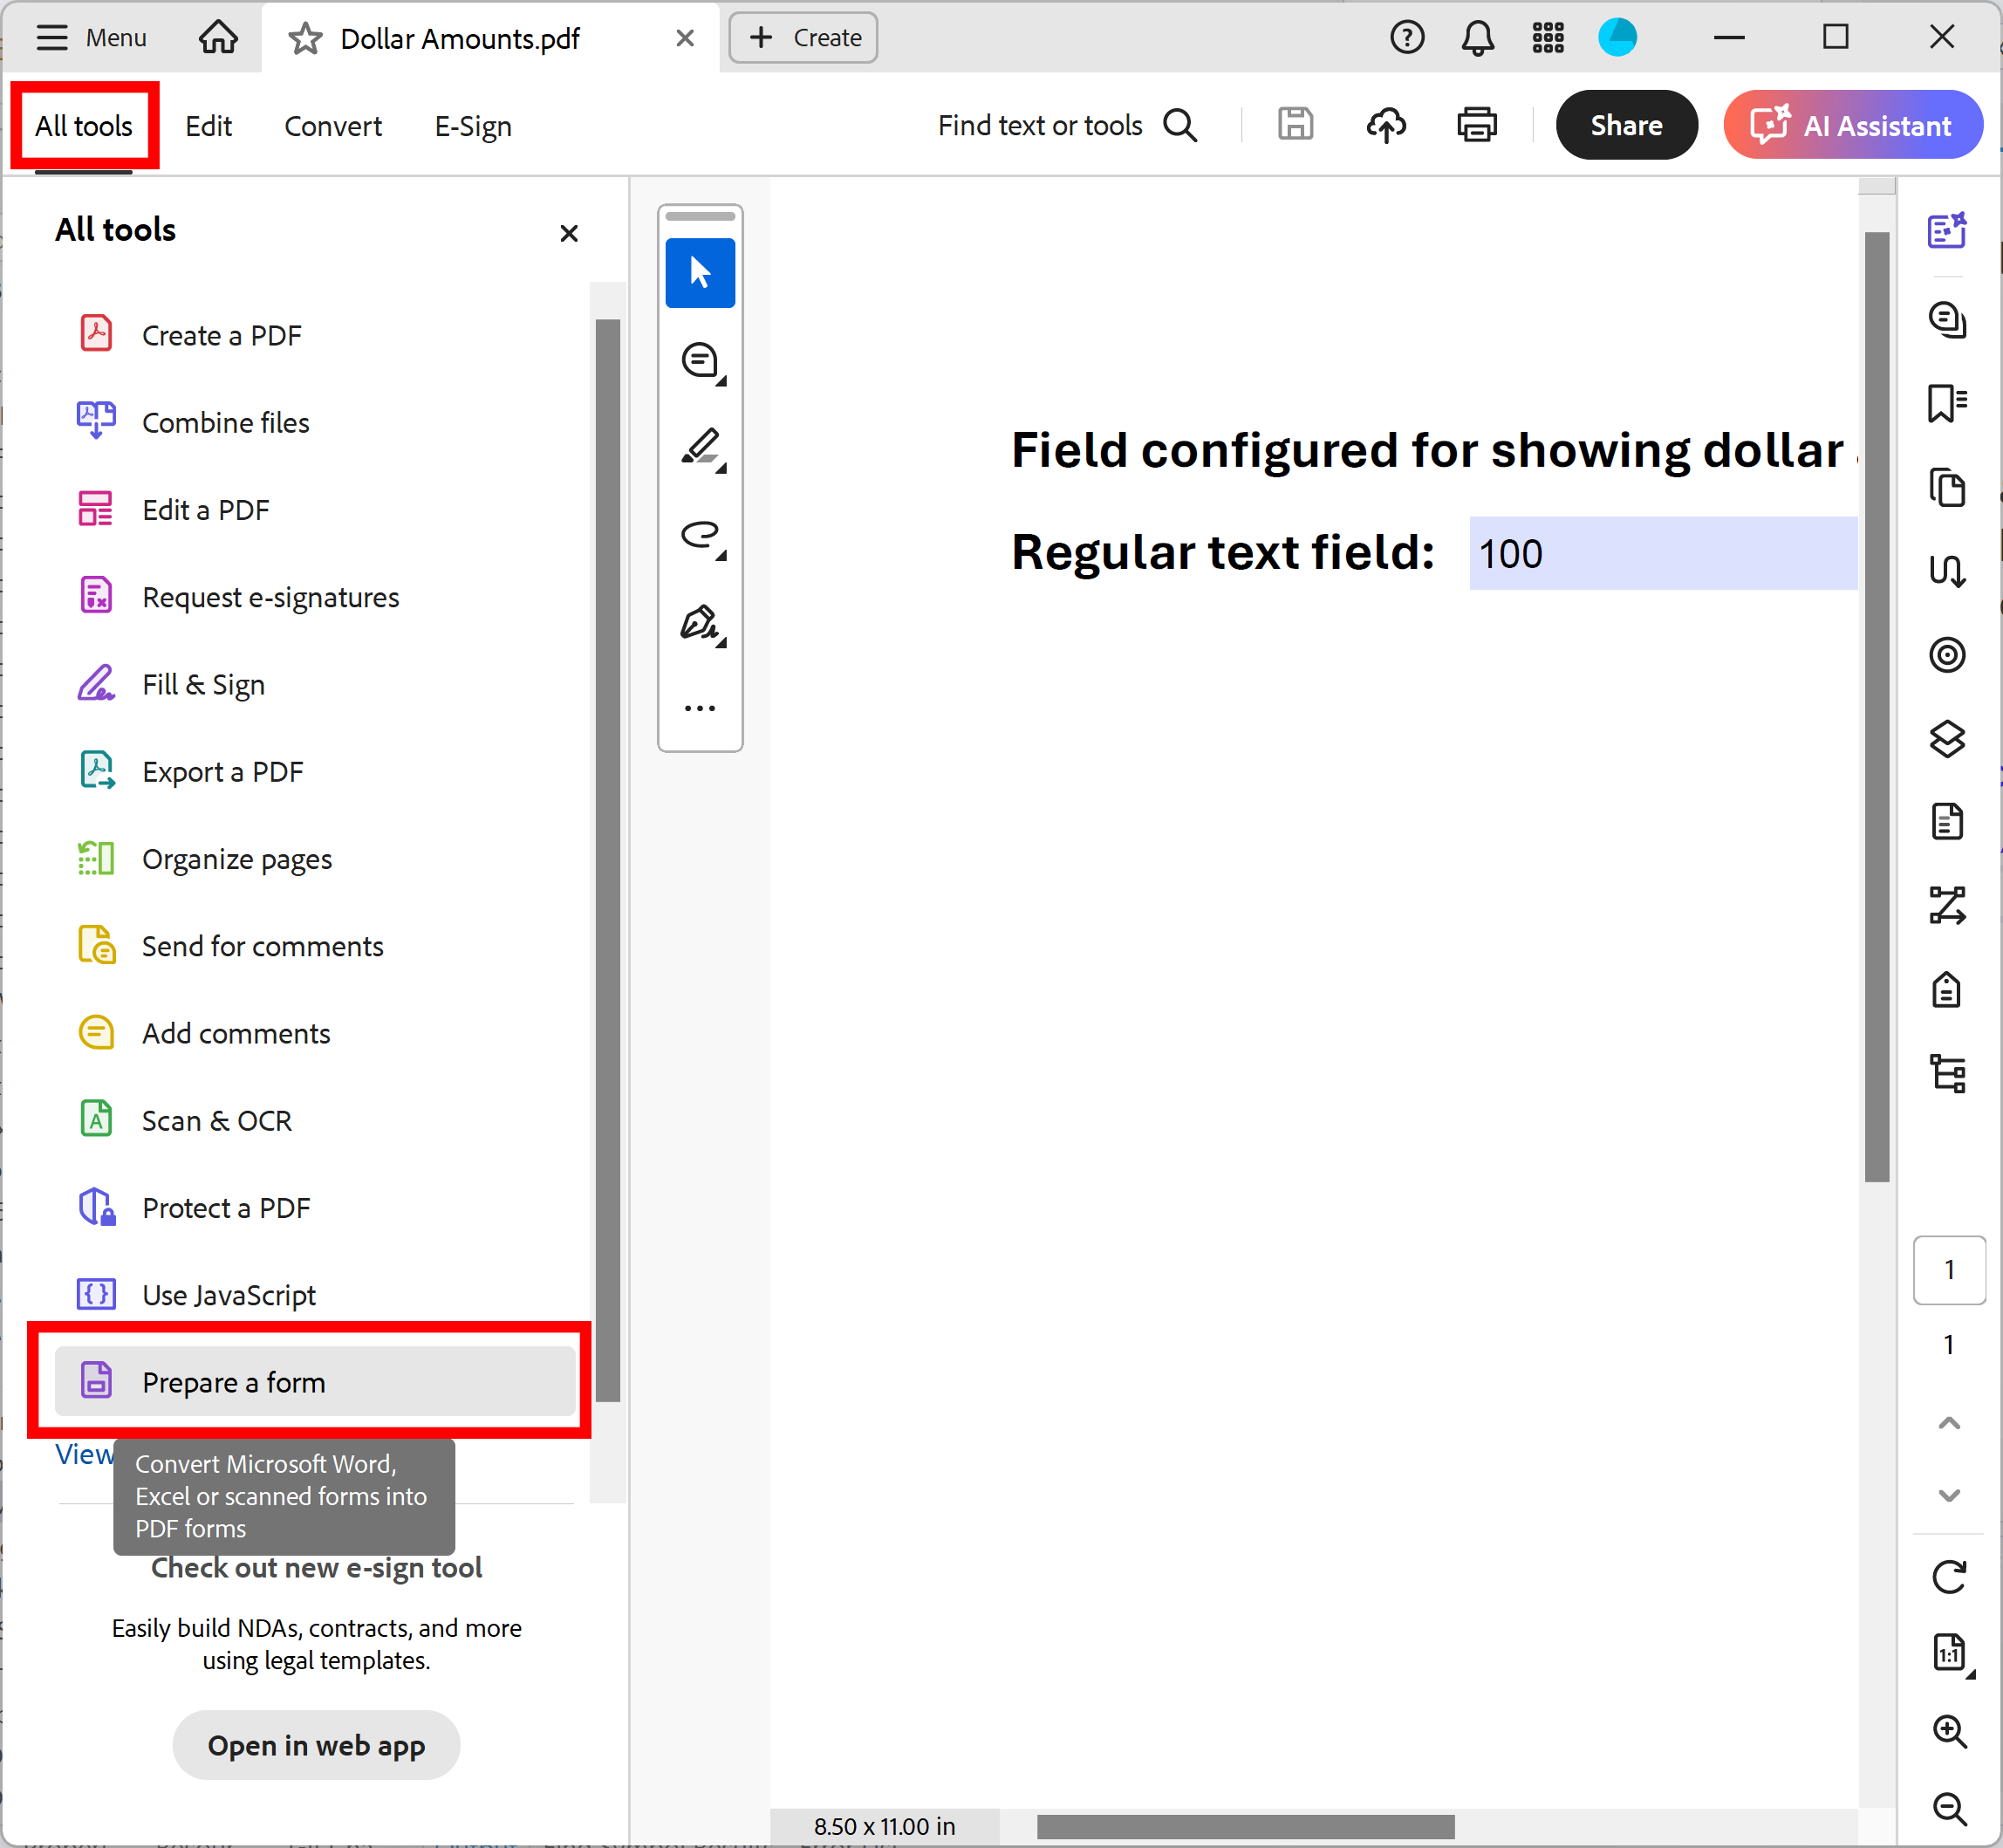
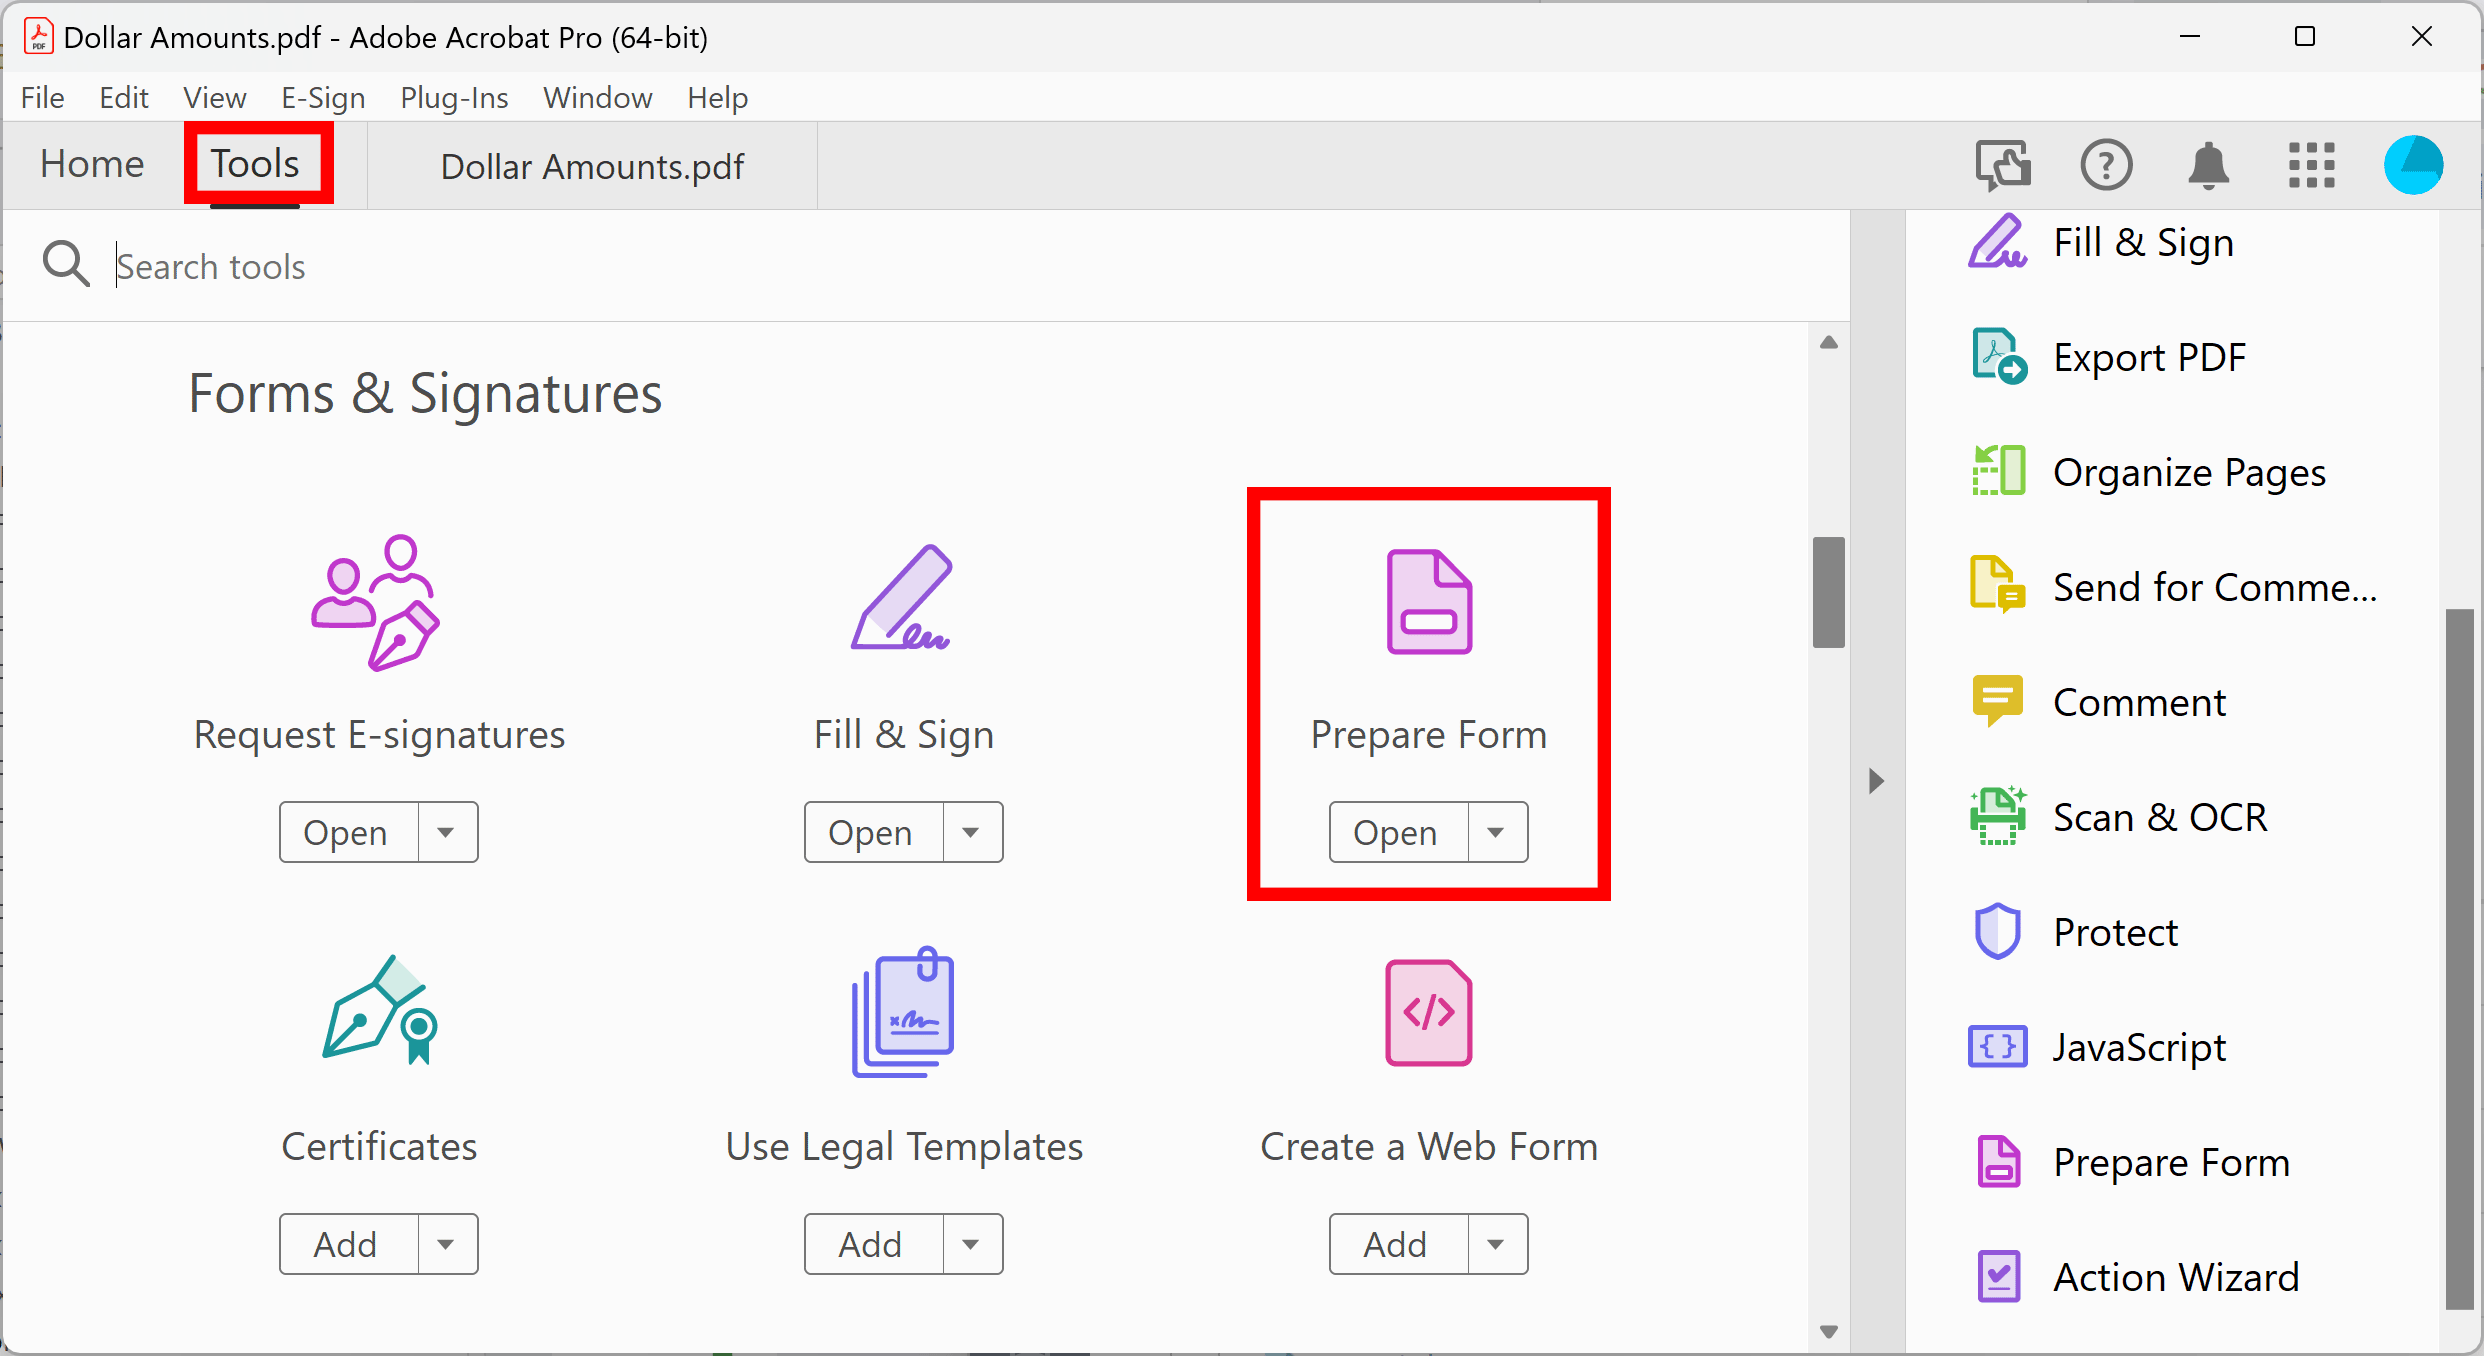
- Open "Prepare Form" Tool (Classic Acrobat Interface)
- If you are using a “classic” Adobe® Acrobat® interface, then expand Tools and find Prepare Form tool.
- Select an existing PDF file that will be used as a template for the PDF form. Click the Add a check box icon from the menu. Move cursor to a page location where you want to place a checkbox field. Click on the page where you want to place a checkbox.
.png)
- Enter a checkbox name. Checkbox names are used to uniquely identify each field on a PDF form. It is a good idea to use the same name for both form and data fields to simplify the field mapping. Click "All Properties" to specify checkbox properties.
- If editing an existing checkbox, then place a cursor over it and click a right mouse button. Select "Properties..." from the popup menu.
.png)
- Select the "Options" tab on the "Check Box Properties" dialog. Select a check box style. By default the Adobe® Acrobat® defines export value for a new checkbox as "Yes". Verify value in the "Export Value:" field. Use this text to check this particular checkbox or change it to a different value as necessary. Use the same value in the corresponding column in the data file.
.png)
- Click "Save file" to save changes to the PDF file.
.PNG)
- How to Create a Radio button and Edit its Export Value
- Radio buttons present a group of choices from which the user can select only one item. All radio buttons with the same name work together as a group.

- Open "Prepare Form" Tool (New Acrobat Interface)
- Prepare Form tool is used in Adobe® Acrobat® to create and edit interactive PDF forms. Use it to add text fields, checkboxes, buttons and other interactive elements to the PDF documents.
- If you are using a "new" Adobe® Acrobat® interface, then expand All tools and find Prepare Form tool located towards the bottom of the list. Depending on your screen size you may need to click on “View more” link to find it.
- Open "Prepare Form" Tool (Classic Acrobat Interface)
- If you are using a “classic” Adobe® Acrobat® interface, then expand Tools and find Prepare Form tool.
- Select an existing PDF file that will be used as a template for the PDF form. Click the "Add radio buttons" icon from the menu. Move cursor to a page location where you want to place a radio button field. Click on the page where you want to place radio buttons.
.png)
- Enter a radio button name. This name will be used as an export value. By default the Adobe® Acrobat® defines export value for a new radio button as text "ChoiceN" in the group. Note that at least 2 buttons needed for the radio group. Click "Add Another Button" to create one more radio button.
- Enter a "Group Name" that will group the buttons together. A group name is used to uniquely identify each group on a PDF form. It is a good idea to use the same group name for both form and data fields to simplify the field mapping. Click "All Properties" to specify radio button properties.
- If editing an existing radio buttons, place a cursor over it and click a right mouse button. Select "Properties..." from the popup menu.
.png)
- Select the "Options" tab on the "Radio Button Properties" dialog. Select a button style. Specify an export value in the "Radio Button Chioce:" field. Use this text to check this particular radio button or change it to a different value as necessary.
.png)
- Click "Save file" to save changes to the file.
- How to Create a List of Choices
- List of choices field displays a list of options the user can select. Each option in the list has an associated export value. This values is used to select items from the list.

- Open "Prepare Form" Tool (New Acrobat Interface)
- Prepare Form tool is used in Adobe® Acrobat® to create and edit interactive PDF forms. Use it to add text fields, checkboxes, buttons and other interactive elements to the PDF documents.
- If you are using a "new" Adobe® Acrobat® interface, then expand All tools and find Prepare Form tool located towards the bottom of the list. Depending on your screen size you may need to click on “View more” link to find it.
- Open "Prepare Form" Tool (Classic Acrobat Interface)
- If you are using a “classic” Adobe® Acrobat® interface, then expand Tools and find Prepare Form tool.
- Select an existing PDF file that will be used as a template for the PDF form. Click the "Add a list of choices" icon from the menu. Move cursor to a page location where you want to place a list box. Click on a page where you want to place a list box.
.png)
- Enter a list box name. A list box name is used to uniquely identify each list box field on a PDF form. It is a good idea to use the same name for both form and data fields to simplify the field mapping. Click "All Properties" to specify list of choices properties.
- If editing an existing list box, place a cursor over it and click a right mouse button. Select "Properties..." from the popup menu.
.png)
- Select the "Appearance" tab to specify border style and fill color. Specify text style.
.png)
- Select the "Options" tab page on the "List Box Properties" dialog. Enter items that will be used as the options for the selection. Enter the item names and export values. Press the "Add" button to create a new choice in the "Item List". Check the "Multiple selection" option to enable multiple selection from the list.
.png)
- In the example, we have created 5 items with the following export values: Black - B, White - W, Green -G, Red - R, Blue - Bl. Populate the list field with a text value that matches one of the export values to select an item from the list. For example, fill the list box field with "R" to select "Red".
.png)
- Click "Save file" to save changes to the file.
- How to Create a Dropdown List?
- Dropdown list is used to make a selection from a popup menu or type a text. It is similar to the list of choices, but also allows entering a custom text.

- Open "Prepare Form" Tool (New Acrobat Interface)
- Prepare Form tool is used in Adobe® Acrobat® to create and edit interactive PDF forms. Use it to add text fields, checkboxes, buttons and other interactive elements to the PDF documents.
- If you are using a "new" Adobe® Acrobat® interface, then expand All tools and find Prepare Form tool located towards the bottom of the list. Depending on your screen size you may need to click on “View more” link to find it.
- Open "Prepare Form" Tool (Classic Acrobat Interface)
- If you are using a “classic” Adobe® Acrobat® interface, then expand Tools and find Prepare Form tool.
.png)
- Select an existing PDF file that will be used as a template for the PDF form. Click the "Add a dropdown list" icon from the menu. Move cursor to a page location where you want to place a dropdown list. Click on a page where you want to place a dropdown list box.
.png)
- Enter a dropdown list box name. A dropdown list box name is used to uniquely identify each list box field on a PDF form. It is a good idea to use the same name for both form and data fields to simplify the field mapping. Click "All Properties" to specify dropdown list properties.
- If a dropdown list box was previously created, place a cursor over the dropdown list box field and click a right mouse button. Select "Properties..." from the popup menu.
.png)
- Select the "Appearance" tab to specify border style and fill color. Specify text style.
- Select the "Options" tab on the "Dropdown Properties" dialog. Enter items that will be used as the options for the selection. Enter the item names and export value. Press the "Add" button to create a new choice in the "Item List". Check the "Allow user to enter custom text" option to allow users to type custom text into the field.
.PNG)
- In the example, we have created 3 items with corresponding export values: California - CA, Oregon - OR, Washington - WA. Populate the field with a text value that matches one of the export values to select an item from the list. For example, fill this field with "CA" to select "California".
.png)
- Click "Save file" to save changes to the file.
- Populating a PDF form with checkboxes, radio buttons and list boxes using the AutoMailMerge™ Plug-in
- Use the AutoMailMerge™ plug-in to automatically produce multiple PDF documents by filling PDF forms with data from a spreadsheet or data file. You can download trial versions of both the Adobe® Acrobat® and the AutoMailMerge™.
- Here is an example of the PDF form that uses a text field, multiple checkboxes and radio buttons, list and dropdown list boxes:
.png)
- The mail merge process fills form fields with data from the Excel spreadsheet and generates multiple output PDF documents:
.png)
- Here the sample output from the mail merge process:
.png)
- Click here for a list of all step-by-step tutorials available.