Selecting Data Records for the Mail Merge
AutoMailMerge plug-in for Adobe® Acrobat®
- Introduction
- This tutorial demonstrates the different ways to select data records with the AutoMailMerge™ plug-in. After selecting a data source file when configuring mail merge settings, the user may modify the data racords that are actually used for processing via the "View and Filter Records..." button. Use this feature to preview and inspect data records from the input data source, and specify what records should be used for the mail merge. The user is able to make manual selections, select/unselect a range of records at once, or select/unselect records based on a text search.
- Input Document Description
- The sample source file used here is an Excel spreadsheet featuring twelve entries, each with unique data entered under a series of field headers. In this tutorial, we will demonstrate record selection features using text searches that identify specific data located within these fields.
- Prerequisites
- You need a copy of Adobe® Acrobat® along with the AutoMailMerge™ plug-in installed on your computer in order to use this tutorial. Both are available as trial versions.
Step-by-Step Tutorial
- Step 1 - Open the "Mail Merge" Dialog
- First, open the PDF form that you want to fill in Acrobat.
- Select Plugins > Mail Merge… to open the Mail Merge dialog.
- If you are using a new Adobe Acrobat interface, then you can locate Mail Merge menu here:
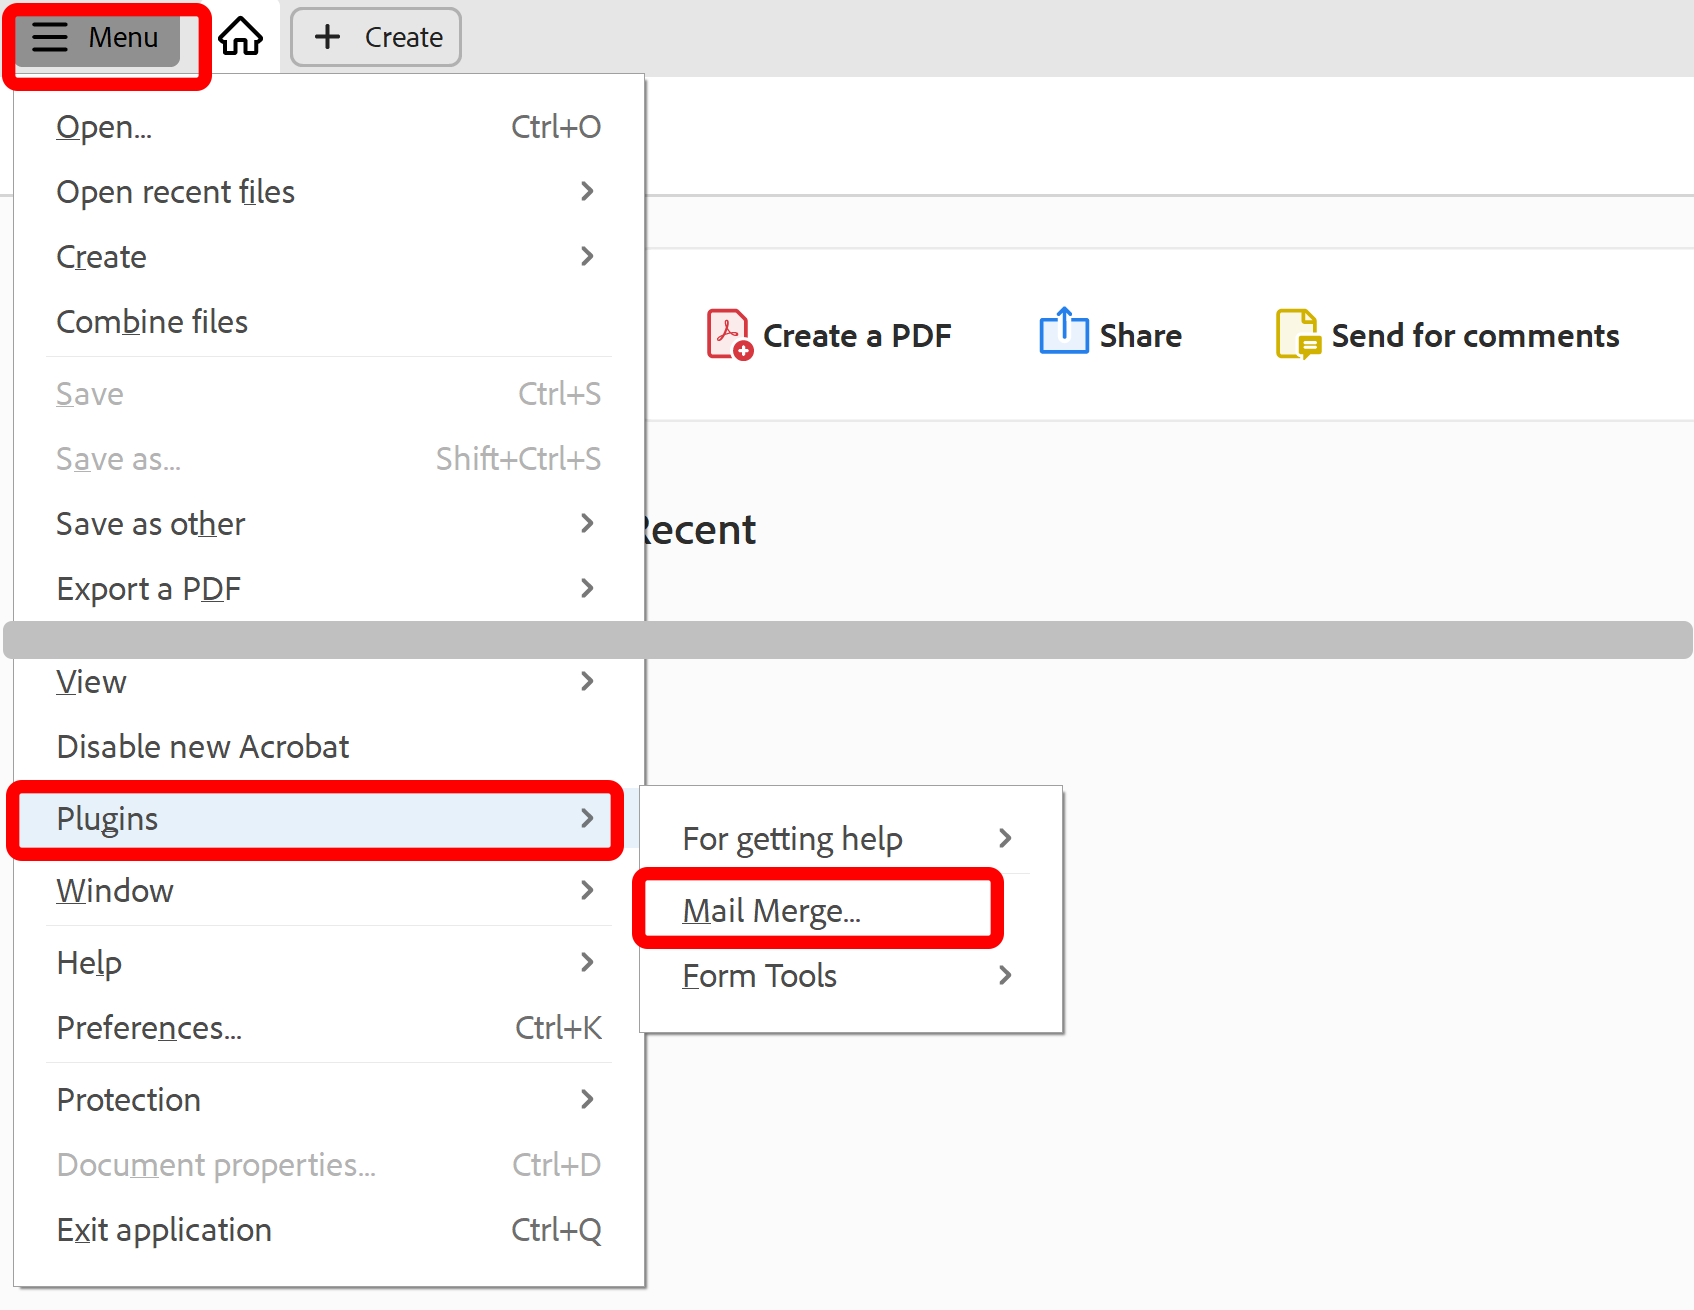
- Please see the following page for a short video tutorial on how to locate Plugins menu in the new Adobe® Acrobat® interface.
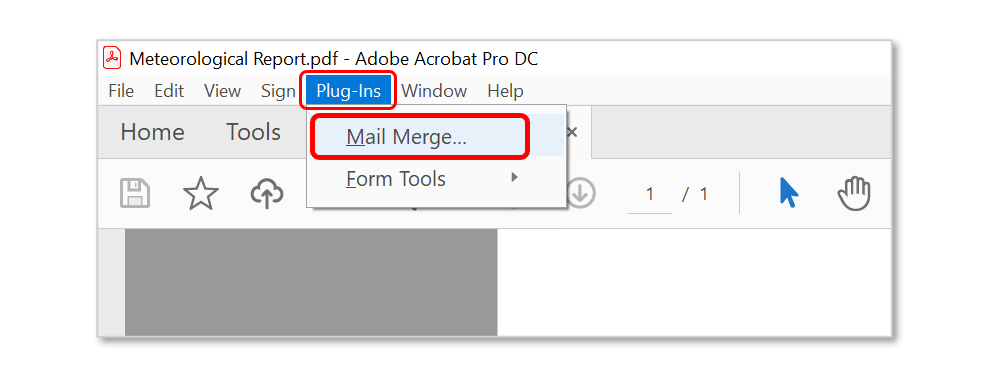
- If you are using a "classic" Adobe Acrobat interface (pre-2022), then you can locate Mail Merge menu here:
- Step 2 - Select the Data Source
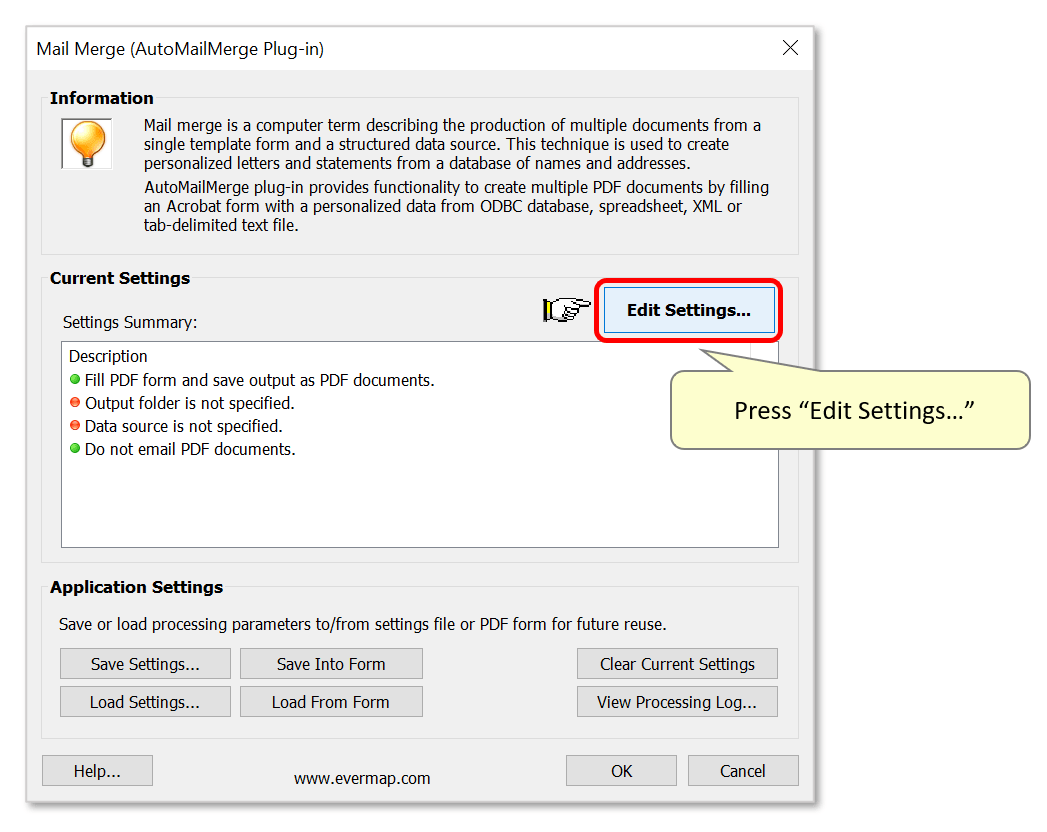
- If necessary, clear current settings and then press the "Edit Settings…" button.
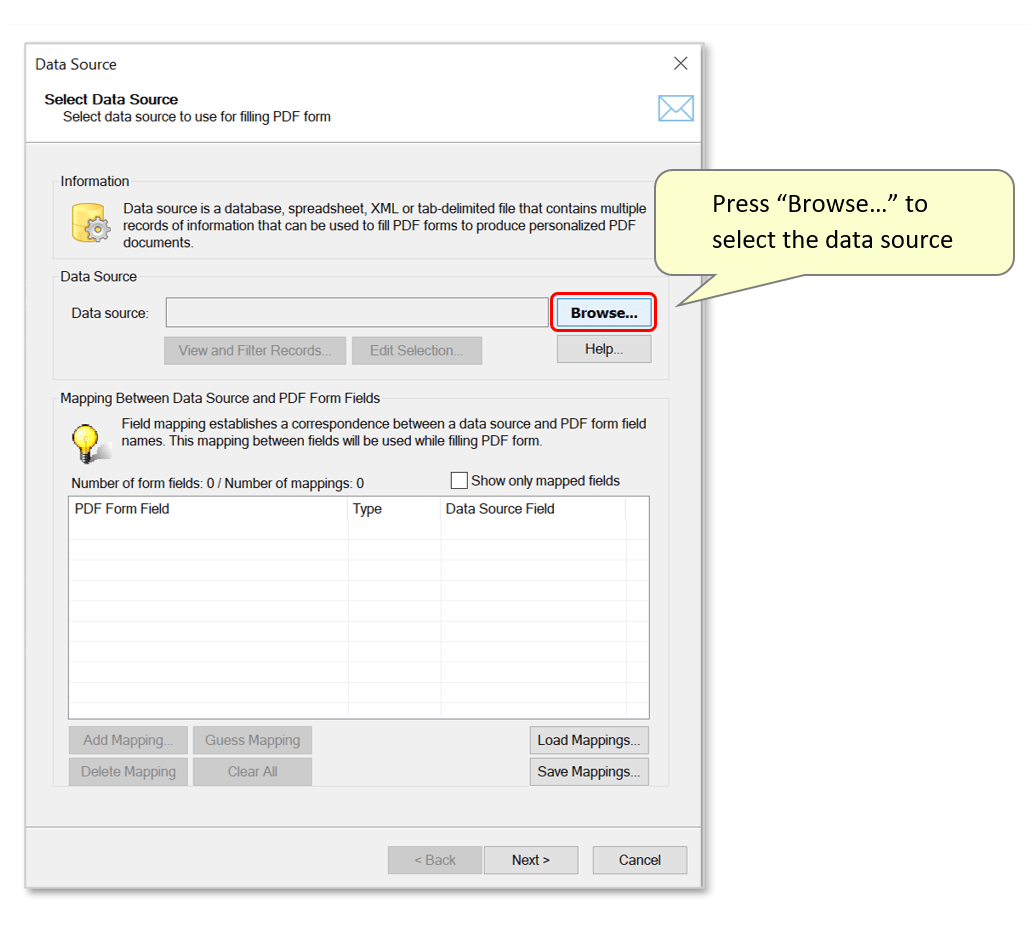
- Press the "Browse…" button in the "Data Source" dialog to select the input data file.
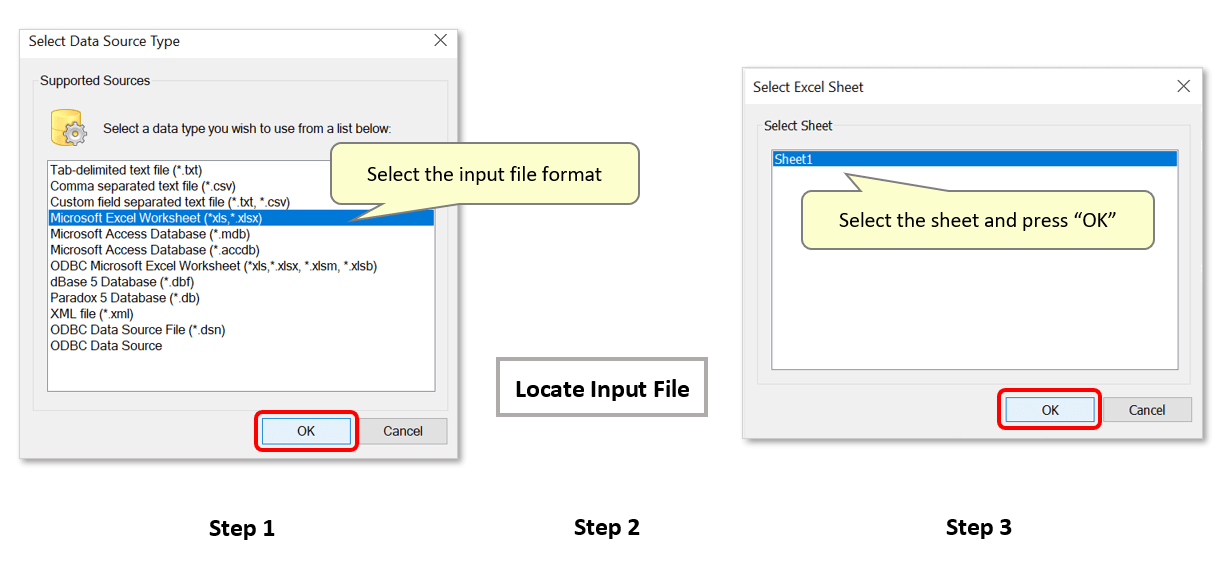
- Select a data type to use from the list (e.g.: Microsoft Excel Worksheet), then press "OK". Use the dialog that opens to locate and select the source file, then select the worksheet in the final dialog that opens.
- Step 3 - Open the "View and Filter Records" Dialog
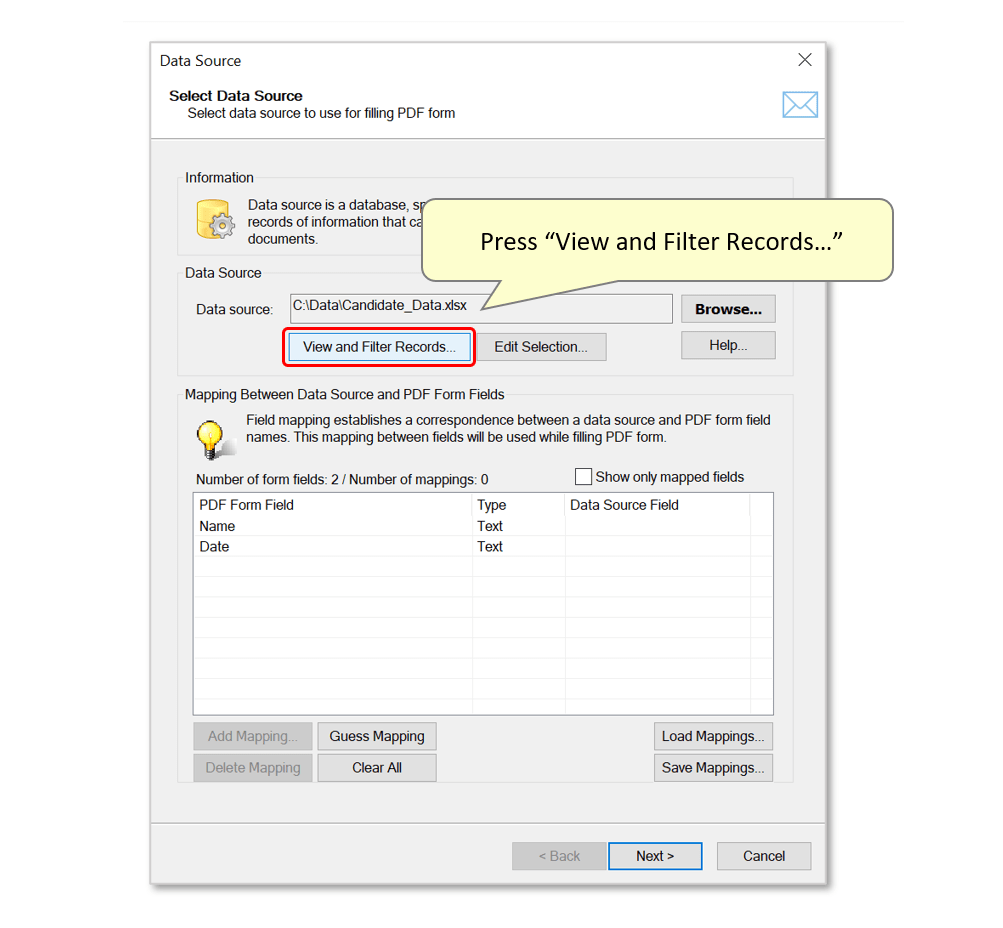
- Press the "View and Filter Records..." button to access the sorting tools.
- Step 4 - Selecting Records Manually
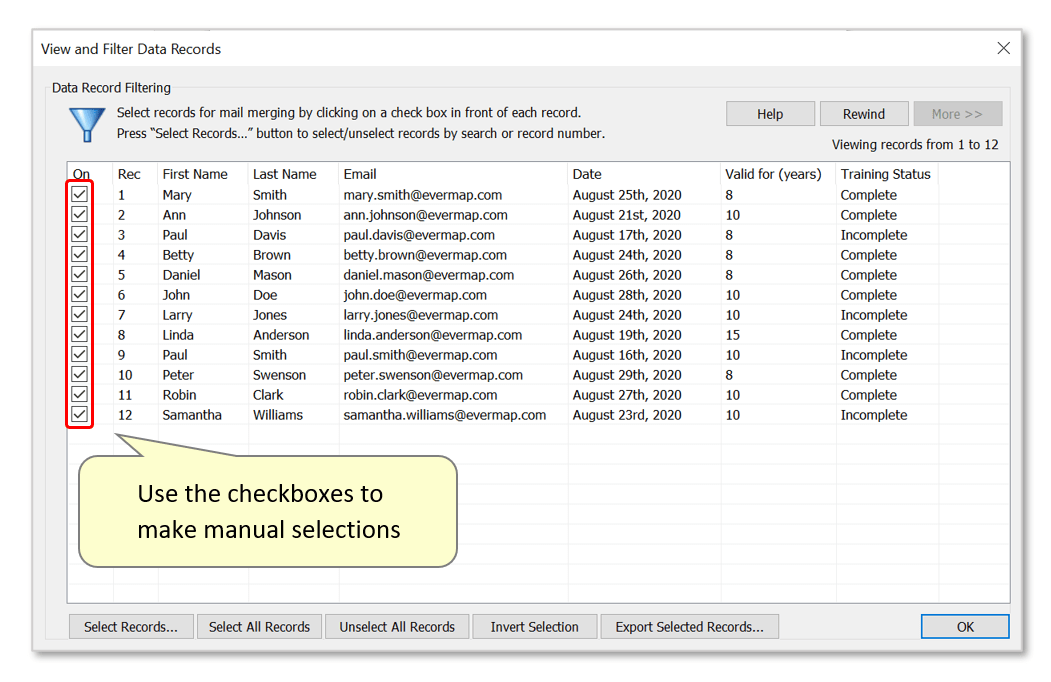
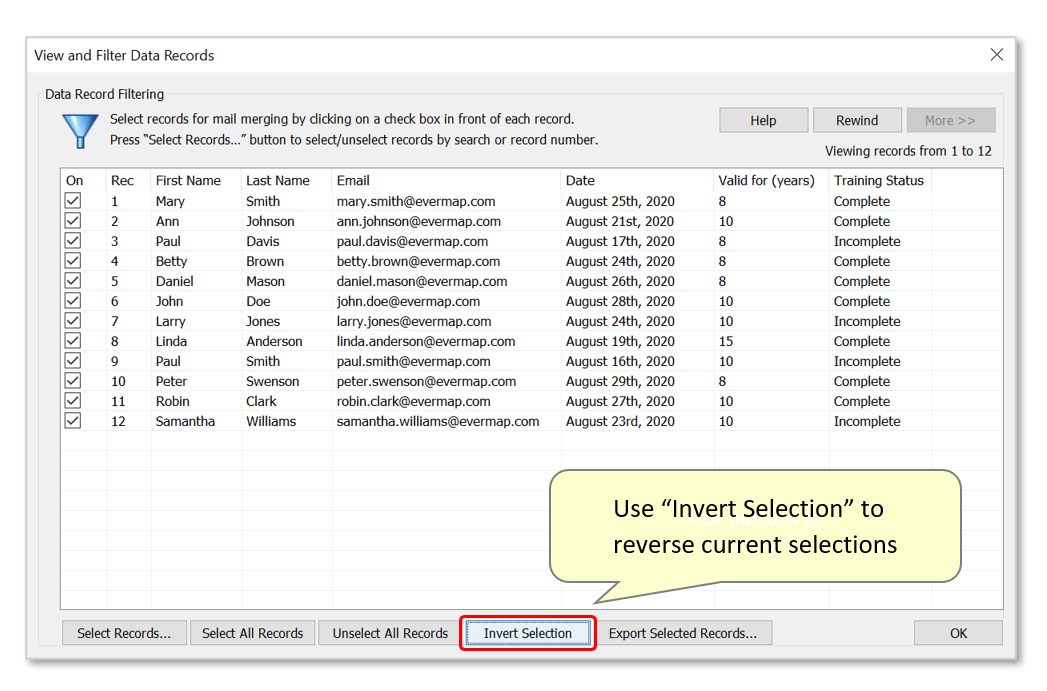
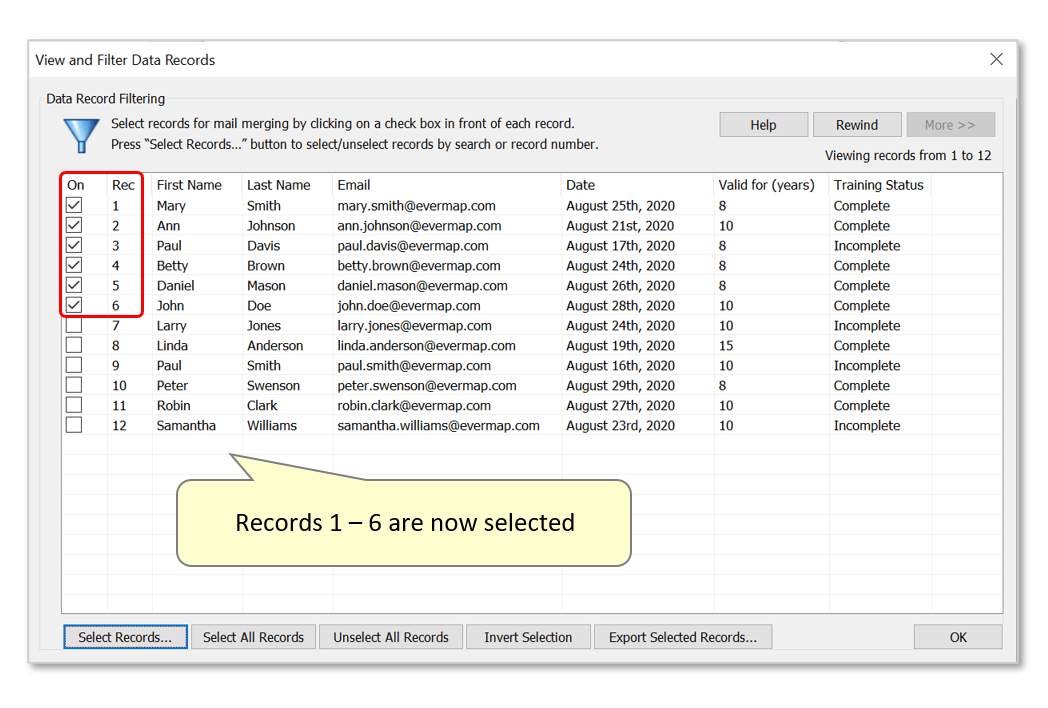
- In the preview window, each record has a check box in the first column (“On”). Use these to make manual selections for processing. Each record that is checked will be used in the mail merge process - all unselected records will be skipped.
- By default, all records from the data source are selected for processing:
- There are several buttons at the bottom of the dialog that can help with the record selection process. The “Select/Unselect All Records…” buttons can be used to simply select or unselect all records in the data source at once. If all records are unselected, no records will be selected for processing, and all records will appear unchecked.
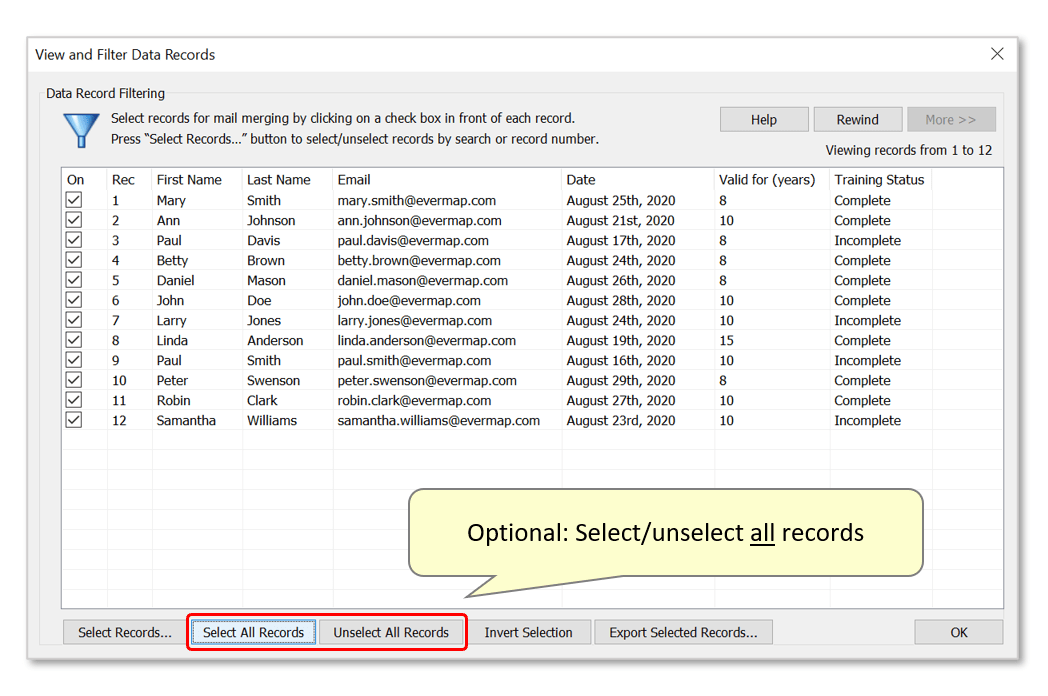
- Use “Invert Selection” to toggle all currently selected records.
- Step 5 - Open the "Select Records" Dialog
- Press “Select Records…” to select/unselect records based on a text search, or record number. Depending on the type of the selection you want to perform, you may want to press “Select/Unselect All Records” first, so that the “Select Records…” screen can be used to select (or unselect) only the desired records.

- Step 6 - Selecting a Range of Records
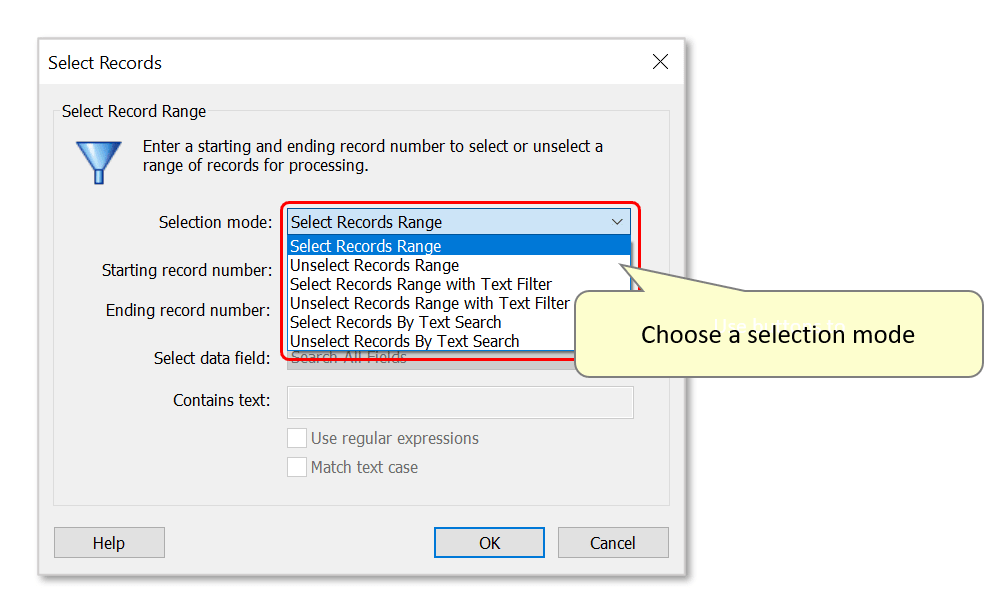
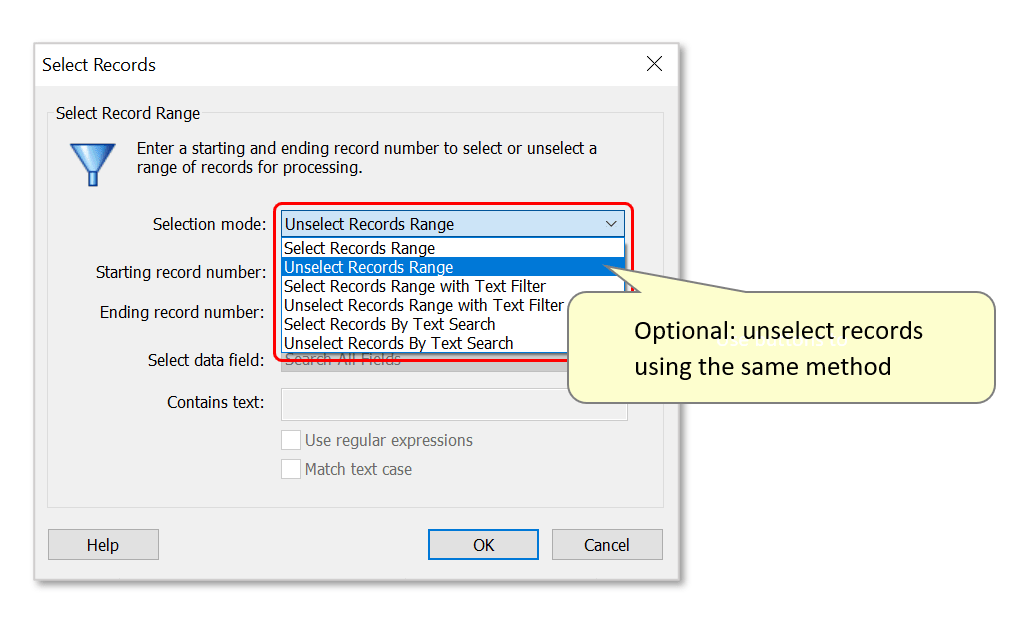
- In this dialog, use the drop-down list to choose a selection mode. Beginning with all records unselected, first we will demonstrate using the "Select Records Range" option.
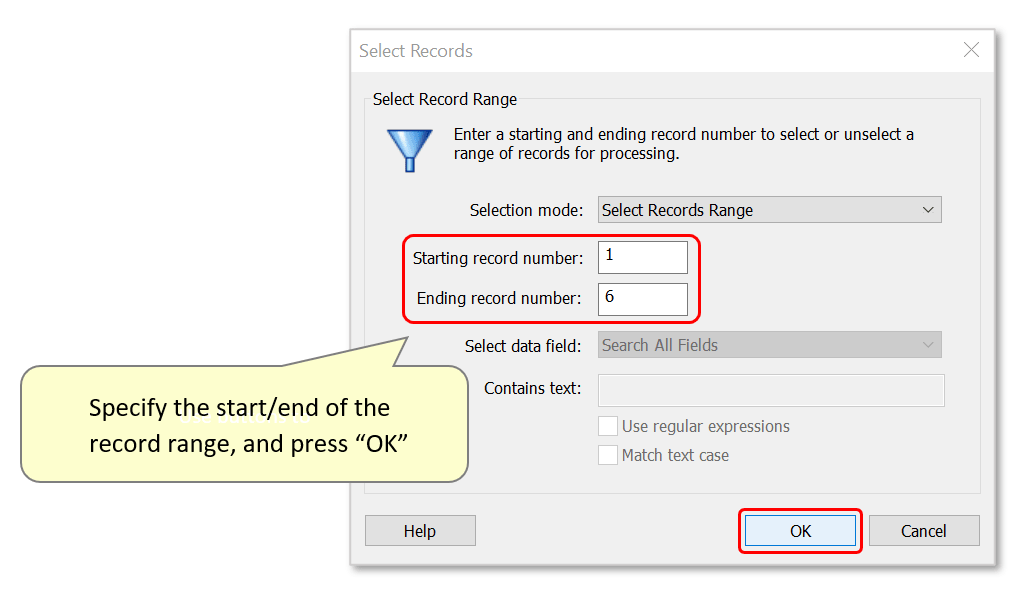
- Specify the start and end numbers of the range of records to be selected in the relevant entry boxes. In this example, we instruct the software to select records 1 - 6.
- Press "OK" once done.
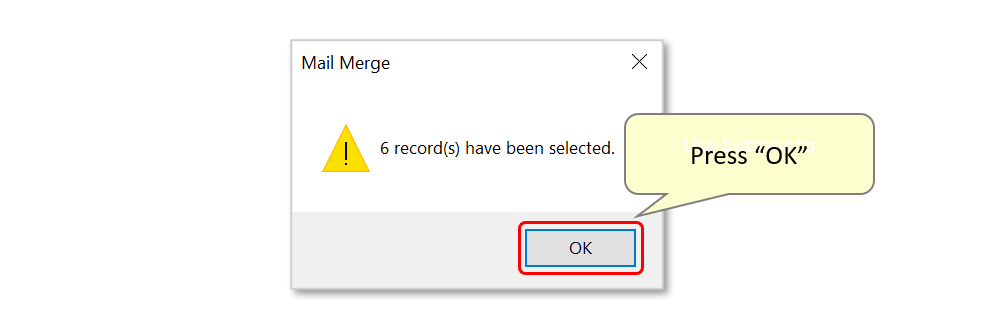
- A report box confirms the number of records that have been selected. Press "OK" to close it.
- Only records 1 - 6 have been selected:
- Step 7 - Unselecting a Range of Records
- Beginning with all records selected, the same technique can be used in reverse, via the "Unselect Records Range" mode.
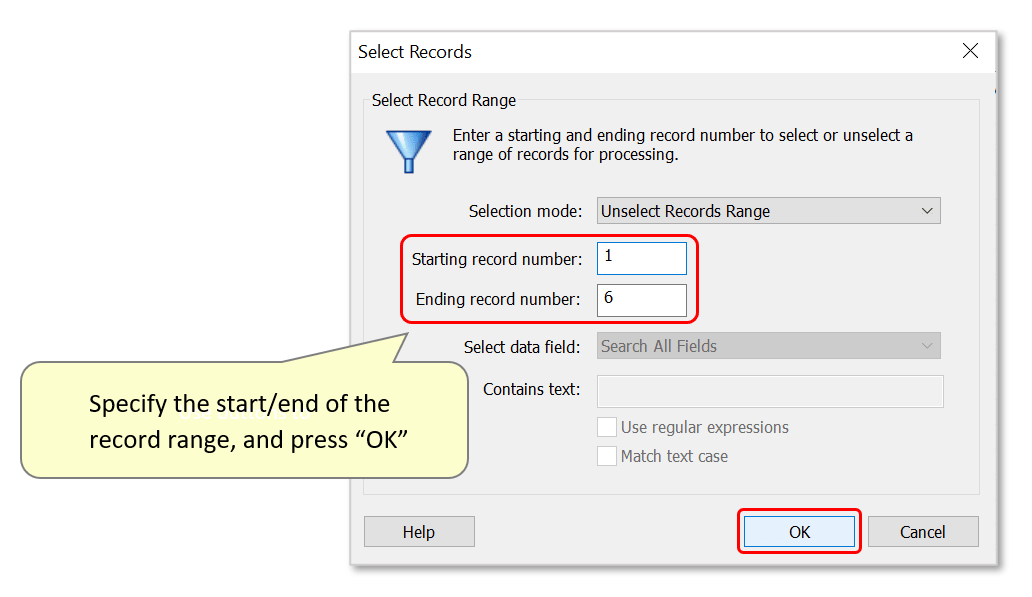
- Specify the start/end numbers of the range of records to be unselected, then press "OK".
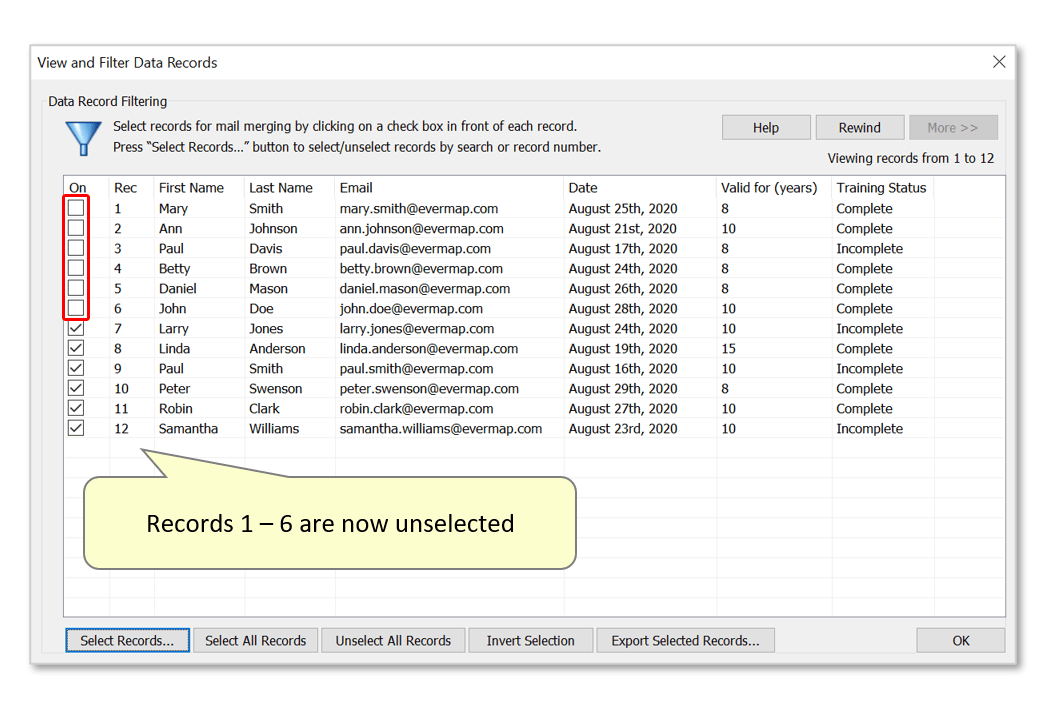
- Records 1 - 6 have now been unselected:
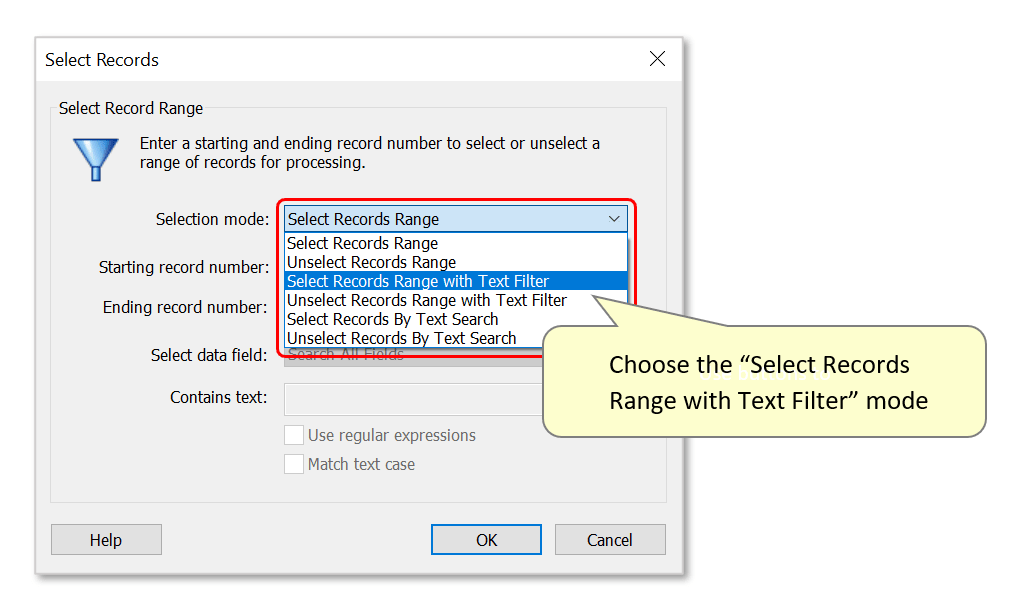
- Step 8 - Selecting/Unselecting a Range of Records with a Text Filter
- With all records unselected, try the "Select Records Range with Text Filter" option. This mode selects records that fall within a specific starting/ending record range and contain specific text or patterns.
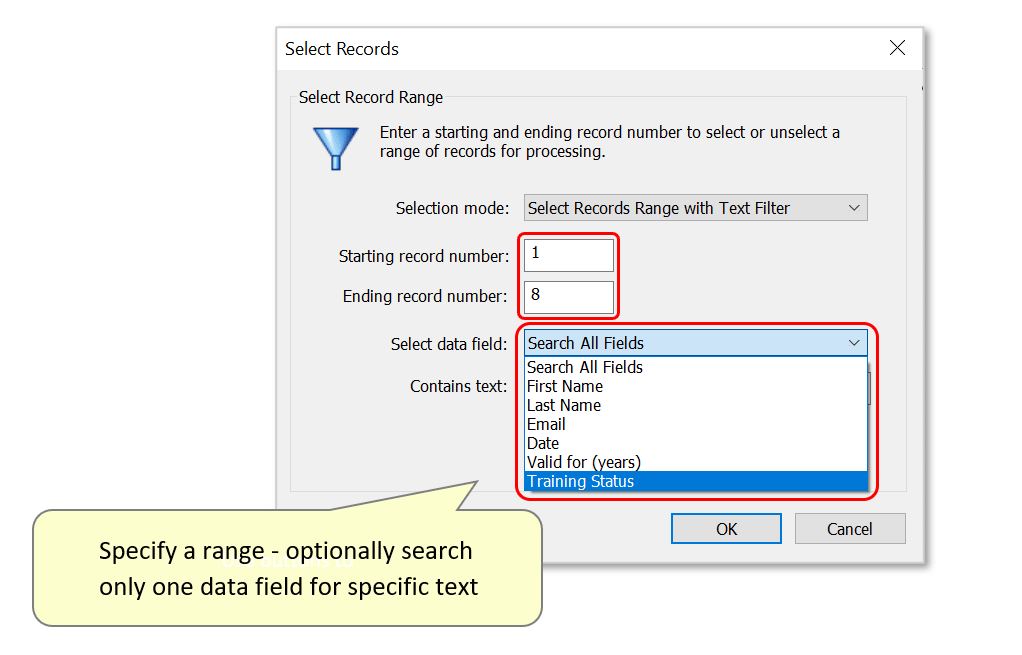
- Specify the start and end numbers of the range of records to be searched, and optionally search only one data field for the specific text. In this example, the “Training Status” field for records 1 – 8 will be searched:
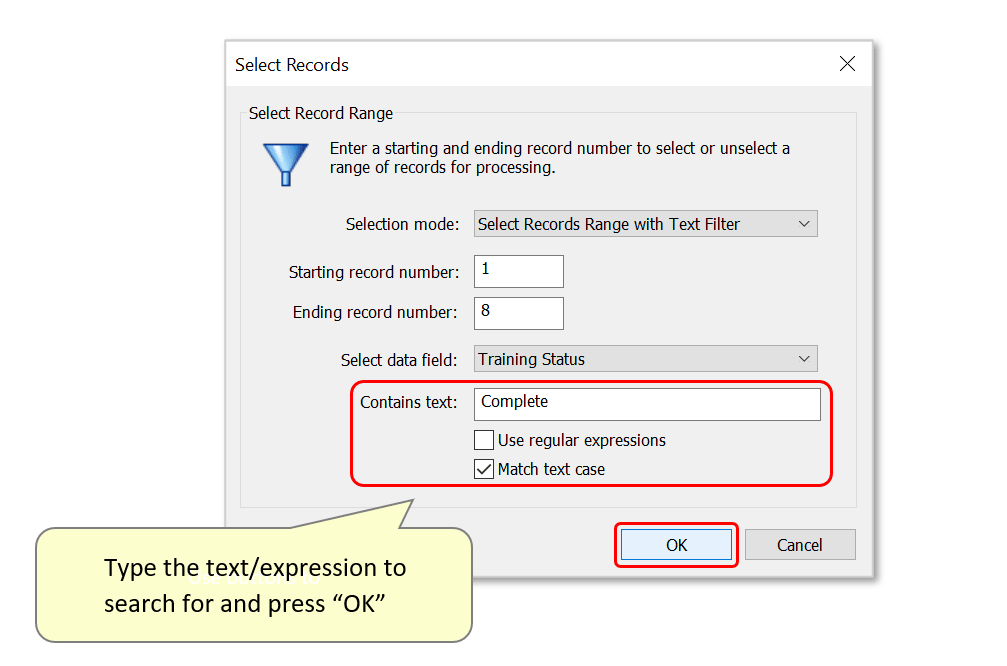
- Now type the text/search expression to search for into the "Contains text:" entry box - in this example, the software will search for the word “Complete”. Then select any necessary processing options - check "Use Regular Expressions" if searching for text via regular expression syntax (for example, if you want to select records that contain 10-digit numbers). Here we have checked "Match Text Case" as the “Training Status” field contains either "Complete/incomplete". This means the word "complete" exists within both options, so we want to search specifically for the word "Complete" with the capitalization.
- Press "OK" to proceed.
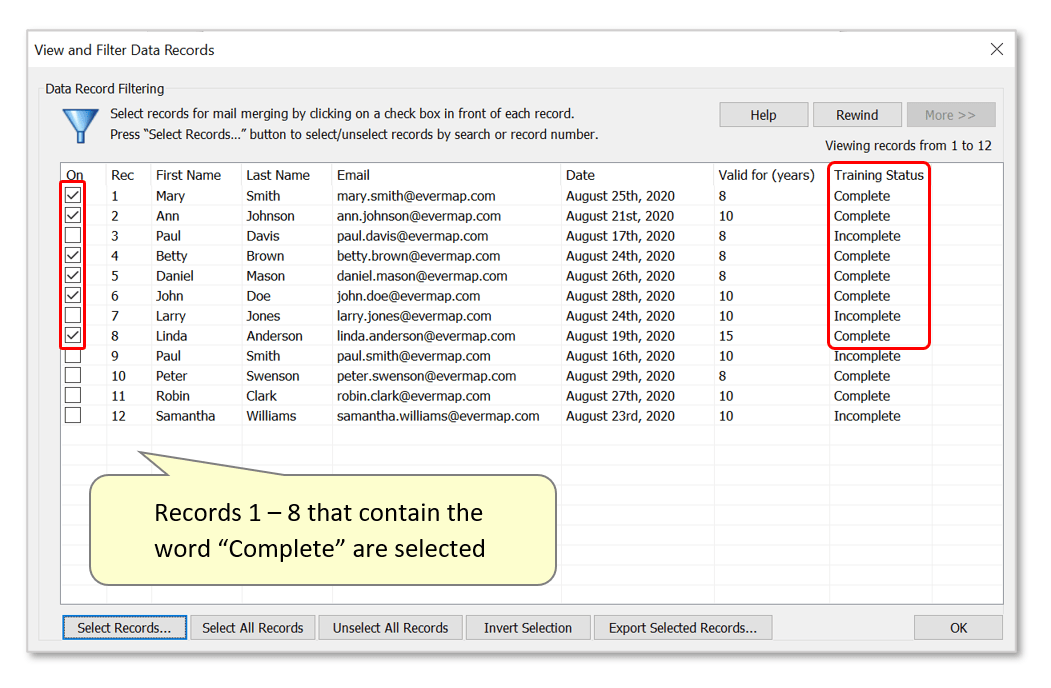
- Only records that fall between 1 - 8 and contain the word "Complete" have been selected:
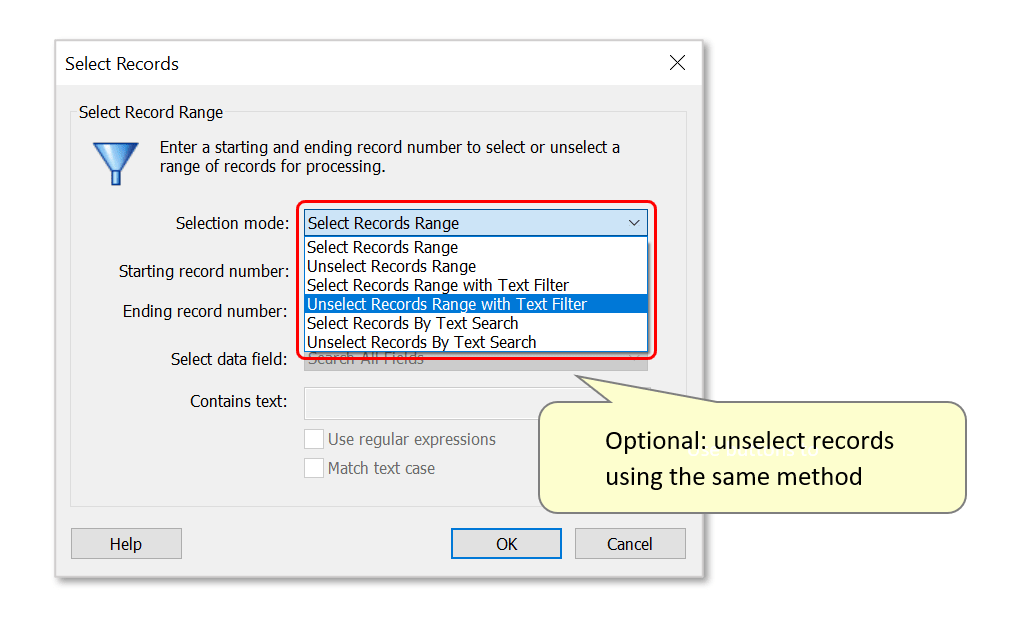
- Records can also be unselected using the same method, via the "Unselect Records Range with Text Filter" option. Note that you must start with all records selected for this to work.
- Step 9 - Selecting/Unselecting Records via a Text Search
- With all records unselected, use the "Select Records by Text Search" mode to select all records that contain specific text or patterns.

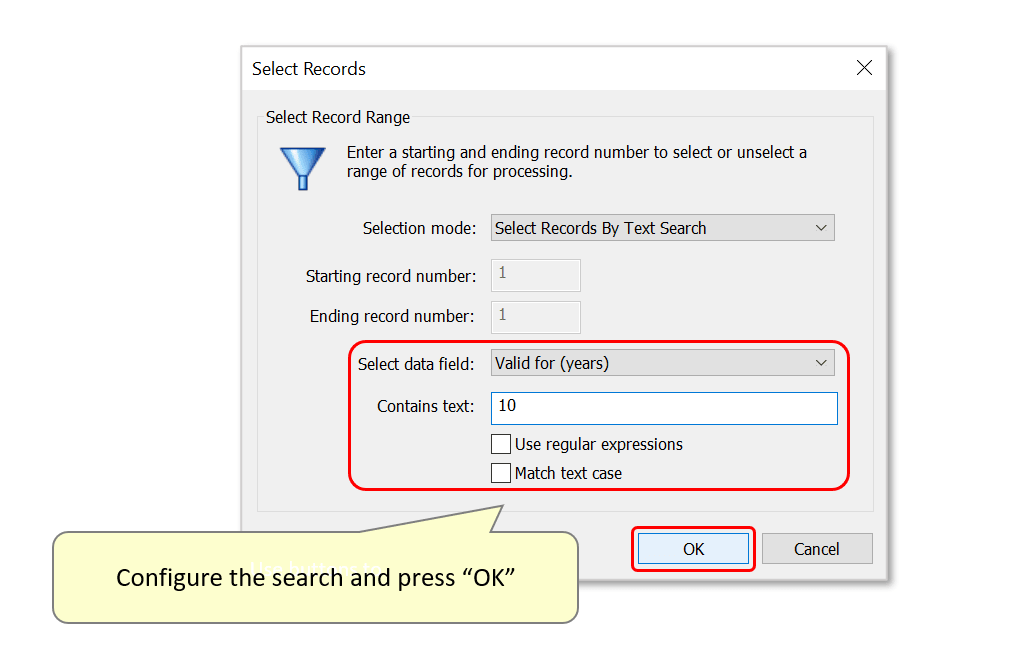
- Type the text to search for/search expression into the "Contains text:" entry box, and select the data field(s) to search using the drop-down list. You have the option to search a single data field, or all fields. In this example, we will search the “Valid for…” field for any occurrences of the number “10”.
- Press "OK" to proceed.
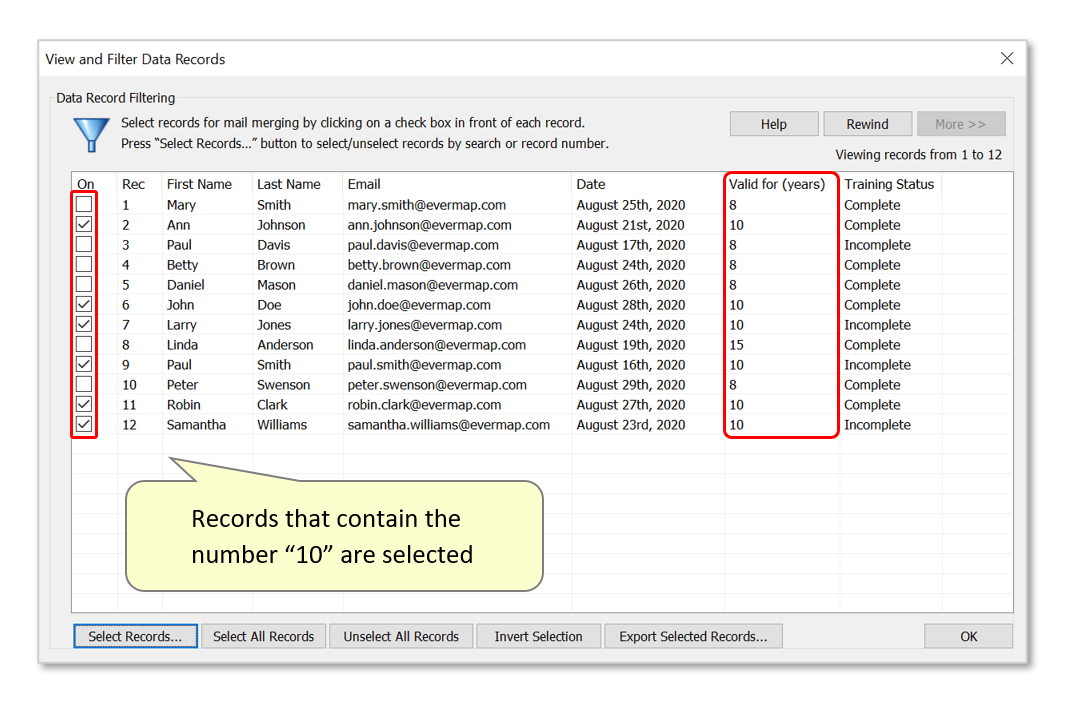
- All records that contain the number "10" in this field have been selected.
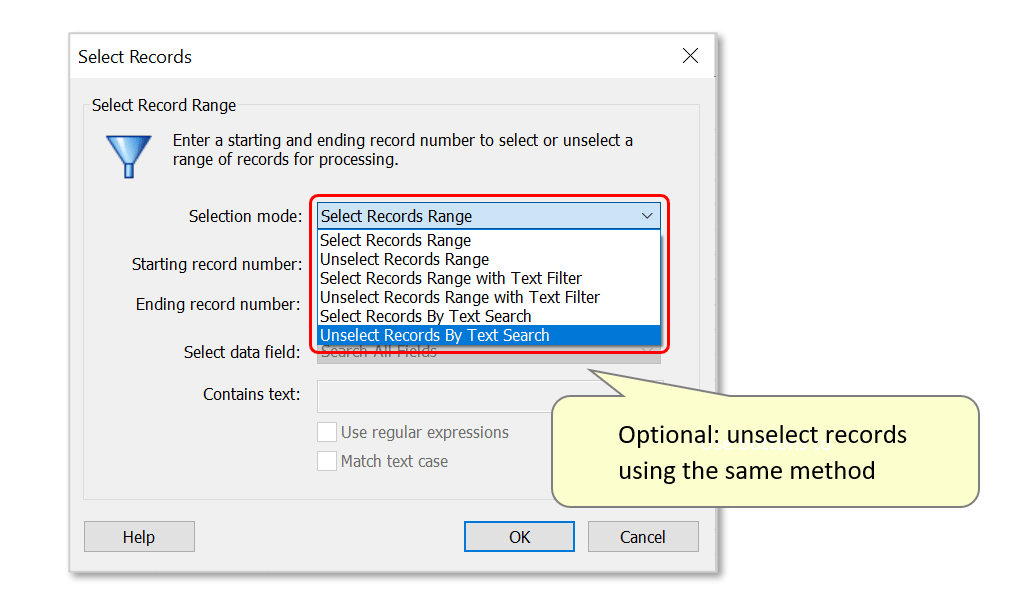
- Records can also be unselected using the same method, via the "Unselect Records by Text Search" option. Note that you must start with all records selected for this to work.
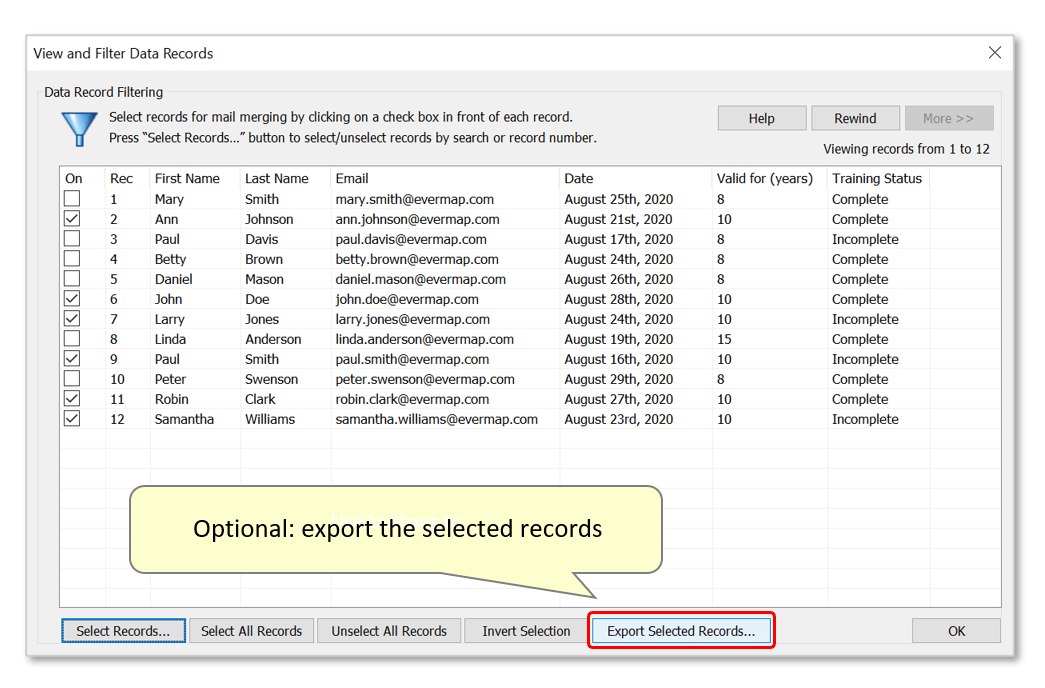
- Step 10 - Optional: Export Selected Records
- Use the "Export Selected Records..." button to export all selected records as a separate file:
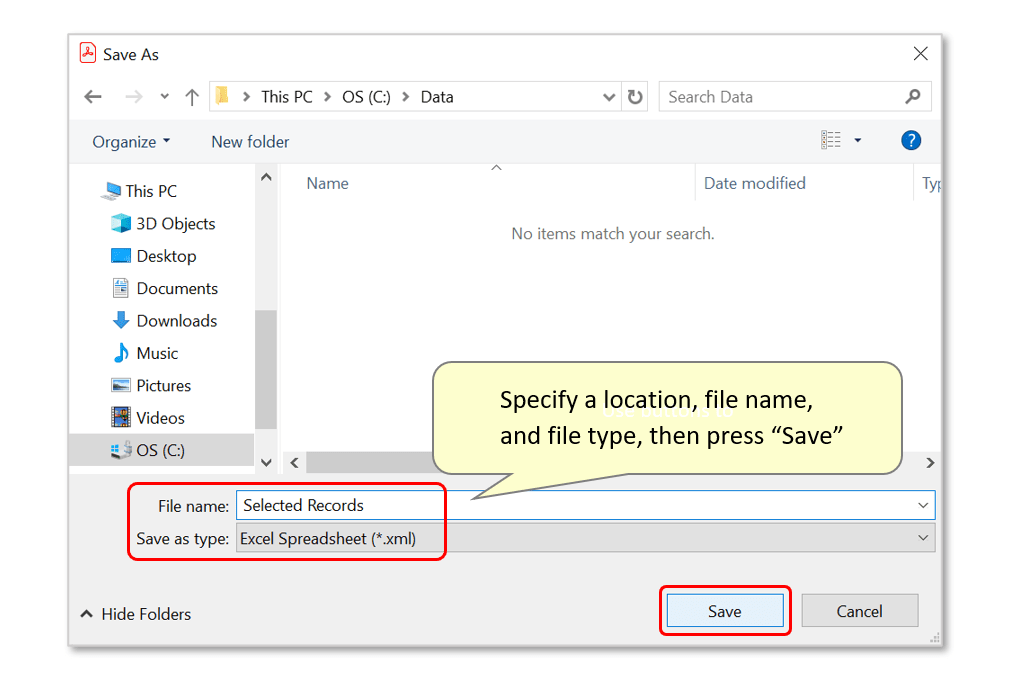
- In the save dialog that opens, choose a suitable location and optionally rename the file before pressing "Save". By default, it will be saved in *.xml spreadsheet format and titled "Selected Records".
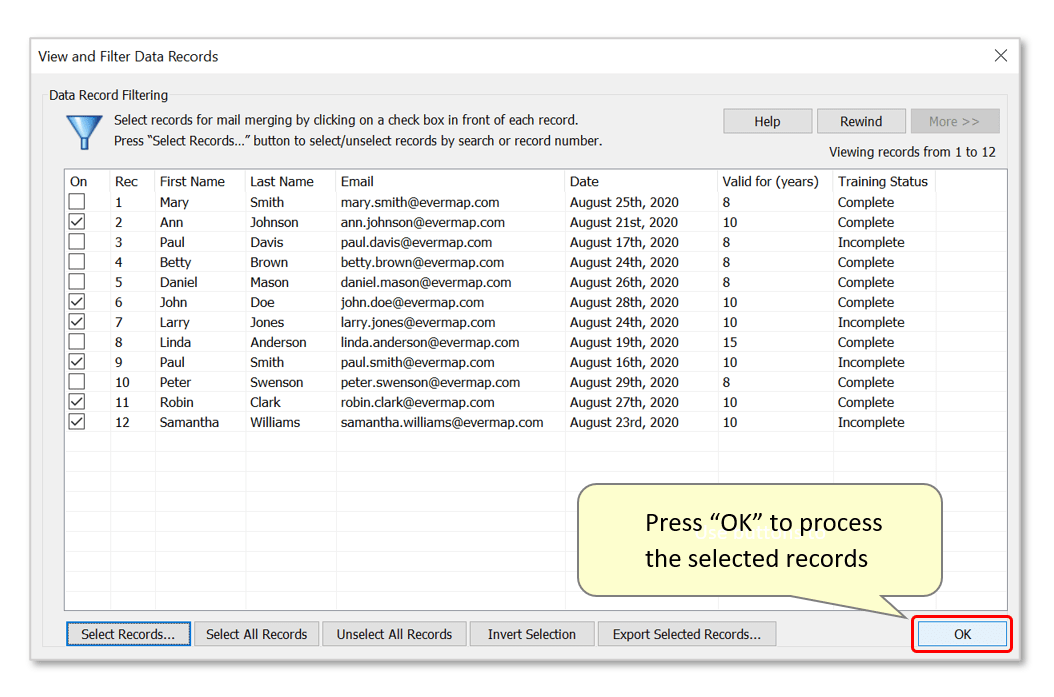
- Step 11 - Confirm Selected Records
- Press "OK" to process the selected records and continue configuring the mail merge.
- Click here for a list of AutoMailMerge tutorials.