Securing PDF Files Using Filename-To-Password Mapping Table
AutoMassSecure™ plug-in for Adobe® Acrobat®
- Introduction
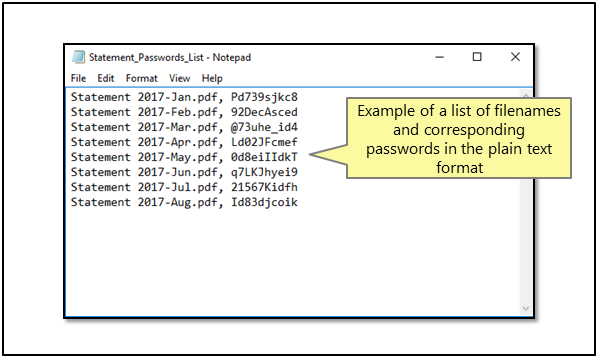
- Manually securing PDF files requires multiple steps and takes considerable amount of time. It is not practical when multiple PDF documents need to be secured. The AutoMassSecure™ plug-in for Adobe® Acrobat® is designed to automatically secure a set of PDF files either by generating random individual passwords or by extracting passwords from the document text. The following tutorial is going to illustrate how to password protect multiple PDF documents by matching file names to passwords using a user-specified mapping table. The mapping table is simply a list of file names and corresponding passwords in the plain text format.
- Input Documents Description
- The input folder used in this tutorial contains 8 PDF files (monthly statements). The goal is to secure each PDF file with a password from the user-specified list of file names and passwords. The list could be prepared in any text editor in the plain text format or using Microsoft Excel spreadsheet editor.
- Securing Approach
- The AutoMassSecure™ plug-in provides an option to lookup passwords from a user-specified filename-to-password mapping file. Use this password-generation method if files have fixed and well known names.
- Prerequisites
- You need a copy of Adobe Acrobat Standard or Professional along with AutoMassSecure™ plug-in installed on your computer in order to use this tutorial. You can download trial versions of both Adobe Acrobat and AutoMassSecure™.
- Step 1 - Open “AutoMassSecure Plug-in Settings” Menu
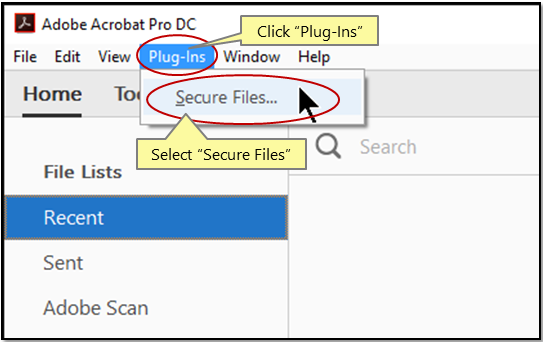
- Select “Plug-Ins > Secure Files...” from the main menu.
- [⚡ How to locate Plugins menu in Adobe® Acrobat® ⚡]
- Step 2 - Specify General Output Settings
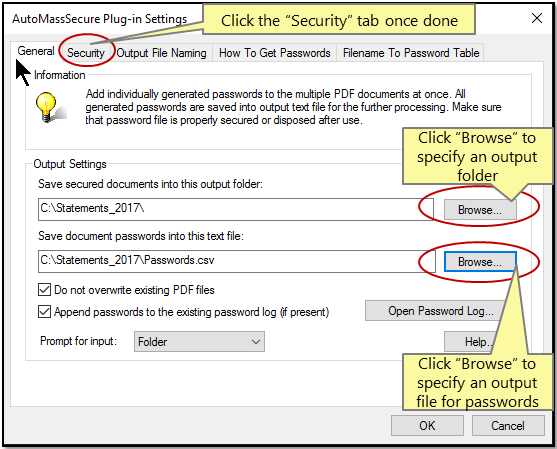
- Specify an output folder for storing secured files via the "Browse" button. Press the “Browse” button below to specify an output file that would contain generated passwords. Click the “Security” tab once done.
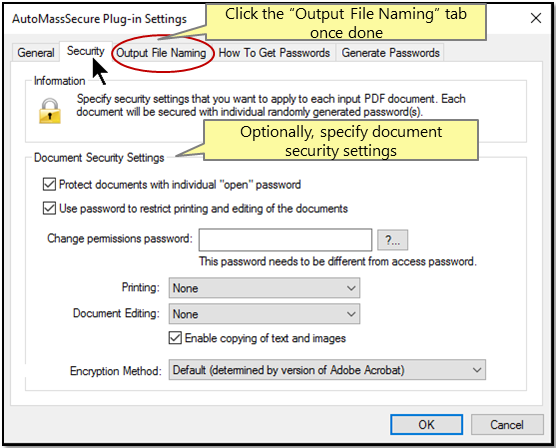
- Step 3 - Specify Security Settings
- Optionally, specify document security settings in this tab. Click the “Output File Naming” tab once done. Please note that "Encryption Method" provides selection of 3 different choices for the encryption algorithm. Not all PDF viewers can support latest encryption methods. Set encryption to "128 bit RC4" algorithm if you want to let users to open encrypted files on mobile phones.
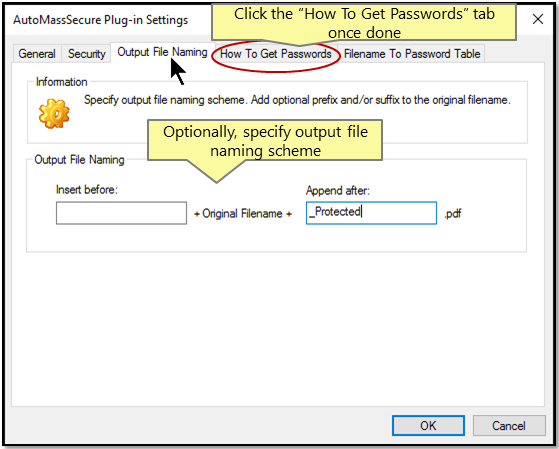
- Step 4 - Specify Output File Naming
- Optionally, specify output file naming scheme for secured files by adding prefix and/or suffix to the original file name. Click the “How To Get Passwords” tab once done.
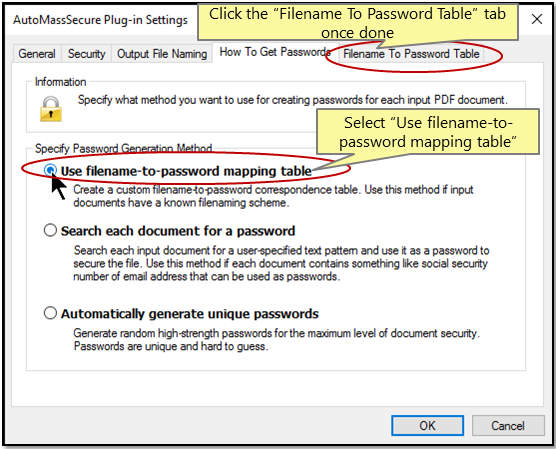
- Step 5 - Specify Password Generation Method
- Select “Use filename-to-password mapping table” method. Click the “Filename To Password Table” tab once done.
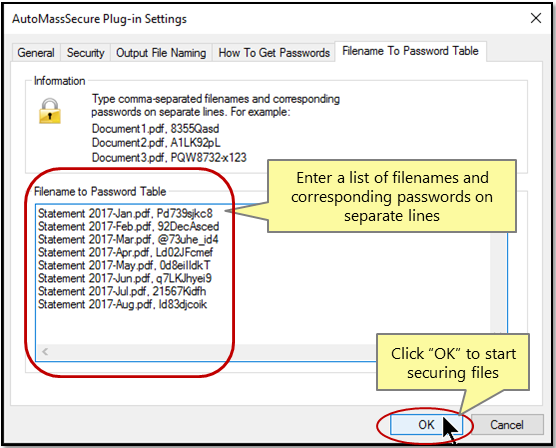
- Step 6 - Specify Filename-To-Password Table
- Type comma-separated file names and corresponding passwords on separate lines in the "Filename to Password Table" box. For example: "Document1.pdf, Pd739sjkc8". Or copy a prepared list from any text editor. Click “OK” to start securing files.
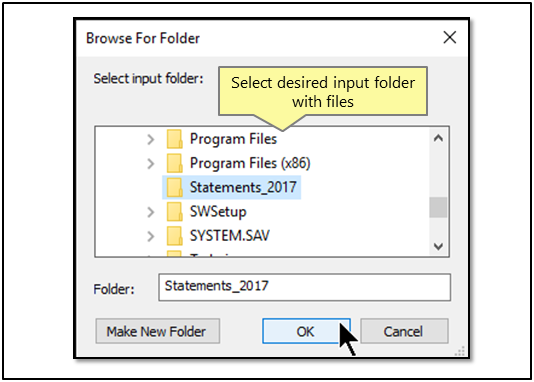
- Step 7 - Specify Input Folder
- Select an input folder with PDF documents that need to be secured. Click "OK" once done.
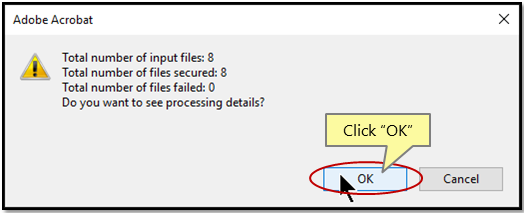
- Step 8 - Inspect the Results
- The final screen shows total number of input files, secured files, and failed files. Click "OK" to open the processing log.
- The processing log contains detailed information about input/output files, password-protection method used, and a processing date.
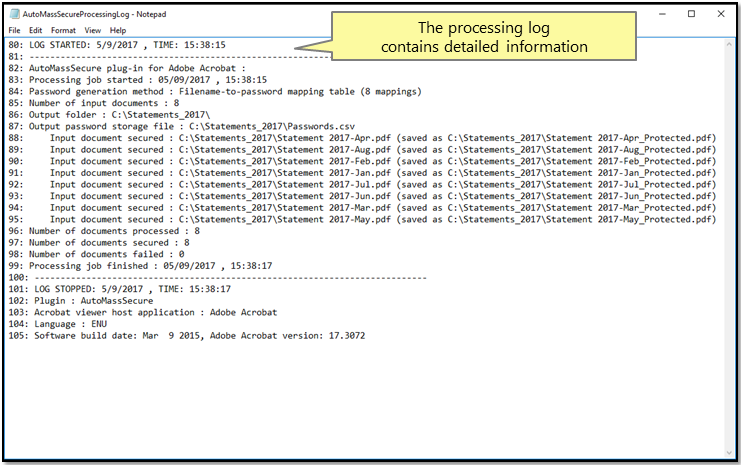
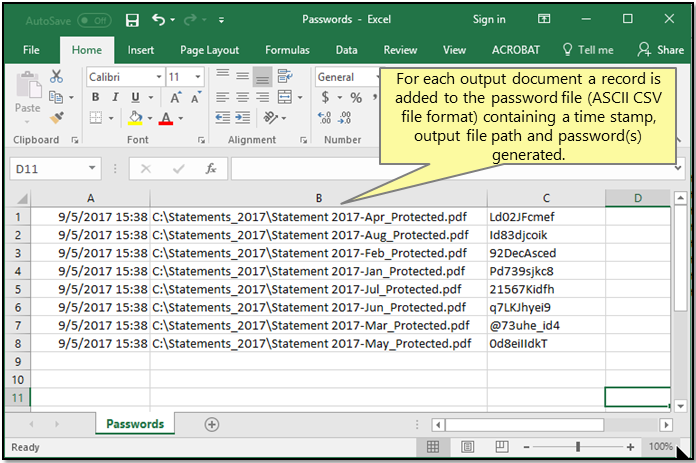
- Processing information such as time stamp, output filename and associated access passwords are saved into a special "password file" for further processing by external applications. The plug-in allows storing this metadata in either CSV or Excel-compatible XML file format.