Extract Metadata from a PDF Portfolio into a Microsoft Excel Spreadsheet
- Introduction
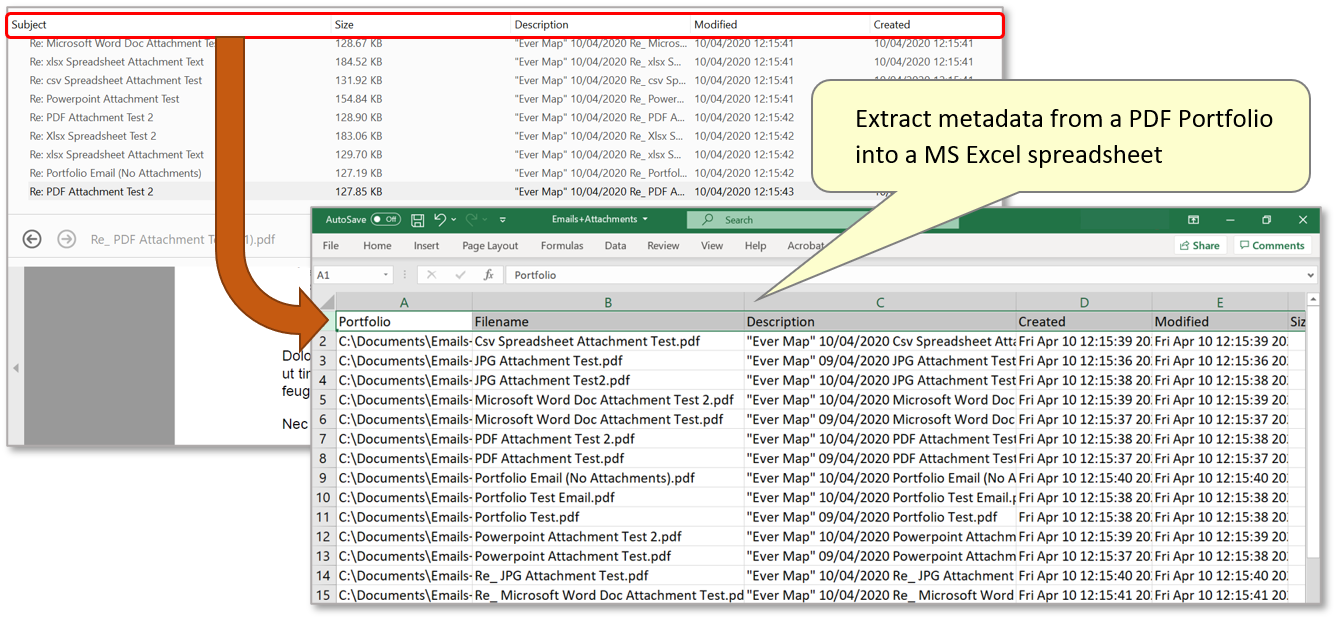
- This tutorial shows you how to extract all metadata from a PDF Portfolio into a spreadsheet format that can be opened in Microsoft Excel. A PDF Portfolio is a single storage file containing multiple elements, along with the corresponding metadata associated with each file. The actual metadata fields included depend on the application that created the particular portfolio. The most common use of PDF Portfolio’s is to store emails exported from email applications such as Microsoft Outlook or Lotus Notes. In this case, most metadata fields come from the corresponding email’s metadata and typically include “To”, “From”, and “Subject” etc. The AutoPortfolio plug-in can export all this information into an Excel spreadsheet file. It exports all fields that are actually present in the PDF Portfolio, along with some additional metadata fields that are computed by the plug-in itself (MD5 hash). The plug-in also offers the ability to process only specific entries – e.g.: for a selected date or a person (in the case of email Portfolio’s).
- What is a PDF Portfolio?
- A PDF Portfolio contains multiple files assembled into an integrated PDF unit. For example, it can include text documents, e-mail messages, spreadsheets, CAD drawings, and PowerPoint presentations etc. The original files retain their individual identities but are assembled into one PDF Portfolio file. In this tutorial, the sample Portfolio we'll use is an entire Microsoft Outlook inbox of emails, extracted into a Portfolio file to include all corresponding attachments. See the tutorial on how to extract Outlook emails as a Portfolio file here.
- It is important to understand that a PDF Portfolio is not a PDF document. It is an archive of files stored inside a single document, with a PDF extension. PDF portfolios are commonly used for storing emails exported from Microsoft Outlook.
- Every file inside a PDF Portfolio may contain associated metadata information. In the case of emails, it can include "From", "To", "Subject", "Sent", "Description", "Attachments" and other fields. The list of fields depends on the type of the email messages and may vary. The metadata fields may be absent from the portfolio if it was not exported from Outlook, and instead created directly in Adobe Acrobat.
- Prerequisites
- You need a copy of Adobe® Acrobat® along with the AutoPortfolio™ plug-in installed on your computer in order to use this tutorial. Both are available as trial versions.
- Step 1 - Opening the Tool
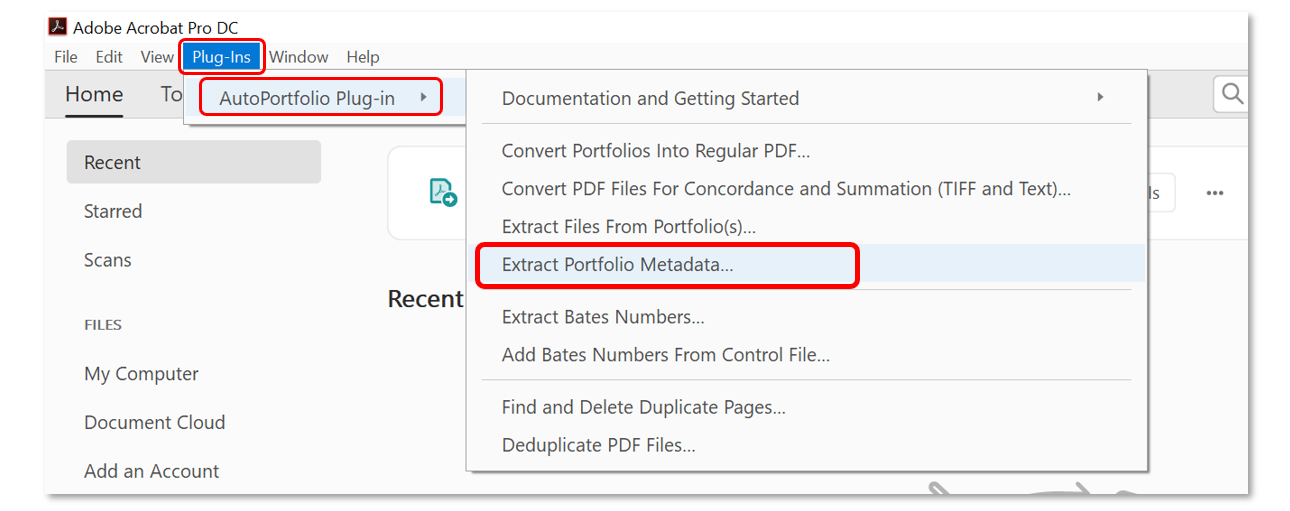
- Start Adobe® Acrobat® and select “Plug-ins > AutoPortfolio Plug-in > Extract Portfolio Metadata...” from the main Adobe Acrobat menu to open the extraction dialog. Do not open a PDF Portfolio directly in Acrobat, or the program will automatically disable most tool menus including “Plug-ins”.
- Step 2 - Select Input Files
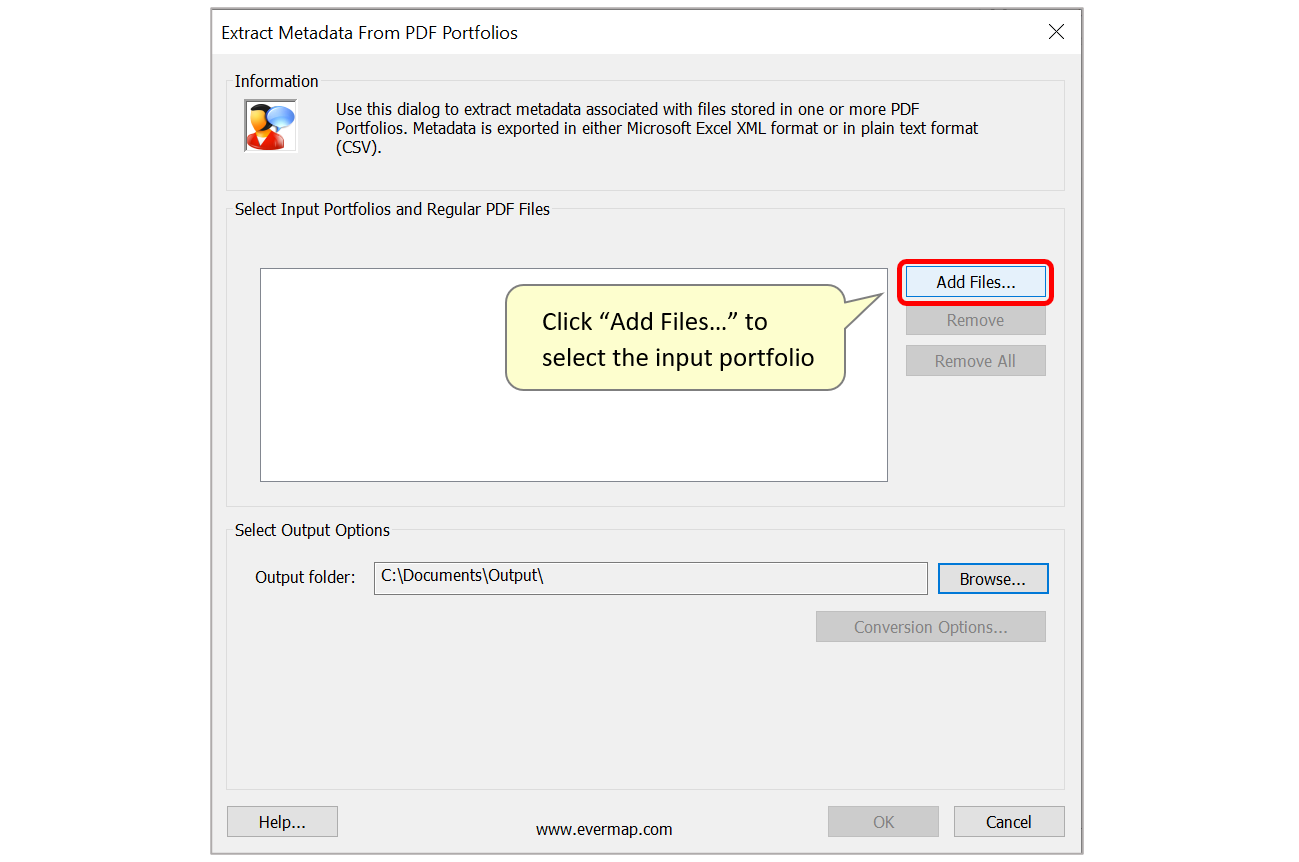
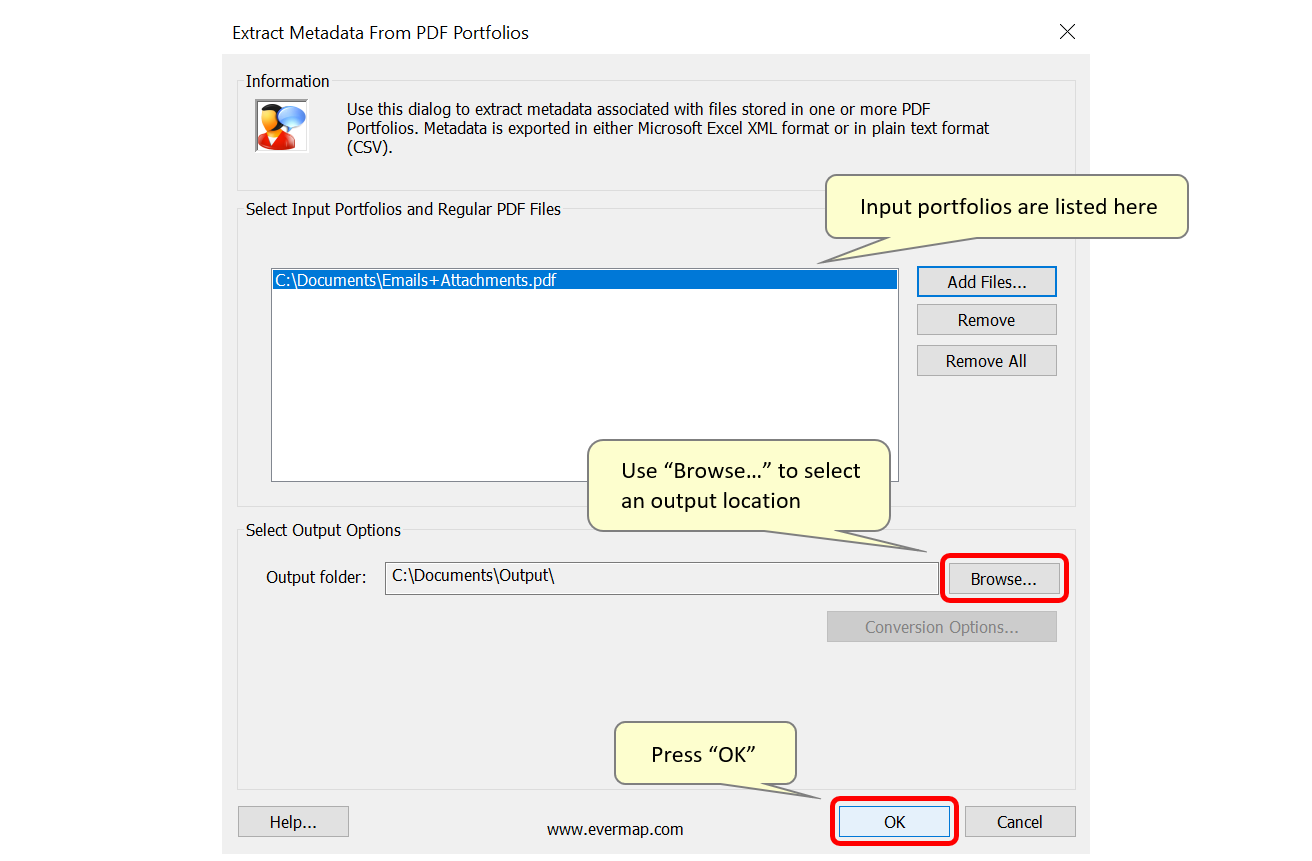
- In the "Extract Metadata from PDF Portfolios" dialog, press the “Add Files…” button to select the input PDF portfolio for processing.
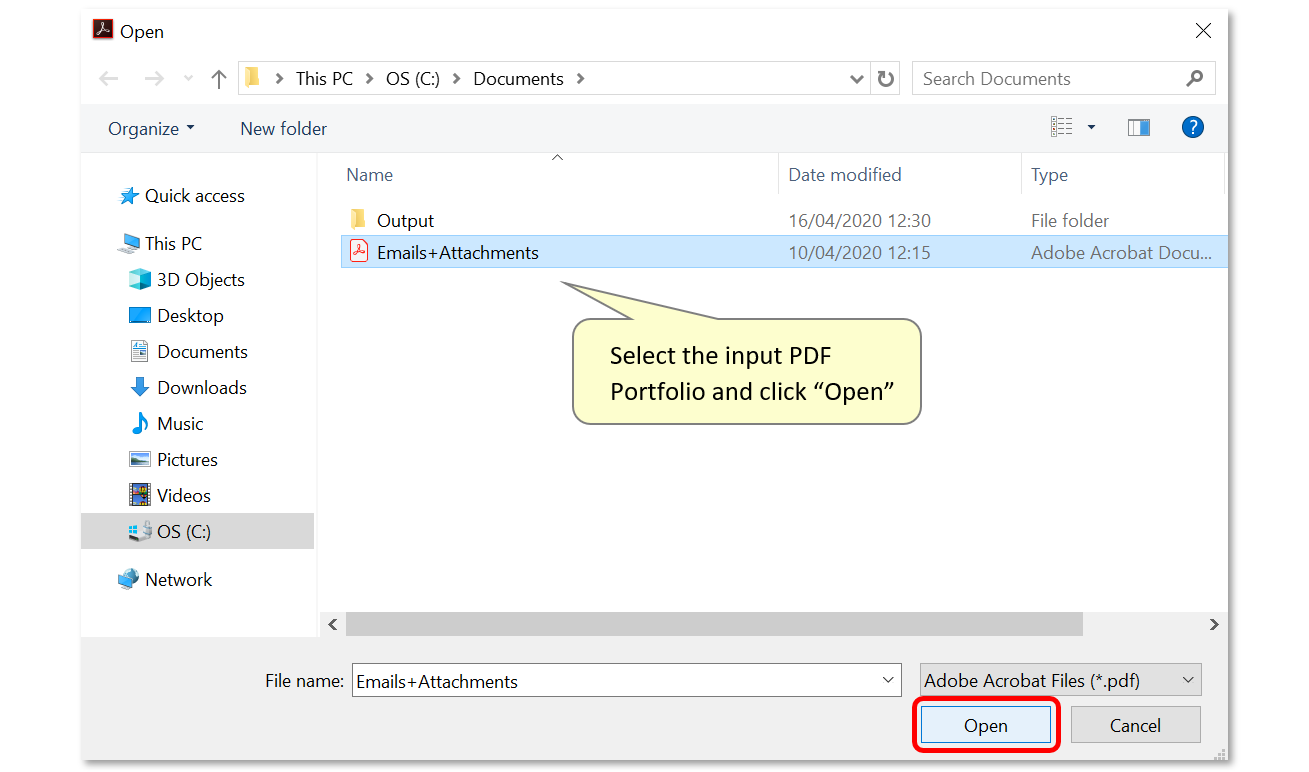
- Select the required input PDF Portfolio file and click "Open". The sample Portfolio used here contains multiple emails with various file attachments of different formats.
- Step 3 - Select Portfolio Components for Processing
- Use the “Specify Sort Order” dialog to select the parts of the PDF Portfolio that are to be processed. Do this manually via the check boxes in front of each record. Return to default by using the "Select All" button, or use "Toggle Selection" to de-select all entries, and manually select fewer necessary entries with the checkboxes. Alternatively, click "Select by Search..." to perform a text search which can be used to select/unselect all corresponding entries.
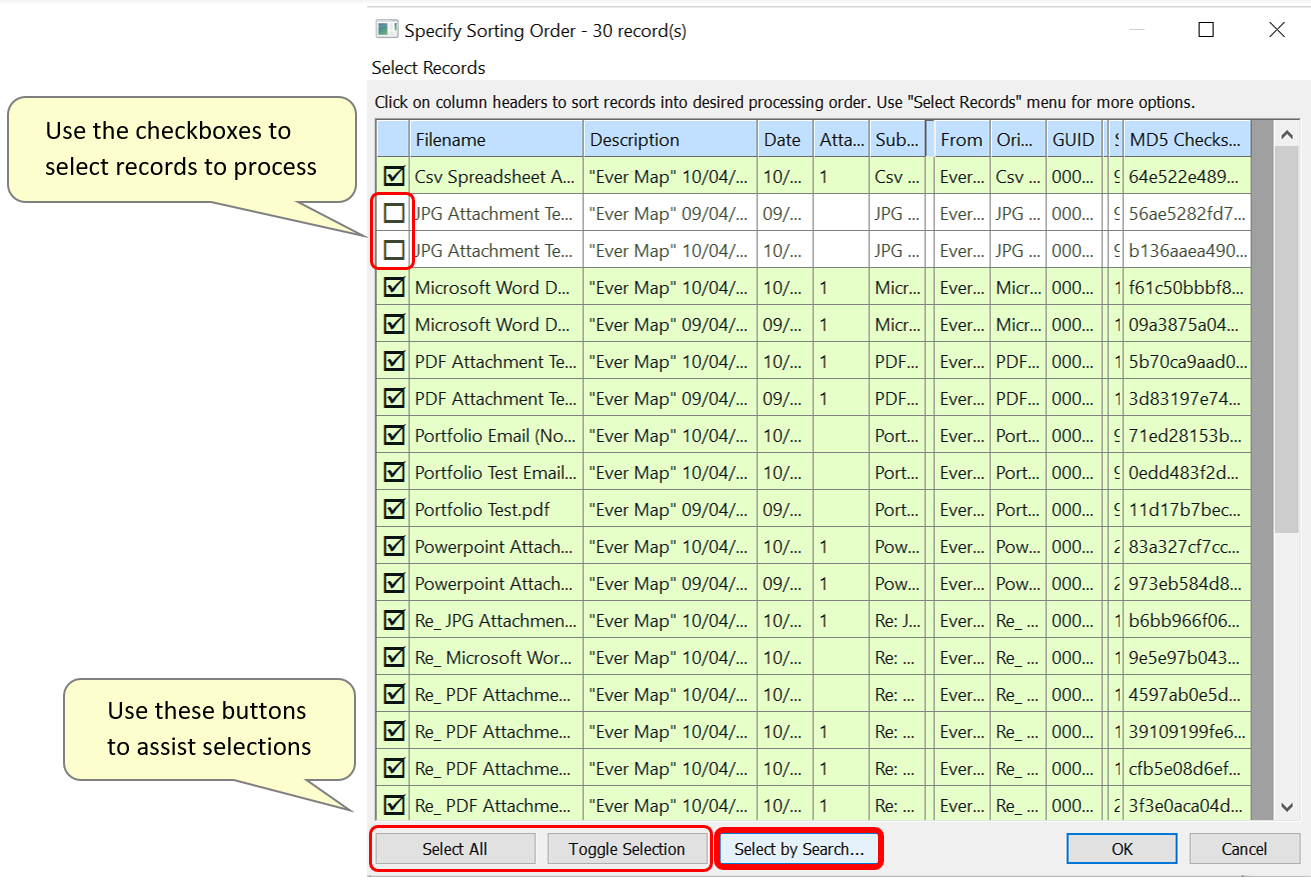
- If used, this button opens the "Select Records by Search" dialog. First, select how the text search will be used - either to select or unselect records. Then specify the text to search for in the entry box. Search expressions can also be used via regular expression syntax. To do this, ensure that "Use regular expressions" is checked. Make other necessary selections ("Match text case/whole words"), as well as where to search; search within specific fields by using the drop down list. By default, the text search would search all fields.

- Step 4 - Confirm Selections
- Optionally, use the “Select Records" menu to manipulate the current selections. Use the listed features to select a specific subset of Portfolio entries. Click "OK" on the “Specify Sort Order” dialog to confirm selections.

- Step 5 - Select an Output Location
- The input Portfolio file is now added to the processing list. Repeat this procedure using the "Add Files..." button to process multiple Portfolio's at the same time.
- Select an output folder by pressing the “Browse…” button.
- When ready, press “ OK” to start the metadata extraction process.
- Step 6 - Select an Output File Format
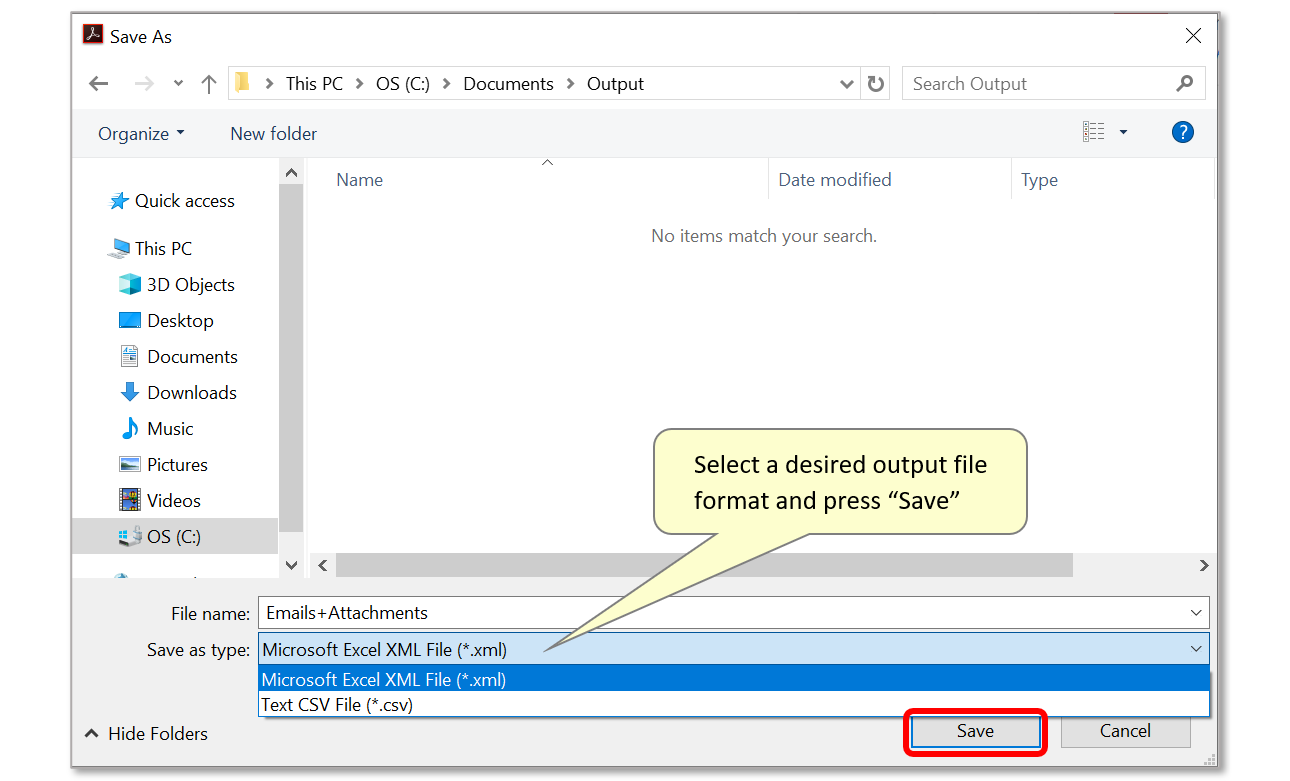
- The “Save As” dialog will now open. Use the “Save as Type” menu to choose a desired output file format. The plug-in supports two output formats: Microsoft Excel XML, and plain text ASCII *.CSV file format. Both output formats contain the same data. Optionally edit the output filename, then press "Save".
- Step 7 - Open the Output Spreadsheet
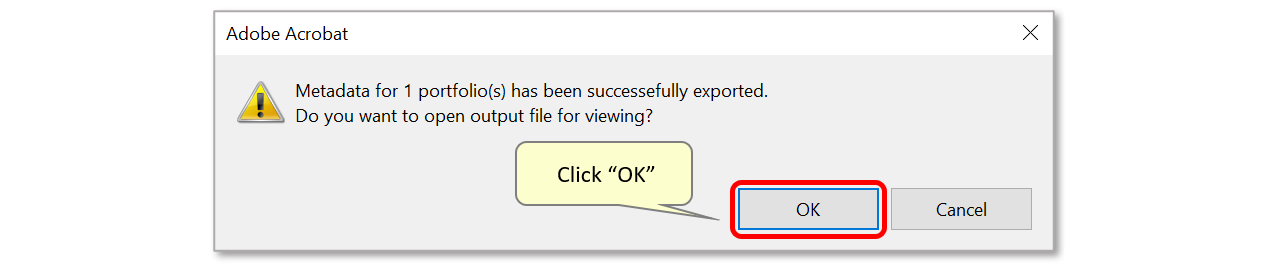
- Once processing is completed, a report message appears on the screen stating the success of the operation. Click “OK” to open the spreadsheet that's been created.
- Step 8 - Inspect the Spreadsheet
- The spreadsheet file will be opened in MS Excel.
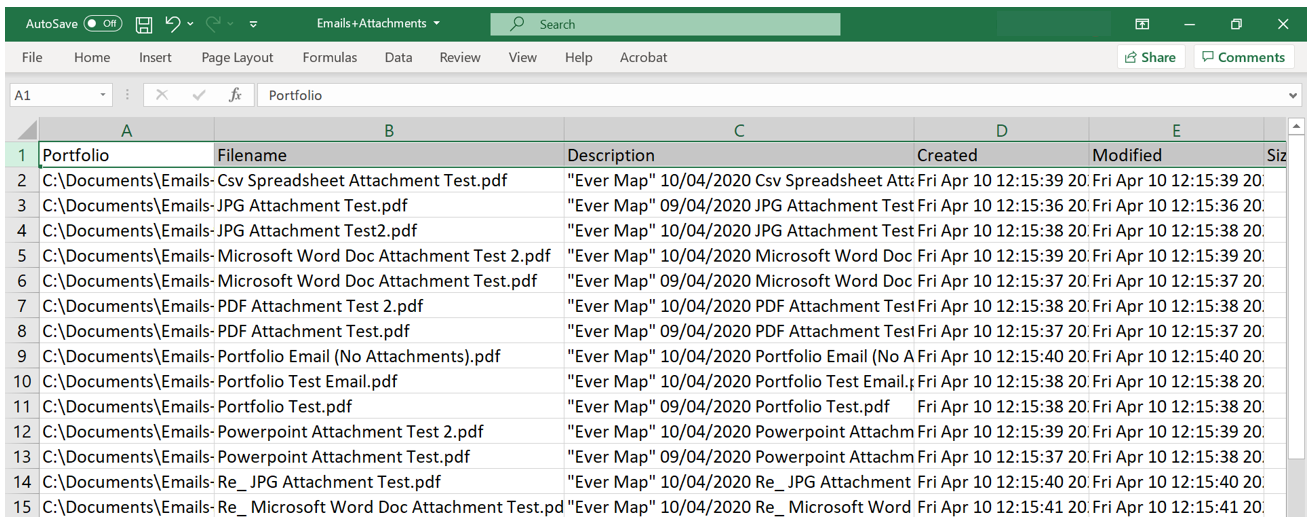
- “Portfolio” – the full path to the portfolio.
- “Filename” – original filename associated with the email entry.
- “Description” – a composite field that combines the “From” field with data and email subject.
- “Created/Modified” – the date this entry was created and modified (this is not the “Sent” date).
- “Size” – the actual size in bytes of the email entry (typically the size of a corresponding PDF file).
- “MD5 Hash” – MD5 hash value for the corresponding file. This number is unique and can be used to compare files.
- “Folder location” – the name of the email folder where this email came from (e.g.: personal folders/Inbox).
- “From” – the “From” field of the corresponding email message.
- “To” – the “To” field of the corresponding email message.
- “GUID” – globally unique identifier for the corresponding email message.
- “Date” – the actual date the email was received.
- “Attachments” – the number of attachments in the corresponding email message.
- “Subject” – subject field of the corresponding email message.
- The above fields are listed as an example only. The actual output depends on the metadata fields stored in the specific PDF Portfolio that is used. The plug-in does not look for any pre-defined fields, and exports all fields that are present in the actual file.
- You can find more AutoPortfolio™ tutorials here.
A typical email-based Portfolio exported from Microsoft Outlook has the following metadata fields for each email entry: