Extracting Multiple Page Ranges Via a Text Search
AutoSplit plug-in for Adobe® Acrobat®
- Introduction
- The AutoSplit plug-in is useful for extracting pages from a PDF document that contain specific search words or text patterns. These may be pages that contain certain text such as names, identification numbers, dates, or address components etc. This may be useful when a PDF file consists of multiple combined documents, but only pages containing certain data need to be extracted.
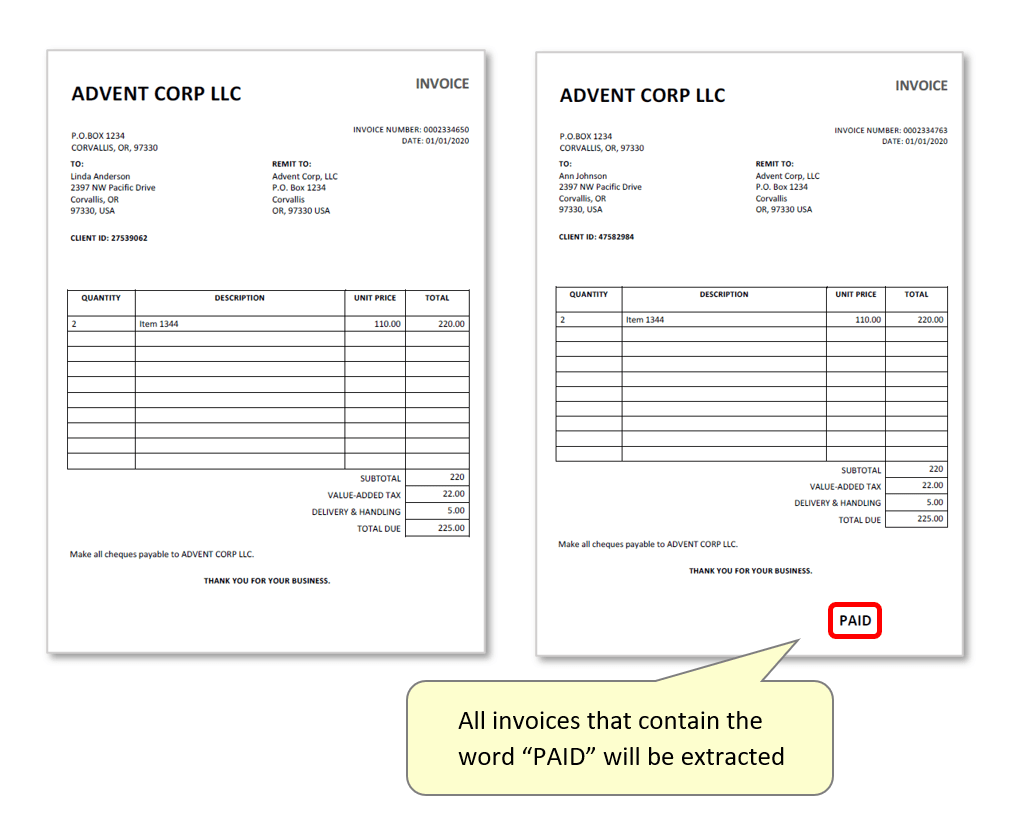
- This tutorial explains one way to extract specific page ranges from a large PDF containing combined invoices. The first page of some invoices contains the word "PAID". We will configure a split method that identifies these pages as the first of a range of pages to be extracted.
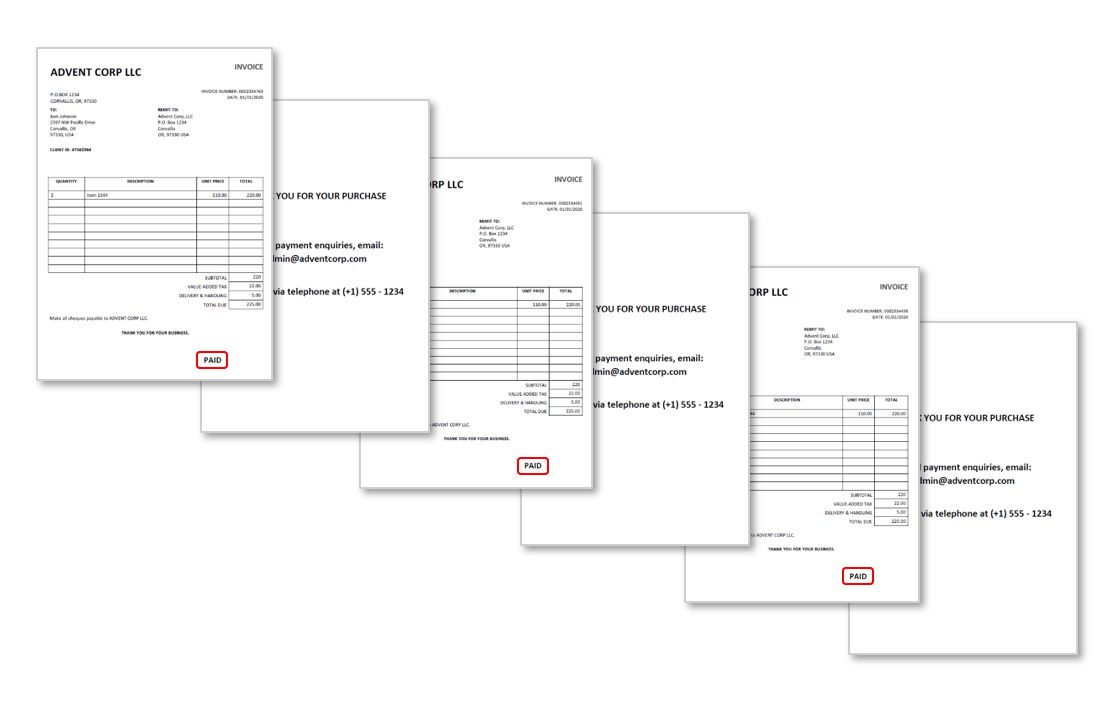
- Each invoice is appended with an identical "end" page to accompany each document. This last page always contains "THANK YOU..." - this text can be identified to mark the end of an invoice/page range.
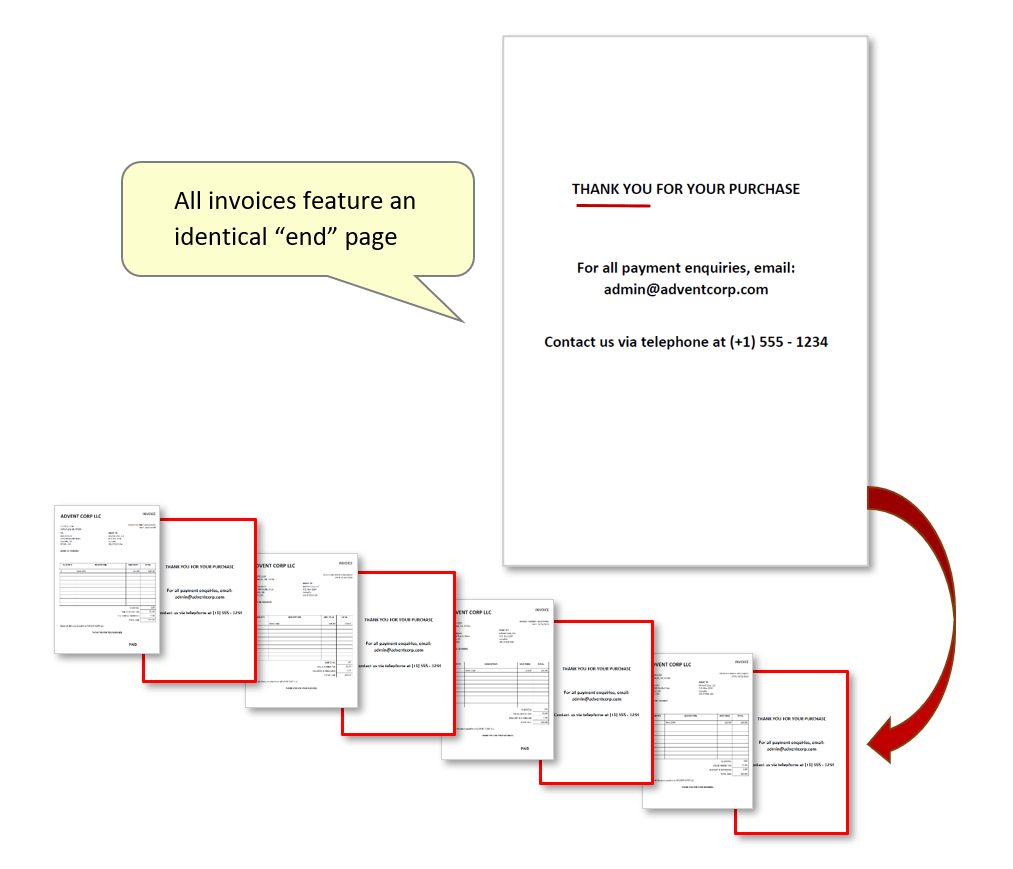
- All page ranges beginning with one containing "PAID" and ending with the "THANK YOU" page, will be identified and extracted into a separate PDF document.
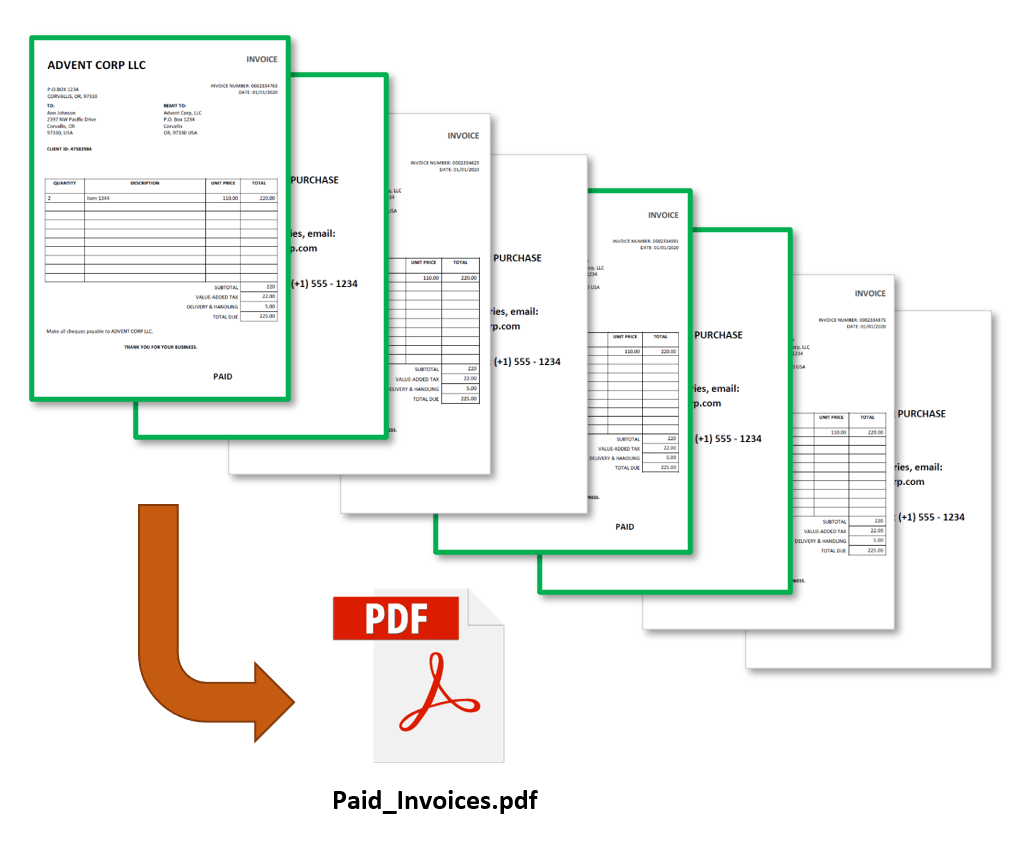
- Note that we will use this method to extract only two-page invoices, but the same technique would work with invoices of any length. As long as the first page contains "PAID", and the last page "THANK YOU", all pages of the document will be extracted.
- Input Document Description
- The sample PDF document used in this tutorial contains multiple combined invoices, all ending with an identical "end" page (see images above). Some invoices contain the text "PAID" on the first page. We will use the AutoSplit plug-in to search for this specific text within these documents, to identify which ones are to be extracted. These invoices can be located anywhere in the input document and not necessarily in continuous order.
- Batch Processing Support
- Automate this operation with Acrobat's batch processing tool (Guided Actions (aka Action Wizard)) to process similar files using the same configuration with only one click.
- Prerequisites
- You need a copy of Adobe Acrobat along with the AutoSplit™ plug-in installed on your computer in order to use this tutorial. Both are available as trial versions.
- Step 1 - Open a PDF File
- Start Adobe® Acrobat® application and open a PDF file using “File > Open…” menu to open a PDF document that needs to be processed.
- Step 2 - Open “Split Document Settings” Menu
- Select “Plug-ins > Split Documents > Split Document...” from the main Acrobat®
menu to open “Split Document Settings” dialog.
[⚡ How to locate Plugins menu in Adobe® Acrobat® ⚡] - Step 2 - Select the Splitting Method
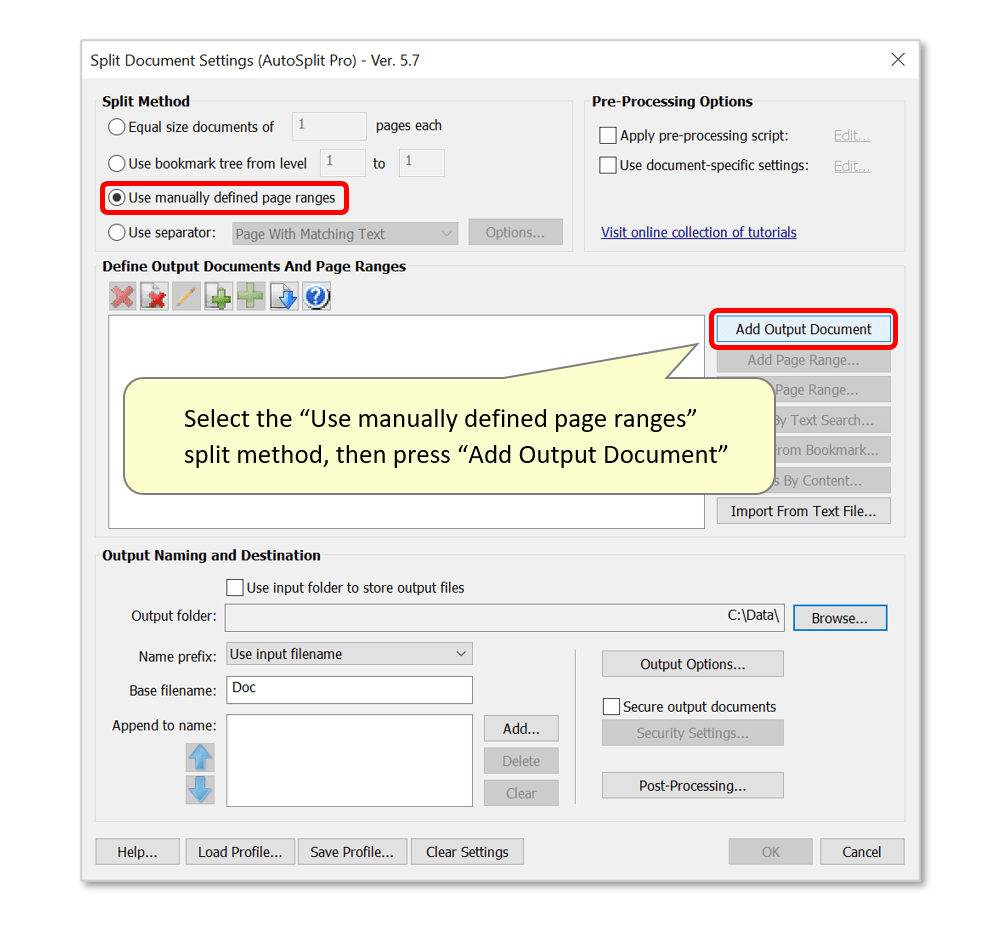
- Select the “Use manually defined page ranges” splitting method.
- Now press the "Add Output Document" button.
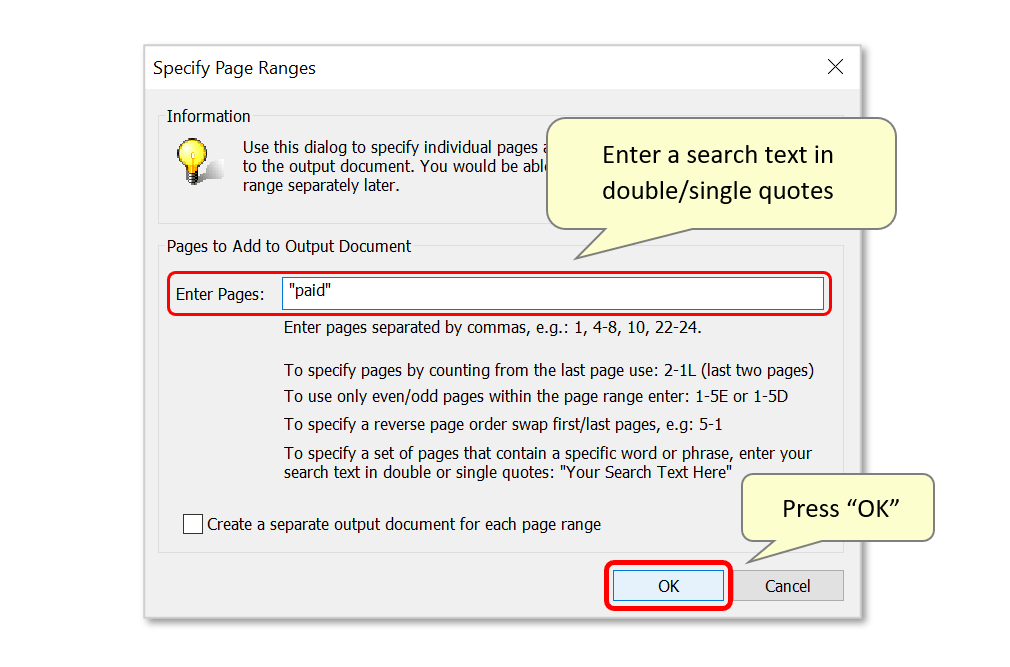
- Step 3 - Enter Search Text
- The "Specify Page Ranges" dialog will appear on the screen. Enter search keywords here, within double or single quotes. In this example, we'll search for the word "paid":
- Press "OK" once done.
- Step 4 - Open the Extract Pages by Text Search Dialog
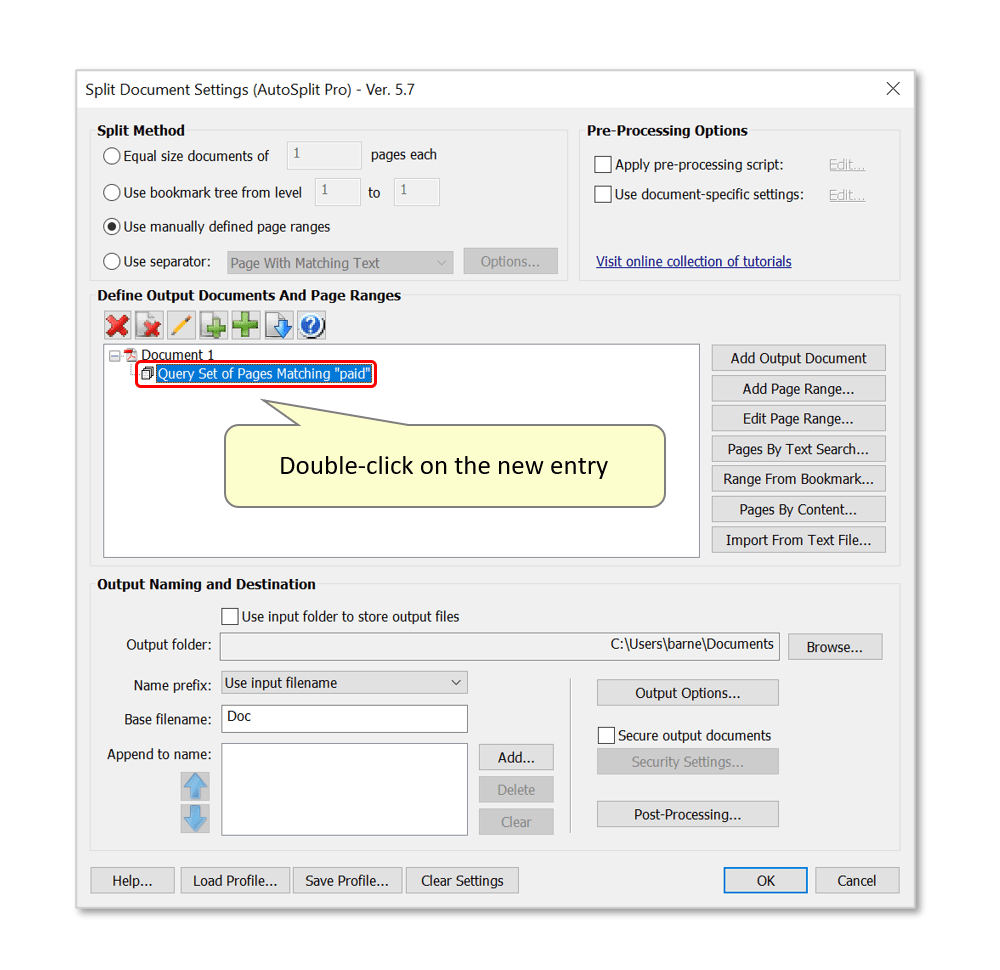
- The new document entry will be created in the output document list.
- Double-click on the new entry or select it and press the "Edit Page Range..." button to open the 'Extract Pages by Text Search' dialog.
- Step 5 - Specify Text Search Options
- Select the "Set of page ranges..." option. The previously entered search text will be shown below and can be edited if necessary. Pages containing "paid" will act as the first page of a range to be extracted.
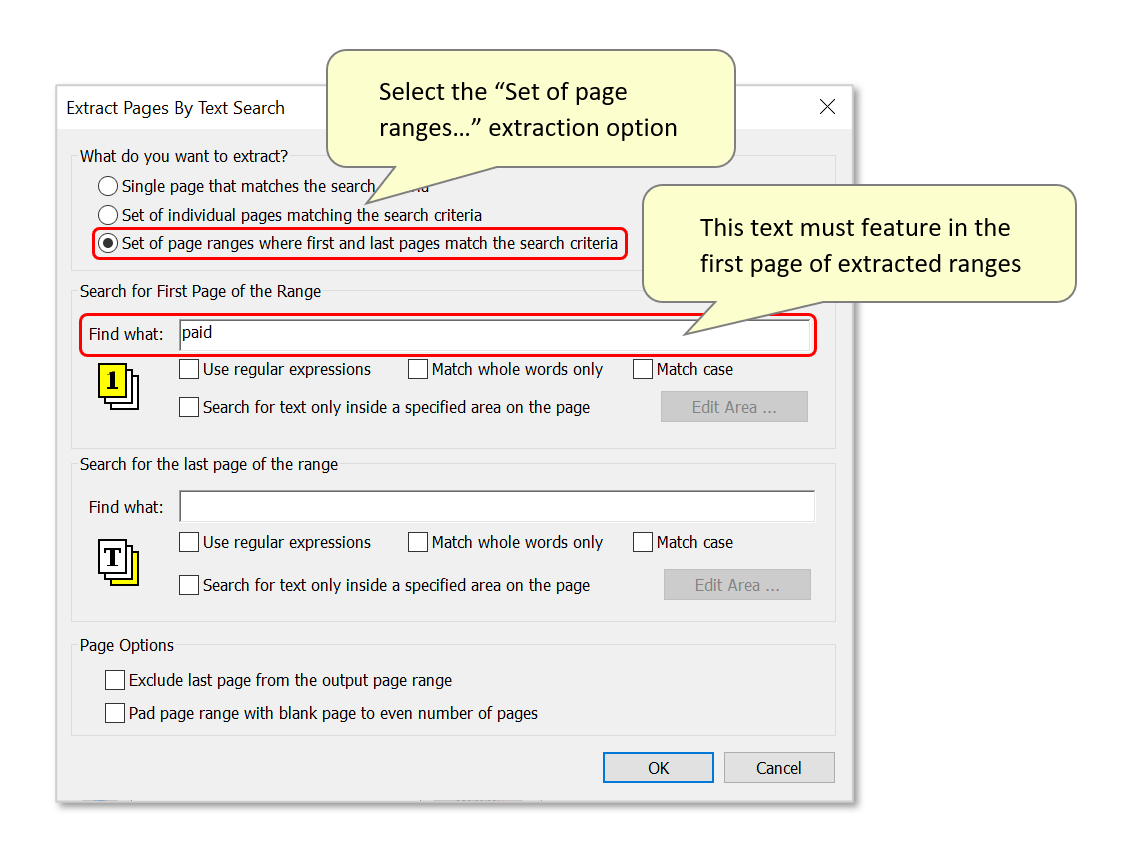
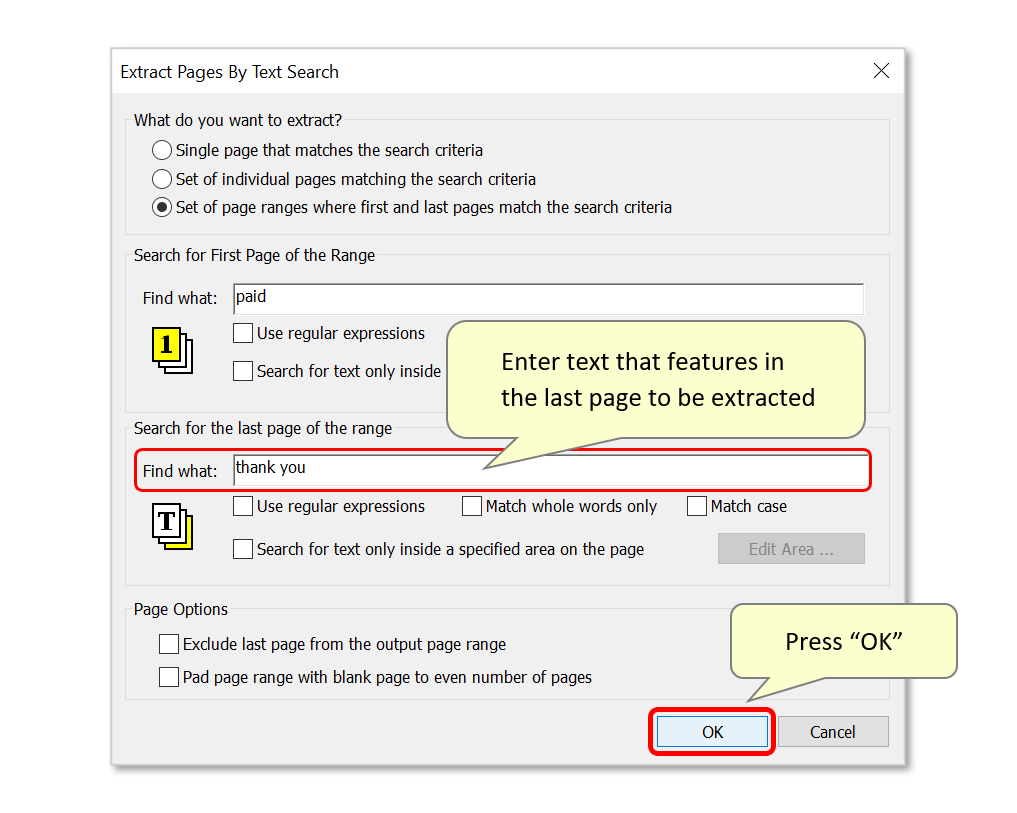
- In the "Search for the last page of the range" section, type text that features in the last page of each range to be extracted. In this example, we'll use "thank you" - but it could be any text that is unique to the "end" page.
- Press "OK" to close the dialog.
- Step 6 - Edit the Output Filename
- Double-click on the default 'Document 1' filename if you want to enter a custom name for the output document.
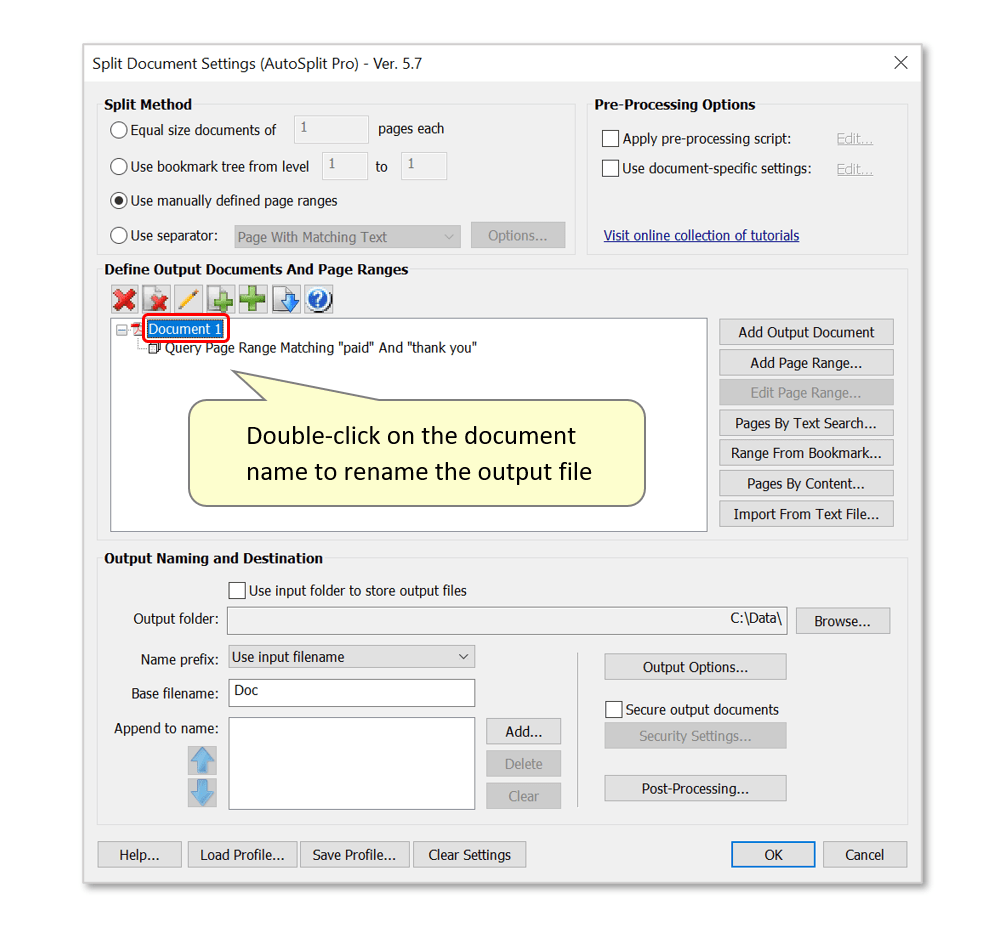
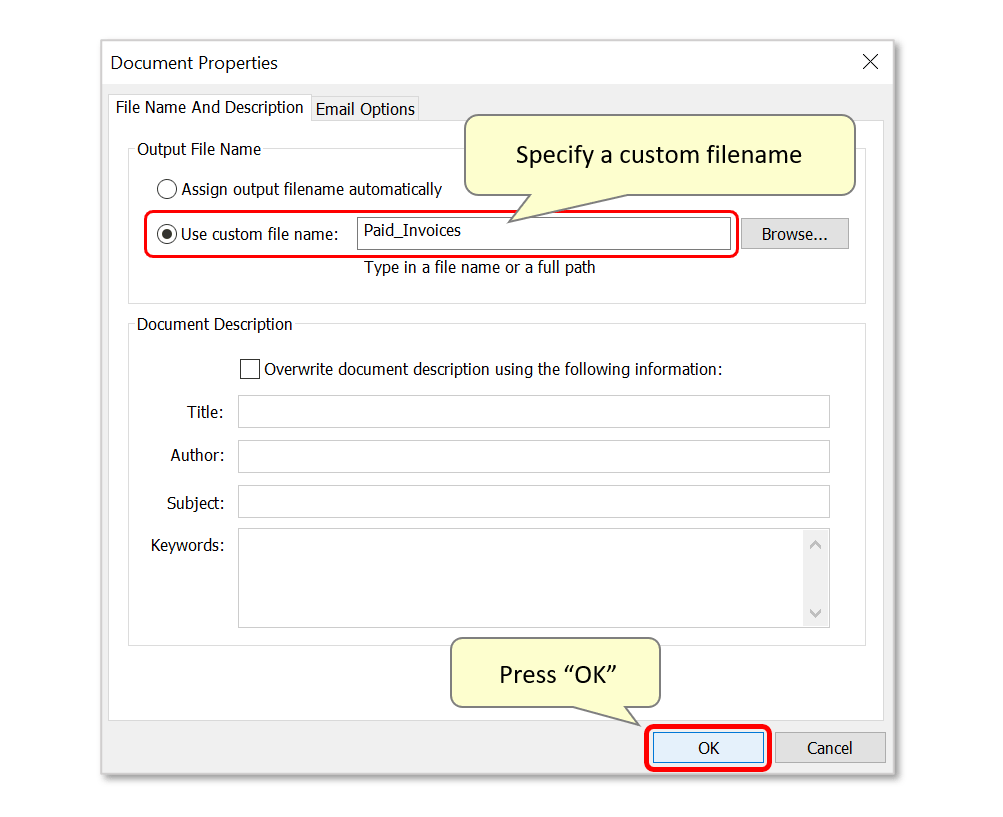
- Select the 'Use custom file name' option and specify a new file name in the entry box (the extracted pages will become "Paid_Invoices.pdf"). Press "OK" once done.
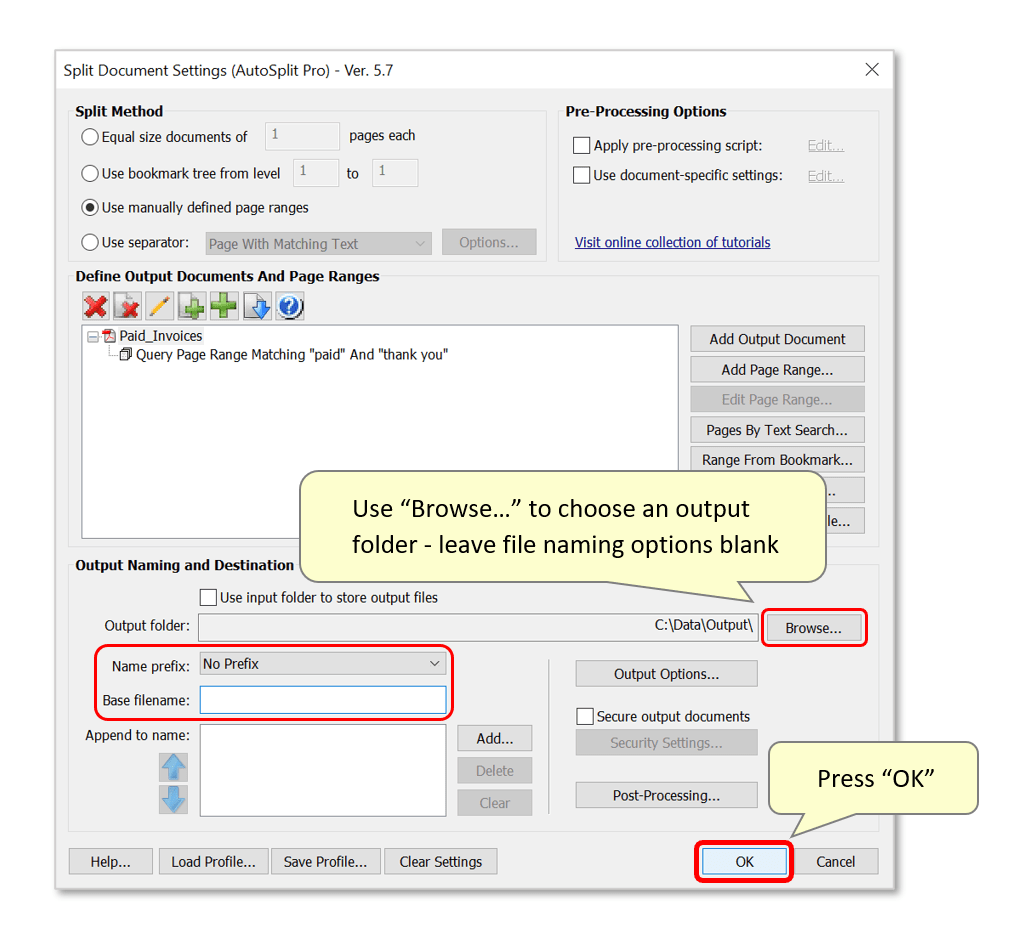
- Step 7 - Specify an Output Folder
- The new filename will now be displayed. Specify an output folder location for the extracted pages via the "Browse..." button. Ensure that the filenaming options are left blank if the output filename has been specified already in step 6.
- Press "OK” to proceed with the extraction.
- Step 8 - Confirm the Extraction Procedure
- Press “OK” in the dialog box to start the process.

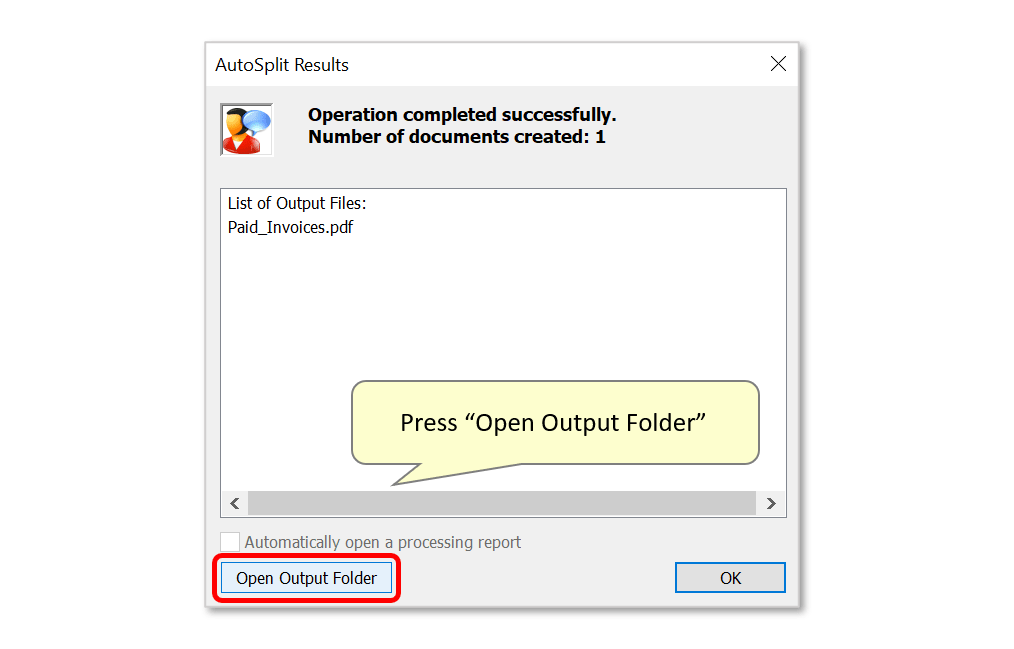
- Step 9 - Inspect the Results
- The “AutoSplit Results” dialog appears on the screen once processing is complete, listing files that have been created.
- Press “Open Output Folder” to inspect the results.
- Open the created file.

- Check the results - in this example, all invoices containing the "PAID" text will have been extracted - as well as their accompanying "end" pages.
- You can find more AutoSplit tutorials here.