Handling PDF Form Fields During a Document Merge
AutoSplit plug-in for Adobe® Acrobat®
- Introduction
- This tutorial shows you how to handle interactive form fields in PDF documents that are being merged together with the AutoSplit™ plug-in. In PDF format, all form fields with the same name automatically share the same values. This can become a problem when merging PDF forms with identically-named form fields together – even if the text within form fields is different. The steps below demonstrate the different kinds of output files that can be produced while merging forms together.
- Input Document Description
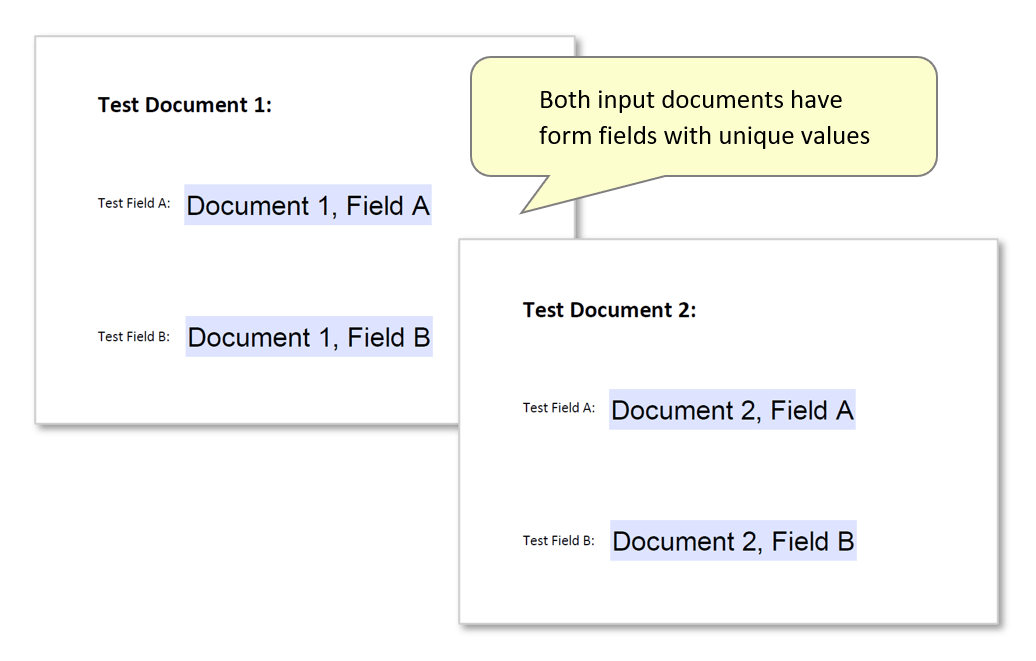
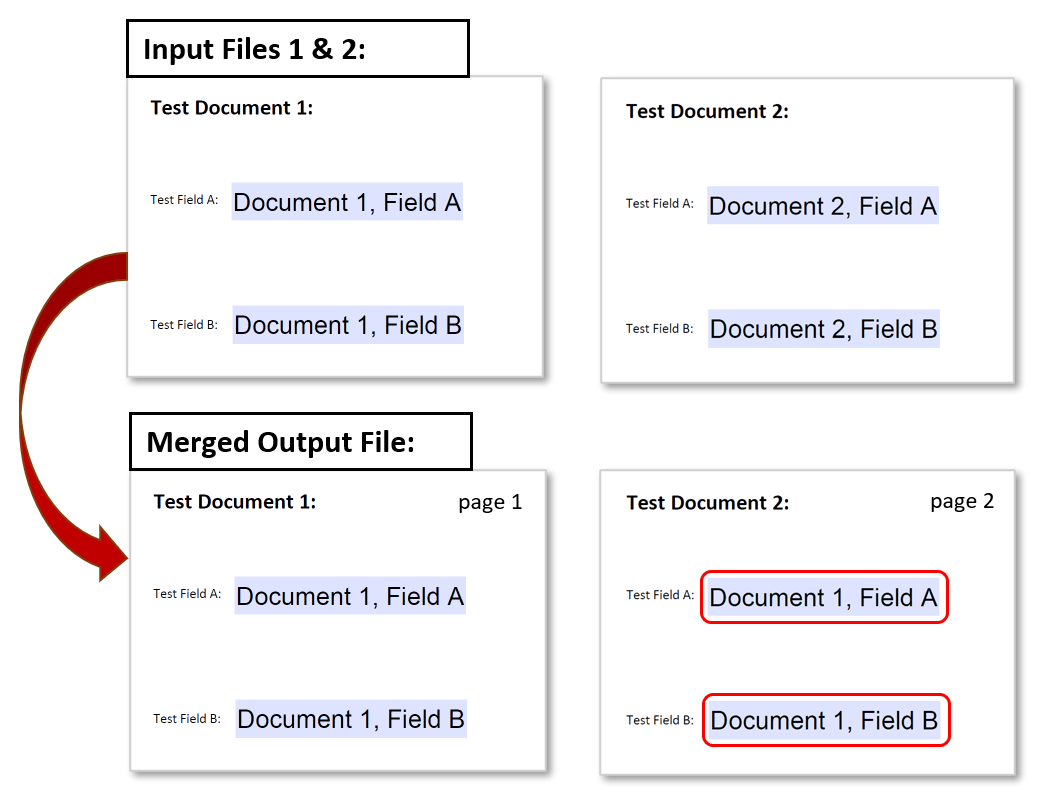
- To demonstrate how identical form fields affect the merging of documents, we use two sample PDF forms – each contains form fields named “Field A” and “Field B”.
- The text within the fields is different in both input documents, as they feature either “Document 1” or “Document 2".
- Prerequisites
- You need a copy of Adobe® Acrobat® Standard or Professional along with the AutoSplit™ plug-in installed on your computer in order to use this tutorial. Both are available as trial versions.
Step-by-Step Tutorial
- Step 1 - Open the "Merge Documents Settings" Dialog
- In Adobe Acrobat, select "Plug-Ins > Merge Documents > Merge Documents into Single Documents..." from the main menu to open the "Merge Documents Settings" dialog.
- [⚡ How to locate Plugins menu in Adobe® Acrobat® ⚡]
- Step 2 - Select Documents to be Merged
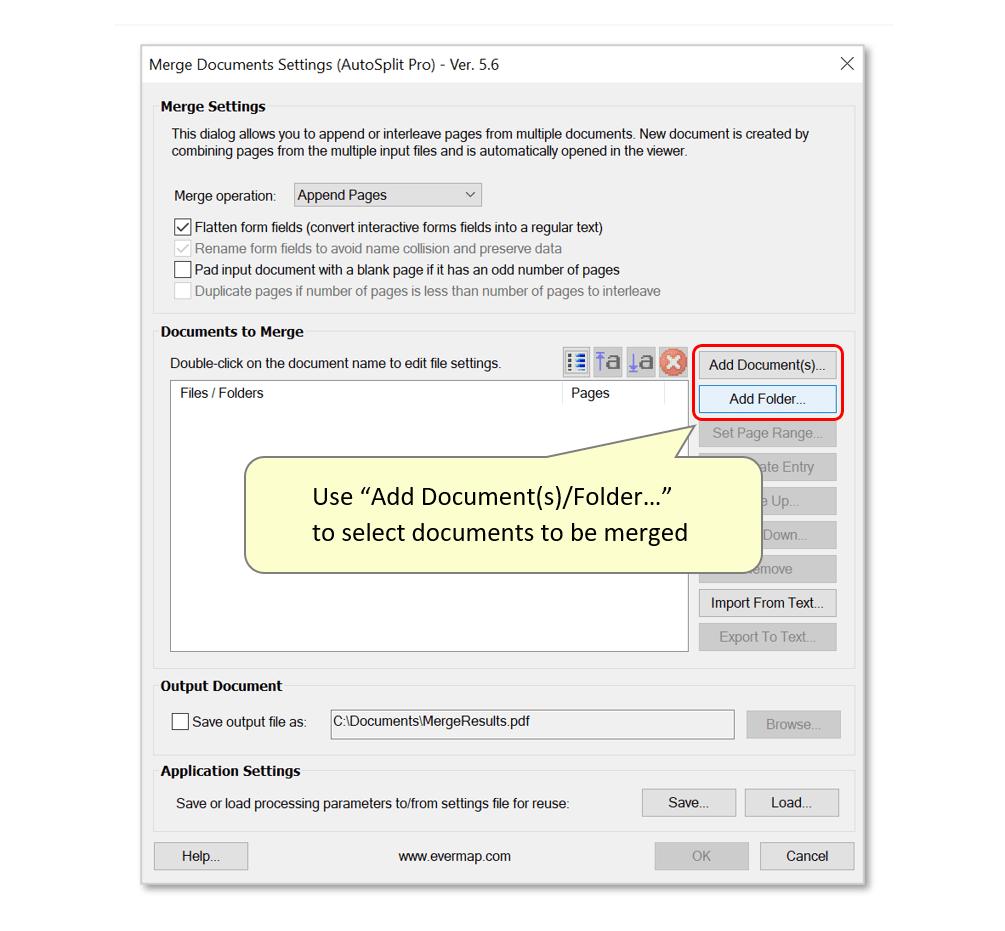
- Use the "Add Document(s)/Add Folder..." buttons to select the documents that are to be merged together. In this example, the two input files are located in the same folder - press "Add Folder..." to select it.
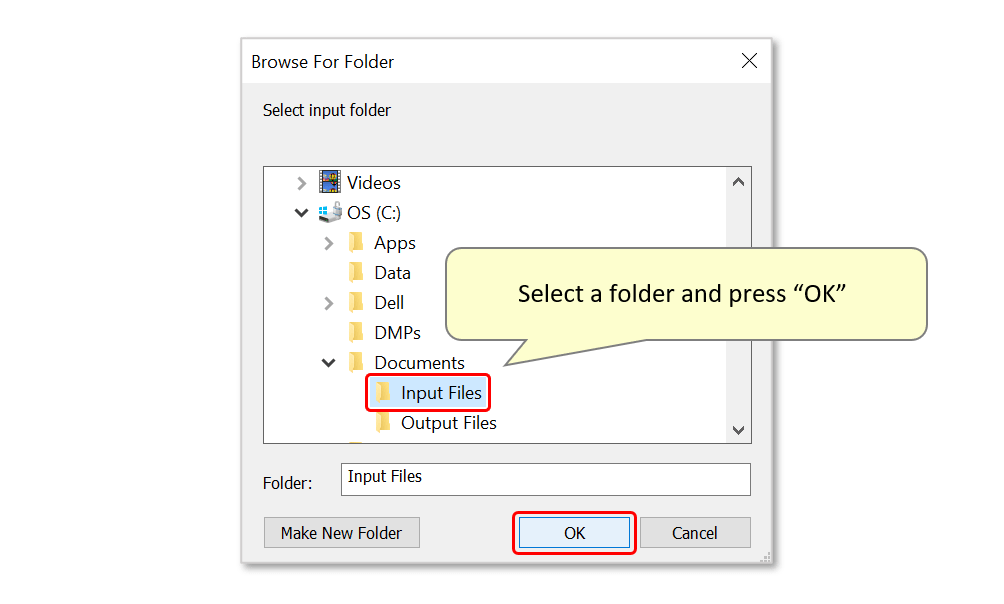
- Use the folder selection dialog that opens to select the desired folder. Press "OK" once done.
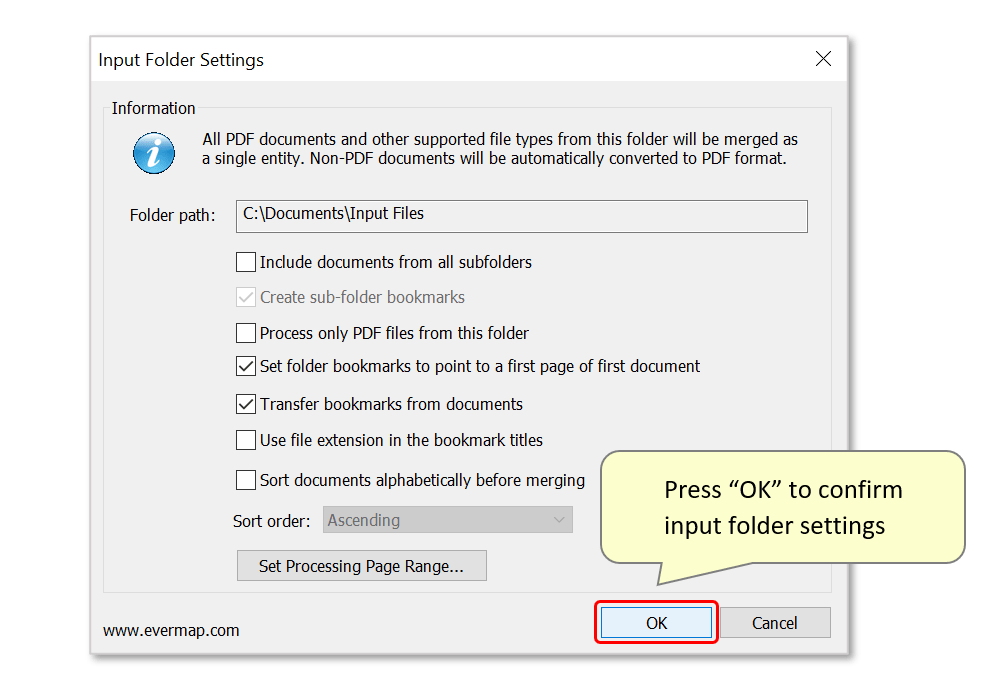
- The "Input Folder Settings" dialog will now appear. Use it to modify file processing settings - press "OK" to confirm them.
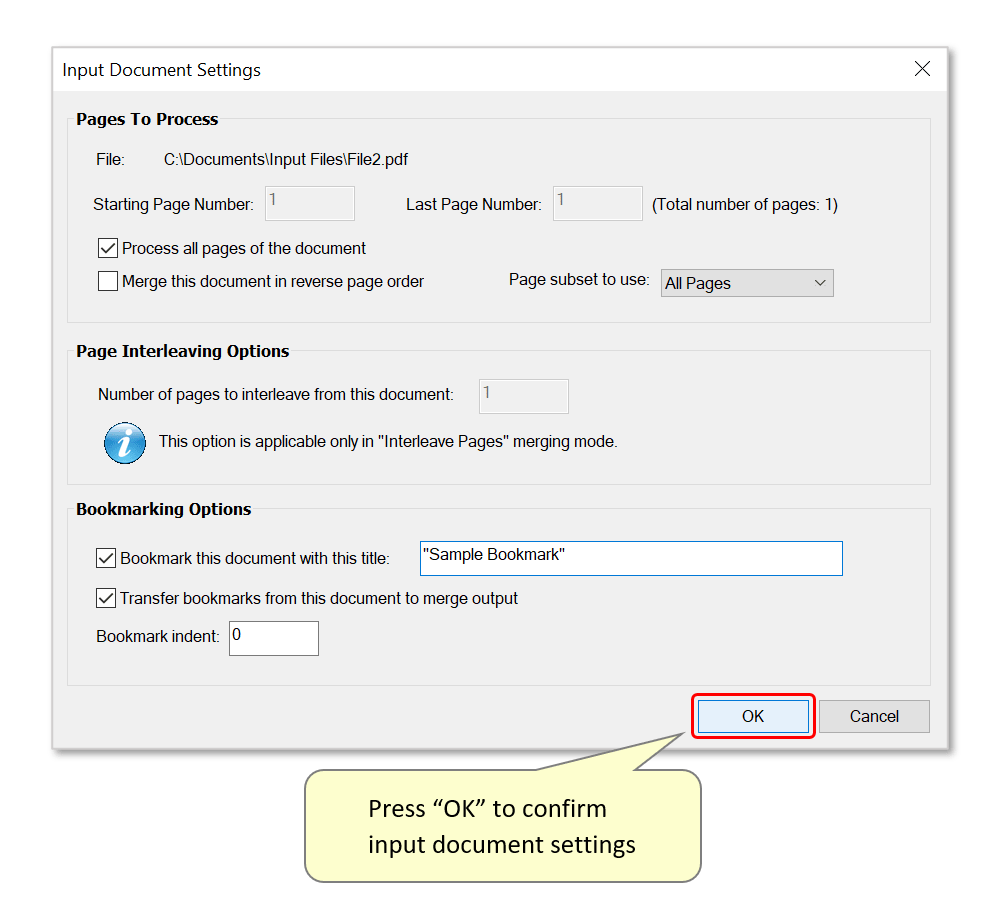
- If the "Add Document(s)..." button is used to select files individually, the "Input Document Settings..." dialog opens instead. Use it to modify file processing settings - press "OK" to confirm them.
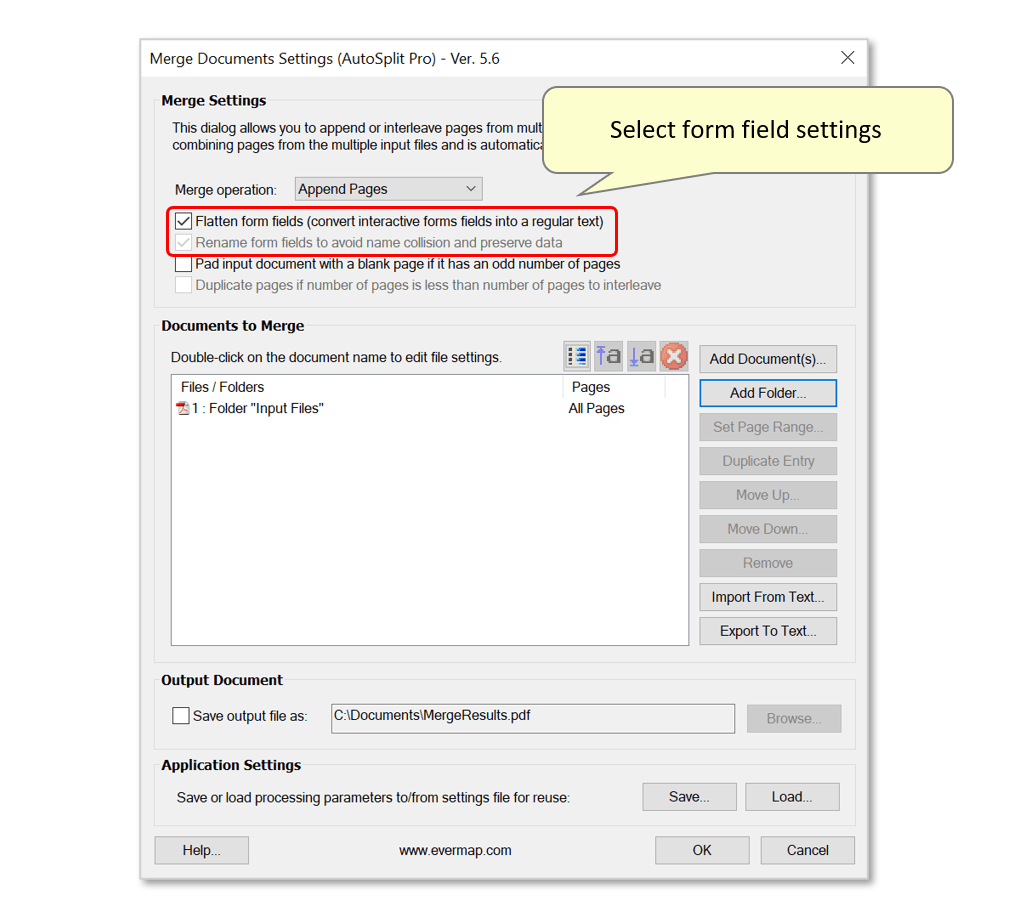
- Step 3 - Select Form Field Settings
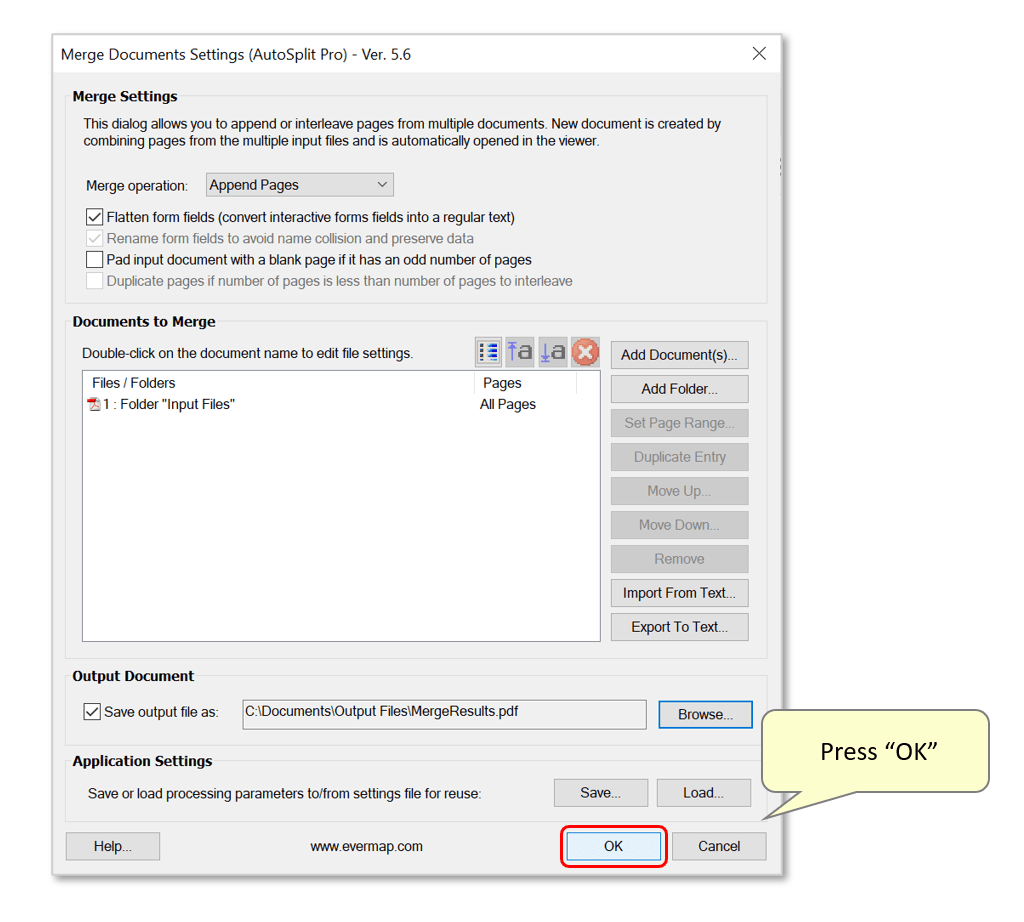
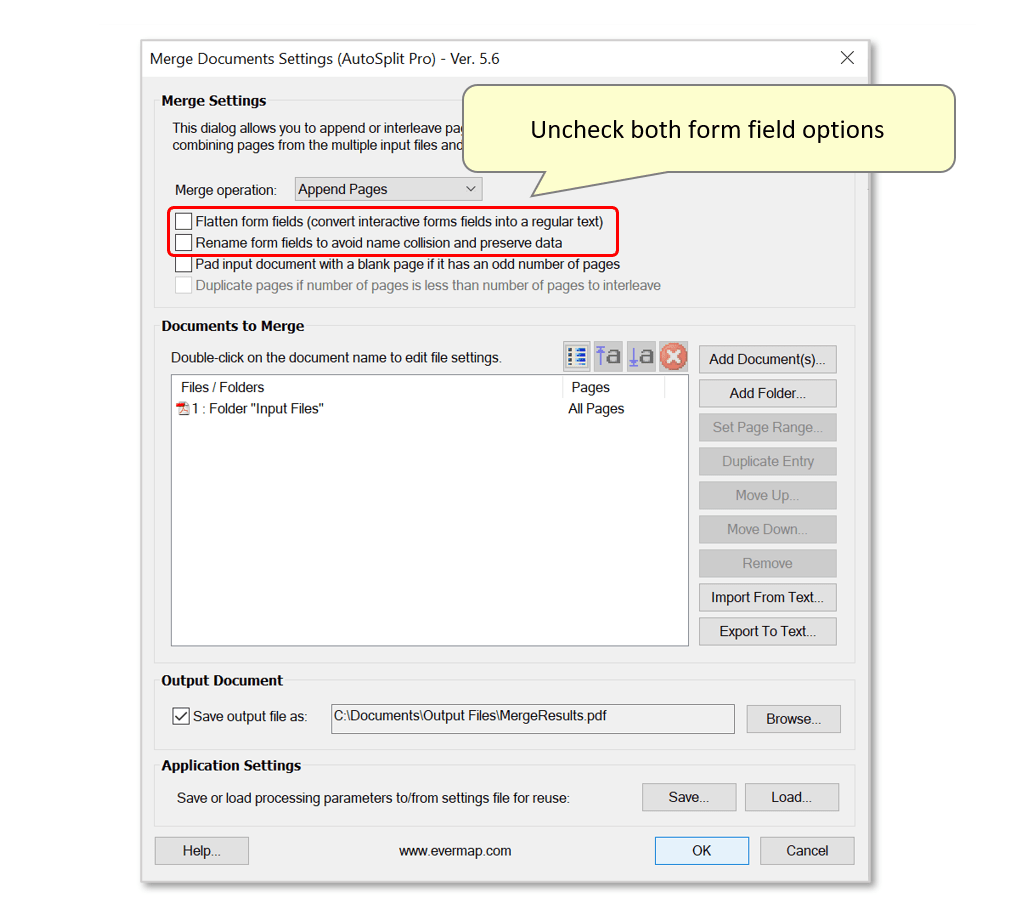
- Use the check boxes in the 'Merge Settings' section to set processing options relating to form fields. By default, "Flatten form fields..." option is checked. This option converts form fields into regular text in the output document. First, we will demonstrate running the merge procedure with this option left checked.
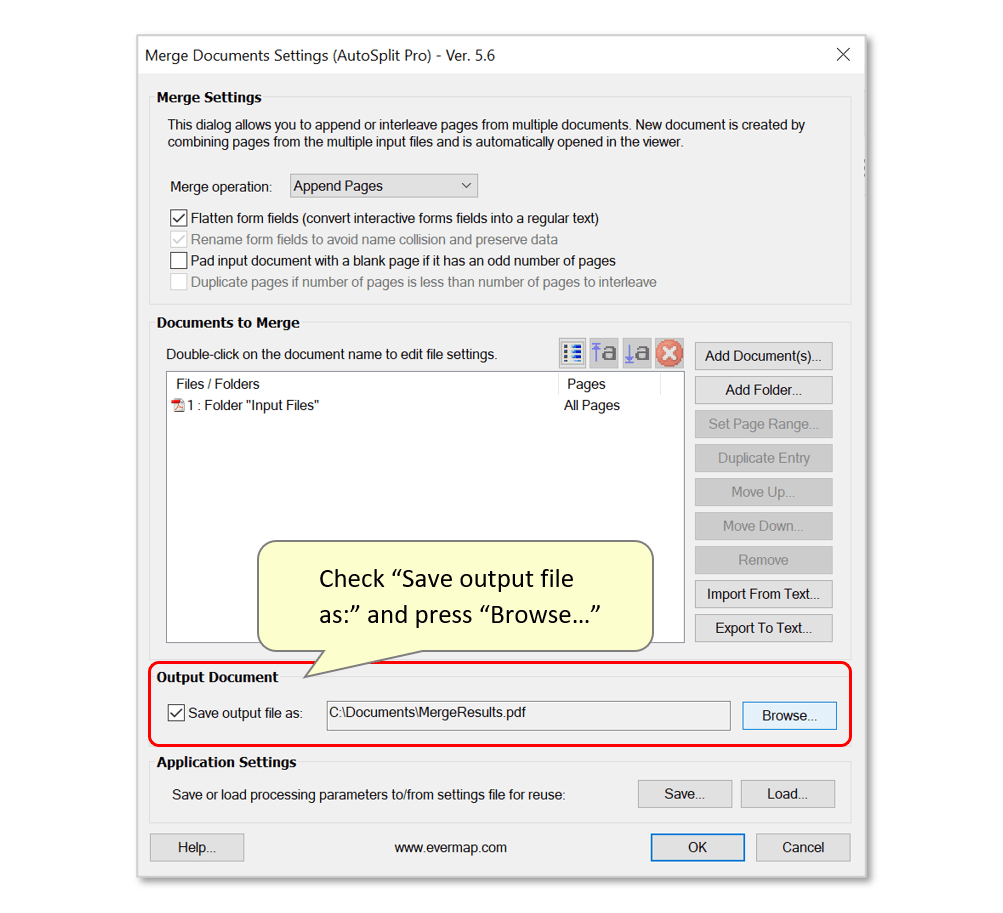
- Step 4 - Optional: Save the Output File
- The output document will be opened in Acrobat, and can be saved manually via "File > Save As...". There is also the option to configure a specific folder to save the merged files in after processing. To do this, check "Save output file as" and press the "Browse..." button to select a folder.
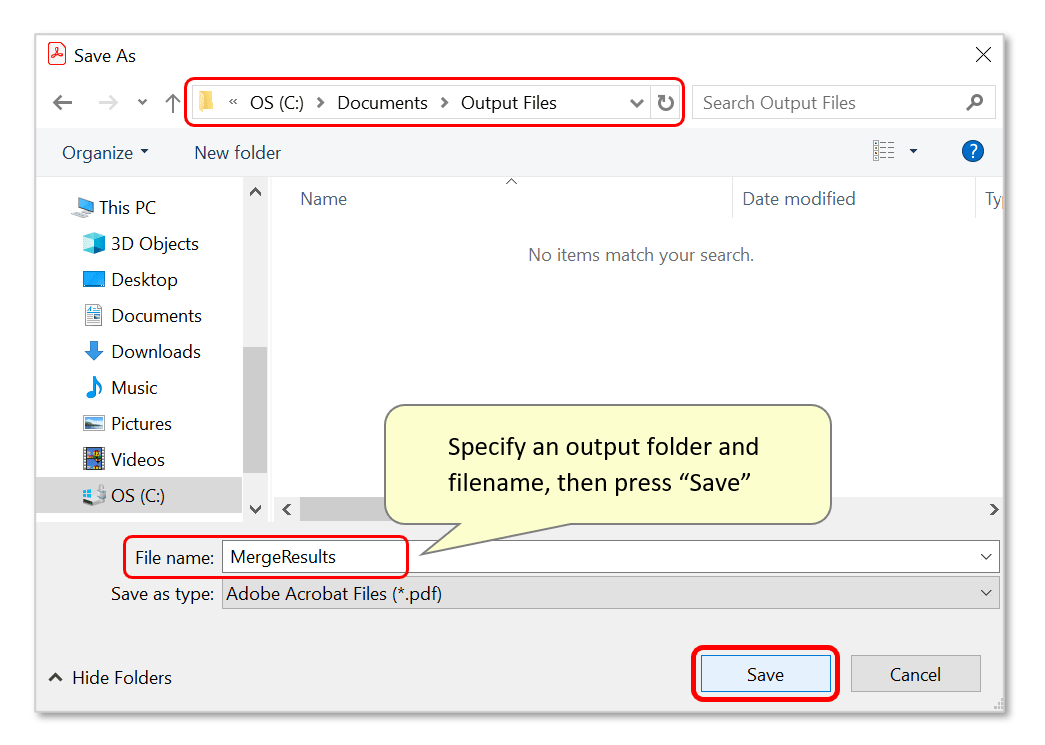
- Use the "Save As" dialog to select an output folder. The default filename is "MergeResults" - this can be manually edited before pressing "Save".
- Step 5 - Merge the Documents
- Press "OK" to proceed with the merge operation.
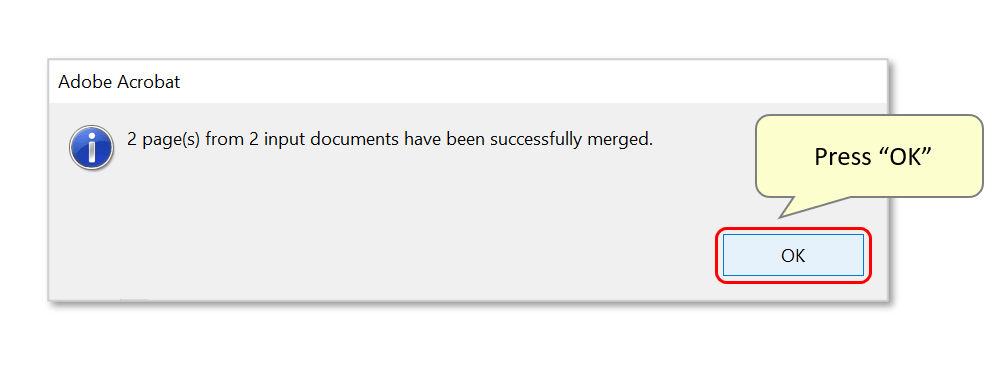
- A report box displays the success of the operation. Press "OK" to close it.
- Step 6 - Check the Results
- The merged documents will be opened in Acrobat. With the form field settings used in step 3 above, both input documents have been combined. Their form fields have been removed, and their values have been converted into regular text.

- Option 2: Keeping and Renaming Form Fields
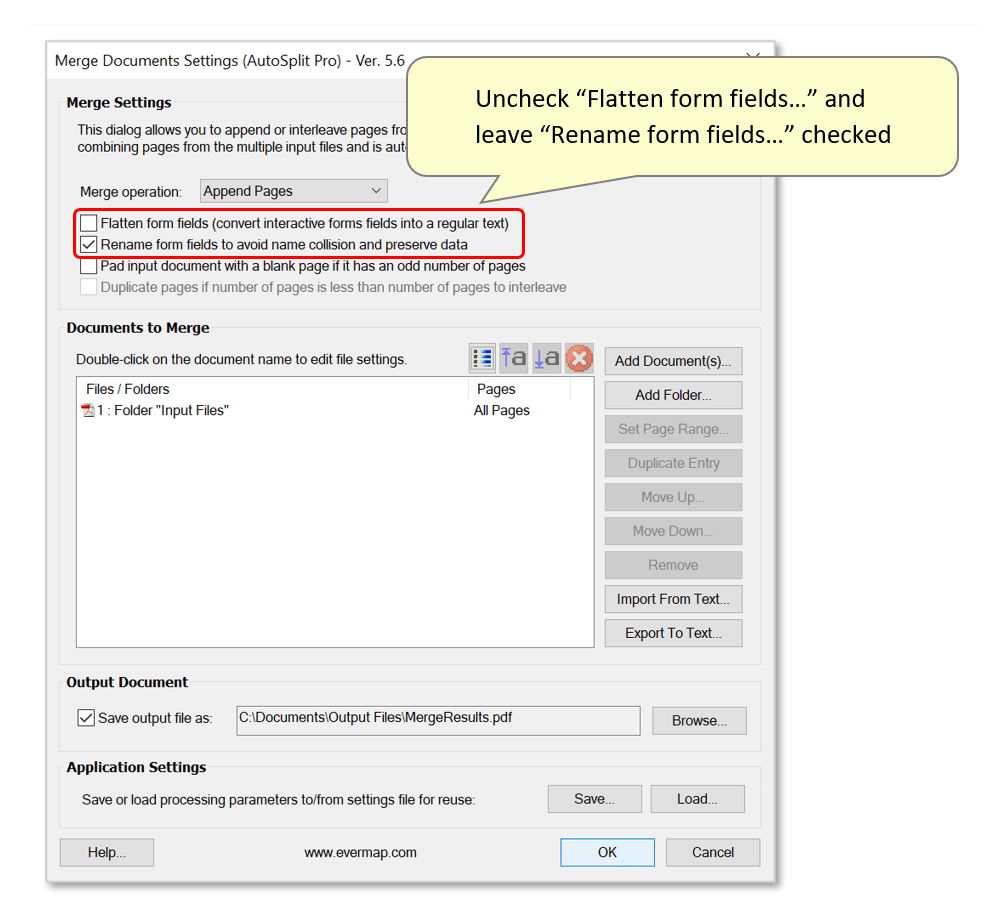
- Now we will demonstrate the same merge operation, with the "Flatten form fields..." option unchecked. Unchecking this activates the "Rename form fields..." option. This option is selected by default to make sure form fields with identical names are renamed before merging to avoid a conflict. This means that field values will be correctly preserved in the output PDF file while all fields will remain interactive.
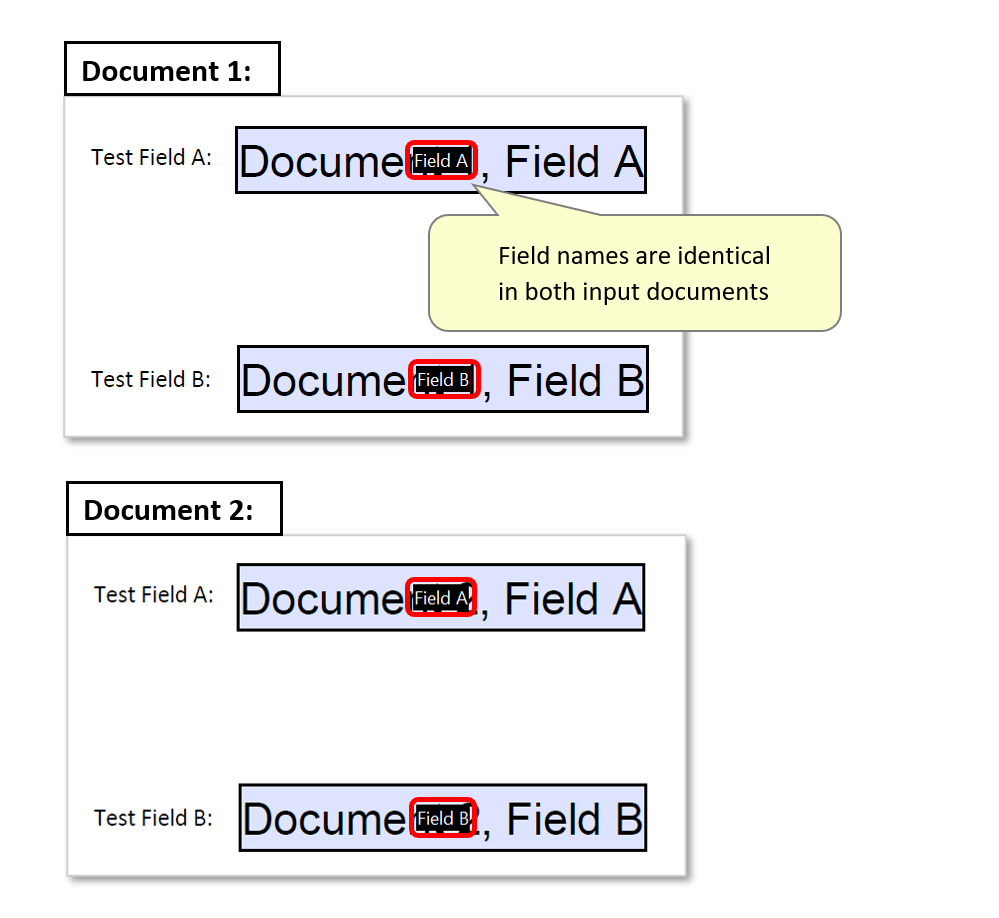
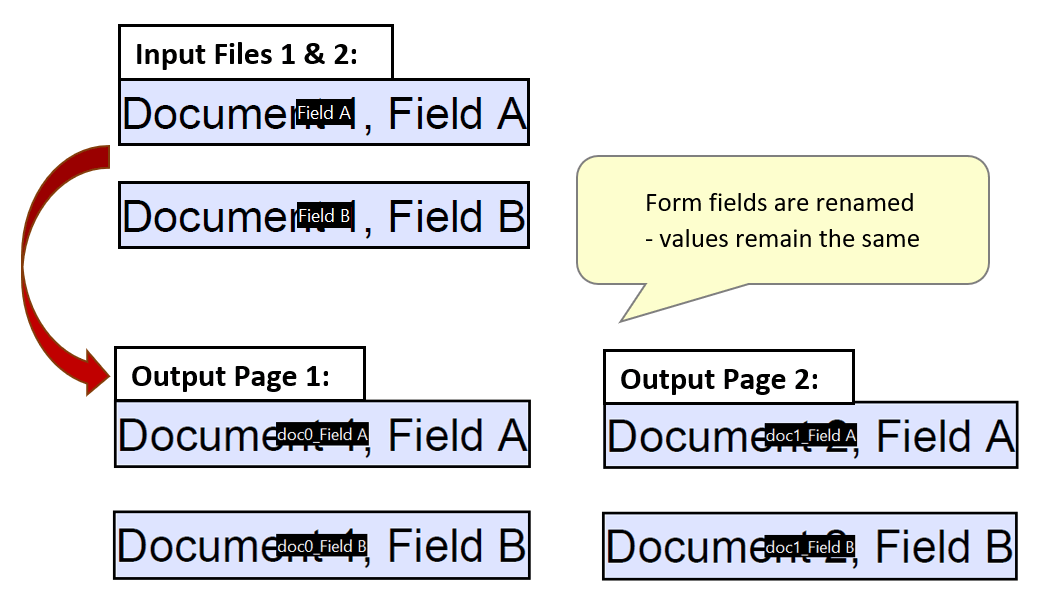
- With these settings selected, form fields are still interactive in the output documents. They have also been renamed - a "Doc0_" prefix is added, the "0" being an incrementing number for each page of the merged document: "Doc0_, Doc1_, Doc2_..." etc. The image below shows the form fields and their names in black boxes (as displayed when using the "Prepare Form" tool in the Acrobat "Tools" menu.
- As they are renamed, there are no conflicting fields so data values are preserved in all pages of the merged document.
- Option 3: Keeping Form Fields and Their Original Names
- Now we will demonstrate the same merge operation, with both form field options unchecked. This means interactive form fields will NOT be converted into regular text, but form fields will also NOT be automatically renamed. This results in name conflicts if the form fields have the same names in both input files. In the output merged document, the form field content from the second document will be replaced with that of the first document.
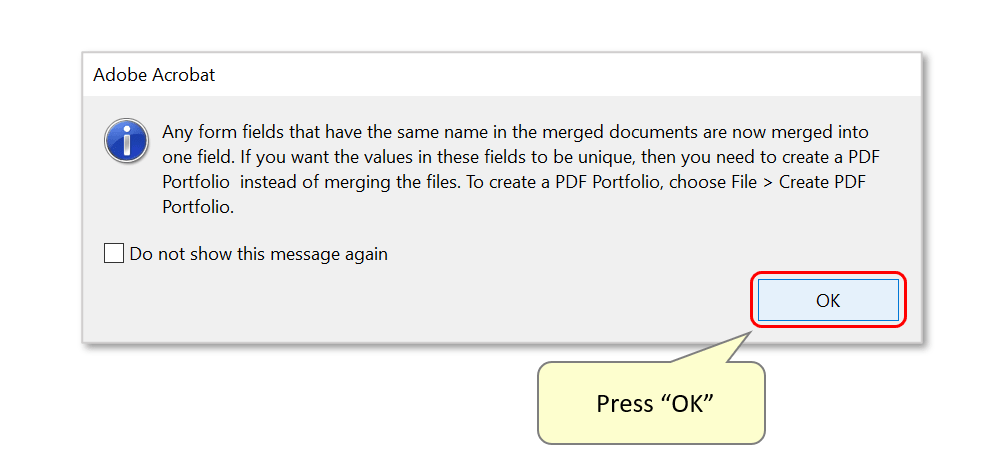
- Acrobat will warn the user that fields with the same name in the merged documents will be merged into one field. Press "OK" to proceed.
- In the merged output file, the form fields on page 2 (input document 2) contain the same data as those on page 1 (input document 1). They still have the same names (Field A/B) and therefore must contain the same values.
- Click here for a list of all step-by-step tutorials available.