Creating Table of Contents When Merging PDF Documents
AutoSplit plug-in for Adobe® Acrobat®
- Introduction
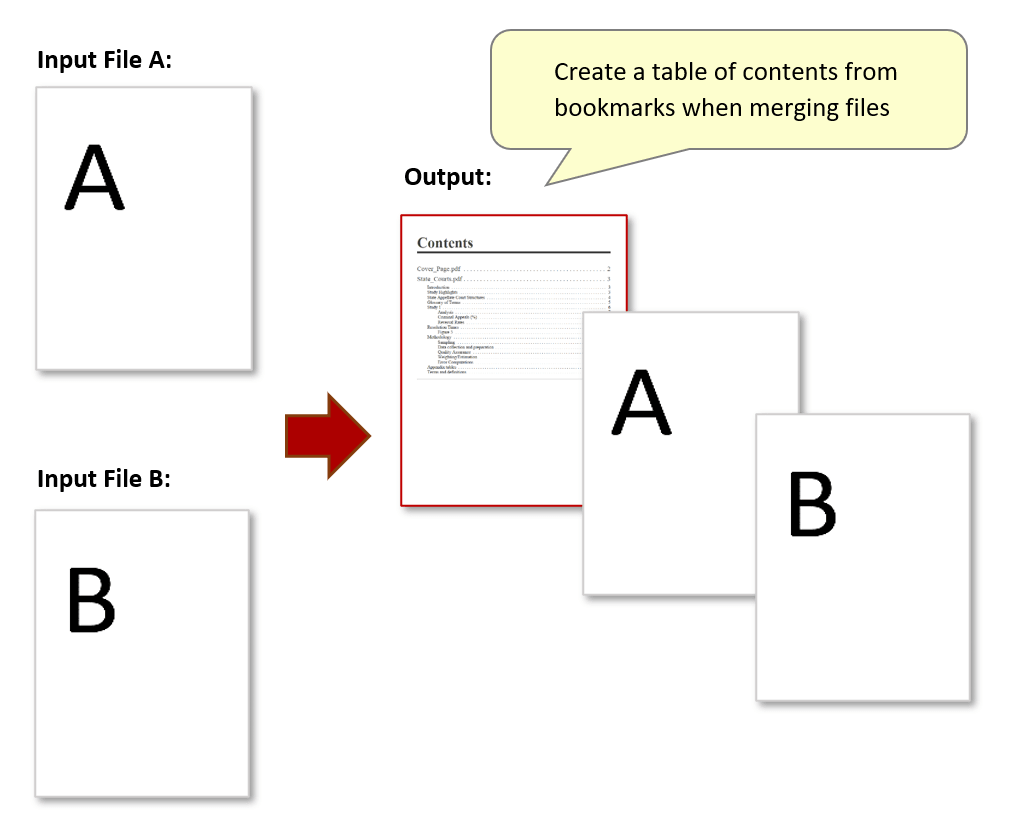
- The “Merge Documents into a Single Document” operation provides an option to generate a table of contents for the resulting document. The table of contents is generated from bookmarks in the merged files. Each input document for the merge operation can be optionally bookmarked using it’s filename, and bookmarks can be transferred from the source document into the merged document.
- Use this option to generate a hyperlinked table of contents that provides an additional navigation aid without the use of the ‘Bookmarks’ panel. A table of contents is useful when viewing the result on mobile devices or via a web browser where bookmarks are not always accessible.
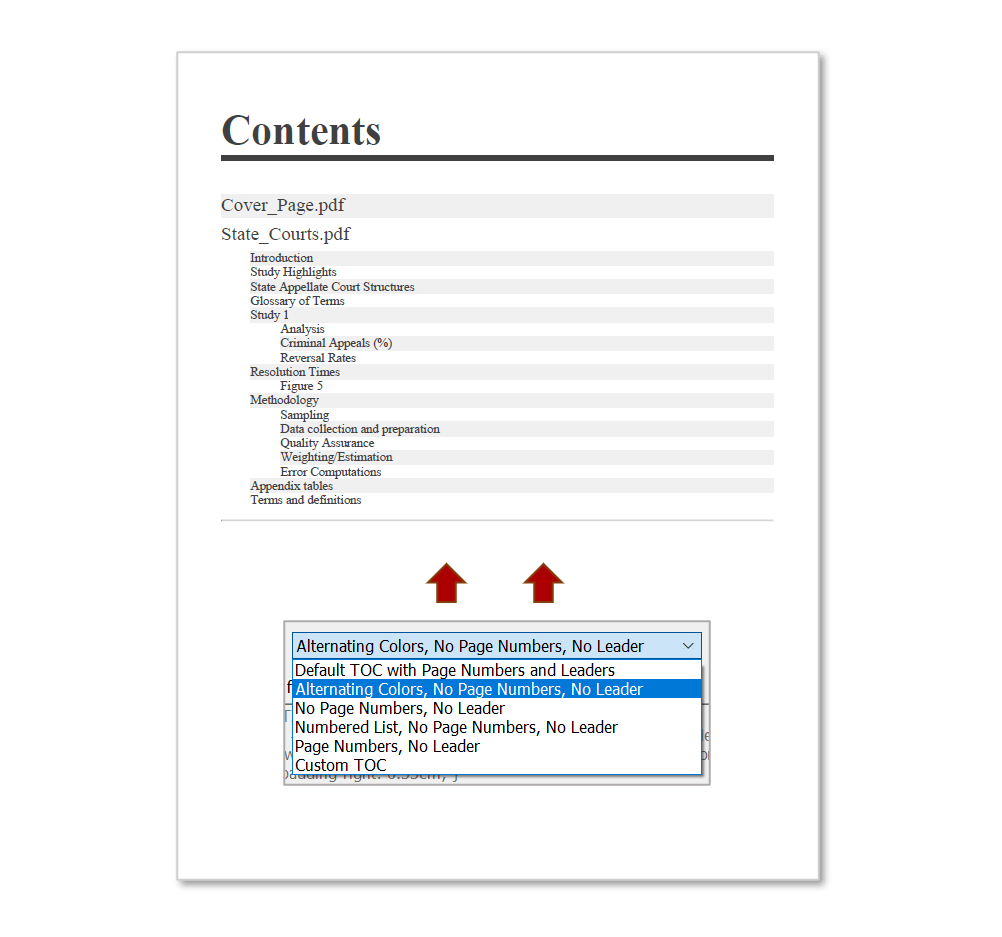
- There are a number of style presets available for immediate use without any additional programming. If you want to make changes or customize the visual appearance of the TOC, select “Custom TOC” and make any necessary adjustments to the CSS/HTML code.
- The steps below demonstate how to generate a TOC when carrying out a basic document merge procedure, and insert it at the beginning of the output. We will look at the appearance of all template styles available with the plug-in, and how to create custom TOC styles/content.
- Prerequisites
- You need a copy of Adobe® Acrobat® along with the AutoSplit™ plug-in installed on your computer in order to use this tutorial. Both are available as trial versions.
Step-by-Step Tutorial
- Step 1 - Open the "Merge Documents Settings" Dialog
- In Adobe Acrobat, select "Plug-Ins > Merge Documents > Merge Documents into Single Document..." from the main menu to open the "Merge Documents Settings" dialog.
- [⚡ How to locate Plugins menu in Adobe® Acrobat® ⚡]
- Step 2 - Open Table of Contents Settings
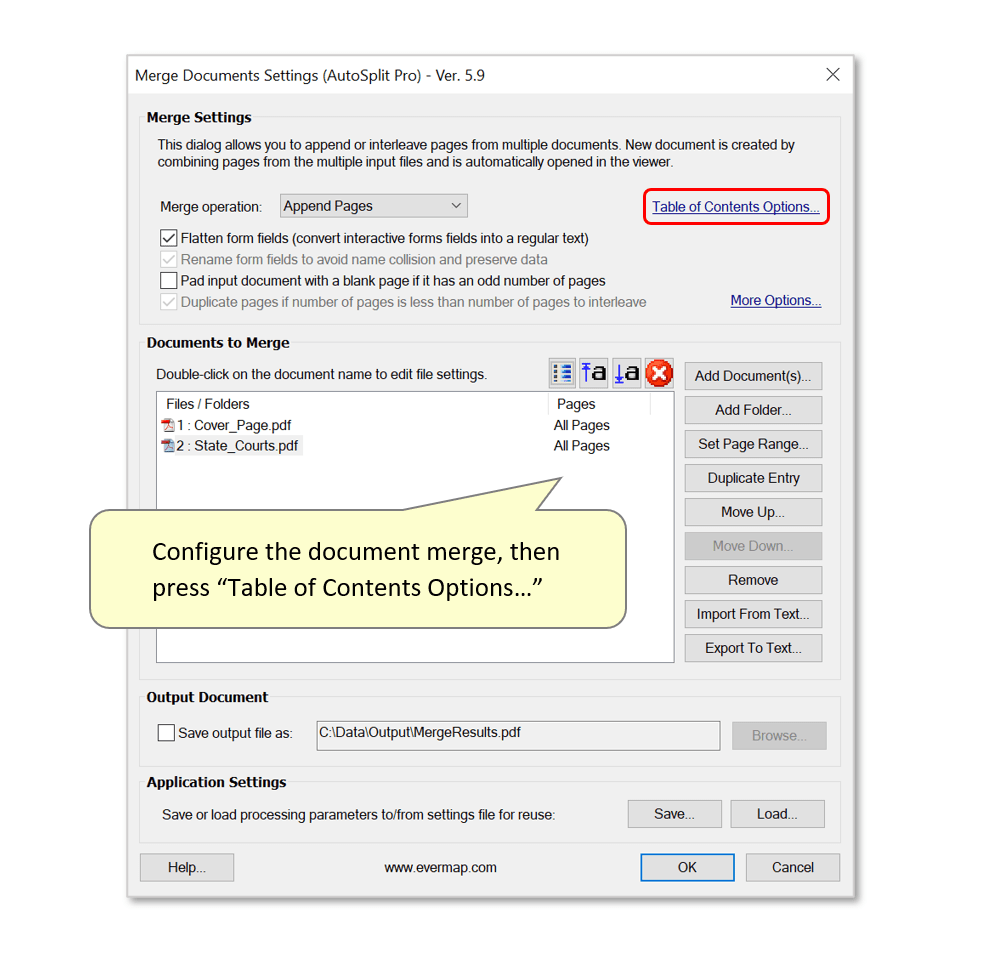
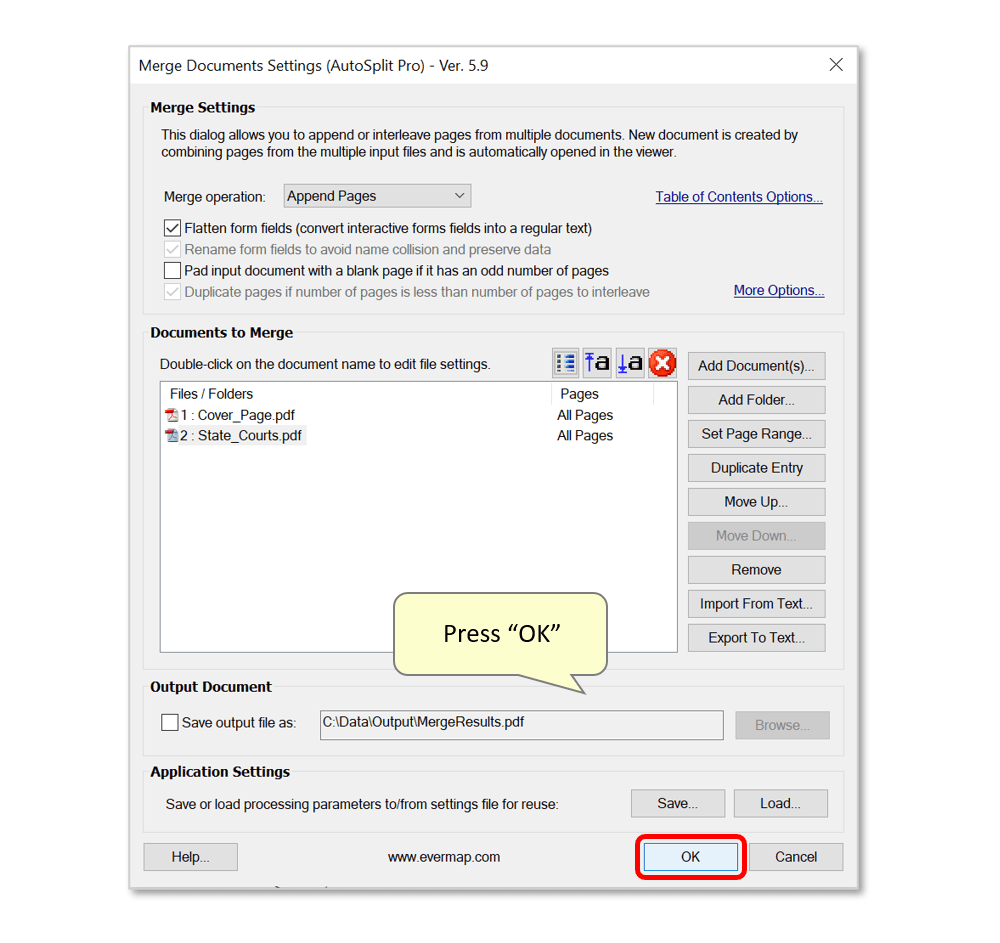
- Select the desired merge operation type and use the "Add Document(s)/Folder..." buttons to choose files to be merged. See this list of document merge tutorials for help configuring these settings.
- Click on "Table of Contents Options" at the top right side of the dialog to access TOC options.
- Step 3 - Configure the TOC Appearance
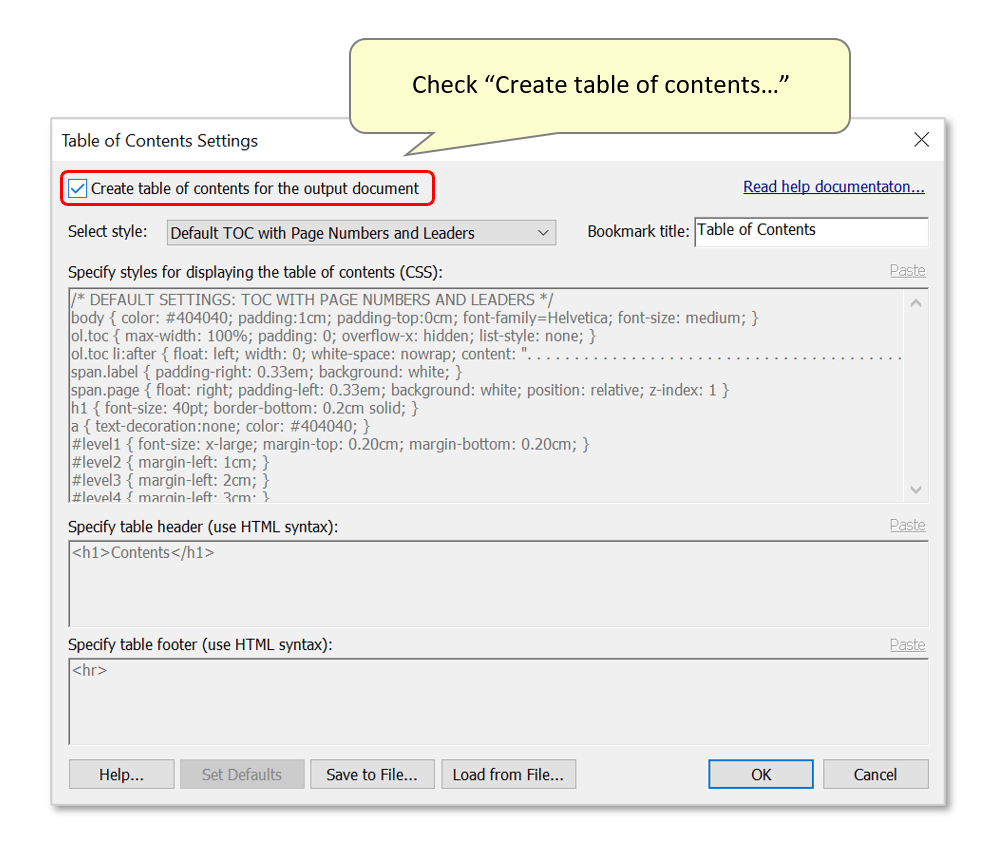
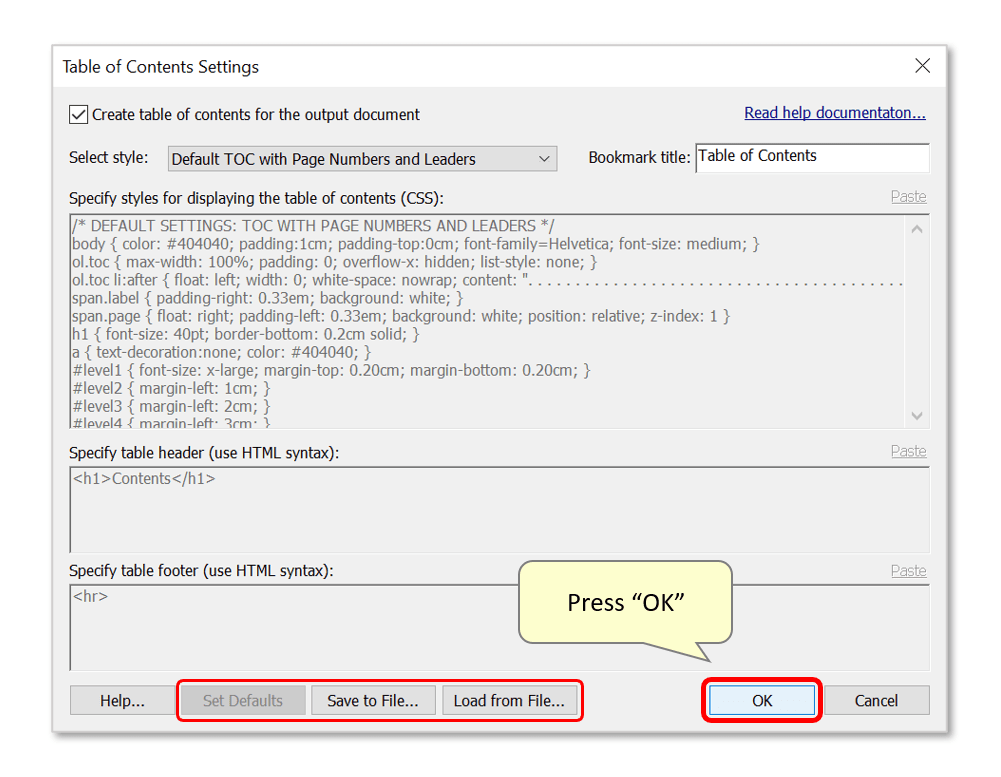
- In the "Table of Contents Settings" dialog, check the box next to "Create table of contents for the output document".
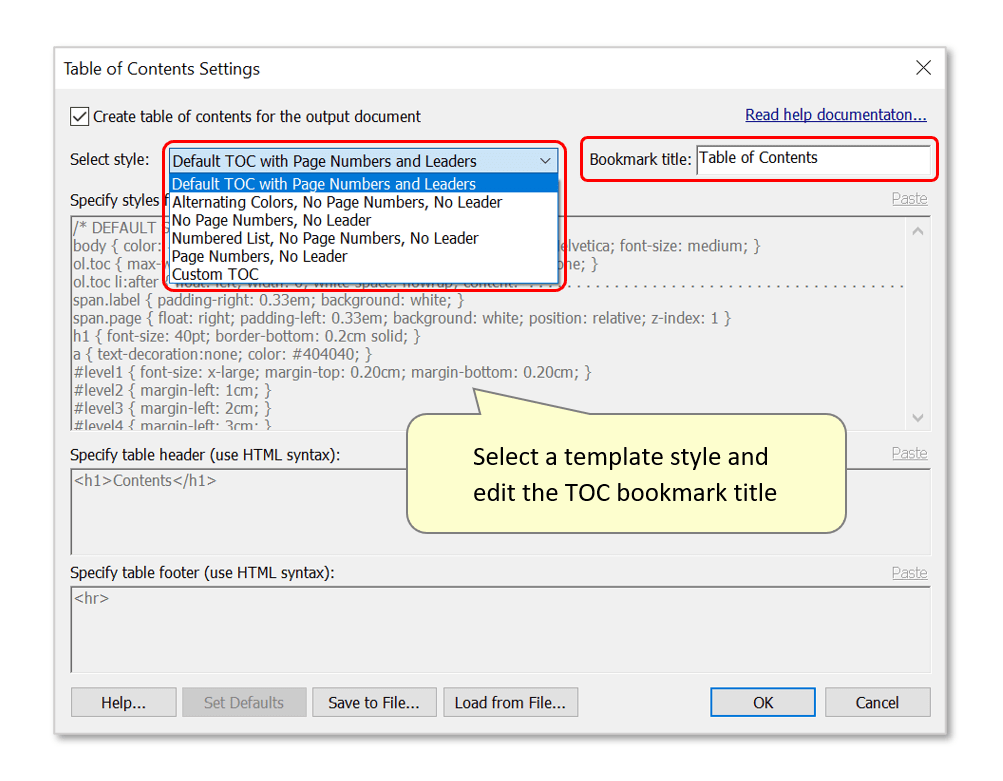
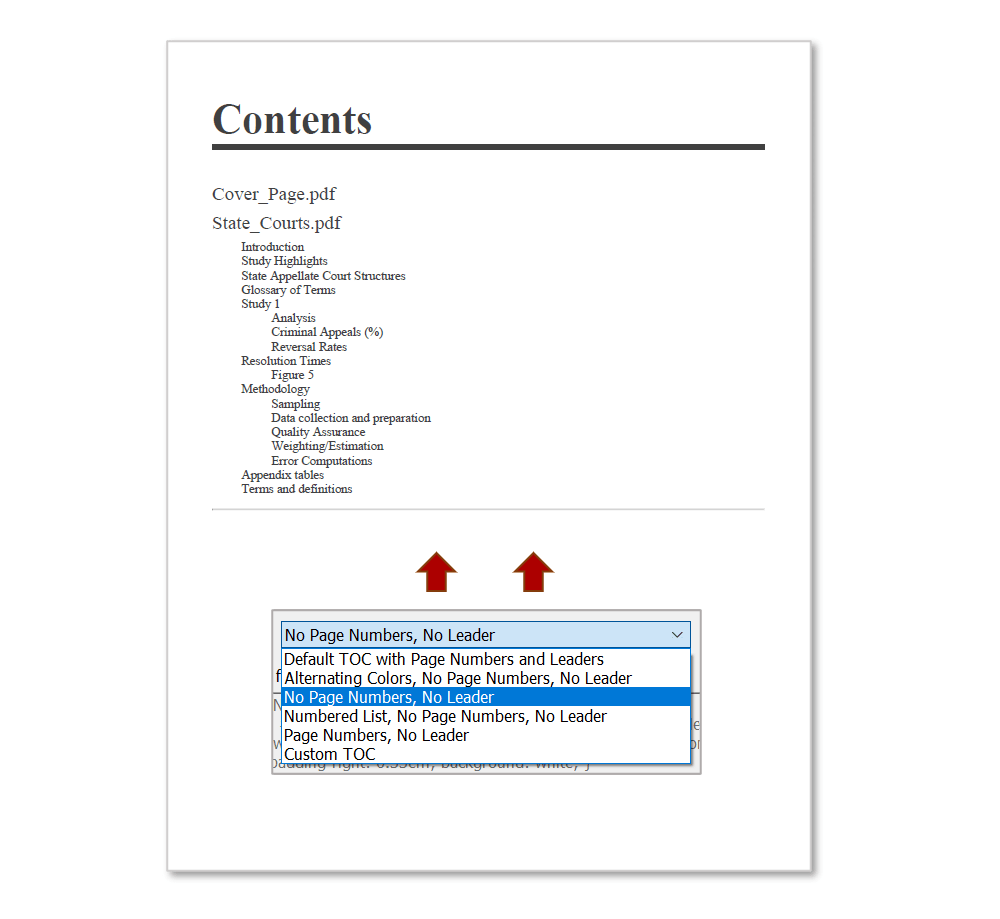
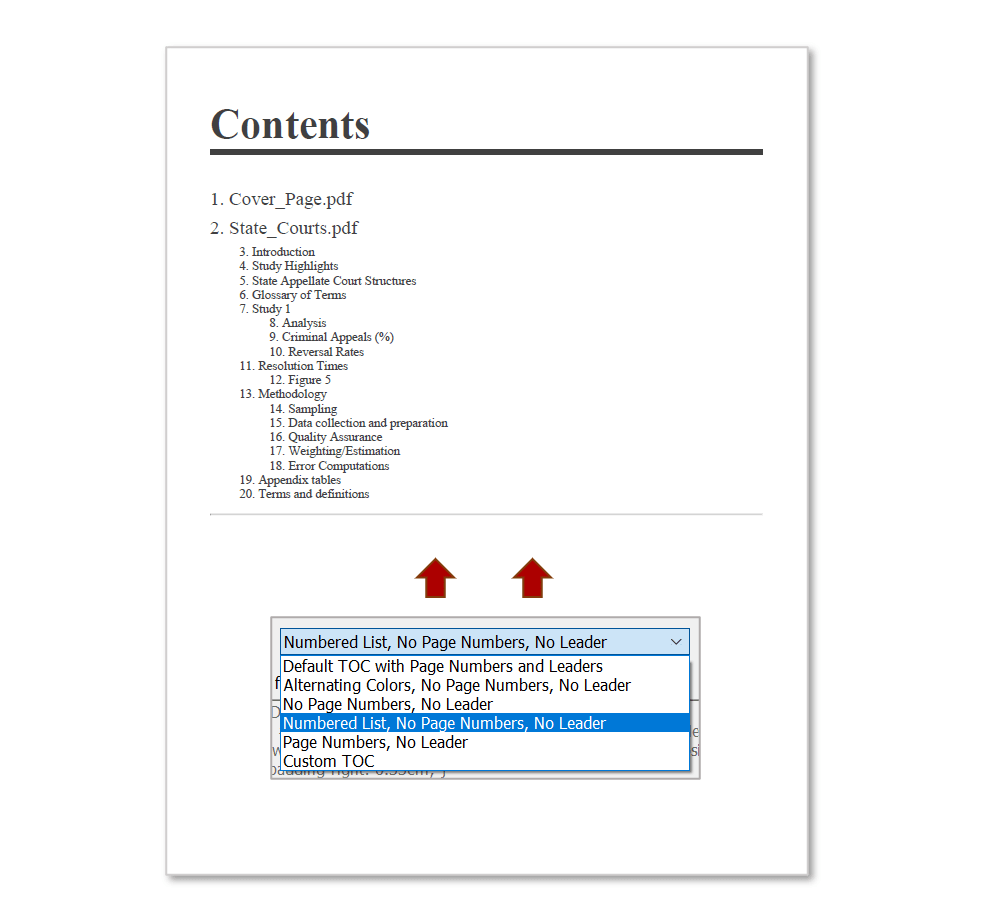
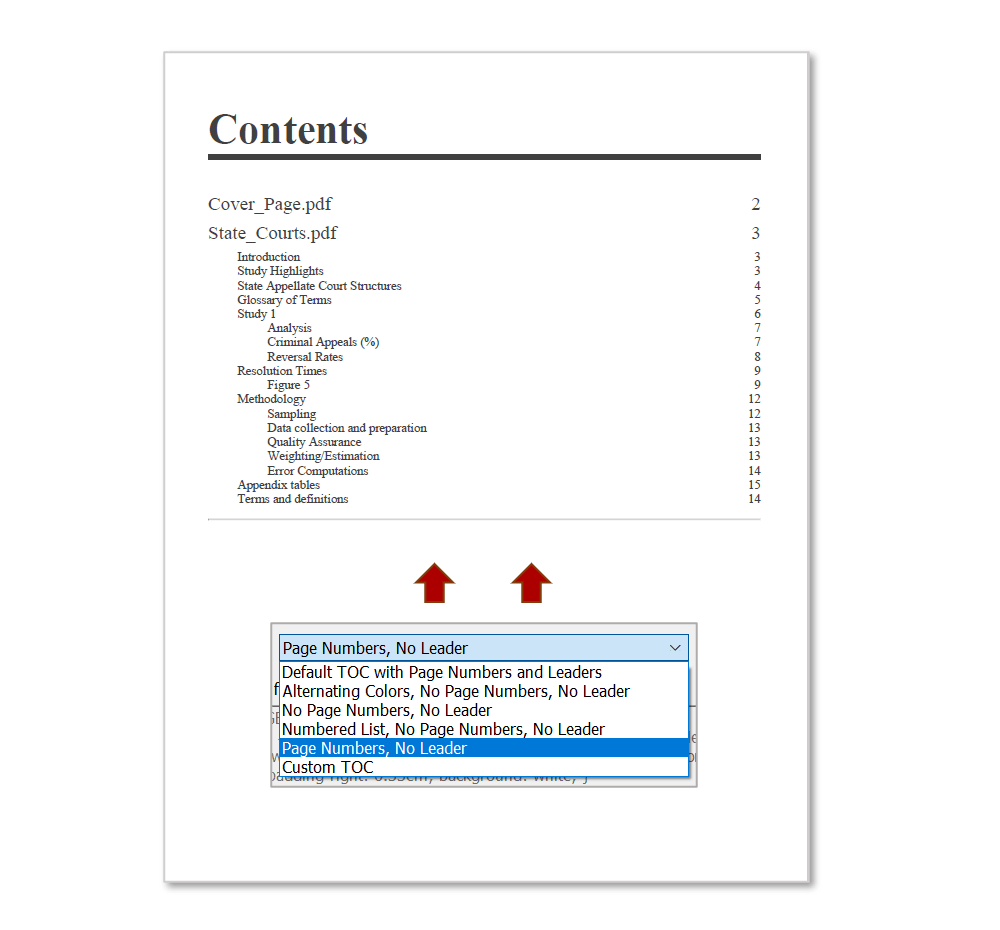
- Use the drop-down list next to "Select style:" to select one of the style presets available. First, we'll demonstrate using the "Default TOC..." option.
- Optional: edit the "Bookmark title" text - this will be displayed as a bookmark title for the TOC page(s) inserted into the output. The default title is "Table of Contents".
- Optionally use the "Set Defaults" button to replace any current settings with the default values.
- Use the "Save to File..." and "Load from File..." buttons to save and reuse a current set of settings as a *.tocmerge settings file. These files can also be shared with others so that they can process files in the same way. By default, *.tocmerge files are saved in the ‘AppData’ folder for the AutoSplit plug-in. Settings saved here will automatically appear in the list of style presets the next time this dialog is open.
- Press "OK" to proceed.
- Step 4 - Merge the Documents
- Optional: save these processing parameters as an *.ams settings file for future reuse via the "Save..." button. Use "Load..." to load the configuration.
- Press "OK" to merge the documents together.
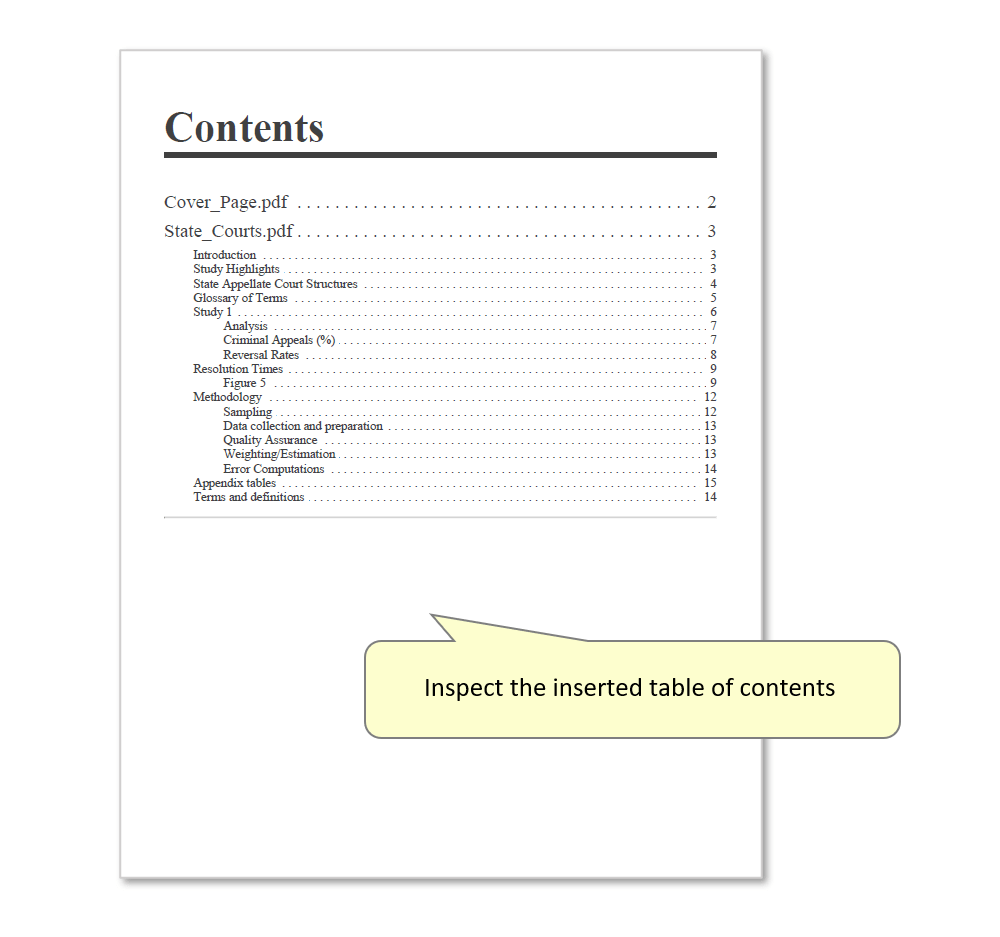
- Close the report box displaying the success of the operation. The merged documents will be opened in Acrobat - inspect the inserted TOC page.
- Note: A bookmark and TOC entry has been added for each input document merged during this operation.
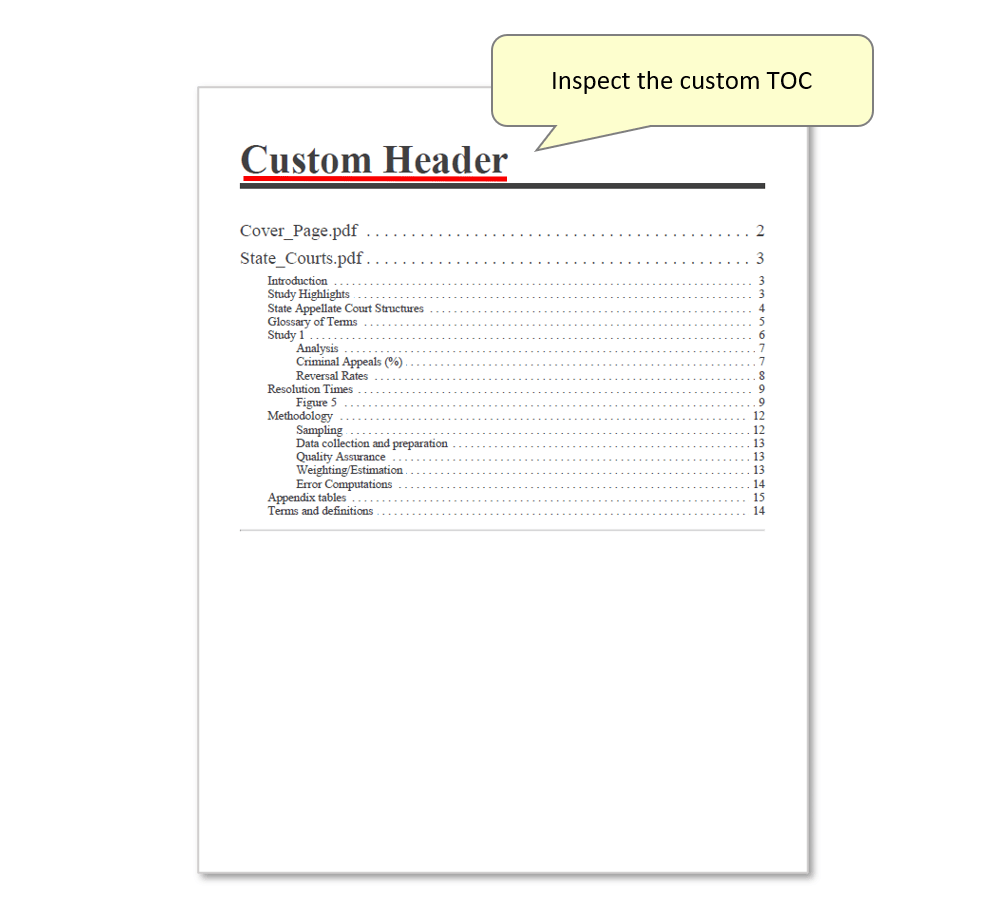
- The following images display the output TOC that would be created using the different available presets, when merging the same two documents:
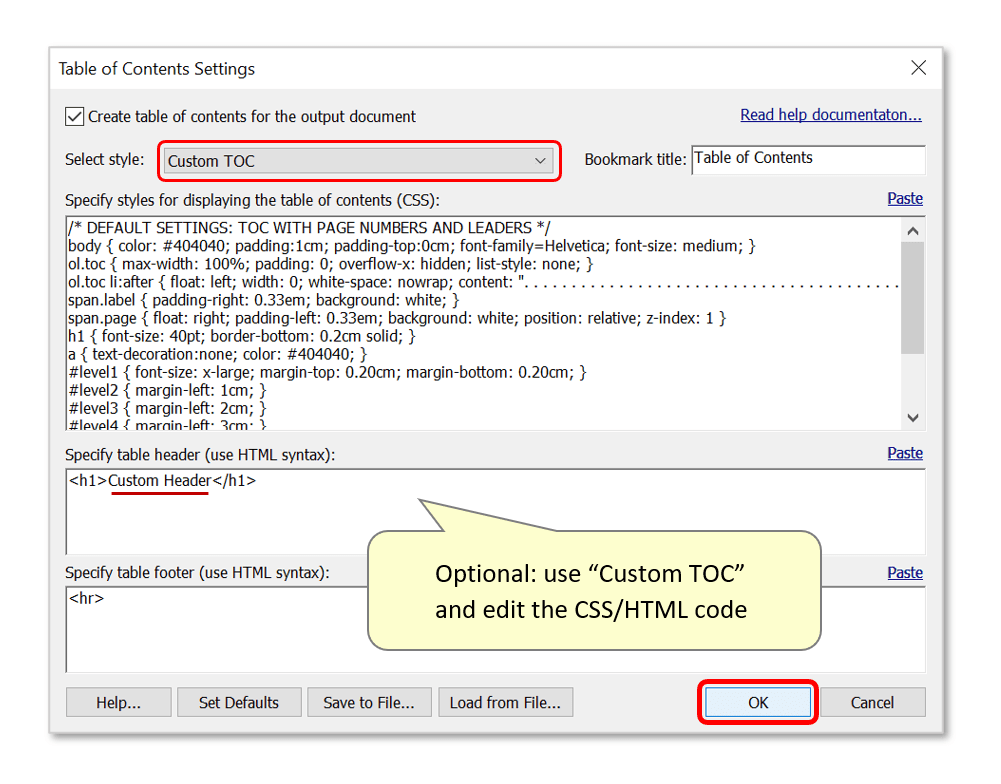
- Optional: Create Custom TOC Designs
- Select the "Custom TOC" option from the style selection menu. This unlocks the boxes below where the CSS/HTML code that generates the output TOC can be manually edited.
- Here, we have modified some text under "Specify table header...". Press "OK" to use these settings.
- Proceed to merge the documents together and inspect the output. The TOC that has been inserted will reflect any custom changes:
- Click here for a list of all step-by-step tutorials available.