Use Rules to Automatically Rename Different Document Types
AutoSplit plug-in for Adobe® Acrobat®
- Introduction
- Auto-renaming different types of documents using different settings for each document type can be time consuming and prone to errors. Use rules to avoid repeating the process for each document type and process different documents in the single run. Documents with different text layouts and naming requirements can be auto-renamed at the same processing run. Separate file naming scheme will be applied for each document type based on text search results.
- What is Auto-Renaming Rule?
- Rules are text search conditions that can be used to decide how to auto-rename a specific PDF file. Each rule has a text search pattern and one or more filenaming components to auto-rename a file.
- Rules are configured to search input documents for specific text or pattern. It could be account /employee/social security numbers, names, keywords or dates etc. If matching text is identified, the corresponding rule will be used to rename the file. If multiple rules match the input document, then all or only some of them will be used to rename the document. Rules can be setup to be mutually exclusive. If one rule is matching the document, other rules can be skipped. This allows creating flexible renaming rules that adapt to differences in the document content.
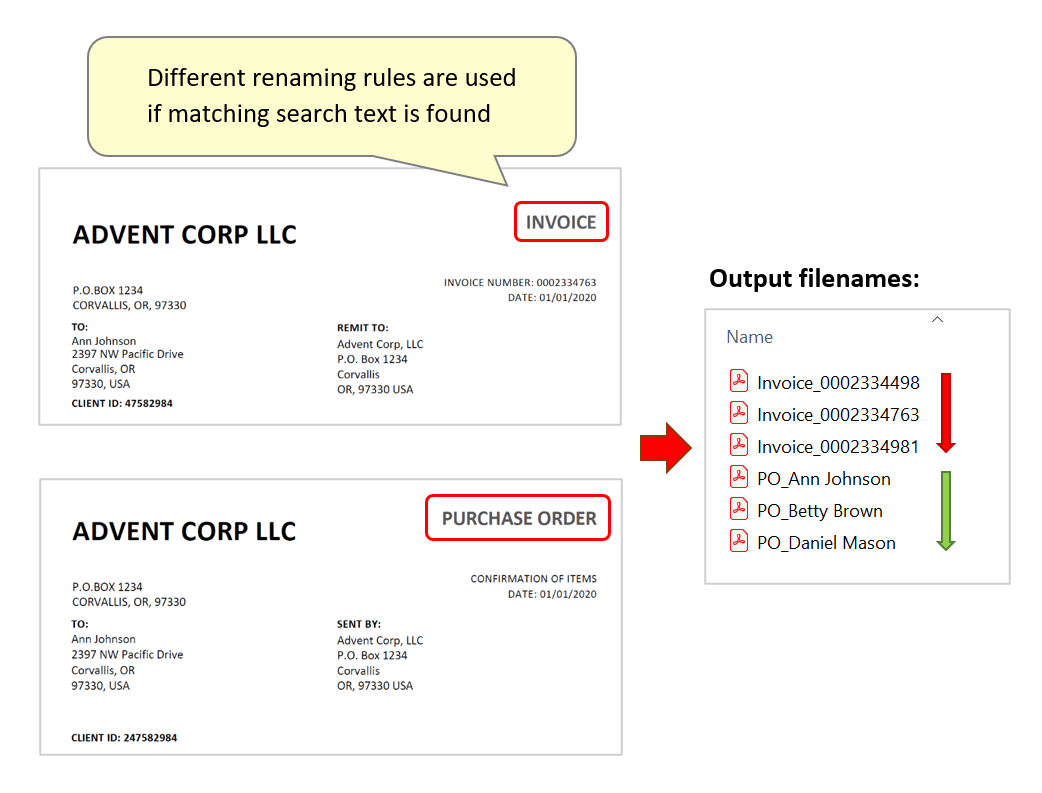
- In the tutorial below, we will create two separate renaming rules and use them to rename sample business documents. First file naming scheme will be designed to rename invoices, while the other to rename purchase orders. Input documents will be searched for the presence of the text "invoice" or "purchase order". If matching text is identified in an input document, the correct rule will be applied to rename it.
- Input Document Description
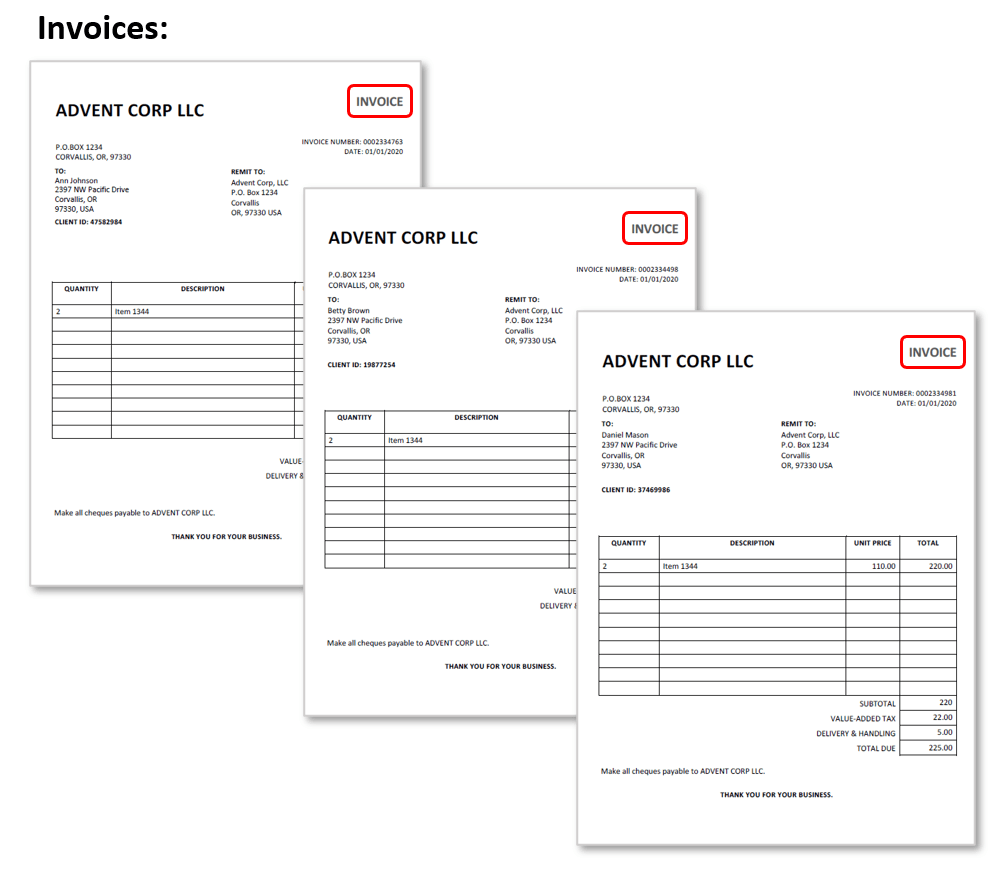
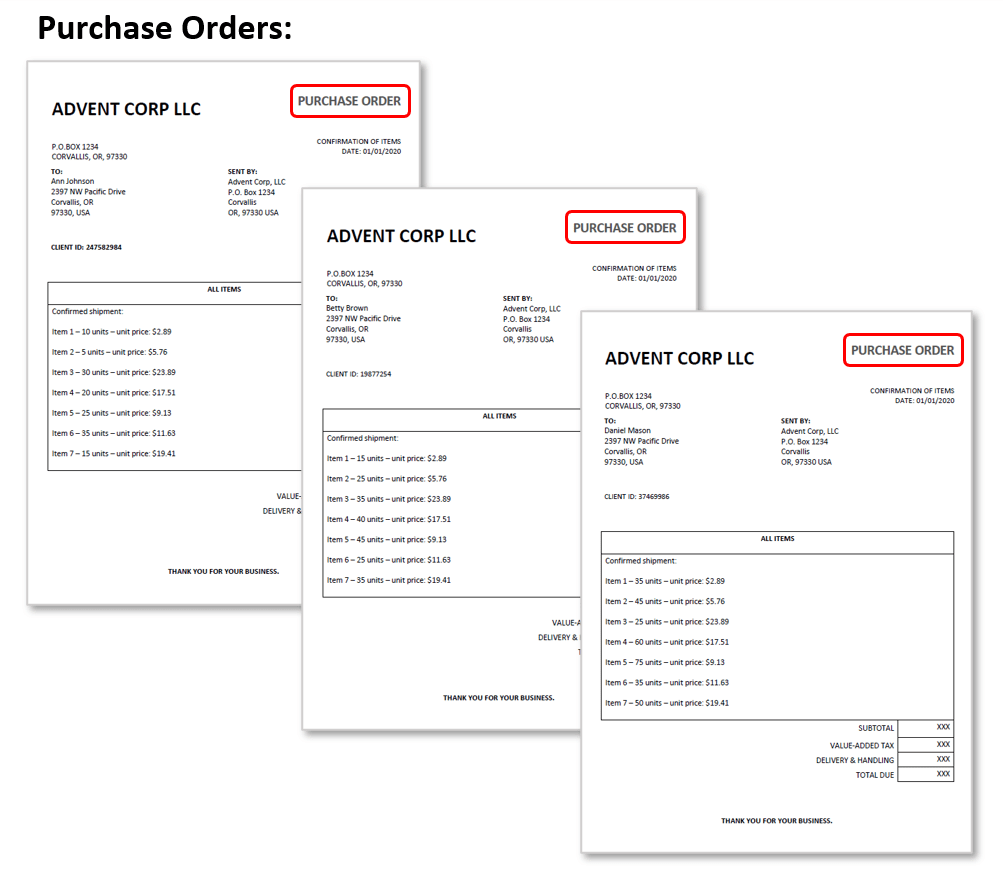
- The sample files used in this tutorial are a collection of invoices and purchase orders. The original file names do not feature any content that is related to each document's content. The goal is to rename them so that invoices are named using the invoice number located within them, and purchase orders are renamed using the relevant customer names. This information is located on the first page of each document. Such file names may be more useful when used by an accounting department or being archived for future use.
- The plug-in will identify "INVOICE" or "PURCHASE ORDER" in each document, and use the correct renaming rule to generate an output filename.
- Batch Processing Support
- Automate this operation with Acrobat's Guided Actions tool (aka Action Wizard) to process PDF files using the same configuration with only one click.
- Prerequisites
- You need a copy of Adobe® Acrobat® along with the AutoSplit™ Standard or Pro plug-in installed on your computer in order to use this tutorial. Both are available as trial versions.
Step-by-Step Tutorial
- Step 1 - Open the "Auto-Rename PDF Files" Menu
- Close all open PDF documents to avoid possible file access conflicts.
Start Adobe® Acrobat® and select "Plugins > Auto-Rename PDF Files…"
from the main Acrobat menu. The location of the menu depends on the version of Adobe Acrobat.
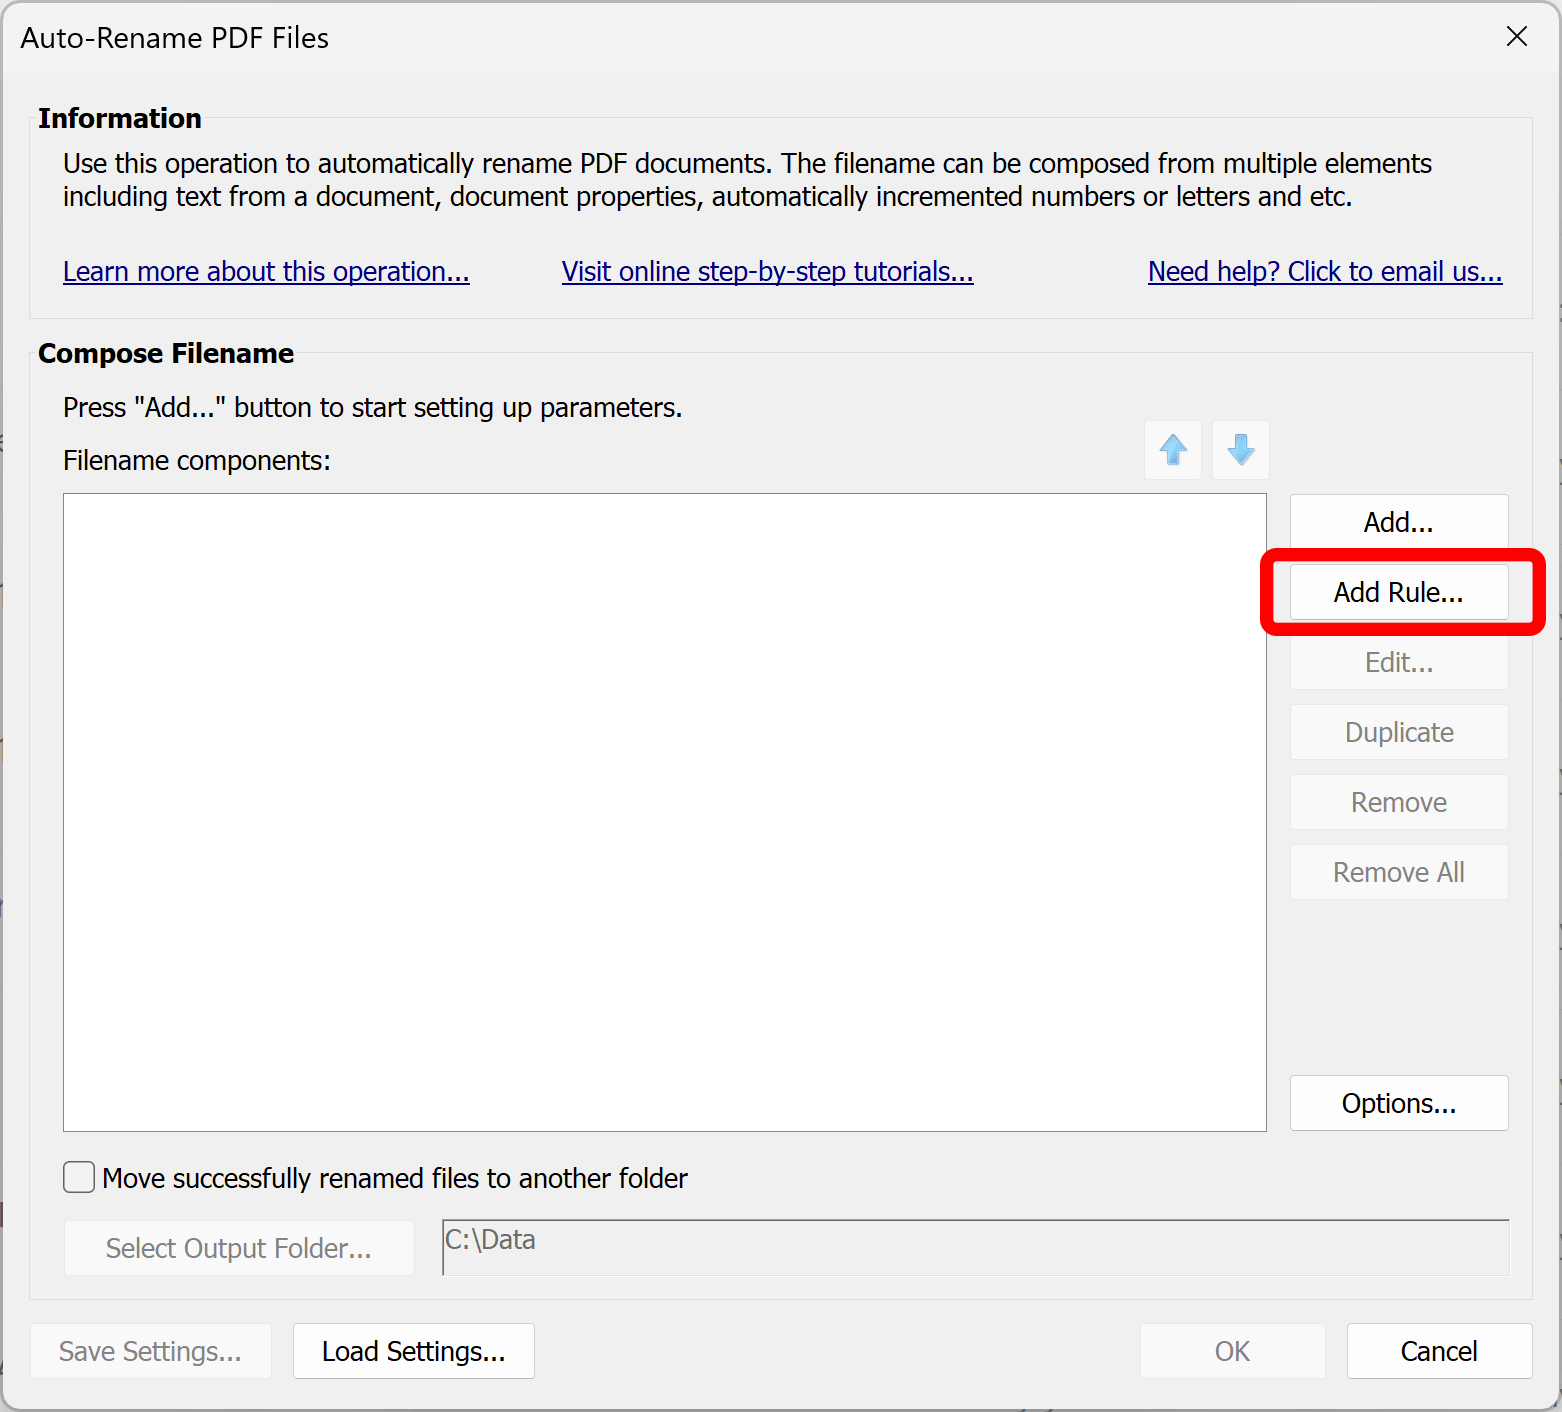
[⚡ How to locate Plugins menu in Adobe® Acrobat® ⚡] - Step 2 - Add a New Renaming Rule
- Press “Add Rule…” to configure a file renaming rule.
- Step 3 - Setup First Renaming Rule (Invoices)
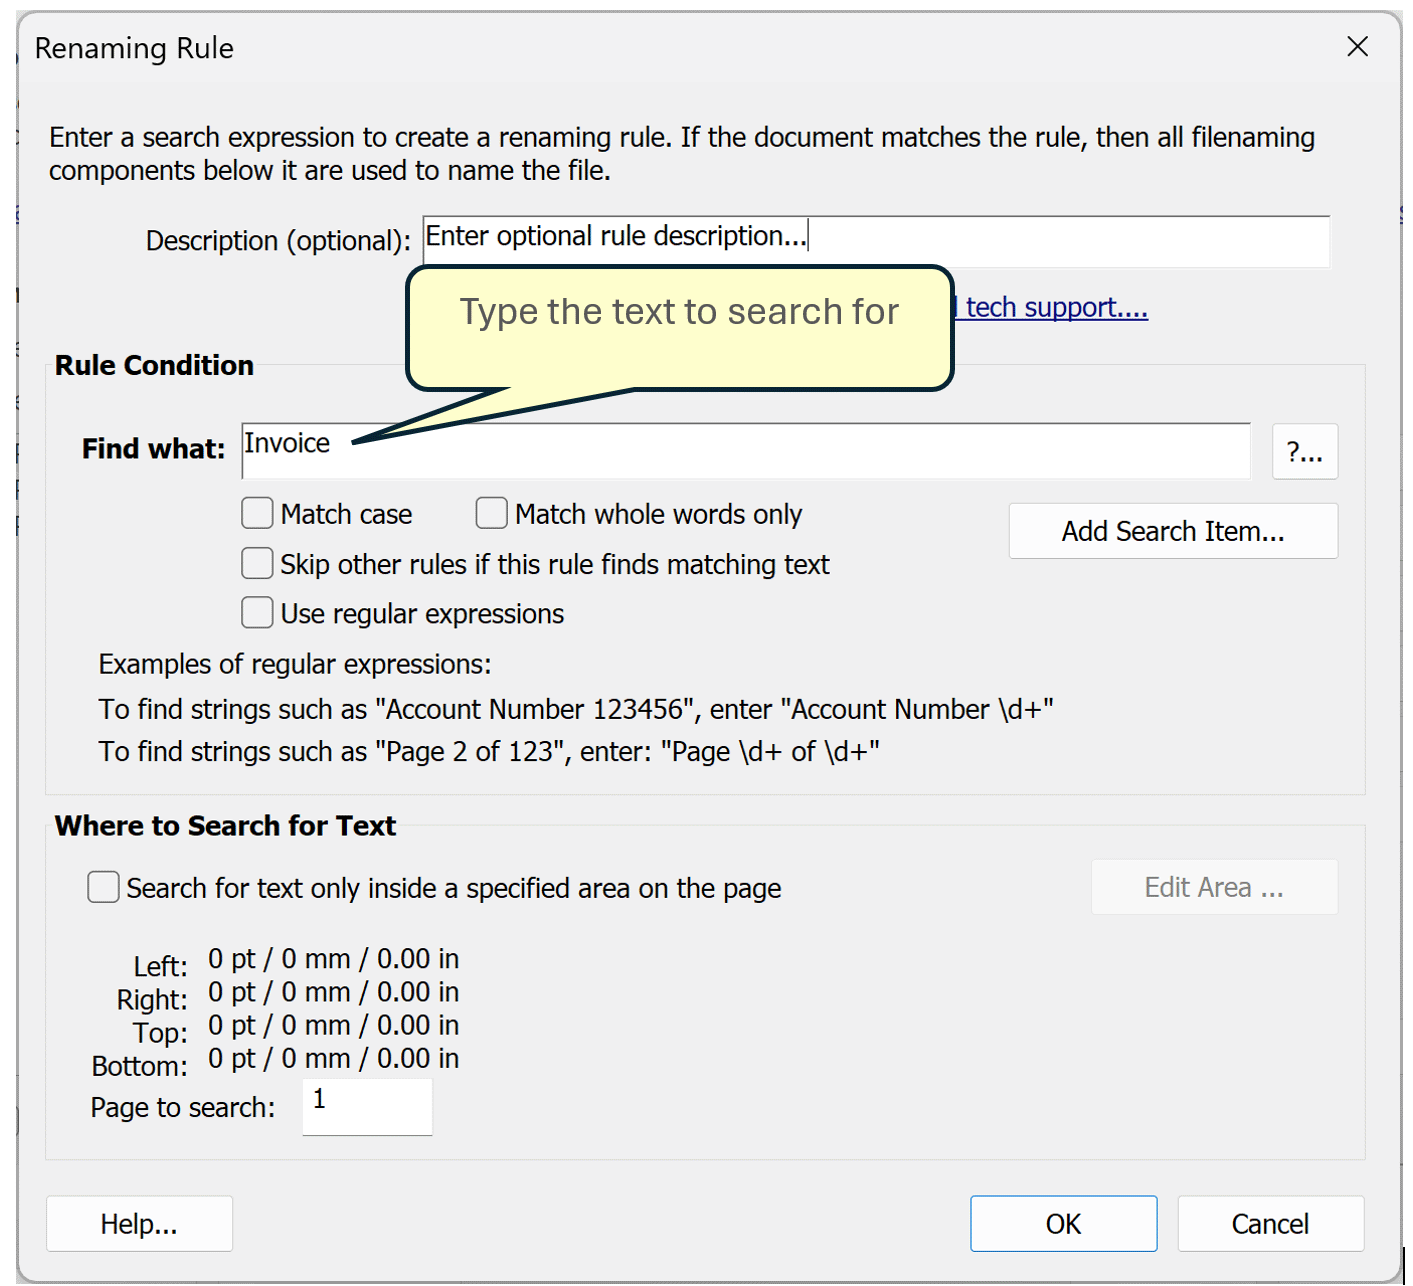
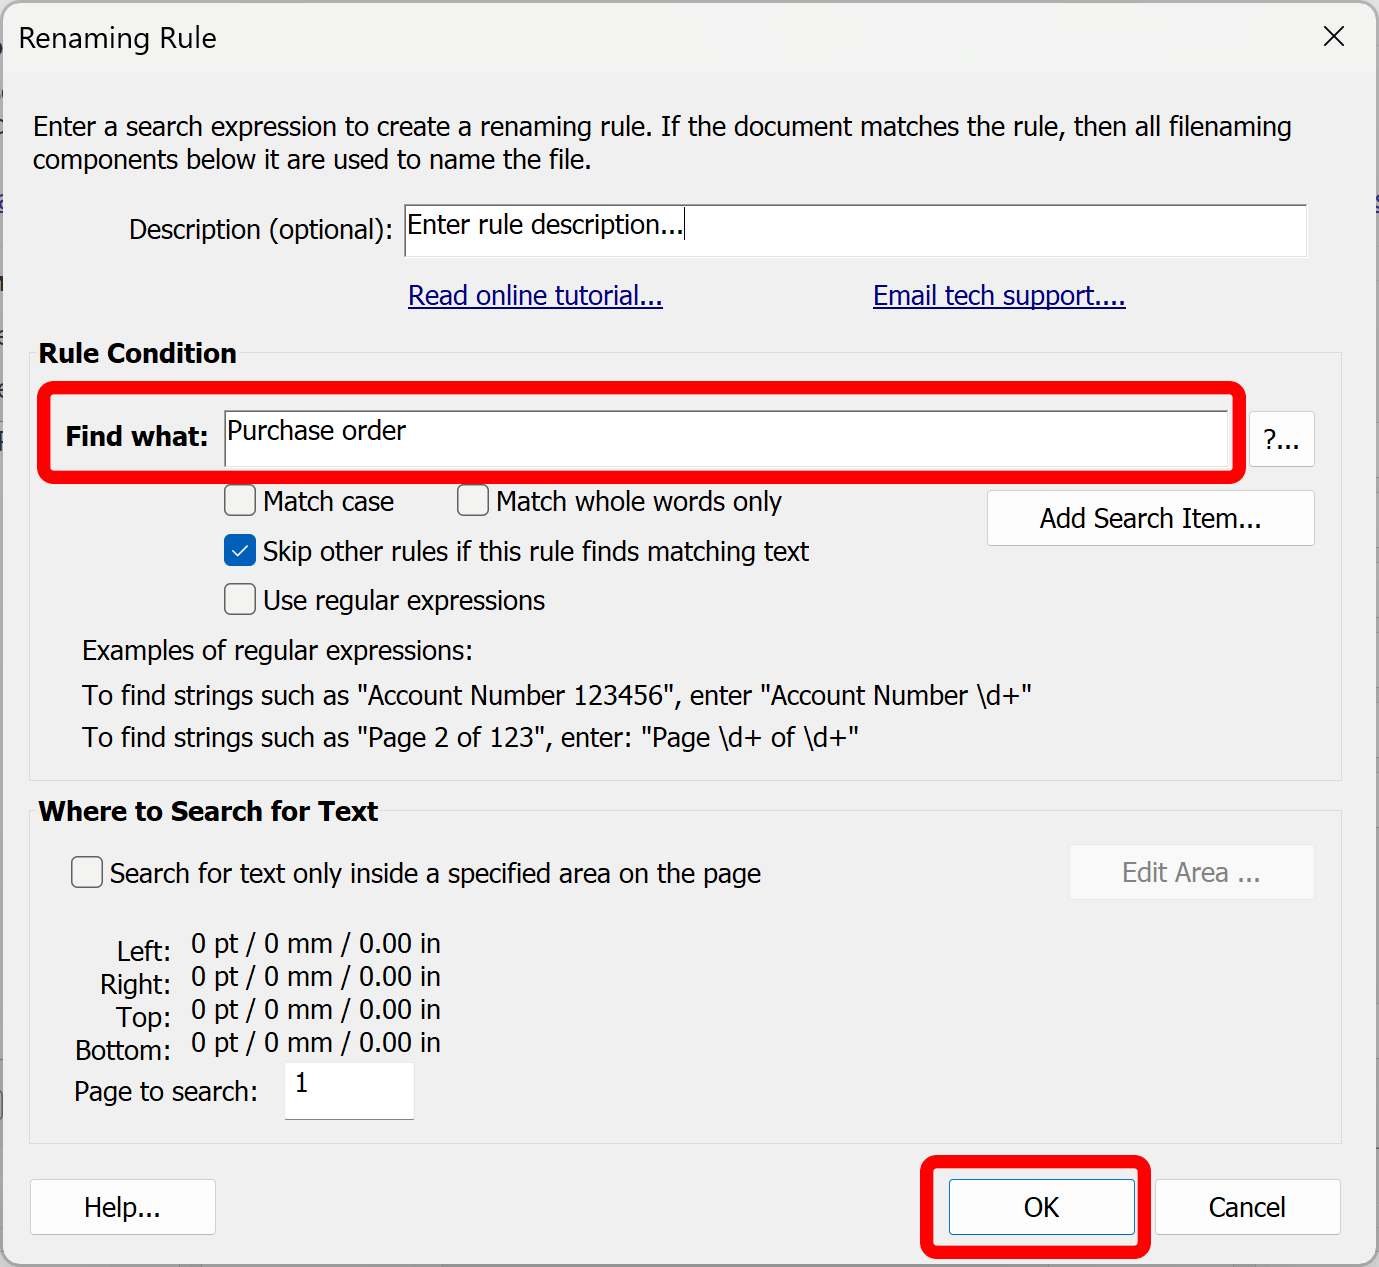
- Type the text or pattern that you want to search for in the Find what: entry box. Here, we will search for the word Invoice to identify invoices. This renaming rule will be applied only if a matching text (invoice) is found in the input PDF file.
- Optional: use a search expression by checking "Use regular expressions" to find text following a specific pattern. Regular expression syntax is used to search for text patterns.
- Check any necessary processing options such as "Match case". In this example, both are left unchecked ("INVOICE" is uppercase in the sample invoices used here, but the expression would still work if the text case was inconsistent across all files being renamed).
- Press "OK" to proceed.
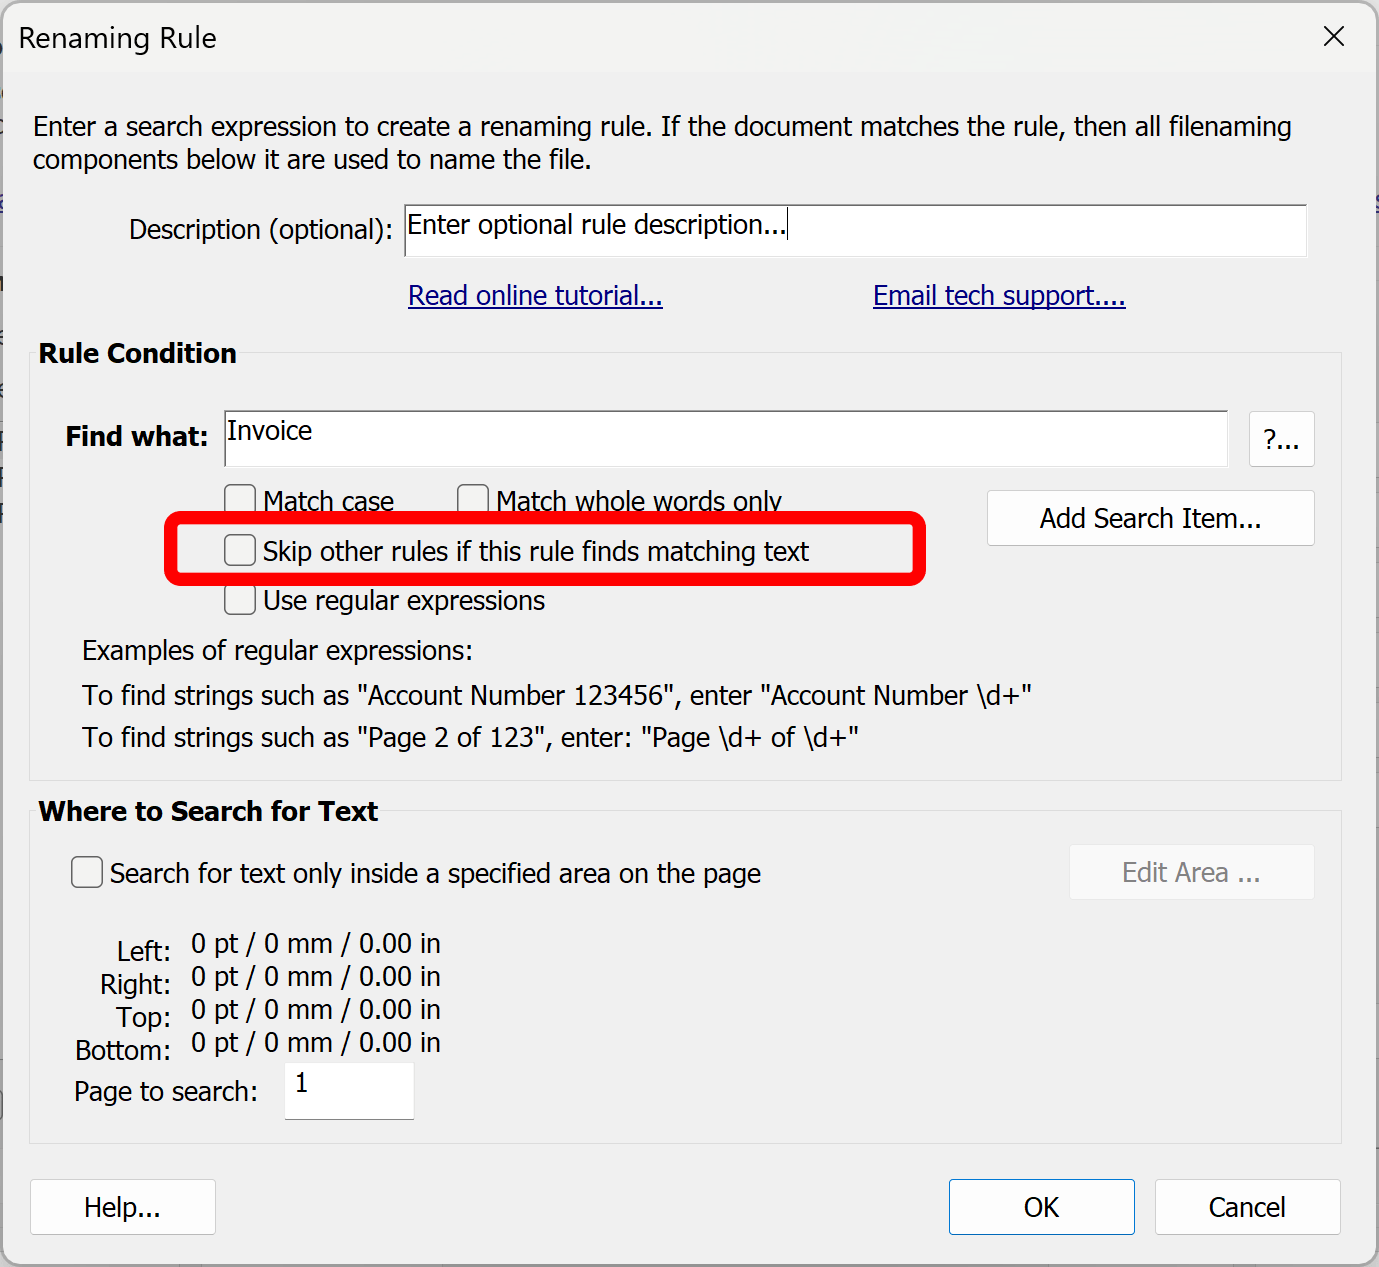
- Making Rules Mutually Exclusive
- Check Skip other rules if this rule finds matching text box to stop processing other rules if this rule is matching the input PDF document. This allows to apply only one rule to rename the document and ignore all other cases. If this checkbox is left unchecked, then the next rule that follow this one will evaluated and possibly applied (if rule finds matching text or pattern).
-
- Rule Description
- Optionally, enter a rule description into Description box. Description is used to provide human-readable explanation for the rule and also used to display rule name in the filenaming components list.
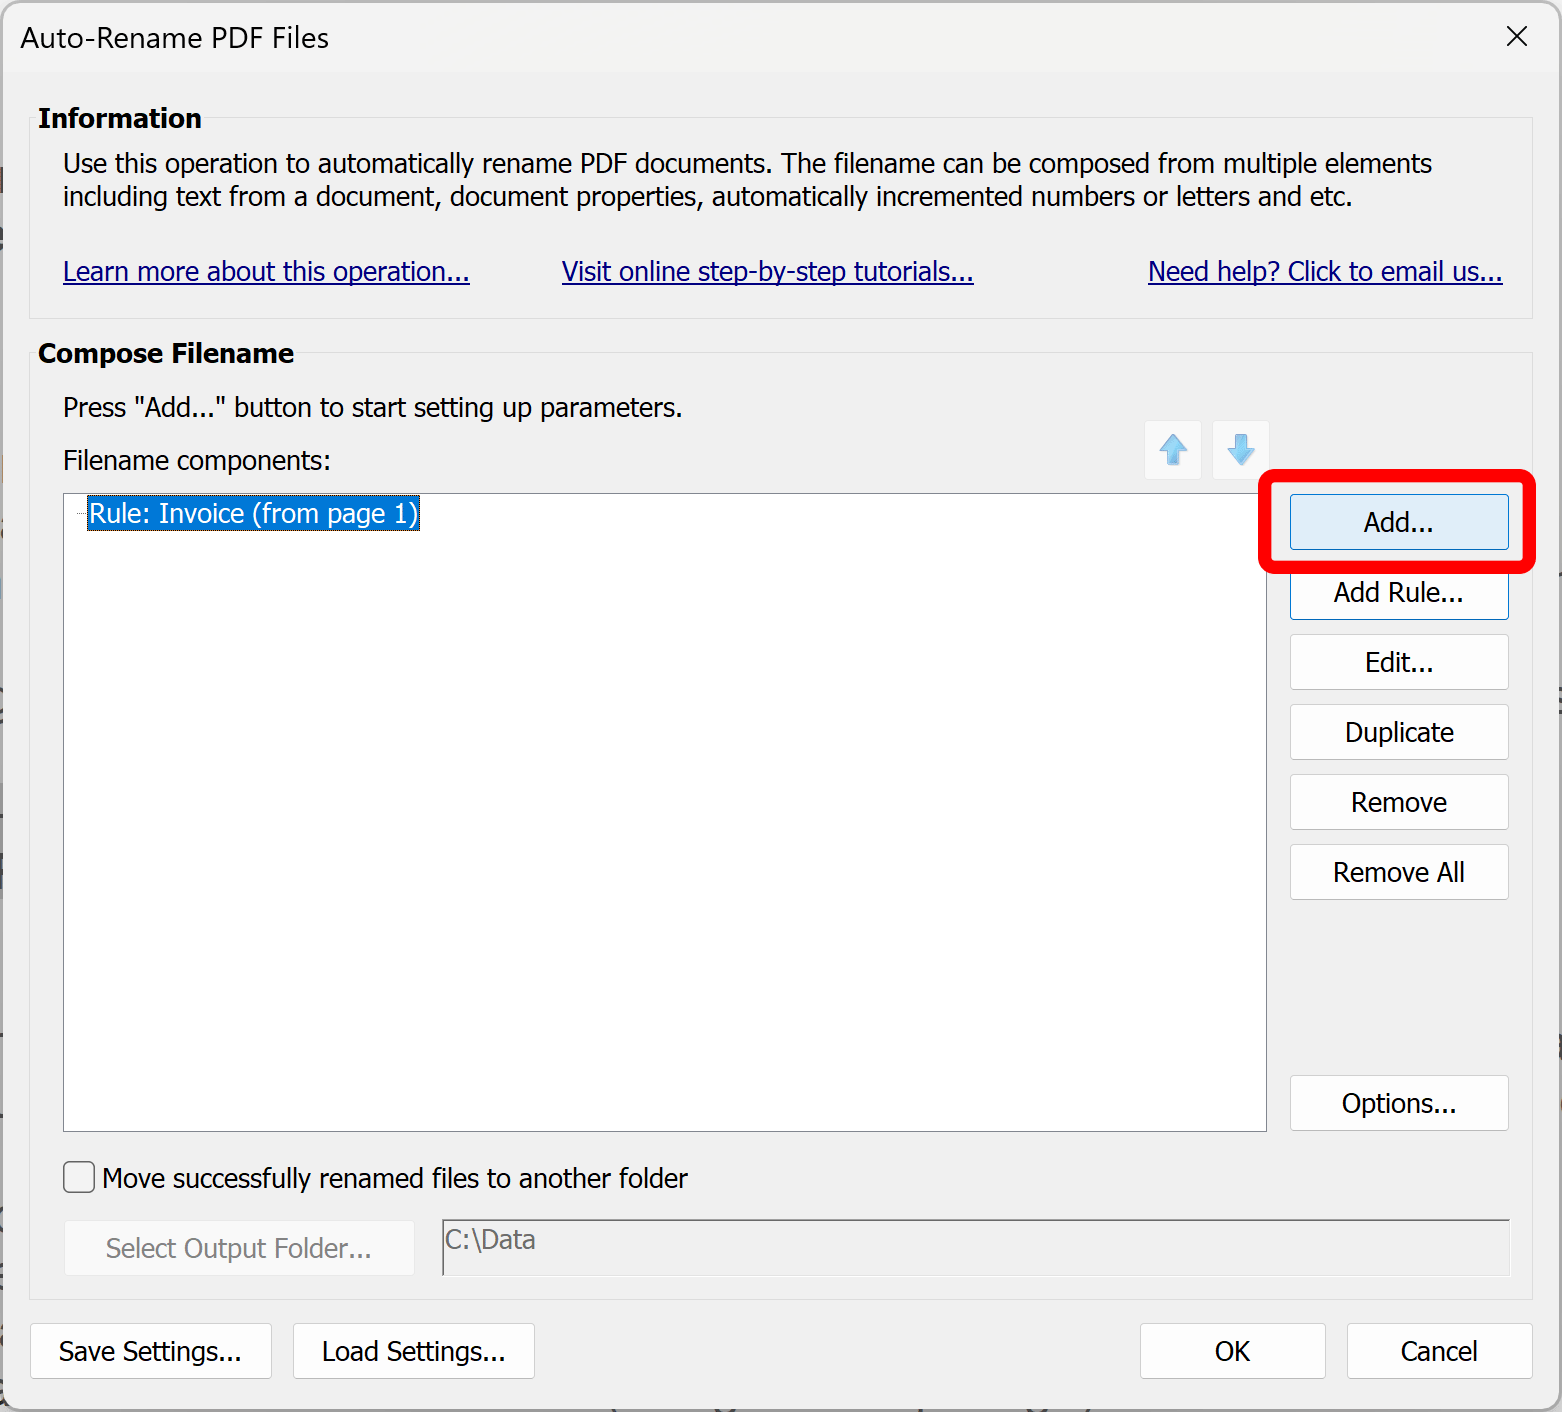
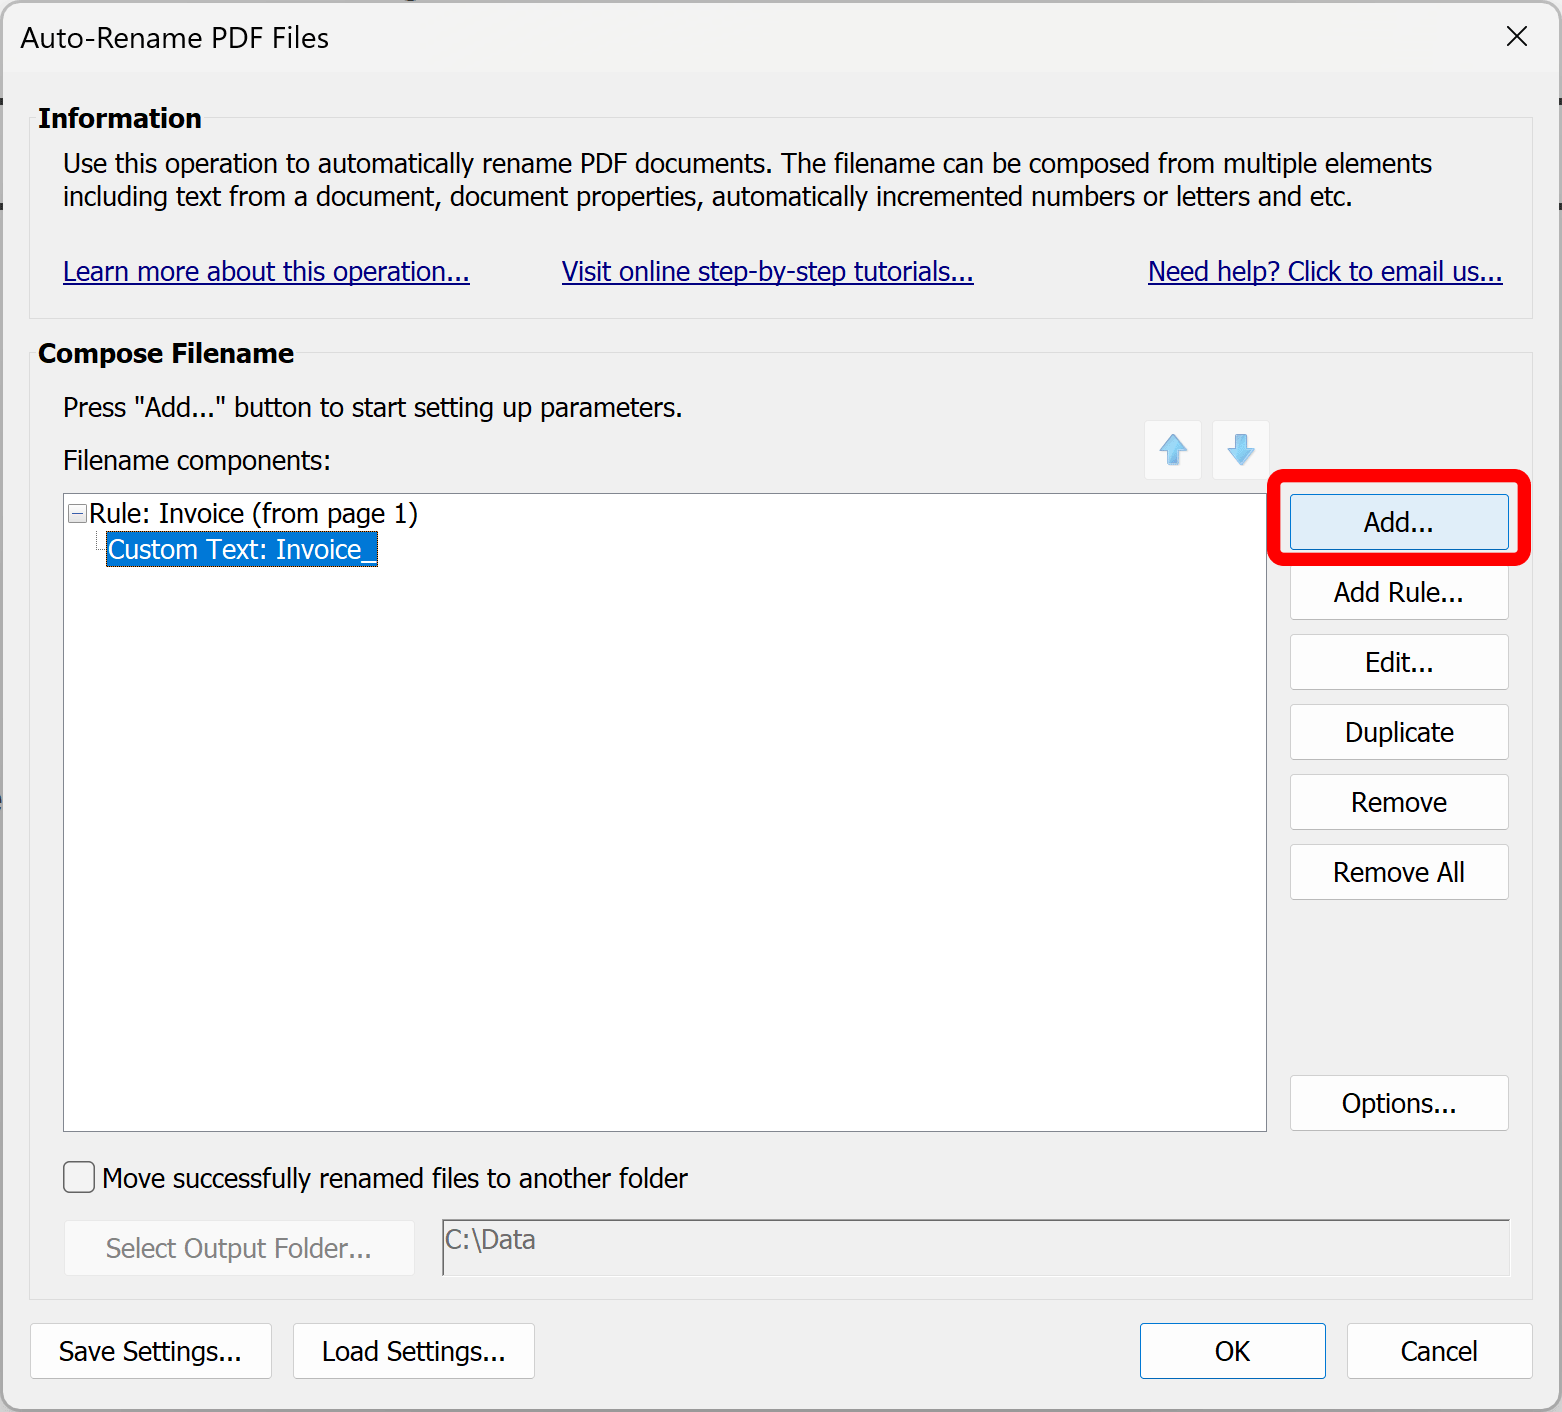
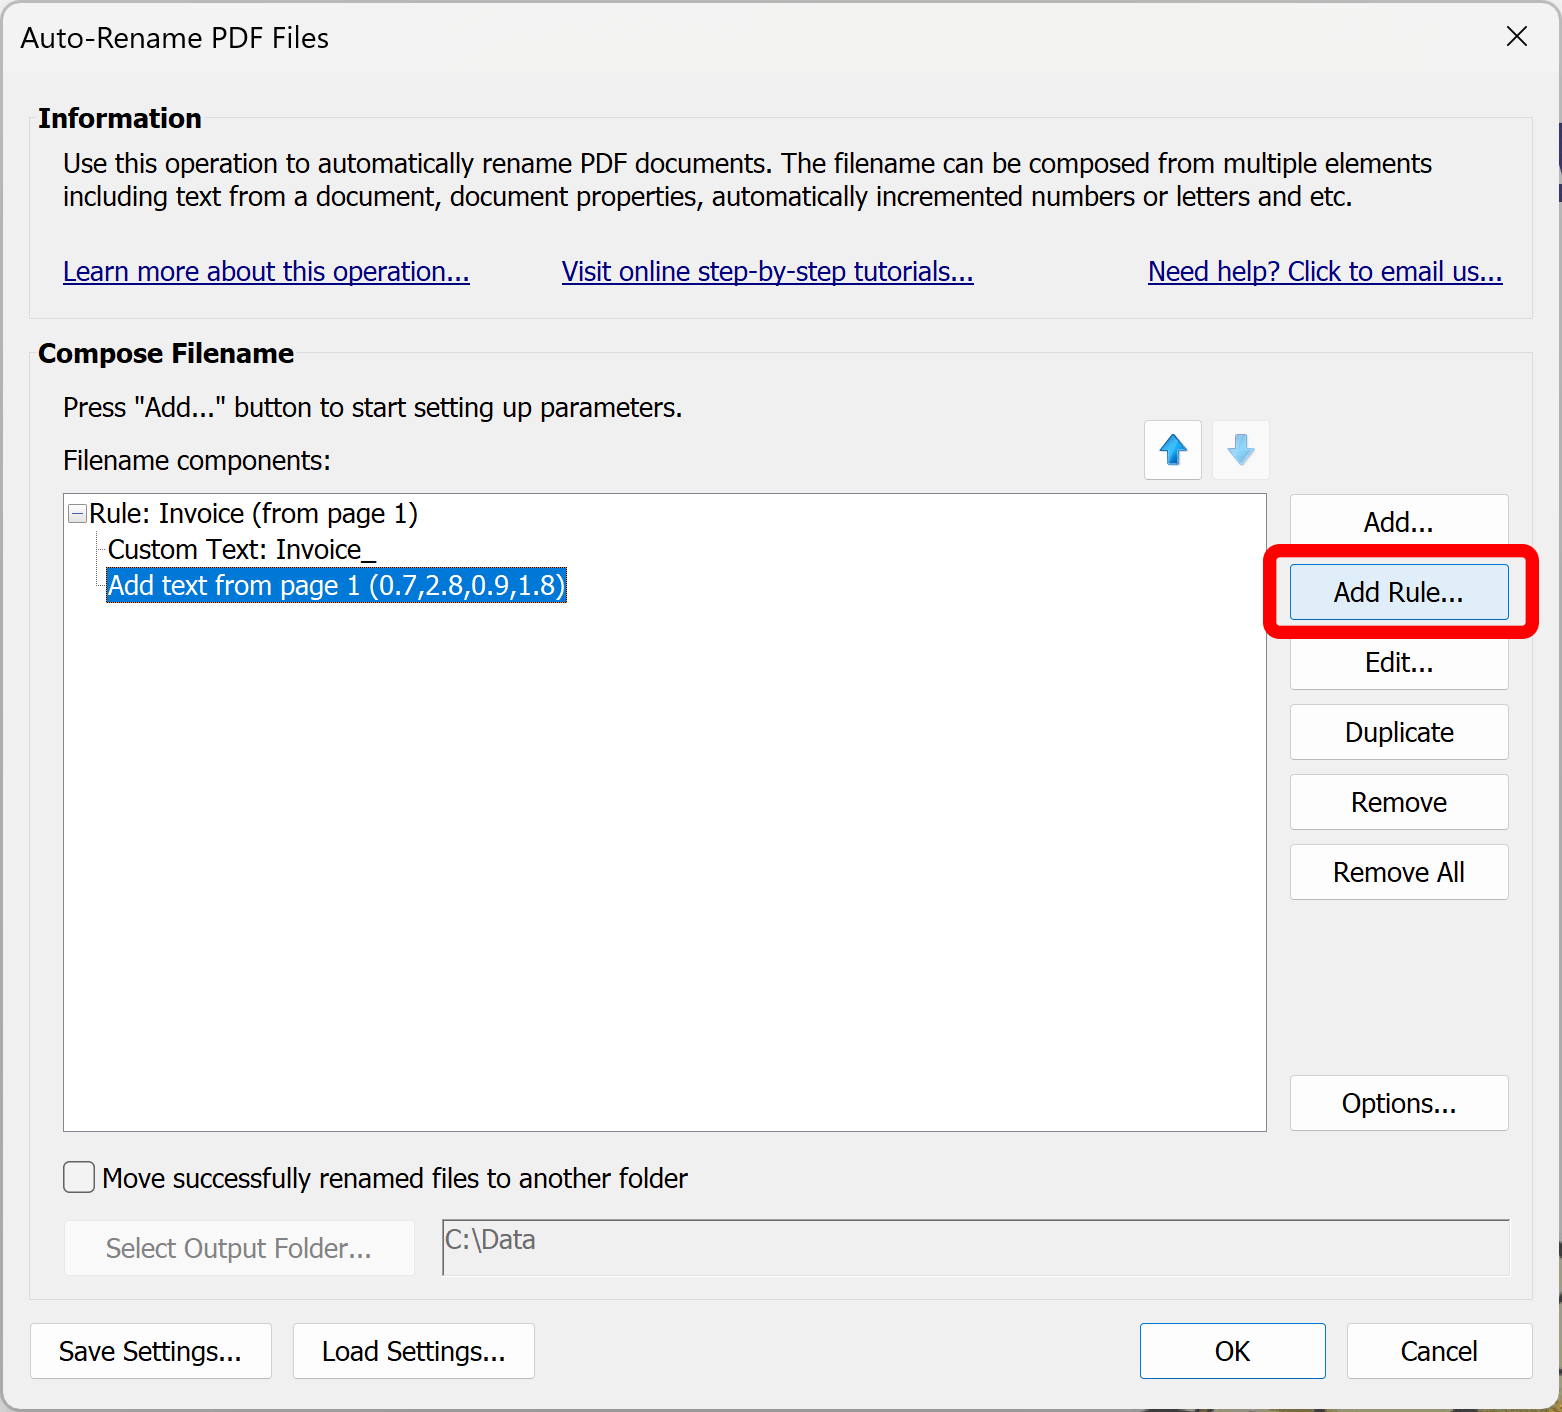
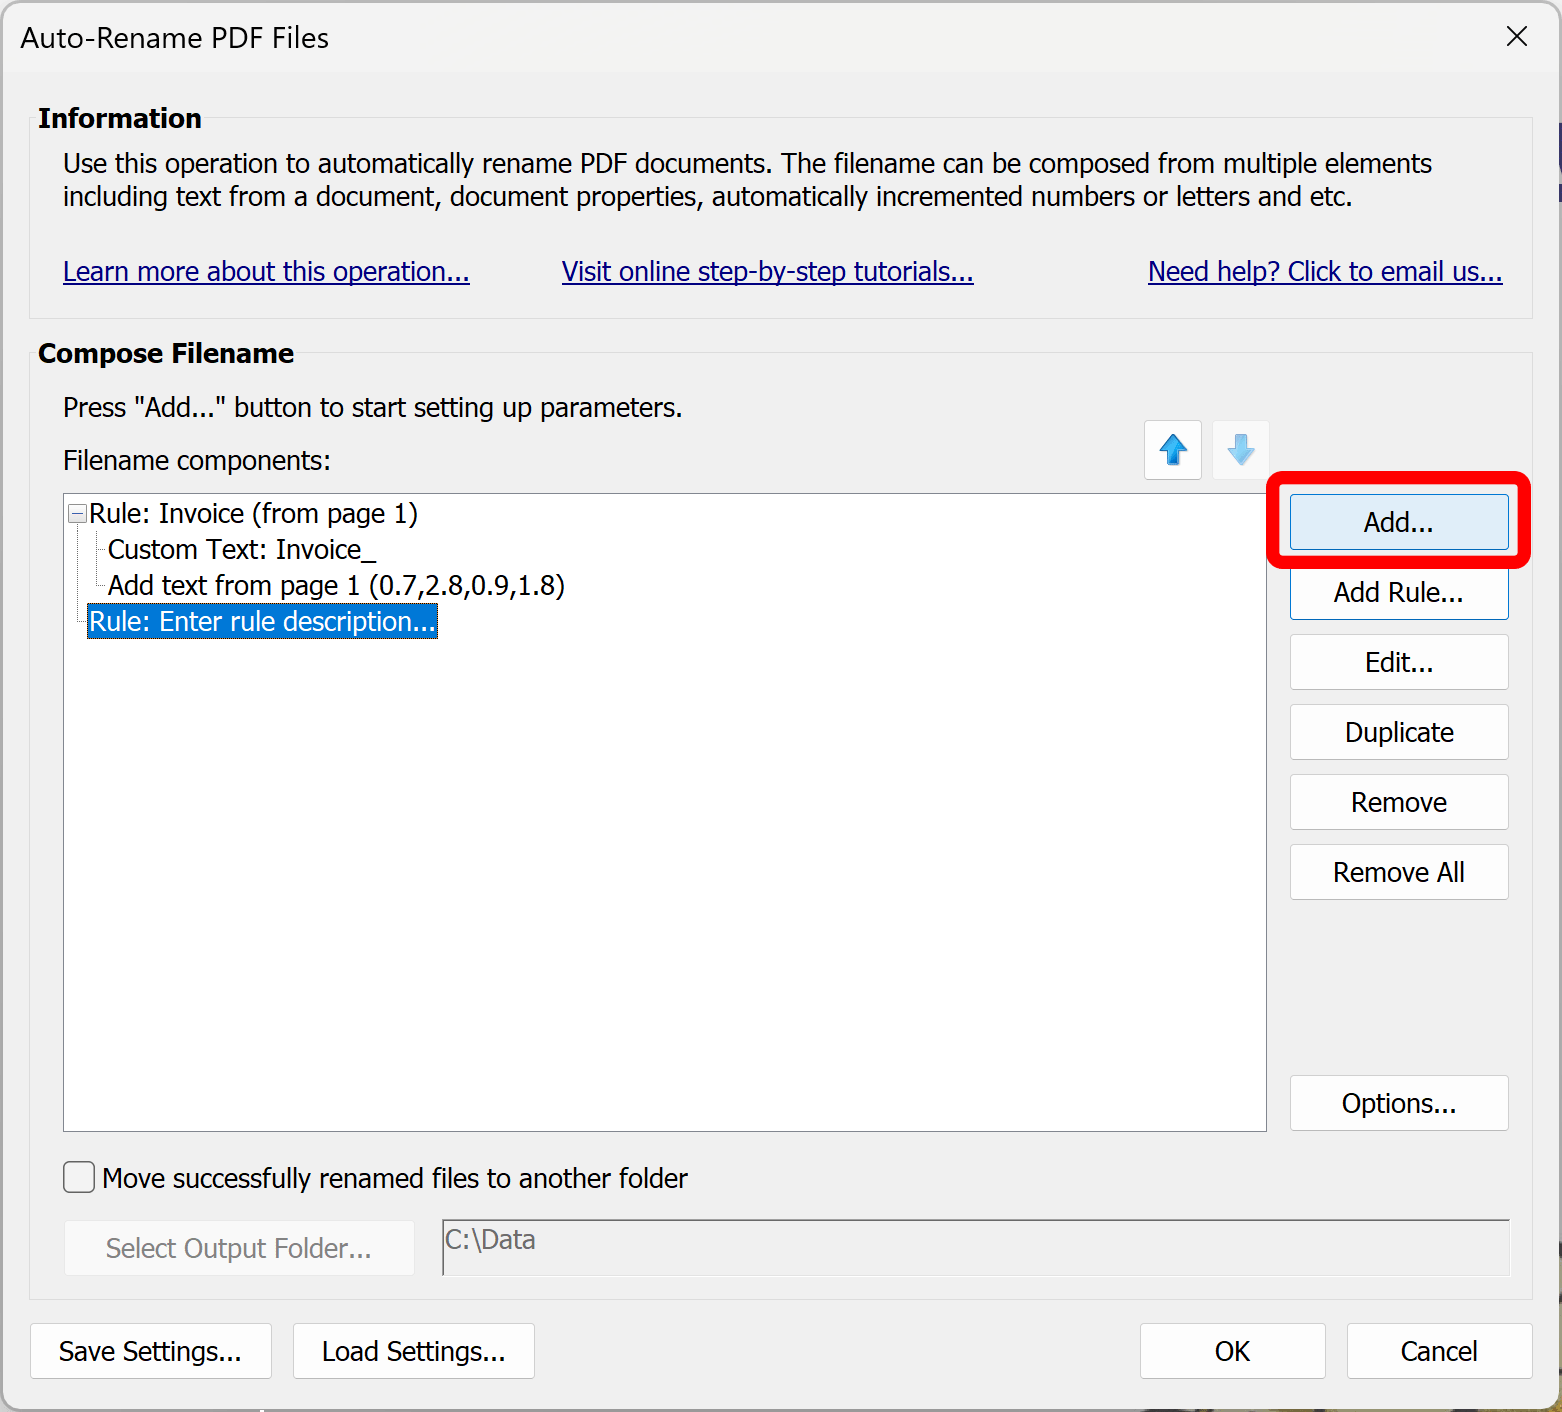
- Step 4 - Add File Naming Components
- Press "Add..." to begin defining a file renaming scheme for the "Invoice Rule".
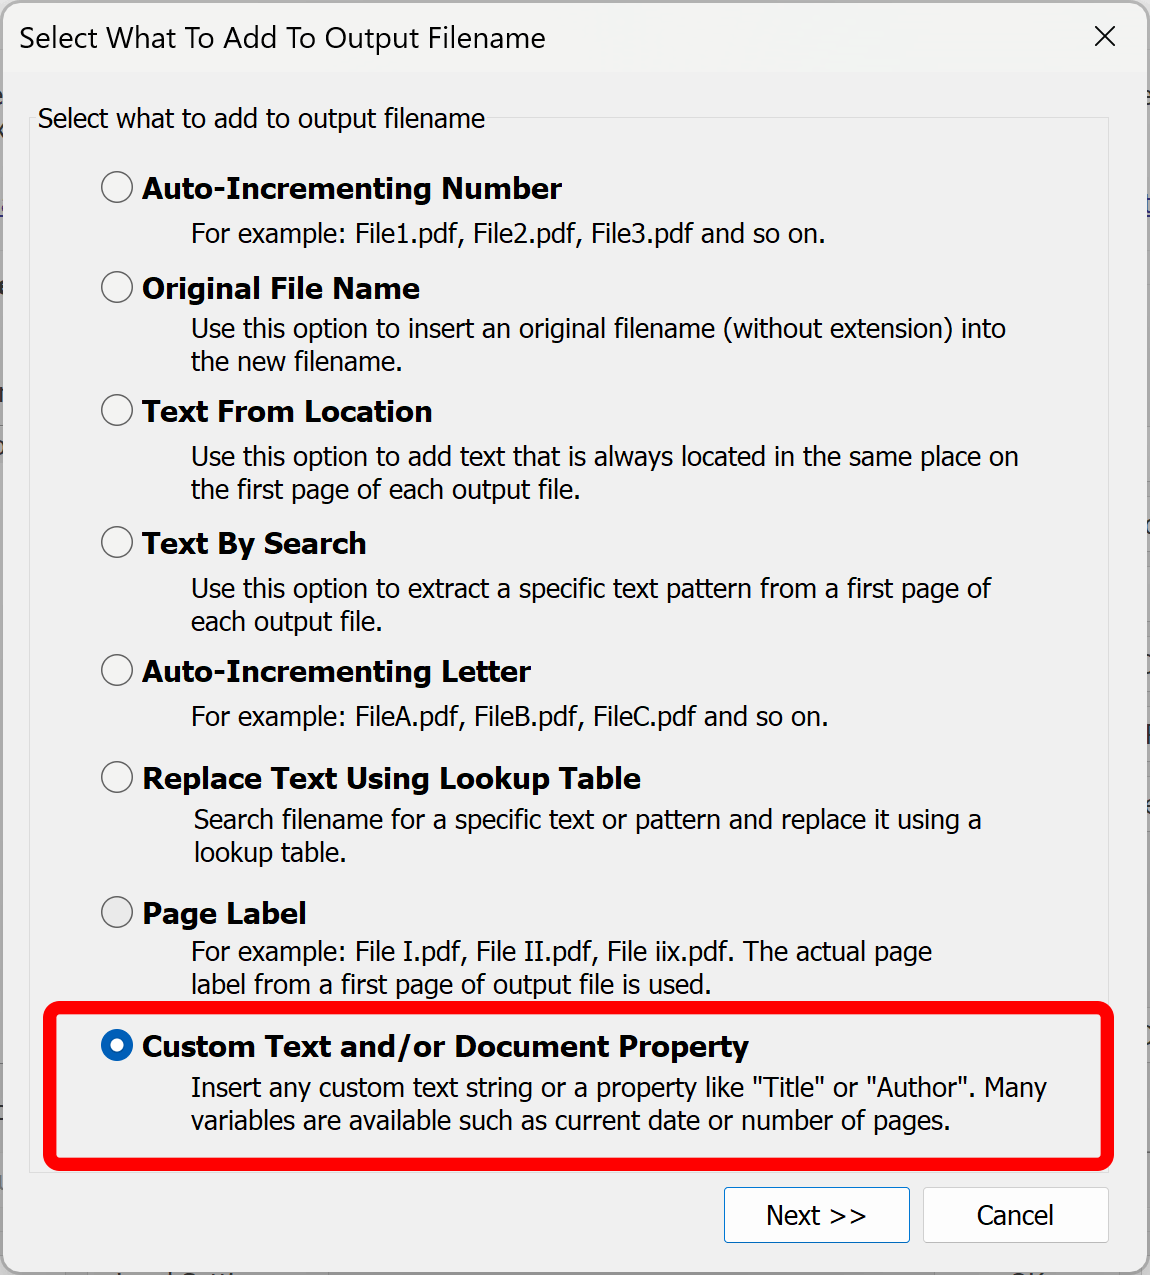
- Choose a method for adding a file name component. Here, we will demonstrate how to add custom text. Select the "Custom Text..." option and press "Next >>".
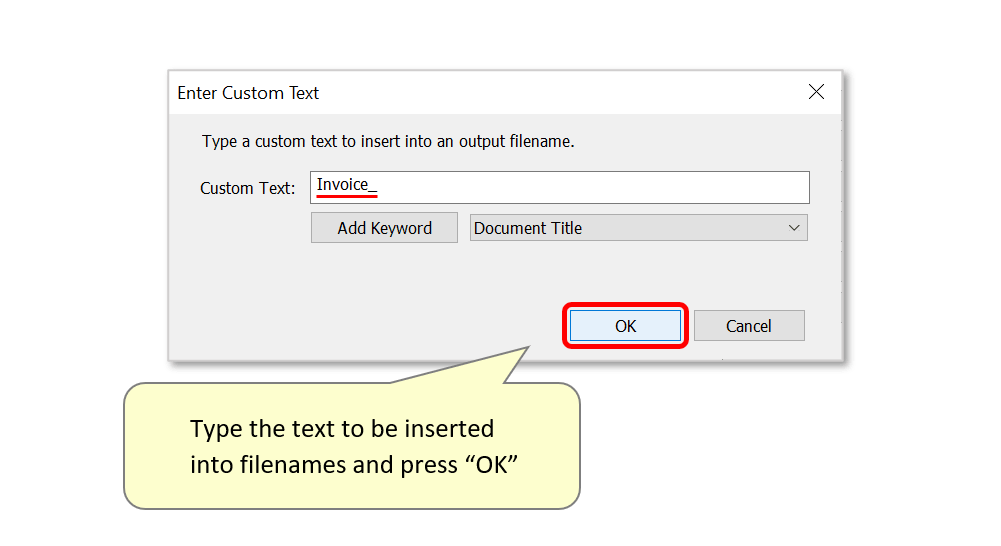
- Enter the custom text that you wish to add to file names when this renaming rule is used, and press "OK". Here, we will insert "Invoice_".
- Step 5 - Insert Text From a Specific Page Location into File Names
- Press "Add..." to add another file renaming component.
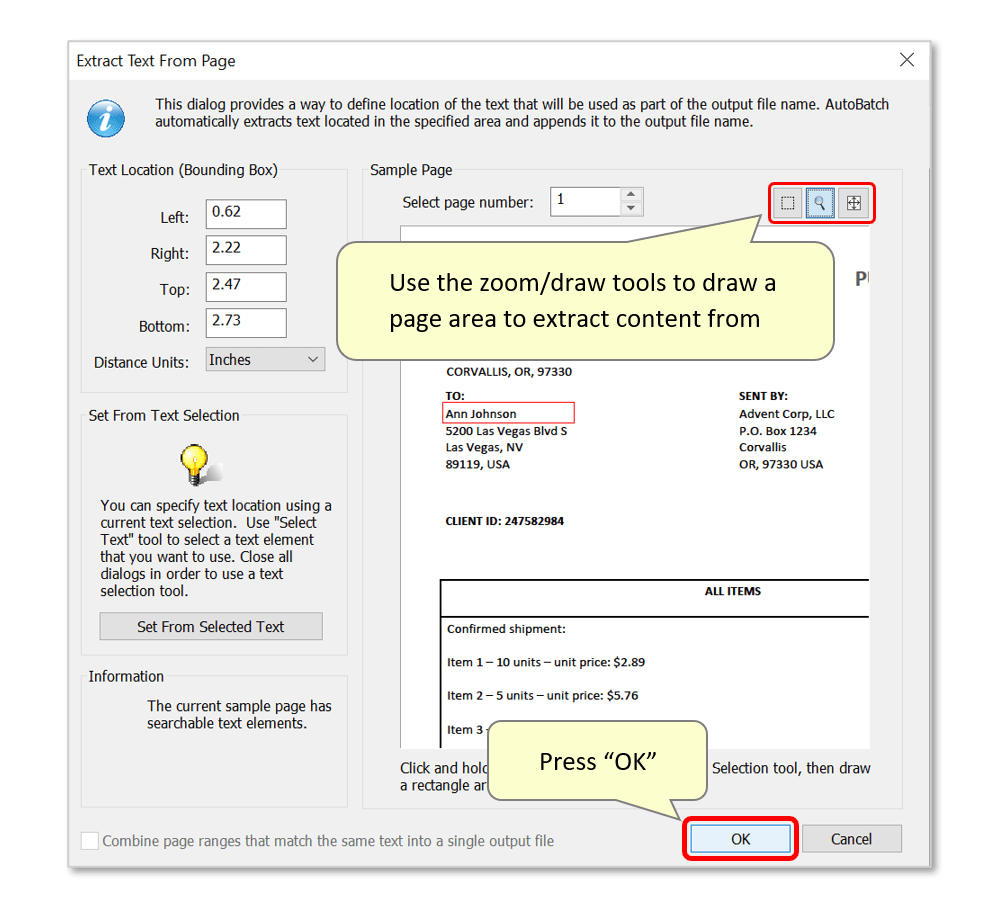
- Select the "Text From Location" option and press "Next >>".

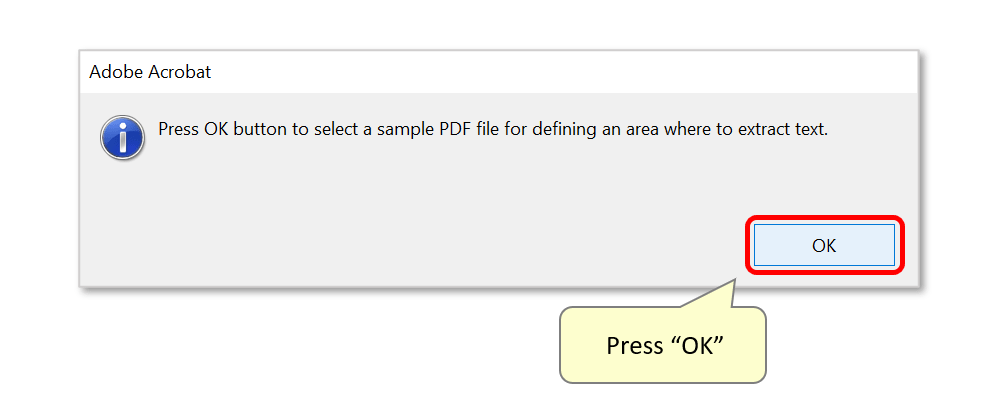
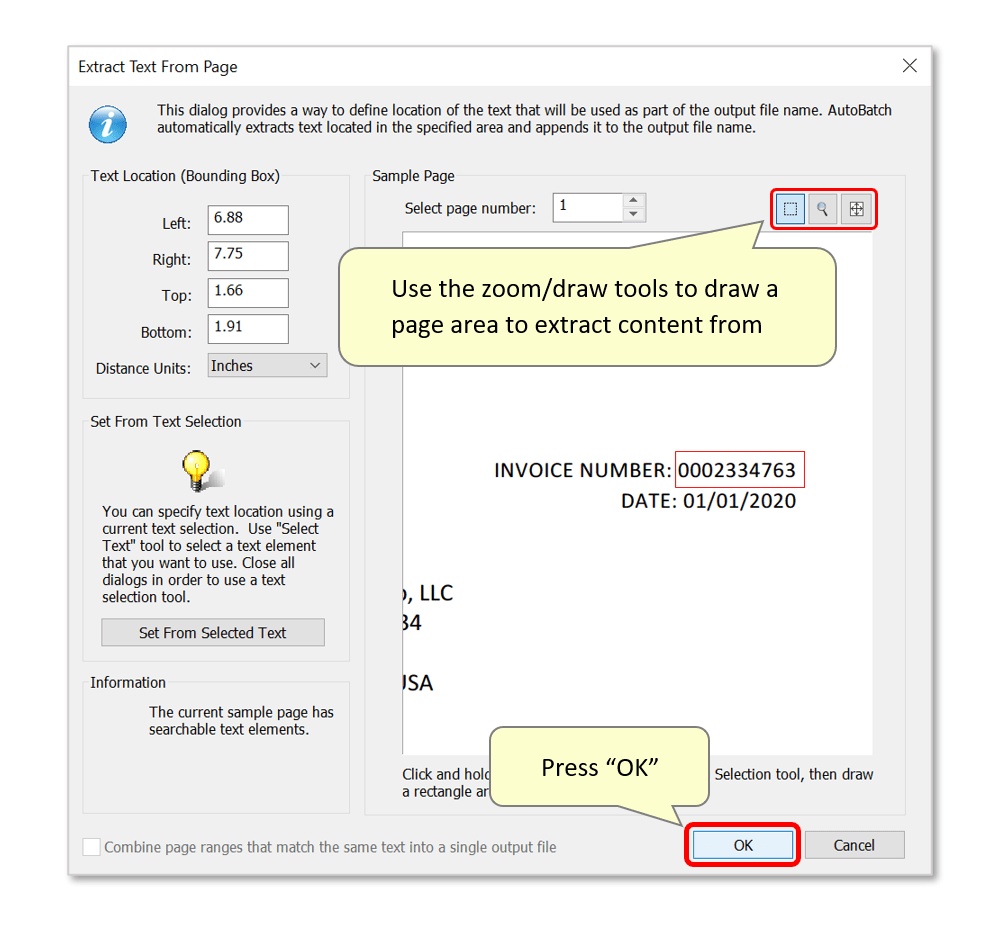
- You will be prompted to select a sample file to define the area text should be extracted from. Press "OK" to proceed.
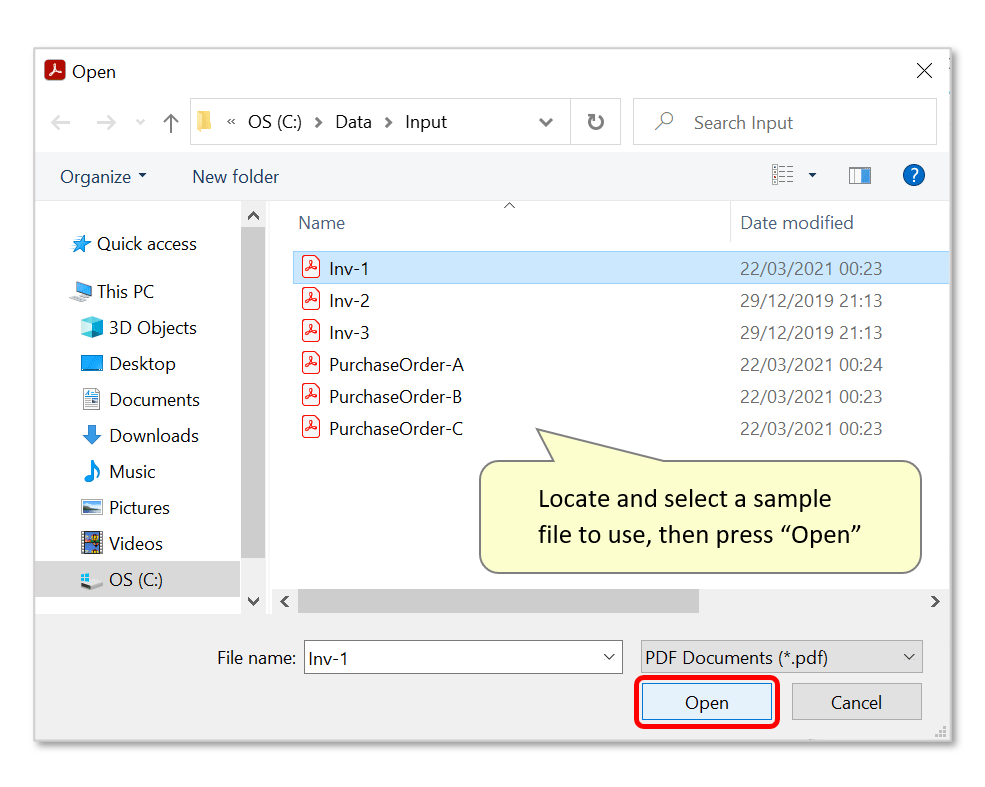
- Locate and select a suitable file to use, and press "Open".
- Use the zoom tool to expand a page area. Then use the drawing tool to draw a box around the desired text area by clicking and dragging the cursor.
- Press "OK" to proceed.
- We have now completed all file naming components for the first rule. Optionally, repeat steps 4-5 to add more components. Use blue arrow buttons to re-order components.
- Step 6 - Setup Second Renaming Rule (Purchase Orders)
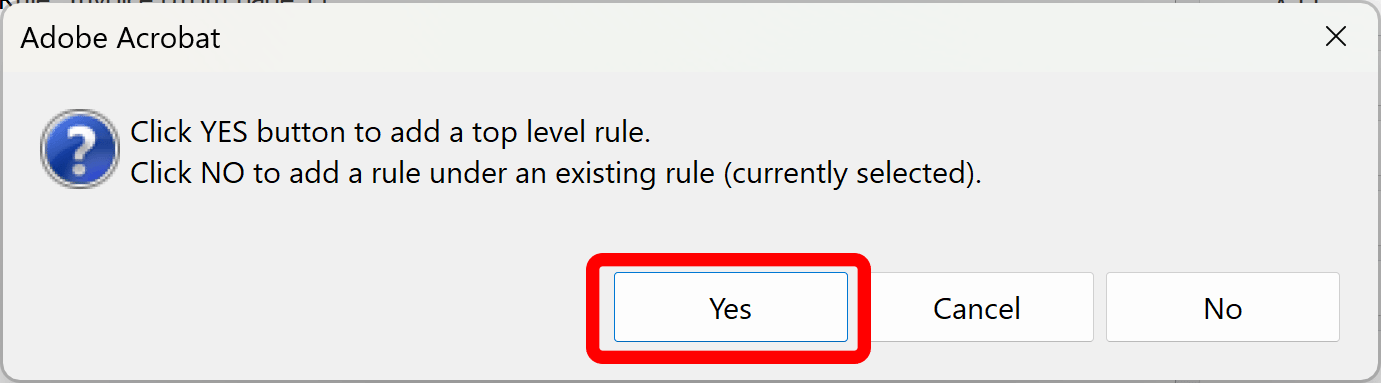
- Press “Add Rule…” to add renaming rule for "Purchase Order" documents.
- This renaming rule will be used only if purchase order is found in the input document.
- Press "OK" to proceed.
- Press Yes button to add this rule as a top-level rule. Rules can be added either at top level or below other rules to created nested rules. In our example, we want to add this new rule at the same level (top-level) as the first rule (Invoice).
- Step 7 - Add File Name Components
- Press "Add..." to configure the file name components to be used when renaming purchase orders.
- We will use the same method as steps 4 & 5 above to rename purchase orders with custom text ("PO_"), followed by text extracted from a specific page location. Here, we will extract customer names located within each purchase order in the output file names. Select a sample file to define the area text should be extracted from, then use the zoom/drawing tools to draw a box around where names are located.
- Press "OK" to proceed.
- A single renaming rule will be used when either "invoice" or "purchase order" is identified within an input document.

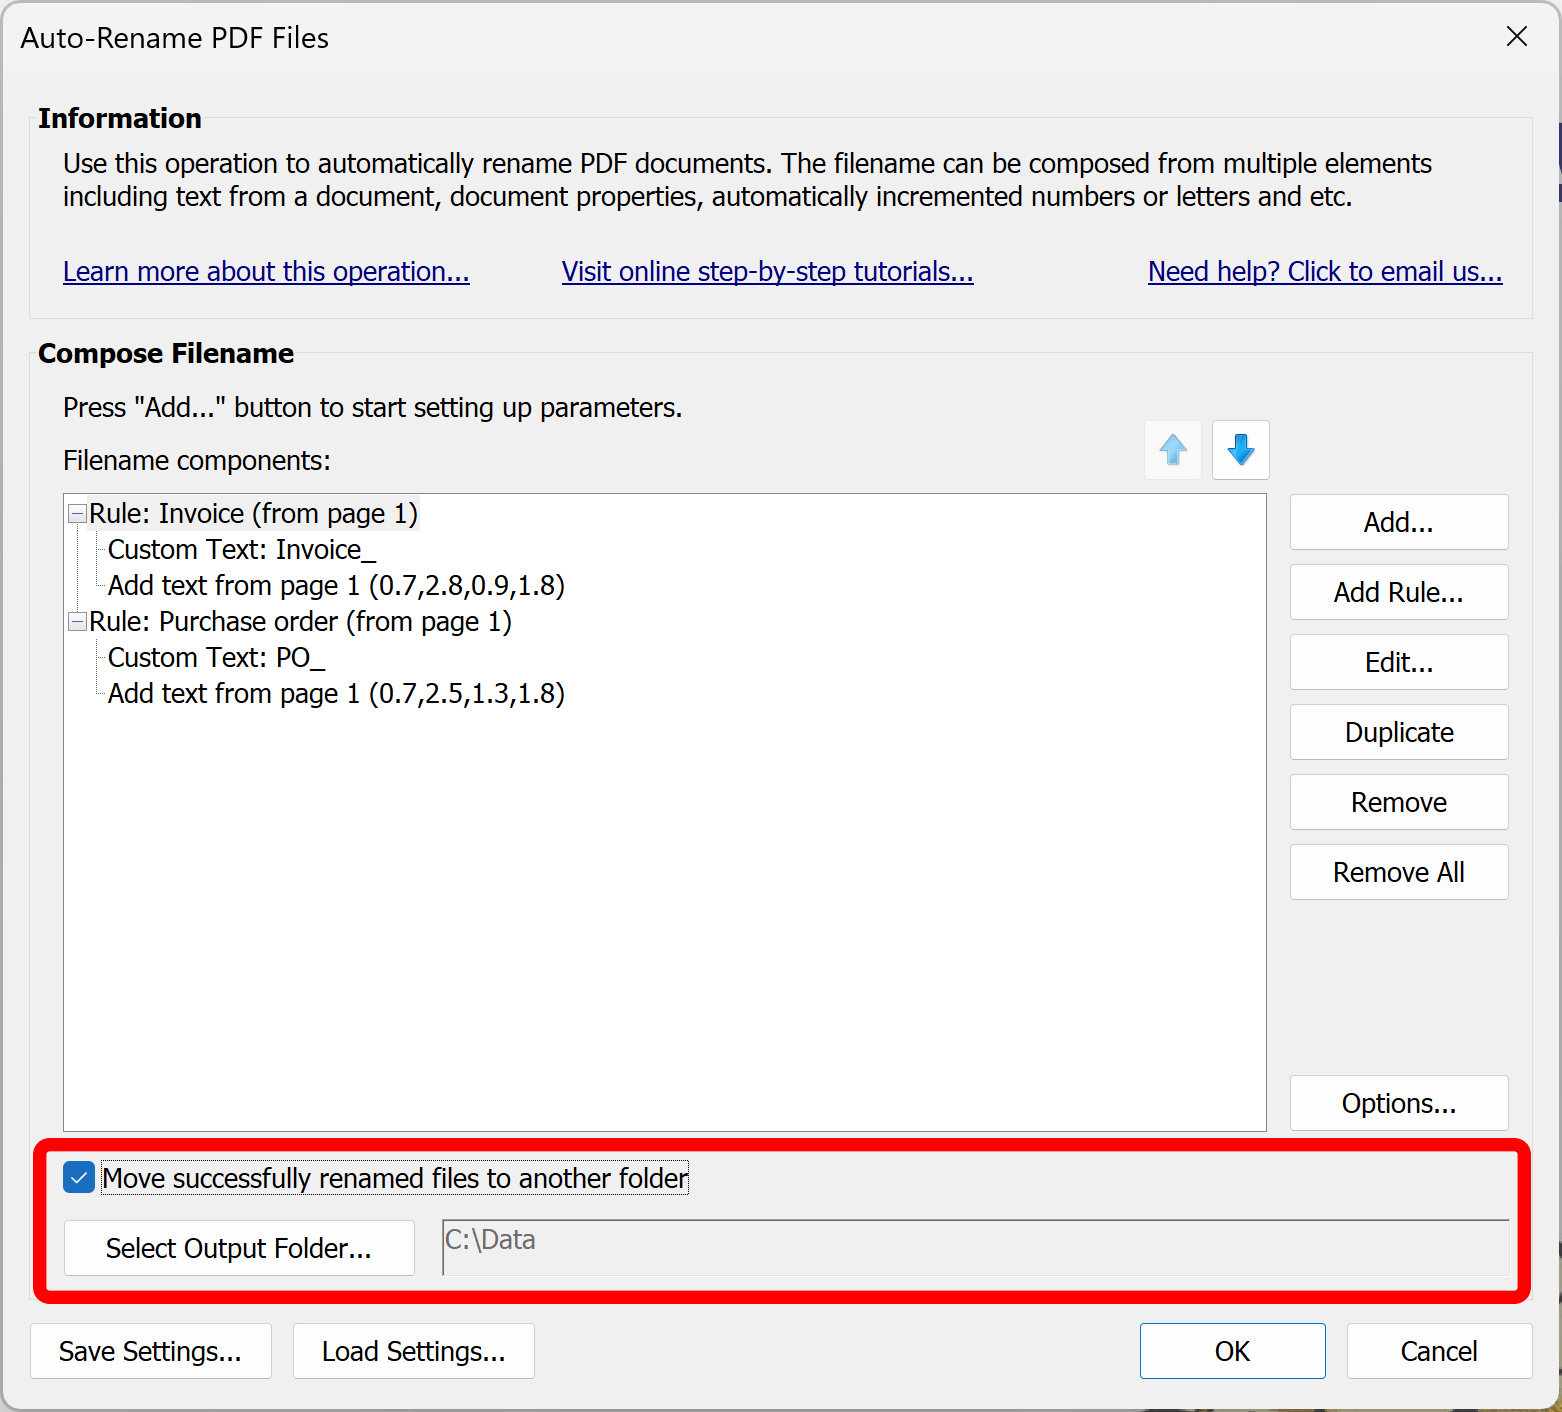
- Step 8 - Optional: Move Renamed Files
- Optionally, move renamed files in a separate location (instead of replacing existing file names) by checking the "Move successfully renamed files to another folder" option. Press "Select Output Folder..." button to choose an output folder for storing the renamed files.
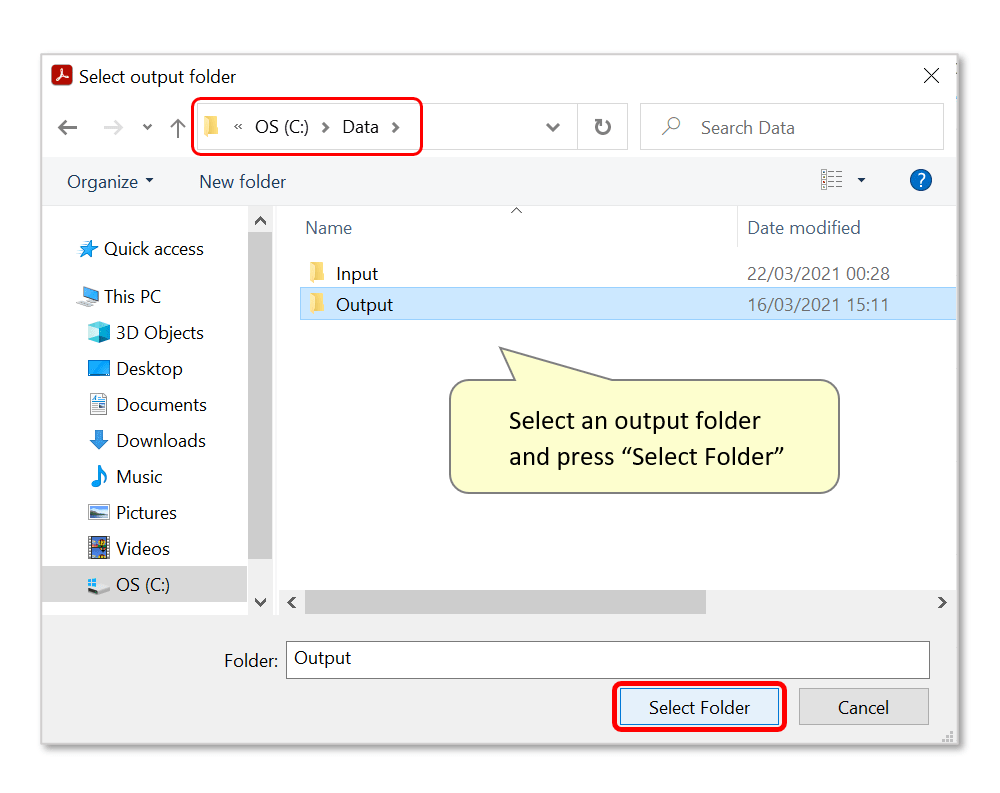
- Locate the desired folder, select it, and press "Select Folder".
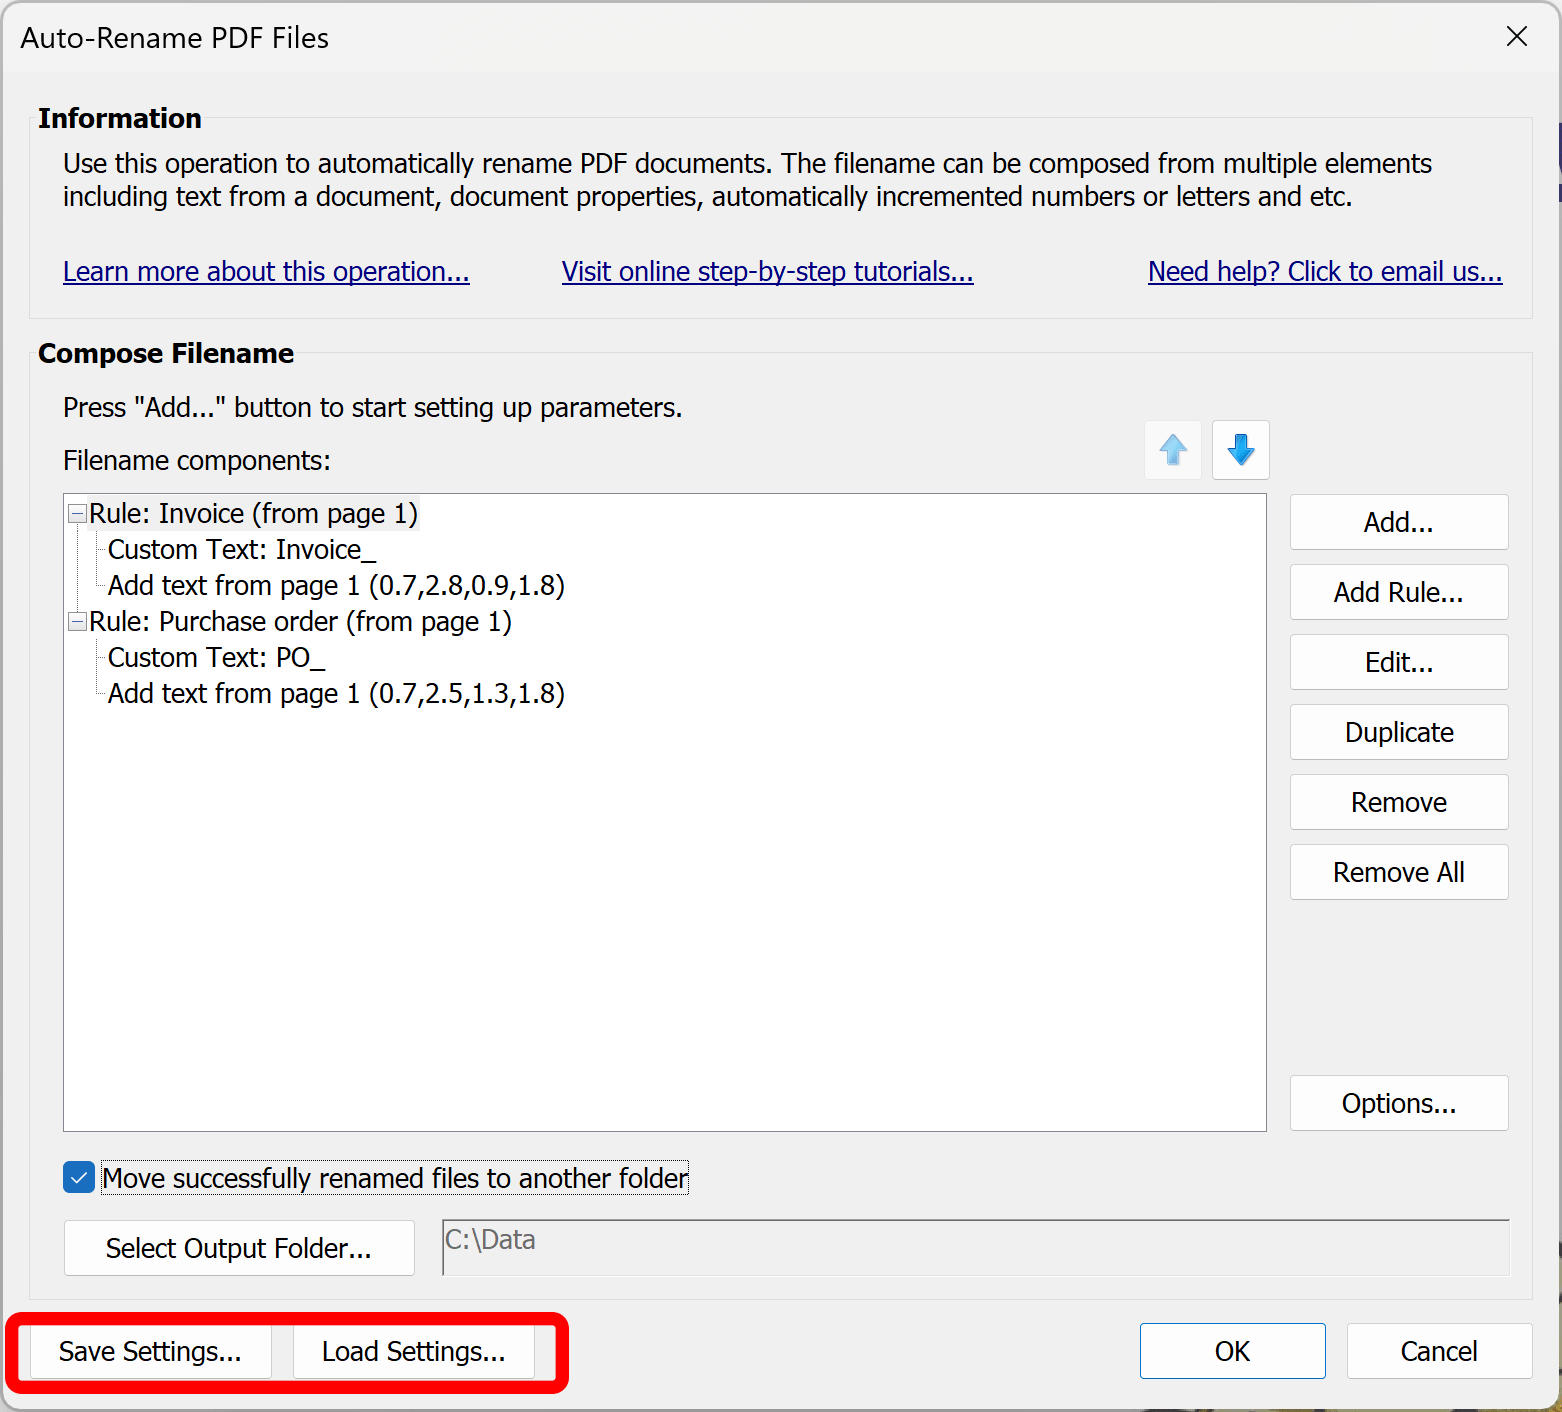
- Step 9 - Optional: Save Settings
- Optionally, press "Save Settings..." button to save this configuration as a *.docren settings file for future re-use. Settings can be loaded back via the "Load Settings..." button.
- Click "OK" to start renaming files.
- Step 10 - Add Files for Renaming
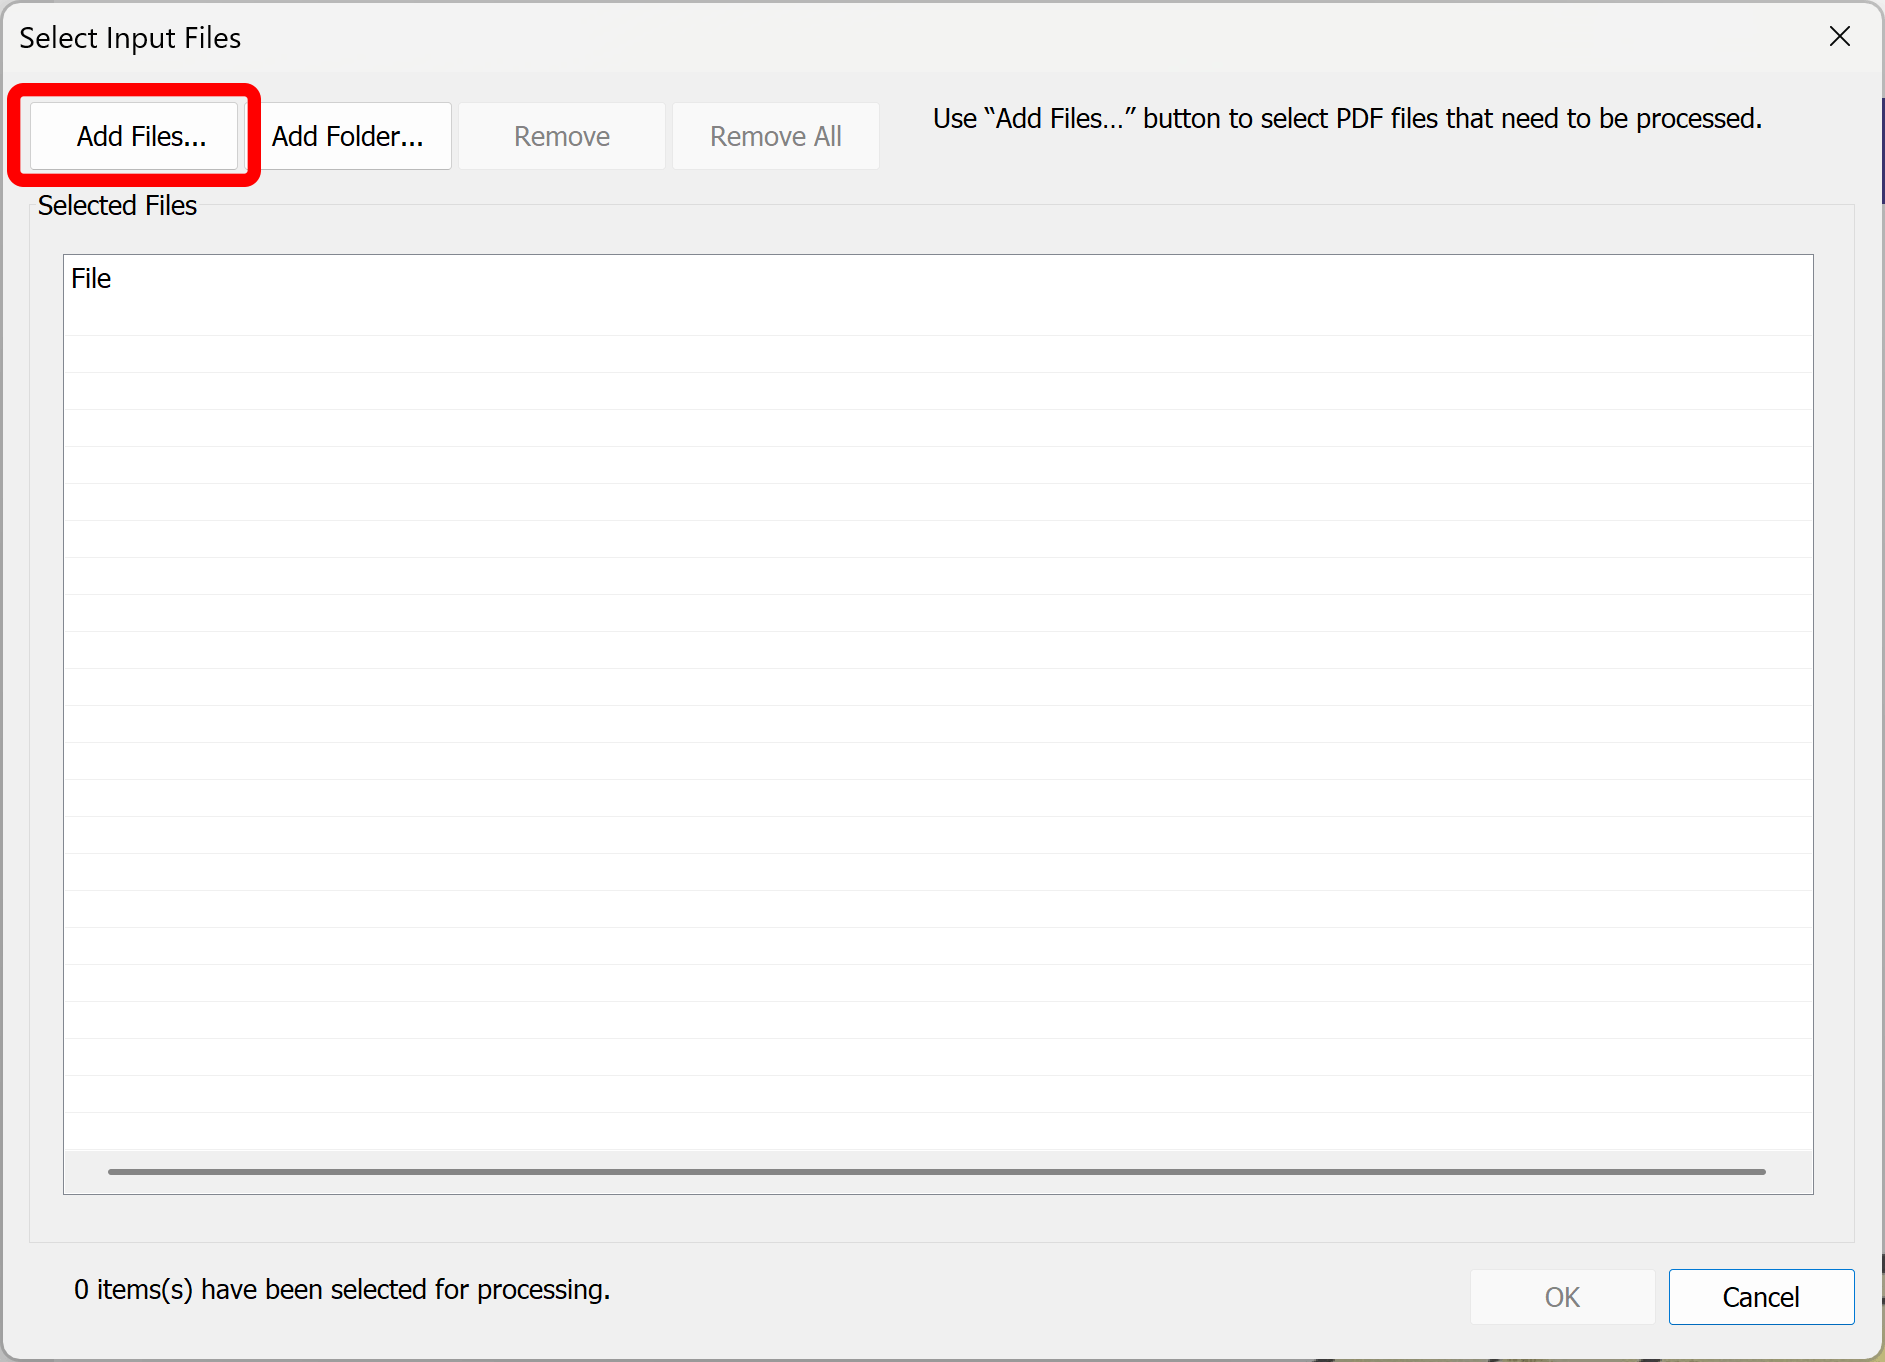
- Press “Add Files…” in the “Select Input Files” dialog to select files that need to be renamed. Consider also making backup copies of the input files before processing.
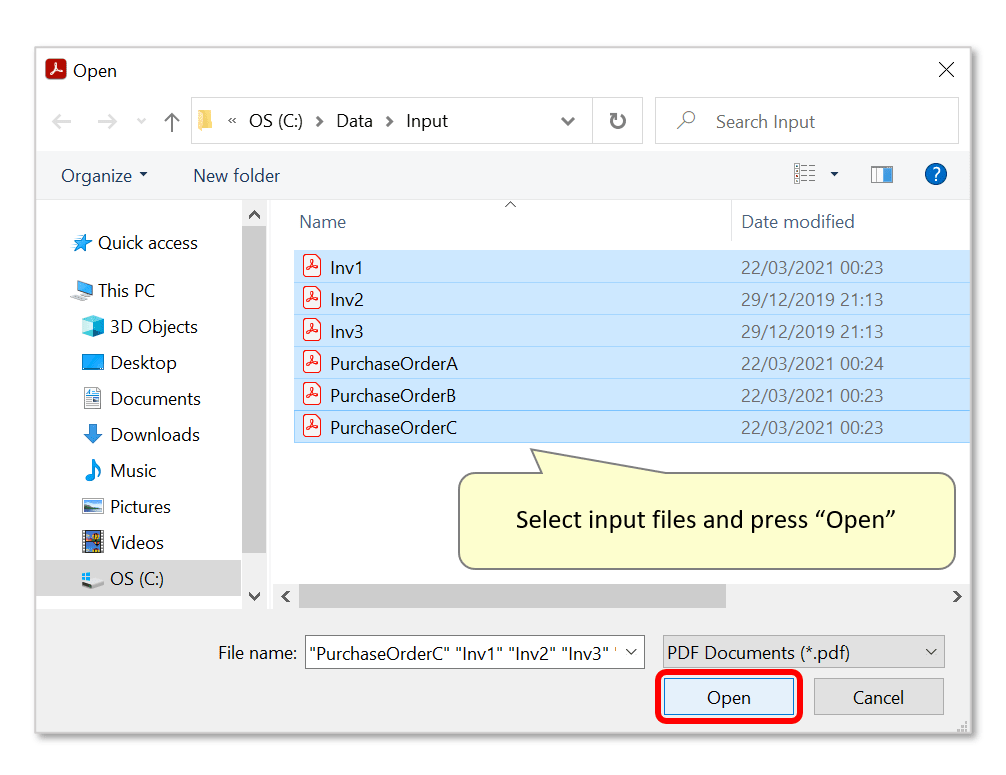
- Select PDF files that need to be renamed and click "Open" once done. Note that files from multiple folders can be added with repeated use of the "Add Files..." button.
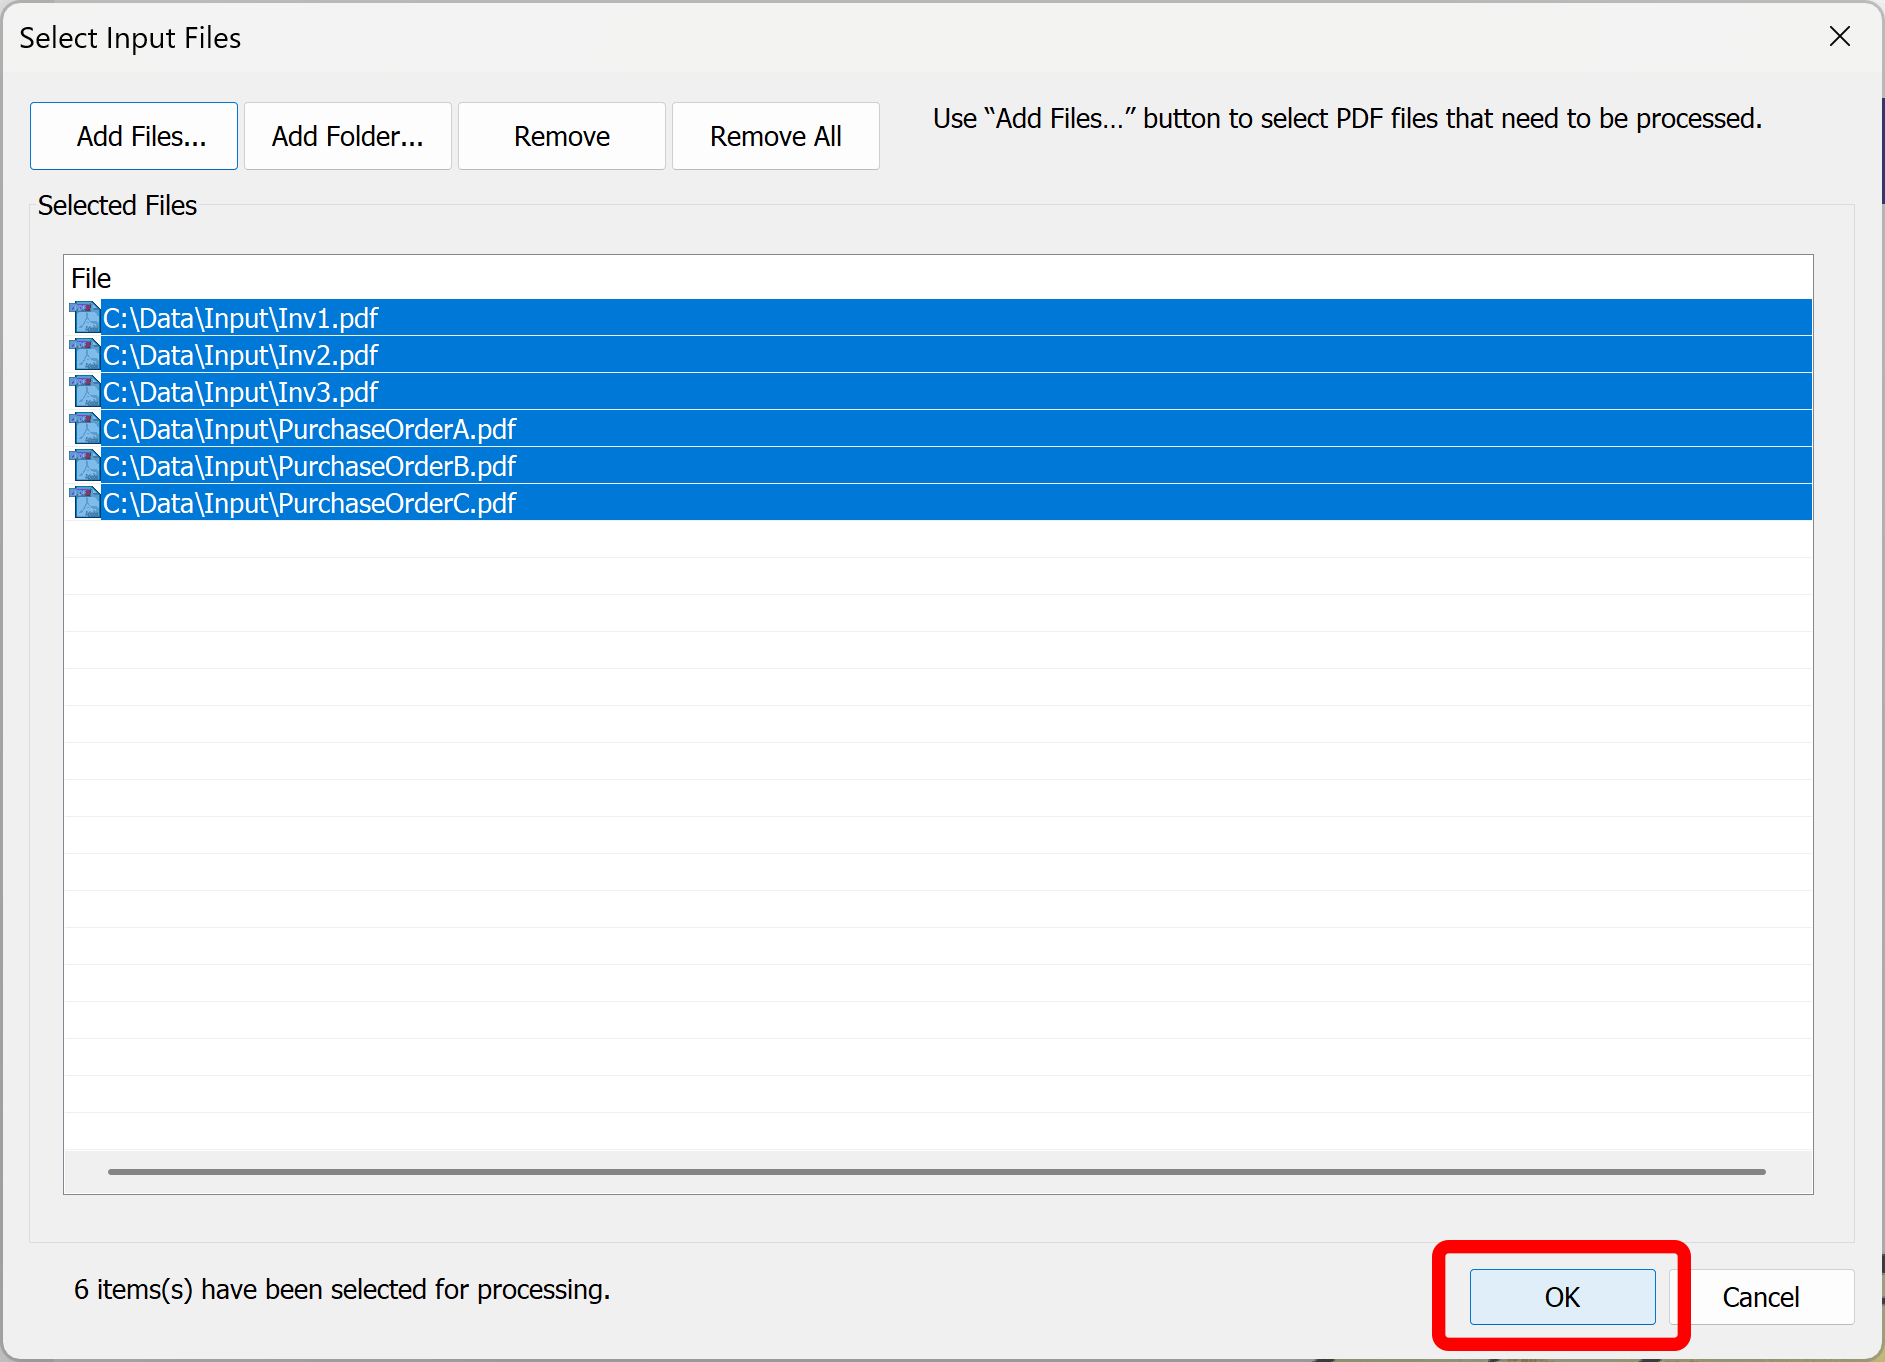
- Selected PDF files will be listed in the "Select Input Files" dialog. Press "OK" once all necessary files have been selected.
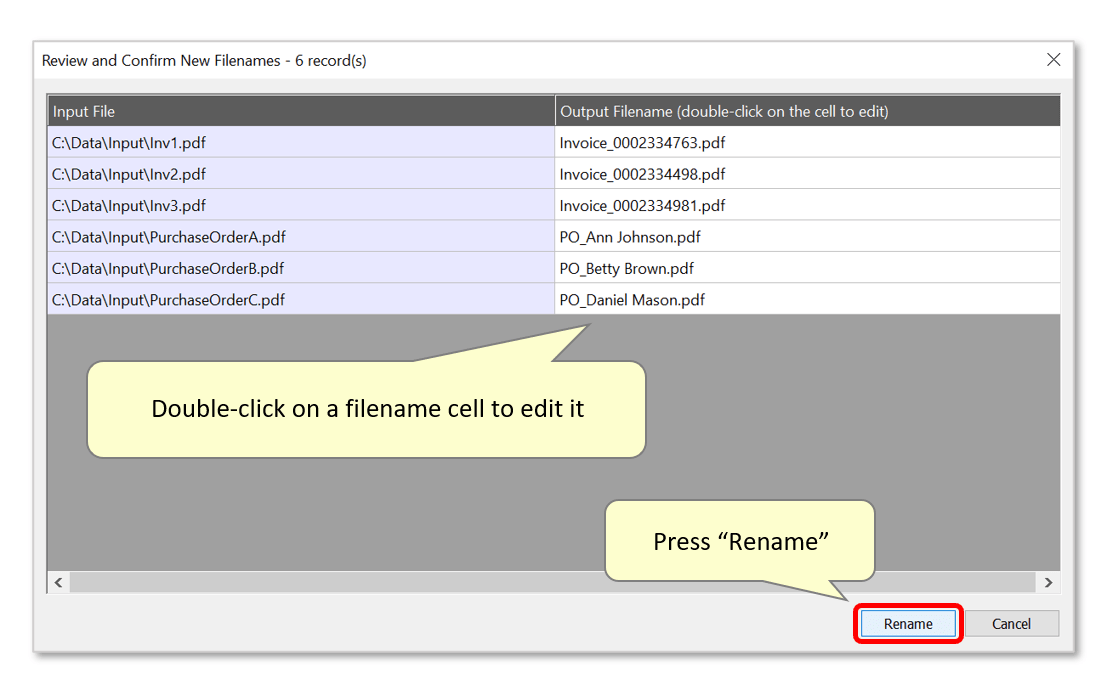
- Step 11 - Confirm New File Names
- The software will process input files without renaming them yet, and present "computed" file names in the "Review and Confirm New File Names" dialog. The documents have been searched for text matching the search rules, and the appropriate one has been used to create a new file name for each document type. Note that no files have actually been renamed at this step.
- Review the new file names and edit them manually (if necessary) by double-clicking on an output file name cell.
- Press “Rename” to actually start renaming files.
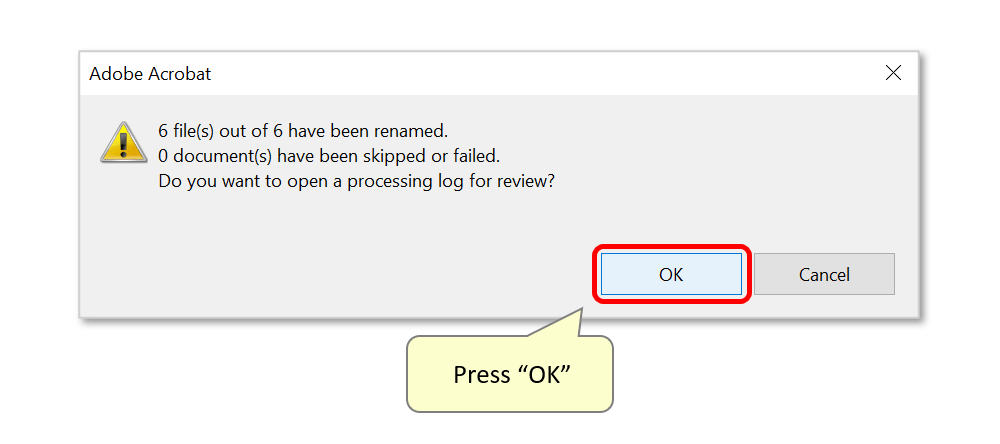
- Step 12 - Review the Processing Report
- Check the renaming statistics. Click “OK” to open a processing report.
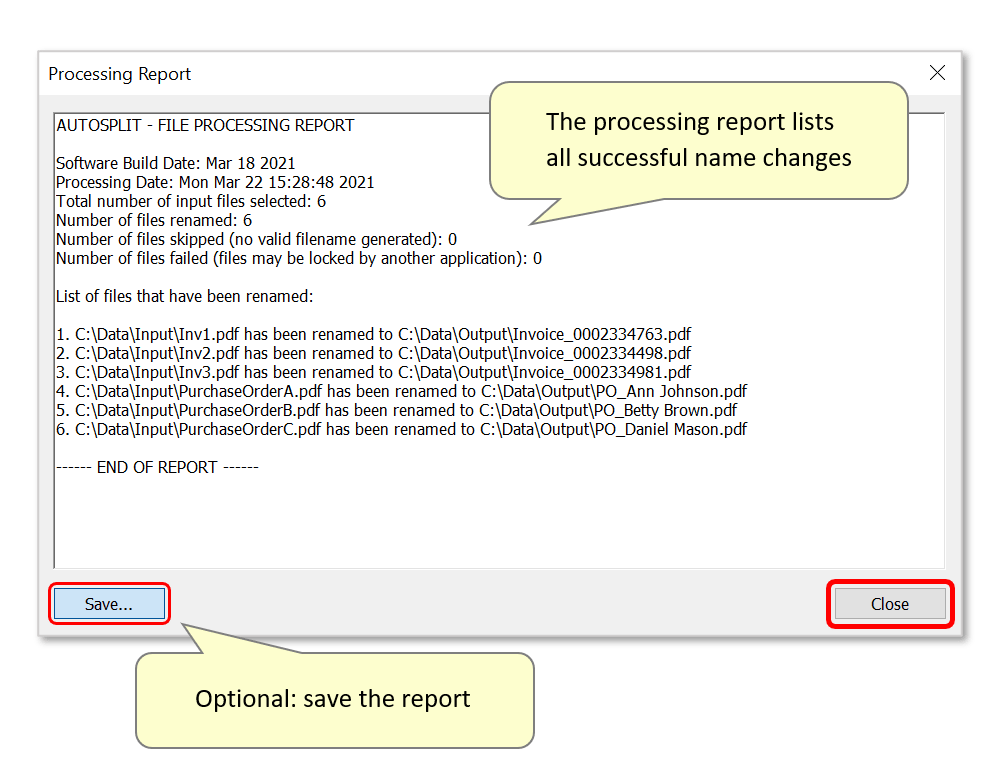
- The processing report shows detailed information on how many files have been renamed or failed, along with input/output file names for each document.
- Optionally, save this report by pressing the "Save..." button. Click "Close" to close it.
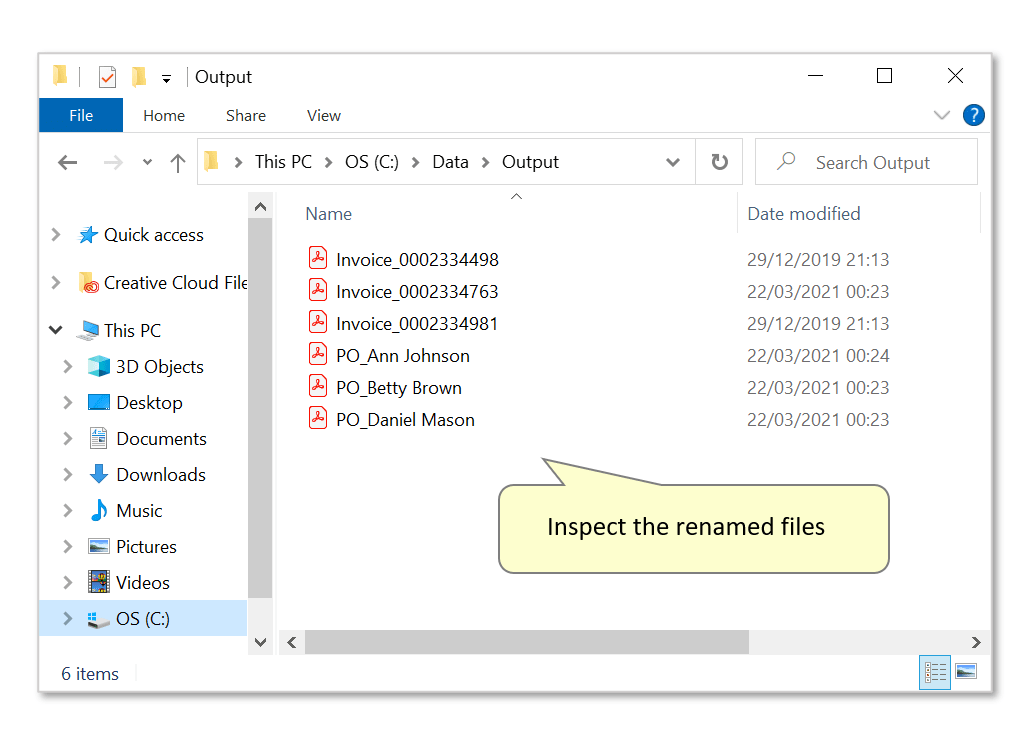
- Inspect the new file names. Invoices and purchase orders now follow an "Invoice_0123456789" or "PO_John Doe" format:
- You can find more AutoSplit tutorials here.