Using Watch Folder to Convert, Auto-Rename and Process PDF Files
AutoSplit plug-in for Adobe® Acrobat®
- Introduction
-
AutoSplit plug-in provides functionality to monitor a user-selected “watch” folder and process incoming files.
When new files arrive in the folder, the AutoSplit automatically processes them according to
the user-specified settings. By using a watched folder, you don’t have to manually convert, rename,
or process each file. It streamlines document processing, especially when dealing with large
volumes of files.
This functionality can be used to perform one or more of the following tasks: -
- Convert non-PDF files into PDF file format
- Auto-Rename PDF files based on document's content or metadata
- Reduce File Size
- Enhance Scanned Pages and Recognize Text
- Perform custom processing by running Acrobat JavaScript code
- Set document's metadata, insert cover pages, add watermarks, etc.
- Digitally sign documents (not yet available, upcoming version 6.8)
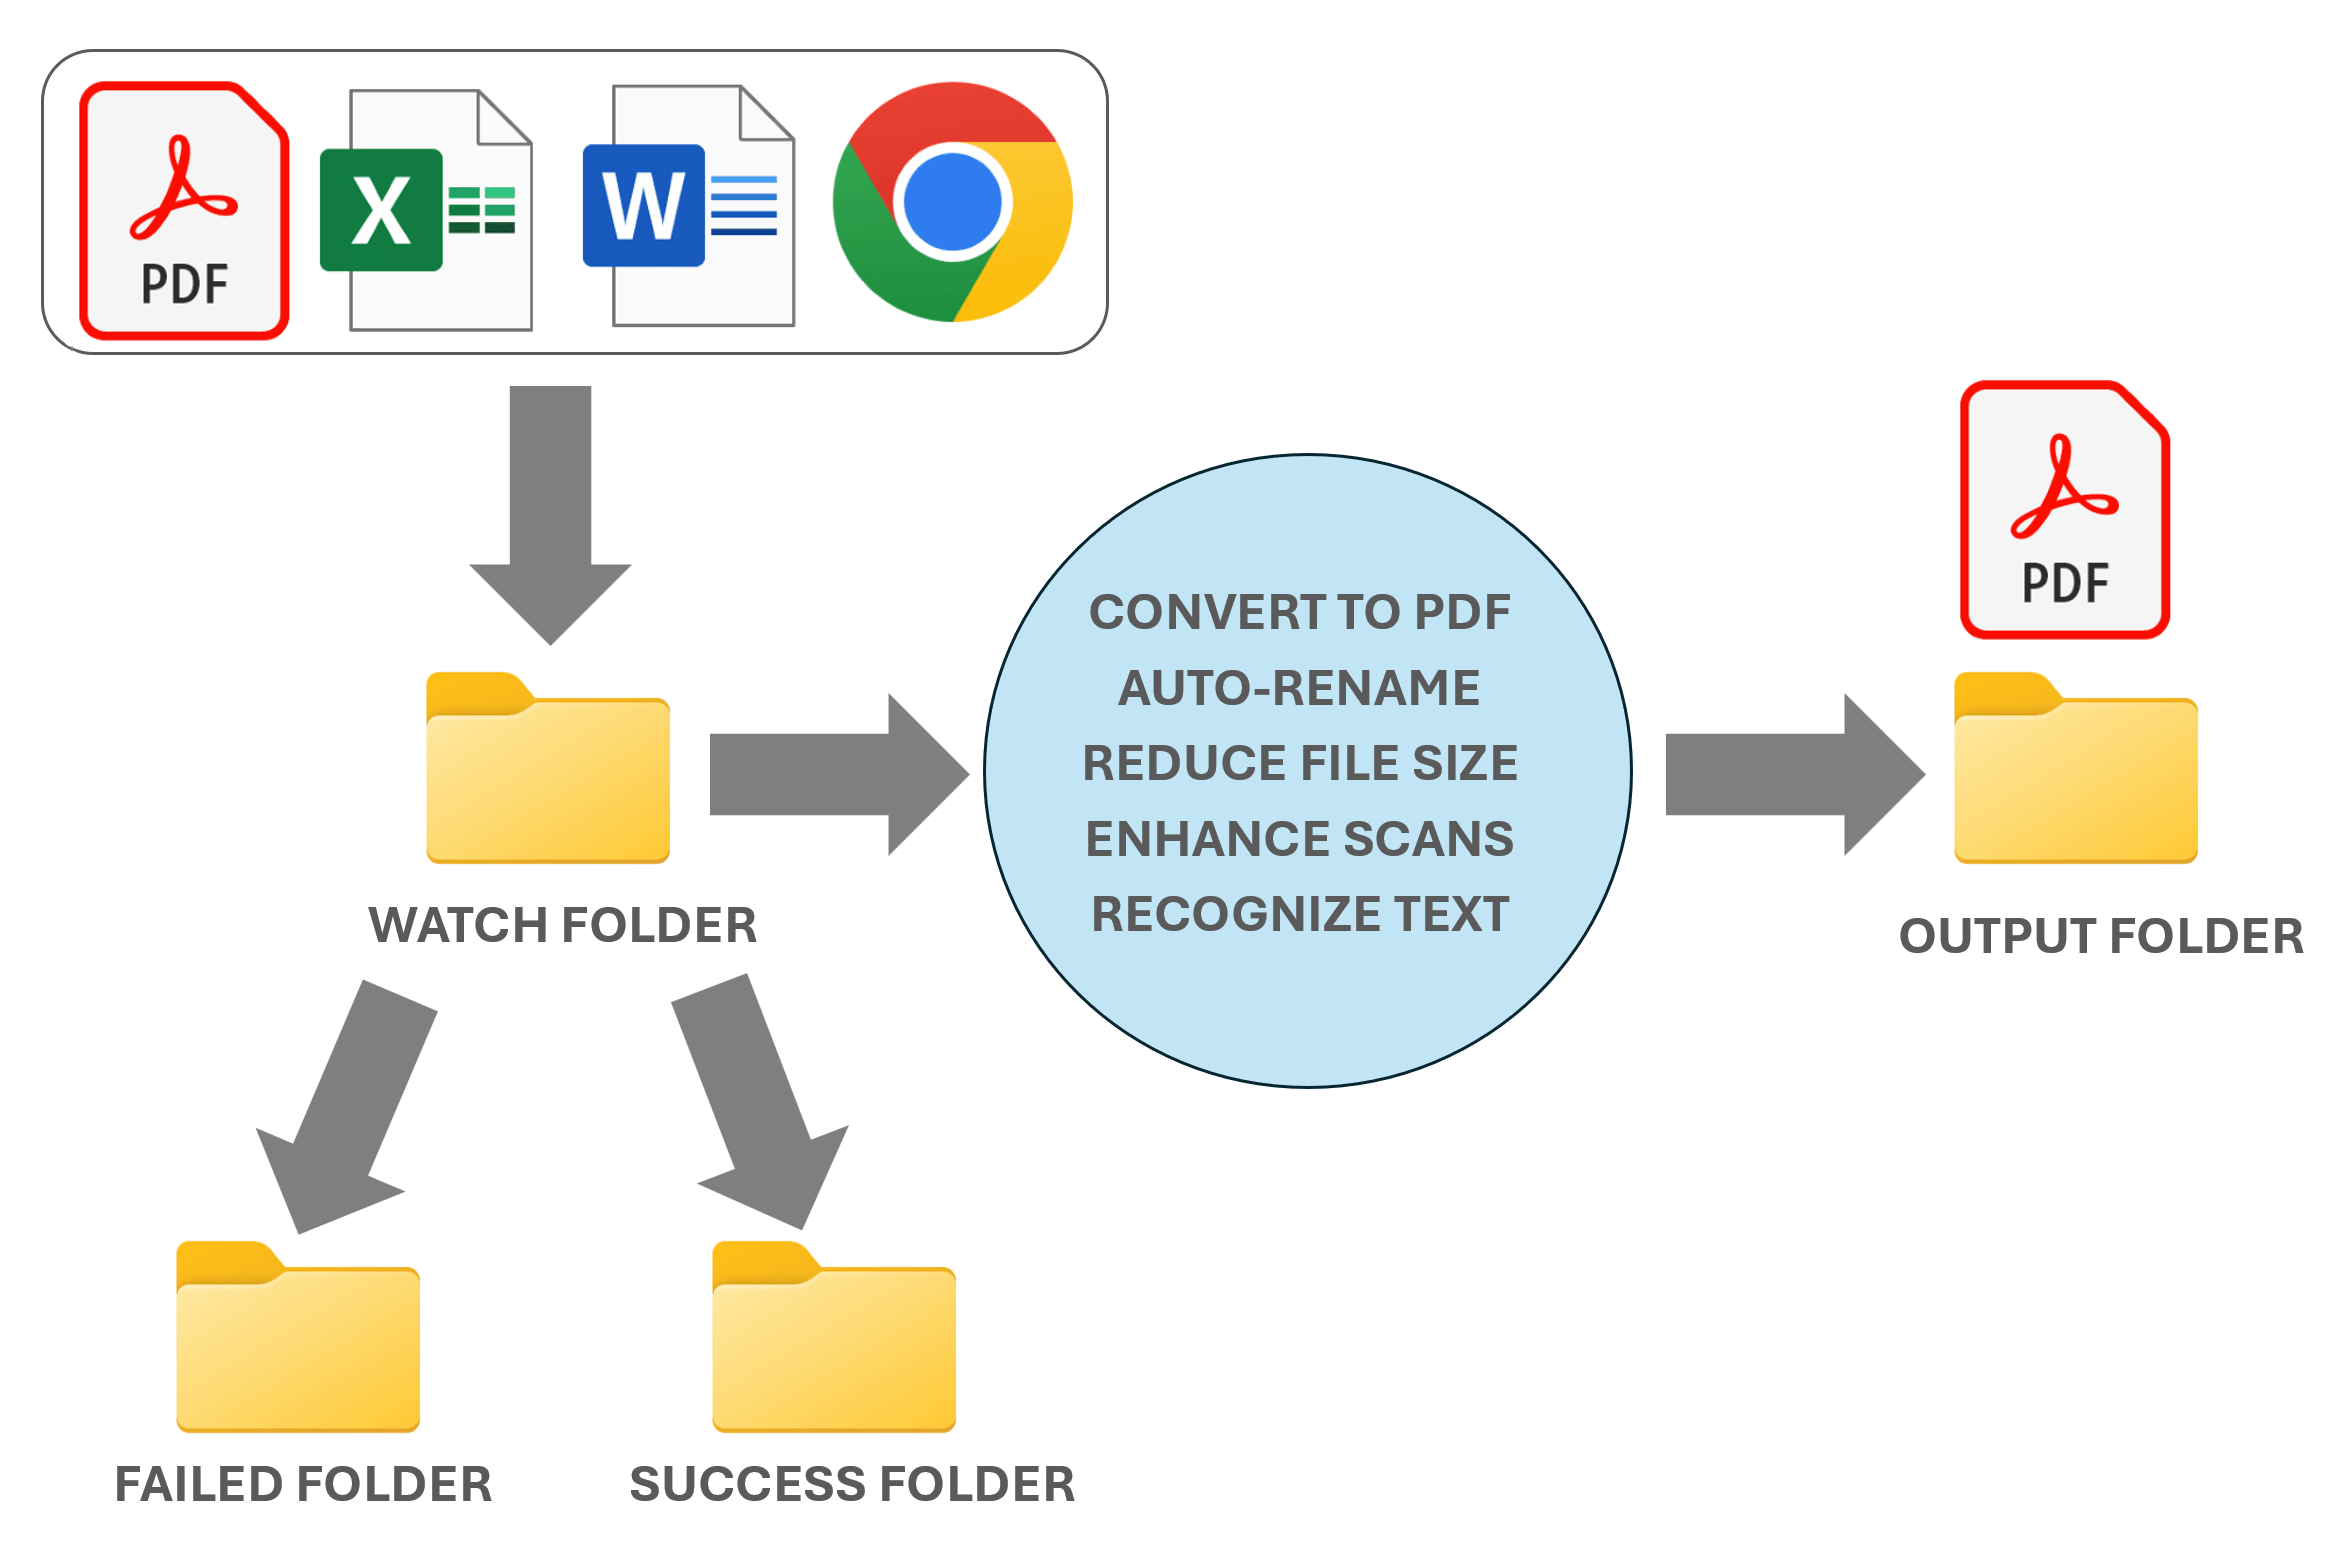
- The following flow chart illustrates the processing workflow. The watch folder is periodically checked for new files. Both PDF and non-PDF files can be processed. Each file placed in the folder is processed according to the user-specified settings. After the input file is processed, the resulting PDF file is placed into an “output” folder. The input file itself is moved to the “success” folder (if processing was successful) or to the “failed” folder (if processing did not complete successfully). The errors are recorded in the log file using plain text format.
-
Step-by-Step Tutorial
- Setup Processing Folders
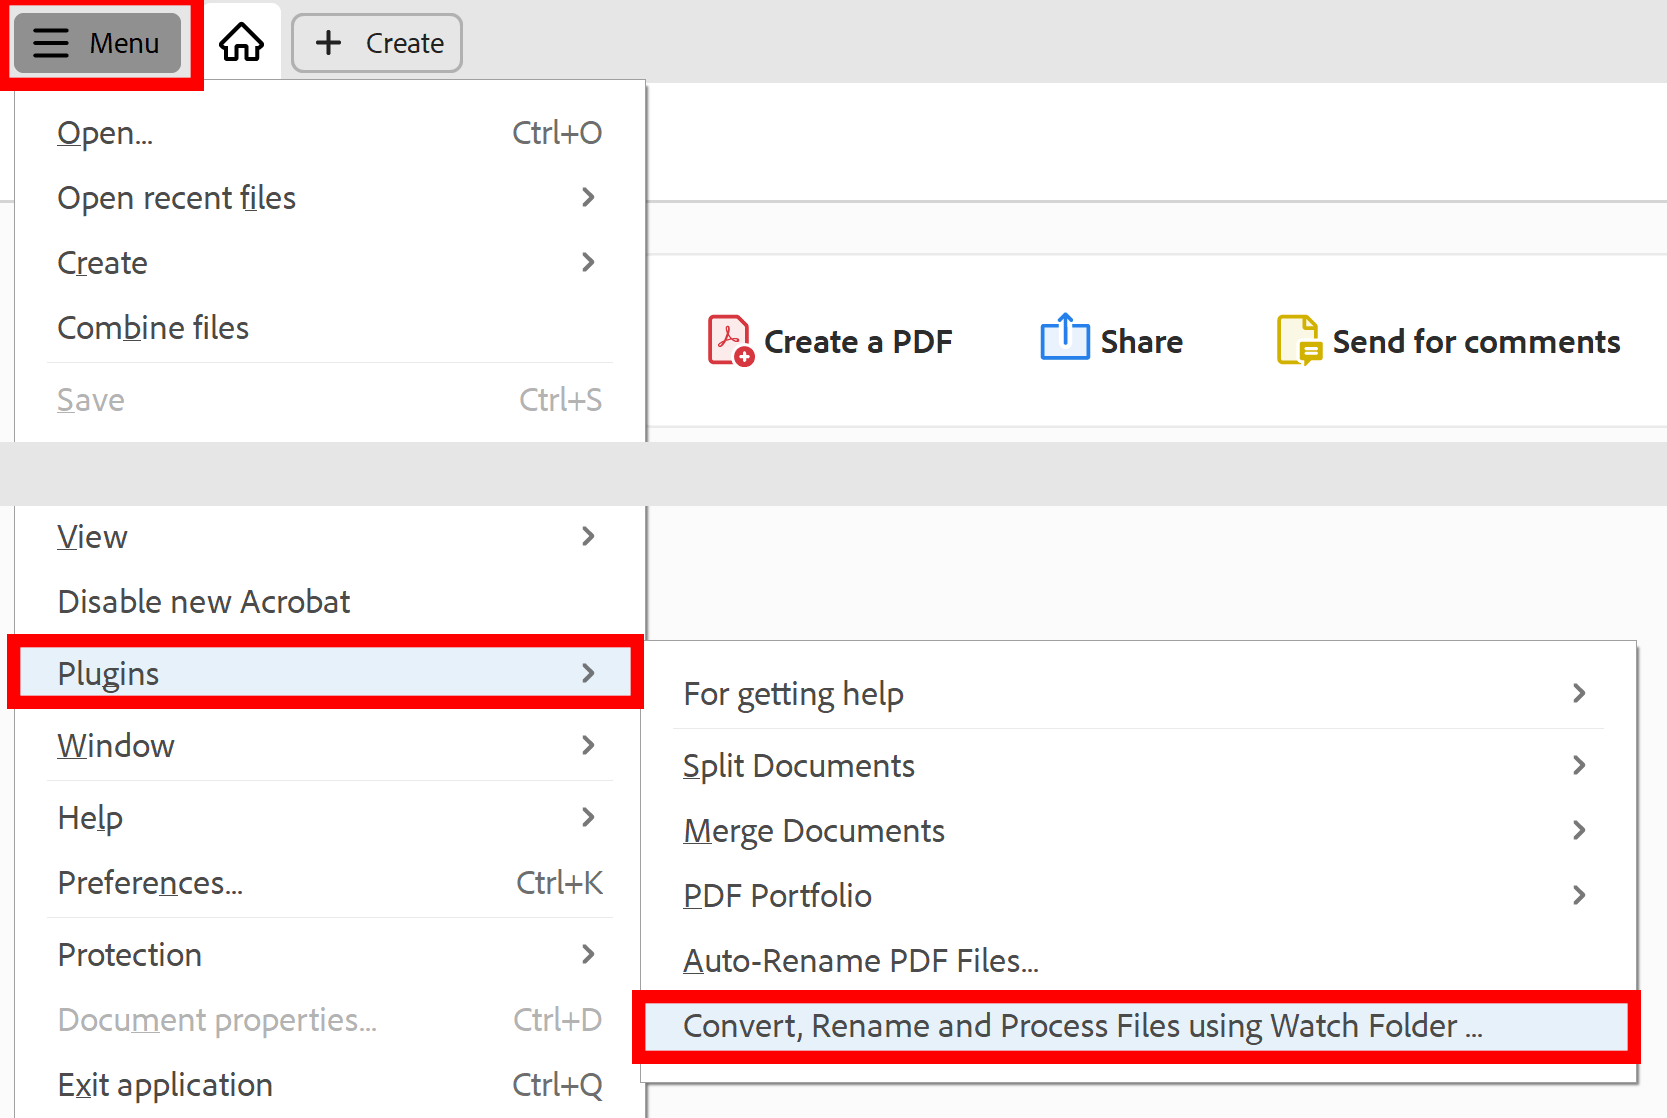
- Select Plugins > Convert, Rename and Process Files using Watch Folder... from the menu. See the below screenshot where to find it if you are using a new Adobe Acrobat interface:
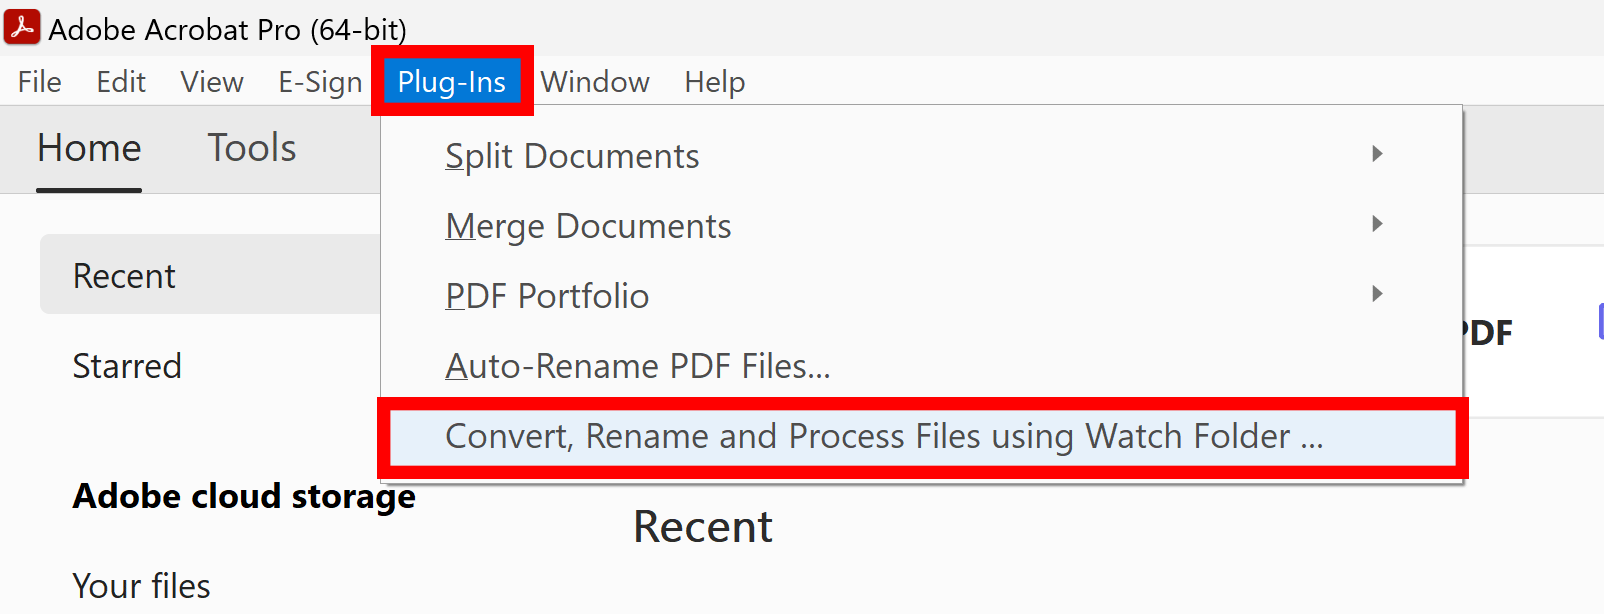
- If you are using a "classic" Acrobat interface, then you can access this menu via Plug-ins menu on the top toolbar:
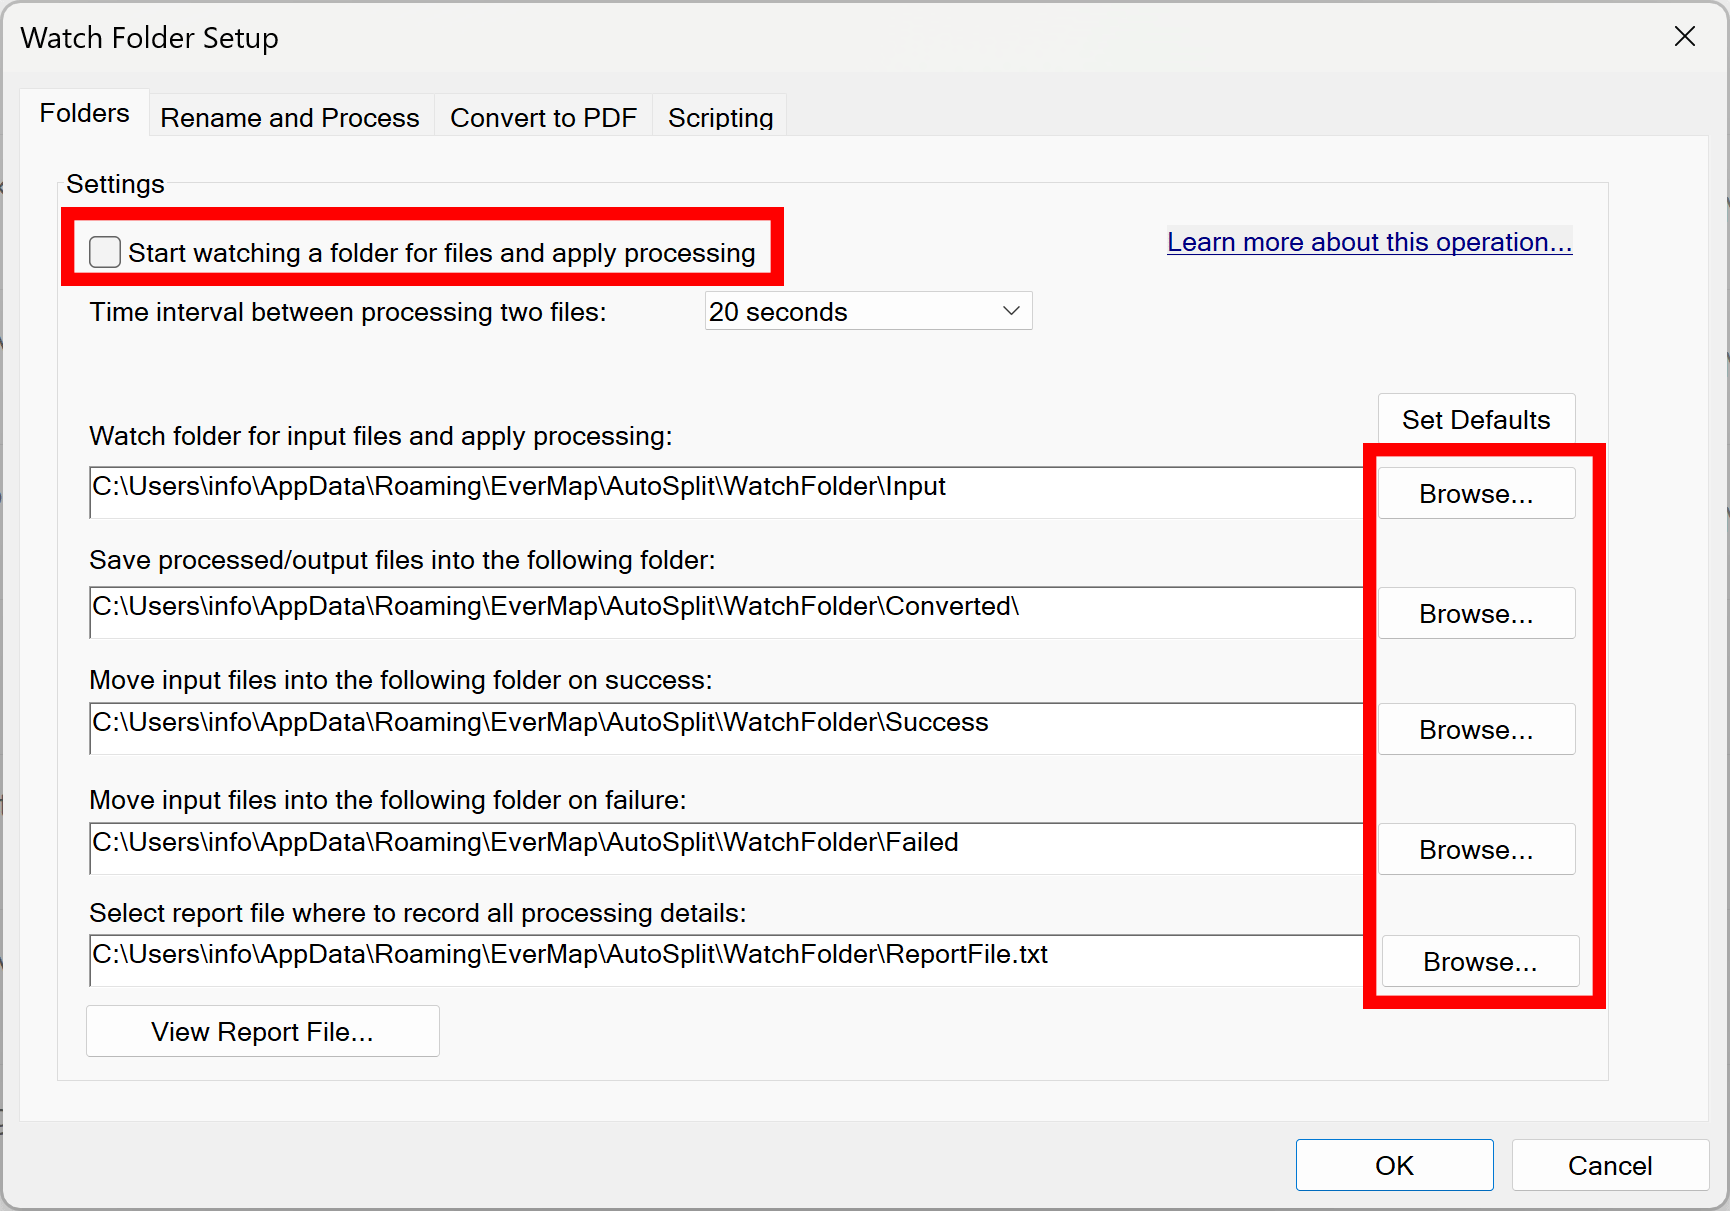
- The first step is to select processing folders on your system. AutoSplit will automatically pre-fill these folders with default locations, but in most cases, you would probably need to choose different folders that are more suitable for your particular project.
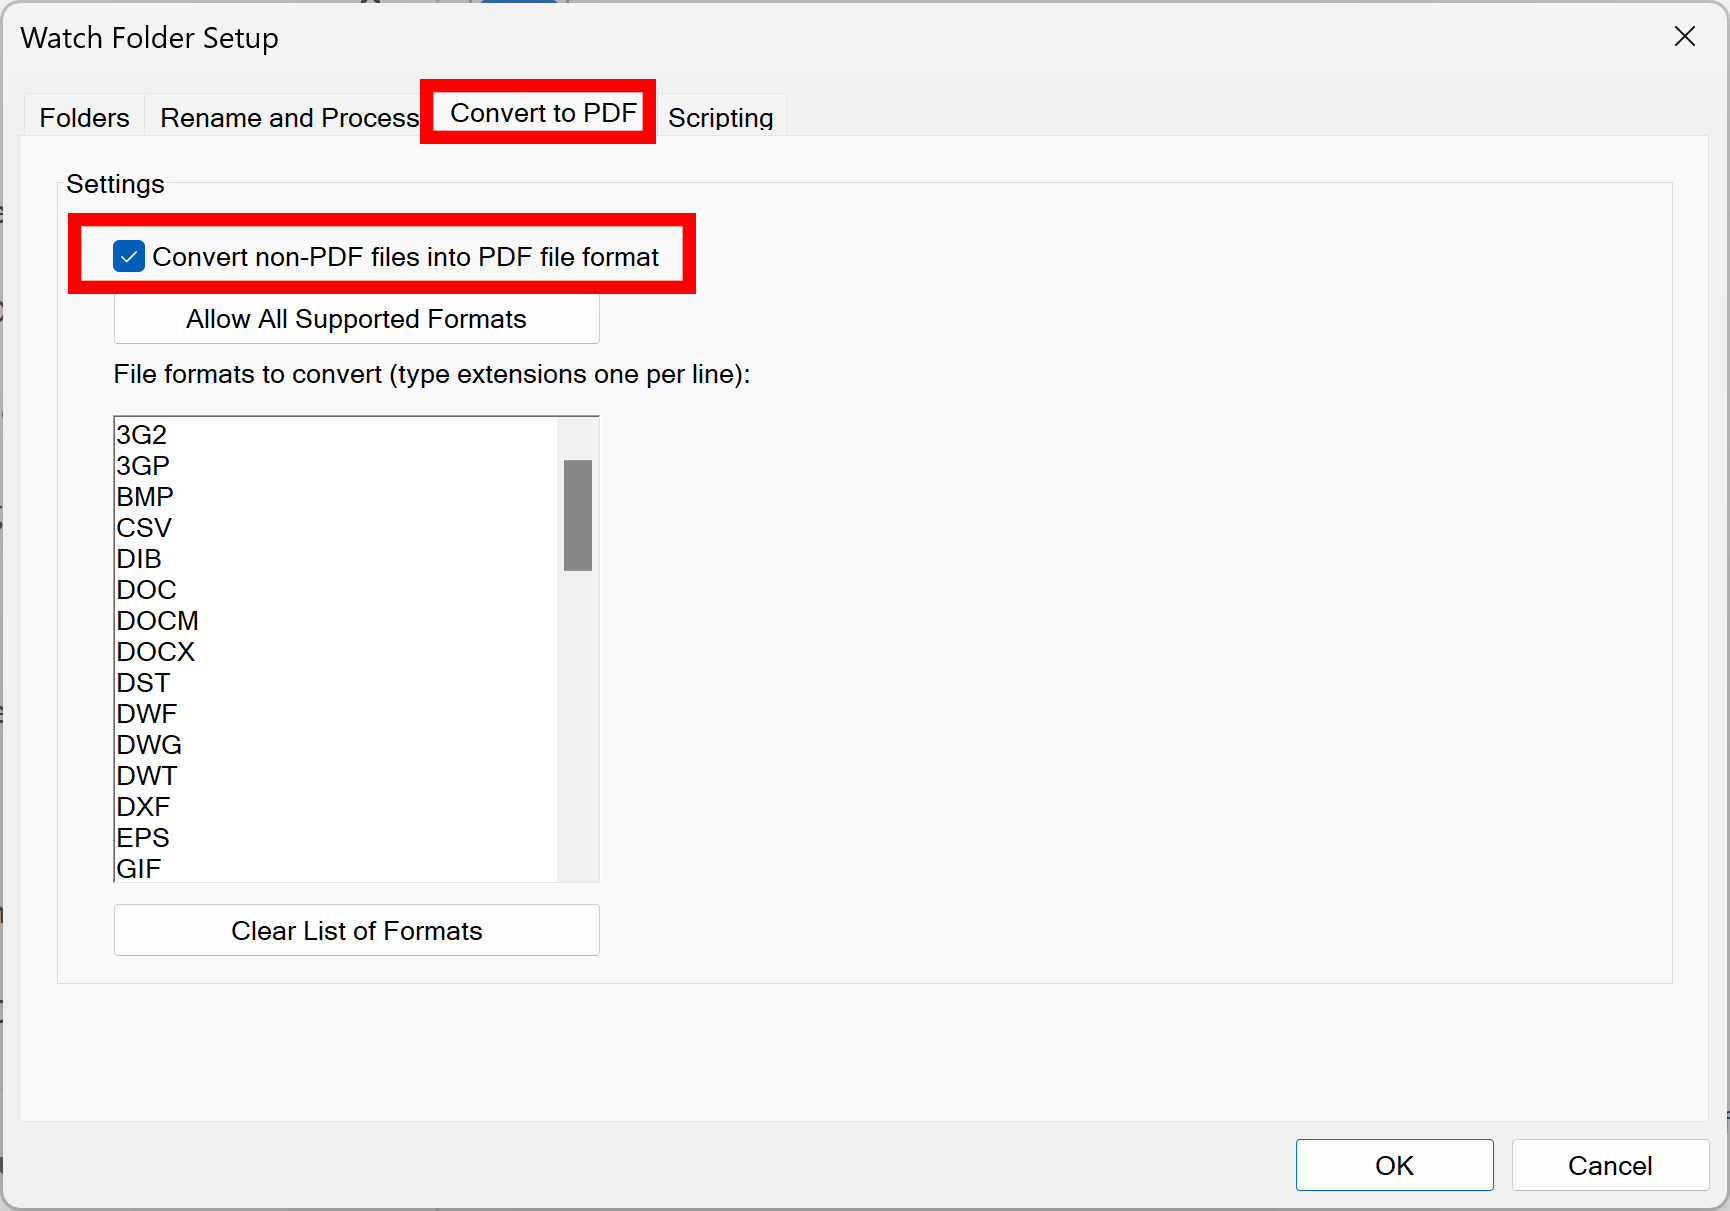
- Enable Convert-to-PDF Settings (Optional)
- Select Convert tab and check Convert non-PDF files into PDF file format option. Select either all supported file format extensions or clear the list and specify only the specific ones you need to convert. If input file format is not listed in the box, then it is not going to be processed when placed into a watch folder. It will remain there and is not going to be moved into "success" or "failed" folders.
- All conversions will be performed according to the current Adobe Acrobat settings. You can review settings and make changes via Edit > Preferences menu ("classic" Adobe Acrobat interface) or via Menu > Preferences ("new" Adobe Acrobat interface).
- Important: All non-PDF files will be moved to the "success" folder after conversion to PDF file format is completed. The resulting PDF file will be placed into "processed" folder after applying all other optional processing.
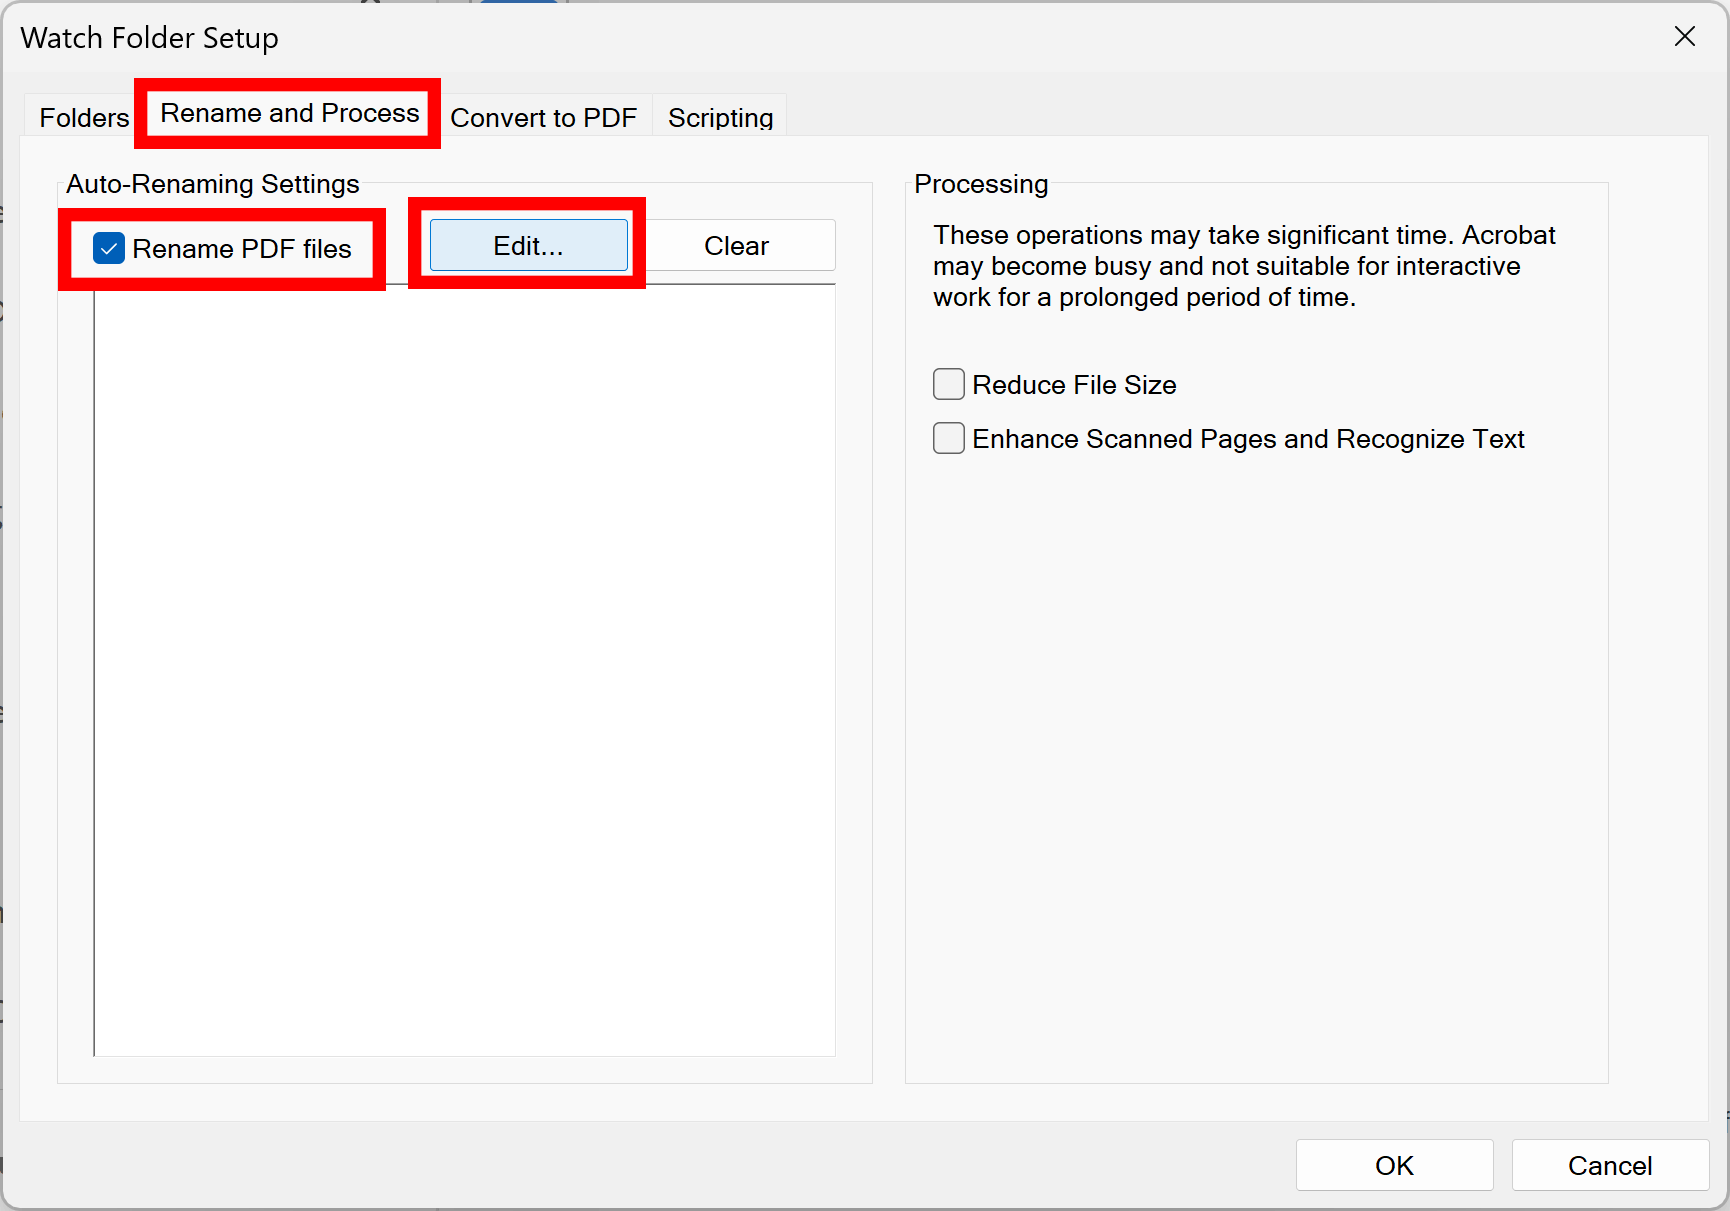
- Specify Auto-Renaming Settings (Optional)
- Optinally, it is possible to automatically rename PDF files using text from the document, metadata or custom text, auto-incrementing numbers, Bates numbers etc.
- Select Rename and Process tab and check Auto-Rename PDF Files options. Next, press Edit... button and configure document renaming settings. This functionality is identical to using Plugins > Auto-Rename Files menu. You can either configure auto-renaming settings from scratch or load previously saved settings. Please see the following online tutorials for details on how to use this feature. There are many tutorials available covering different methods and options.
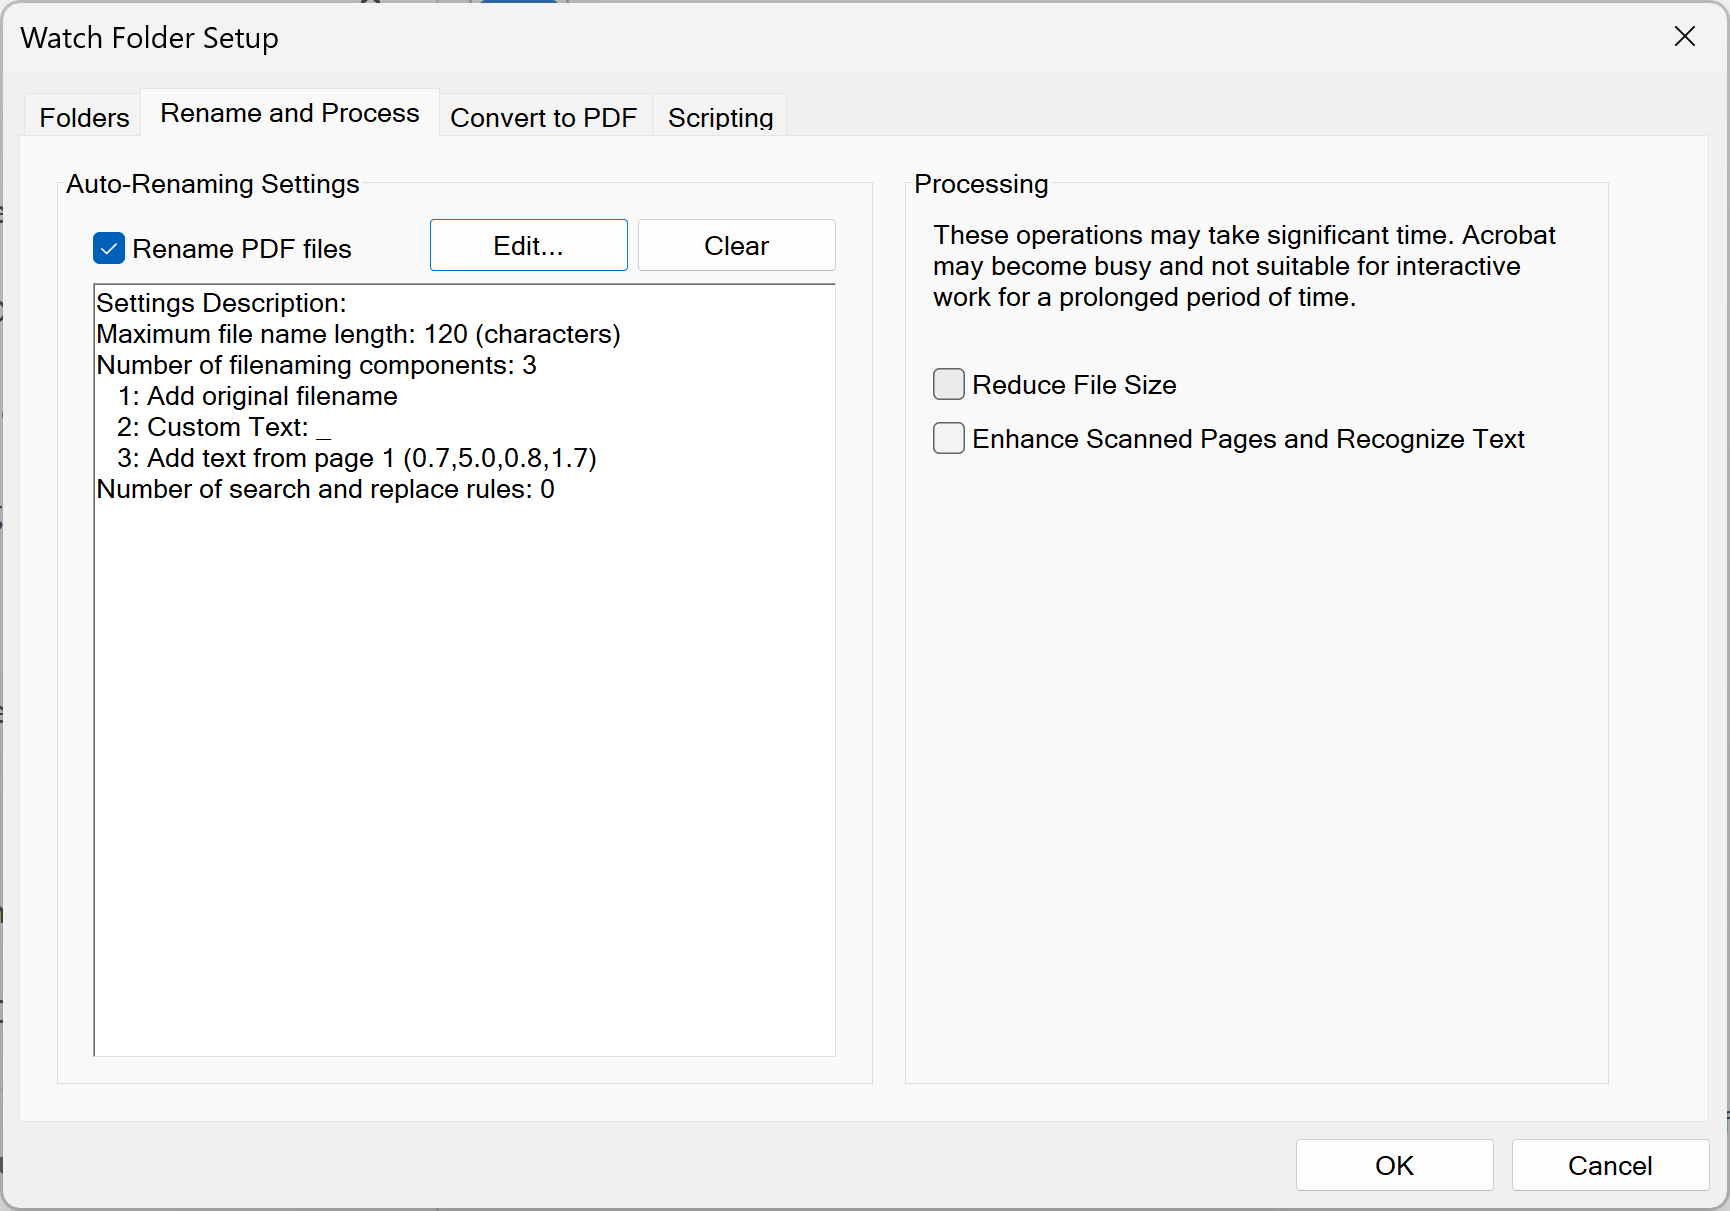
- The Description box will be updated with auto-renaming settings you have configured to provide a quick overview of the parameters.
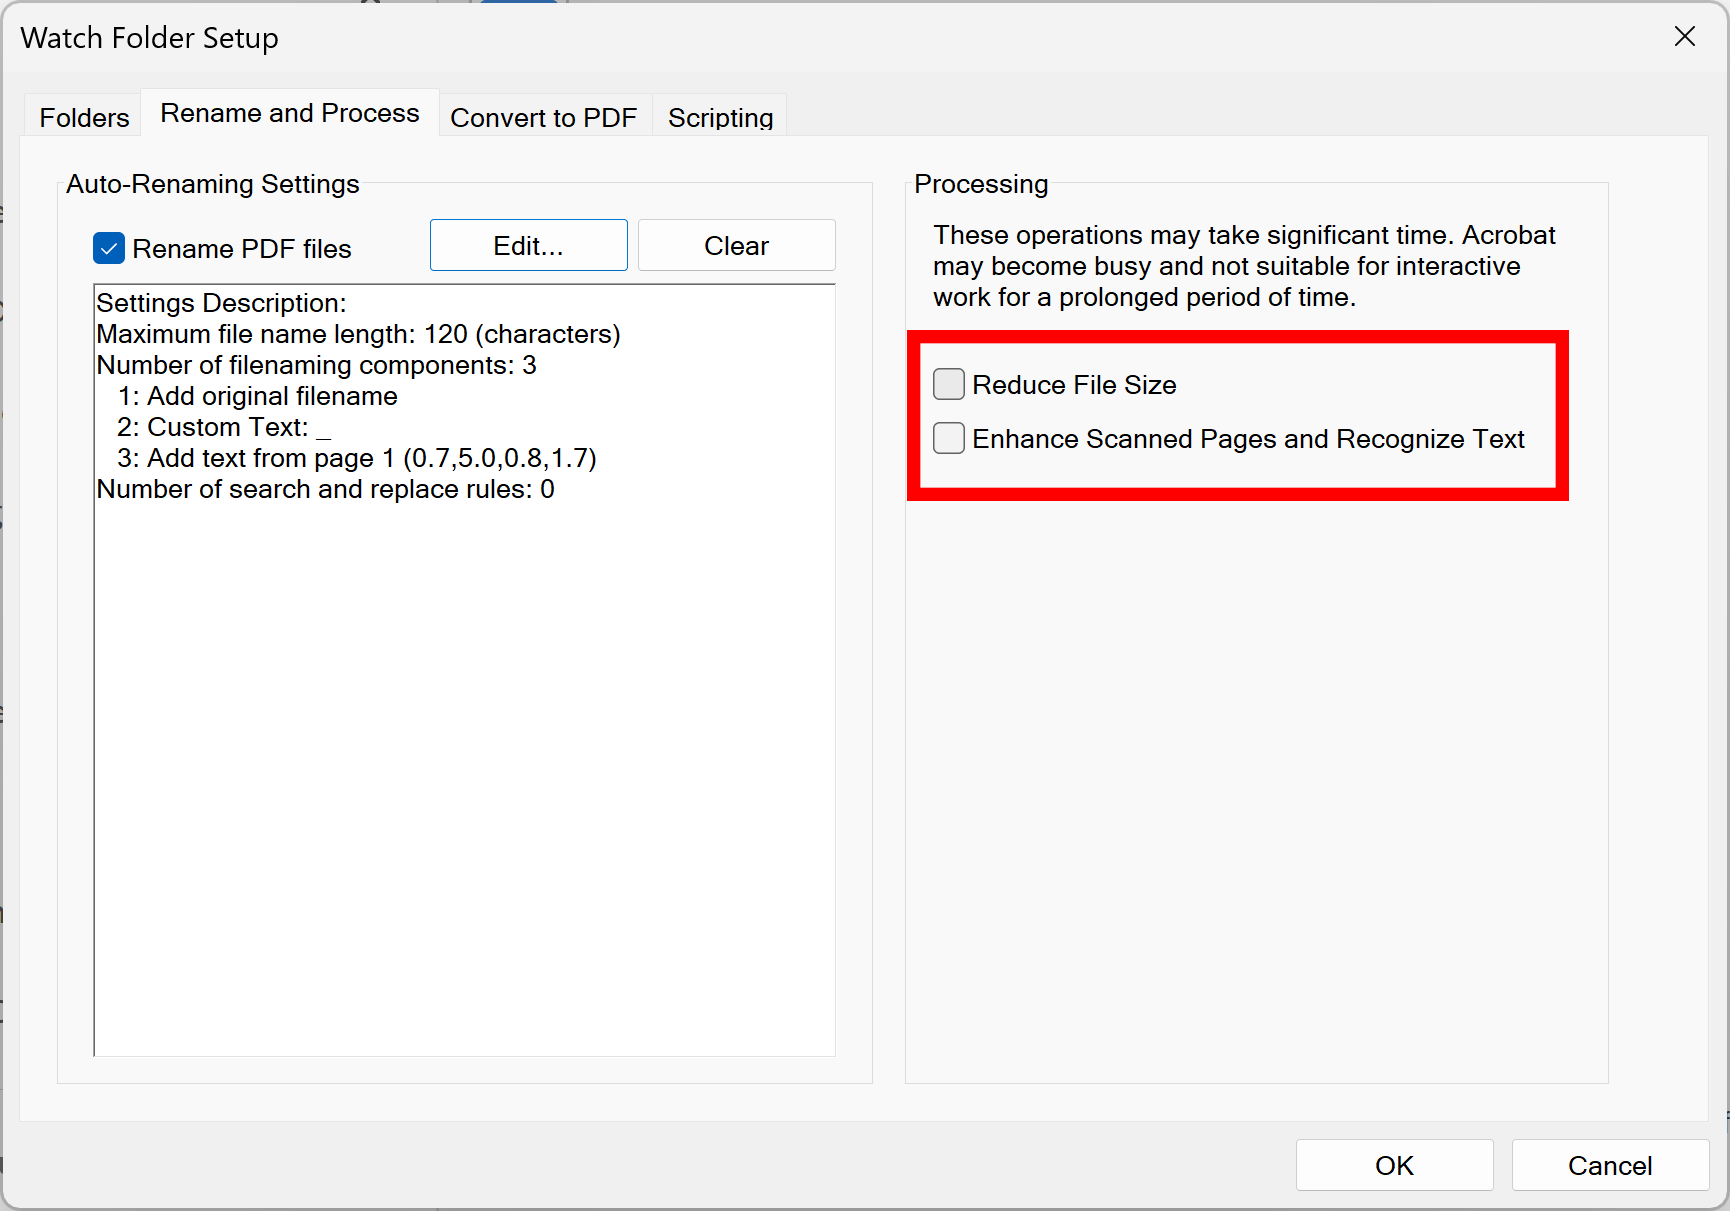
- Reduce File Size, Enhance Scanned Pages, Recognize Text (Optional)
- There are multiple optional processing options available. It is possible to reduce file size, enhance scanned pages and recognize text in the scanned documents to make them searchable. However, these options are time consuming and even on relatively small documents may cause Adobe Acrobat to remain unresponsive for some time. Use this options only if you are not planning to use Adobe Acrobat for any manual work at the same time the processing is performed.
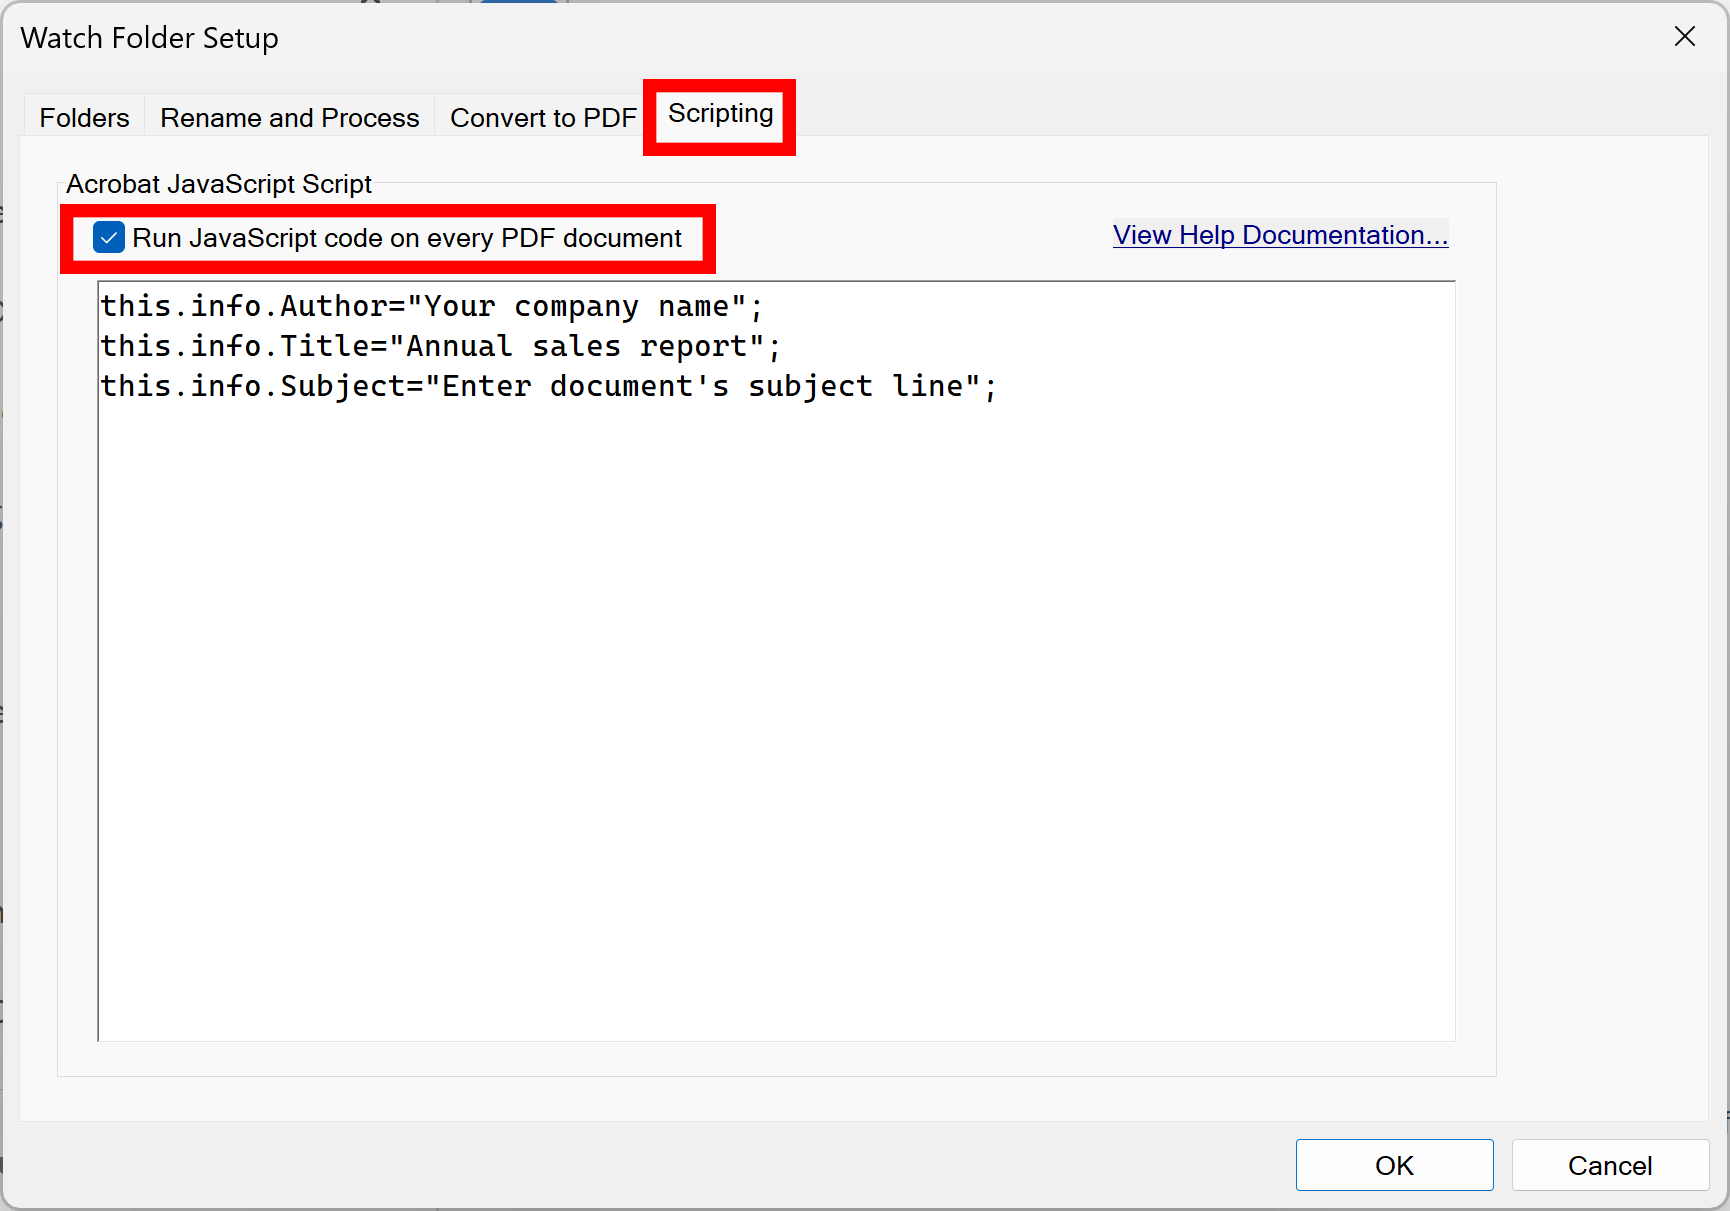
- Assigning Document Metadata
- It is often necessary to set document's metadata fields to the specific values. Standard metadata fields include Author, Title, Subject, Keywords. The easiest way is to use custom scripting for this purpose. Select Scripting tab and enter the following script (you can customize it with your document-specific values):
-
this.info.Author = "My Company Inc.";
this.info.Subject = "Enter document's subject medatata";
this.info.Title = "Enter a title";
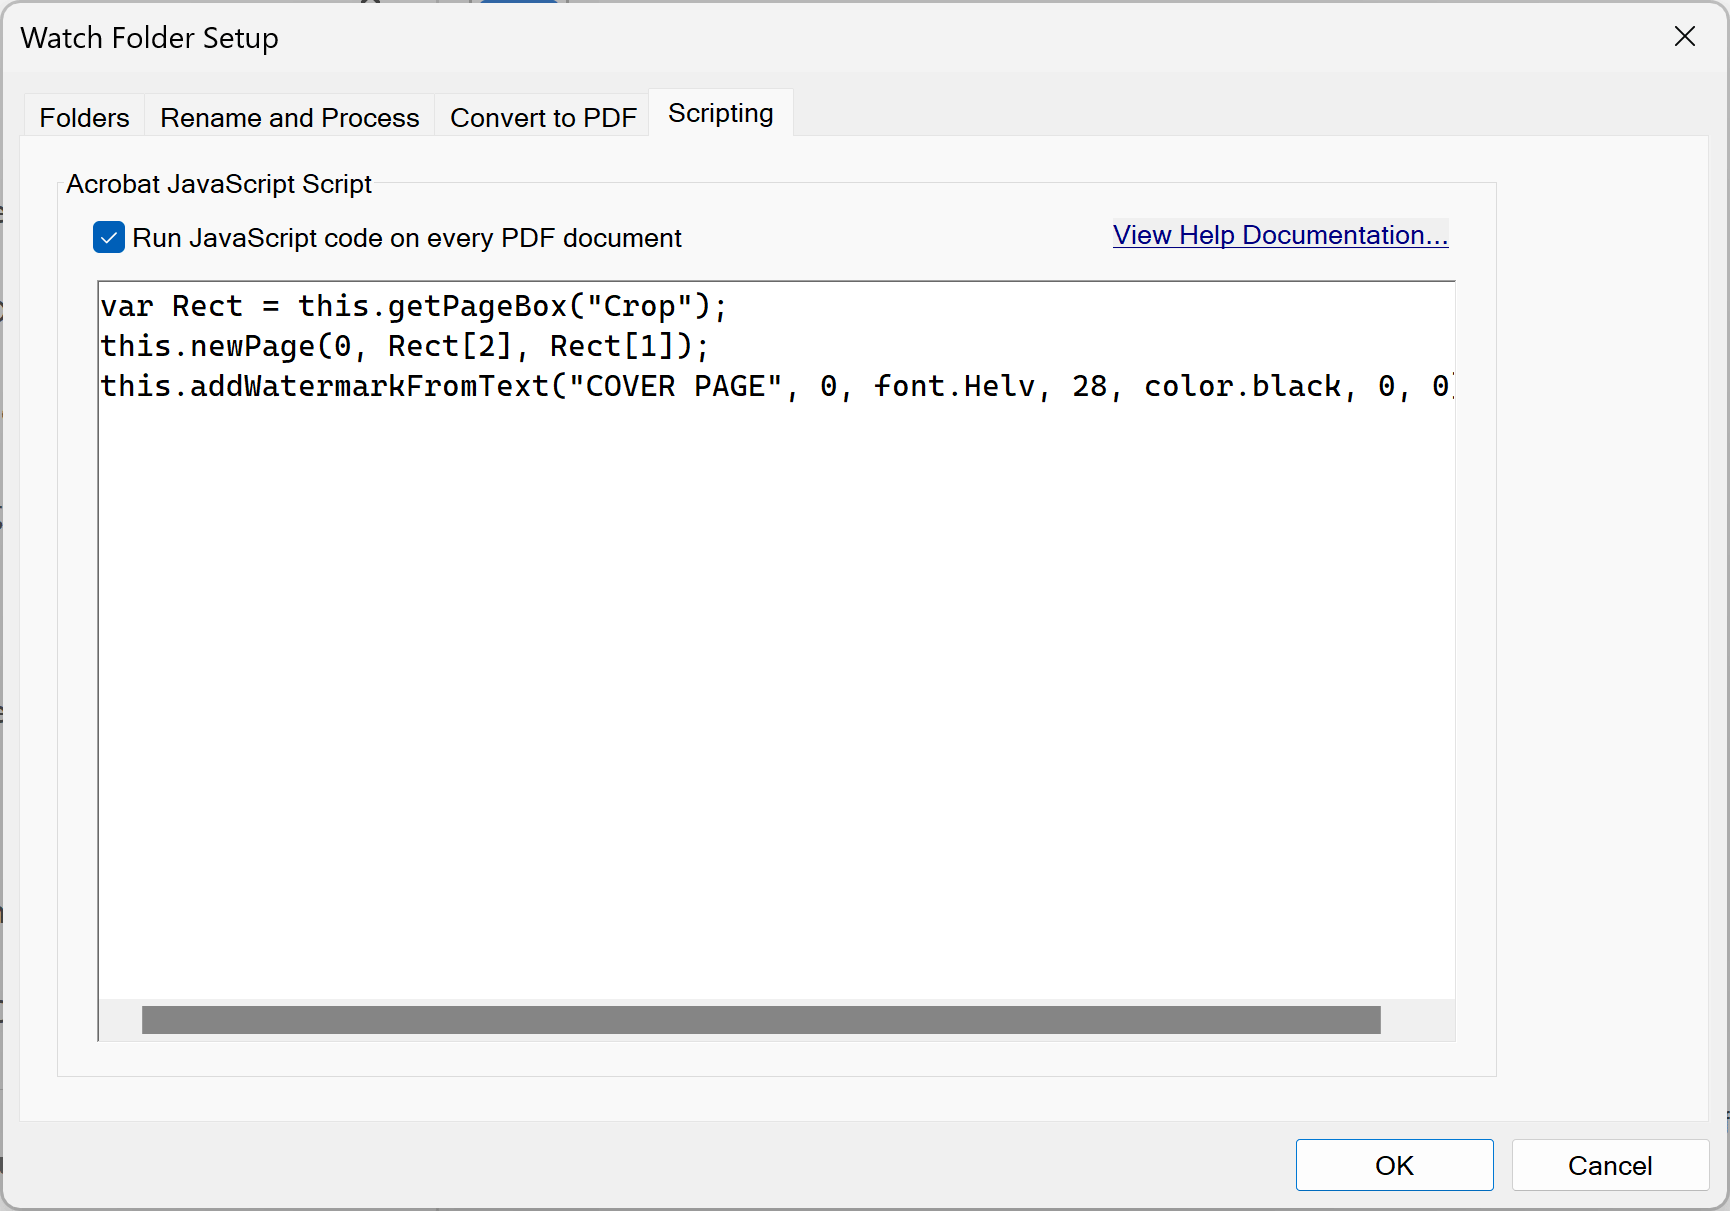
- Inserting a Cover Page
- The following JavaScript code will create a new page and insert it before the input document. It will also place a text label into the middle of the page.
-
var Rect = this.getPageBox("Crop");
this.newPage(0, Rect[2], Rect[1]);
this.addWatermarkFromText("COVER PAGE", 0, font.Helv, 28, color.black, 0, 0);
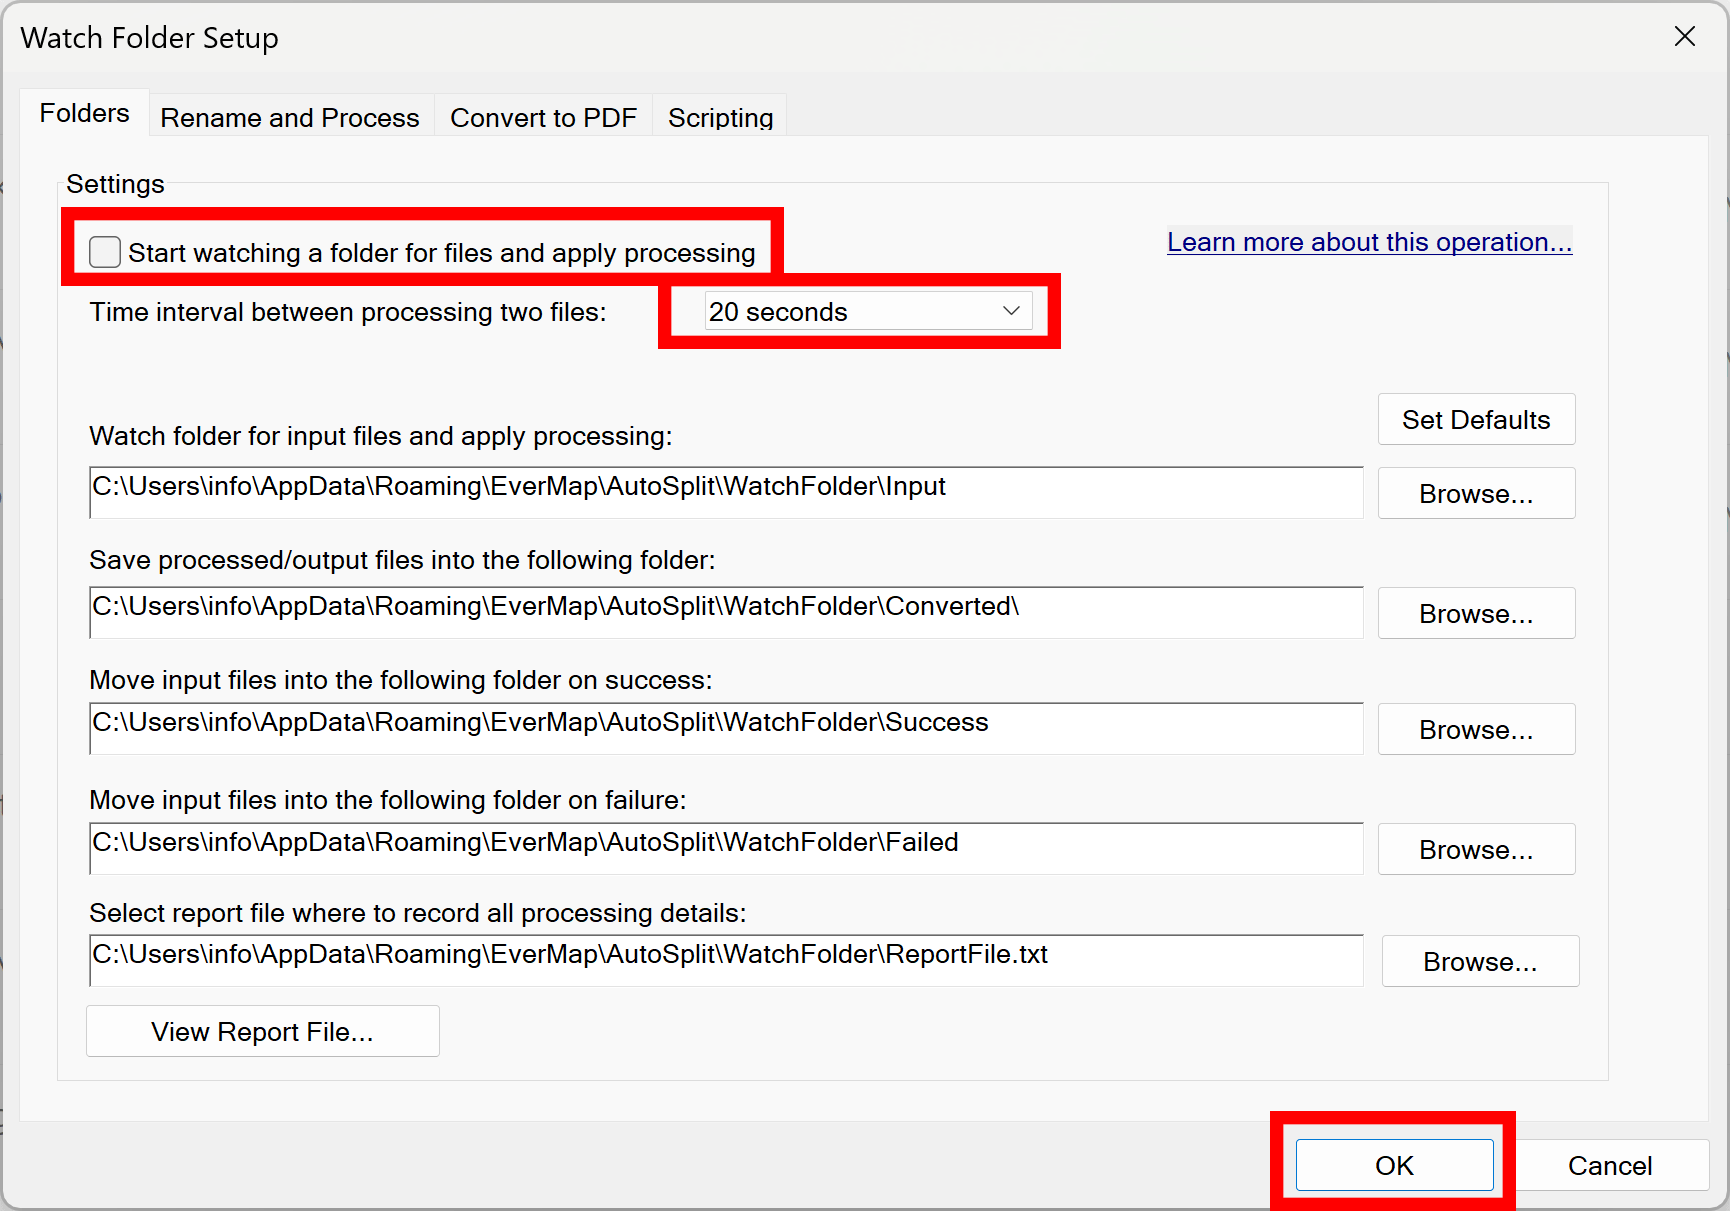
- Specify Time Settings and Start Monitoring
- Select desired time interval between processing two consecutive files from the Time interval between processing two files pulldown menu. This is the time between the end of processing one file and starting processing the next file. The default value is 5 seconds. This will make sure that Adobe Acrobat will remain fairly responsive and you can continue using it for other tasks. If you are planning to use this copy of Adobe Acrobat exclusively for processing files in a watch folder, then you can set time interval to its minimum value (1 sec).
- Press OK button to close this dialog and start monitoring a watch folder. Please note, that monitoring is automatically paused when this settings dialog is open.
- Review Processing Log
- Press View Report File... button to access processing log file that records all files being processed. Log file is a plain text document that can be opened using any text editor that supports *.txt file format. By default, the log file is opened in Notepad text editor. It is a default viewer for *.txt file format on Windows OS. Scroll down the end of the log. Newer entries are added to the end of the file.

- Online Tutorials
- You can find more AutoSplit tutorials here.