Create PDF Table of Contents From a Text File
AutoBookmark plug-in for Adobe® Acrobat®
- Introduction
- In this tutorial, we will look at how to create a table of contents (TOC) from a text file. The method involves two steps - first, listing bookmark titles and their corresponding page numbers within a text file. This is then used to add bookmarks to the PDF. The second step is to create a TOC from these bookmarks. The hierarchical table of contents can either be inserted as a new page or saved as a separate PDF document. All TOC entries have the same hyperlink as their corresponding bookmark.
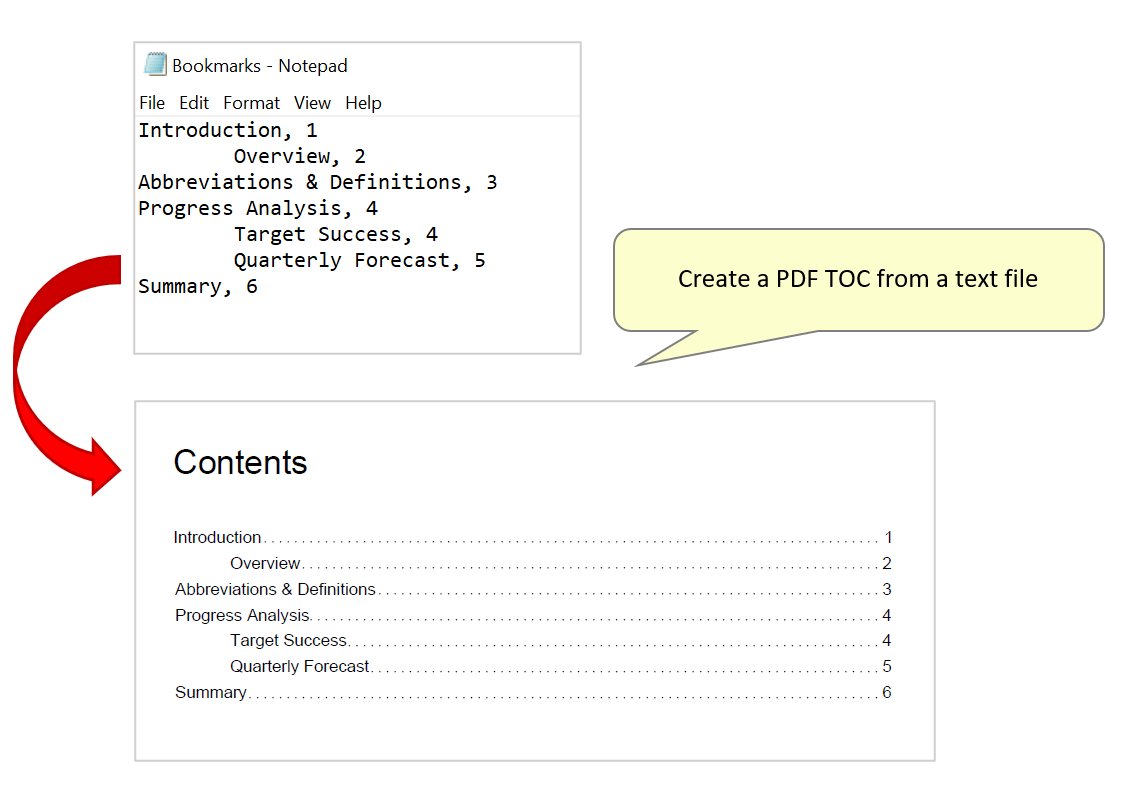
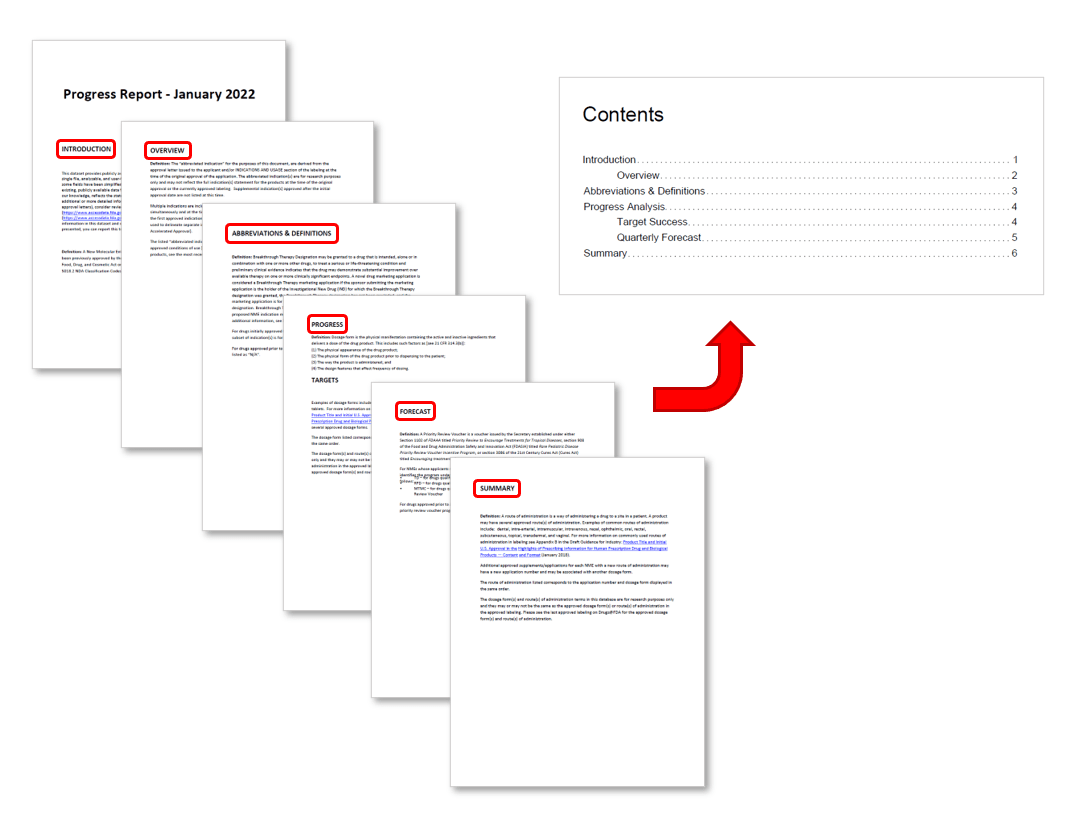
- In section 1 below, we will demonstrate this procedure by using a sample PDF progress report. The file contains no existing bookmarks or TOC - we will prepare a text file that contains a collection of sample bookmark trees, import the bookmarks, then create a TOC from them. The goal is to insert an interactive TOC page at the beginning of the document, with hyperlinked entries relevant to each chapter of the report.
- Batch Processing Support
- Automate this operation with Acrobat's batch processing tool (Action Wizard) to process similar files using the same configuration with only one click. For example, if each monthly report has an identical format, use batch processing to quickly add a TOC page using the same settings. Note that AutoBookmark Pro is required for batch processing support. The second section of this tutorial demonstrates how Action Wizard can be used to automate the task shown in section 1.
- Prerequisites
- You need a copy of Adobe® Acrobat® along with the AutoBookmark™ plug-in installed on your computer in order to use this tutorial. Both are available as trial versions.
Step-by-Step Tutorial
- Step 1 - Create a Text File
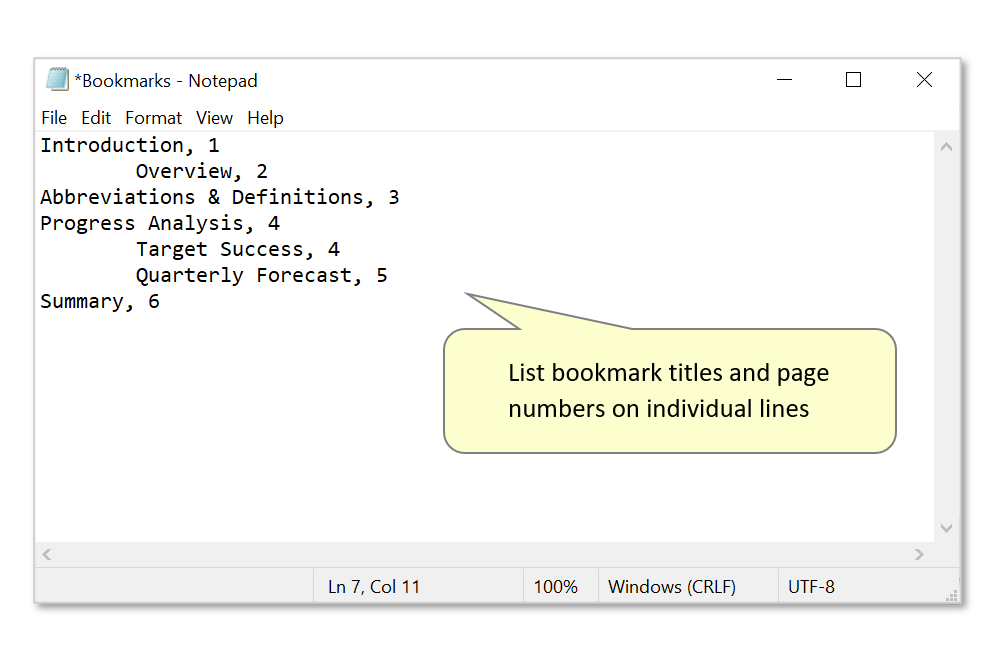
- The first step is to prepare a bookmark control file using any text editor, such as MS Notepad. Add bookmark definitions - each record should occupy a single line and is required to contain at least one element; a bookmark title. All other bookmark attributes are optional and can be added after a bookmark title using a comma or a tab as a field delimiter. Each bookmark's destination page should always follow the title (if a page number is specified).
- A multi-level bookmark hierarchy can be defined by properly indenting each bookmark record. It is recommended to use
or space symbols for indenting text lines - but not both at the same time. The parent-child relationships will be reflected in the output TOC that is generated. - Note that it is also possible to export existing bookmarks as a text file, and use it to add bookmarks to another document via the "Plug-ins > Bookmarks > Export > To Text..." menu.
- See this separate tutorial for more detailed help with creating a control file.
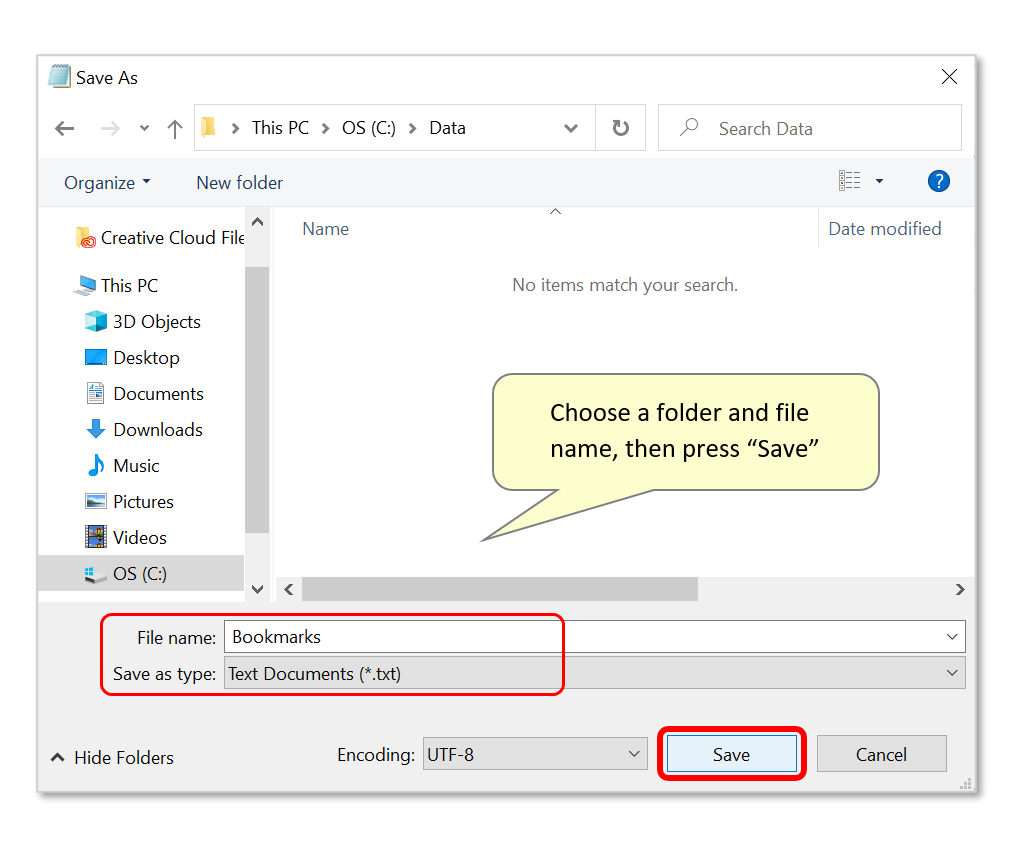
- If using Notepad, select "File > Save As..." to save it.
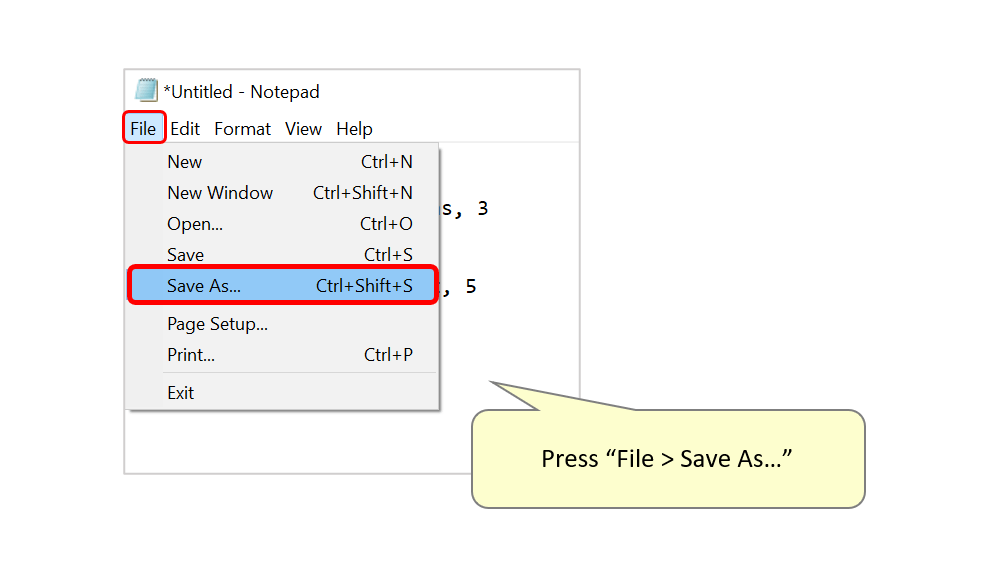
- Select a suitable folder and filename, then save the file with a *.txt extension (default in Notepad).
- Step 2 - Create Bookmarks
- Next, use the text file created in step 1 to add bookmarks to the PDF document. Open it in Acrobat, and select Plug-Ins > Bookmarks > Create from Text File... from the main menu.
- Locating menu in new Adobe Acrobat interface:
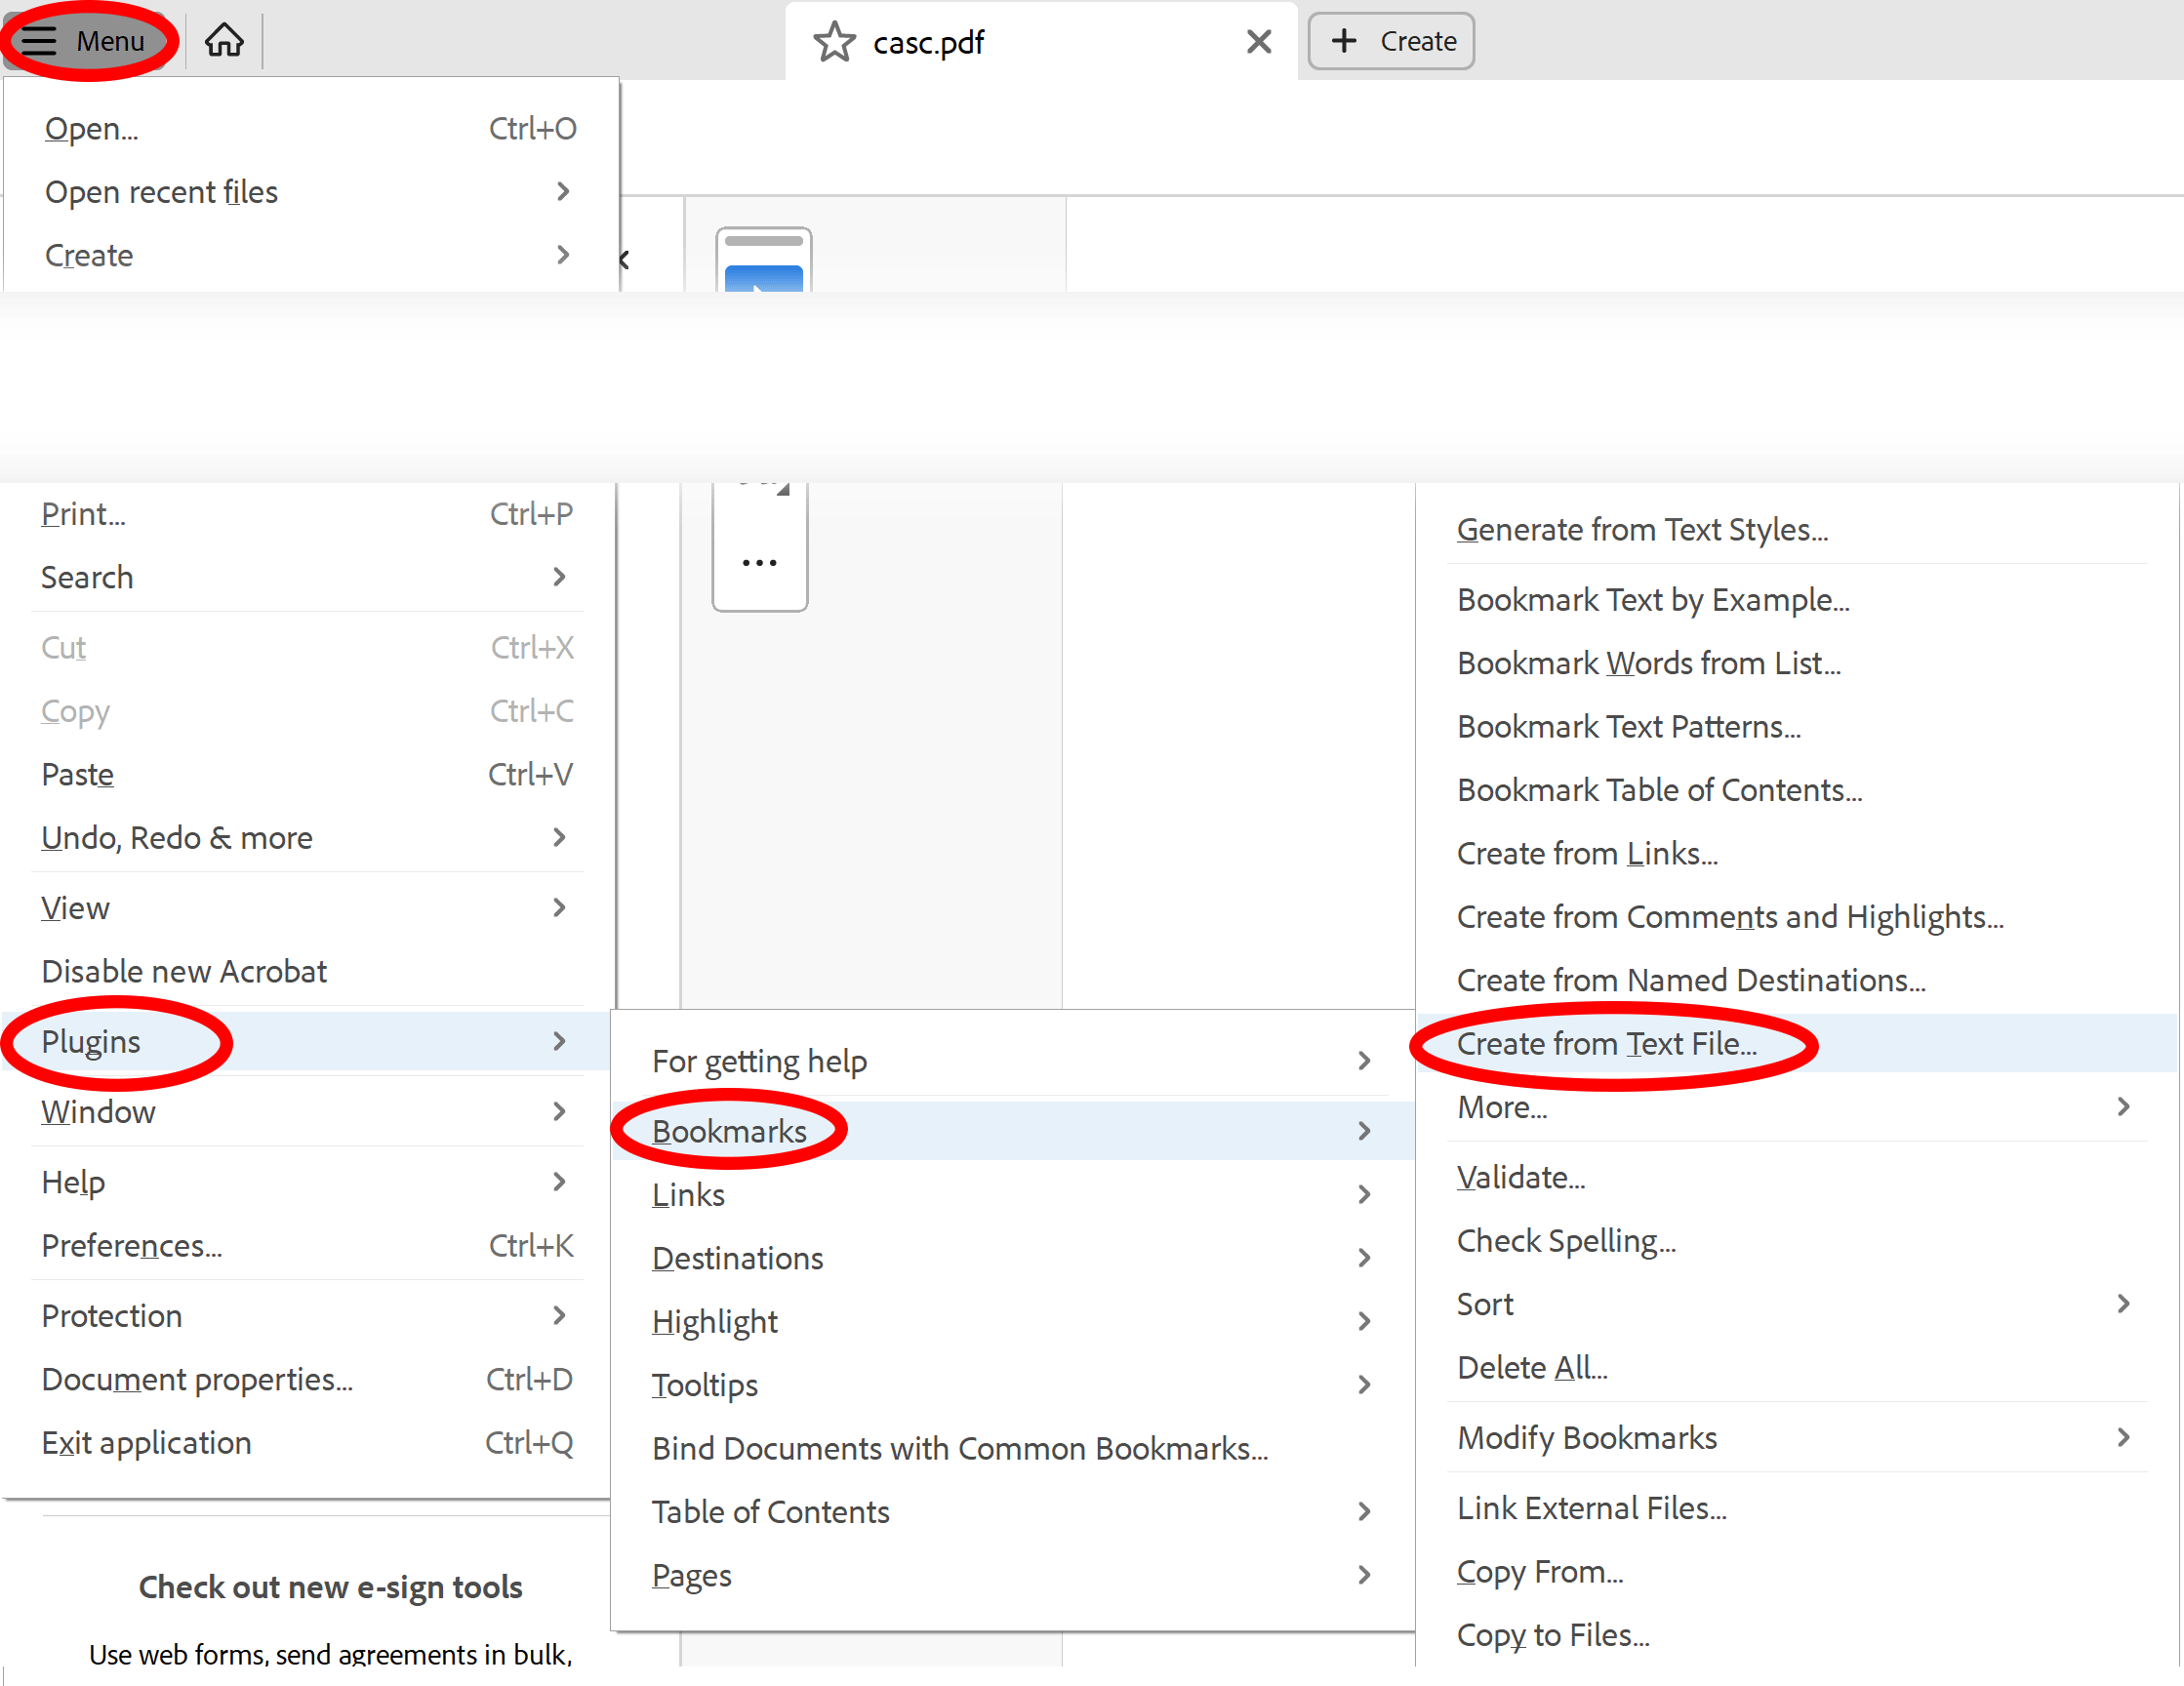
- New Acrobat interface is a lot less ergonomic and requires an extra mouse click. You can always switch to the time-tested "classic" interface.
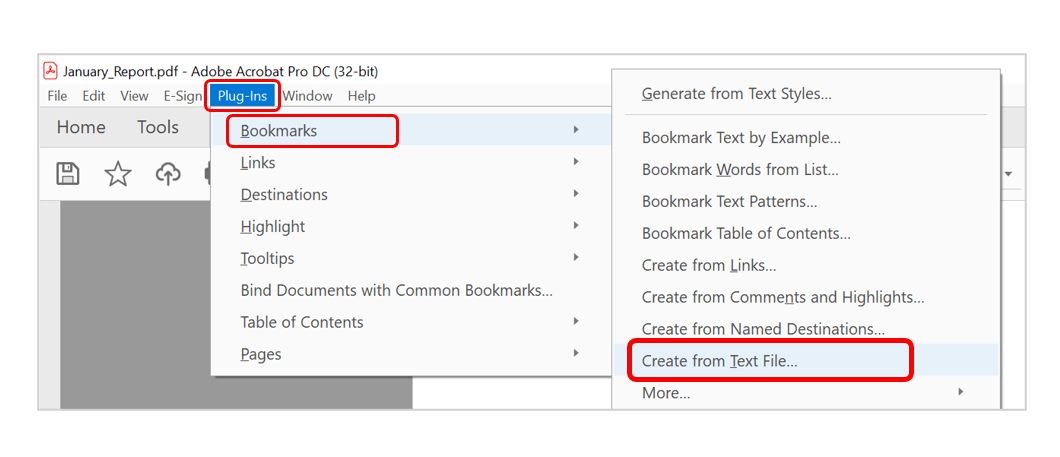
- Locating menu in the "classic" Adobe Acrobat interface:
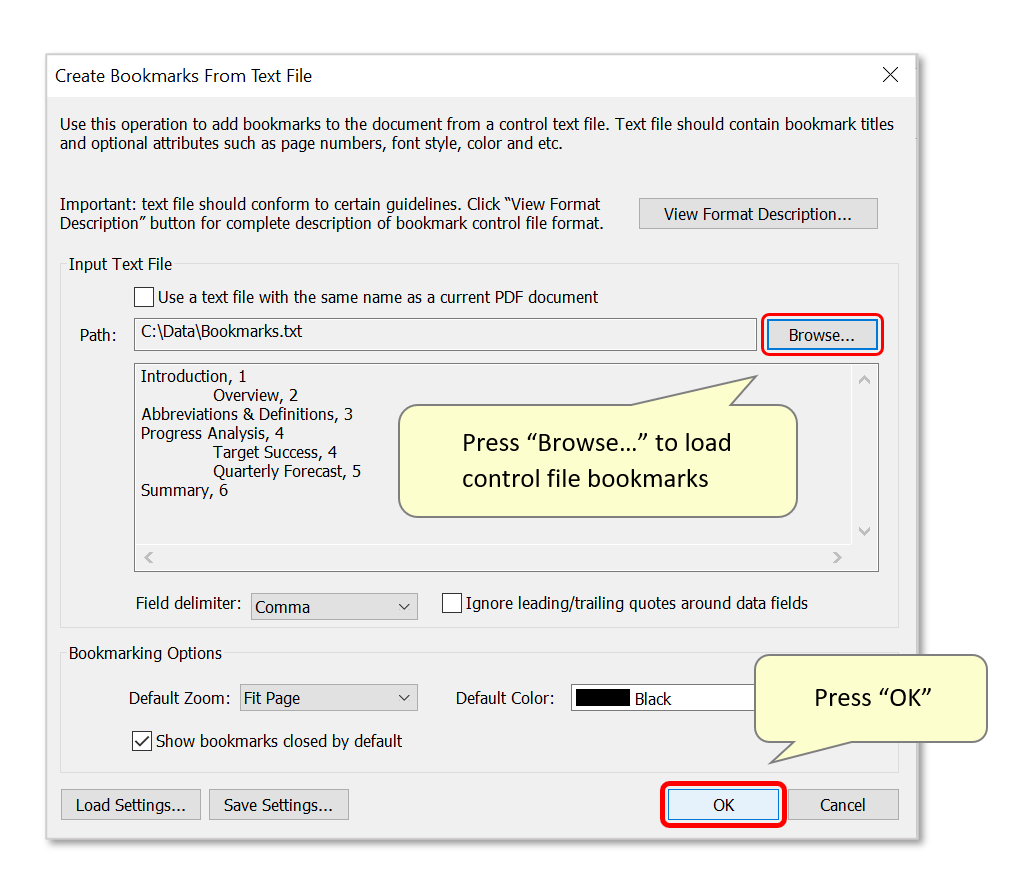
- In the "Create Bookmarks From Text File" dialog, press "Browse..." to locate the text file saved in step 1. The bookmark records will be shown in the preview box below.
- Press "OK" to add bookmarks.
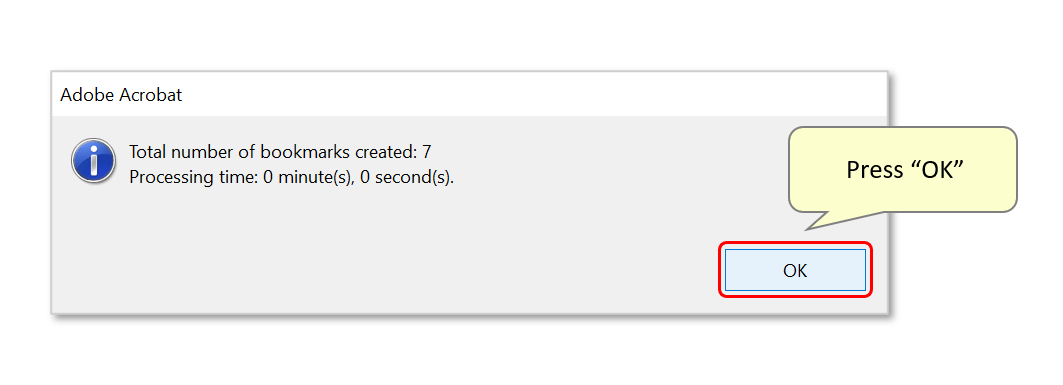
- A report box displays the number of bookmarks created. Press "OK" to close it.
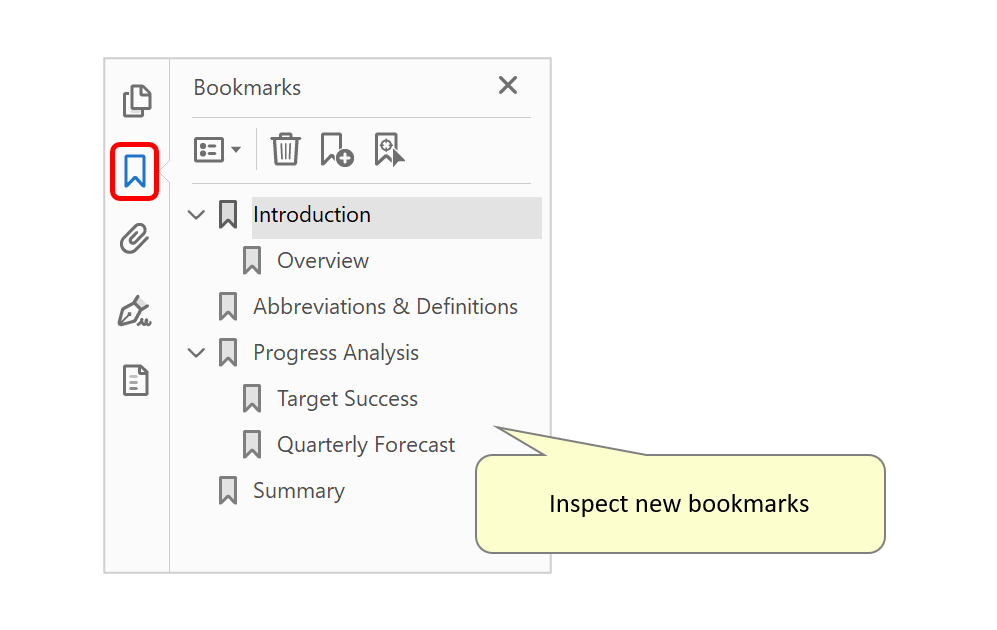
- Open the bookmarks panel to inspect the newly added bookmarks.
- Step 3 - Create a TOC
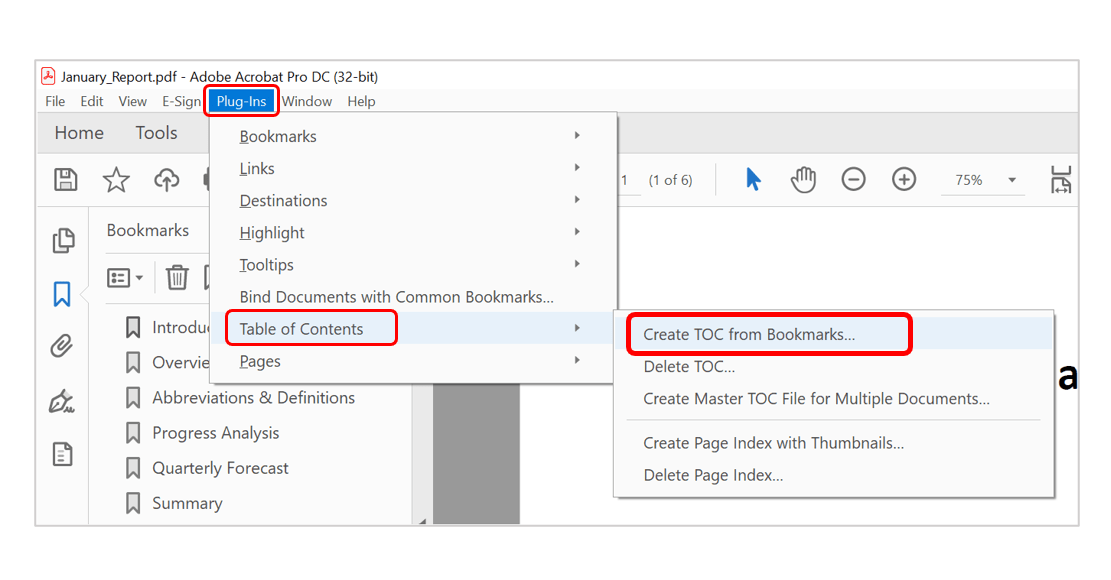
- Now we will create a TOC based on these bookmarks. To do this, select "Plug-Ins > Table of Contents > Create TOC from Bookmarks..." from the main menu.
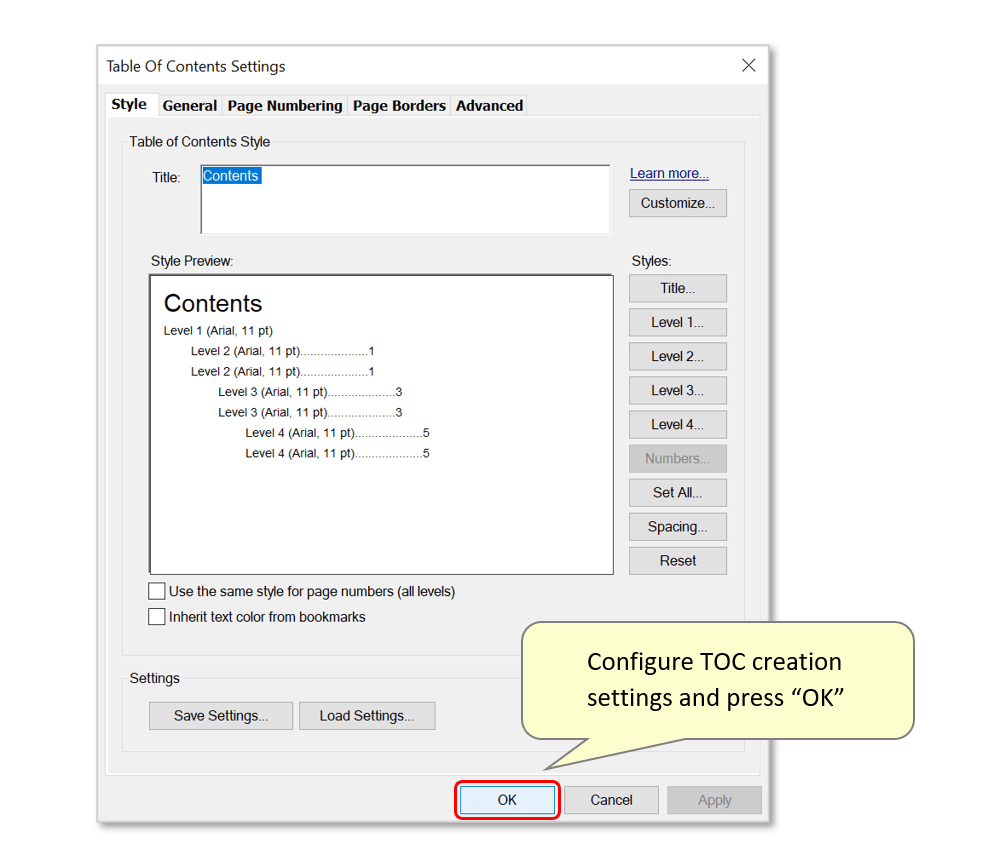
- Use this dialog to configure TOC settings. Click here to view a more detailed tutorial on how these settings can be configured.
- It's possible to use various page references to number records in the TOC - change this under the "Page Numbering" tab:
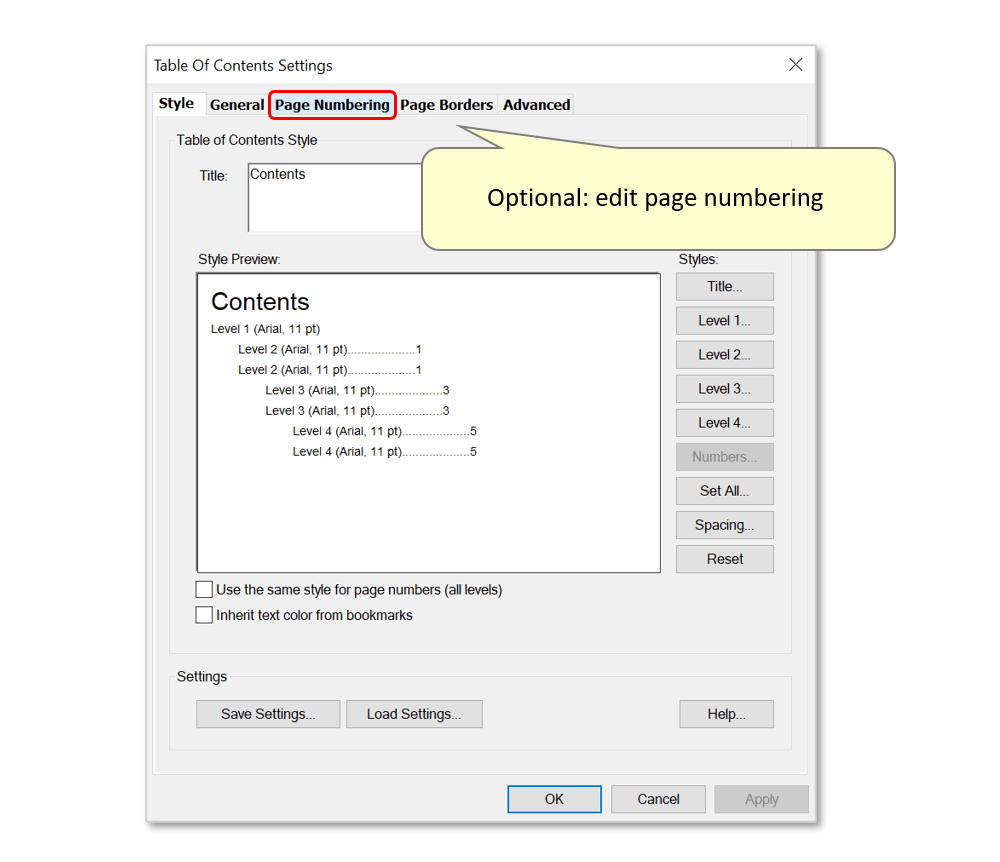
- Use the dropdown menu to output page numbers as either:
-
- Page labels (default)
- Page numbers
- Bates numbers
- Named destinations
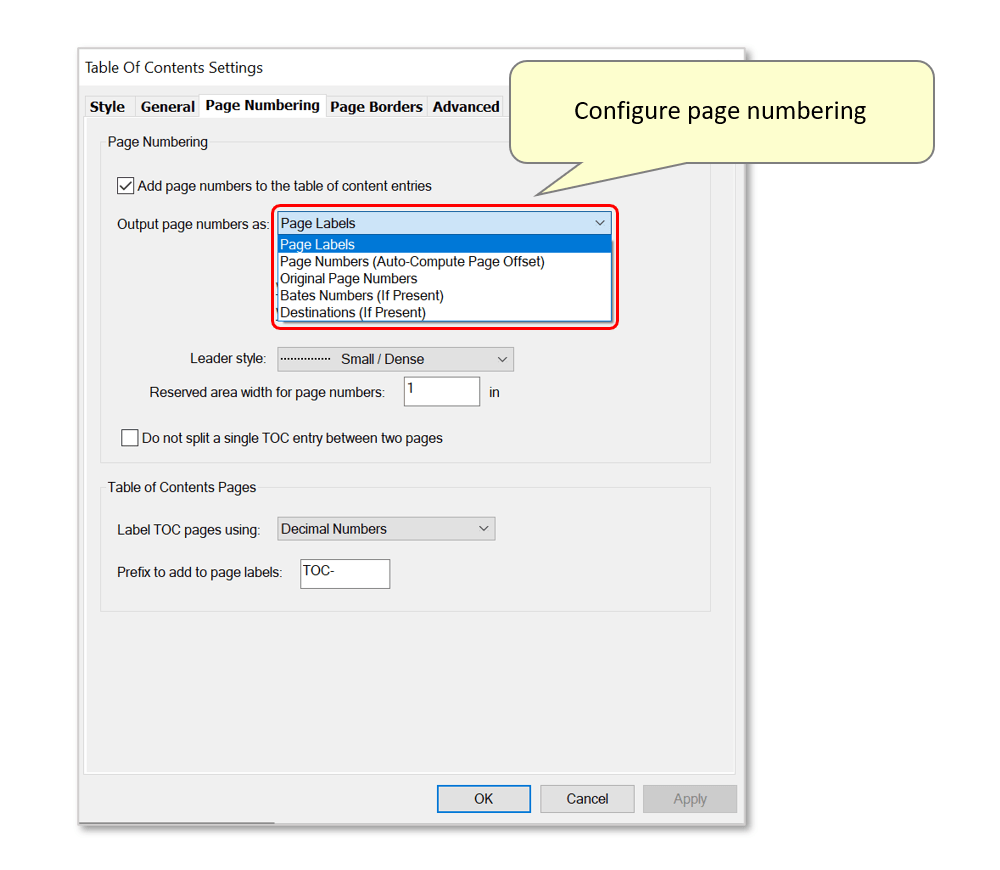
- In this example, we will use the plug-in's default settings.
- Press "OK" to proceed.
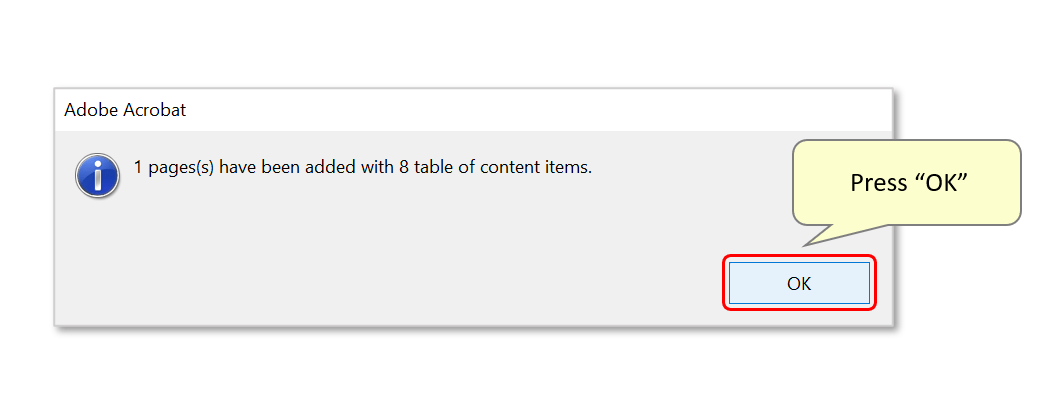
- A report box displays the number of TOC items added. Press "OK" to close it.
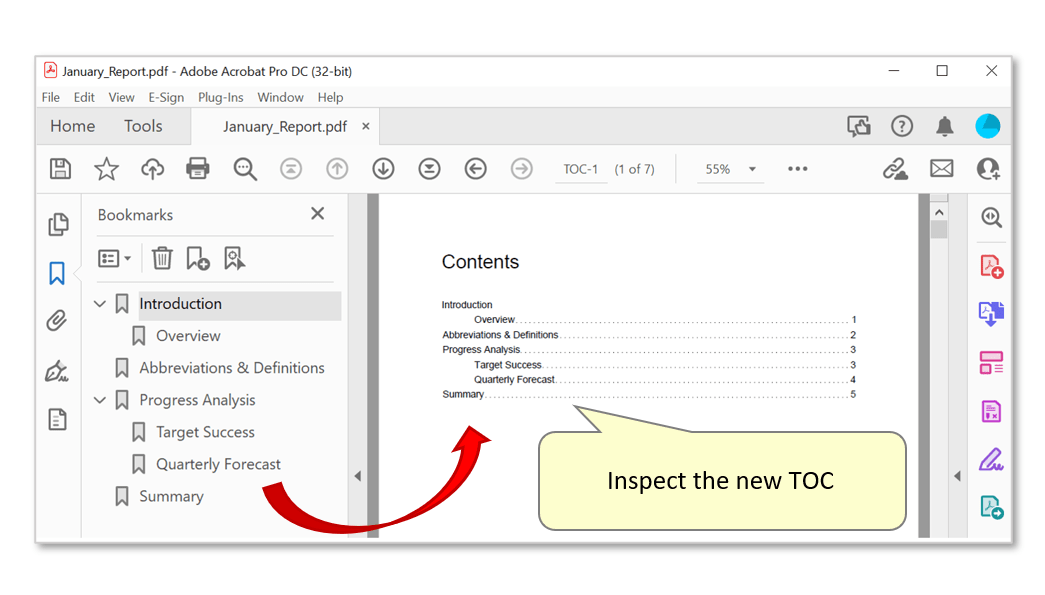
- Step 4 - Inspect the Results
- A TOC page has been inserted at the beginning of the document - its contents matching the text file created in step 1.
Using Action Wizard to Automate Processing
- Step 1 - Open Action Wizard
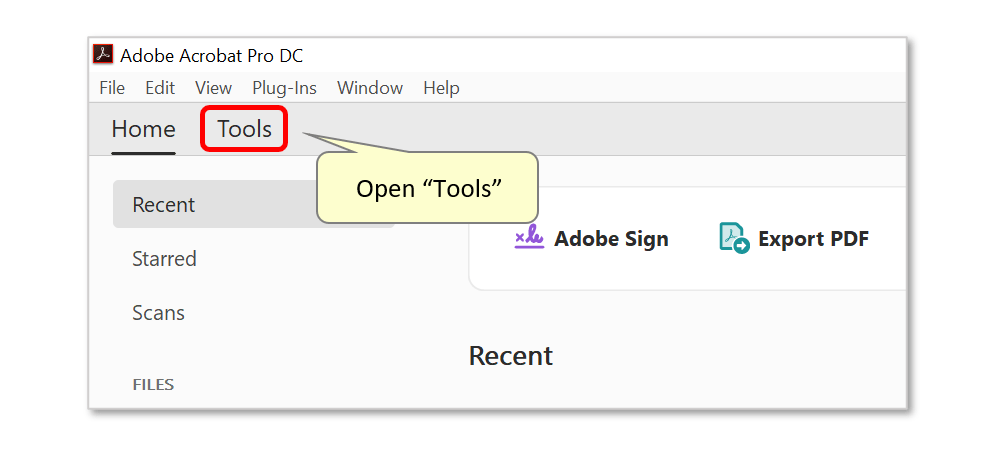
- Start Adobe® Acrobat® Pro and open the "Tools" panel located on the main Acrobat toolbar.
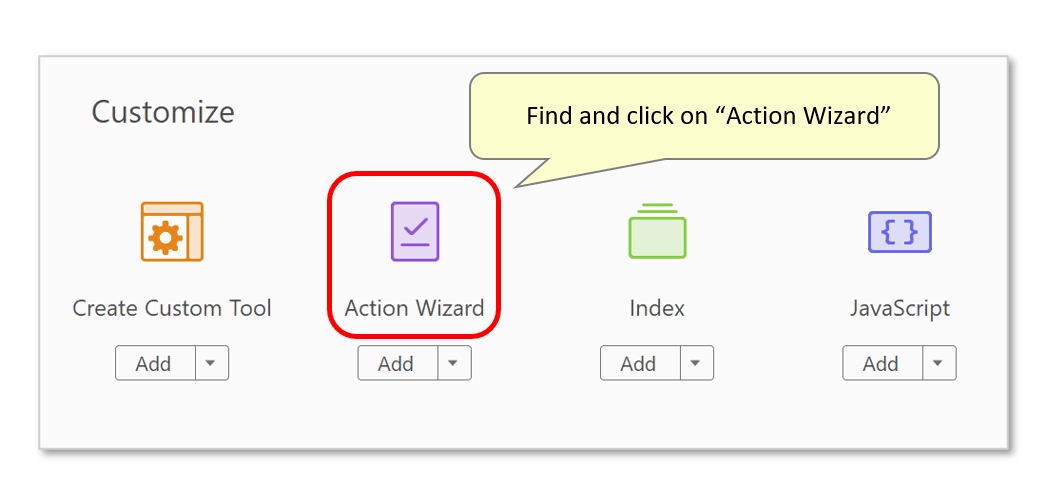
- Scroll down and click on the "Action Wizard" tool icon.
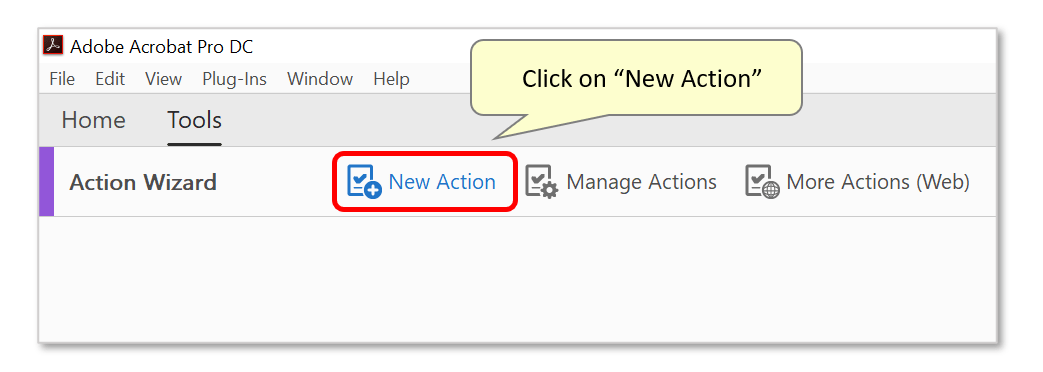
- Click on the "New Action" icon on the Action Wizard toolbar to create a new batch processing "action".
- Step 2 - Add a "Bookmarks From Text" Command to the Action Steps
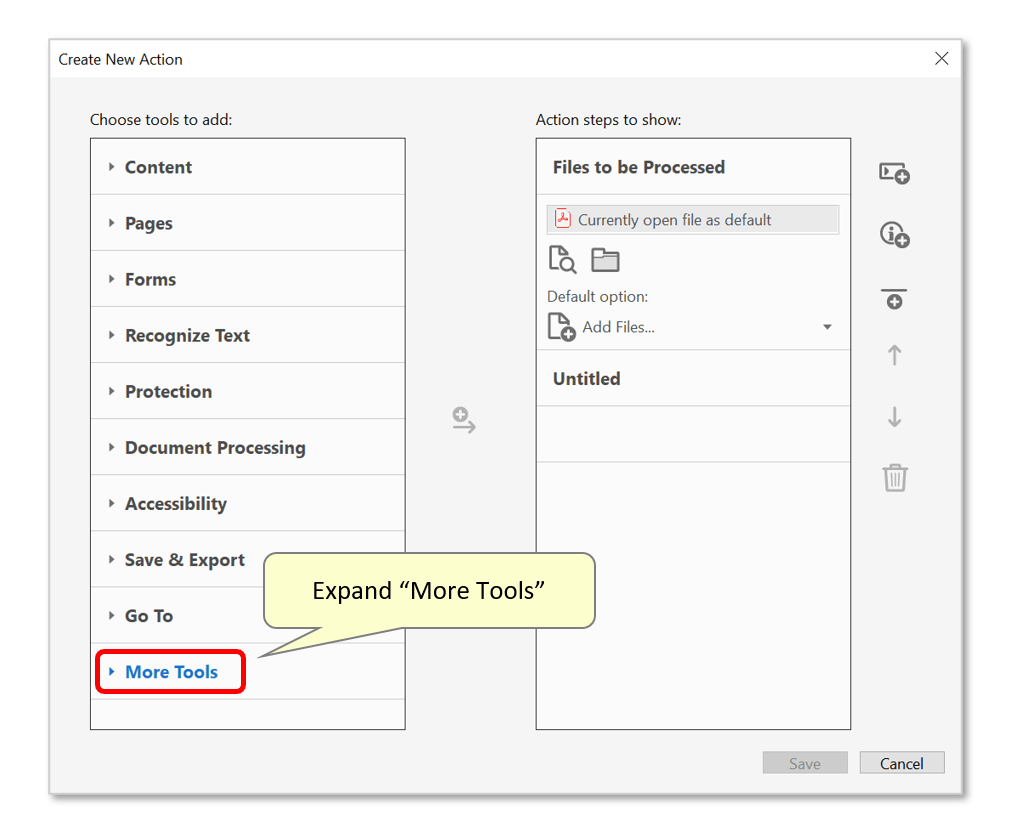
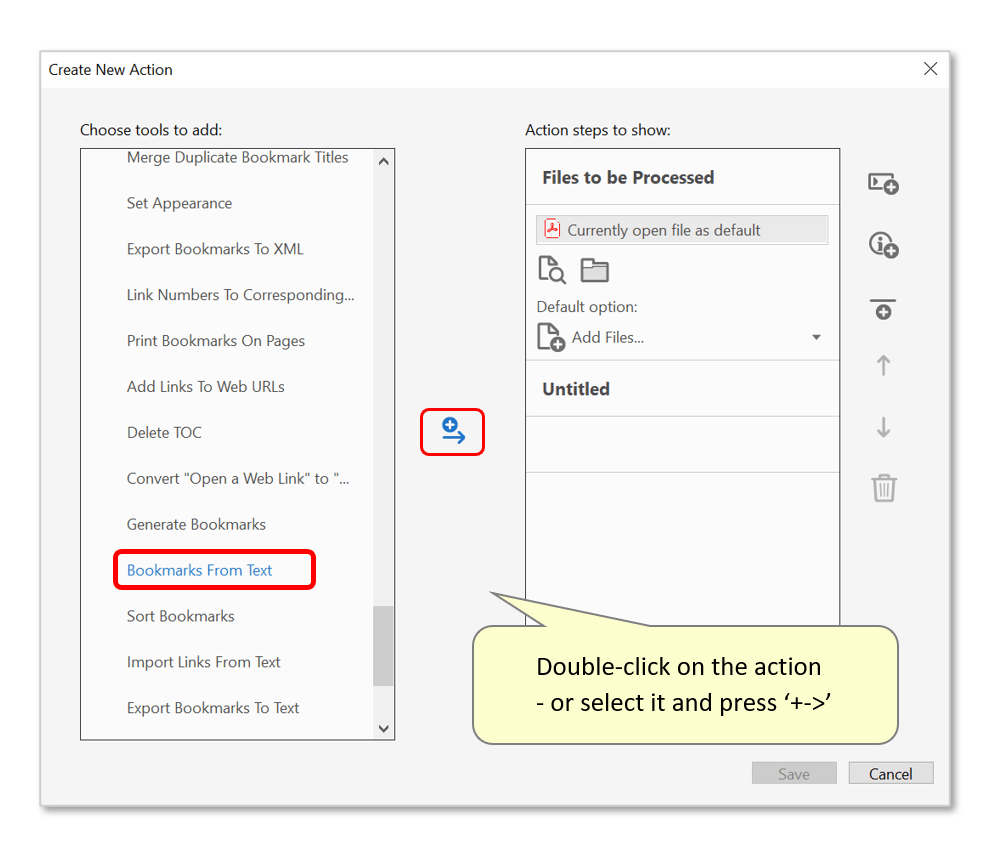
- Click on the "More Tools" category to expand the list of available commands.
- Find and double-click on the "Bookmarks From Text" command - or select it and press the "+->" button to add it to the list of action steps on the right.
- Step 3 - Configure Bookmarking Settings
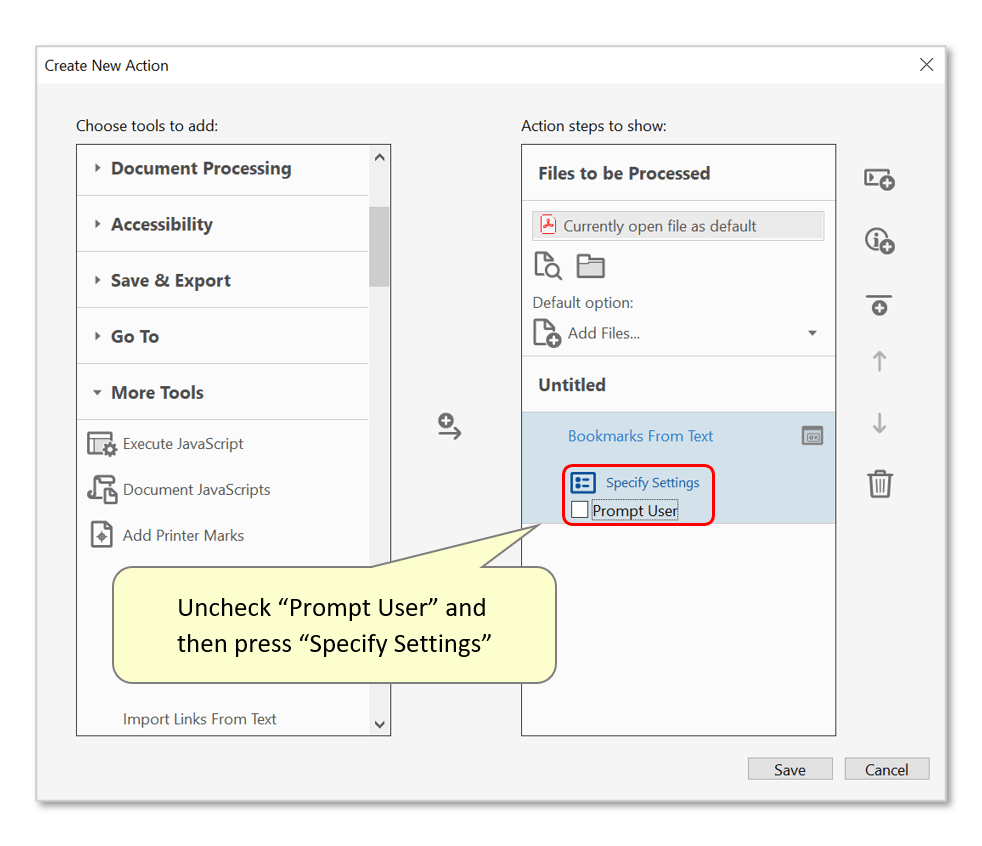
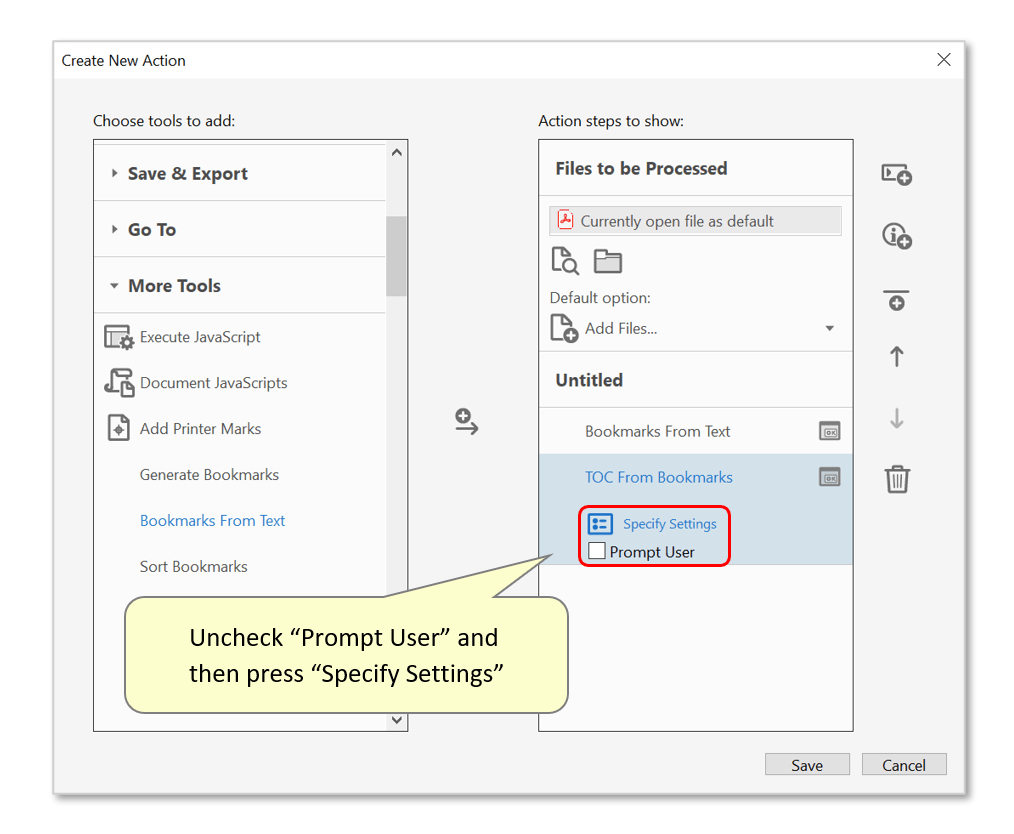
- The "Bookmarks From Text" command will appear in the "Action steps to show:" list. Uncheck the "Prompt User" checkbox, otherwise the program would always prompt for the user to modify settings when this action is executed. Then press "Specify Settings".
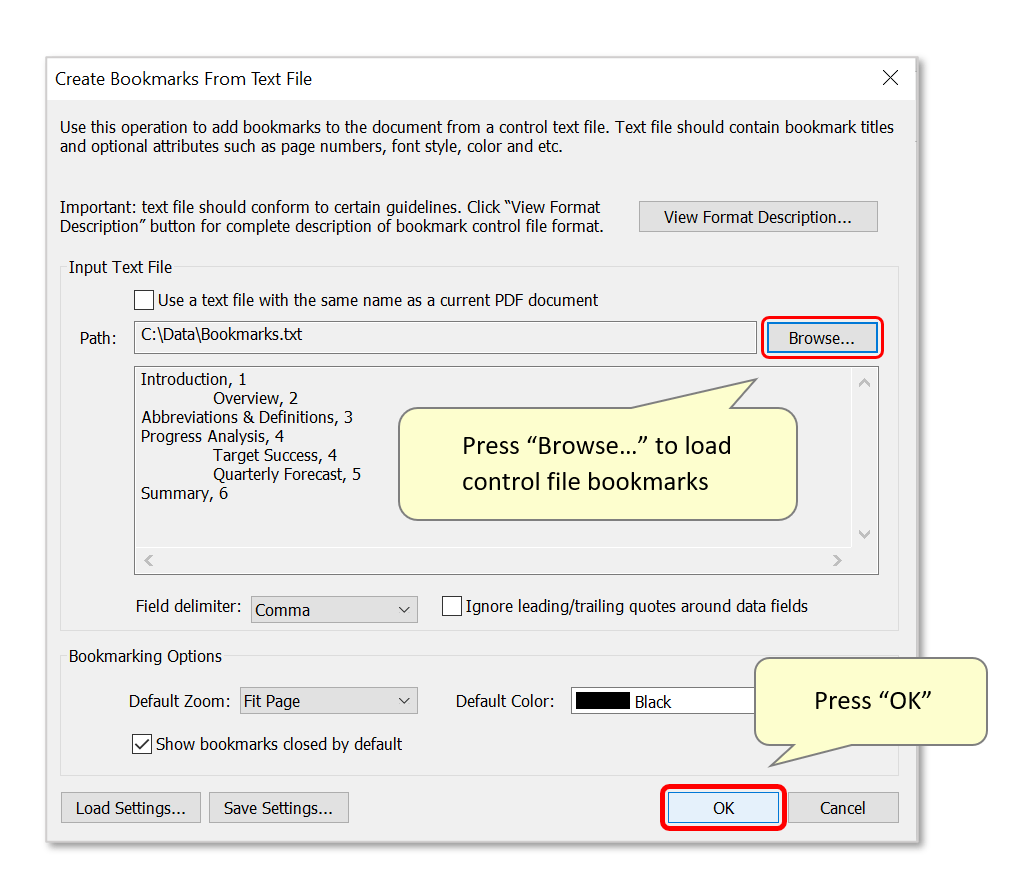
- This opens the standard "Create Bookmarks From Text File" dialog from the AutoBookmark plug-in (see section 1, step 2 above). Press "Browse..." to load a saved *.txt control file, then press "OK".
- Step 4 - Add a "TOC From Bookmarks" Command
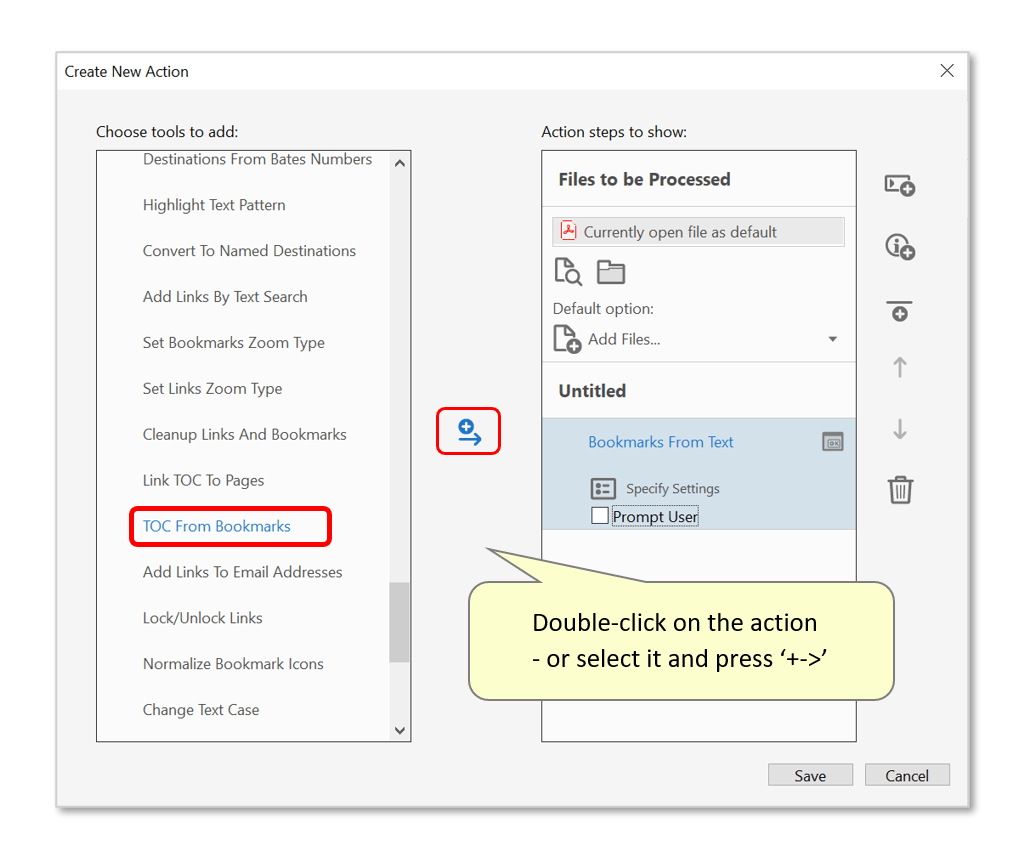
- Find and double-click on the "TOC From Bookmarks" command - or select it and press the "+->" button to add it to the list of action steps on the right.
- Uncheck "Prompt User" and press "Specify Settings".
- Configure the desired TOC settings and press "OK" to proceed.

- Step 5 - Add a Save Command
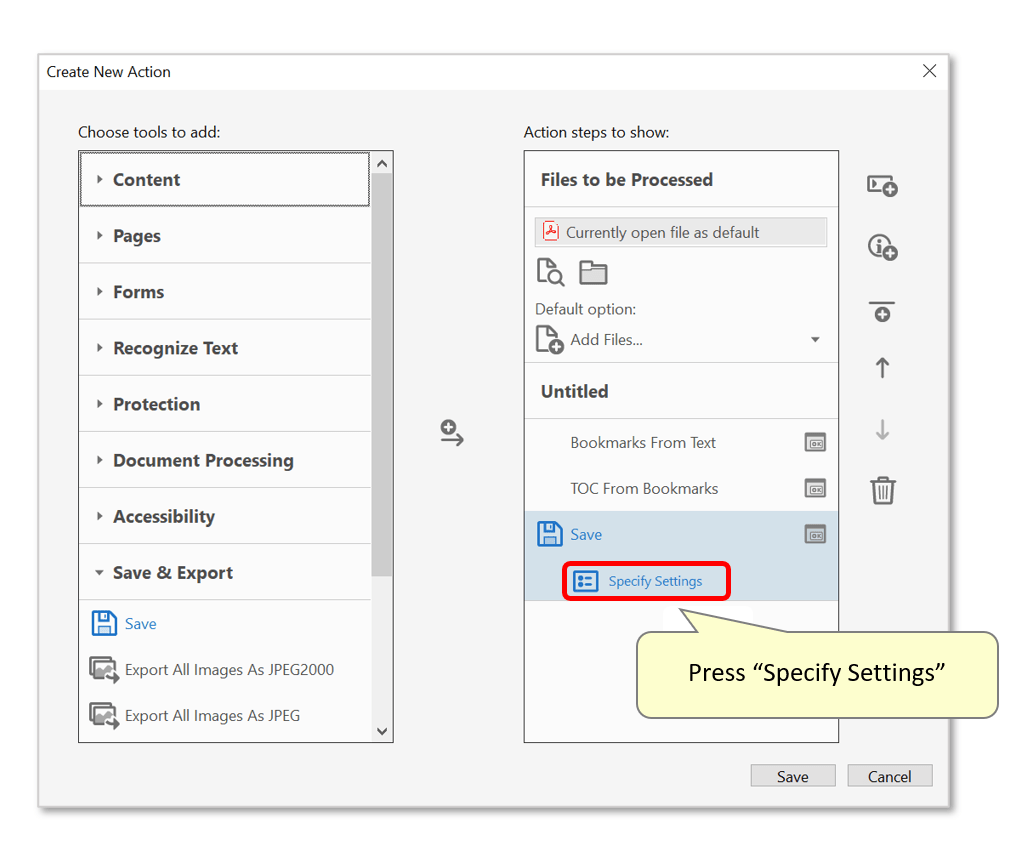
- Optionally add a "Save" command so that output files are saved in a specific location. To do this, expand the "Save & Export" category and double-click on "Save".

- Press "Specify Settings..." to configure the saving options.
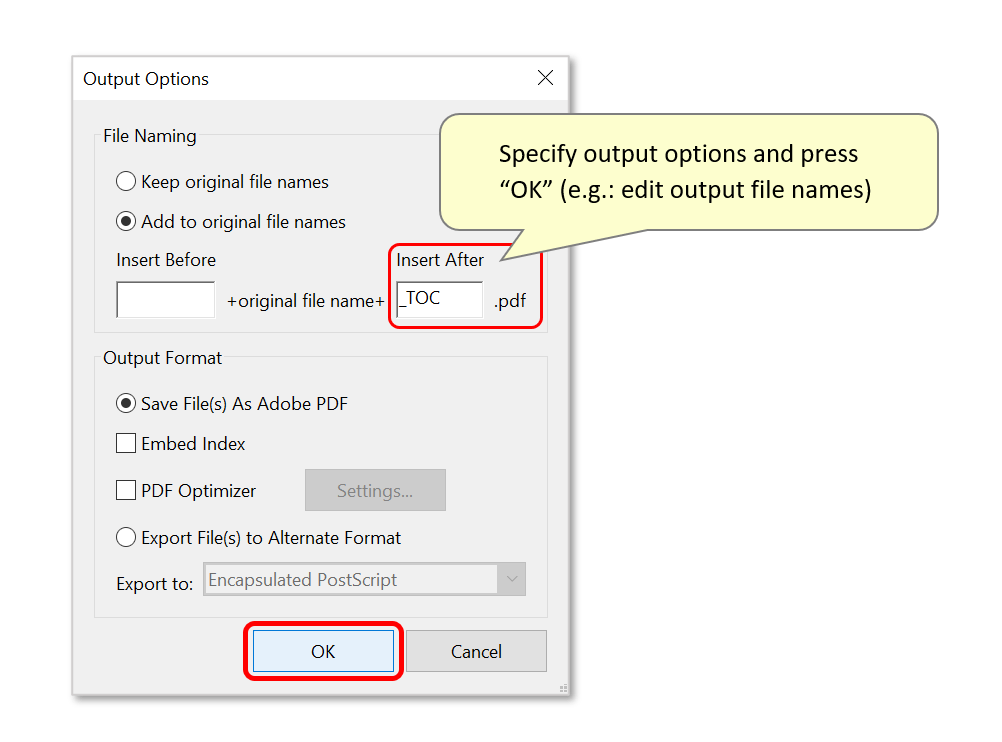
- In the "Output Options" dialog, specify filenaming options and processing parameters ("Embed Index" or "PDF Optimizer"). In this example, "_TOC" will be added to the end of output filenames.
- Press "OK" to proceed.
- Step 6 - Select an Output Location
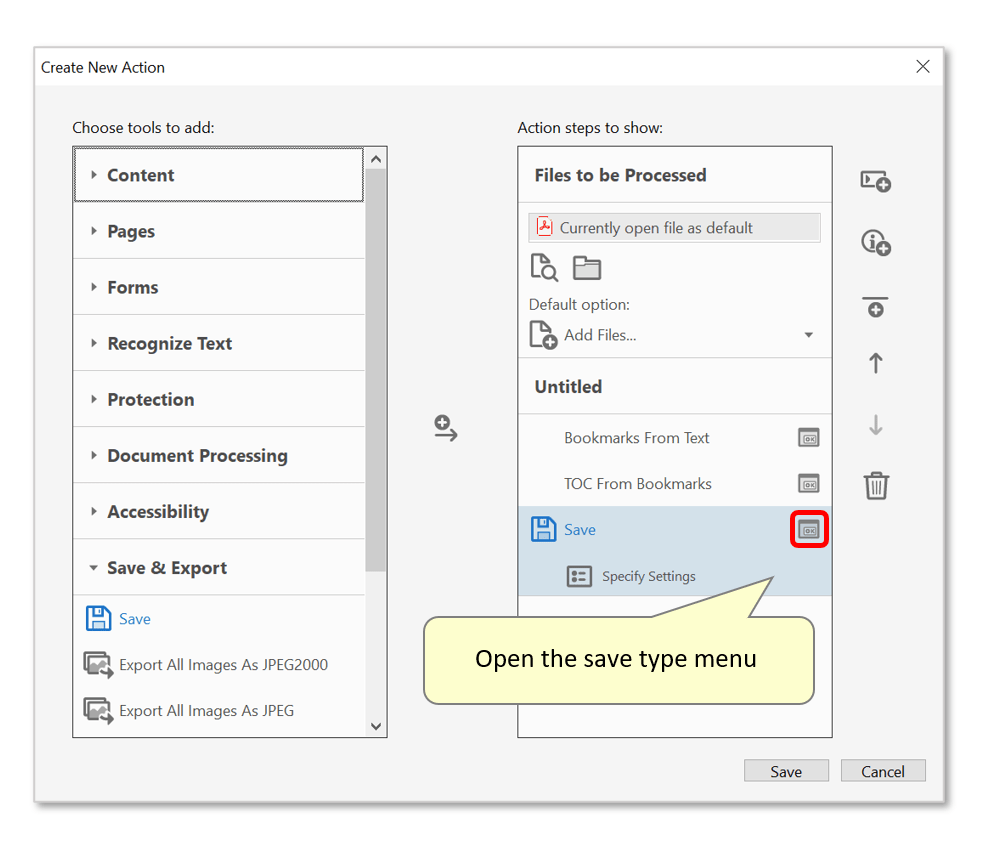
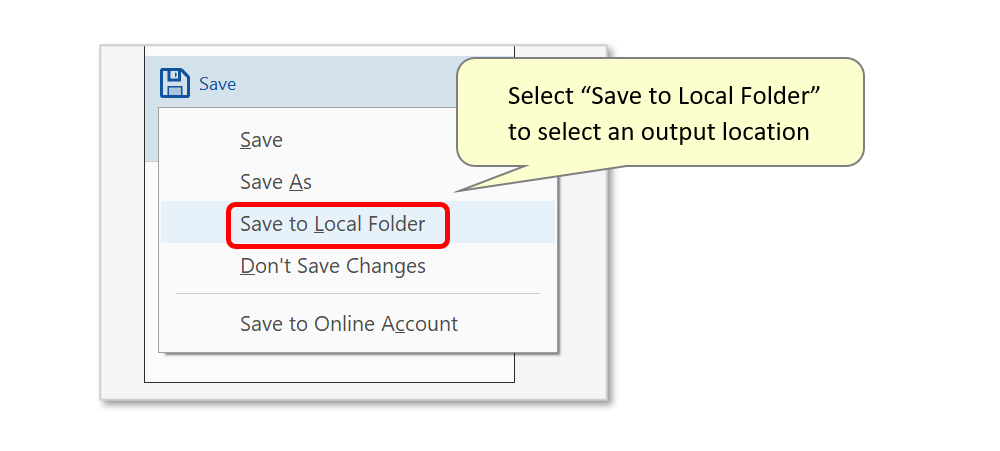
- Optionally specify an alternative location for updated files to be saved in. To do this, press the "Save" symbol to open the save type menu.
- Click "Save to Local Folder":
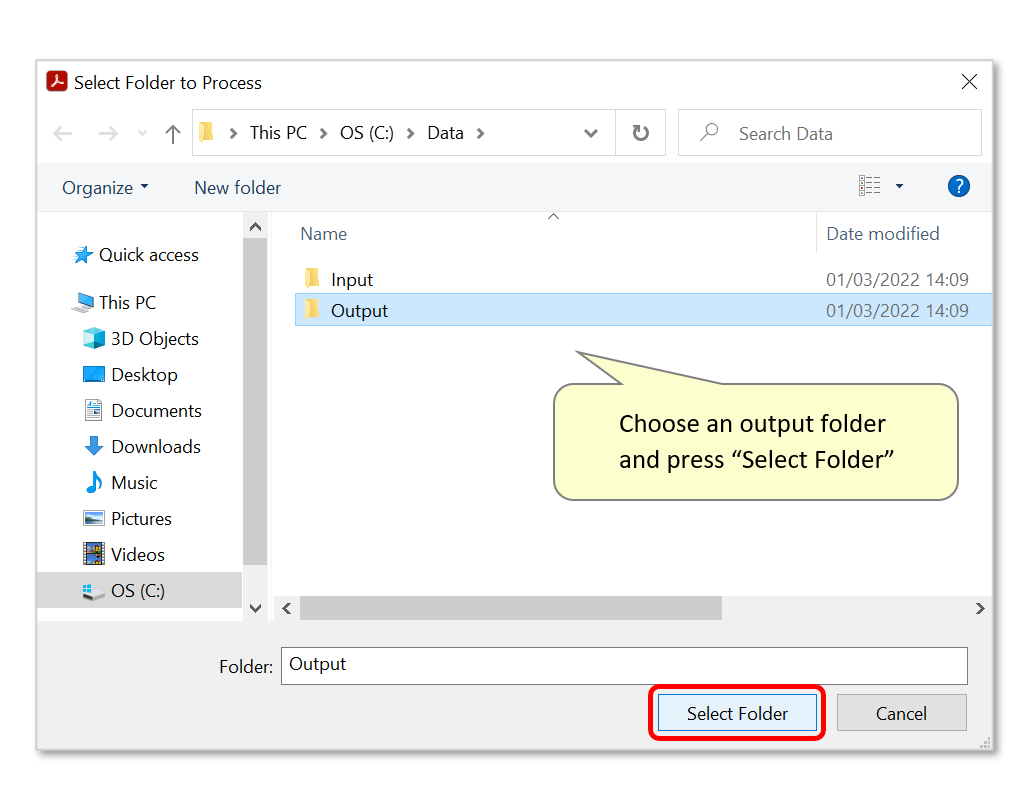
- Choose a suitable output folder and press "Select Folder".
- Step 7 - Optional: Configure an Input Folder
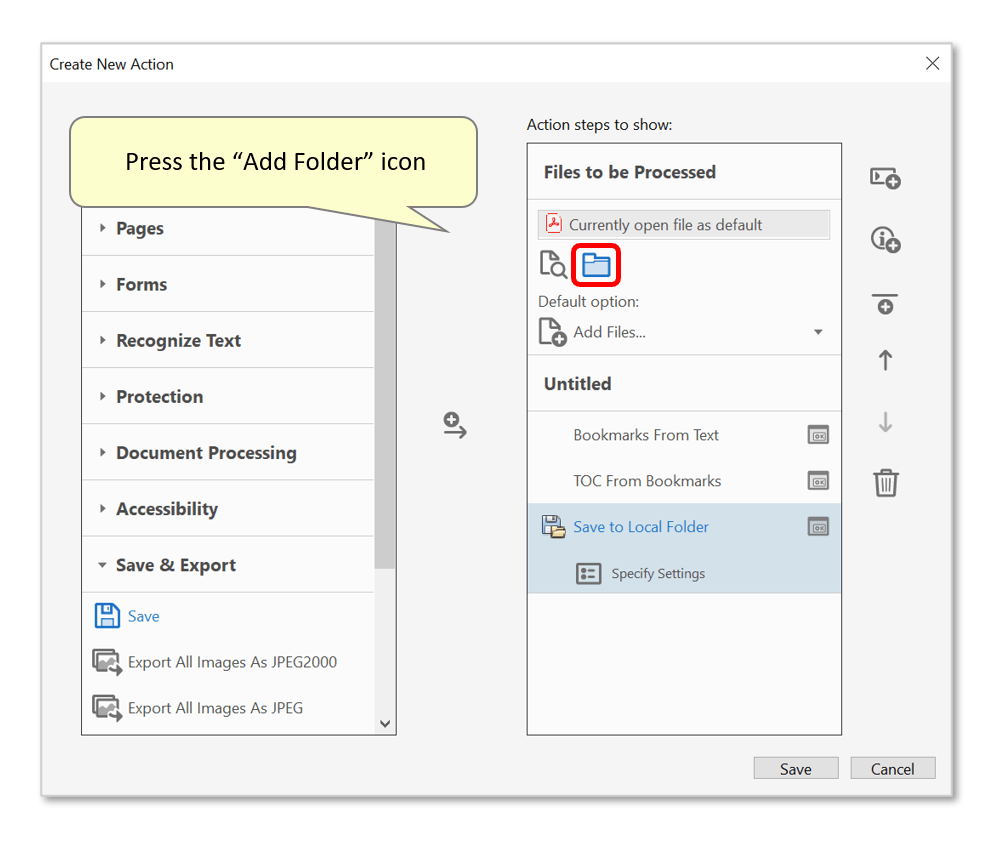
- The action will process the file currently open in Acrobat - or it can be configured to process all files located within a specific folder. Specify the folder at this stage by pressing on the "Add Folder" icon.
- Note: to manually select different input files/folders each time the action is used, ignore this step. Files for processing can simply be selected manually at a later stage.
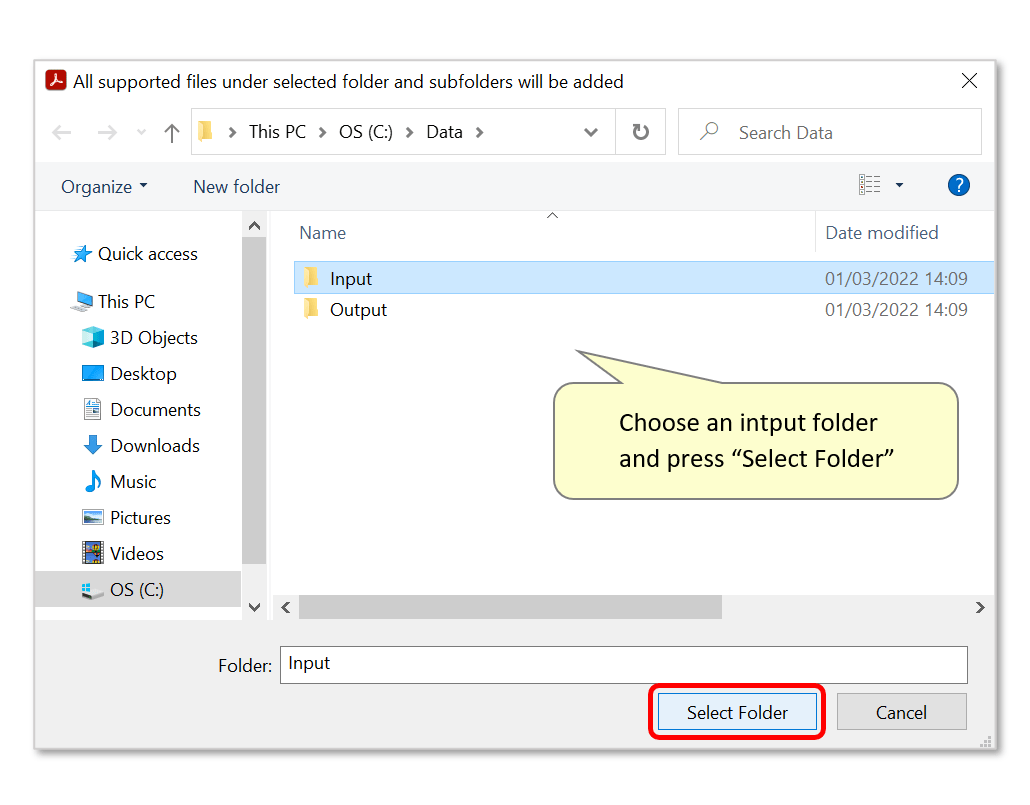
- Locate and select the desired input folder and press "Select Folder".
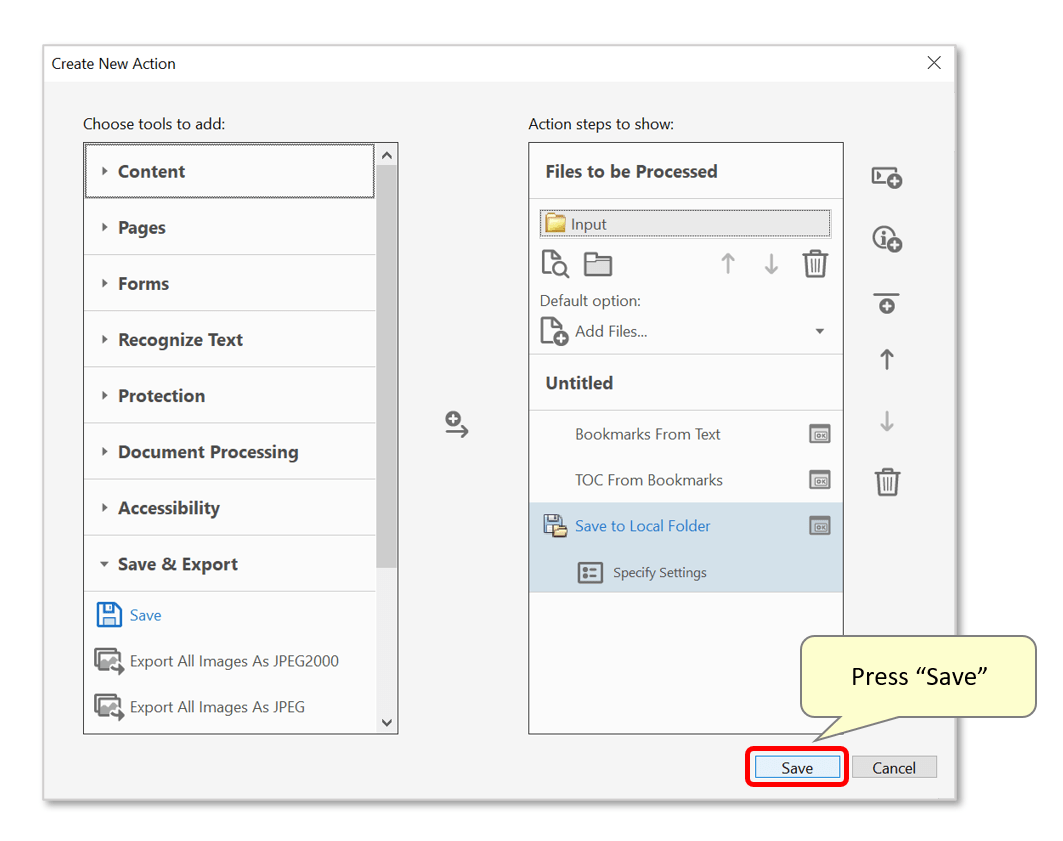
- Step 8 - Save the Action
- Press "Save" to save the action.
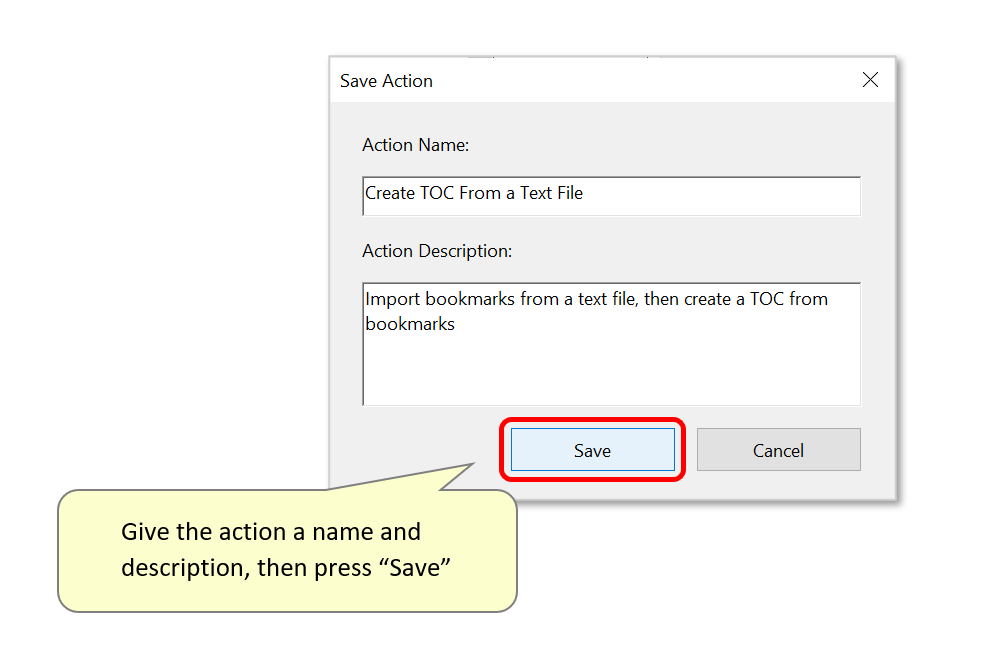
- Now type a suitable "Action Name" and optionally a description into the "Save Action" dialog, then press "Save".
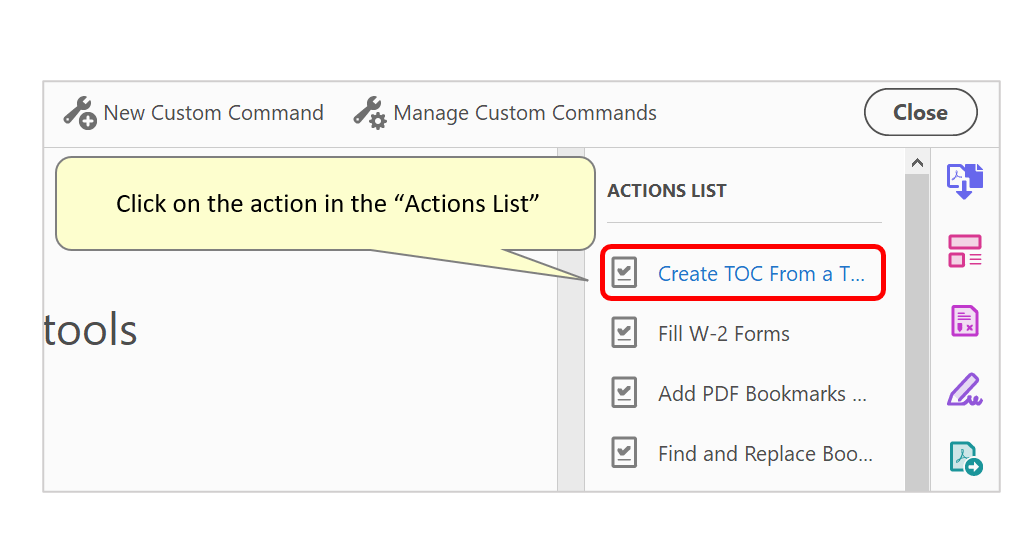
- Step 9 - Execute the Action
- The new action will have been added to the "Actions List" on the right. Click on it to use it.
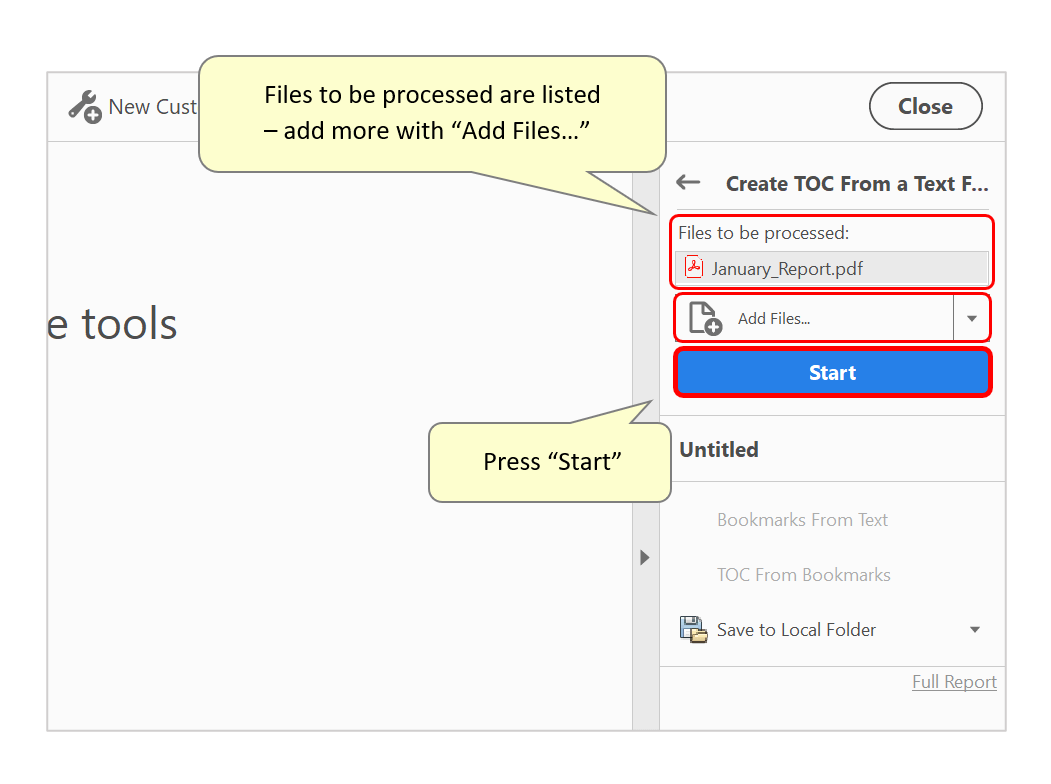
- Any files in the specified input folder will now be listed under "Files to be processed:". Press "Add Files..." to add more - note that files from different folders can be processed at the same time, via the repeated use of the "Add Files..." button.
- Press the "Start" button to begin running the action.
- Step 10 - Inspect the Results
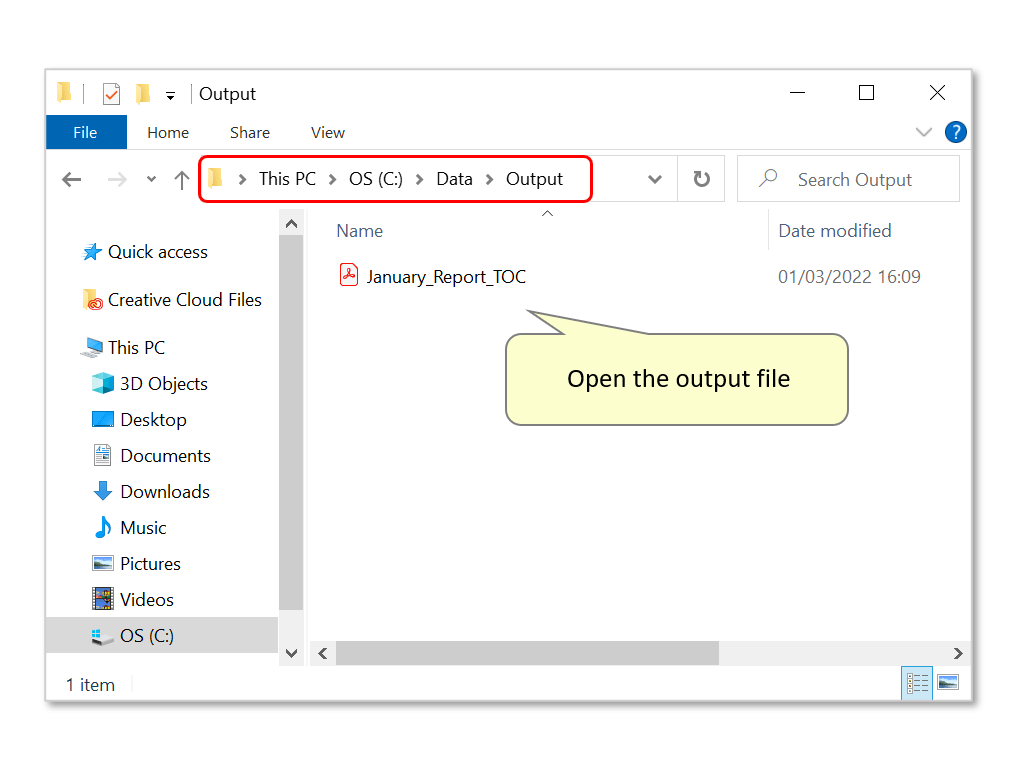
- If an output location was configured in step 6, open the folder to view the new file(s). In this example, the new filename contains "_TOC". Open it to inspect the added TOC.
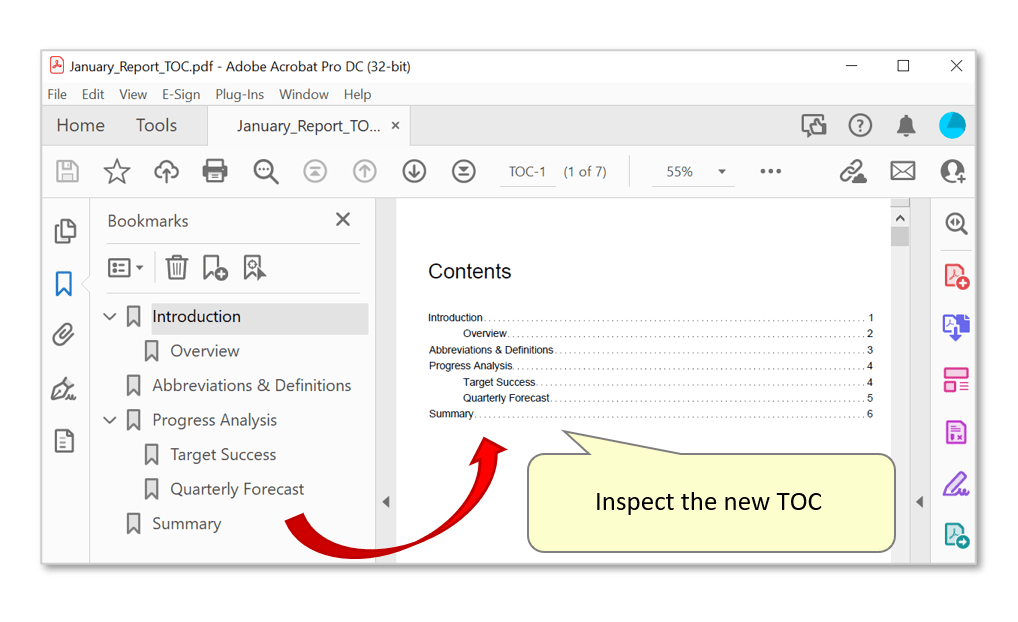
- A TOC page has been inserted at the beginning of the document - its contents matching the text file loaded in step 3.
- You can find a list of other step-by-step bookmarking tutorials by clicking here.