Securing PDF Files By Text Search
AutoMassSecure™ plug-in for Adobe® Acrobat®
- Introduction
- Manually securing PDF files requires multiple steps and takes considerable amount of time. It is not practical when multiple PDF documents need to be secured. The AutoMassSecure plug-in for Adobe® Acrobat® is designed to automatically secure a set of PDF files either by generating random individual passwords or by extracting passwords from the document text. The following tutorial is going to illustrate how to password protect multiple PDF documents by using 4 last digits of EIN (Employer Identification Numbers) as a password. The passwords are extracted from the document content.
- Input Documents Description
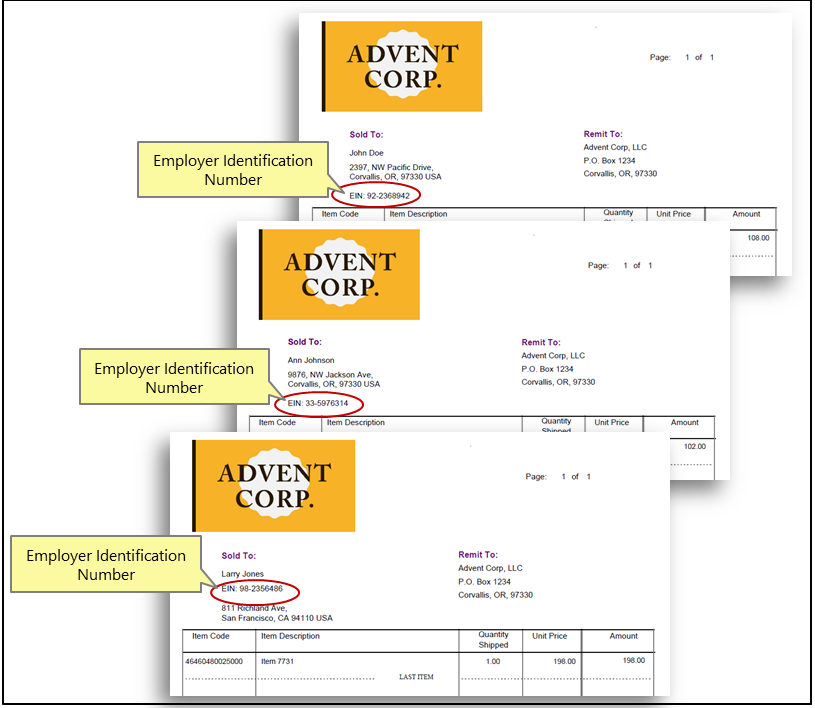
- The input folder used in this tutorial contains 5 PDF files (monthly statements). Each file contains a full 9-digit EIN somewhere on the first page. The goal is to secure each PDF file with a password that is using only last 4 digits of EIN. The exact same method can be used to secure files with 4 last digits of SSN (social security number) or any other text pattern.
- Securing Approach
- The first page of each documement is searched for EIN text pattern (XX-XXXXXXX). Only last 4 digits of the EIN are used for the password. The AutoMassSecure™ plug-in provides an option to search for user-defined text pattern in the document content and uses it as a password to secure the file. This method can be used if a desired password is contained in the document itself.
- Prerequisites
- You need a copy of Adobe Acrobat Standard or Professional along with AutoMassSecure™ plug-in installed on your computer in order to use this tutorial. You can download trial versions of both Adobe Acrobat and AutoMassSecure™.
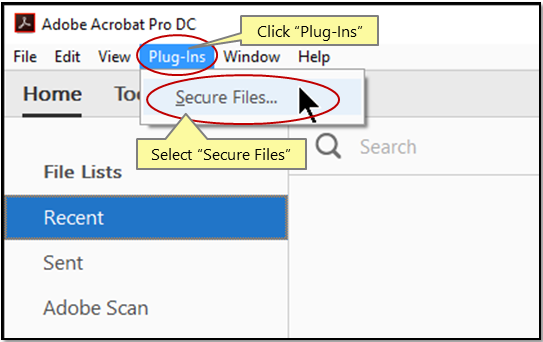
- Step 1 - Open “AutoMassSecure Plug-in Settings” Menu
- Select “Plug-Ins > Secure Files...” from the main menu.
- [⚡ How to locate Plugins menu in Adobe® Acrobat® ⚡]
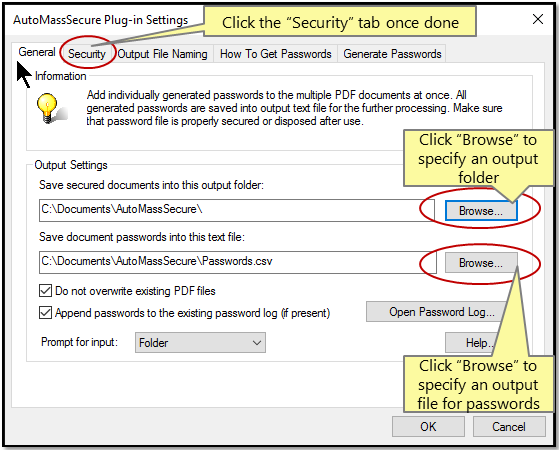
- Step 2 - Specify General Output Settings
- Specify an output folder for storing secured files by pressing "Browse" button. Press “Browse” button below to specify an output file that would contain generated passwords. Click the “Security” tab once done.
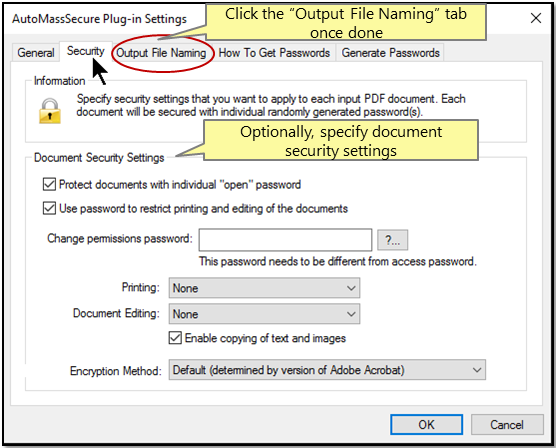
- Step 3 - Specify Security Settings
- Optionally, specify document security settings in this tab. To restrict printing or editing of the documents, check appropriate options. Selected access restrictions will be applied to each processed document. Click the “Output File Naming” tab once done.
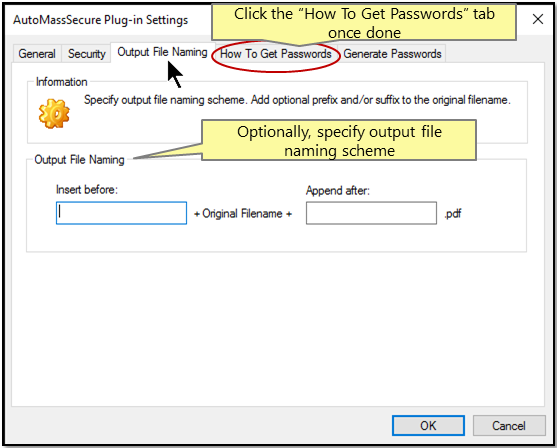
- Step 4 - Specify Output File Naming
- Optionally, specify output file naming scheme for secured files by adding prefix and/or suffix to the original file name. Click the “How To Get Passwords” tab once done.
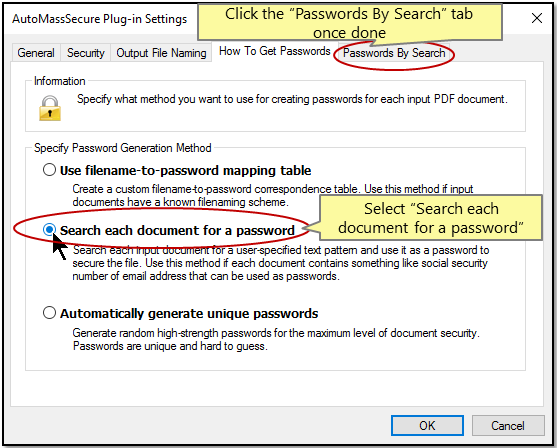
- Step 5 - Specify Password Generation Method
- Select "Search each document for a password" method. A new "Passwords By Search" tab would appear. Click it.
- Step 6 - Specify Search Pattern
- In this tutorial we are going to show how to use regular expressions to specify a text pattern.
- For example, enter the following text pattern to search for: (?<=\b\d{2}-\d{3})\d{4}\b.
- The above pattern searches for EIN (format: 12-3456789) and uses only 4 last digits as a password.
- Here is the text pattern for the social security number (format: 123-45-6789). It is using only last 4 digits for the password: (?<=\b\d{3}-\d{2}-)\d{4}\b .
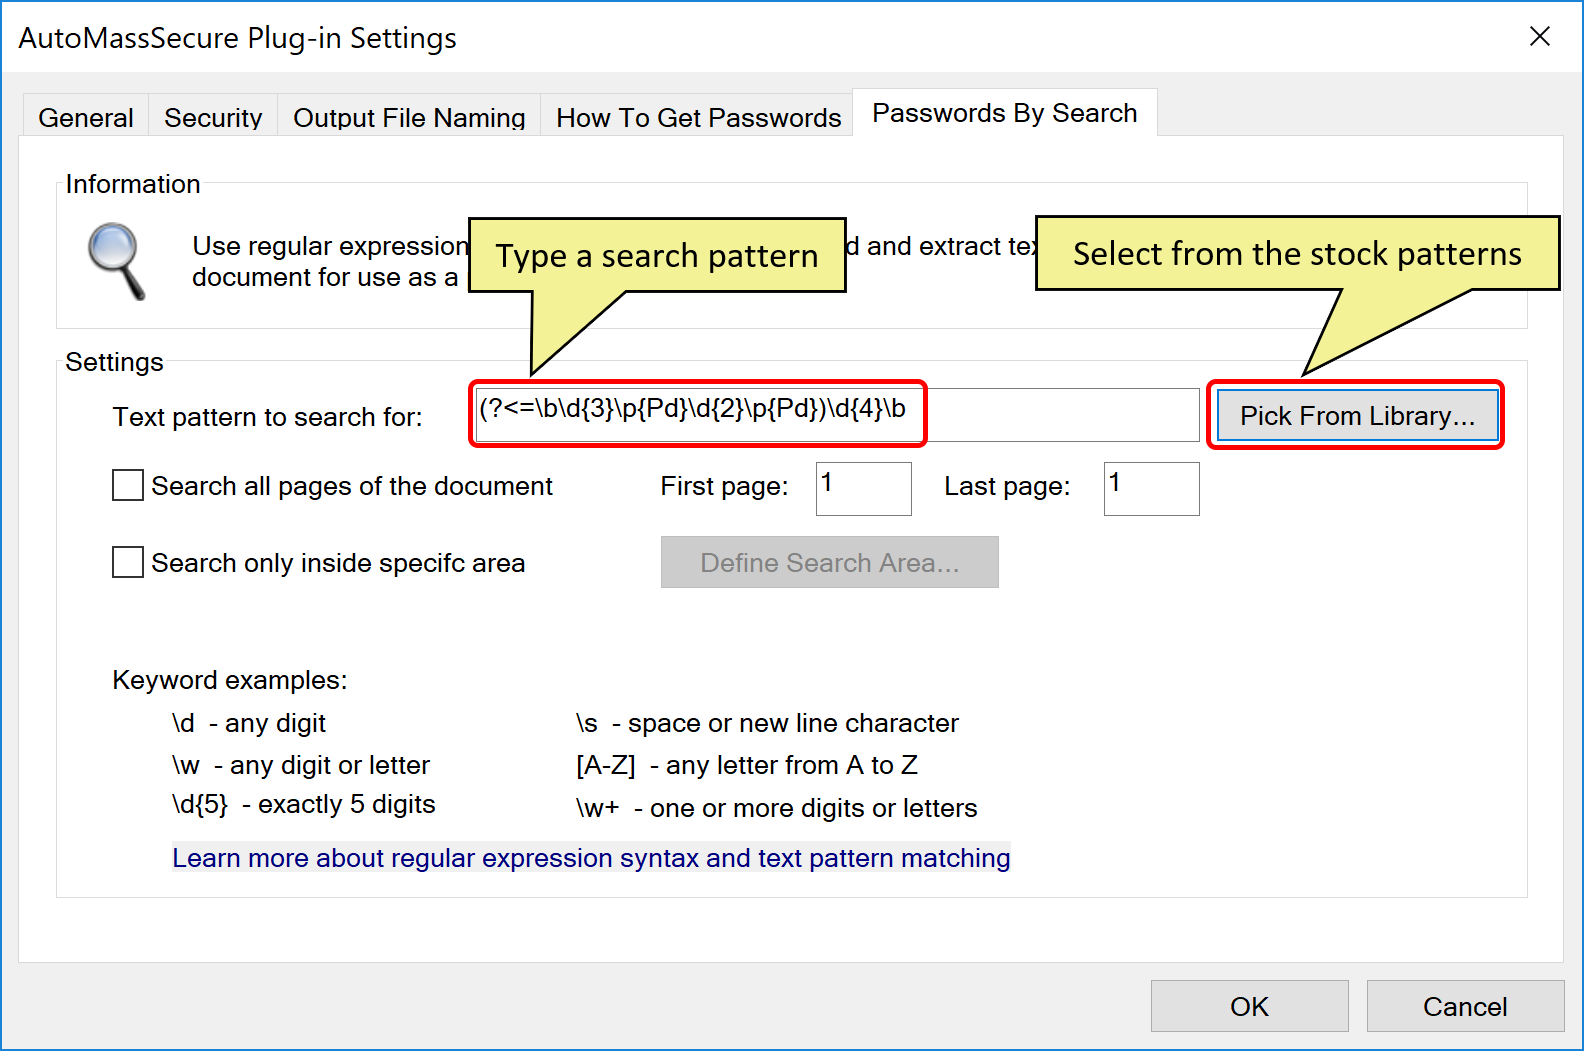
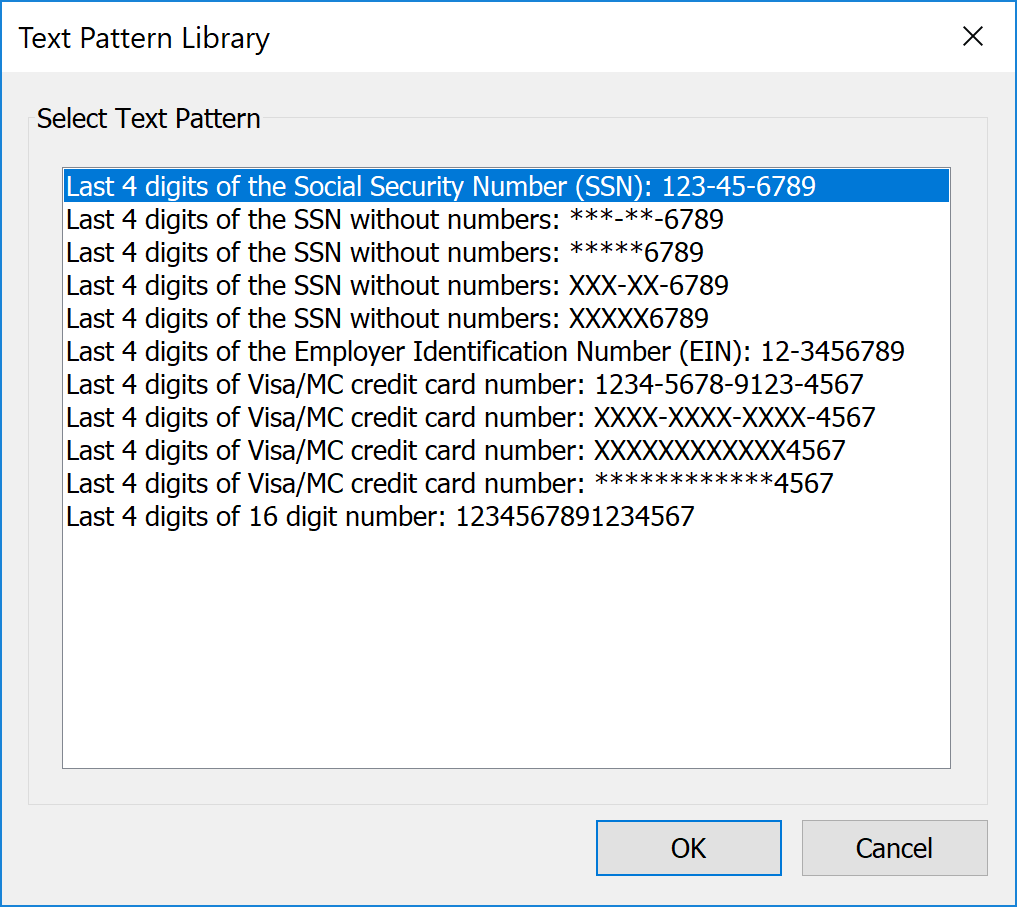
- Actually, you do not have to master the regular expressions in order to use this functionality. The AutoMassSecure comes with a library of the most commonly used text patterns, including various formats of SSN, EIN, and credit card numbers. Simply press "Pick From Library..." button and select one of the available patterns:
- The regular expressions that come with AutoMassSecure are more advanced in order to cover many possible cases, and are far less readble than the above example.
- Check "Search only inside specific area" option to limit text search to a specific page area. This feature is useful when there are multiple occurences of the same text pattern within the page. Press "Define Search Area" button to specify coordinates of the search area. Use Acrobat ruler to determine page coordinates prior to using this dialog. Press Ctrl+R on the keyboard to use the ruler.
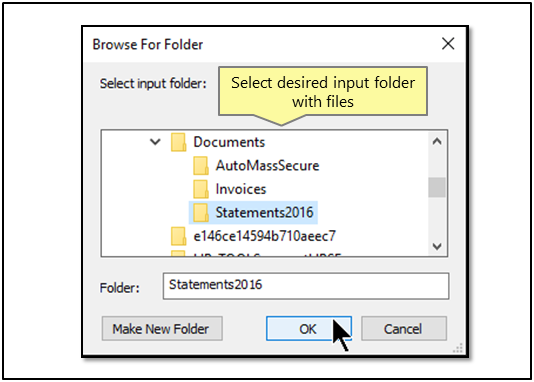
- Step 7 - Specify Input Folder
- Select an input folder with PDF documents that need to be secured. Click "OK" once done.
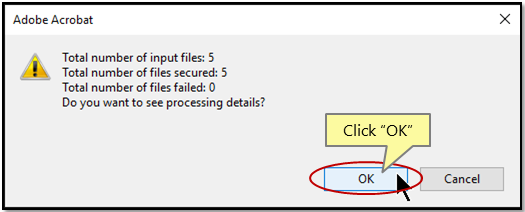
- Step 8 - Inspect the Results
- The resulting dialog contains information about the total number of input files, secured files, and failed files. Click "OK" to open the processing log.
- The processing log contains detailed information about input/output files, password-protection method used, and a processing date.
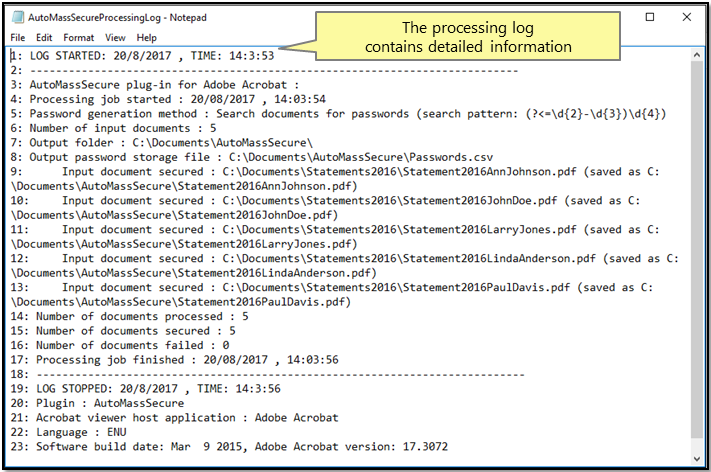
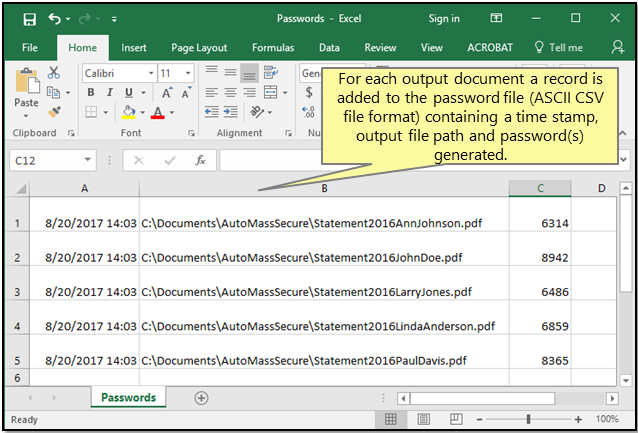
- Processing information such as time stamp, output filename and associated access passwords are saved into a special "password file" for further processing by external applications. The plug-in allows storing this metadata in either CSV or Excel-compatible XML file format. The "password file" lists filenames with corresponding passwords and processing dates.