Selecting and Ordering PDF Portfolio Records for Conversion
AutoPortfolio for Adobe® Acrobat®
- Introduction
- This tutorial shows you how to navigate the 'Specify Sorting Order' dialog in the AutoPortfolio™ plug-in. The software provides the ability to limit processing/conversion to the specific PDF Portfolio entries by using this dialog. It is presented to the user after selecting an input PDF Portfolio, whilst using any AutoPortfolio™ features via the "Plug-ins > AutoPortfolio Plug-in" menu. For example, select Portfolio records for only a specific date or relevant person (as in the case of email Portfolio’s). Only these selected records will then be included when carrying out Portfolio processing tasks.
- This tutorial explains how to perform the following tasks:
-
- Manually select/unselect portfolio entries (emails) for conversion.
- Sorting portfolio records (emails) based on metadata fields (Date, From, To, etc).
- Filter portfolio entries (emails) for conversion by using a text search.
- Convert only a subset of entries (emails) based on record numbers or email dates.
- Prerequisites
- You need a copy of Adobe® Acrobat® along with the AutoPortfolio™ plug-in installed on your computer in order to use this tutorial. Both are available as trial versions.
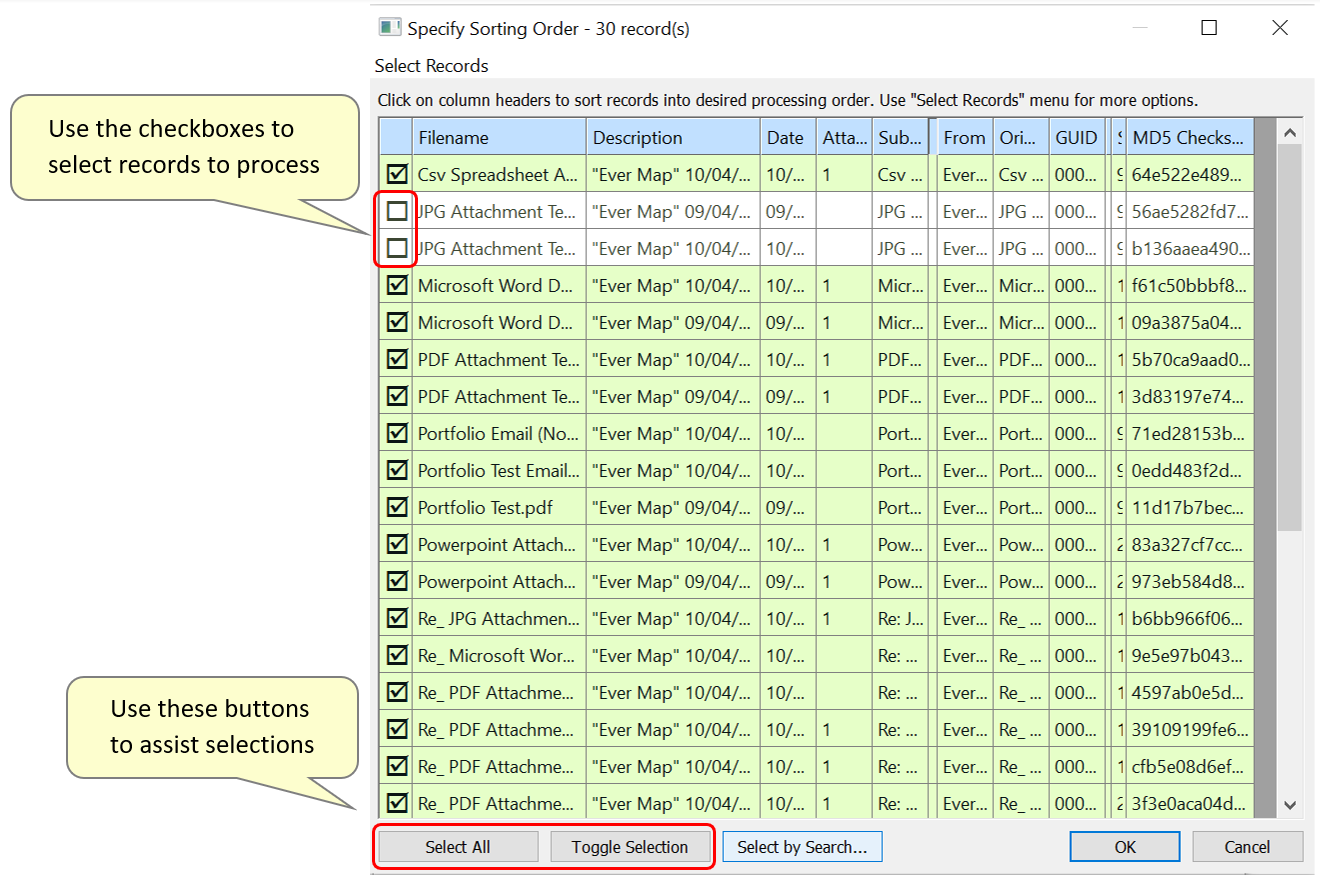
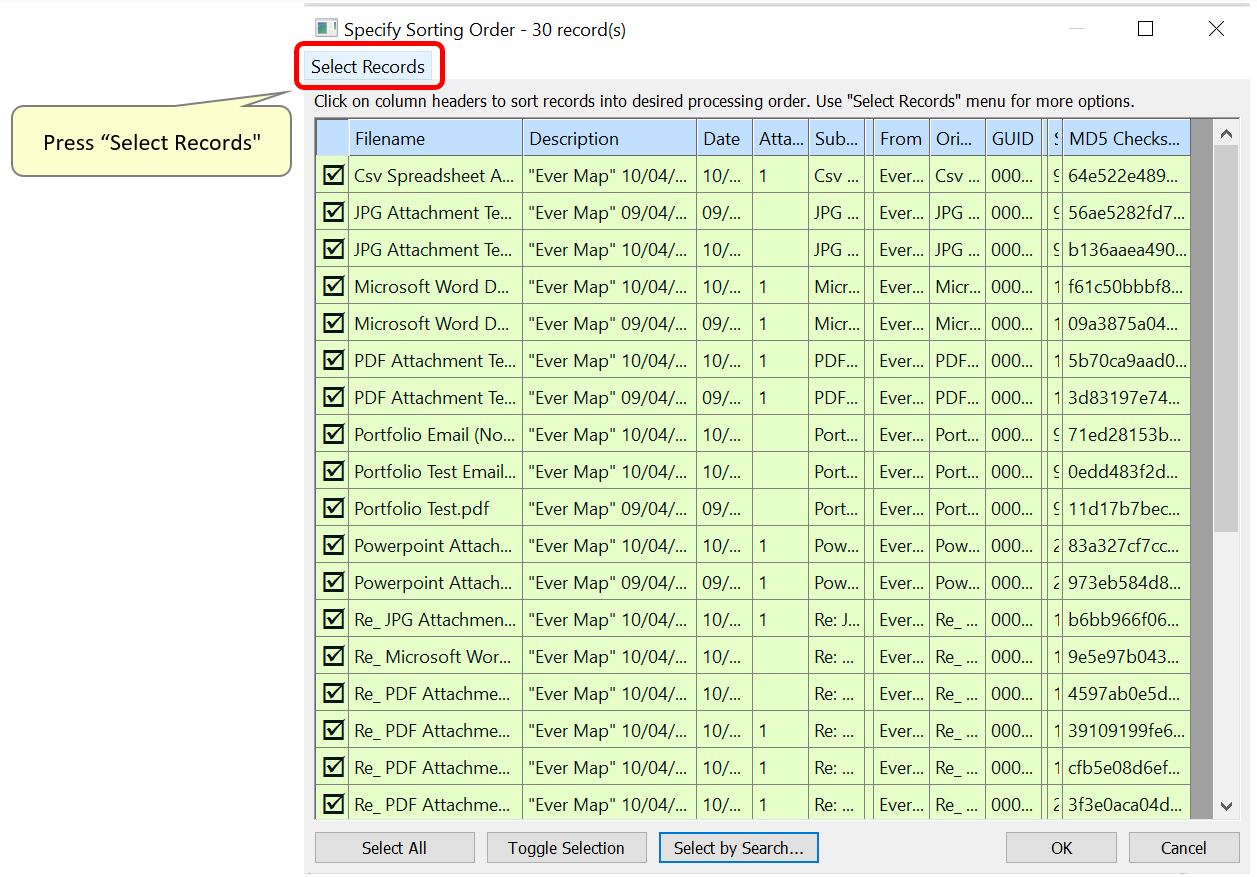
- Step 1 - Select Records/Emails using Checkboxes ↑overview
- In the 'Specify Sort Order' dialog, use the check boxes in front of each record to manually select/unselect entries. Use the "Toggle Selection" button to de-select all entries. This way, if fewer entries are required for processing, they can be manually selected via the checkboxes without the need to unselect most of them. Return to default by using the "Select All" button to select all entries.
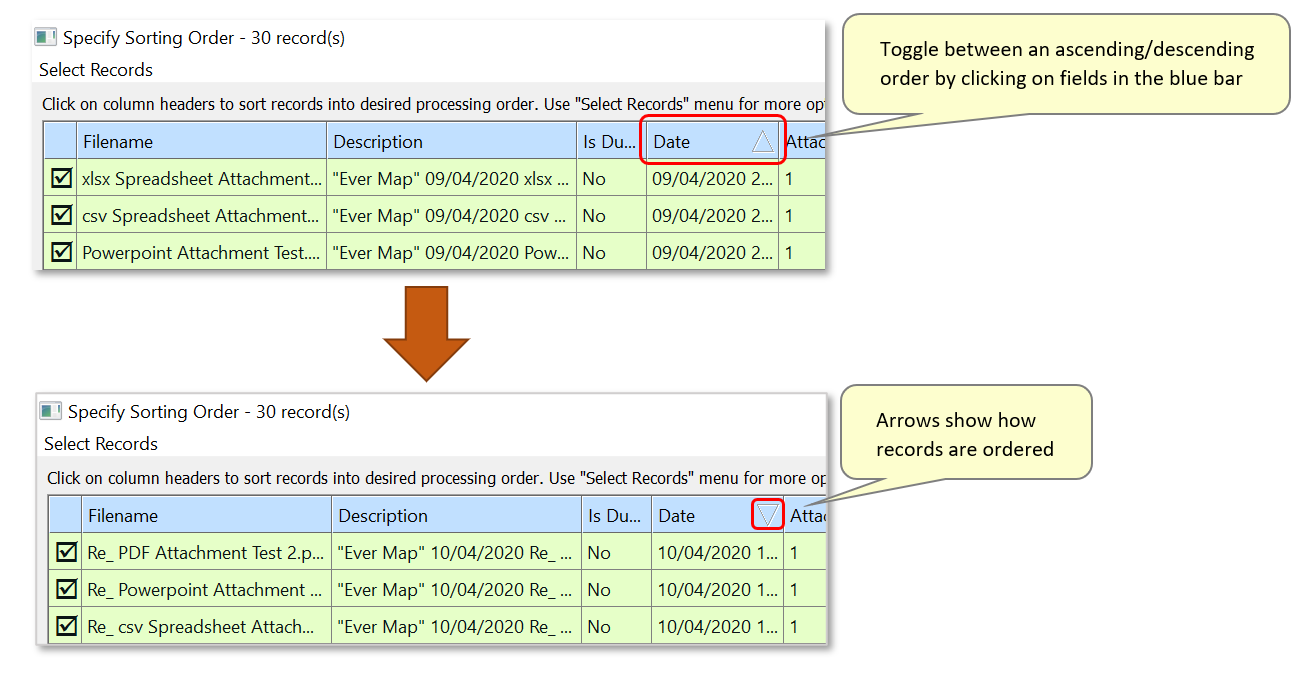
- Step 2 - Ordering (Sorting) Records ↑overview
- It may be easier to make selections by ordering the records in a specific way under a single data field (e.g.: order them alphabetically according to 'File names' or file 'Description', or by ascending/descending dates etc.). To do this, toggle between reverse orders by clicking on a field within the blue bar above the listed records. The changing arrows will show the direction that files are ordered in.
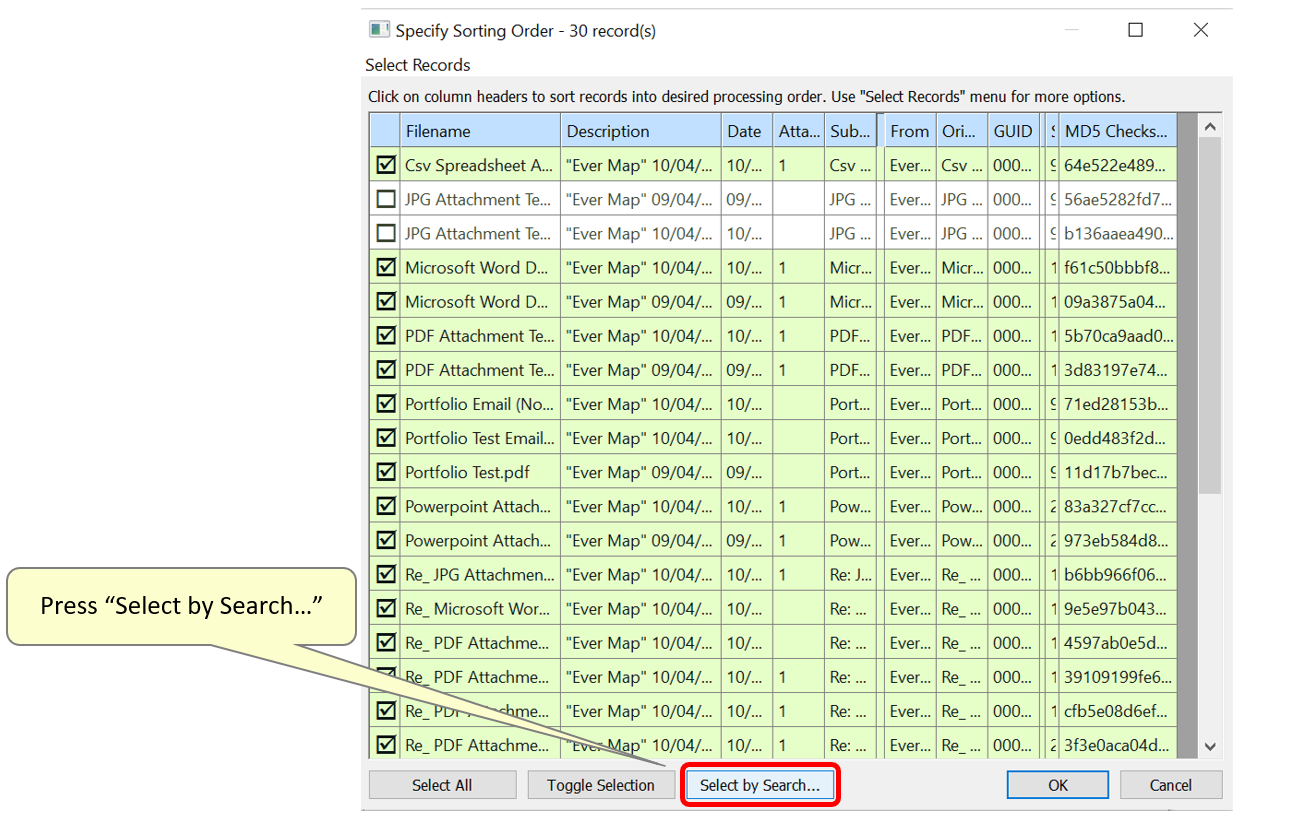
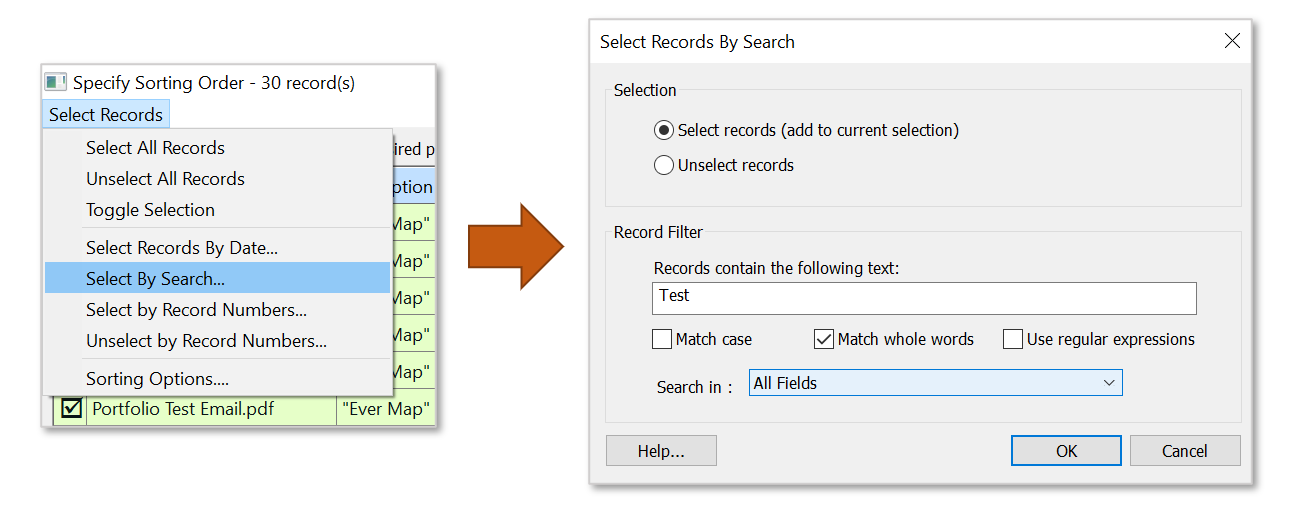
- Step 3 - Select Records using a Text Search ↑overview
- Press "Select by Search..." to perform a text search. This opens the "Select Records by Search" dialog. This method can be used to select/unselect all corresponding entries that contain text matching a specific criteria.
- In the "Select Records by Search" dialog, first select how the text search will be used - either to select or unselect records.
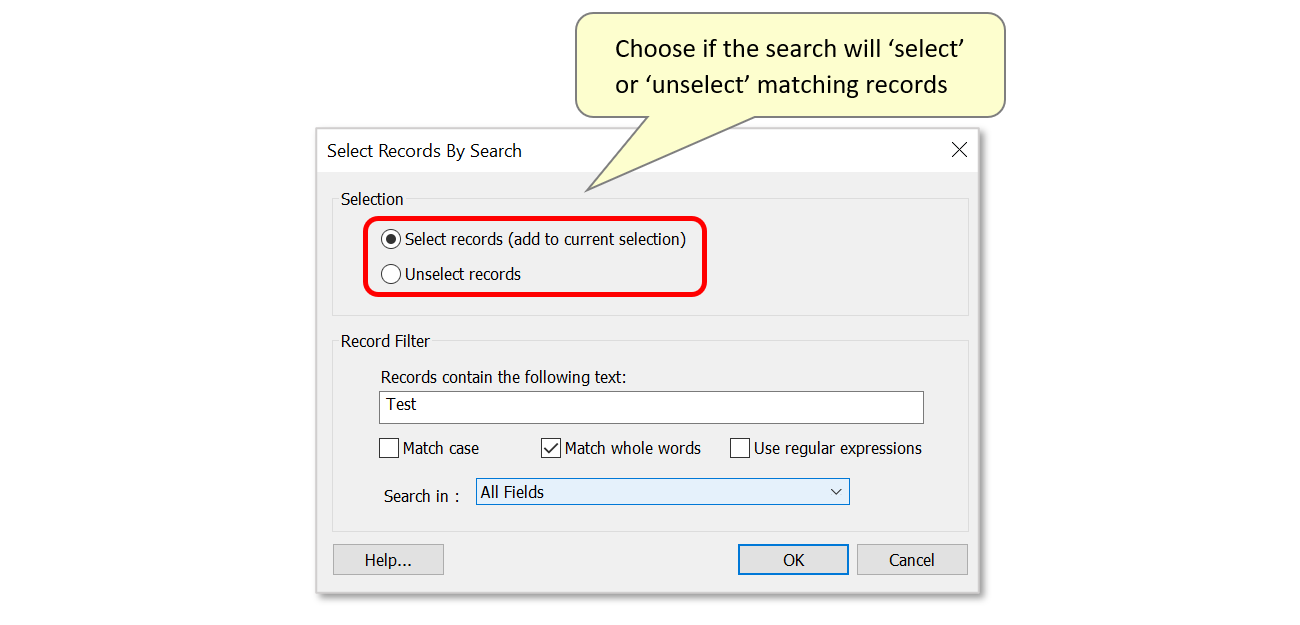
- In the 'Record Filter' section, specify the text to search for in the entry box. Search expressions can also be used via regular expression syntax. To do this, ensure that "Use regular expressions" is checked. Use the checkboxes to select other necessary options. "Match text case" ensures that matches will only occur where the text case is identical to the text entered here. "Match whole words" ensures that the plug-in matches only with entire words that match the entered text, and prevents partial matches with words that partly-contain this text.
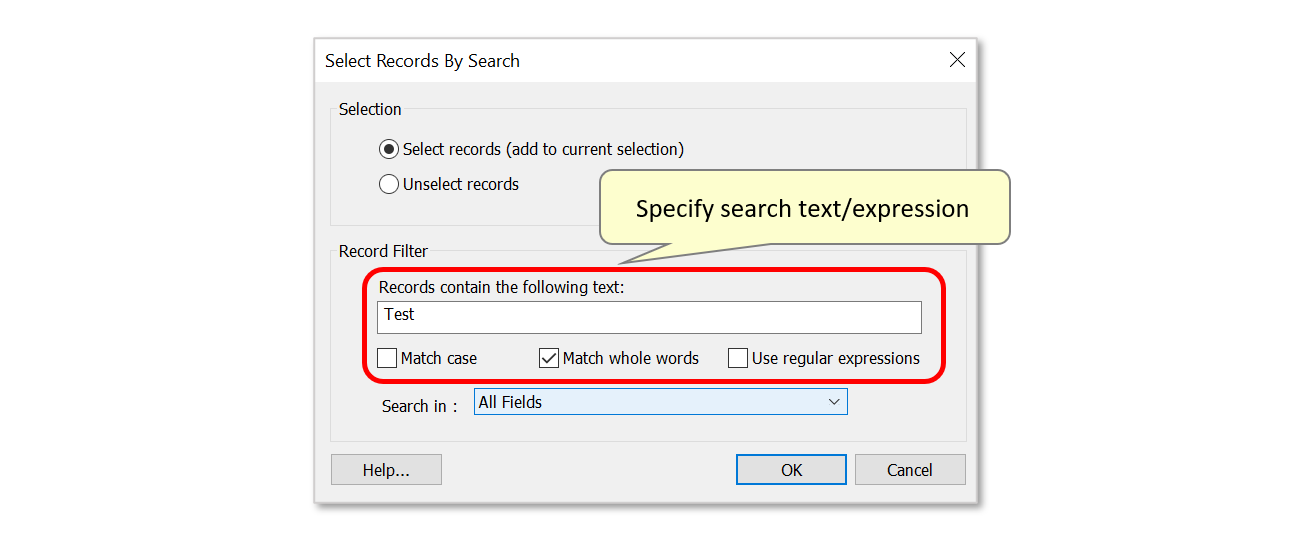
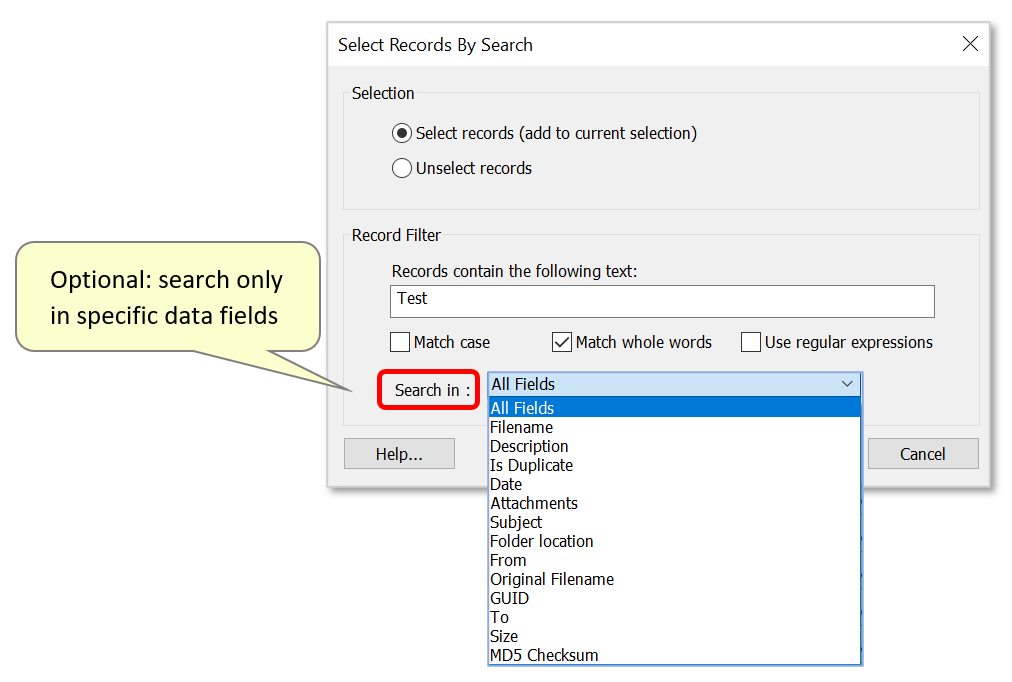
- Lastly, select where to search. By default, the text search will process all fields to find matches. Optionally, use the drop down list to search within a specific data field.
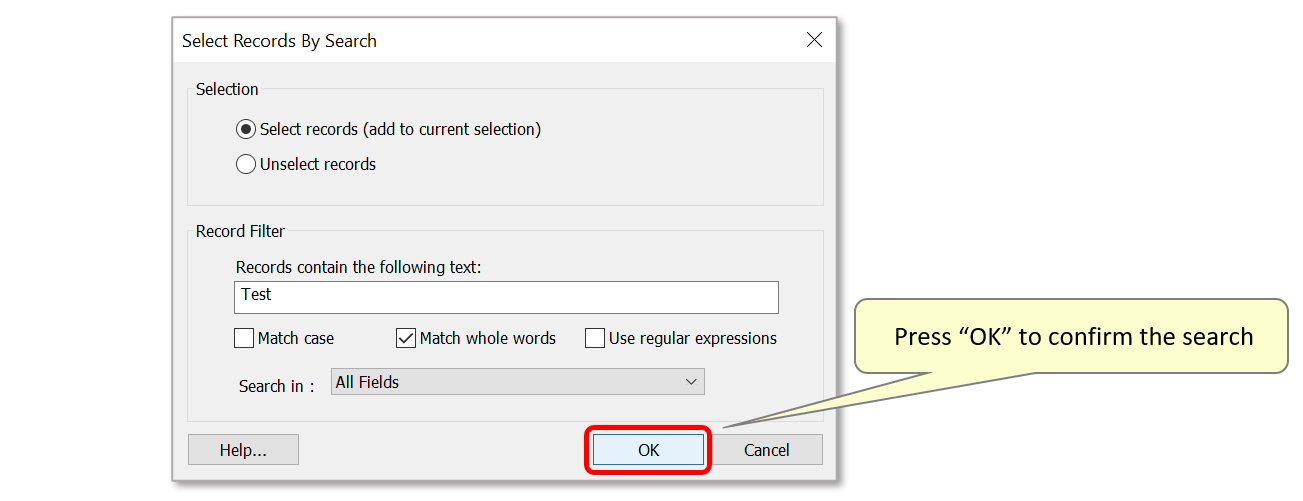
- Step 4 - Confirm the Text Search ↑overview
- Press "OK" to confirm the search parameters.
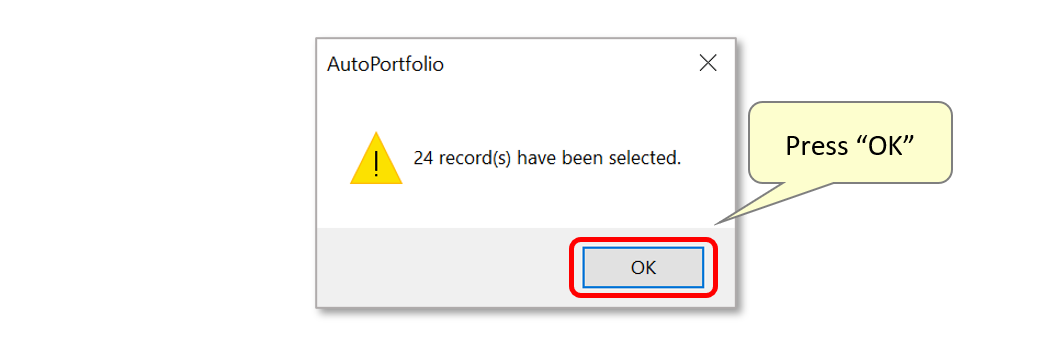
- A report box will open, displaying the results of the search (how many records have been selected/unselected). Press "OK" to close it.
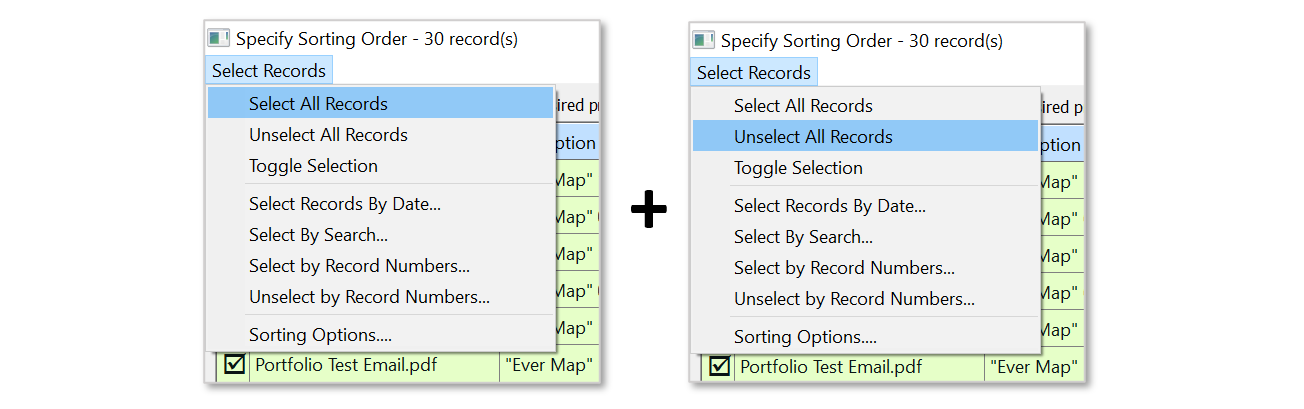
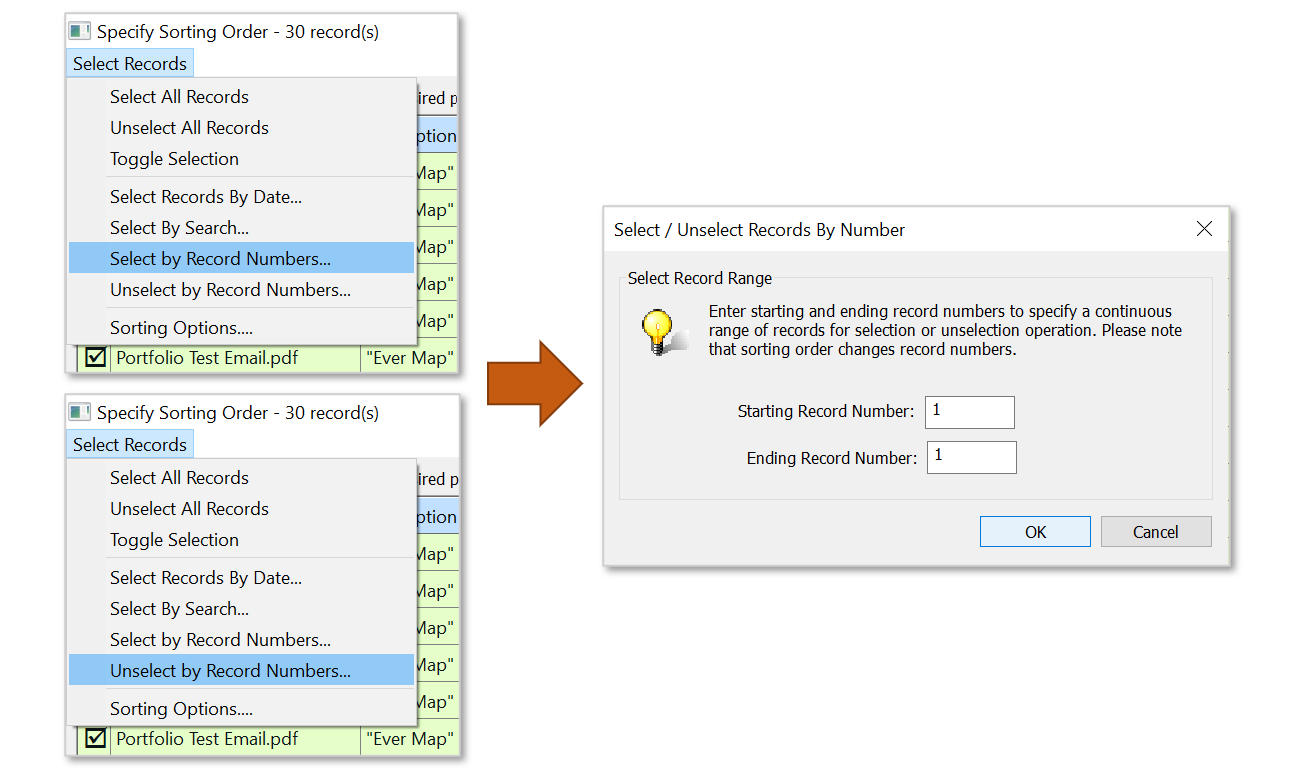
- Step 5 - Opening the 'Select Records' Menu ↑overview
- Optionally, use the 'Select Records' menu to manipulate the current selections. It lists additional features useful for selecting specific Portfolio entries. To open it, press "Select Records" in the upper left corner.
- Step 6 - Using the 'Select Records' Menu ↑overview
- Use the "Select / Unselect All Records" options to check/uncheck all records in the list.
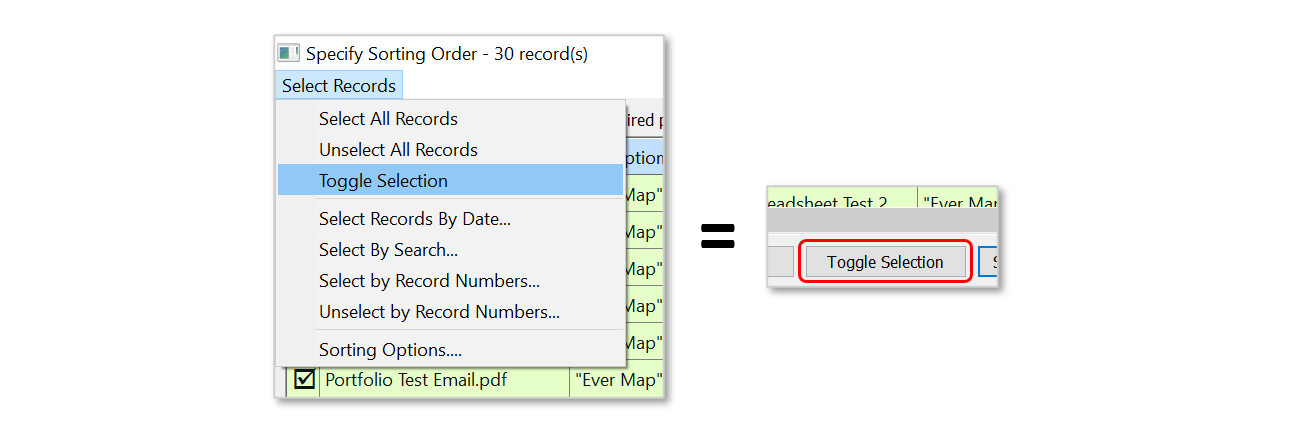
- "Toggle Selection" is the same option as the button provided within the 'Specify Sorting Order' dialog. Use it to unselect all entries, in order to manually select only a few records.
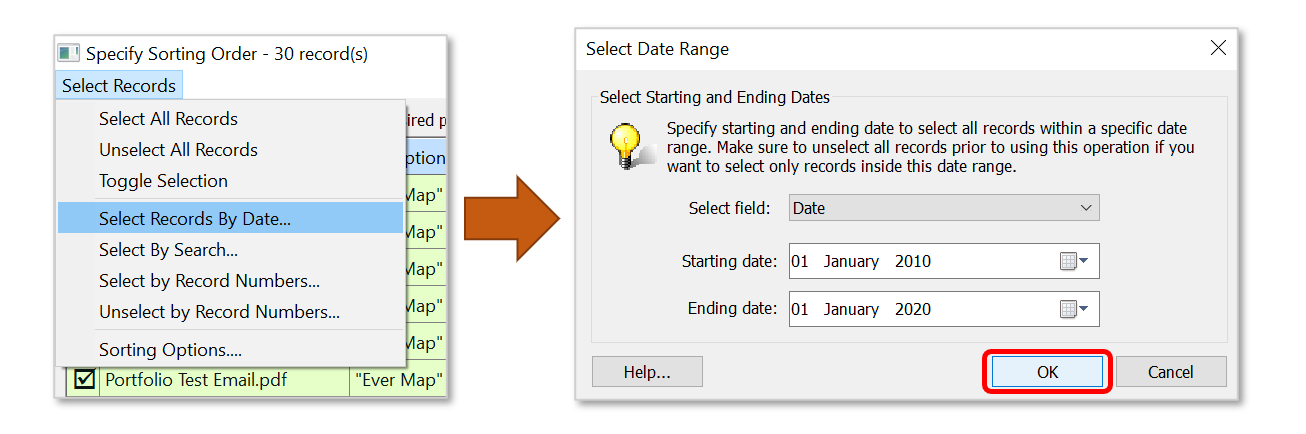
- Press "Select Records By Date..." to open the 'Select Date Range' dialog. Use this window to specify start and end dates to select specific records that fall within this range. IMPORTANT: Ensure that all records are previously unselected (using "Toggle Selection") before selecting records within a date range.
- Use "Select By Search..." to select records using a text search(see Steps 2/3 above).
- Use the "Select / Unselect by Record Numbers..." options to open the same dialog. Use this window to specify a range of starting and ending record numbers. Note that the current sorting order affects record numbers - by default, records are ordered in ascending order starting from '1'. All records within this specified range will be selected or unselected, depending on which option was selected from the 'Select Records' menu.
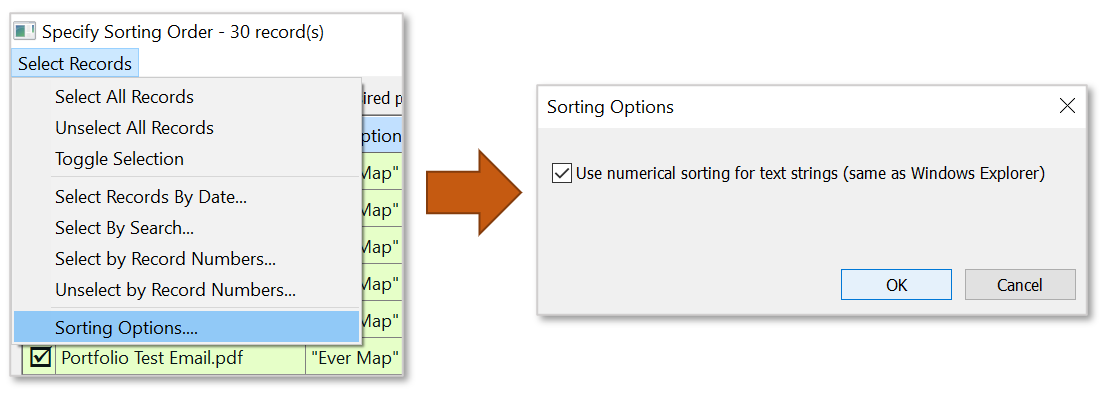
- Press "Sorting Options..." to optionally un-check the option to use numerical sorting for text strings.
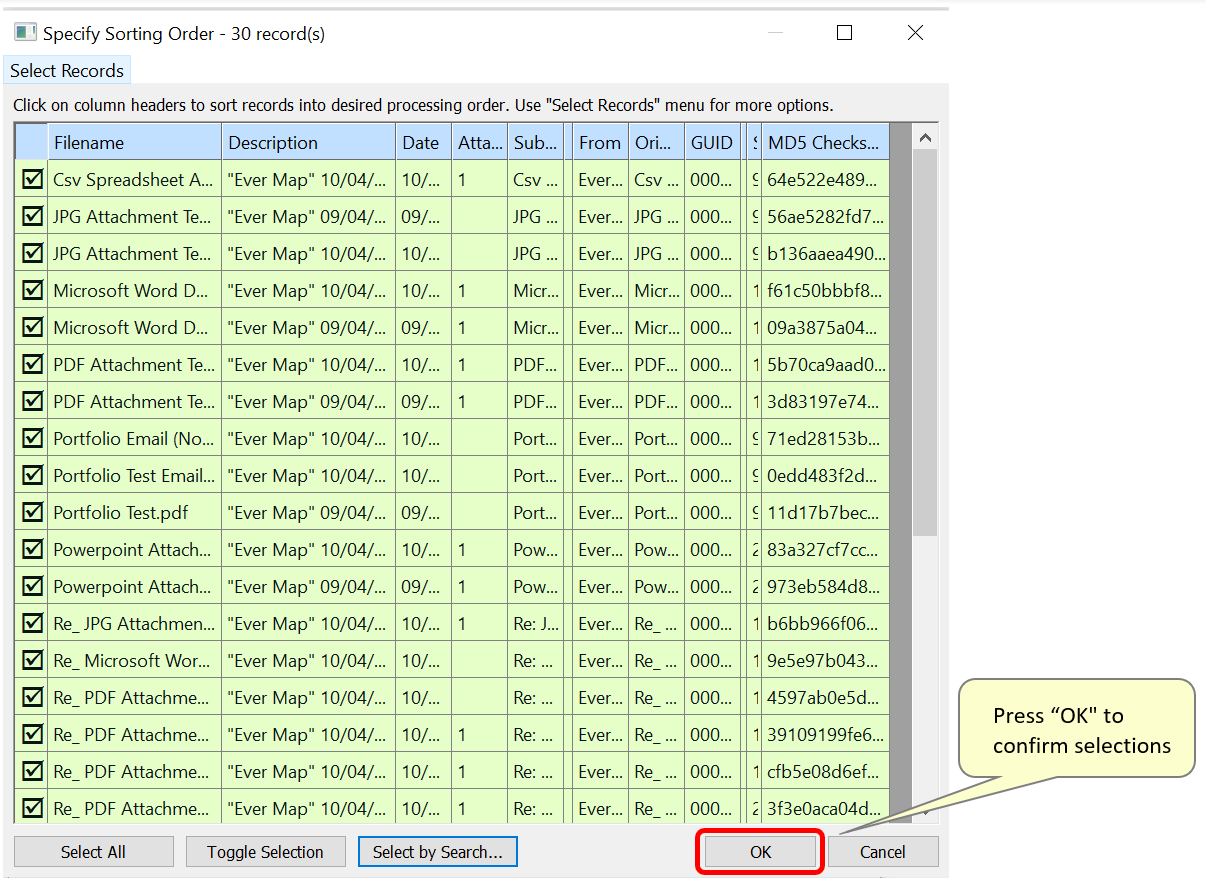
- Step 7 - Confirm Selected Records ↑overview
- When ready, press “ OK” on the 'Specify Sorting Order' dialog to confirm selections.
- You can find more AutoPortfolio™ tutorials here.