Redacting PDF Files By Drawing Areas
AutoRedact® Plug-in For Adobe® Acrobat®
- Introduction
- The AutoRedact® is an advanced plug-in for Adobe® Acrobat® software for performing PDF redaction. It is designed for removing sensitive information from PDF documents. The software comes with both manual and automated tools for marking up content for redaction. It is also possible to use Acrobat®’s standard commenting tools such as highlight, cross-out, underline and rectangle.
- This tutorial explains how to redact PDF documents by drawing redacting areas using AutoRedact® plug-in for Adobe® Acrobat®. Manual redacting is convenient if automated methods can’t be applied to the document.
- What is Redacting?
- Redaction, by definition, means removing certain types of information from documents. In the context of United States government agency documents, redaction refers to the process of removing classified information from a document prior to its publication. For attorneys, redacting is very important procedure of protecting confidential information. Here are few examples of the redacting applied to a PDF document:
- Prerequisites
- You need a copy of Adobe® Acrobat® along with AutoRedact® plug-in installed on your computer in order to use this tutorial. You can download trial versions of both Adobe® Acrobat® and AutoRedact®.
- Step 1 - Open a PDF file
- Start Adobe® Acrobat® application and open a PDF file using "File > Open…" menu to open a PDF document that needs to be redacted.
- Step 2 - Select "Draw Redacting Areas" Tool
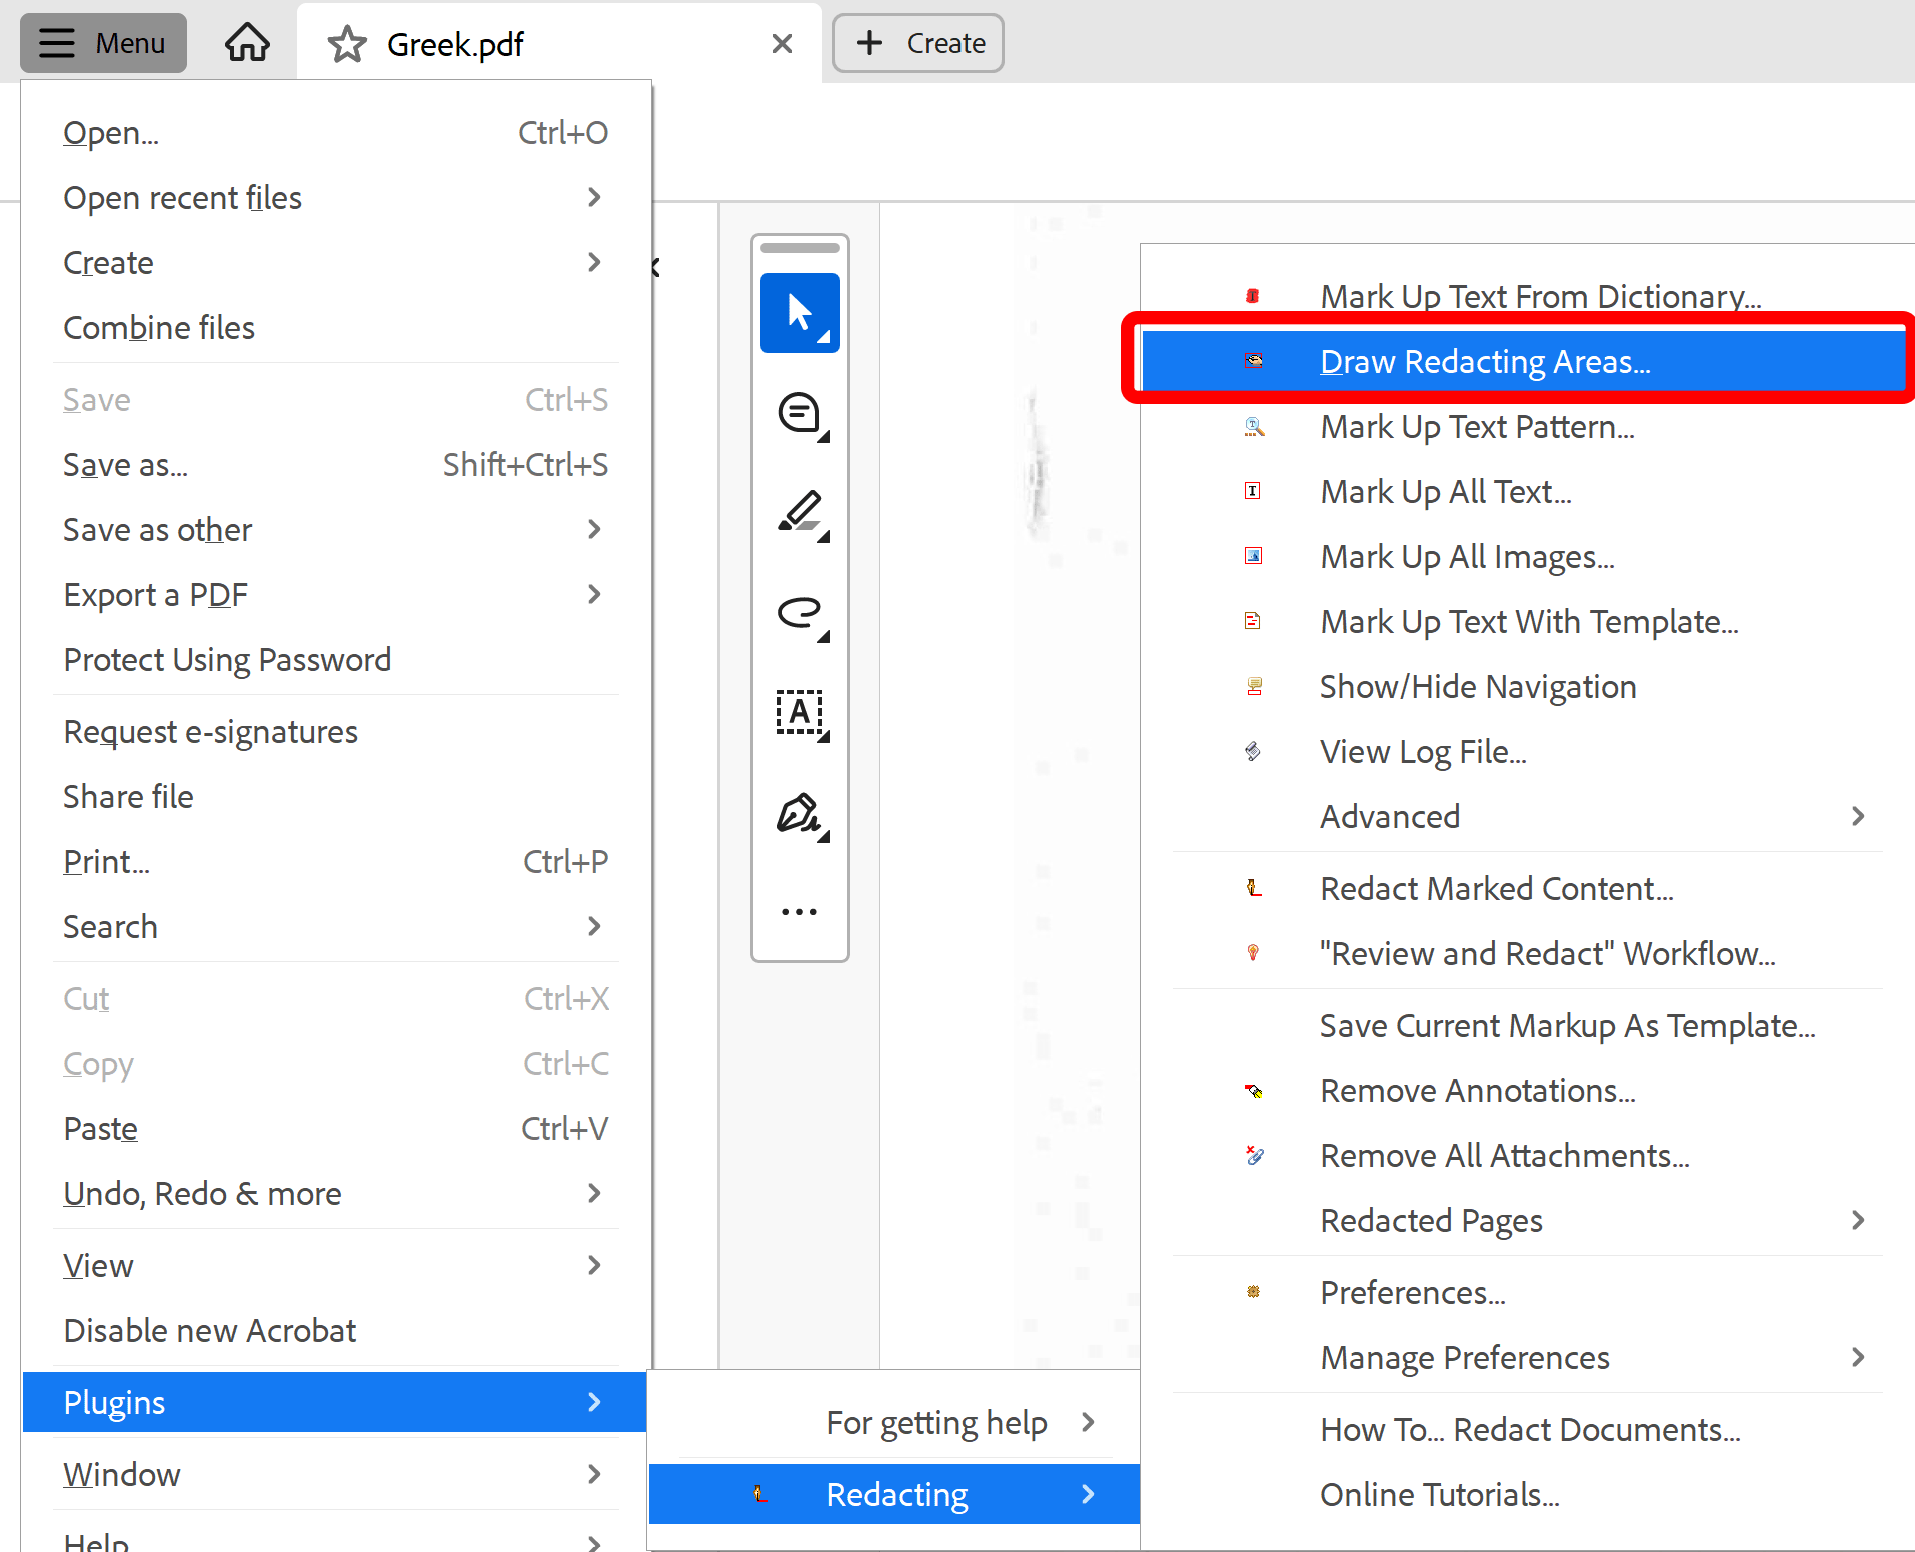
- Select "Plug-ins > Redacting > Draw Redacting Areas..." from the main Acrobat® menu to select the redacting tool. The "Redacting Tool" window will appear on the screen.
- Step 3 - Select an Exemption Code (Optionally)
- Optionally, select an exemption code from the "Select Group" and "Select Code" menus. Ignore this step if you do not plan to use exemption codes for redacting.
.PNG)
- Step 4 - Draw Redaction Area
- Draw a rectangular area on the page around the text or image you’d like to redact. The redacting annotation will be added to the page according to the current settings. Use "Plug-ins > Redacting > Preferences..." to edit application preferences. It is possible to redact the same area on the every page starting from the current one. Check "Add redacting areas to every page starting from the current one" box before drawing a redaction area, if this option is required.
.PNG)
- Step 5 - Draw More Redaction Areas (Optionally)
- Draw more redaction areas if necessary.
.PNG)
- Step 6 - Redact Marked Content
- Press "Redact Marked Content..." button once done adding redaction areas.
.PNG)
- Step 7 - Edit Preferences (Optionally)
- If you are using the software for the first time or need to change processing options, then press "Edit Preferences..." button. Otherwise skip to Step 10.
.PNG)
- Step 8 - Select Processing Options (Optionally)
- Select desired processing options in the "General" tab of the "Redacting Preferences" dialog. Check "Create a new document for redacting output" option to create a separate PDF document for the output or uncheck it to perform redacting right on the input document itself.
.PNG)
- Step 9 - Select Visual Appearance of the Redacted Areas (Optionally)
- Use Redacting" tab to control a visual appearance of the redacted documents.
-
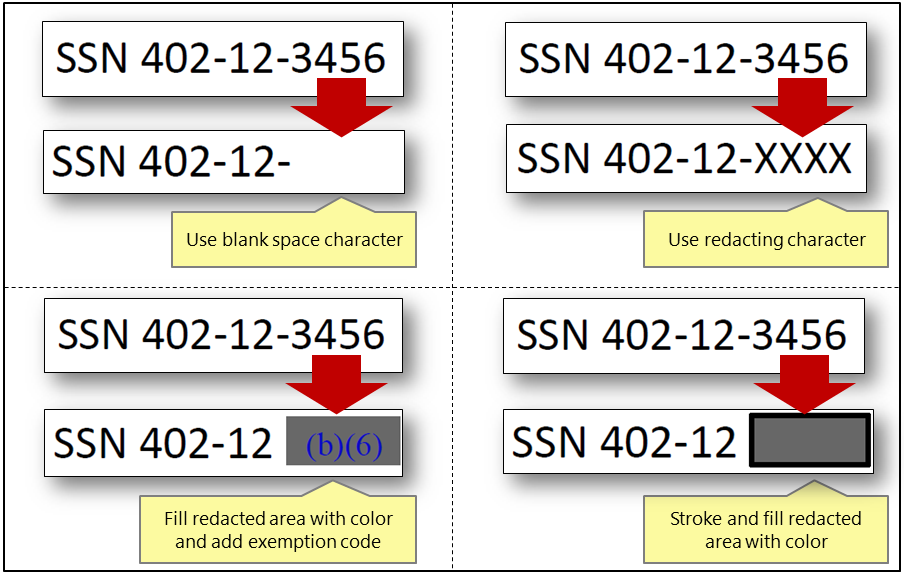
- Specify a redacting character to use for replacing the redacted text. By default, a blank space character is used.
- Uncheck the "Add exemption codes to the redacted areas in output document" box in the "Exemption Codes" section if there is no need to display exemption codes on the redacted areas.
- If redacting bars are required in the output, then check "Fill redacted areas with the color" option and selected a desired color. IMPORTANT: Redacting bars are used solely for the visual appearance of the redacted areas. They are not used to cover the text. The AutoRedact always removes redacted text from the document by replacing it with a user-specified redacting character. Click "OK" once done with processing options.
.PNG)
- Here are the various appearance options that can be achieved:
- Step 10 - Start Redacting
- Select a processing page range in "Redact Document" dialog. Only selected pages will be redacted. Click "OK" to start the redaction process.
.PNG)
- Step 11 - Check Stats
- The dialog with the redaction results will be displayed at the end of the processing. Click "OK" to finish.
.PNG)
- Step 12 - Examine Results
- By default, the output document with redacted content is shown on screen. The appearance of the redacted areas are controlled by the application preferences (see Step 9).
.PNG)
- Step 13 - Save Redacted PDF File
- Save the redacted PDF file by using "File > Save As..." menu.
- Step 14 - Close the Redacting Tool
- Select the input file tab or window. Click "Close" button located on "Redacting Tool" window to finish the redacting process.
.PNG)