Creating "Actions" using "Action Wizard" Tool
Tutorial for Adobe® Acrobat® X
- Introduction
- The Adobe Acrobat Professional offers a powerful way for automating repetitive tasks on the number of documents at once. The Adobe Acrobat X calls it “Action Wizard”. It is also known as “Batch Processing” in previous versions of Adobe Acrobat. You can define a series of commands with specific settings and in a specific order that you apply in a single step. You can apply an action to a single document, to several documents, or to an entire collection of documents. Once you have created an action, you can execute it from a command-line batch file using AutoBatch plug-in.
- The instructions below explain how to start using "Action Wizard" and define your own PDF processing "action". This example shows how to create an action that executes a custom Acrobat JavaScript code via "Execute JavaScript" batch command.
- Step 1 - Create New Action
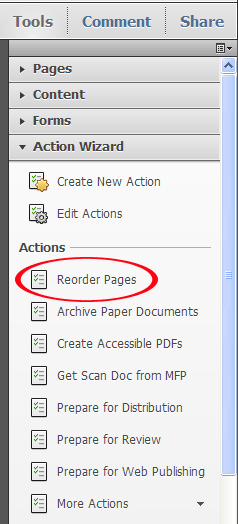
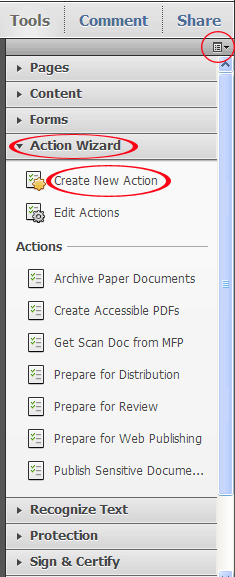
- Select "File > Action Wizard" from the menu (in Adobe Acrobat Professional X) to access and manage the actions. Alternatively,
open "Action Wizard" toolbar by expanding "Tools" panel located on the right-hand
side of the Acrobat window. If you do not see "Action Wizard" in the list of the
available toolbars, click on a small icon in the upper-right corner of the "Tools"
panel and select "Action Wizard" from a pull down list.
- Step 2 - Configure Action
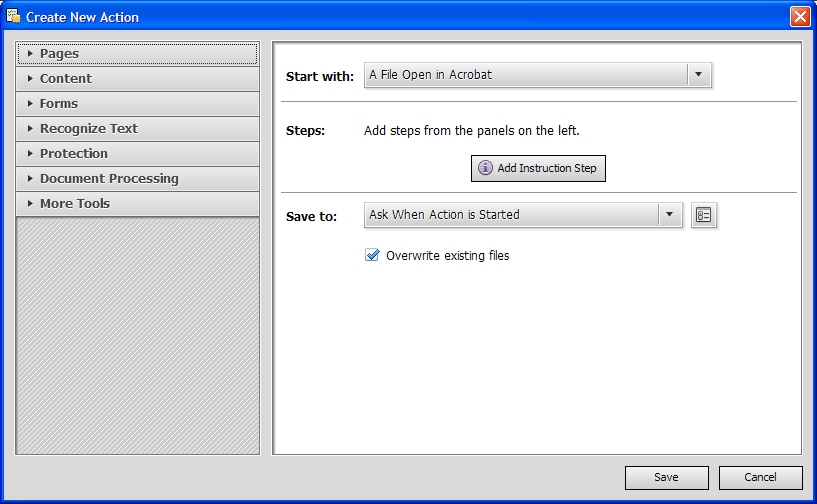
- The "Create New Action" dialog appears on the screen. Now, add batch commands
to the action and configure what documents to use as the input.
- Step 3 - Select Input Files
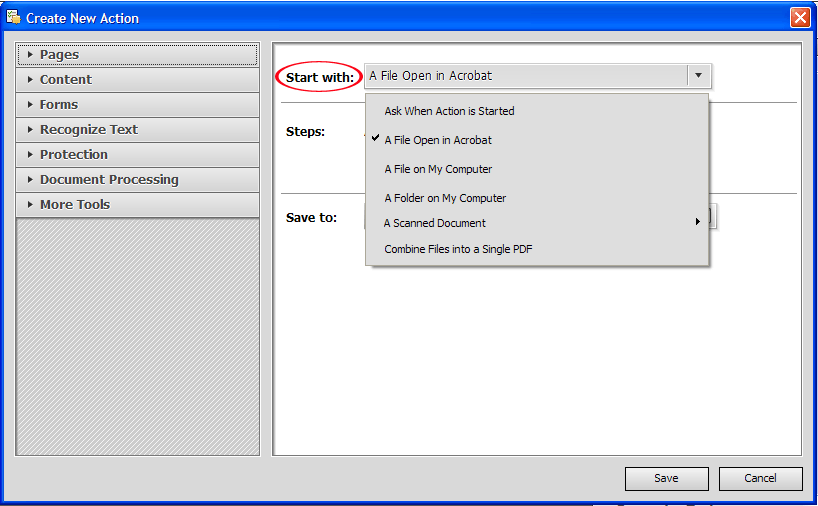
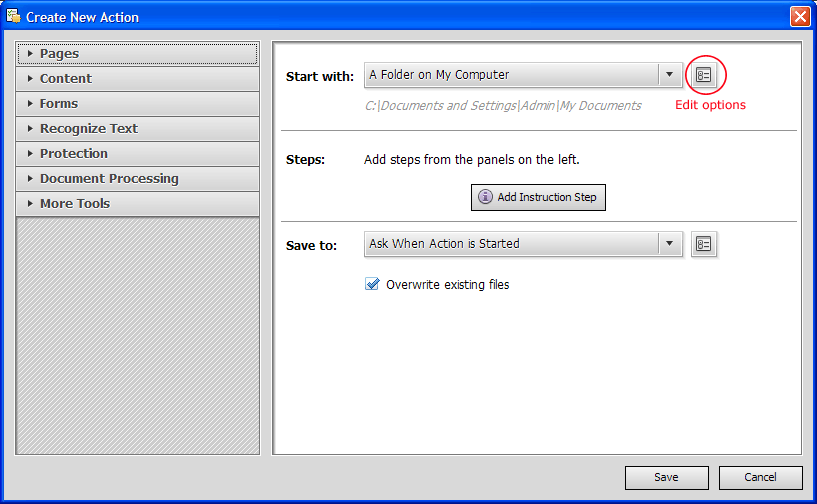
- Click on "Start with" menu and select a desired type of the input. If you want to
process all files from a selected folder, then choose "A Folder on my computer"
from the menu. The Adobe Acrobat will prompt you to select a folder.
- Step 4 - Configure Input Options
- Depending on the input selection (for example, if a folder is selected), the "options" icon may appear next to the "Start with" menu. Click on this icon to edit allowed
input file formats:
- Step 5 - Select Input File Formats
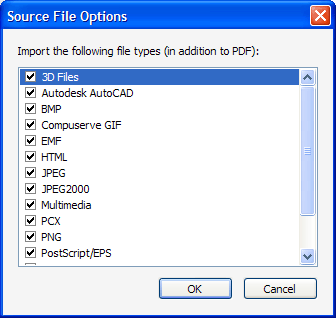
- Check or uncheck desired file formats from the list. If you only want to process
PDF files, then simply uncheck all file formats.
- Step 6 - Select Batch Command
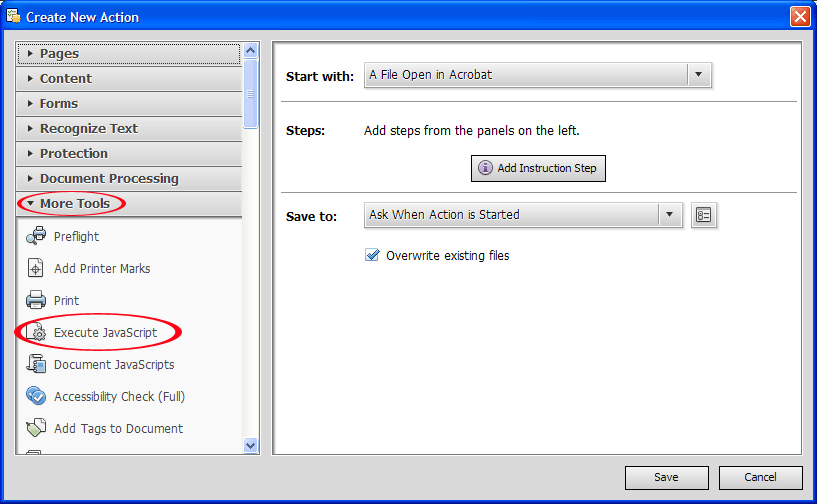
- Add batch commands to the action using the panels on the left. Here is an example
of adding "Execute JavaScript" batch command. Expand "More Tools" section and click
on "Execute JavaScript" command. This will add it to the list of "Steps" on the
right.
- Step 7 - Configure Batch Command
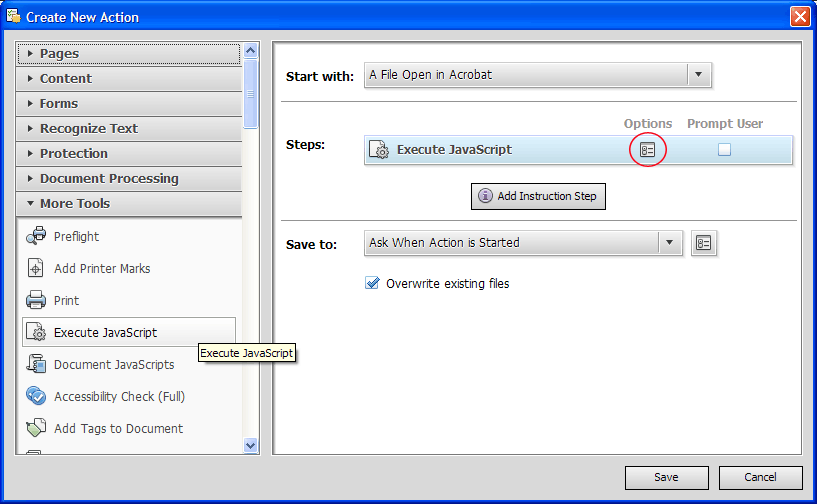
- Edit batch command ("step") parameters by clicking on the "options" icon in the
"Options" column. This will open a corresponding properties window.
- Step 8 - Specify Command Parameters
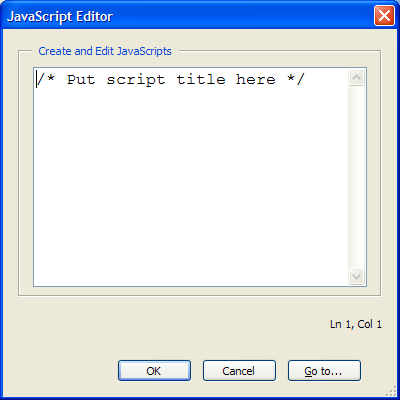
- In case of "Execute JavaScript" command the "JavaScript Editor". Type Acrobat JavaScript
code into the window and press "OK" button.
- Step 9 - Specify How To Save Results
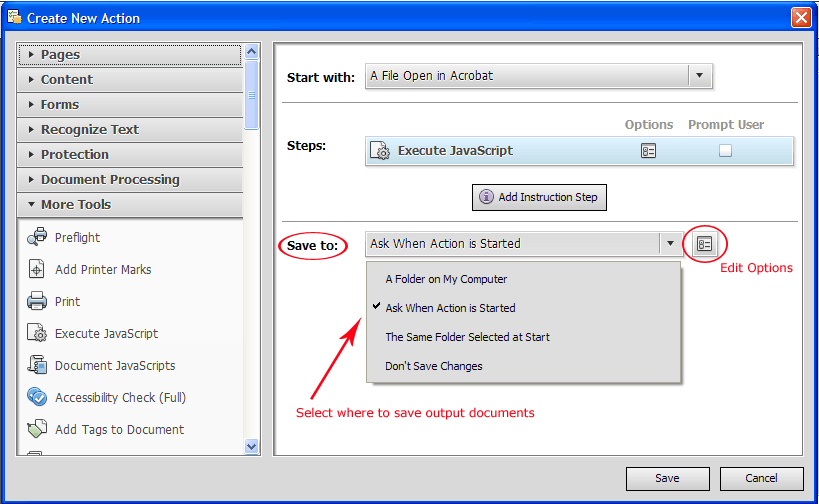
- Repeat previous 3 steps to add as many commands ("steps") as needed. Once all commands
have been added, use "Save to" menu to select where to save output documents.
- Step 10 - Specify Output Options
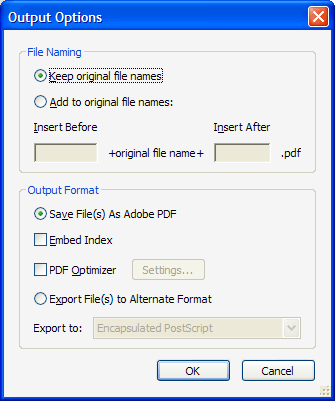
- Click
on "options" icon right next to this menu to edit output settings. Output settings
define the naming of output files as well as file format and post-processing options
such as PDF optimization.
- Step 11 - Save Named Action
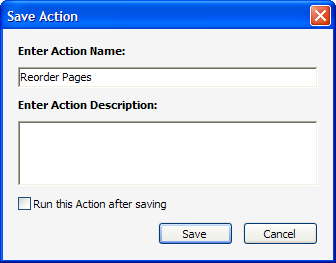
- Press "Save" button in "Create New Action" window once finished editing the action. You will be prompted to save it. Type a descriptive name for the action and press "Save" button in "Save
Action" window again.
- Step 12 - Select Action To Execute
- Now you should see this new action added to both the "Action Wizard" toolbar and
to "File > Action Wizard" menu. Click on
the action in the "Actions" list to execute it.
