Using the SMTP E-mail Server to Distribute Documents
- Introduction
- Using AutoDocMail to distribute large numbers of emails and attachments via a default email application (Outlook/Thunderbird etc.) could take a long time and may prompt security restrictions. To reduce user interaction, use the SMTP e-mail server to send business documents to multiple email addresses at once. This option is selected under the "Email Settings" tab whilst configuring AutoDocMail settings. It is ideal for sending large numbers of emails with less restrictions.
- Also use these settings to instruct the plug-in to pause between sending emails. This action prevents your e-mails from being labelled as 'spam' and your sending ability from being temporarily deactivated by your email service provider.
- Prerequisites
- You need a copy of Adobe® Acrobat® (Standard or Pro) along with the AutoDocMail™ plug-in installed on your computer in order to use this tutorial. Both are available as trial versions.
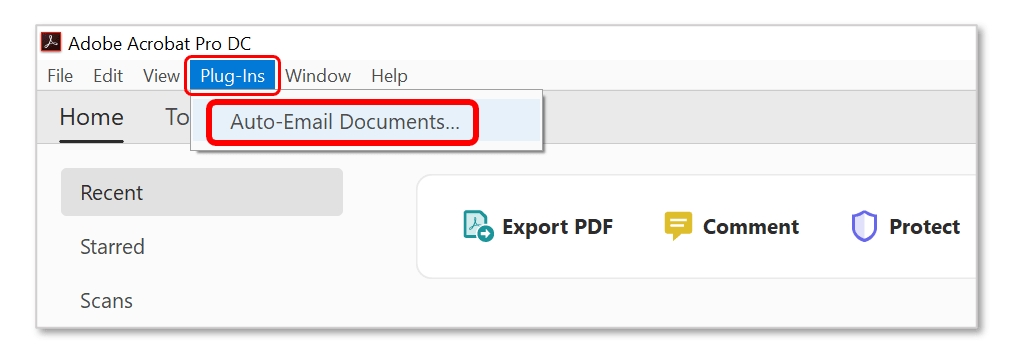
- Step 1 - Open the "Auto-Email Documents" Dialog
- Start the Adobe® Acrobat® application. Now select “Plug-ins > Auto-Email Documents…” from the main Acrobat menu.
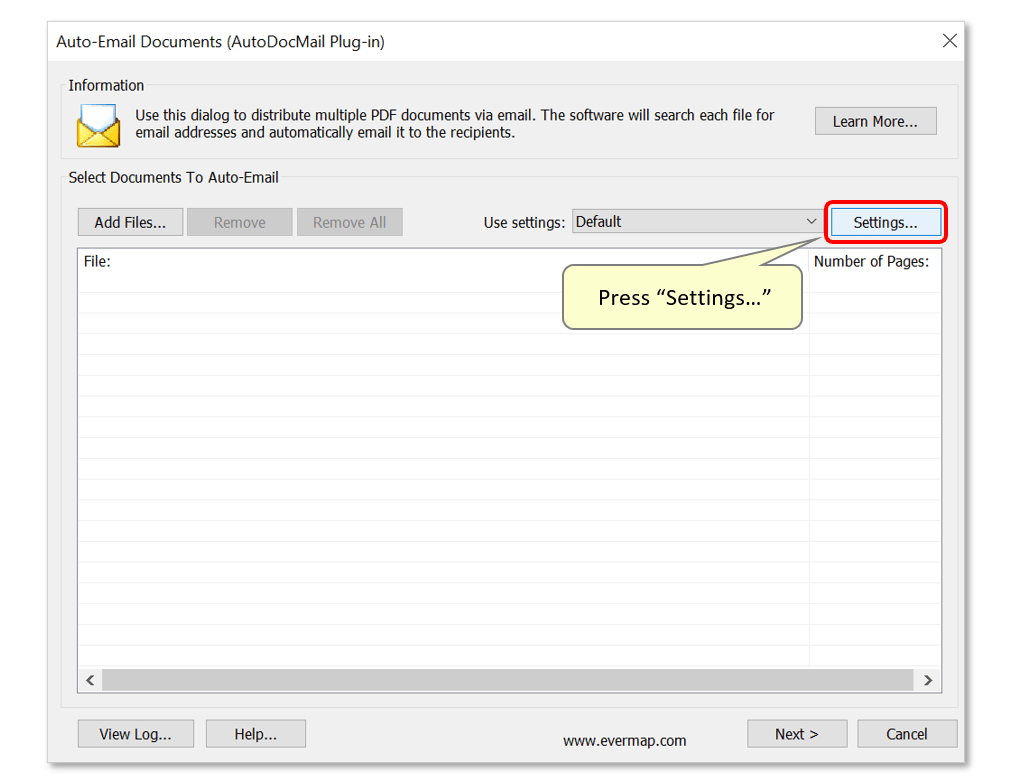
- Step 2 - Access Emailing Settings
- In the "Auto-Email Documents" dialog, press the "Settings..." button.
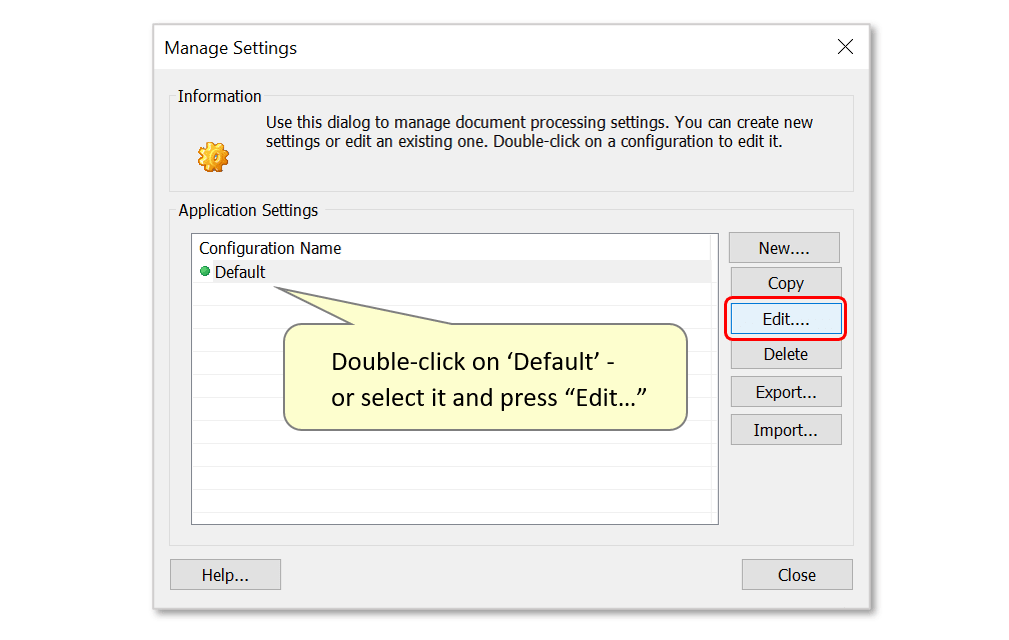
- Step 3 - Edit Settings
- This opens a dialog showing a list of saved settings configurations. Click the “New…” button to configure new settings, or double-click on “Default” settings to modify these. Any settings configuration can also be changed by selecting it and pressing the "Edit..." button.
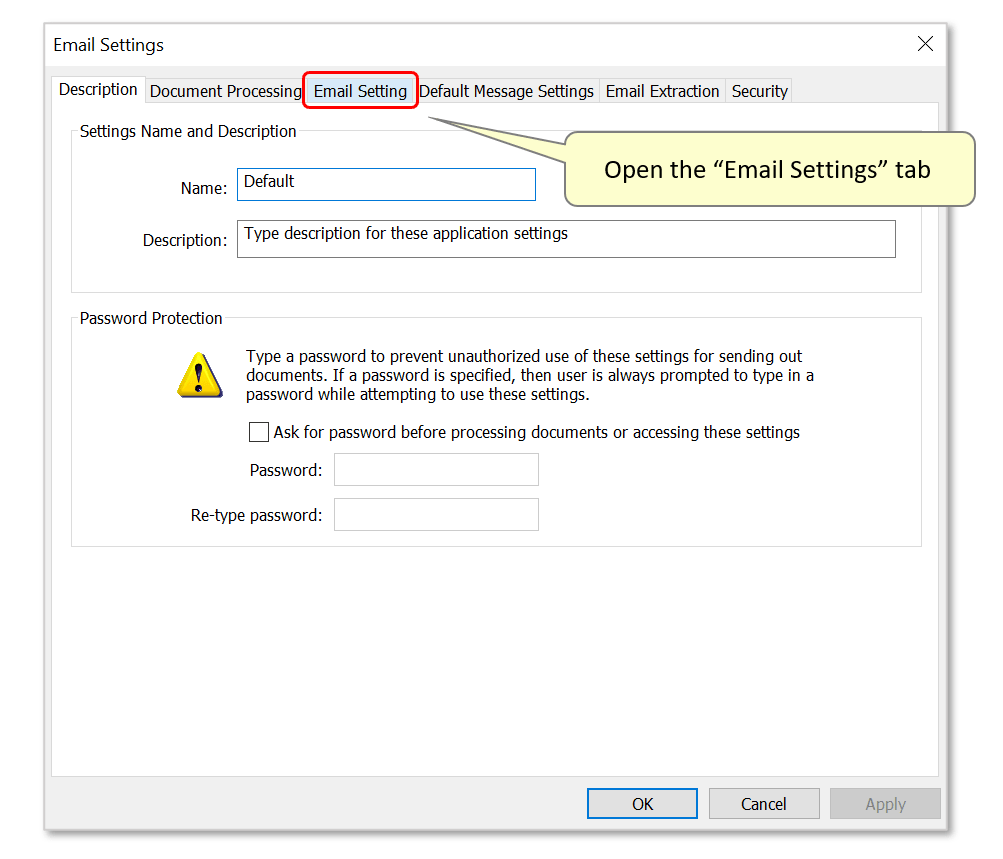
- Step 4 - Open "Email Settings"
- Open the "Email Settings" tab.
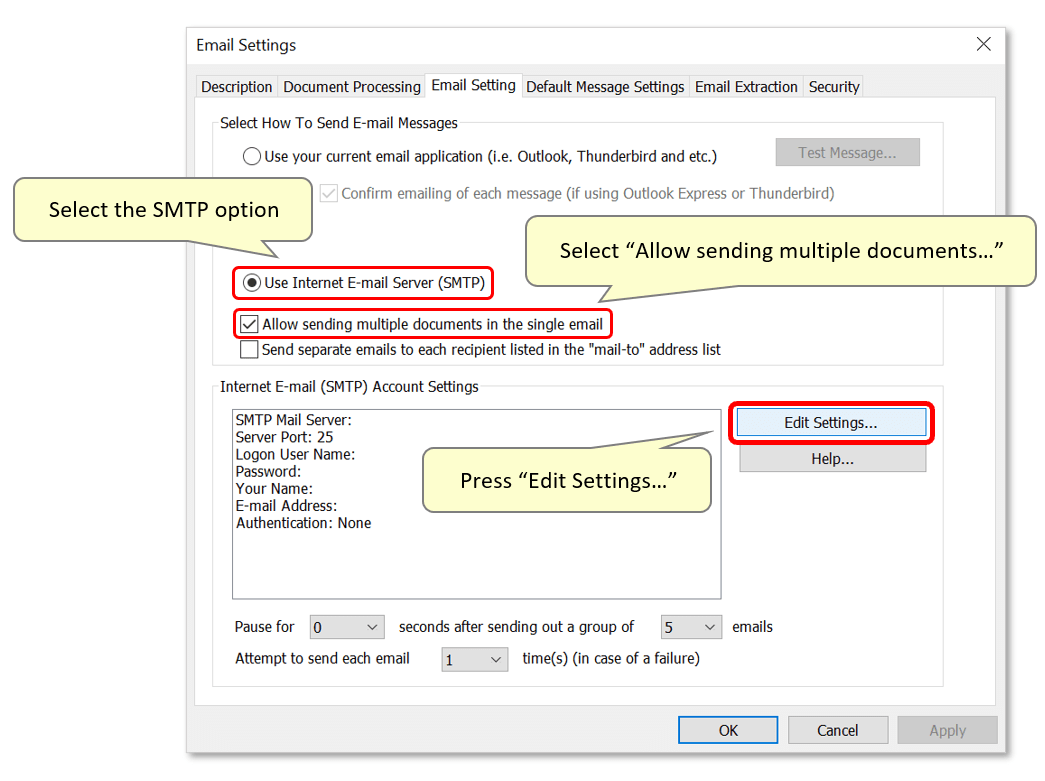
- Step 5 - Select the SMTP Option
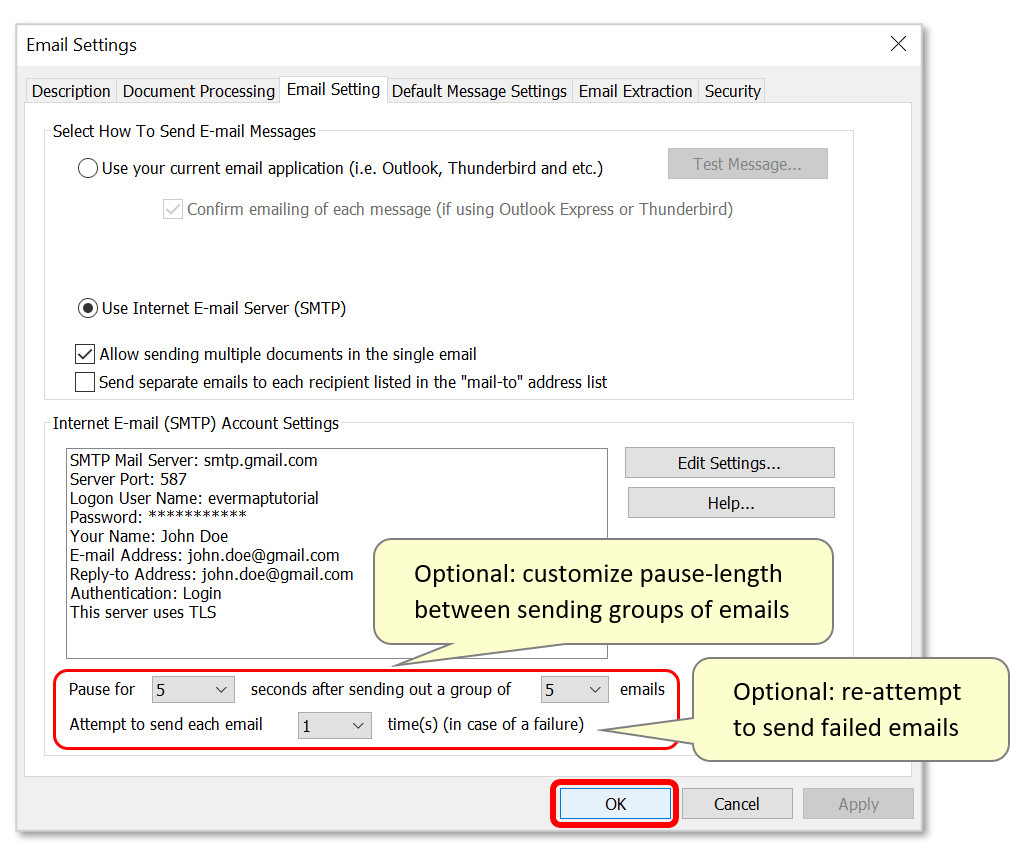
- Select the "Use Internet E-mail Server (SMTP)" option.
- Now ensure that the “Allow sending multiple documents in a single email” option is checked, if there may be multiple files addressed to the same recipient being sent via this method.
- Press “Edit Settings” to configure the "Internet E-mail Account Settings".
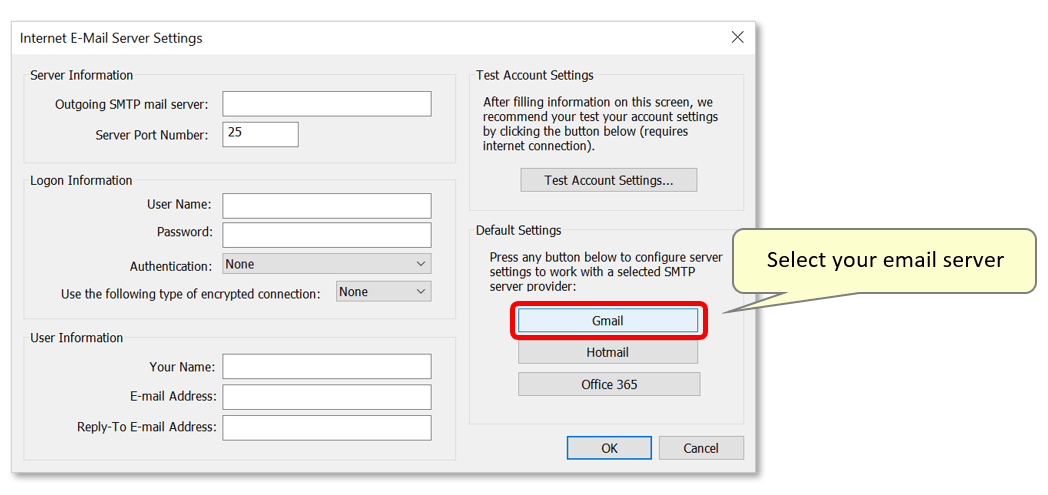
- Step 6 - Set Internet E-mail Account Settings
- In the "Internet E-mail Account Settings" dialog, click on your email server listed under “Default Settings” section on the right. In this example, we select "Gmail". The application will then auto-fill your email server information. If your email server is not listed, you will need to manually enter the server information. If necessary, contact your IT department for exact SMTP server settings used by your organization.
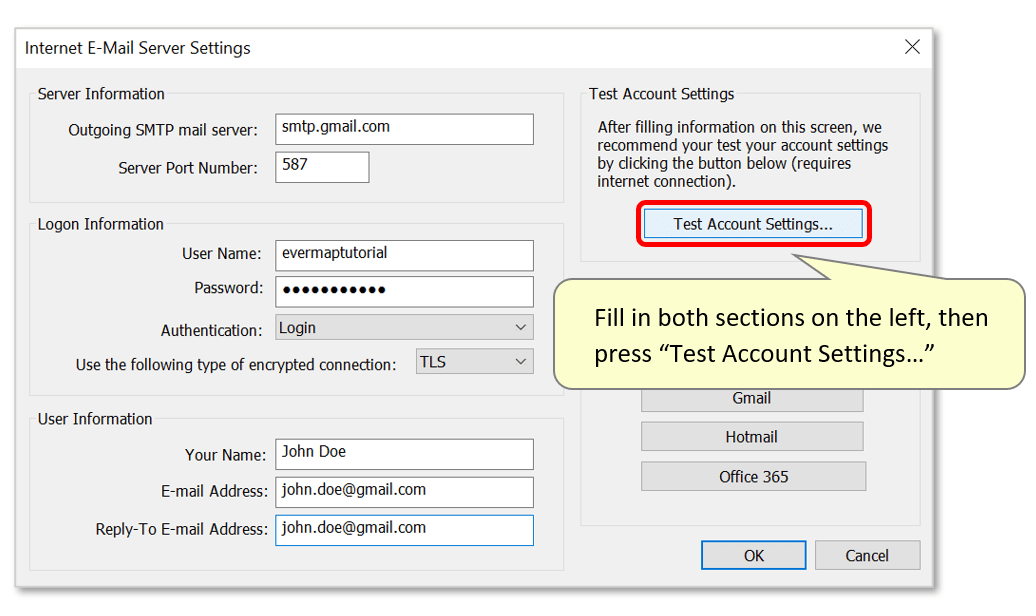
- Step 7 - Add and Test Account Settings
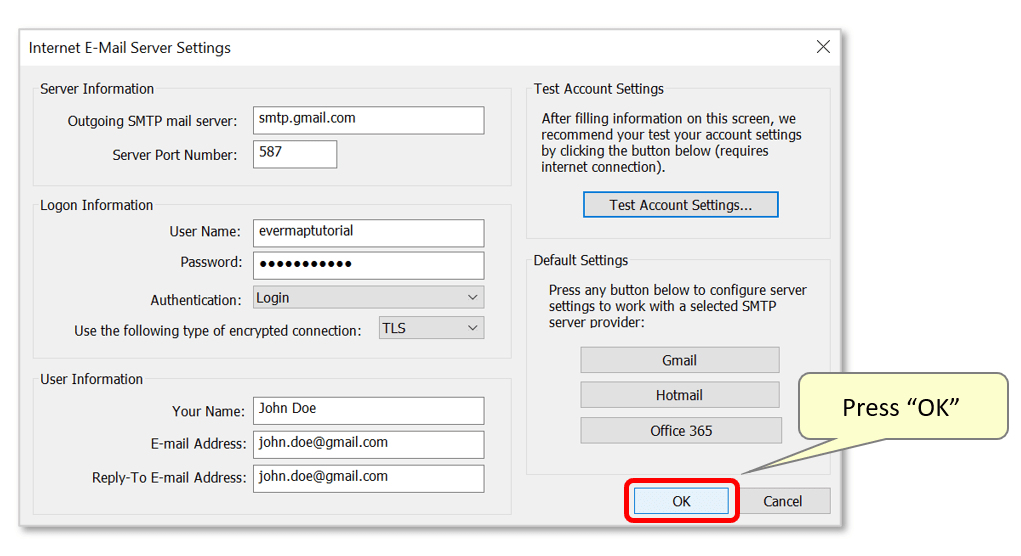
- Fill in your user 'Username' and 'Password' in the “Logon Information” section. Then add your 'Name', 'E-mail Address' and '"Reply-To" E-mail Address' under “User Information”.
- Then press “Test Account Settings” to make sure the e-mail server settings were configured correctly.
- Press "Yes" to confirm the server test (you need a working internet connection to do this).

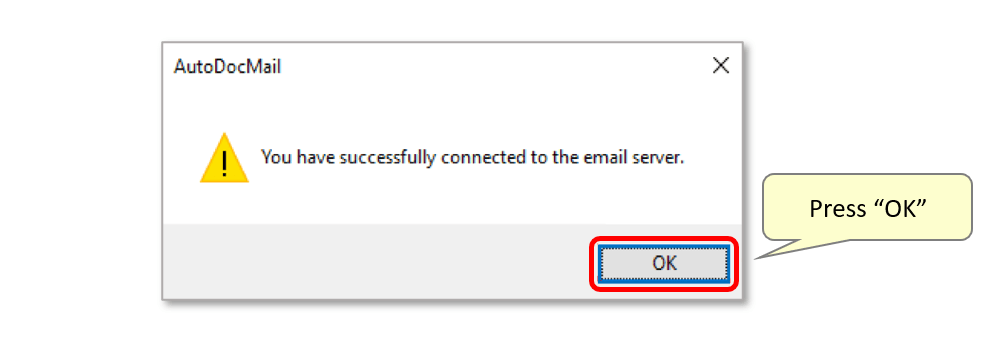
- The following screen appears if the application successfully connected to the server. Press “OK” to close it.
- IMPORTANT: If you receive an error message but your login information is correct, you may need to go into your Gmail account and manually provide the application with access. To see if this is the case, simply check your Gmail inbox and look for a message from Google notifying you of “a sign-in from a less secure app”. That email should provide directions on how you can permit the application's access.
- Press "OK" on this screen to close the SMTP server settings.
- Step 8 - Add Pauses
- If you are wanting to send e-mails to 100 recipients or more, you should configure the application to pause between sending emails. This action prevents your e-mails from being labeled as spam and your sending ability from being temporarily deactivated by your email service provider.
- Use the drop-down lists to manually select: 1) the length (in seconds) of the pause (5 seconds is recommended for 500 or more recipients); 2) the number of emails to send between pauses (5 is default number but this can be reduced); 3) the number of email send attempts (1/2/3) whenever delivery fails.
- Manually select a "0" second pause if you would not like the plug-in to pause between the sending of emails.
- If you are planning to send a large number of emails, contact your email service provider to make sure you will not exceed a daily email quota and to avoid spam filters.
- Lastly, press "OK" to finish the settings configuration and proceed to processing your documents.
- Click here for a list of all step-by-step tutorials available.