Customizing Email Messages Using Data Fields
AutoMailMerge plug-in for Adobe® Acrobat®
- Introduction
- AutoMailMerge™ can be used to send output documents to email addresses located within the data source. The plug-in can also be used to configure accompanying email messages that are sent along with these documents. This tutorial explains how to customize these messages so that they contain unique data that corresponds to the recipient. The plug-in uses a template message format and extracts data from the spreadsheet source to customise it.
- Input Document Description
- To demonstrate message customization using spreadsheet data, we will run a basic merge operation using the following data source. It contains data used to fill PDF forms, as well as email addresses for the output files and messages to be sent to. In the steps below, we will configure a message to be sent that uses data from these fields so that each one contains a relevant name, subject, message body etc. In this example, the "Subject/Body/Cc" fields contain the same sample text, but any data entered here would be extracted and sent to the corresponding email address.
- Prerequisites
- You need a copy of Adobe® Acrobat® along with the AutoMailMerge™ plug-in installed on your computer in order to use this tutorial. Both are available as trial versions.
- Step 1 - Open the "Mail Merge" Settings
- Select Plugins > Mail Merge… to open the Mail Merge dialog.
- If you are using a new Adobe Acrobat interface, then you can locate Mail Merge menu here:
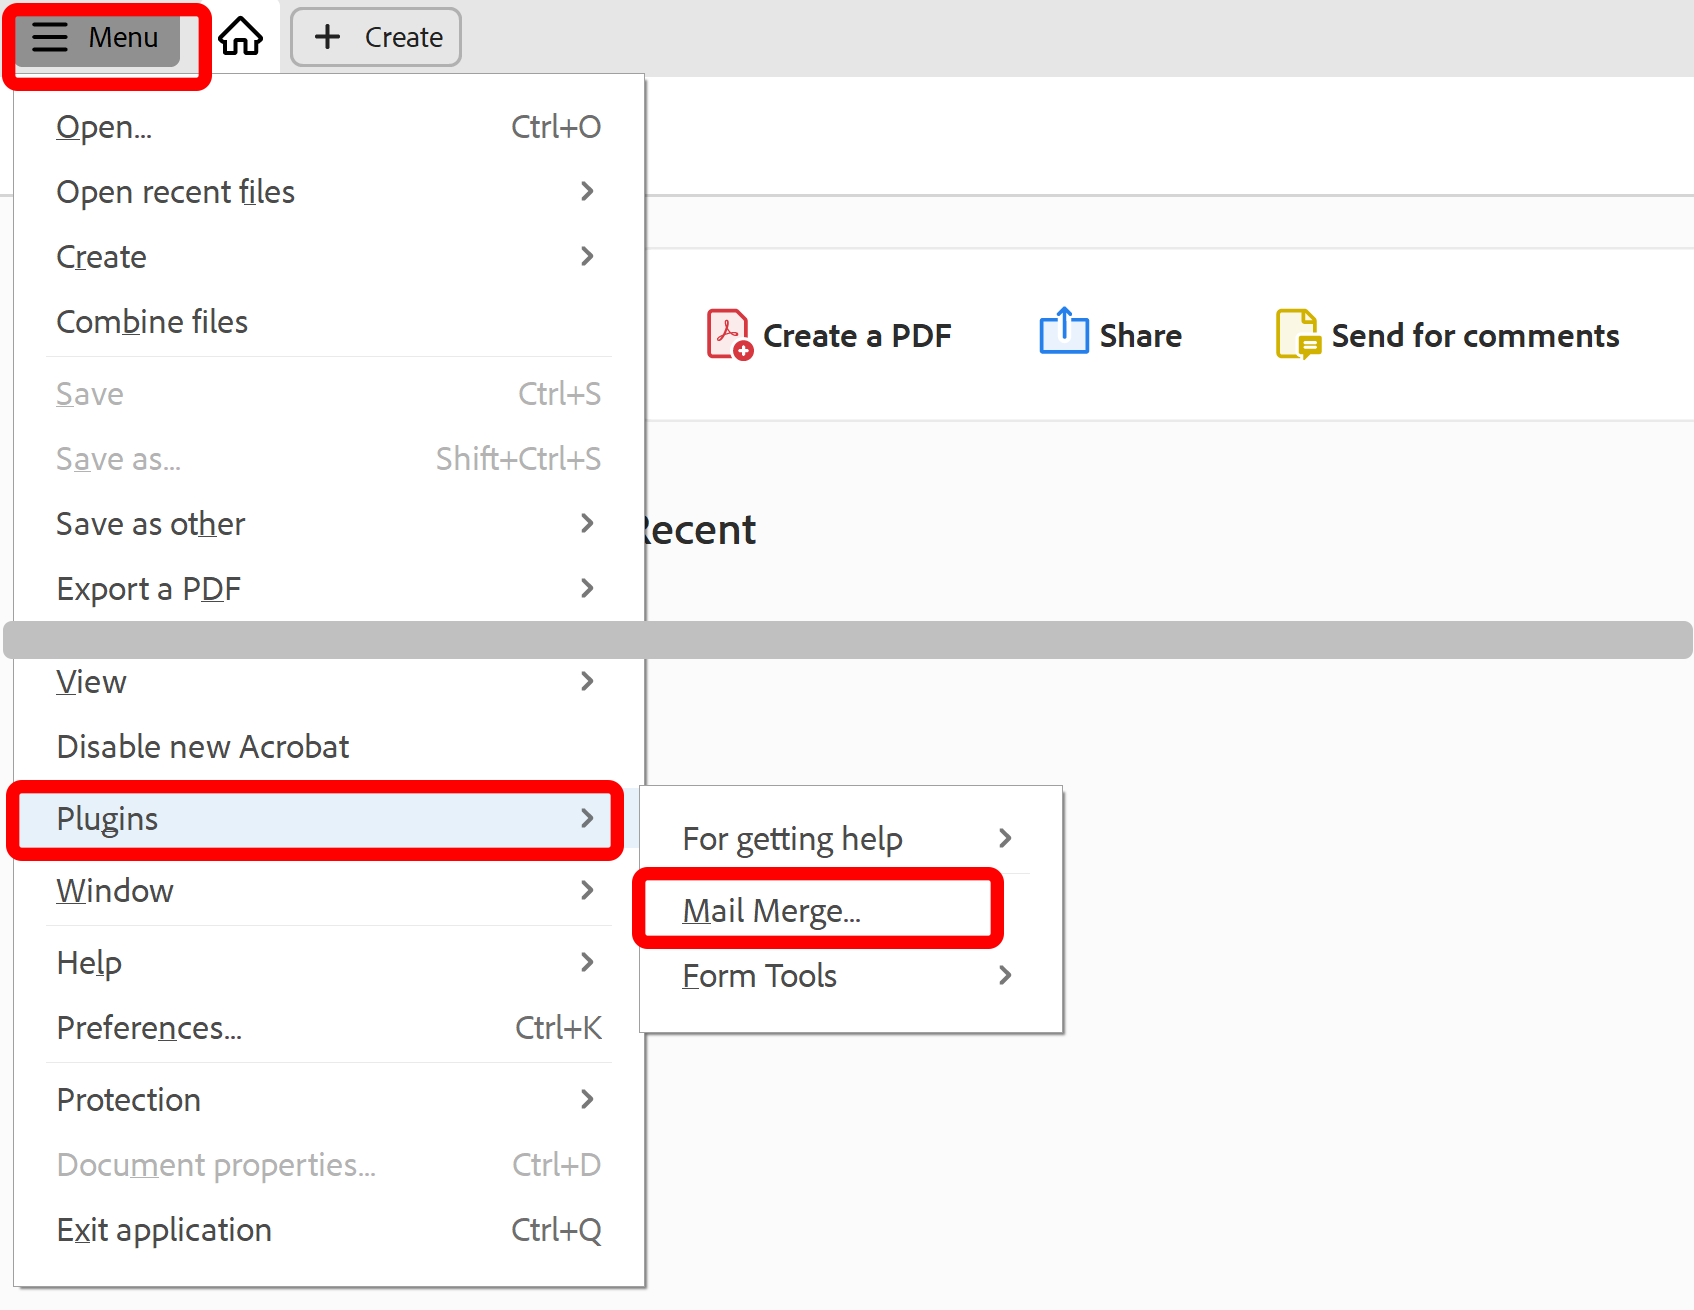
- Please see the following page for a short video tutorial on how to locate Plugins menu in the new Adobe® Acrobat® interface.
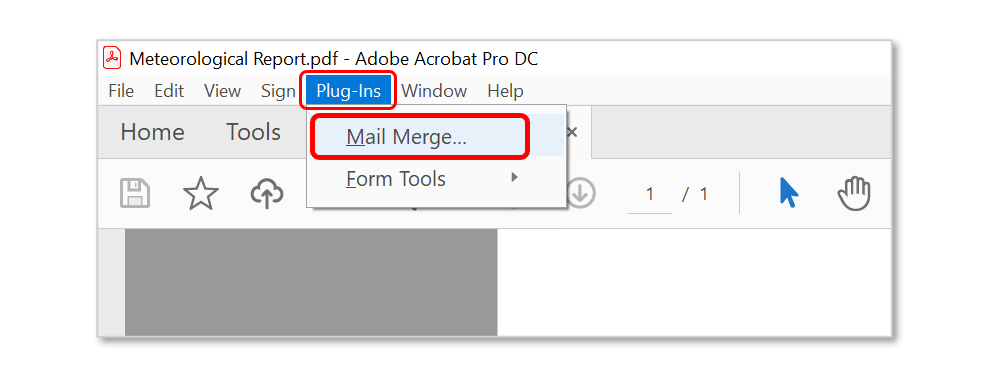
- If you are using a "classic" Adobe Acrobat interface (pre-2022), then you can locate Mail Merge menu here:
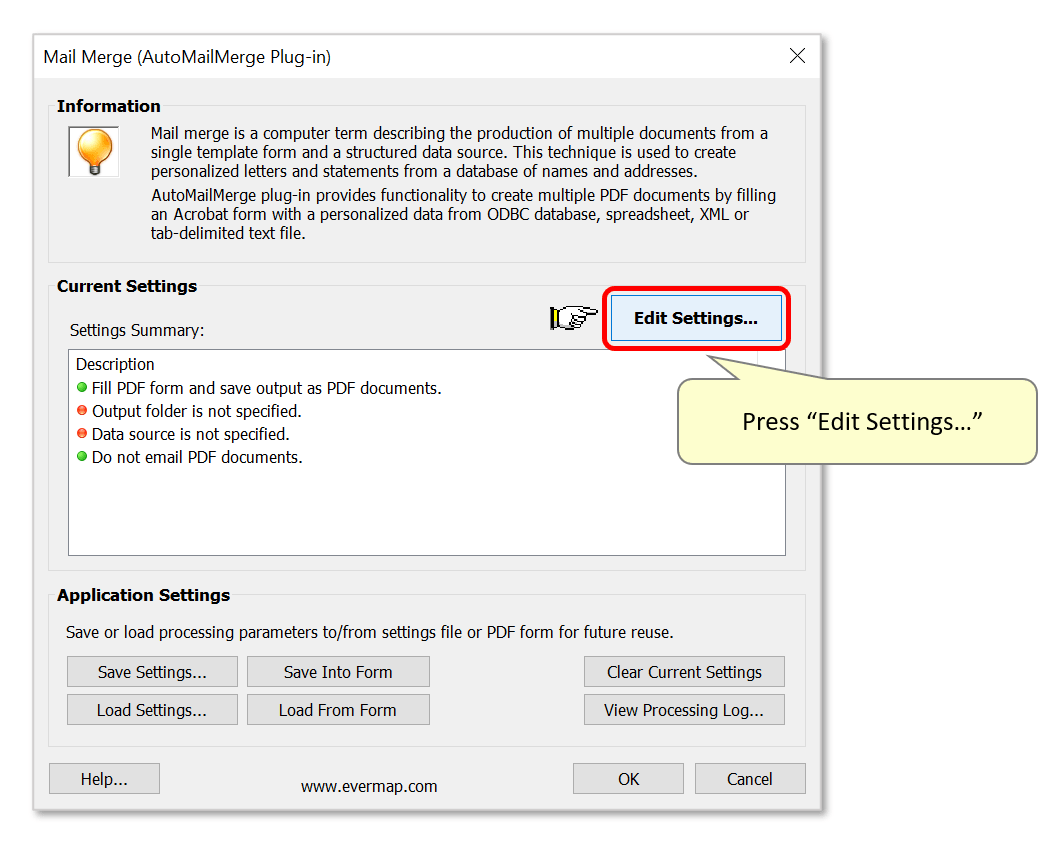
- If necessary, clear current settings and then press "Edit Settings…".
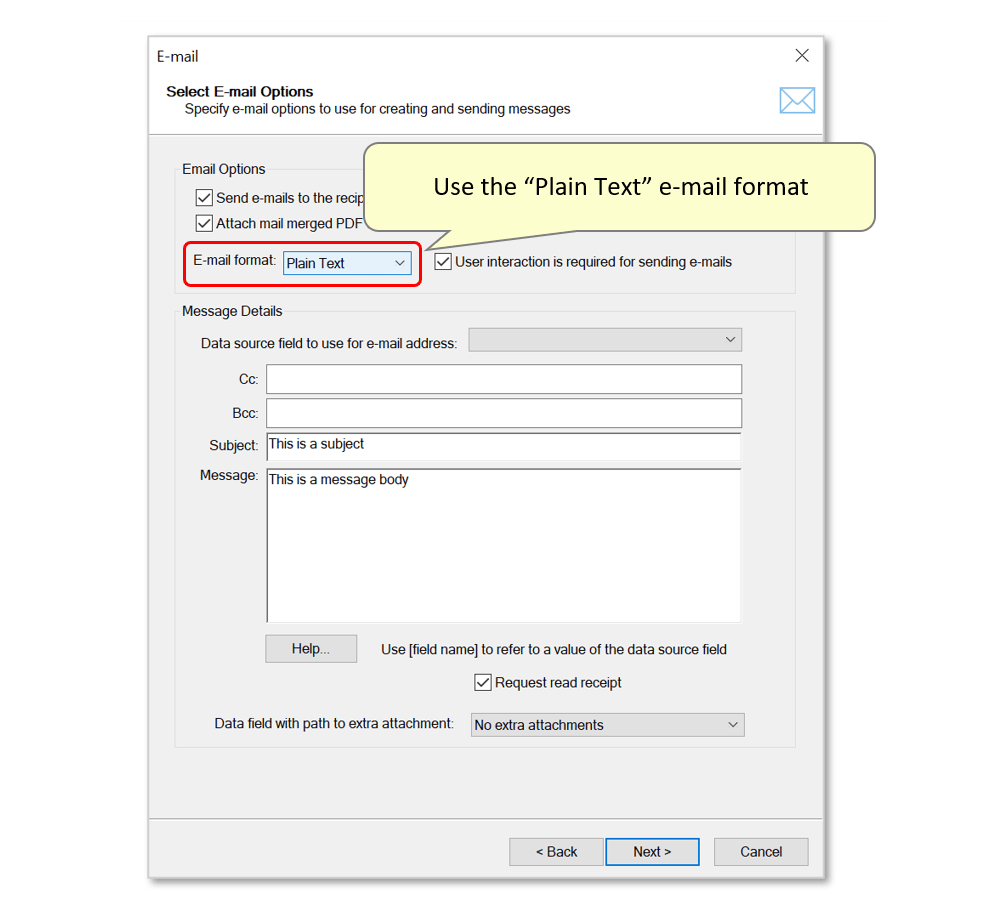
- Step 2 - Select Email Options
- Proceed through the settings screens to configure the desired mail merge. Use this list of mail merge tutorials for detailed help with configuring a mail merge.
- Continue to the "E-mail" settings screen and check the "Send e-mails to the recipients using addresses from the data source" option.
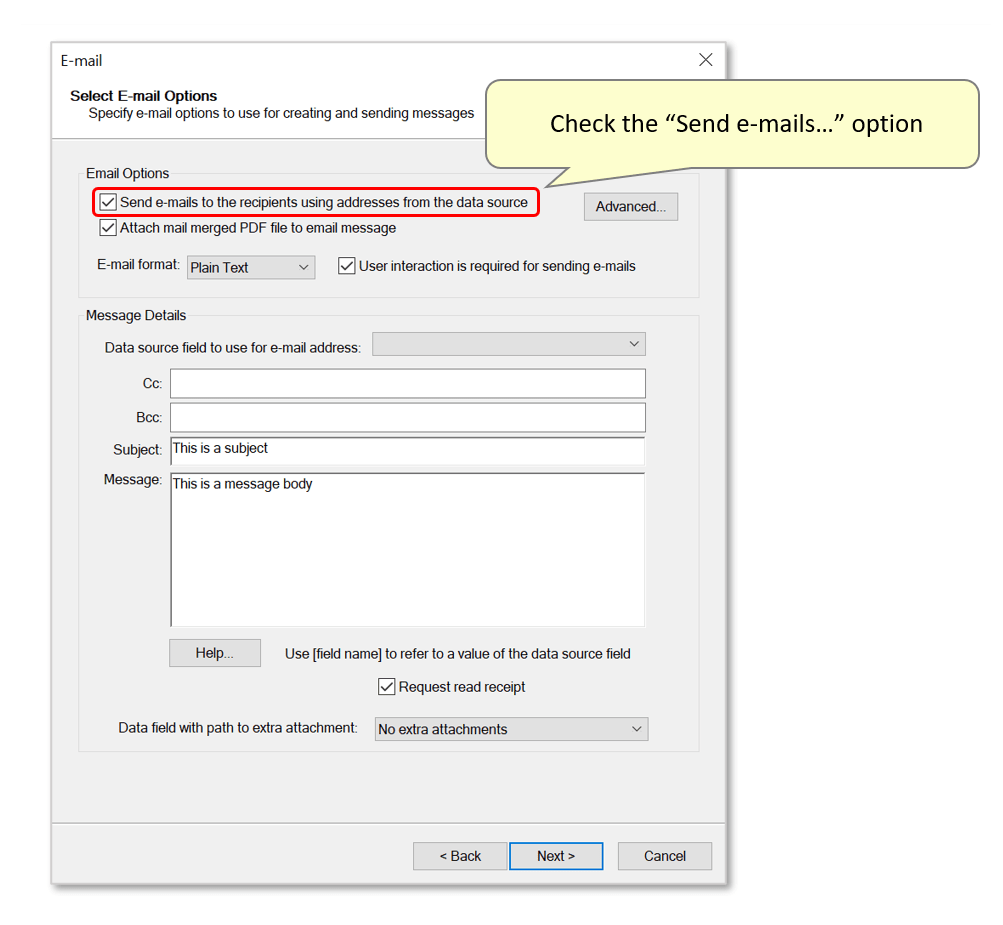
- Ensure that the 'Plain Text' e-mail format option is selected (although the same technique can be used for HTML formatted emails).
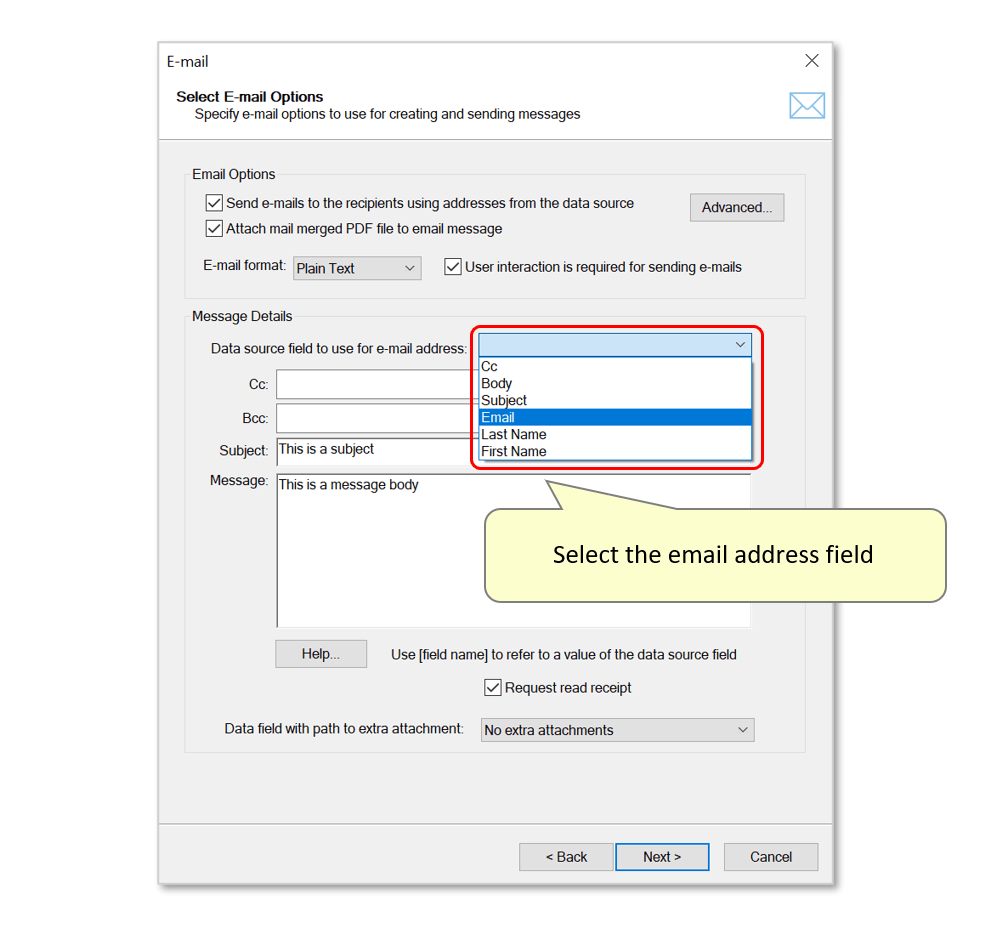
- Step 3 - Configure the Email Message
- Use the drop-down list to select the data source field that contains the email addresses to send messages to.
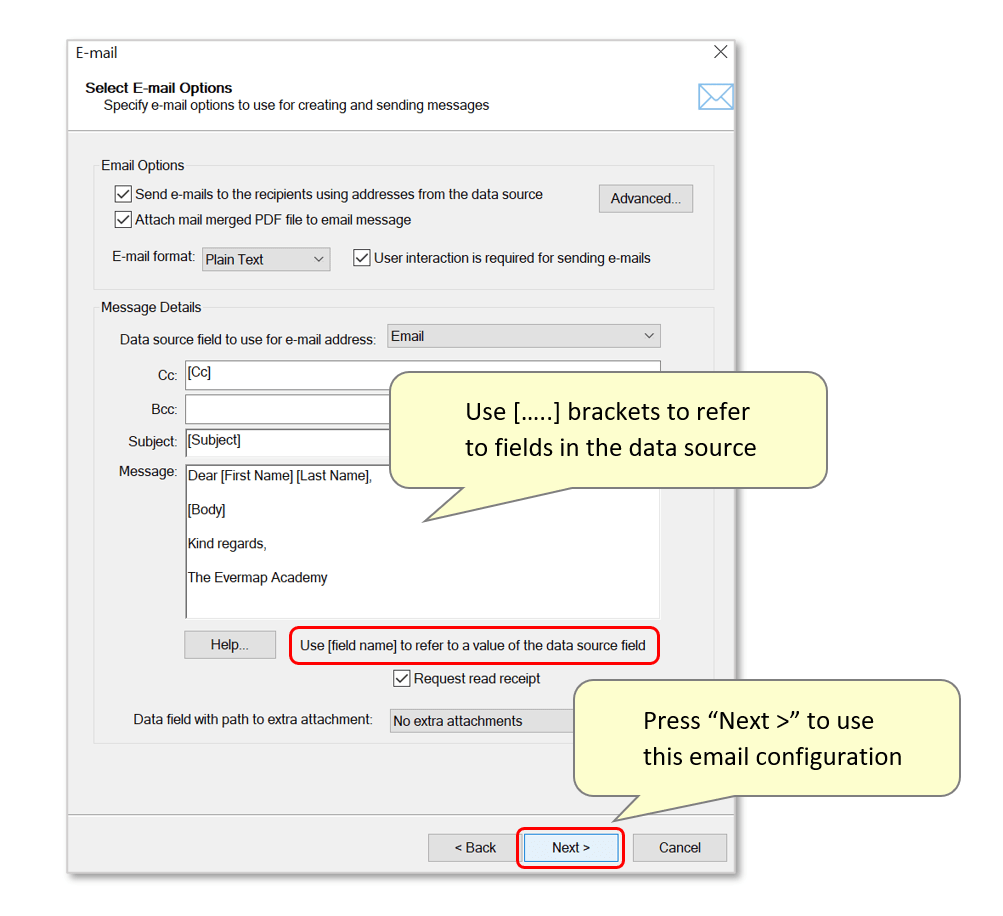
- Use the available boxes to configure the email message. Plain text can be typed here to form a template message, and data from the data source (spreadsheet, database, CSV file) can be used by typing field names within [...] brackets. In this example, we use [Cc], [Subject], [First Name], [Last Name] & [Body] to customise the template message sent to each recipient. Here is an example of the Excel spreadsheet with the corresponding data fields.

- Once the message configuration is complete, press "Next >" to proceed with the mail merge.
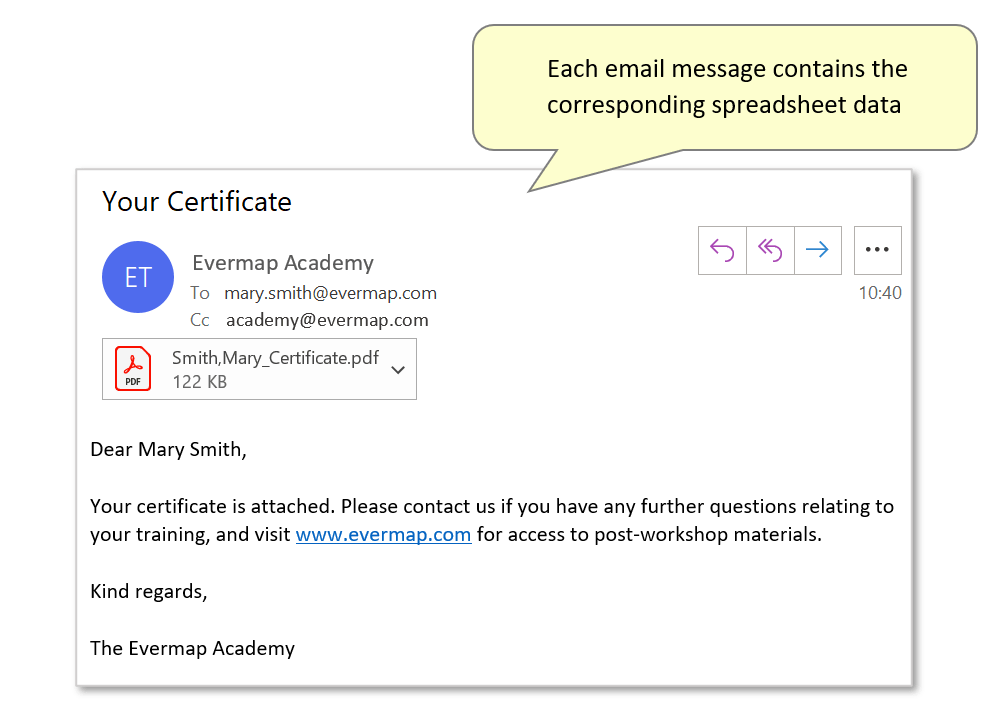
- Here is an example of an output email message where the spreadsheet data has been inserted. All output email messages will contain the relevant data.
- Click here for a list of all step-by-step tutorials available.