Formatting HTML Email Messages
AutoMailMerge plug-in for Adobe® Acrobat®
- Introduction
- AutoMailMerge™ offers two different formats for creating email messages: plain text templates, and HTML. These messages accompany filled forms being sent by the plug-in, to email addresses located in the data source.
- Using the HTML method enables the user to carefully design the appearance and functions of email messages. In this tutorial, we provide some examples of HTML messages that can be sent using AutoMailMerge. These messages can be very simple - or have a more complex appearance, featuring images, links, signature blocks, and email links that open an email application if clicked on etc. Using HTML-formatted messages in AutoMailMerge™ provides fine control over the content and functionality of the emails.
- Note that HTML formatting is only supported when using an SMTP server to send outgoing emails. Sending out HTML-formatted messages may not work when sending them via a local email client (e.g.: MS Outlook or MS Outlook Express). However, some email clients such as Mozilla Thunderbird does support HTML formatting - via MAPI-protocol.
- If you are planning to send out an HTML-formatted email message, you have to use special HTML formatting tags to add styling information to the text message. Consult any online HTML tutorial for details about HTML syntax and available tags, such as w3schools.com.
- Prerequisites
- You need a copy of Adobe® Acrobat® along with the AutoMailMerge™ plug-in installed on your computer in order to use this tutorial. Both are available as trial versions.
- Step 1 - Open the "Mail Merge" Dialog
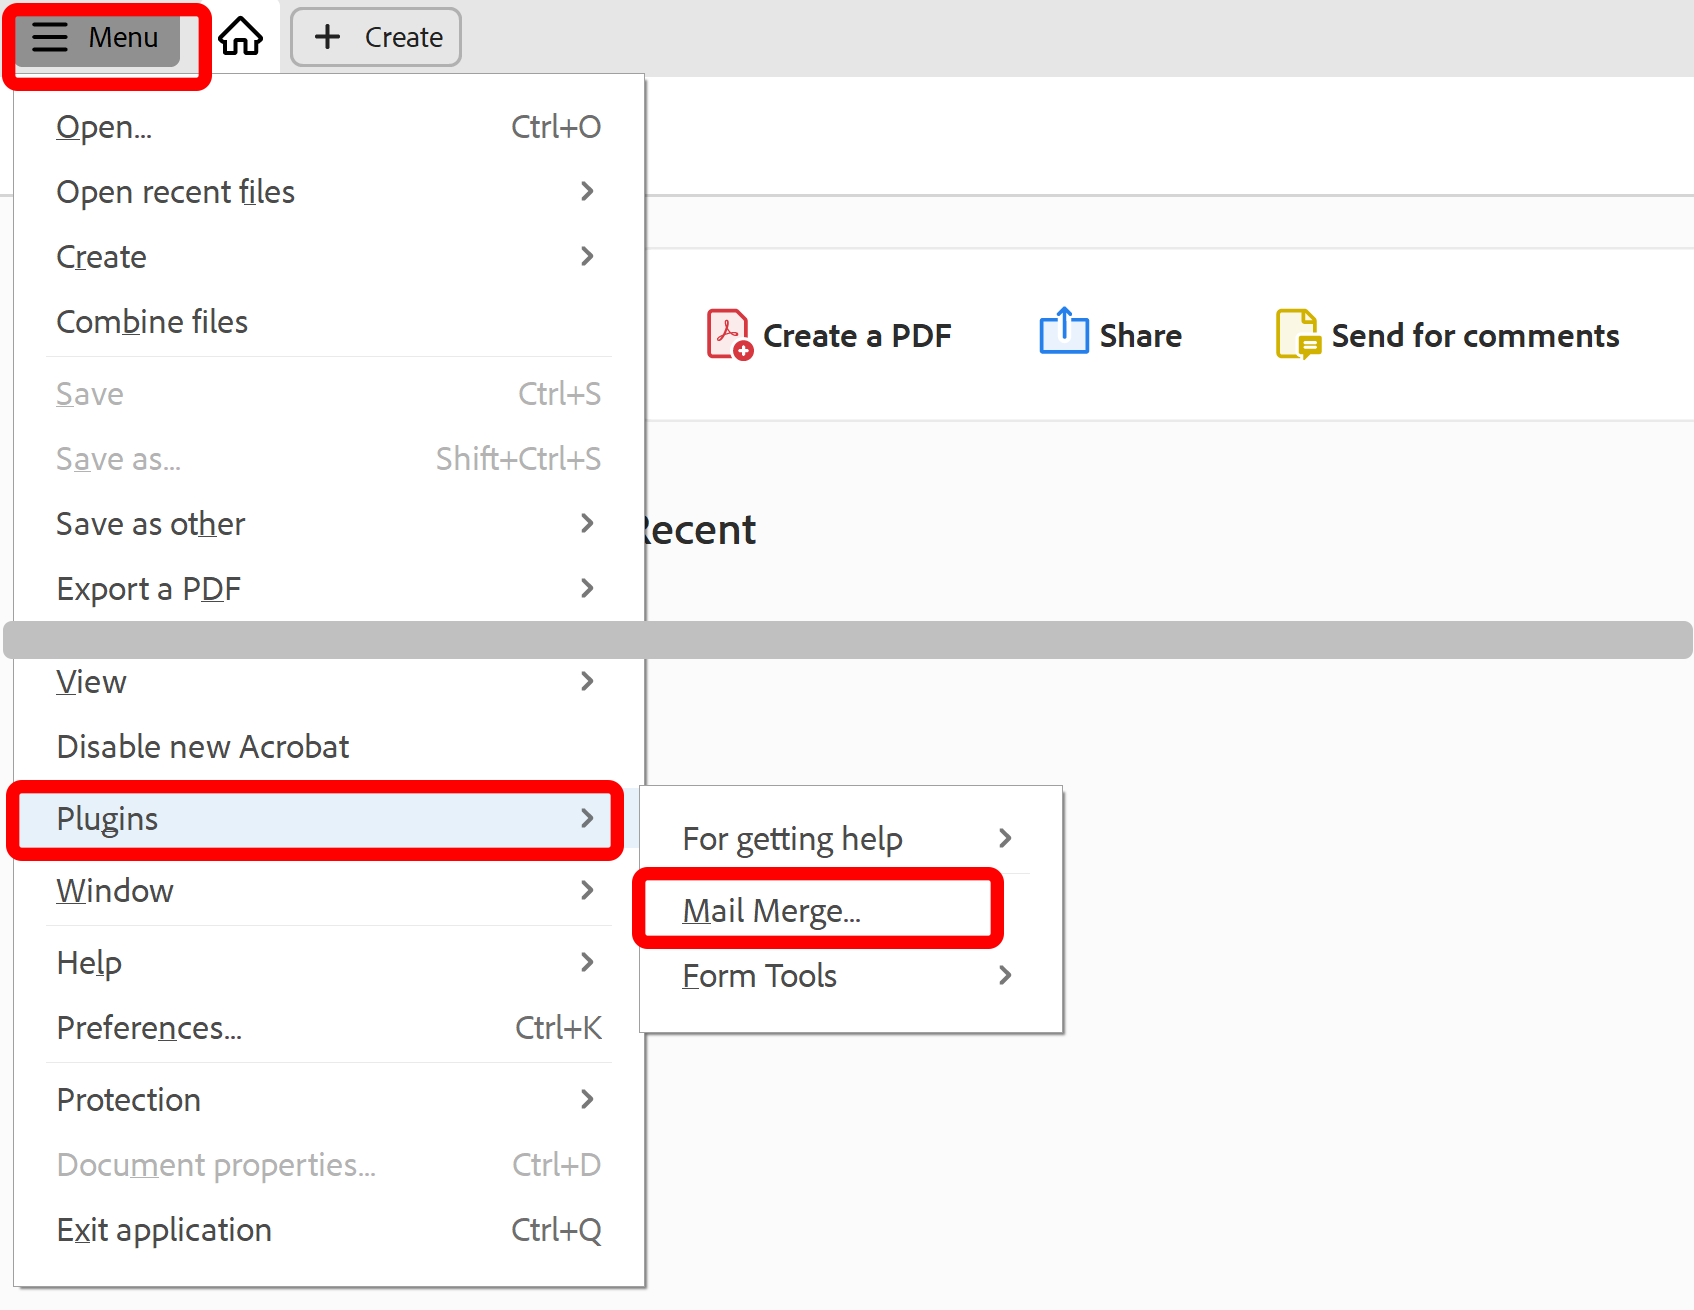
- Select Plugins > Mail Merge… to open the Mail Merge dialog.
- If you are using a new Adobe Acrobat interface, then you can locate Mail Merge menu here:
- Please see the following page for a short video tutorial on how to locate Plugins menu in the new Adobe® Acrobat® interface.
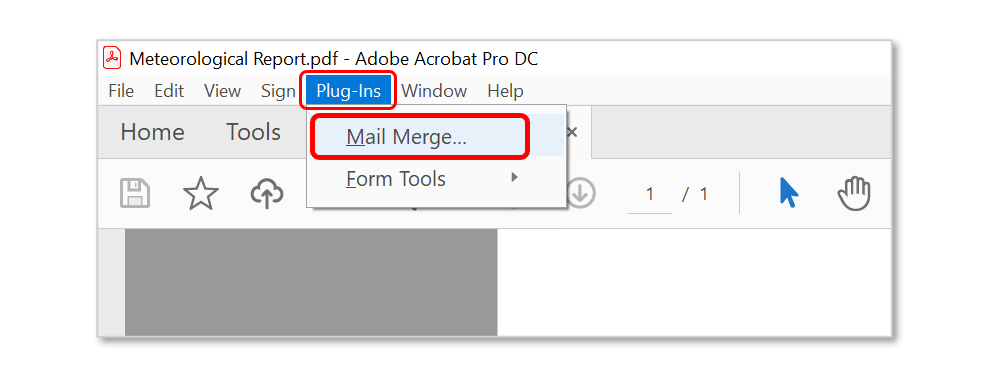
- If you are using a "classic" Adobe Acrobat interface (pre-2022), then you can locate Mail Merge menu here:
- Step 2 - Edit Mail Merge Settings
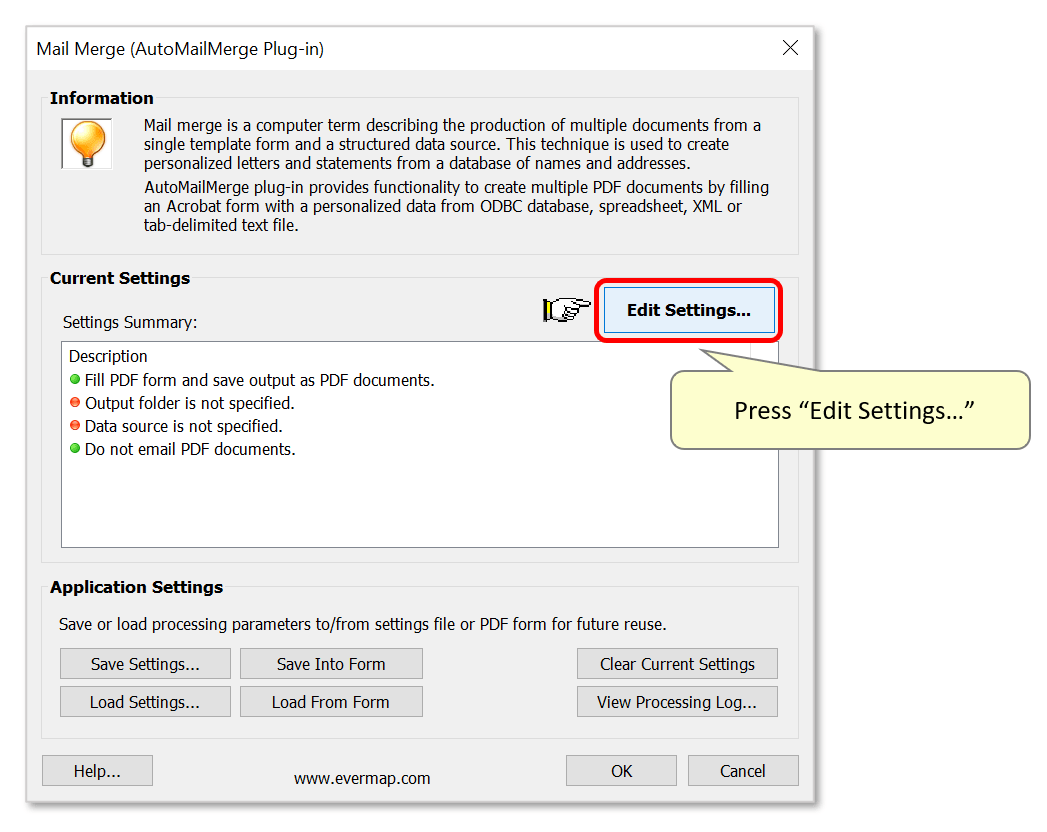
- If necessary, clear current settings and then press the "Edit Settings…" button.
- Proceed through the settings screens to configure the desired mail merge: add the data source; map data fields to their corresponding form fields; specify output options etc. Use this list of mail merge tutorials for detailed help with configuring the mail merge.
- Step 3 - Proceed to "Email" Settings
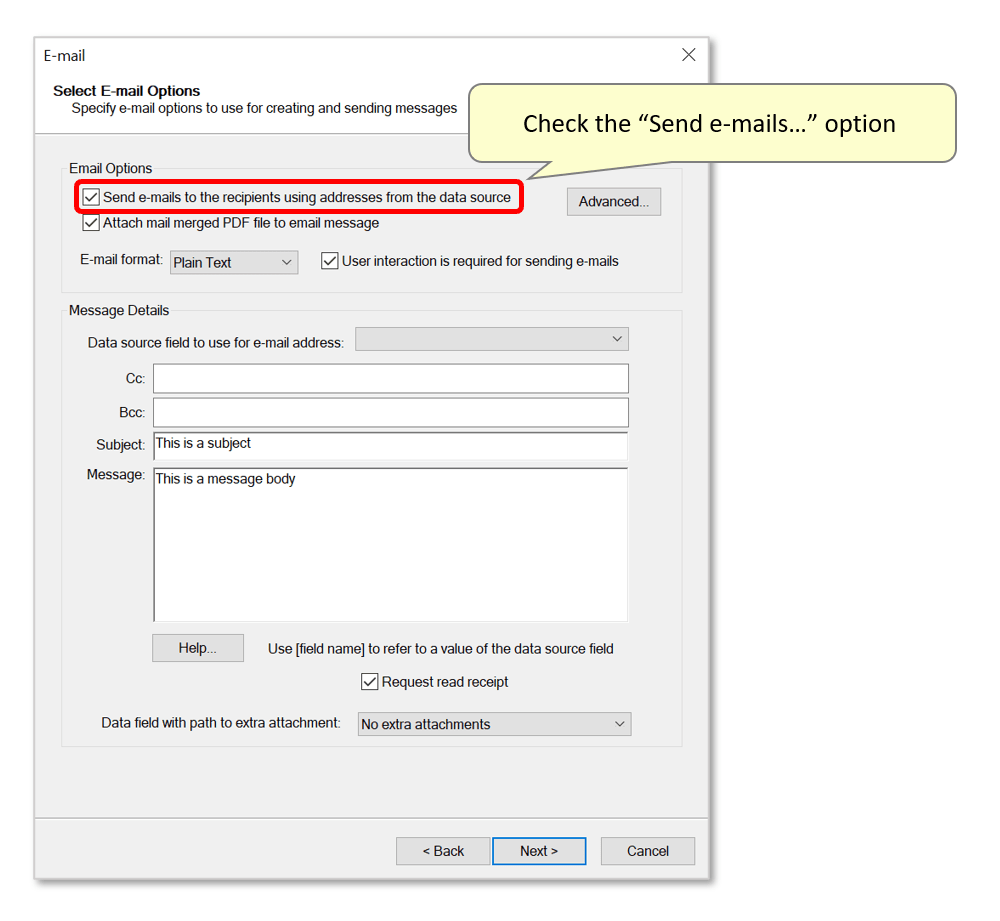
- Continue to the "E-mail" settings screen to configure an HTML message. In this screen, we can activate the option to send the forms being filled via the mail merge, to corresponding email addresses from within the data source.
- Check "Send e-mails to the recipients using addresses from the data source" option to enable form emailing.
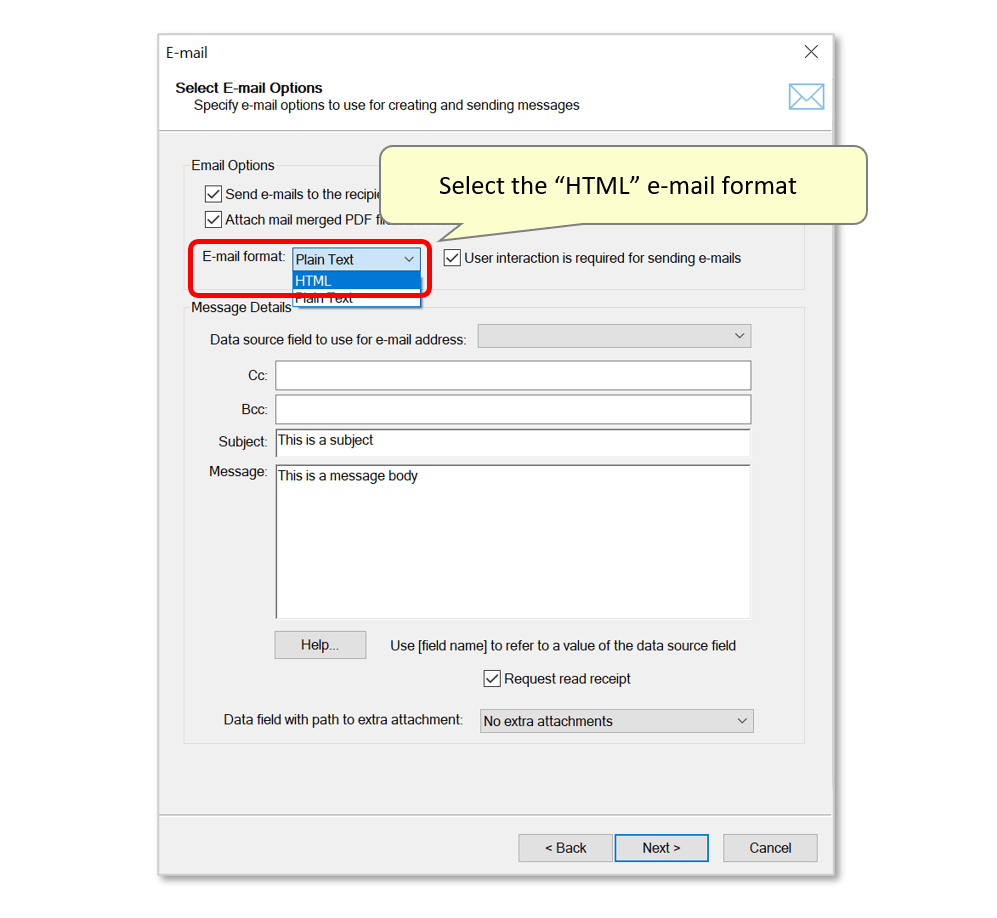
- Step 4 - Select the 'HTML' E-mail Format
- Select HTML option from the E-mail Format list:
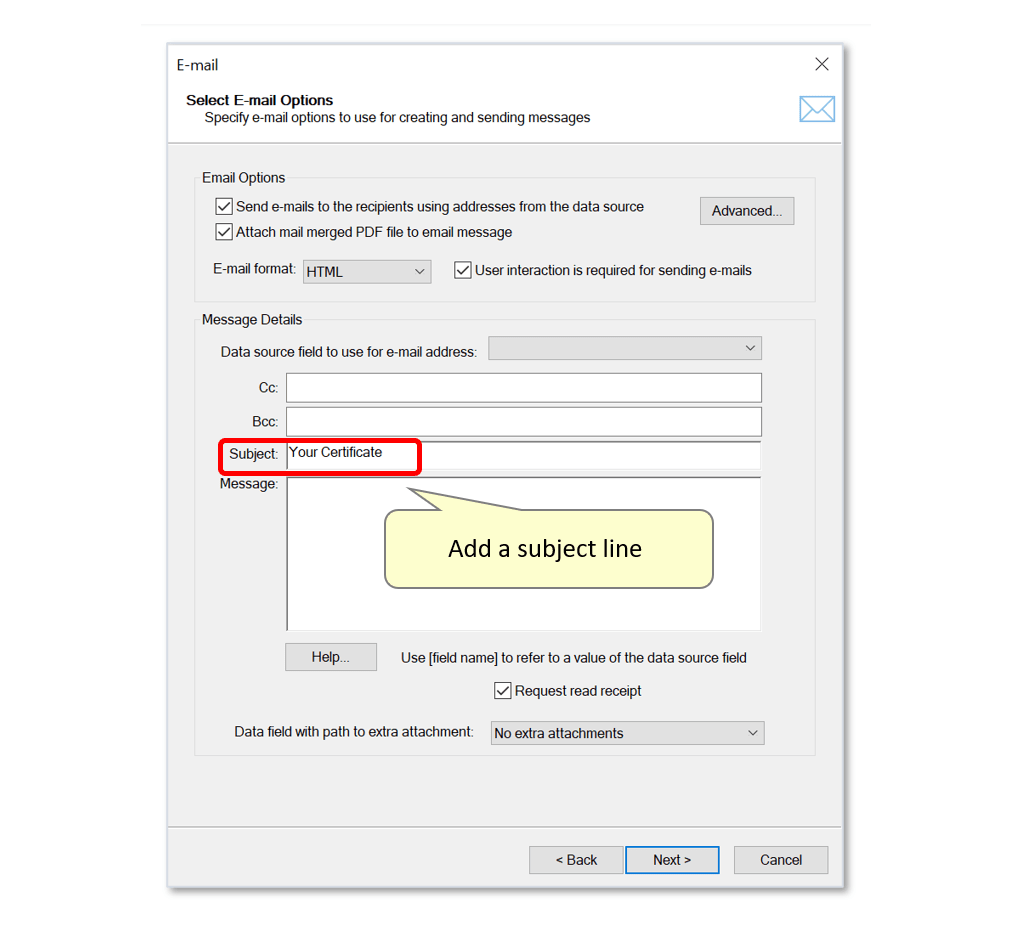
- Step 5 - Configure the HTML Message
- Use the entry boxes to configure the desired email message. Enter email subject line into the "Subject:" box. Optionally, data from the input source file can be used by typing field names within [...] brackets. For example, if each recipient should receive a unique subject line, type these into the source spreadsheet under a "Subject" column - this can then be referred to by typing [Subject] in the entry box.
- In this example, all emails/files will be sent with a "Your Certificate" subject line.
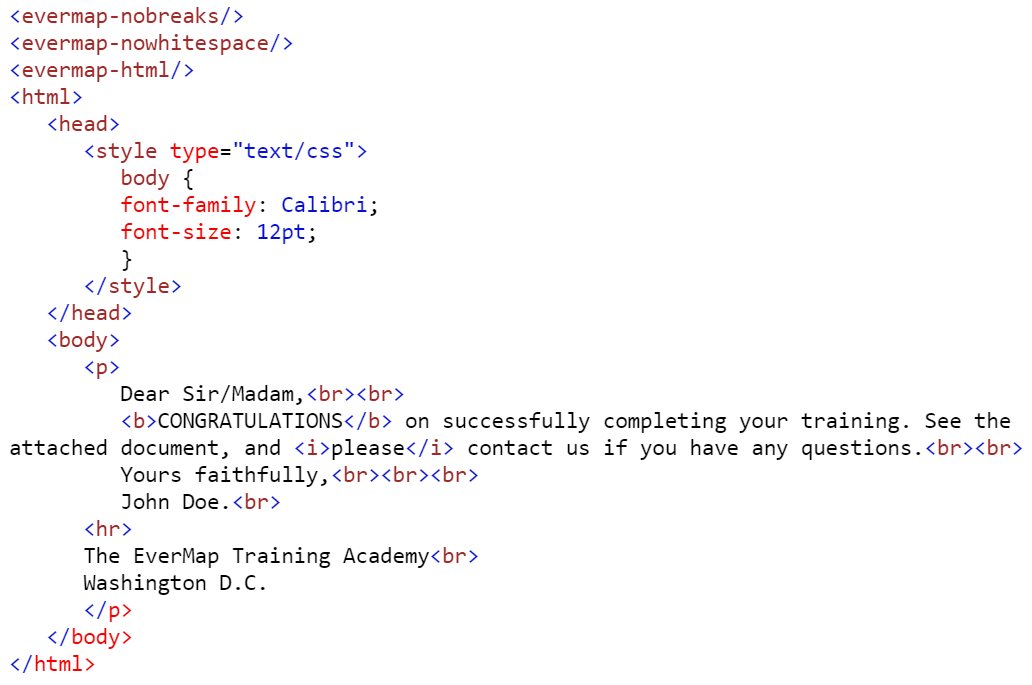
- See the code below that is used in this example to send a basic HTML email message. Download this template as a *.txt file by clicking here - it can be opened and edited in any text editor, such as MS Notepad. This template features style instructions for the desired text font and size.
- It features <b> and <i> tags to create bold and italicized text: CONGRATULATIONS AND please. You can also use <strong> and <em> tags for the same effect.
- There is also a <hr> tag that defines a thematic break - this is displayed as a horizontal line that separates content in the output message (see step 7 below).
- Special HTML tags
- The plug-in automatically surrounds message text with a matching pair of <html><body> tags before sending out the email. The software preserves line breaks (as they are entered in the "Message" box) by replacing them with a <br> tag and preserves all whitespace by replacing it with tag. To modify this behavior use the following special tags:
-
- Use <evermap-nobreaks/> tag to turn off automatic insertion of line breaks.
- Use <evermap-nowhitespace/> tag to turn off automatic preservation of whitespace.
- Use <evermap-html/> tag to turn off automatic insertion of <html><body> tags. You will be fully responsible for providing a complete html code for the message. Use this tag to add styles to the email.
- You can add these tags anywhere in the email message. You can see all of these tags in the basic HTML template example above.
- Here are few examples of some commonly used HTML tags:
-
- Add hyperlink to a website: <a href="https://www.yourwebsite.com">Hyperlinked Text</a> such as Visit our website.
- Insert an image from a web site: <img width=100px src="https://www.yourwebsite.com/image.png"/>
- Display a word/sentence in bold: <strong>Bold Text</strong>, for example: Bold Text.
- Display a word/sentence italicized: <em>Italic Text</em>, for example: Italic Text.
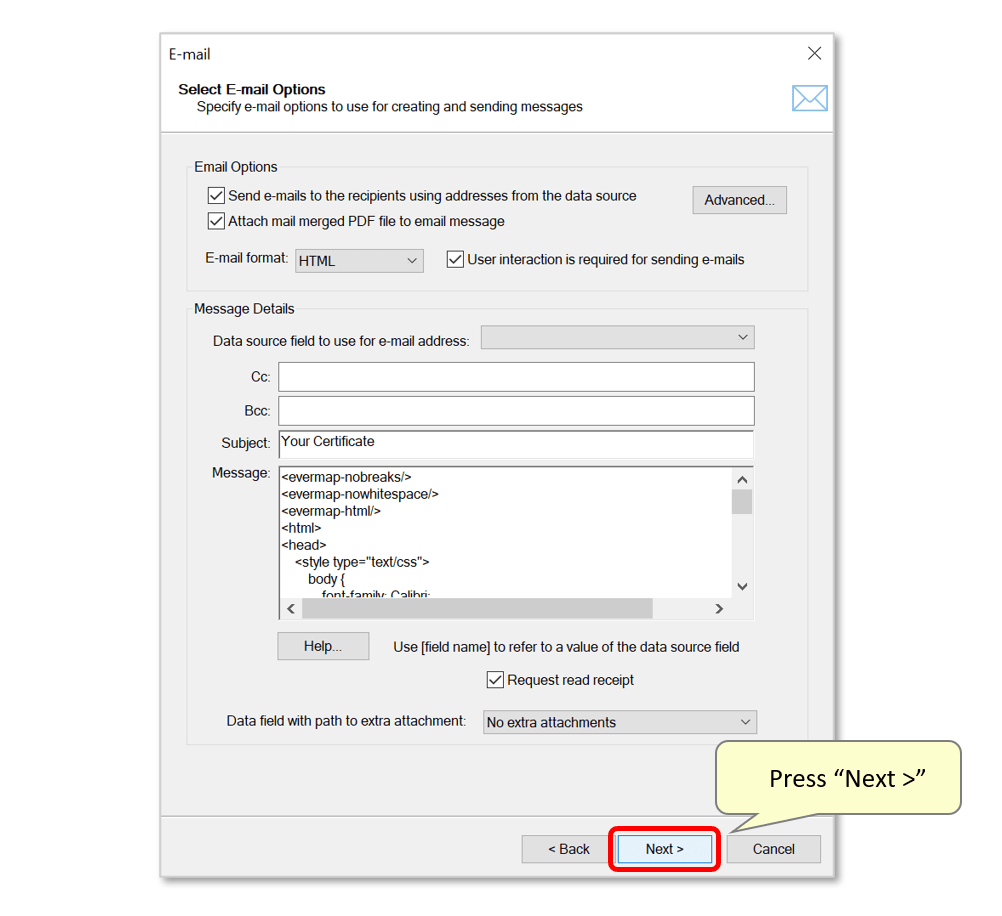
- Step 6 - Complete the Mail Merge
- Once the HTML message is completed, press "Next >" to proceed.
- Use the next settings screen to select an "SMTP Server" method for sending emails. Your organization may have an internal SMTP server that you can use. Contact your IT department for the account settings. Alternatively, Gmail also provides an SMTP server - see the separate Gmail SMTP tutorial for instructions on how to configure it.
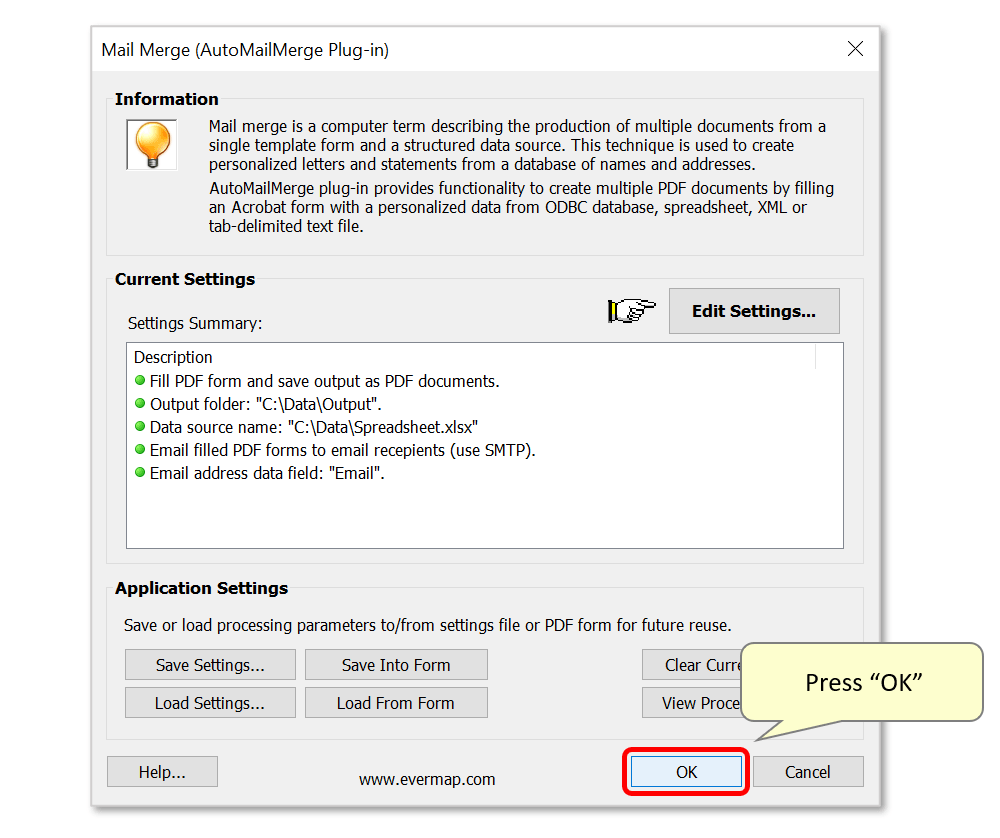
- Continue through the remaining settings screens, and press "OK" to confirm the procedure.
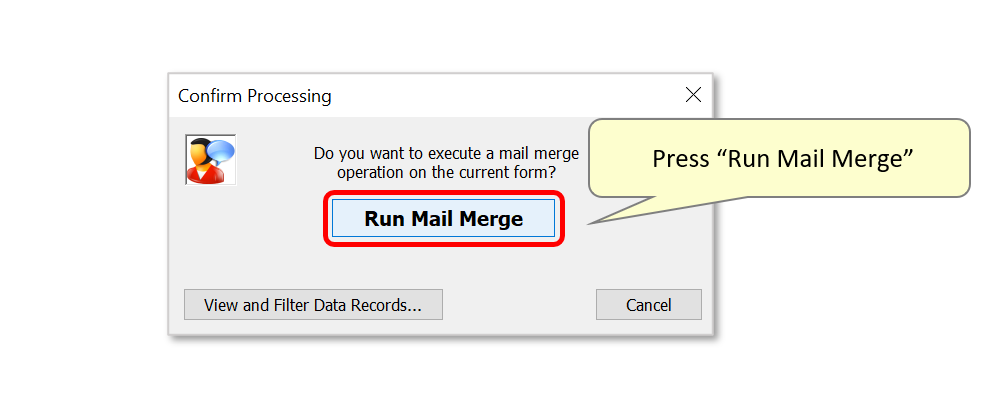
- Press "Run Mail Merge" to confirm.
- Step 7 - Inspect the Results
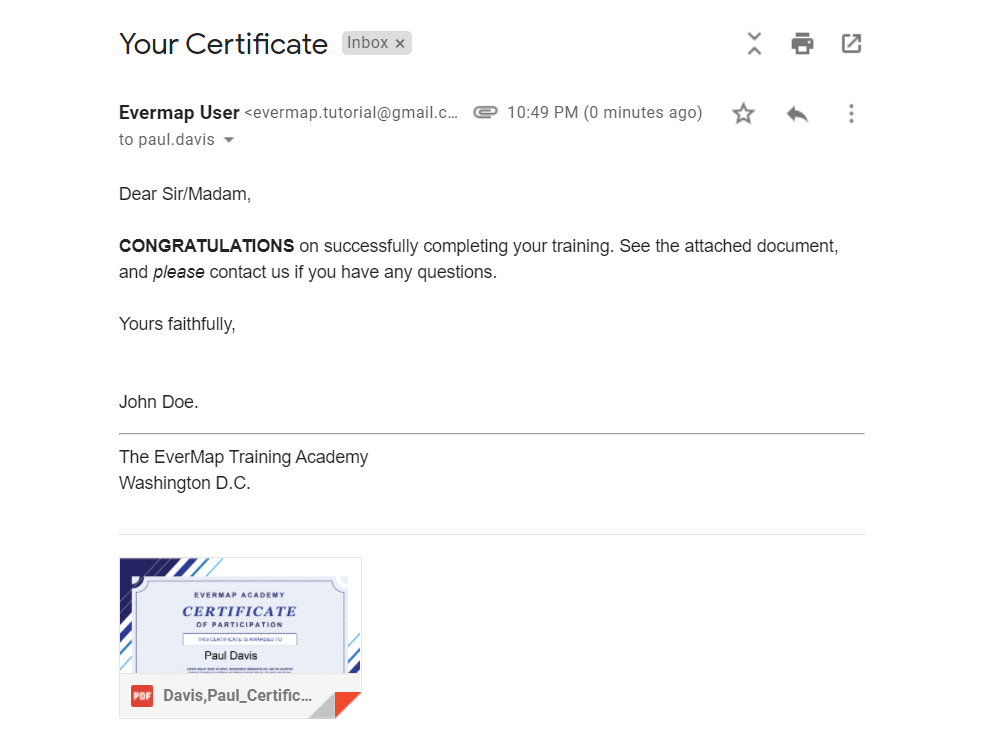
- Inspect the resulting email sent via this method, to see how the HTML code has formatted the message. The image below shows the email as it's received into a Gmail inbox:
- Step 8 - Sending a More Advanced HTML Message
- The next example shows how to use different font styles, hyperlinks, images and signature blocks.
- In this example, we conduct a mail merge that sends PDF certificates to email addresses located in the source file:
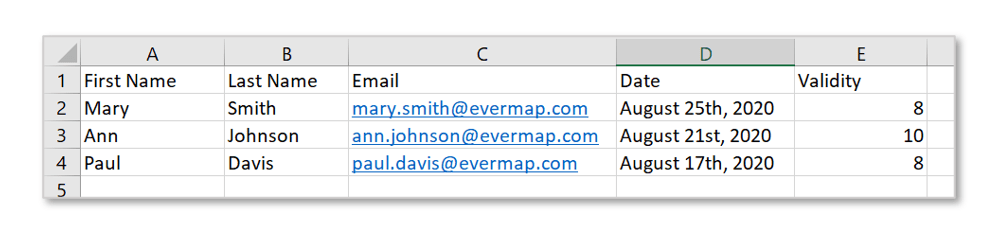
- The data is used to fill both the recipient's name and date:
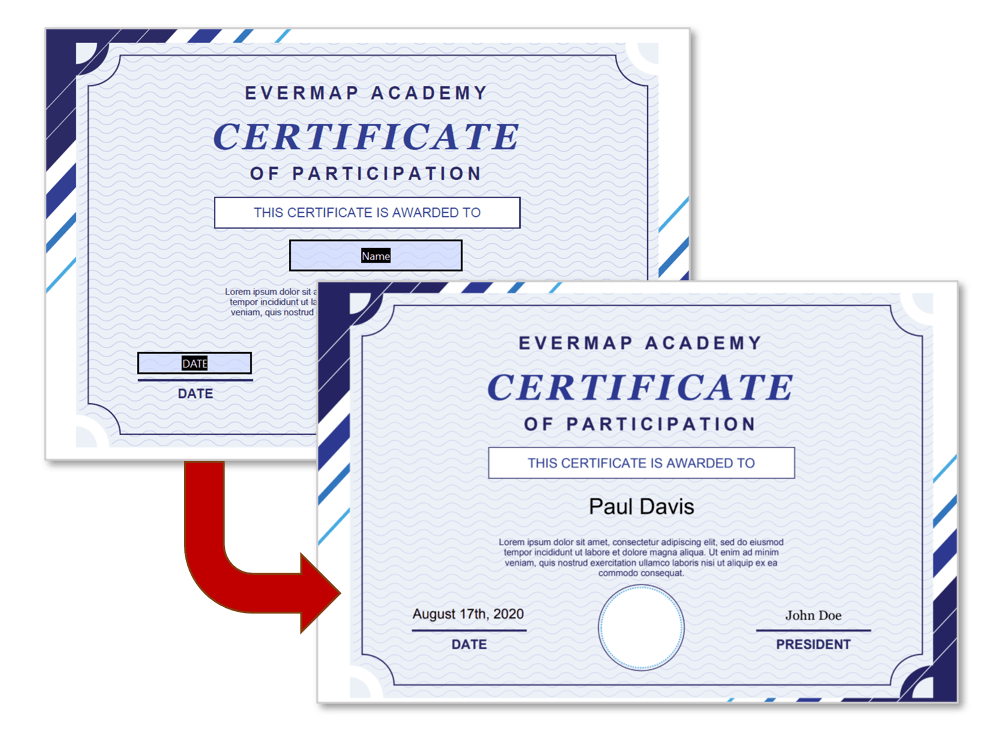
- These certificates will be emailed to their corresponding email addresses, along with a custom email message.
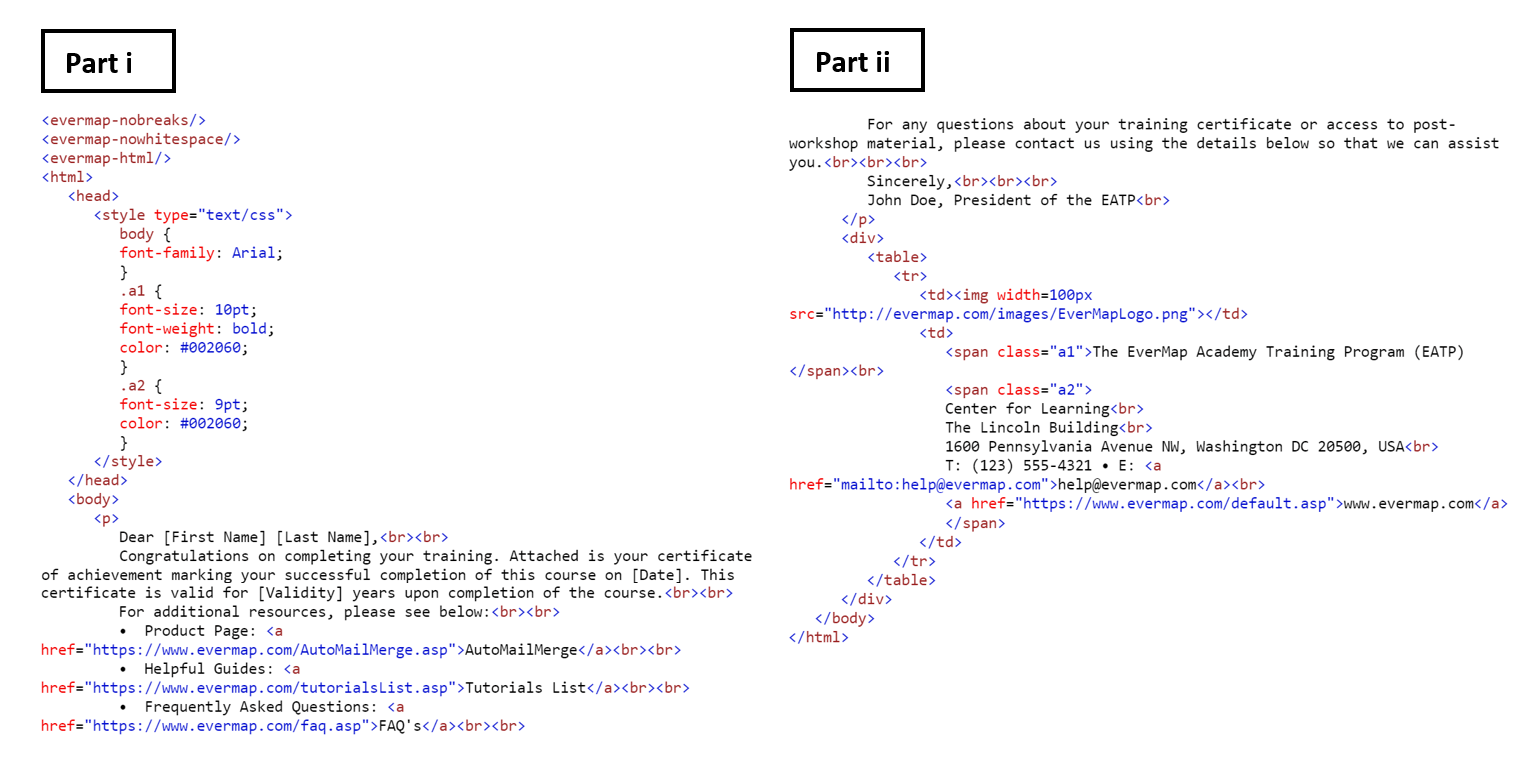
- The code used here features [...] brackets that refer to values in the data source. This data will be extracted to customize the output message for each recipient. For example, "Dear [First Name] [Last Name]" becomes "Dear Paul Davis" for an email being sent to "paul.davis@evermap.com".
- It also contains hyperlinks (for the email address and a website), as well as a signature block with an image. Note that image is not included with the email message to reduce the size of the email. It is located on the website and is being referenced by its URL address. It is a good practice to avoid sending any embedded images when sending multiple identical emails.
- Download this HTML template as a *.txt file by clicking here - it can be opened and edited in any text editor, such as MS Notepad.
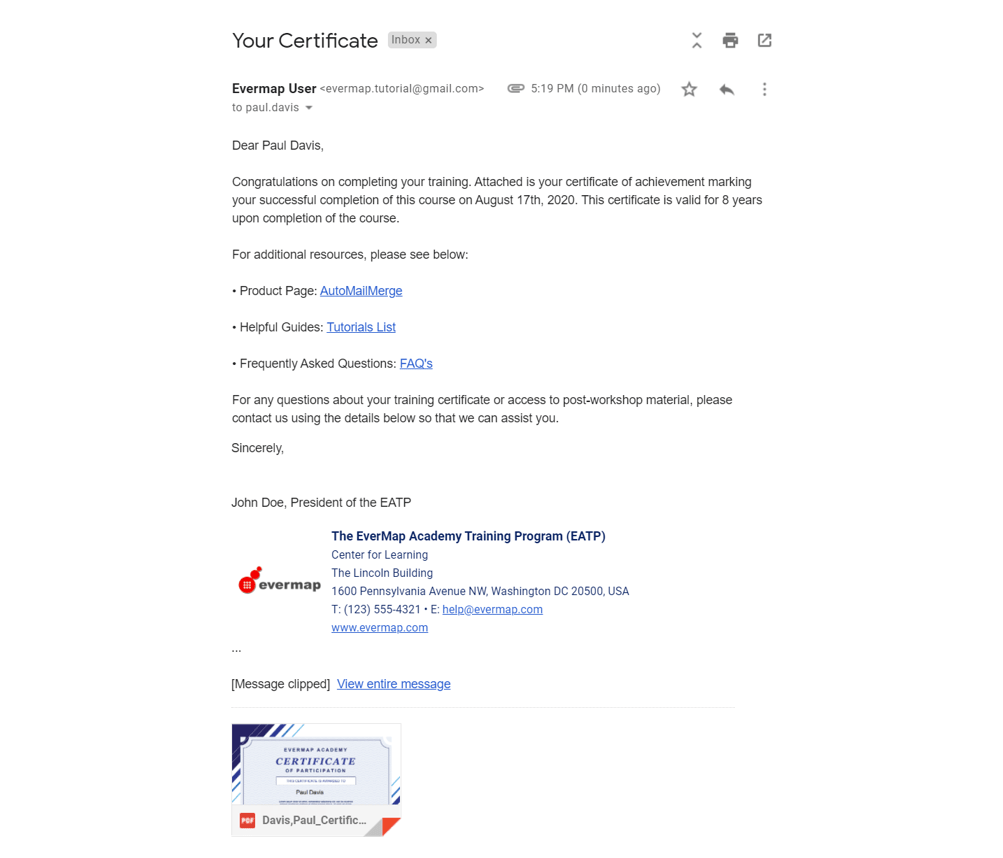
- Here is an example of an output email message. Observe how the name/date field data has been correctly inserted. The links and signature block have also been created:
- Click here for a list of all step-by-step tutorials available.