Populating Multi-line Form Fields in PDF Forms
AutoMailMerge for Adobe® Acrobat®
- Introduction
- One of the most common mail merge tasks is adding mailing addresses to mail correspondence, such as newsletters, invoices, bills, brochures etc. It is necessary to fill PDF form fields with addresses over multiple lines. This tutorial explains how to add personalized mailing addresses from a customer database or spreadsheet to your correspondence, by populating multi-line form fields with data values from a sample Excel spreadsheet. Using multi-line composite fields is an effective way to combine multiple data values into a single PDF field. It allows resulting text to appear in the same style and correctly arranged without gaps between words and misaligned text lines.
- We are going to demonstrate how to add a multi-line text form field to a specific page location in a regular PDF document. Next, AutoMailMerge™ plug-in is going to be used to populate the resulting PDF form using data from a sample Excel spreadsheet.
- Input Document Description
- In the steps below, we use a sample letter to create an input PDF form. The first step is to use Acrobat's Prepare Form tool add a multi-line text field to the PDF document. This field should be large enough to display all address lines. Data values from multiple Excel fields/columns are going to be used to populate this multi-line field to create a complete postal address. This PDF form will be used in the mail merge process to create unique letters for each data record from the Excel worksheet. Using multi-line form field allows creating a mailing address that appears "seamless" with all text lines and values correctly aligned.
- Prerequisites
- You need a copy of Adobe® Acrobat® (Standard or Professional) along with the AutoMailMerge™ plug-in installed on your computer in order to use this tutorial. Both are available as trial versions.
- Step 1 - Insert a Multi-Line Text Field
- Make sure you have a PDF document opened in Adobe® Acrobat®.
- Open "Prepare Form" Tool (New Acrobat Interface)
- Prepare Form tool is used in Adobe® Acrobat® to create and edit interactive PDF forms. Use it to add text fields, checkboxes, buttons and other interactive elements to the PDF documents.
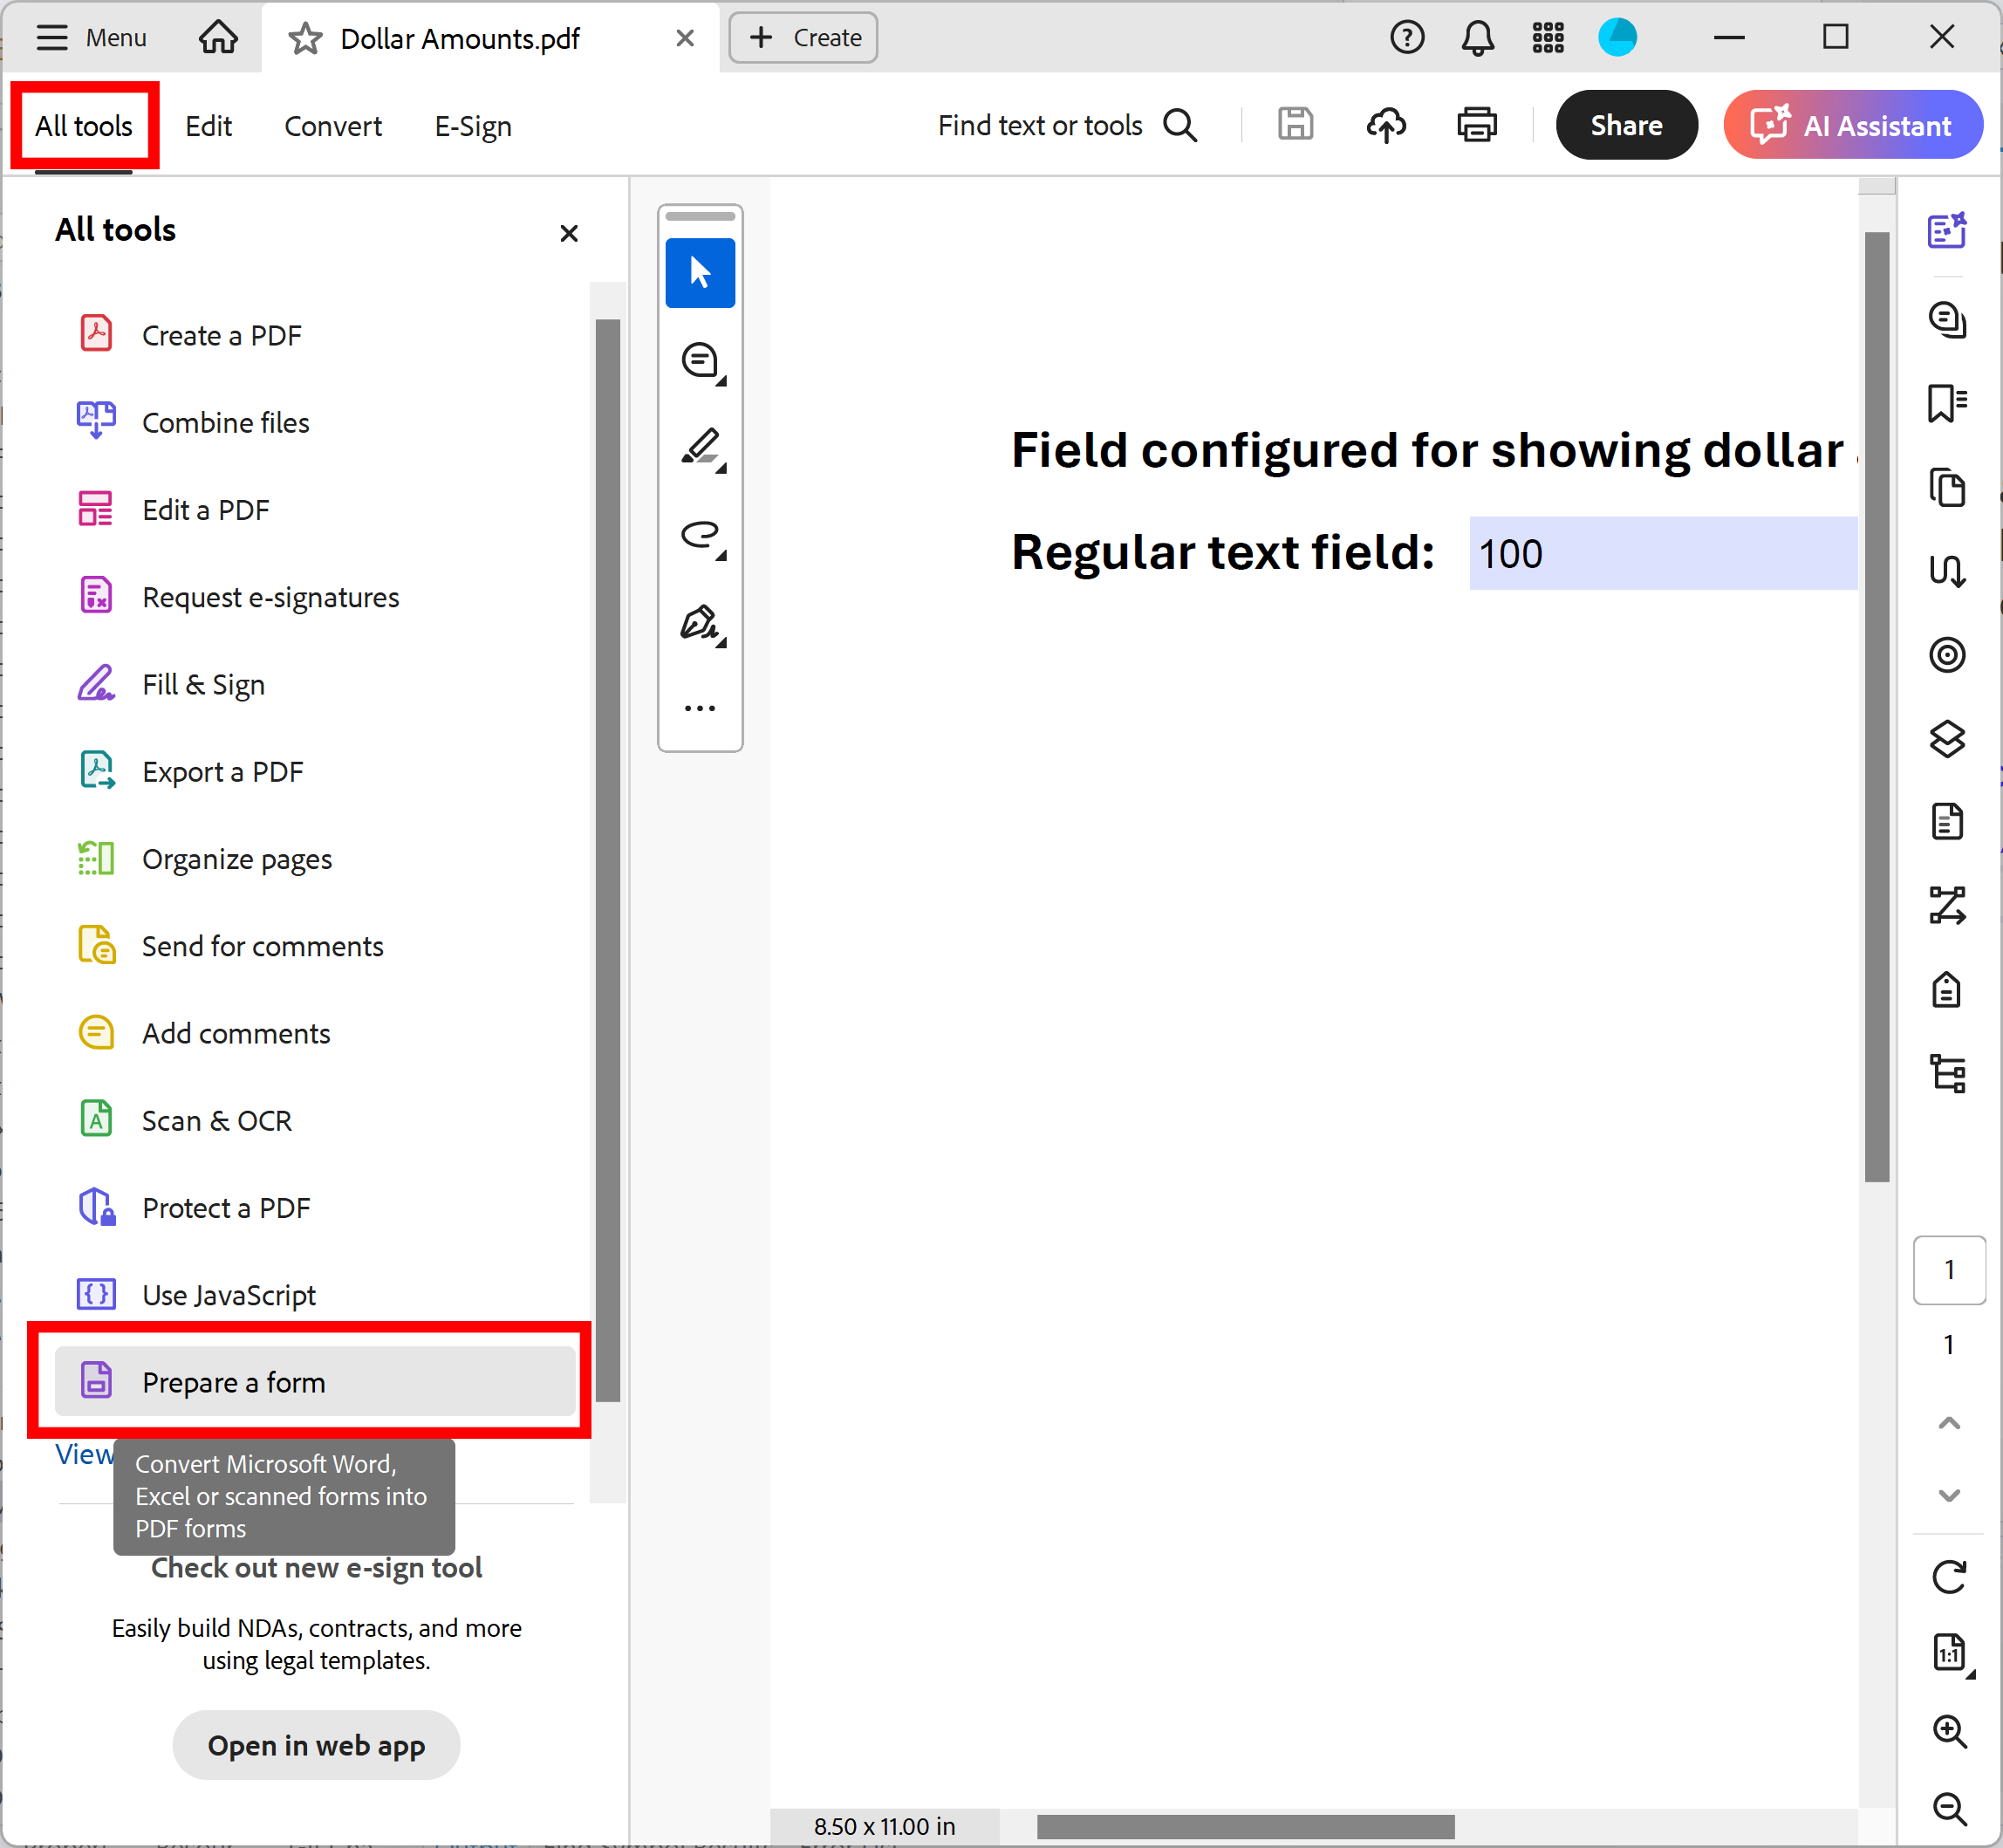
- If you are using a "new" Adobe® Acrobat® interface, then expand All tools and find Prepare Form tool located towards the bottom of the list. Depending on your screen size you may need to click on “View more” link to find it.

- Open "Prepare Form" Tool (Classic Acrobat Interface)
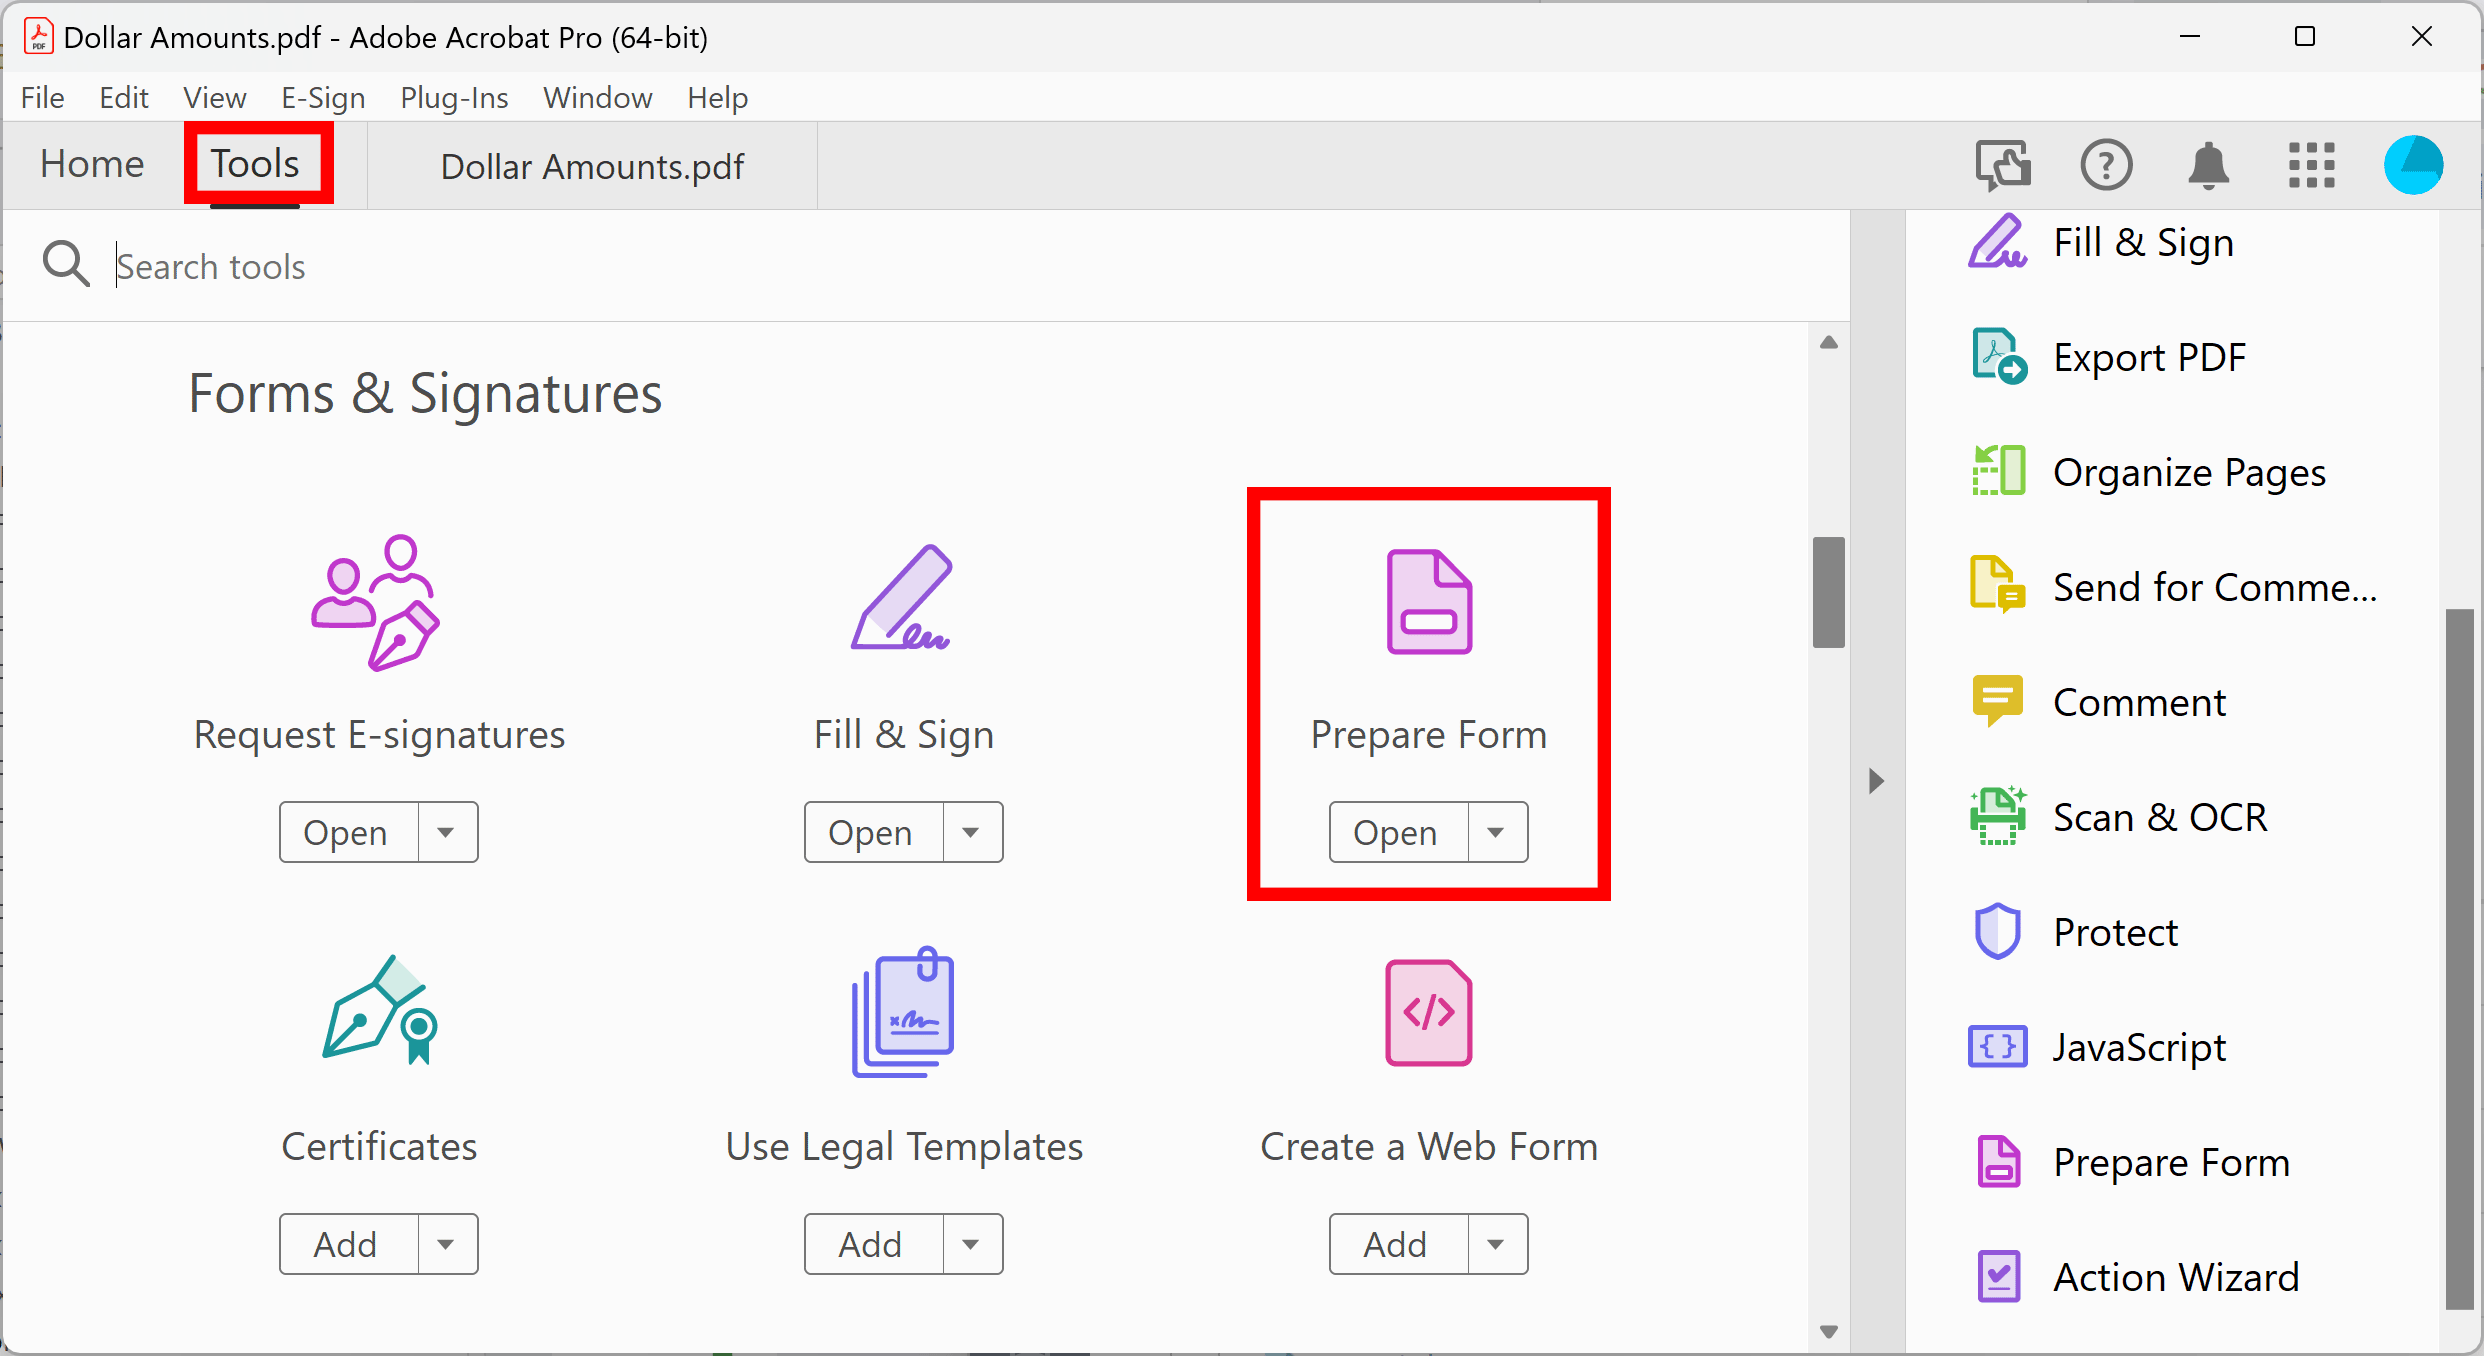
- If you are using a “classic” Adobe® Acrobat® interface, then expand Tools and find Prepare Form tool.

- Consult the following tutorial for more detailed help with creating interactive PDF forms.
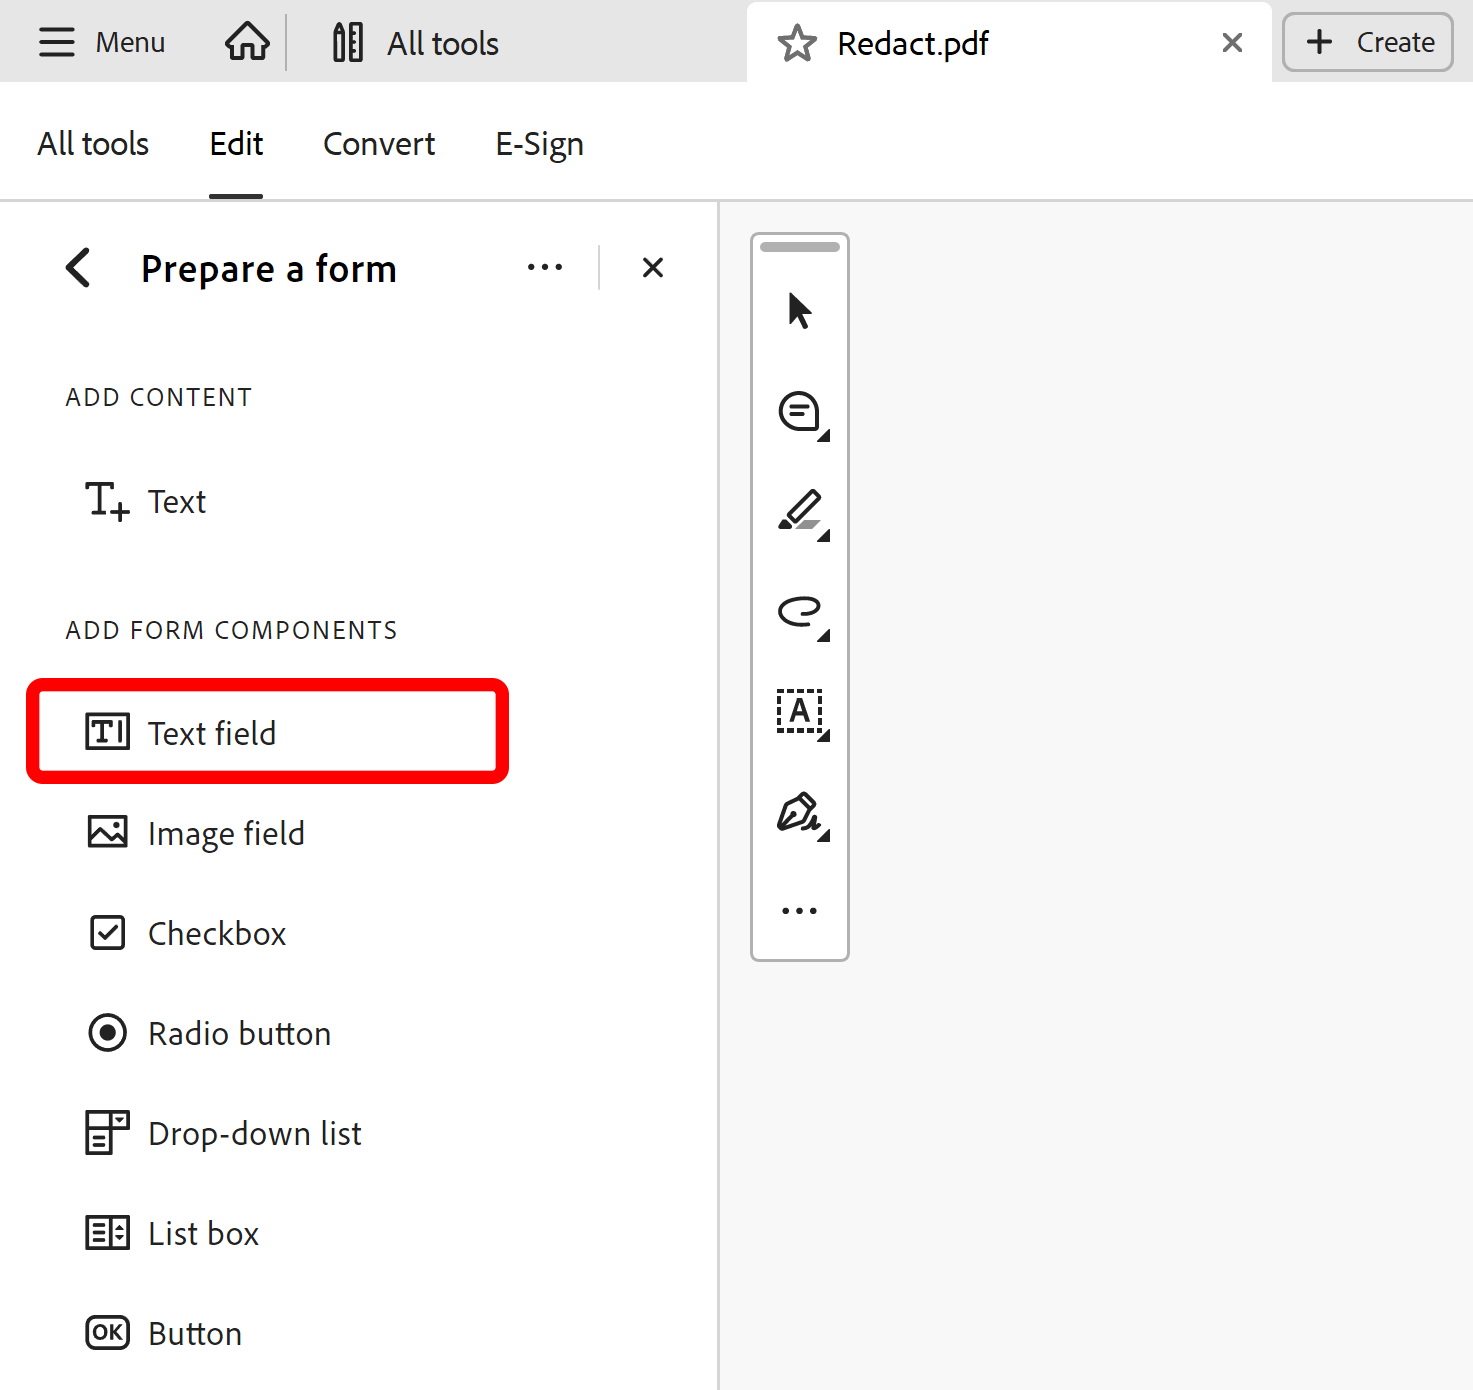
- If you are using "new" Adobe Acrobat interface, then select Text field icon on the application sidebar.

- If you are using a "classic" Adobe Acrobat, then press the "Add a Text Field Icon".
- Place Text Field on the Page
- Click and drag the cursor to draw a box where the text field should be placed on the page. Make sure that it is large enough to hold 4-5 lines of text.
- Step 2 - Edit Form Field Properties
- Double-click on the form field, or right-click on it and press "Properties" to open the "Text Field Properties" dialog.
- Optionally rename the field under the "General" tab. Here, we have named it "Address". Next, open the "Appearance" tab.
- Use the "Font Size" and "Font" drop-down menus to customize the appearance of output addresses. Ensure that the font size is large enough to fill the text field. Optionally use the "Auto" option under "Font Size" to automatically fill the form field using an appropriate size.
- Next, open the "Options" tab.
- Check the “Multi-line” option to allow this field to hold multiple lines of text. Press "Close" to close the dialog and save changes.
- Step 3 - Save the Form
- Save changes to the PDF via the "Save" button or the "File > Save As..." menu in Acrobat.
- Exit Prepare Form tool.
- Step 4 - Open the "Mail Merge" Dialog
- Select Plugins > Mail Merge… to open the Mail Merge dialog.
- If you are using a new Adobe Acrobat interface, then you can locate Mail Merge menu here:
- Please see the following page for a short video tutorial on how to locate Plugins menu in the new Adobe® Acrobat® interface.
- If you are using a "classic" Adobe Acrobat interface (pre-2022), then you can locate Mail Merge menu here:
- Step 5 - Edit Mail Merge Settings
- Clear current settings (if necessary), then press the "Edit Settings…" button.
- Press the "Browse…" button in the "Data Source" dialog to select the input data file.
- Select a data type to use from the list (e.g.: Microsoft Excel Worksheet), then press "OK". Use the dialog that opens to locate and select the source file, then select the worksheet in the final dialog.
- Step 6 - Add the Field Mapping
- Any fields in the source PDF form will now be listed here. Select the desired field, then press "Add Mapping...".
- Check the “Use a multiple-field expression to create a composite field” option.
- Type the expression into the entry box provided. Use [Field Name] syntax to refer to an existing data source field. You can mix static text with data field references as any text that is NOT enclosed within square brackets will appear as it's written here. In this example, the separate address components will be inserted in the format shown below.
- IMPORTANT: The multi-line option (see step 2) must be enabled under form field properties for this to work - otherwise all data will be shown on a single line.
- Note that blank lines entered here are automatically removed from multi-line expressions. This means that addresses can be entered into the form field without any blank lines, if any data fields used for the merge have been left blank. If it’s necessary to create a blank line in the field’s content, do this by using the “{blank}” keyword entered within brackets.
- Press “OK” once done.
- Step 7 - Select Output Options
- Press "Next >" to proceed to the next settings screens.
- Select an output folder using the "Browse..." button.
- Optional: use the 'File Naming' section below to create a file naming scheme for the processed files. Enter text before/after a base filename - in this example, the output files will follow a "John_Doe" format. Use [Field Name] syntax to extract data from the source file and insert it into output filenames.
- Press "Next >" to proceed through the final settings screens.
- Step 8 - Run the Mail Merge
- The confirmed settings summary will now be listed with green circles. Optionally, save the mail merge settings as an *.mms file for later use by pressing "Save Settings". These can be loaded via the "Load Settings" button.
- Press "OK" to start the mail merge process.
- Press "Run Mail Merge" to confirm.
- Step 9 - Open Output Files
- A results box will confirm the success of the operation. By default, pressing "OK" will open the selected output location.
- Open an output PDF letter to inspect the inserted address lines.
- Step 10 - Inspect the Results
- Inspect the files to check that all text from the relevant data fields has been entered into the form field. The example below shows a different address inserted into the designated space in each letter. Note that Mary Smith's "State" field was left empty in the data source, so nothing has been inserted in this part of the output address:
- Examine output documents to make sure that the size of the form field is sufficient to display all necessary text from the data records. Enlarge the field if any text appears to be cut off on some of the output forms, or modify the font size. You can change the size and visual appearance of the text field by re-opening the "Prepare Form" tool (step 1) and repeating the procedure.
- Click here for a list of all step-by-step tutorials available.