Creating PDF Documents with QR Codes with Web Links
AutoMailMerge plug-in for Adobe® Acrobat®
- Introduction
- This tutorial demonstrates how to create custom PDF documents, where each document contains unique information as well as a QR code that encodes a web link. As an example, we will create a COVID PCR test document, that contains the patient's personal information (e.g. name, age, test ID) as well as a QR code that encodes the URL for his/her test results. We will use Microsoft Word to create the template for the PDF form, and MS Excel to create a data spreadsheet containing each patient's information. Then, we will add form fields, including a QR code, to the template to create the final form using Adobe® Acrobat®, and use the AutoMailMerge&trade plug-in to automatically fill out each form with patient information using data from the Excel spreadsheet.
- Input Documents Description
- To carry out the Mail Merge we will first create:
-
- A PCR test template PDF form containing form fields.
- An *.xlsx spreadsheet file containing sample data across seven columns. Each column corresponds to a form field that will be filled with data in the template PDF form.
- Prerequisites
- You need Microsoft Word, Microsoft Excel, Adobe® Acrobat®, along with the AutoMailMerge™ plug-in installed on your computer in order to use this tutorial. The latter two are available as trial versions. You will need a smart phone to confirm that the QR code functions correctly at the end of the tutorial.
- Table of Contents
-
- Design a template PDF form in MS Word
- Save the file as a PDF
- Open the PDF template in Adobe® Acrobat®
- Add text form fields to the PDF template
- Add a QR code form field to the PDF template
- Prepare a spreadsheet containing data in MS Excel
- Select the data file to be used for the Mail Merge
- Assign a data source to each PDF form field
- Configure the Mail Merge
- Run the Mail Merge
- View the results
Step-by-Step Tutorial
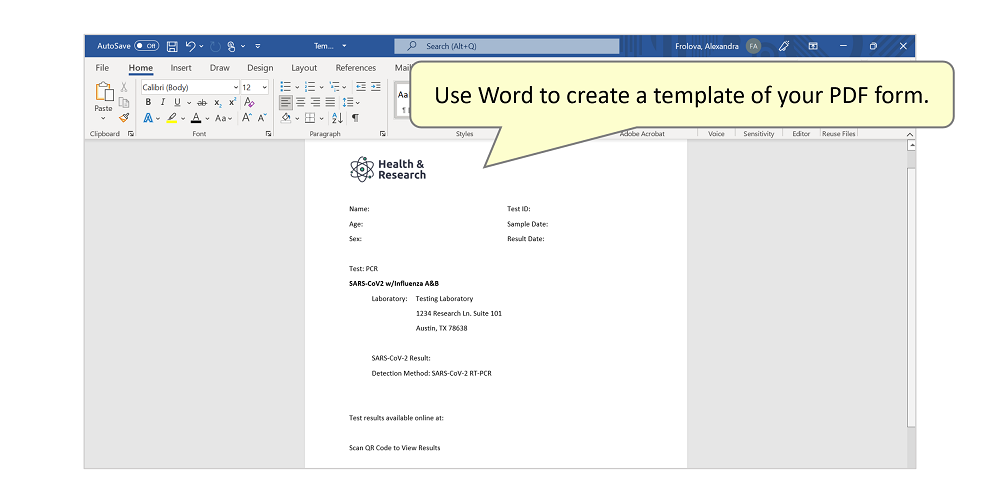
- Design a template PDF form in MS Word
- Use MS Word to design the template for your PDF form, including the text and layout of your document. You can also fill in any non-variable fields, leaving any variable fields blank, as these will be filled by the Mail Merge. Remember to leave space for the QR code.
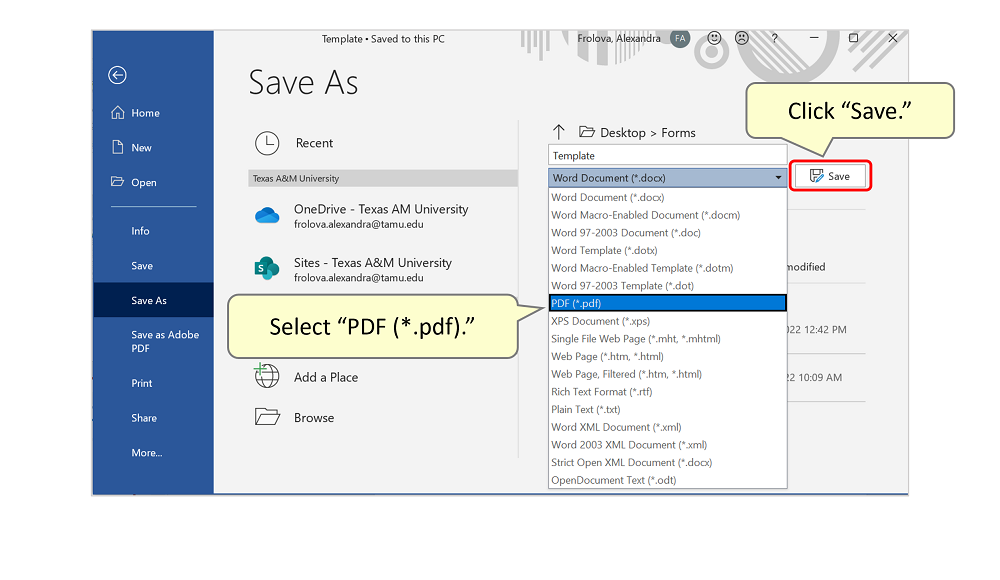
- Save as PDF File
- Save the file as a PDF by going to "File" then "Save as". Select "PDF (*.pdf)" as the file type to be saved in the folder of your choice. Click "Save".
- Open Adobe® Acrobat® application and select Prepare Form tool.
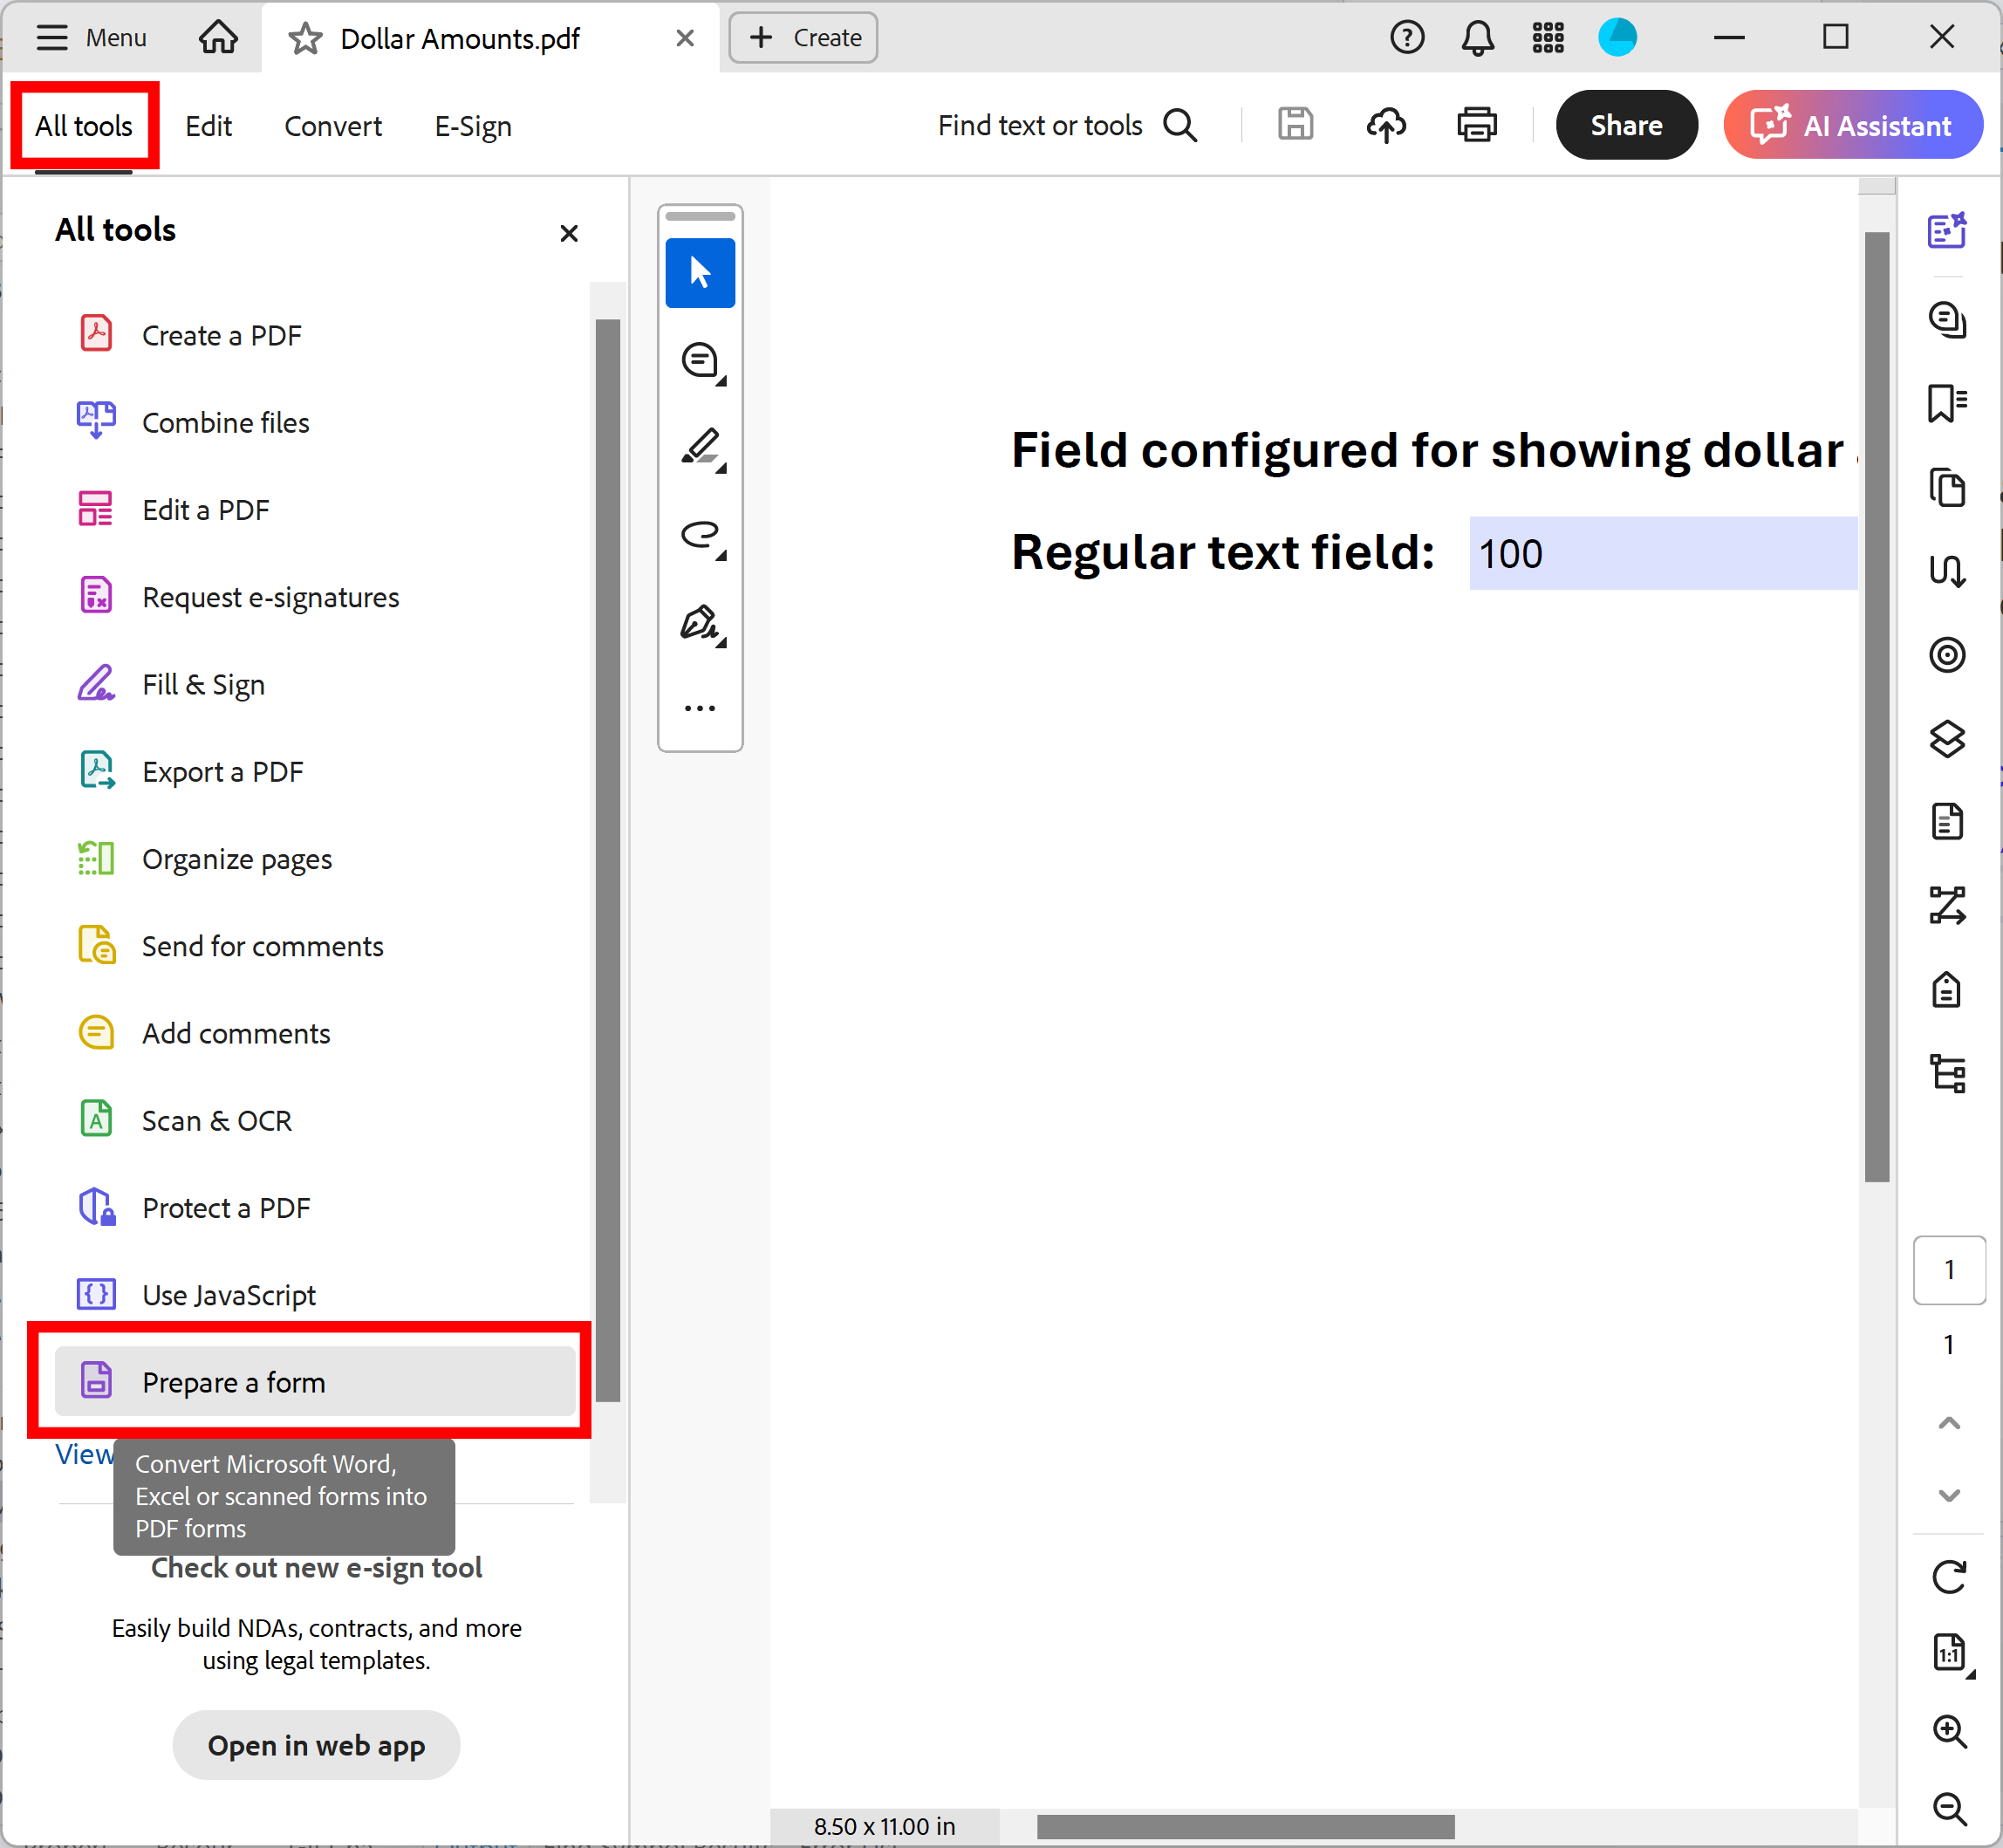
- Open "Prepare Form" Tool (New Acrobat Interface)
- Prepare Form tool is used in Adobe® Acrobat® to create and edit interactive PDF forms. Use it to add text fields, checkboxes, buttons and other interactive elements to the PDF documents.
- If you are using a "new" Adobe® Acrobat® interface, then expand All tools and find Prepare Form tool located towards the bottom of the list. Depending on your screen size you may need to click on “View more” link to find it.
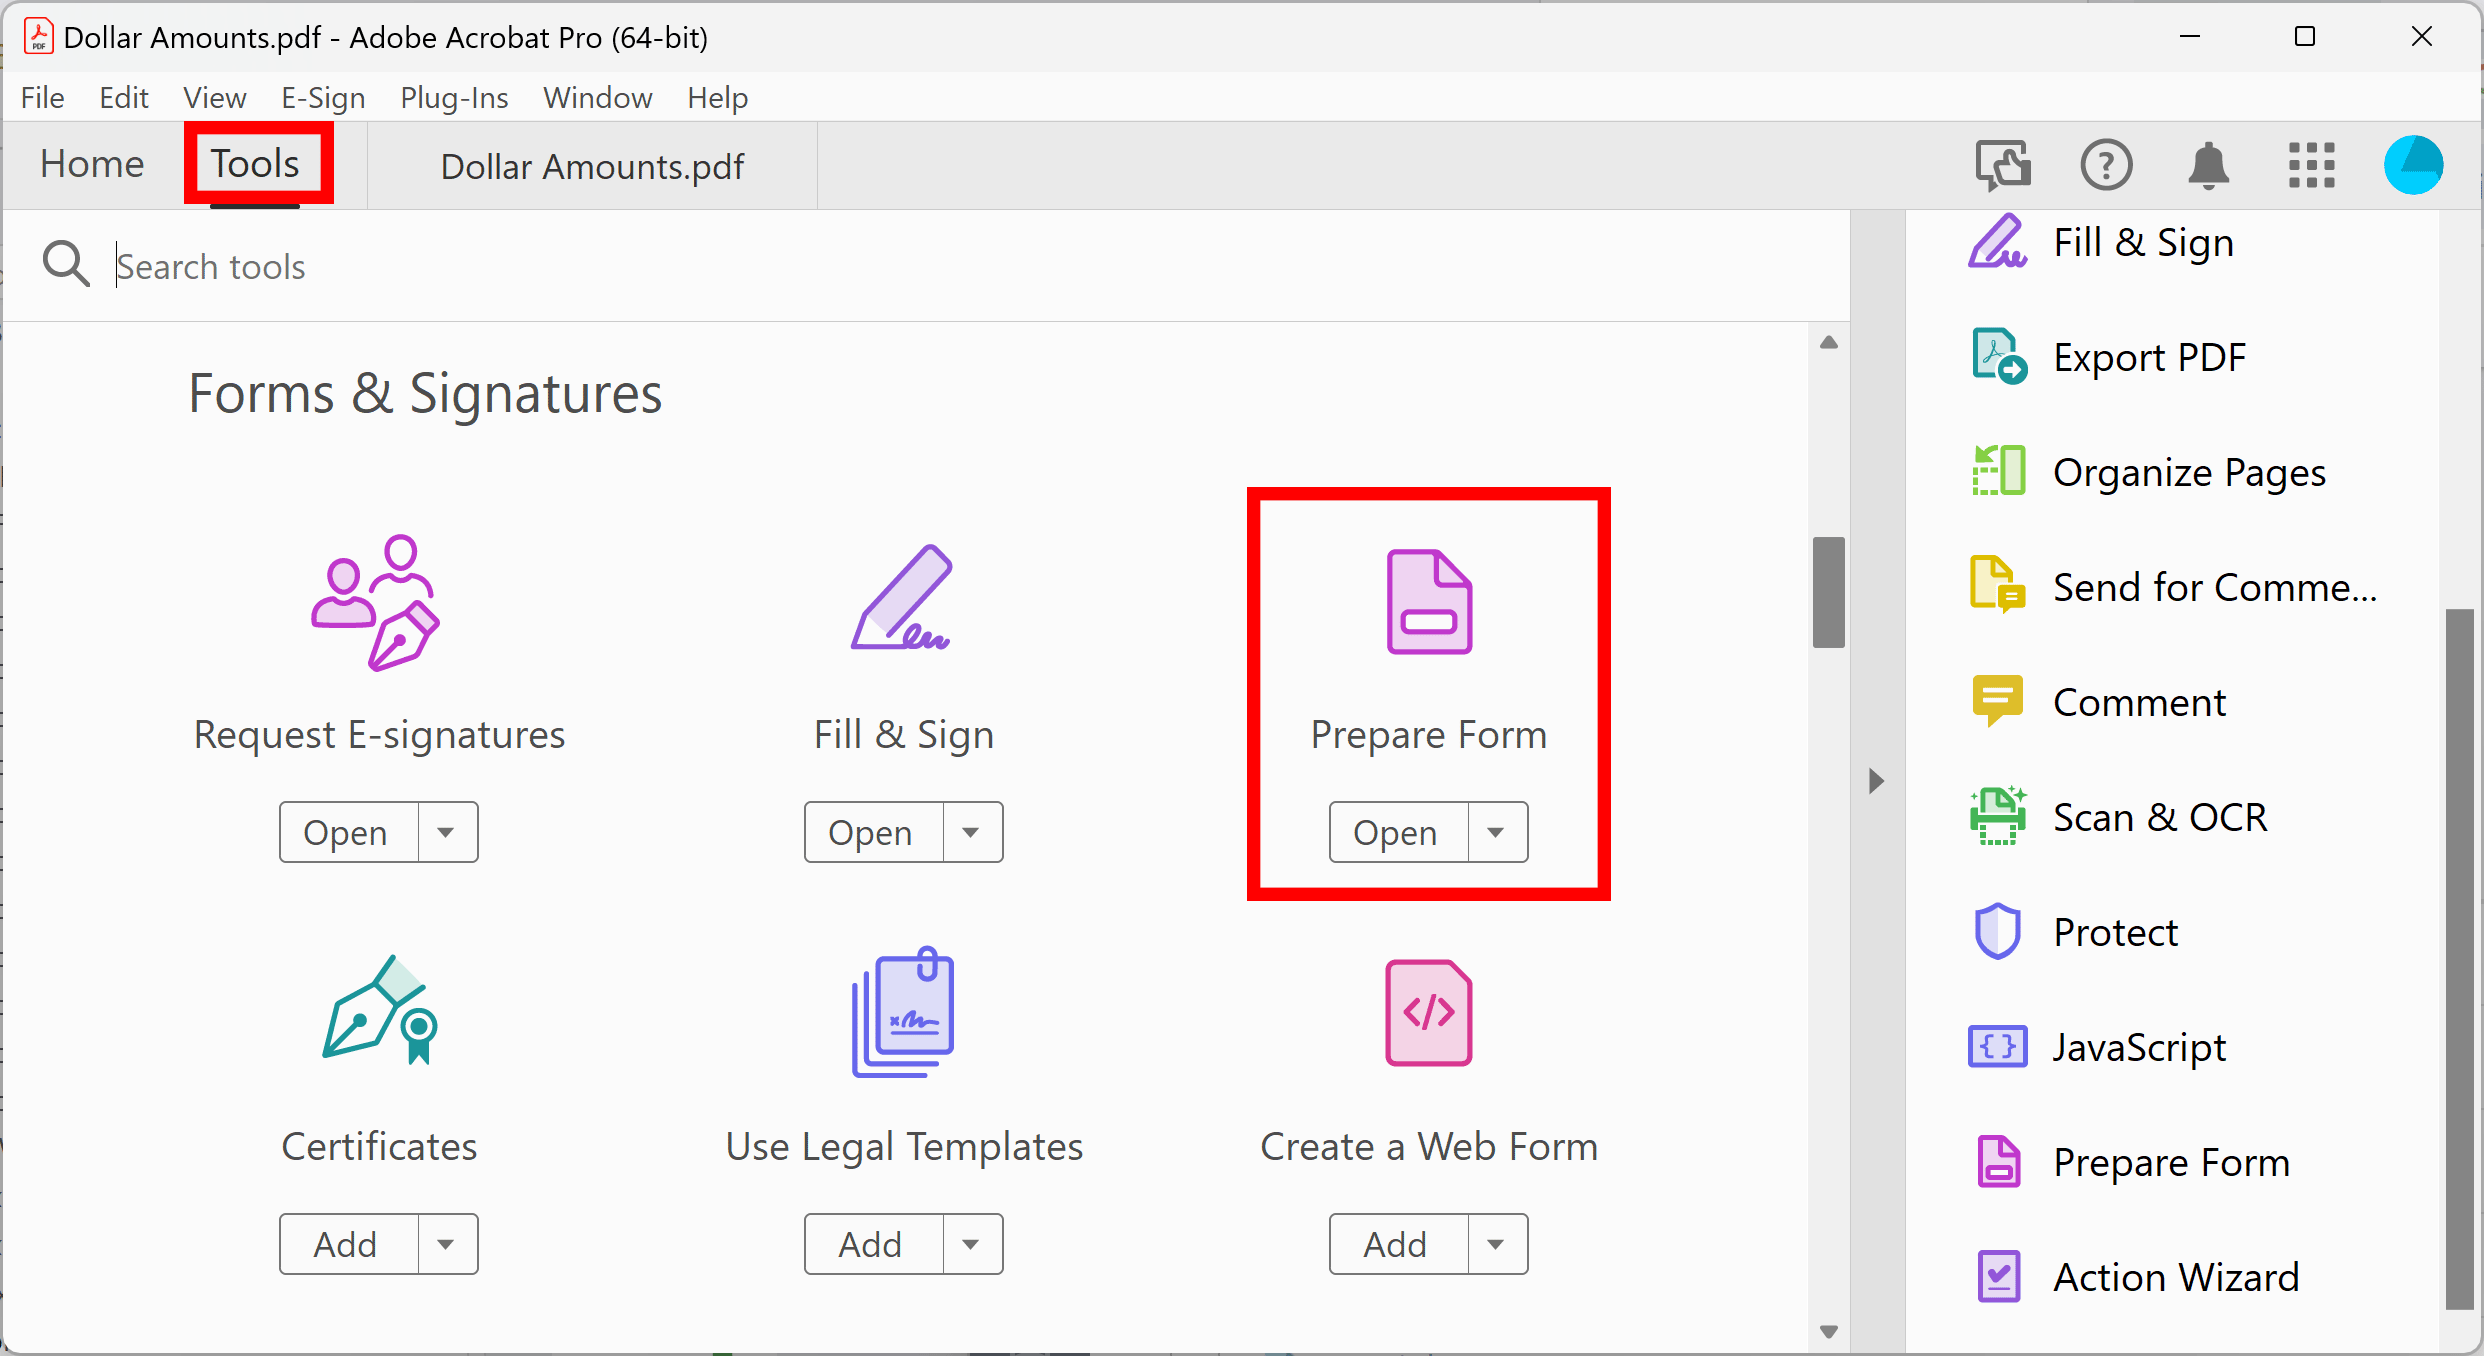
- Open "Prepare Form" Tool (Classic Acrobat Interface)
- If you are using a “classic” Adobe® Acrobat® interface, then expand Tools and find Prepare Form tool.
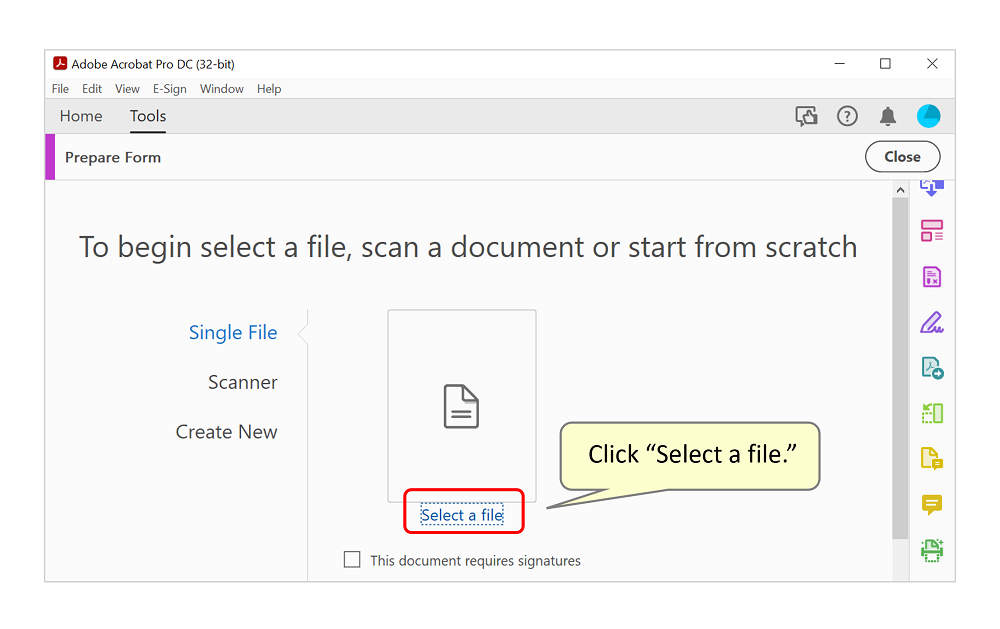
- Click on "Select a file".
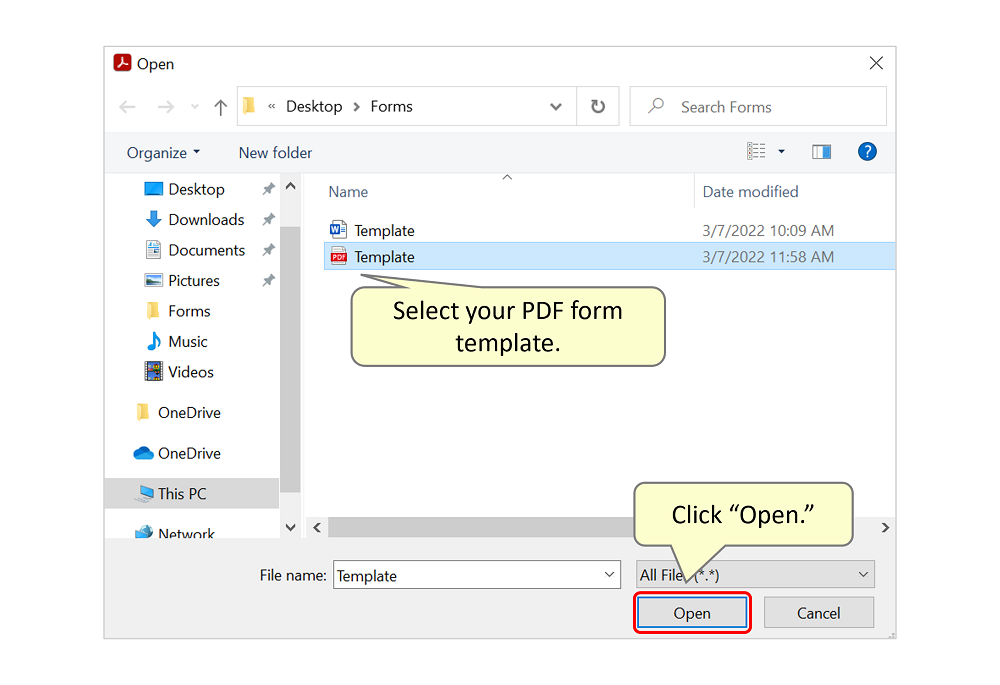
- Navigate to your template PDF file and select it. Then click "Open."
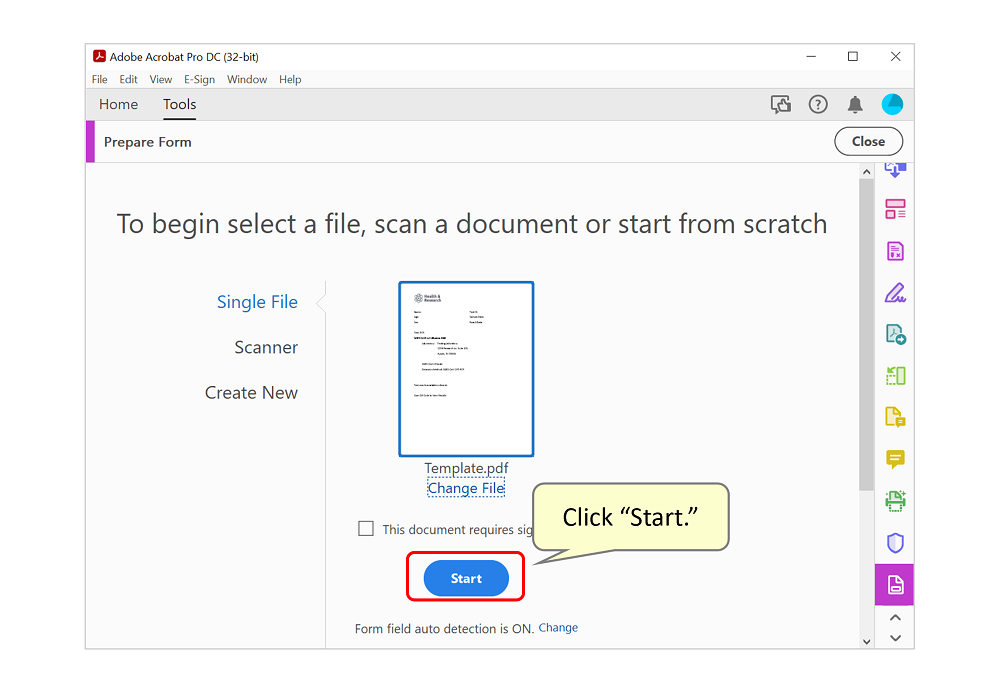
- Click "Start".
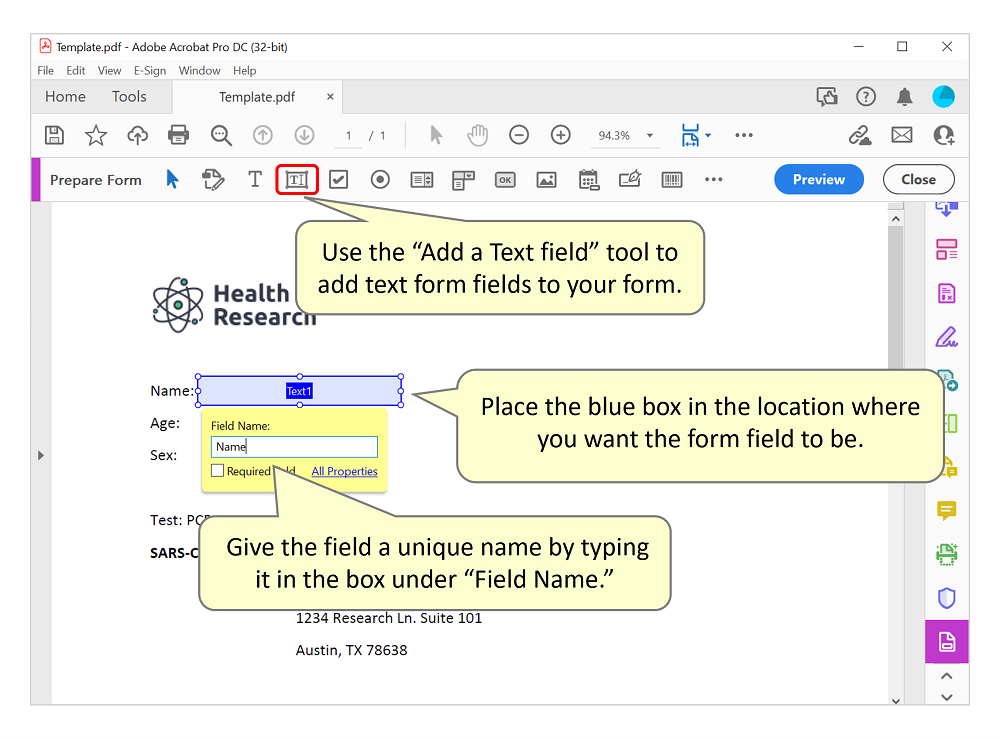
- Add Text Form Fields
- Add text form fields using the "Add a text field" tool from the "Prepare Form" menu. Place the blue boxes in locations where you want your text form fields to be located. These boxes can be resized and moved at any time. Give each form field a unique name by typing it into the yellow "Field Name" box that appears below the blue box.
- Continue adding the rest of the text form fields to the form. Here, the final PDF form contains the text fields, "Name," "Age," "Sex," "Test ID," "Sample Date," "Result Date," and "Result."

- Add a QR Code Field
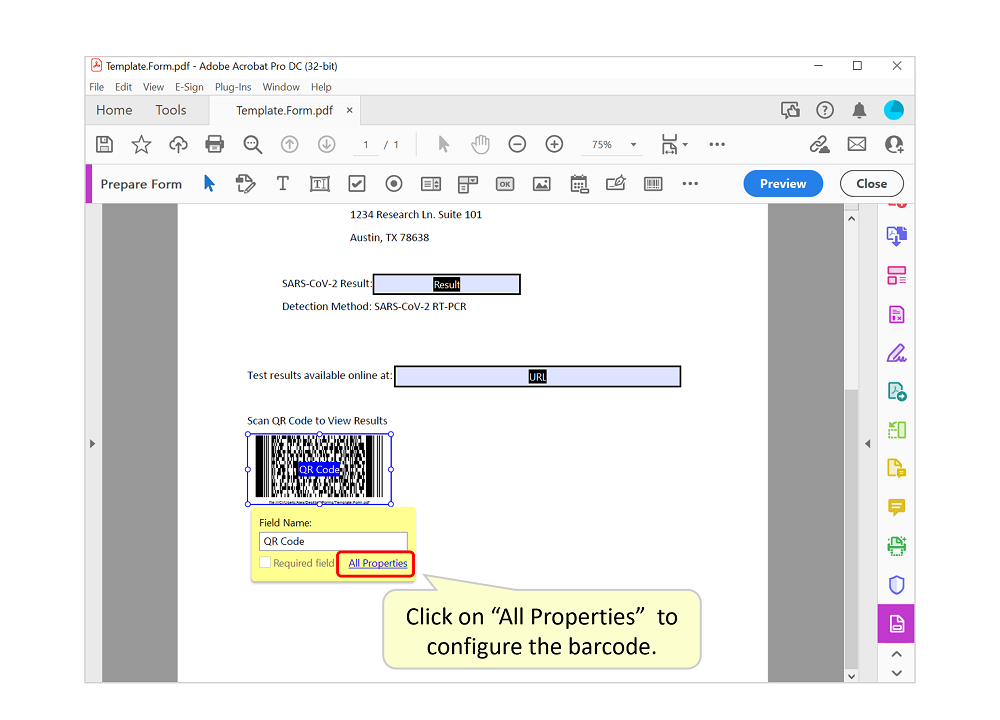
- Select the "Add a barcode" tool from the "Prepare Form" menu, then place the blue box in the location where you want your QR code to appear. You can adjust the location of the barcode at any time. Give the barcode a name by typing it into the yellow "Field Name" box located below the barcode. Here, we named it "QR Code."

- Click on "All Properties" to configure the barcode.
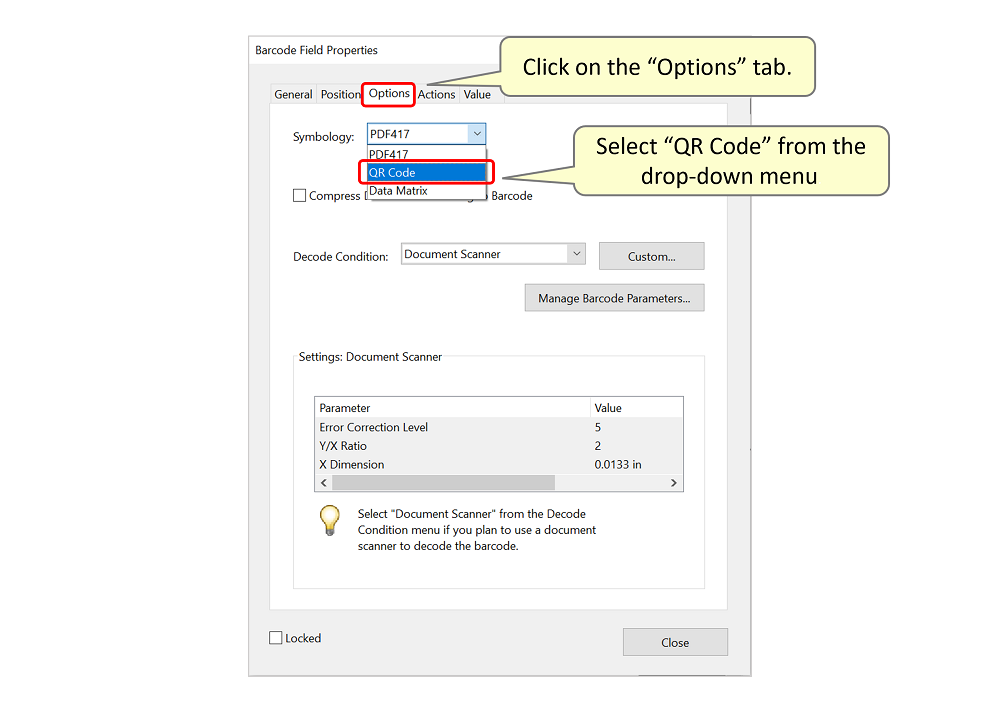
- Go to the "Options" tab and select "QR Code" from the drop-down menu.
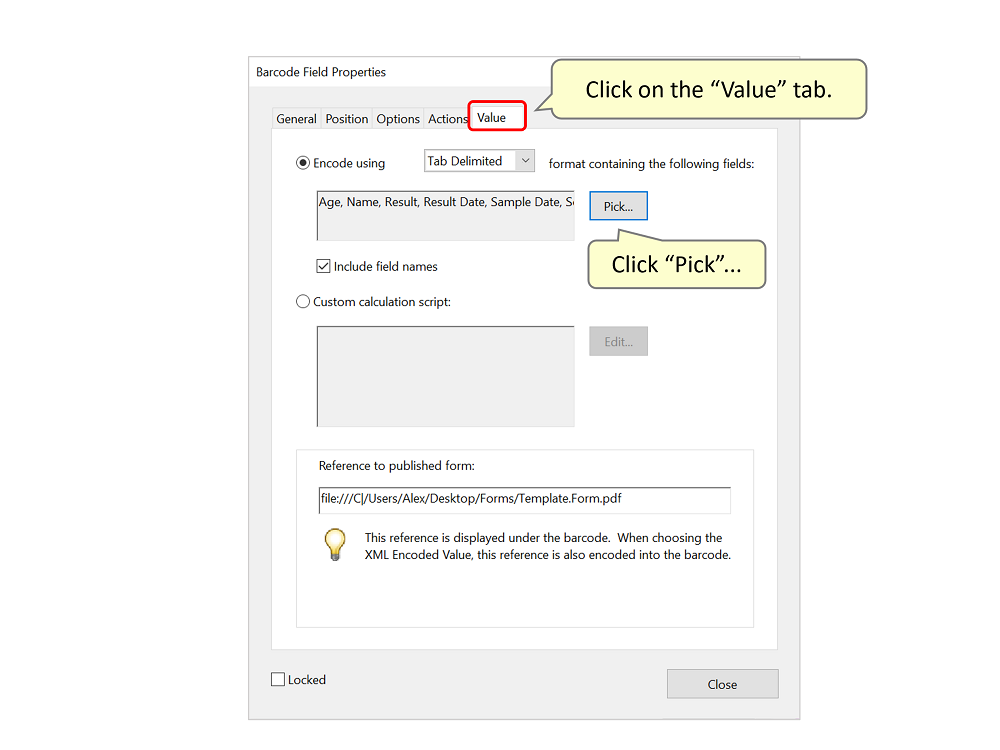
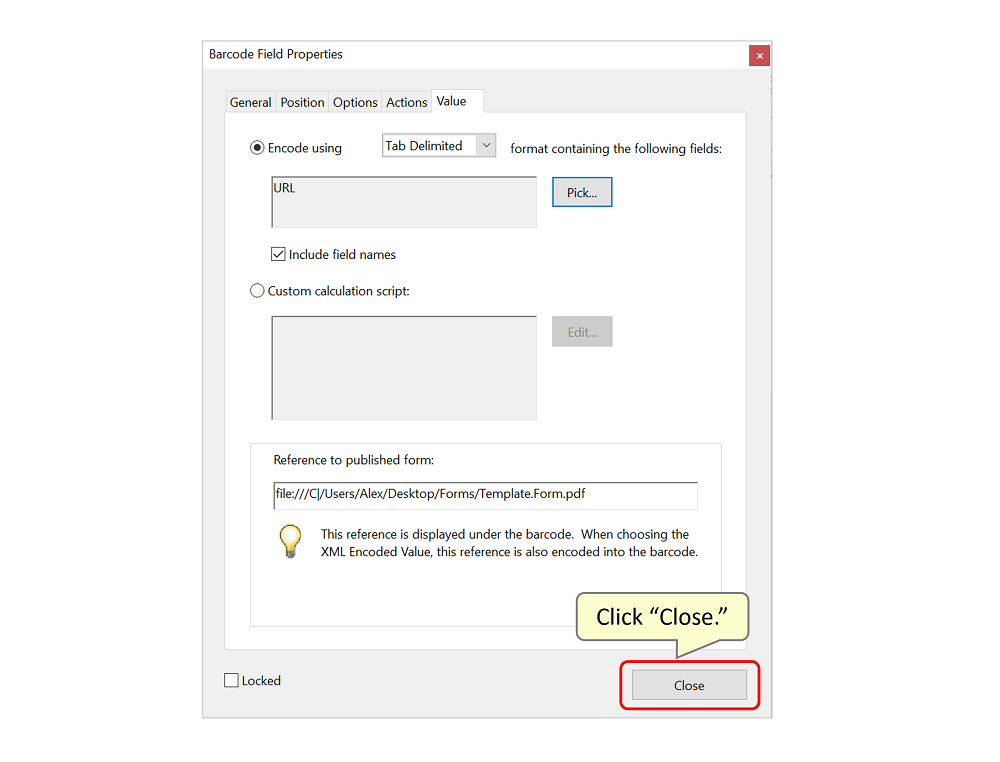
- Then go to the "Value" tab. Click "Pick…" to select the field that you want your QR code to encode.
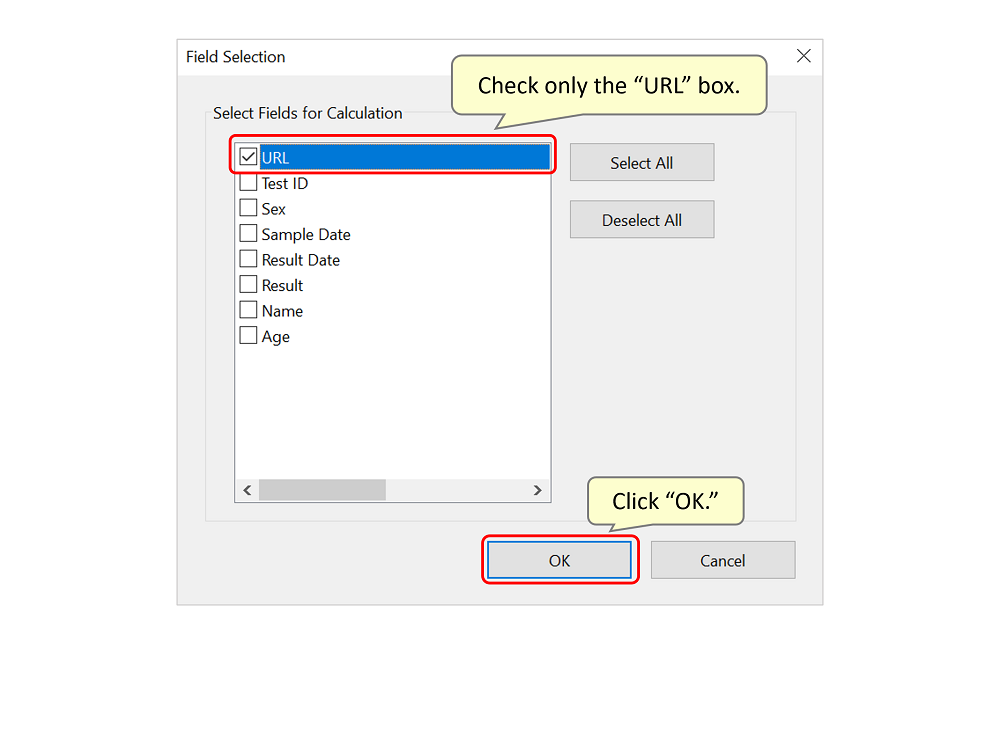
- Check only the "URL" checkbox, leaving the other boxes unchecked. Click "OK."
- Click "Close."
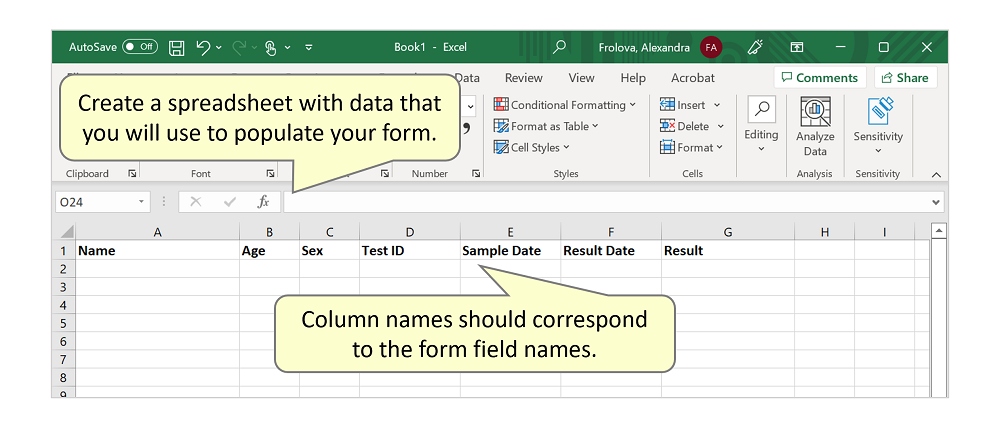
- Prepare Data in Microsoft Excel
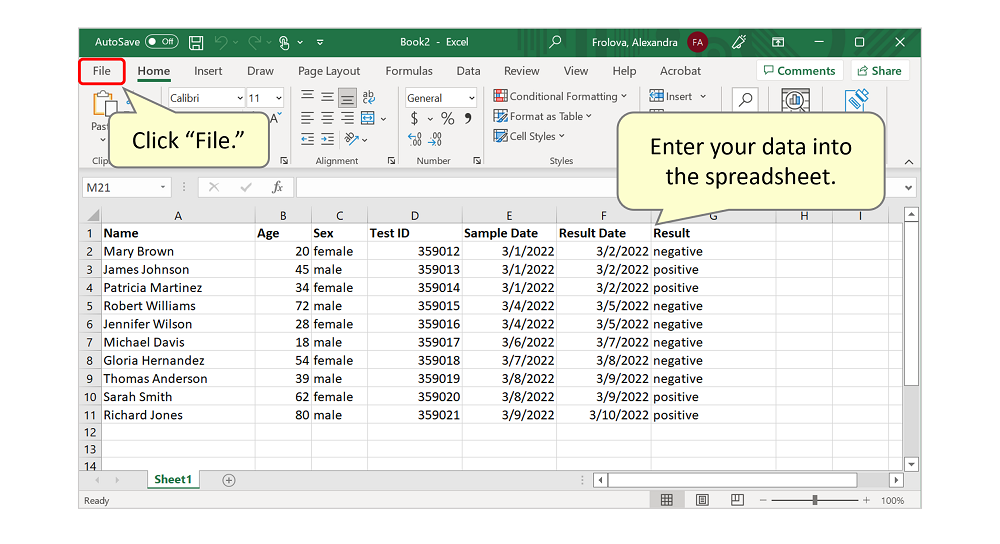
- At this stage, you need a file containing the data that you will use to fill the forms. Use MS Excel to prepare the data file. Data should be organized in columns with names that match the text form fields of the PDF form. It is not necessary to include the URL field, because the unique portion of this field will be based on the Test ID, which is already included in the spreadsheet.
- Once you have entered your data into the spreadsheet, save the file by clicking "File" then "Save as."
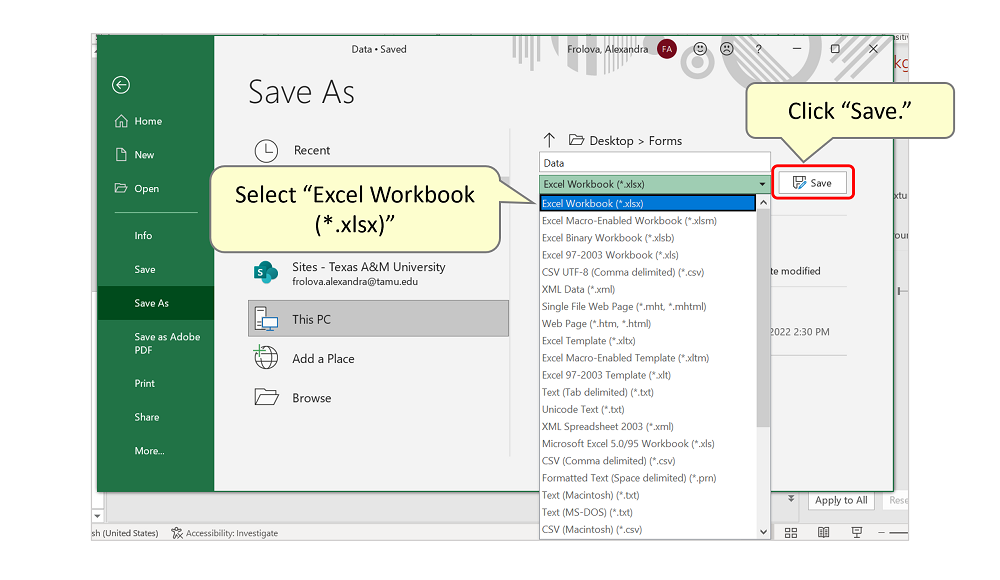
- Select "Excel Workbook (*xlsx)" from the drop-down menu and click "Save." Close the Excel spreadsheet.
- Configure Mail Merge
- Select Plugins > Mail Merge… to open the Mail Merge dialog.
- If you are using a new Adobe Acrobat interface, then you can locate Mail Merge menu here:
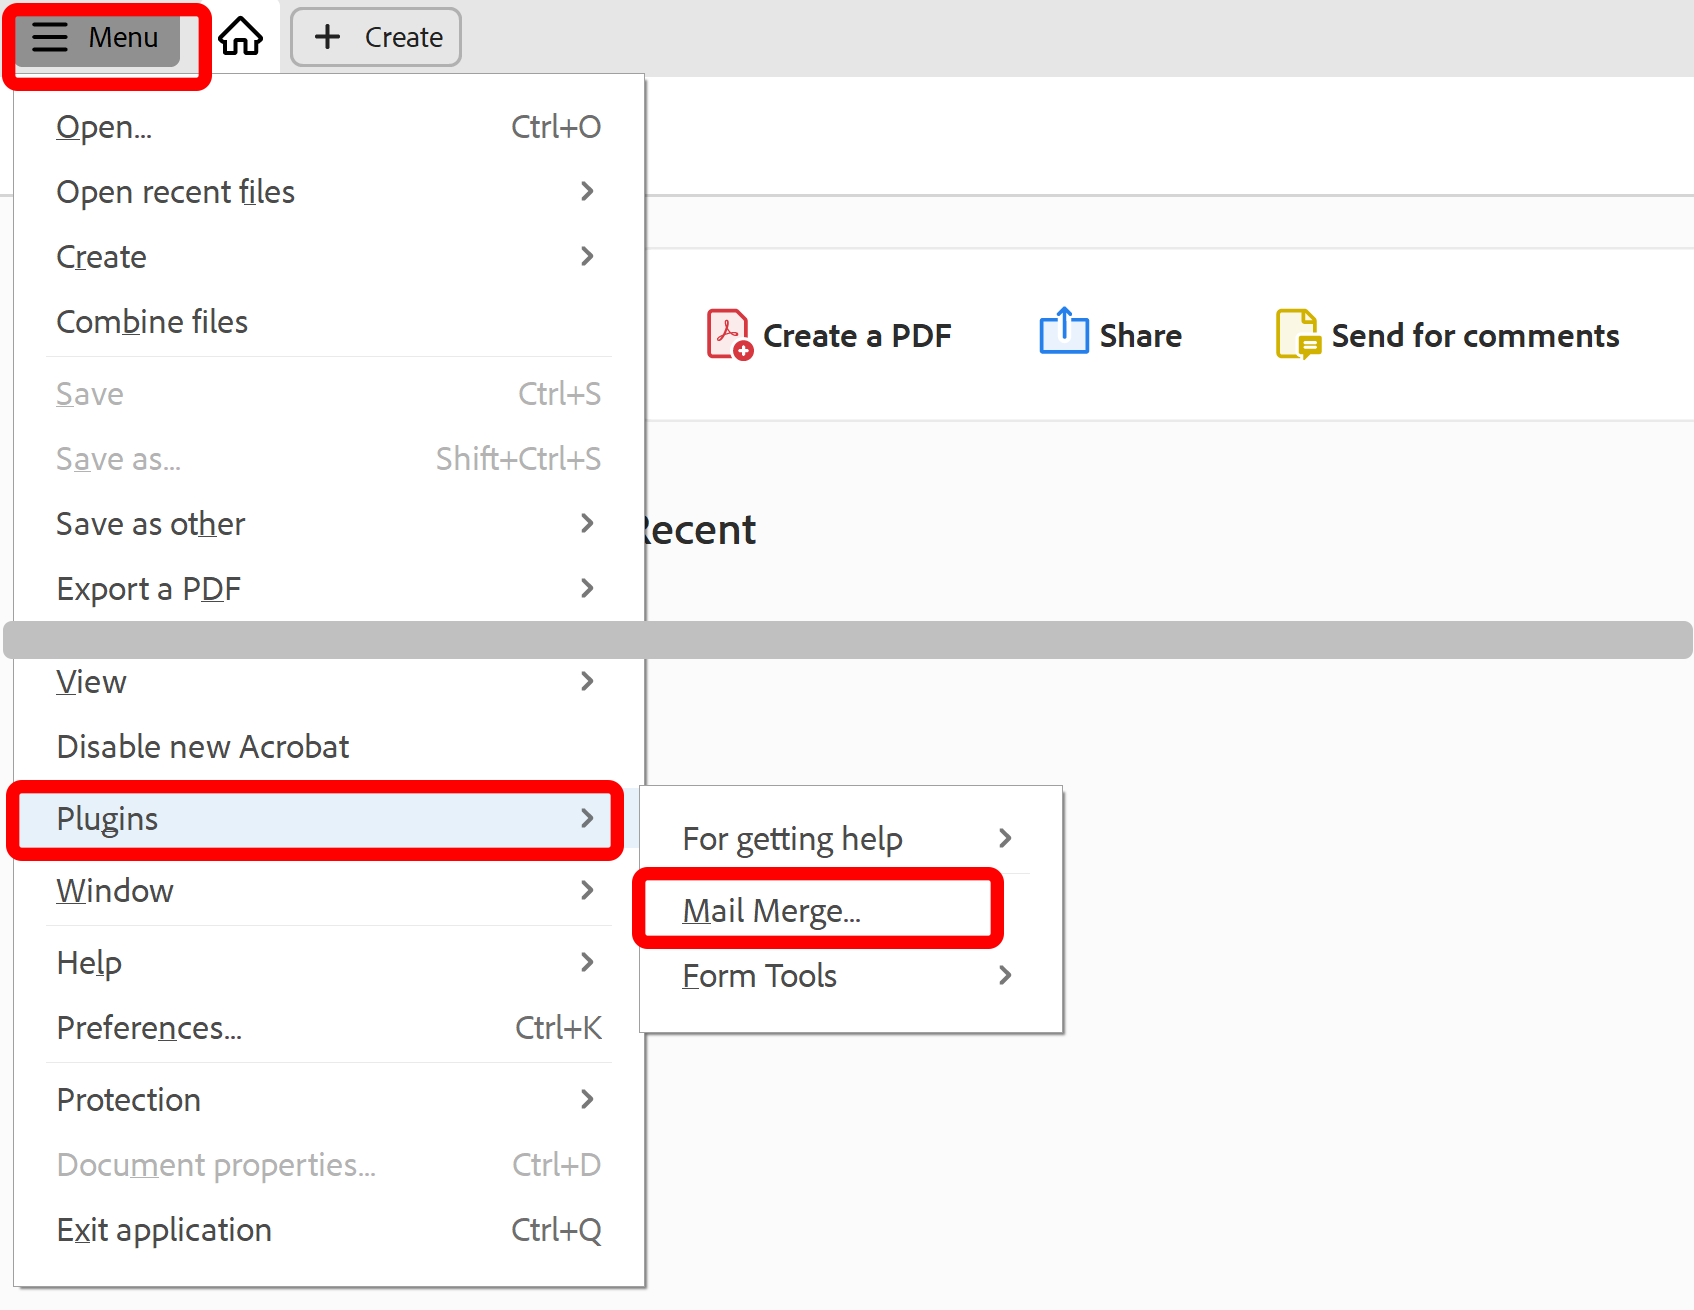
- Please see the following page for a short video tutorial on how to locate Plugins menu in the new Adobe® Acrobat® interface.
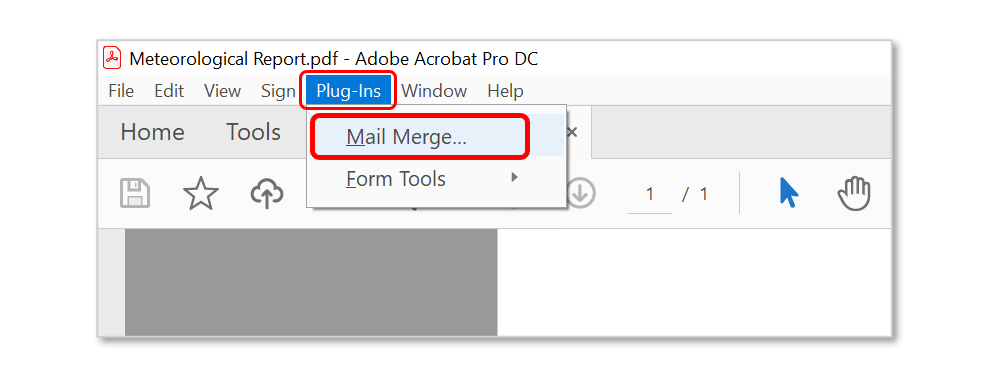
- If you are using a "classic" Adobe Acrobat interface (pre-2022), then you can locate Mail Merge menu here:
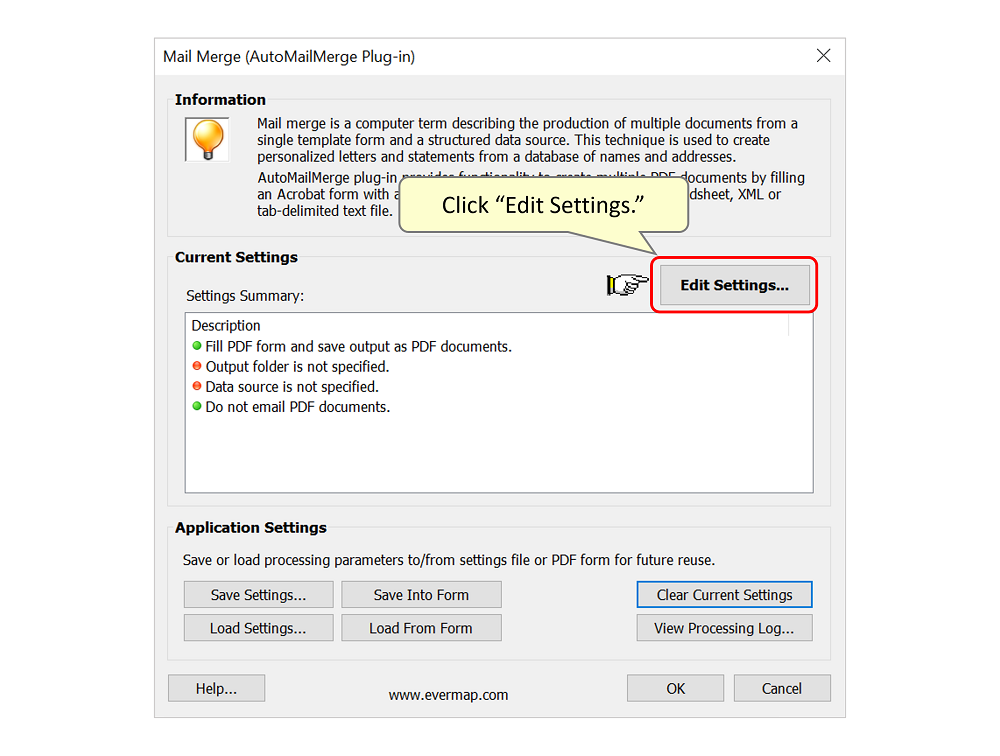
- Click on "Edit Settings…"
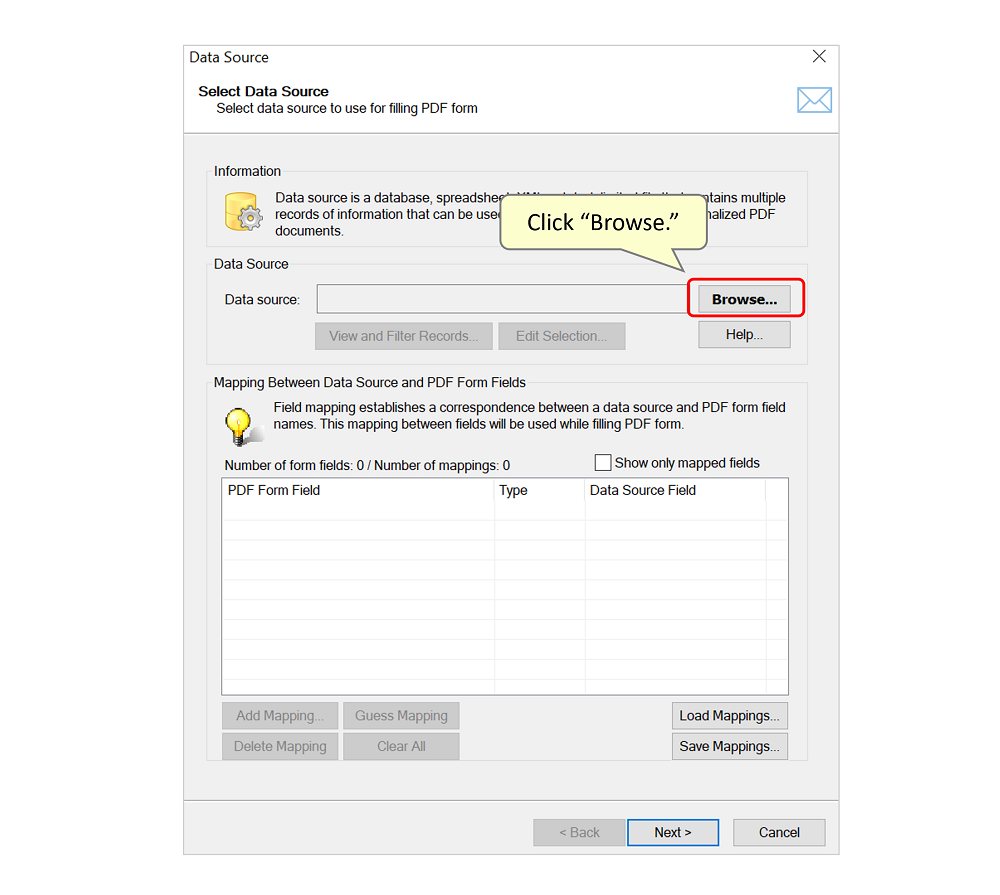
- Click on "Browse…" to select your data source.
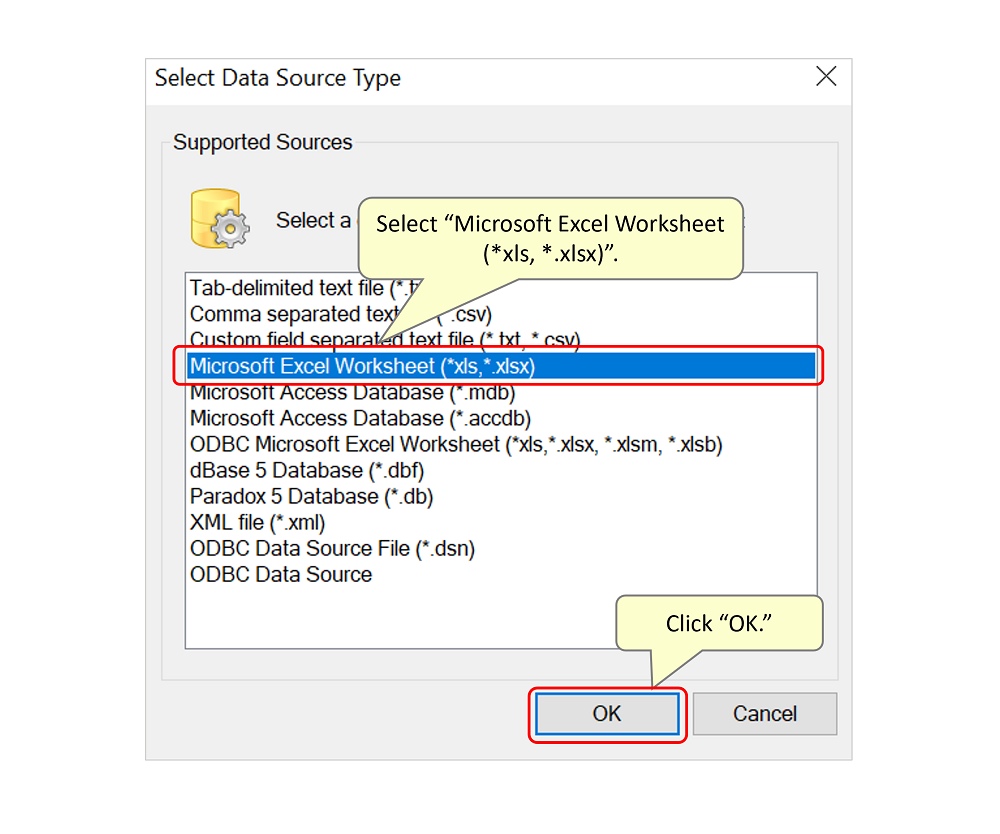
- Select "Microsoft Excel Worksheet (*xls, *xlsx)" from the menu and click "OK."
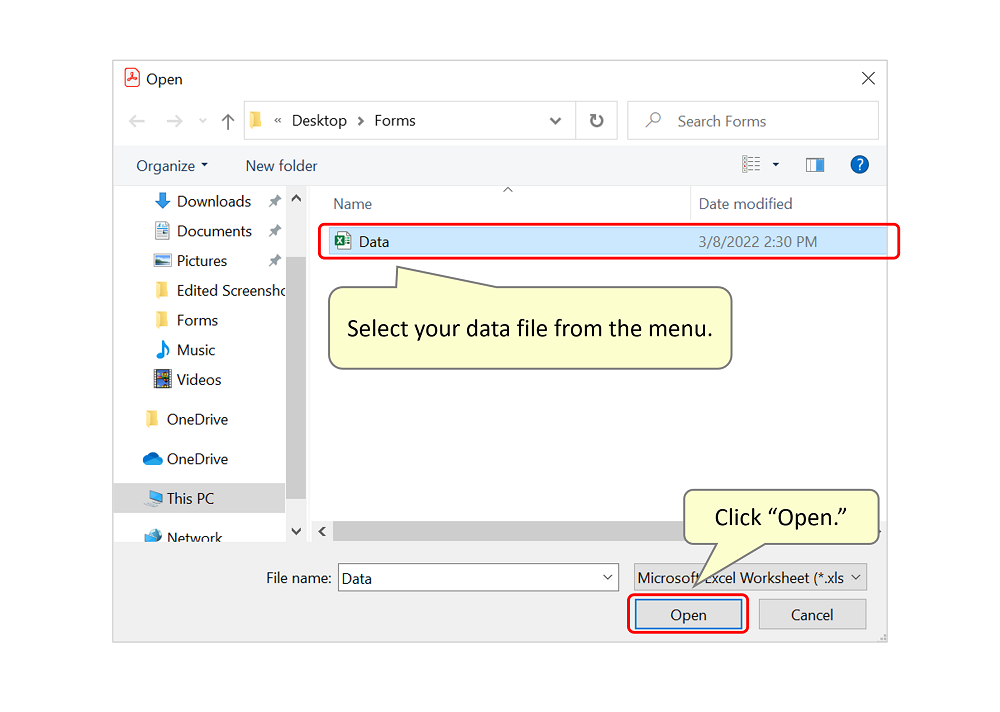
- Select your data file from the menu and click "Open."
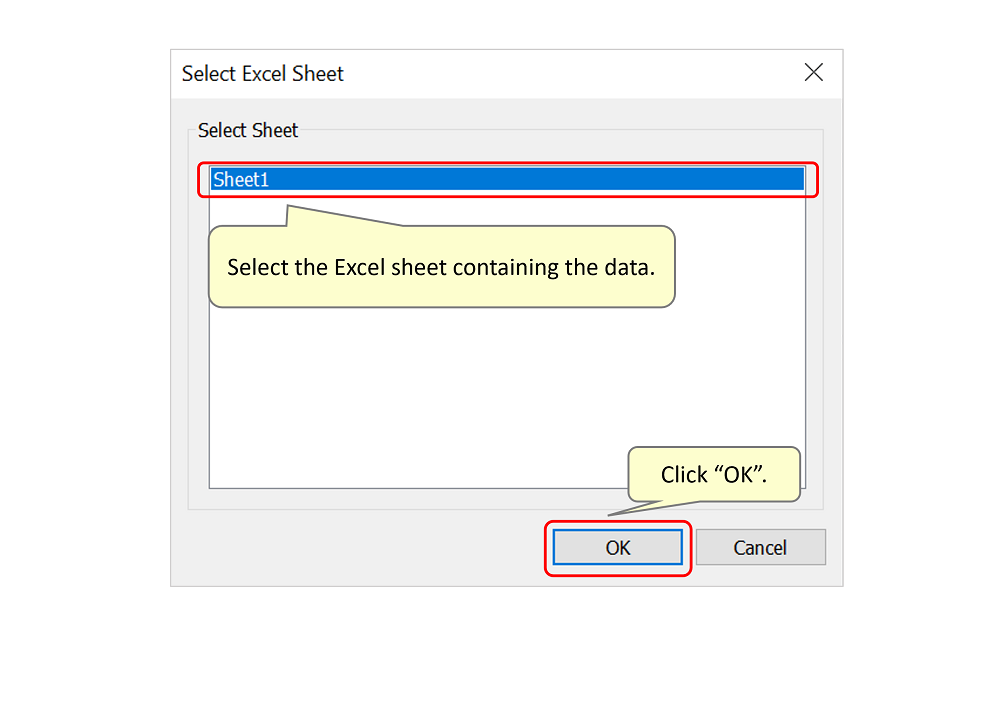
- Select the Excel sheet that you just created. Click "OK."
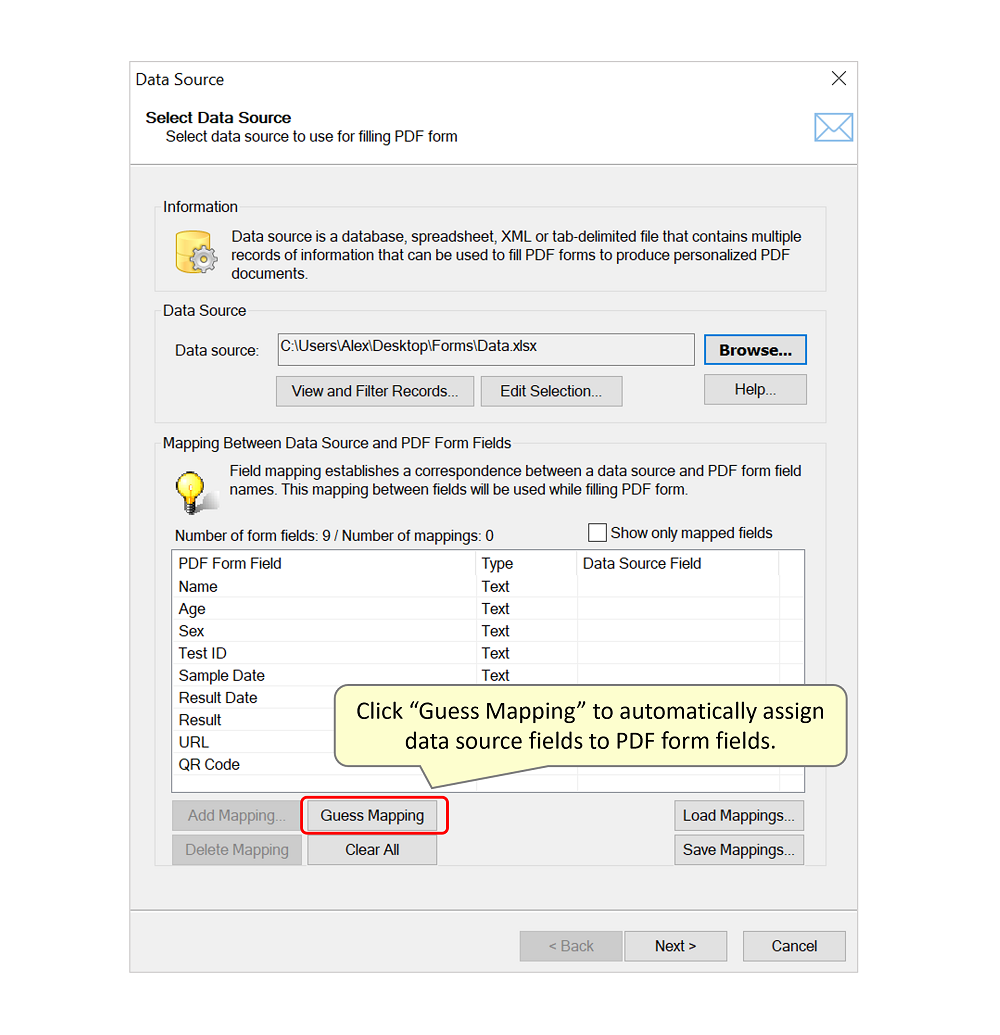
- Assign a Data Field to each PDF Form Field
- Click "Guess Mapping" to have the software assign a data source to each PDF form field (assign mappings) automatically.
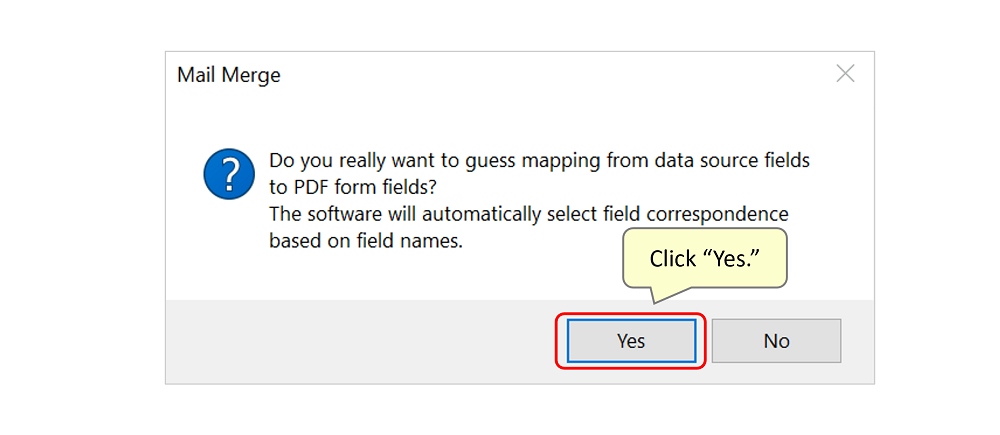
- Click "Yes" on the following Mail Merge pop-up screen.
- Review the mappings to make sure they are correct. If you need to change an incorrectly mapped data source assignment, double click on the PDF form field, select the appropriate data field that you wish to use from the list, then click "OK." To delete a mapping, select the PDF form field and click "Delete Mapping."
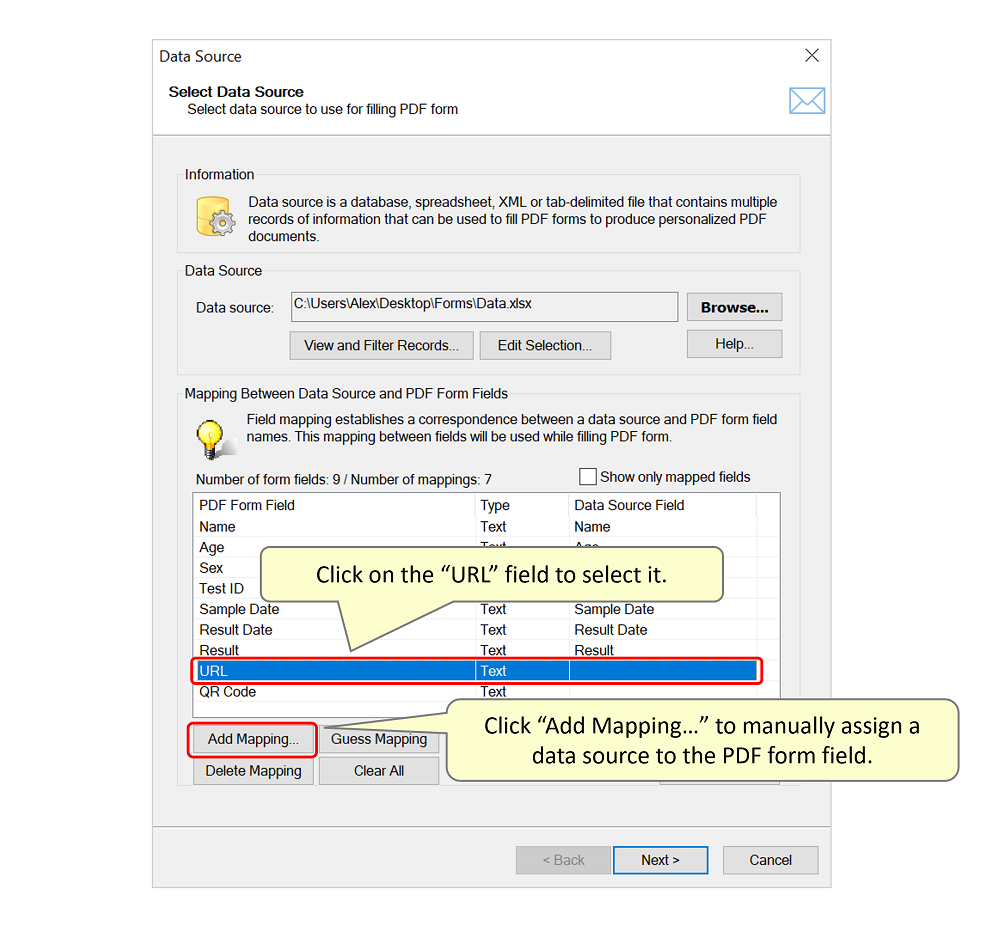
- Two form fields have not been mapped as they do not appear in the Excel data spreadsheet. Select "URL" from the list, then click "Add Mappings…" to manually assign the data source to the PDF form field.
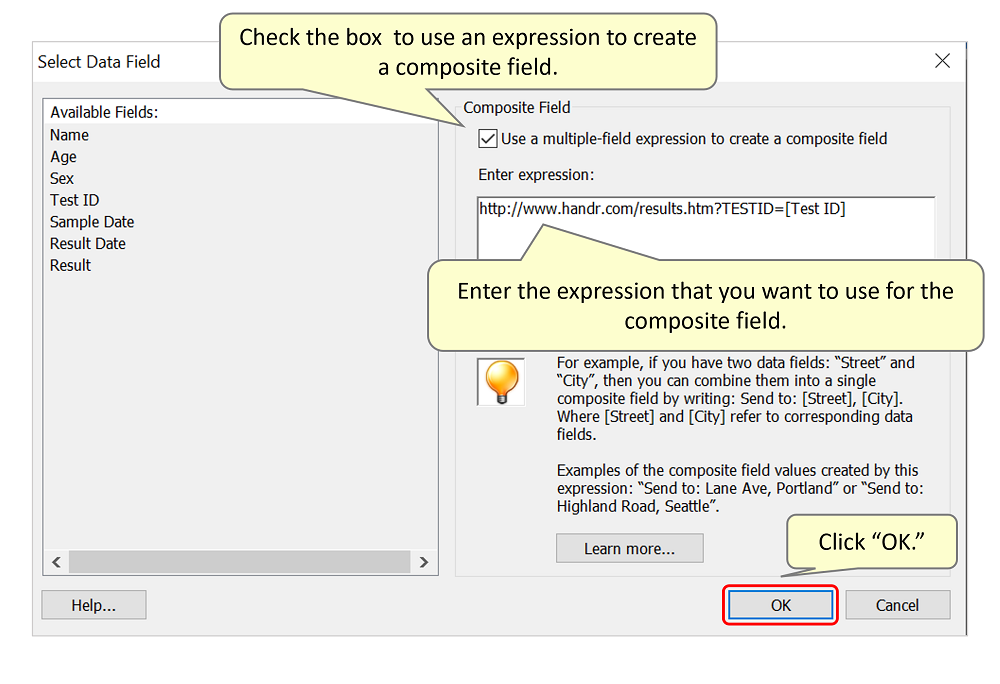
- Check the checkbox for "Use a multiple-field expression to create a composite field." Type the expression that you want to use into the "Enter Expression" box. In this example, the expression is a URL consisting of a non-variable portion and the "Test ID" data field. Click "OK."
- All PDF text form fields have now been assigned a data source. The QR code does not need to have a data source assigned to it, as it was already set to encode the URL in a previous step. We can therefore continue with the Mail Merge. Click "Next."

- Configure Processing Options
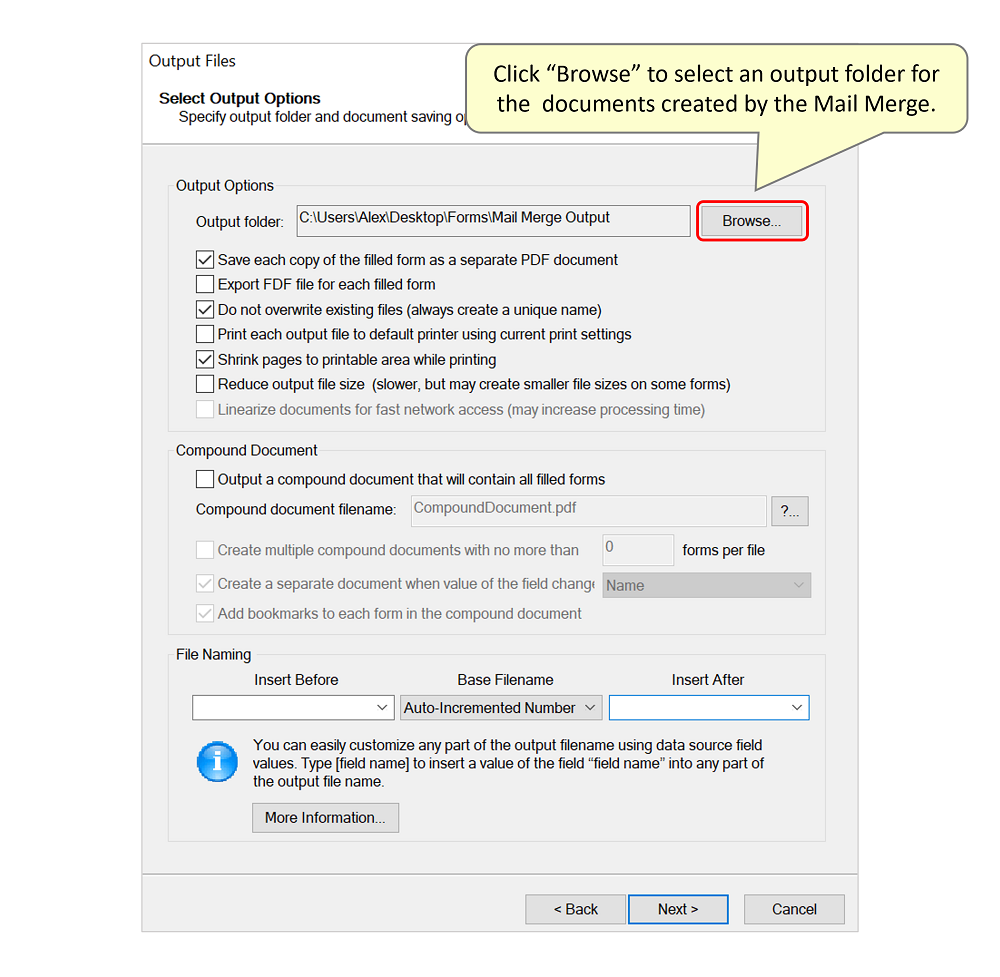
- Click "Next" on the "Field Options" screen to get to the "Output Folder" screen. Set the output folder for the documents created by the Mail Merge by clicking "Browse."
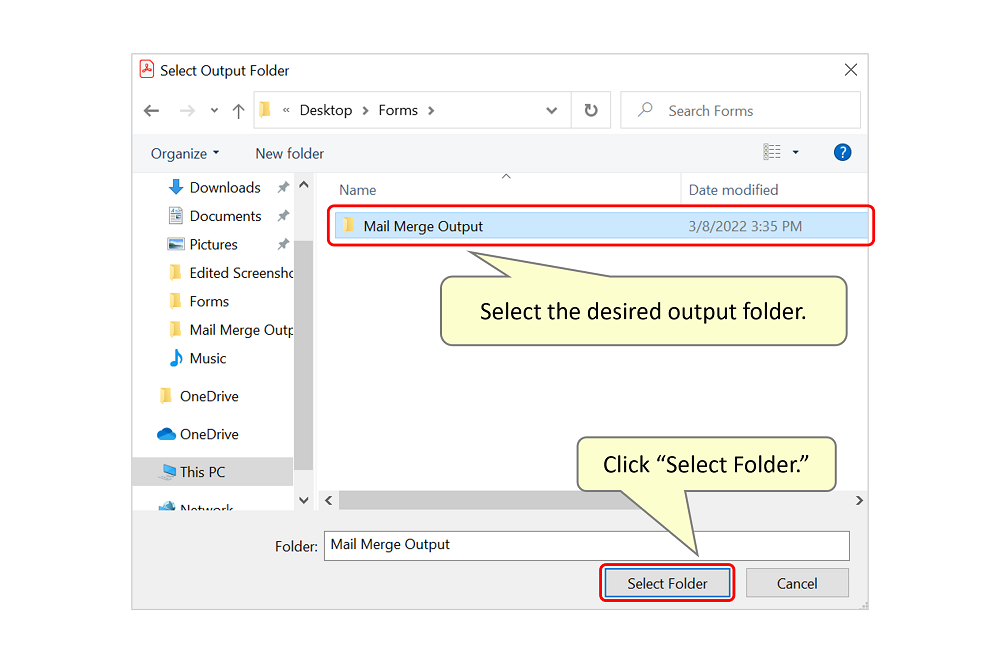
- Navigate within the menu to select your output folder. Click "Select Folder."
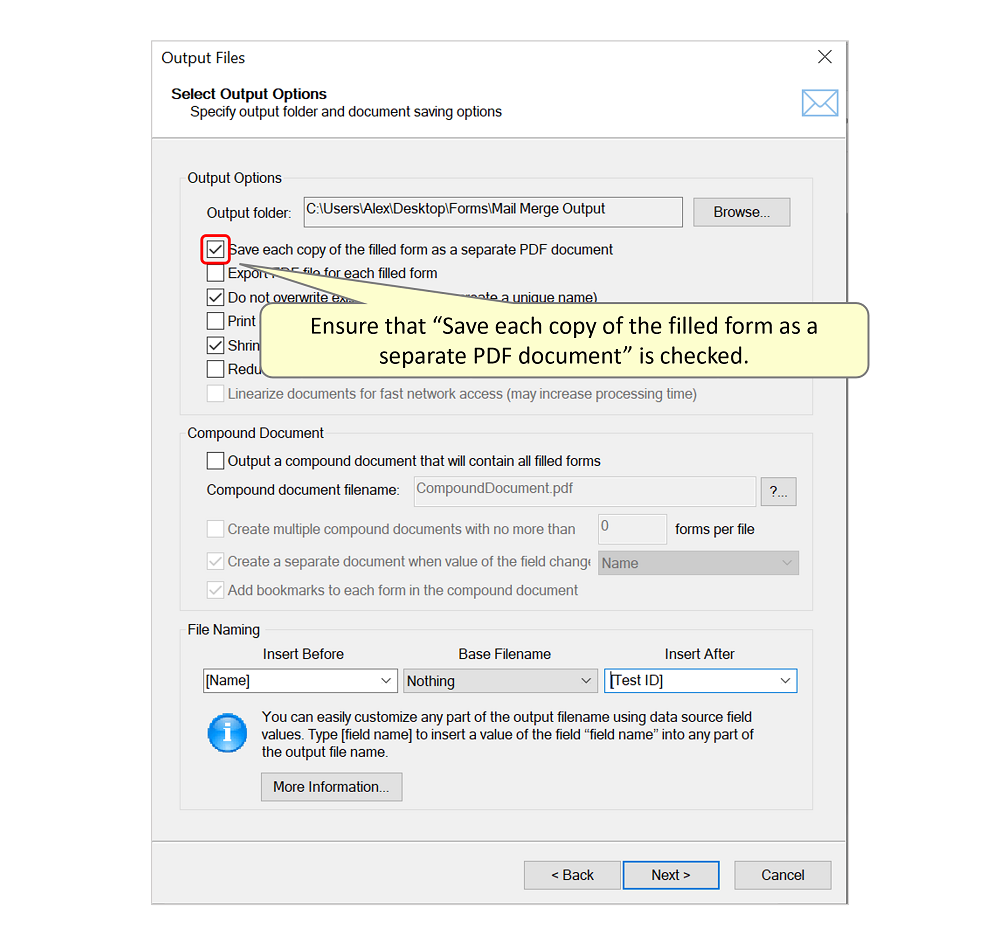
- Make sure that the checkbox for “Save each copy of the filled form as a separate PDF document" is checked.
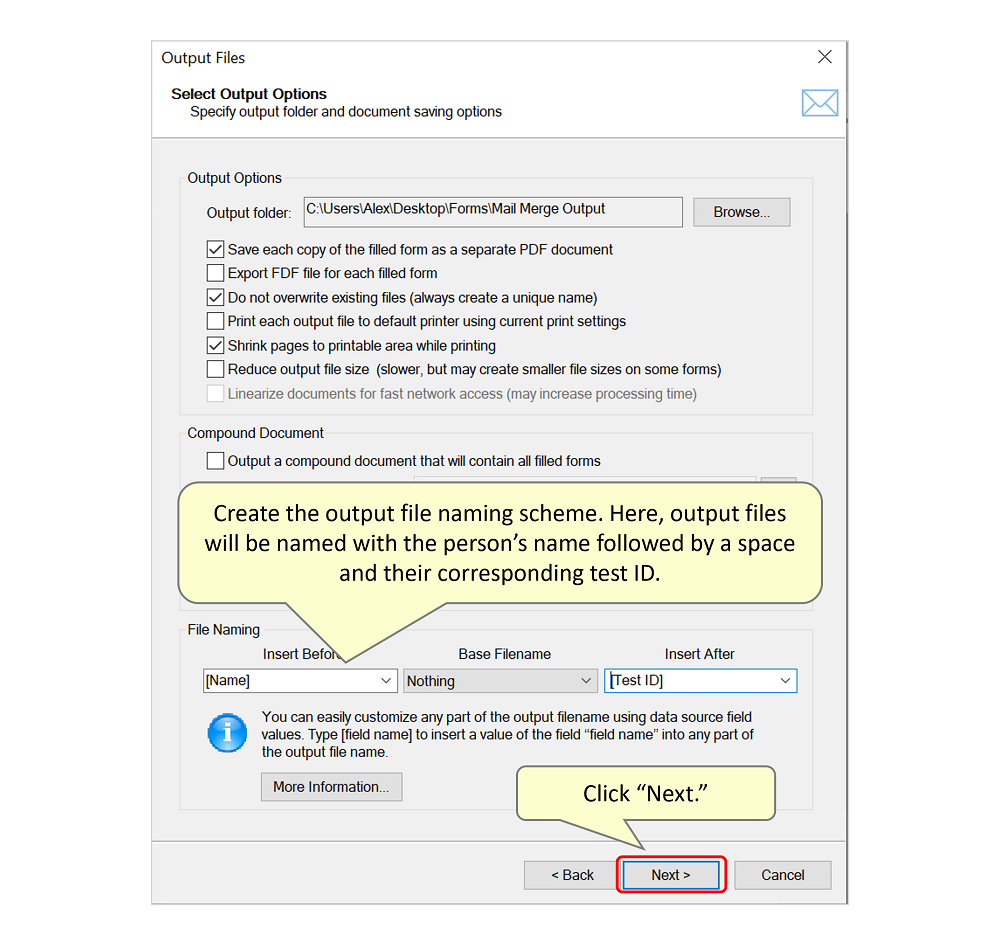
- You can create a custom naming scheme for the output documents that will be created by the Mail Merge in the "File Naming" section. In this example, files will be named with the person’s first and last name followed by a space and the Test ID (eg. Mary Brown 359012.pdf). Notice that there is a space entered prior to [Test ID] in the "Insert After" box. Click "Next" multiple times to finish the configuration wizard.
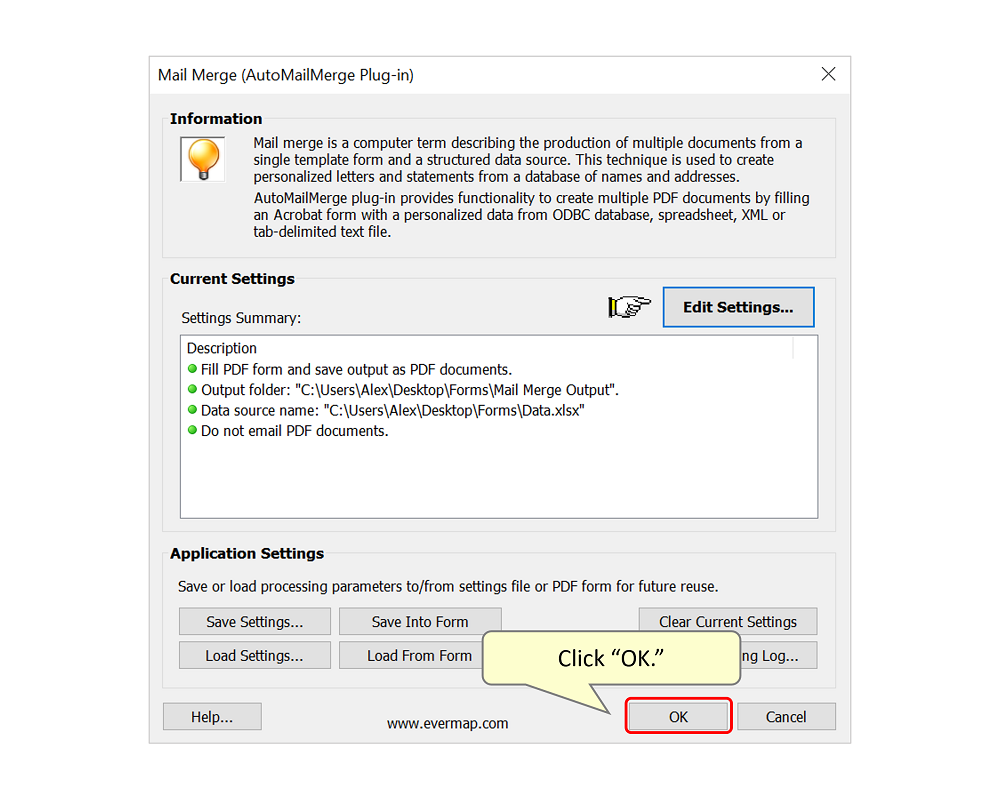
- Now that all settings have been configured, we can proceed with the Mail Merge. Click "OK."
- Run the Mail Merge
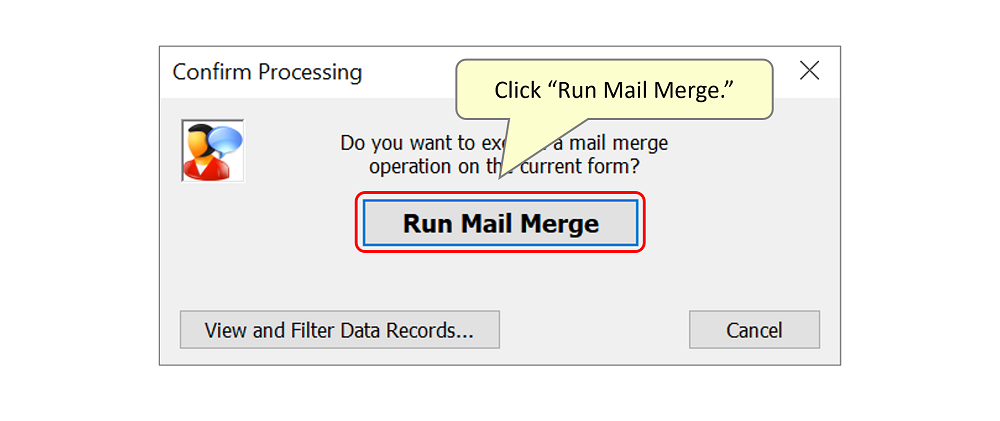
- Click the "Run Mail Merge" button.
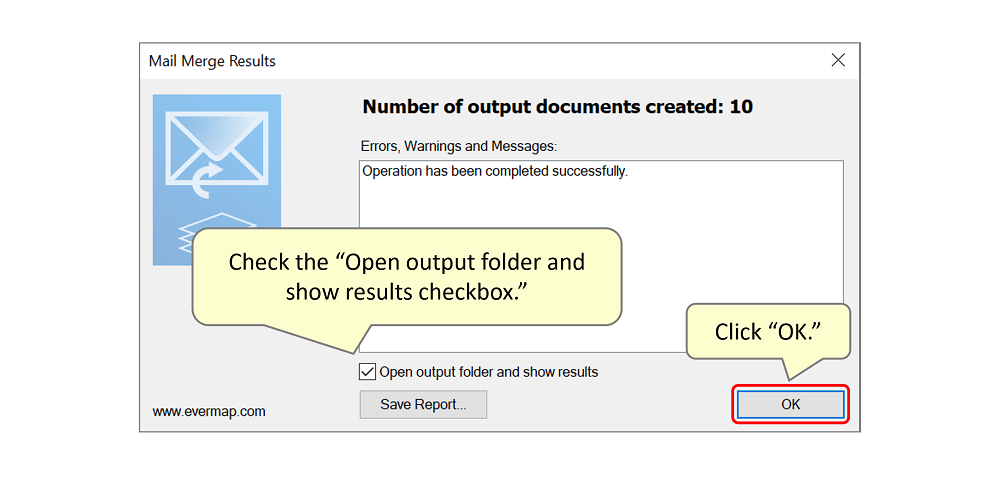
- The following "Mail Merge Results" screen should appear to indicate successful creation of the Mail Merge. To open the output folder and view the files created by the Mail Merge, check the checkbox for "Open output folder and show results," then click "OK."
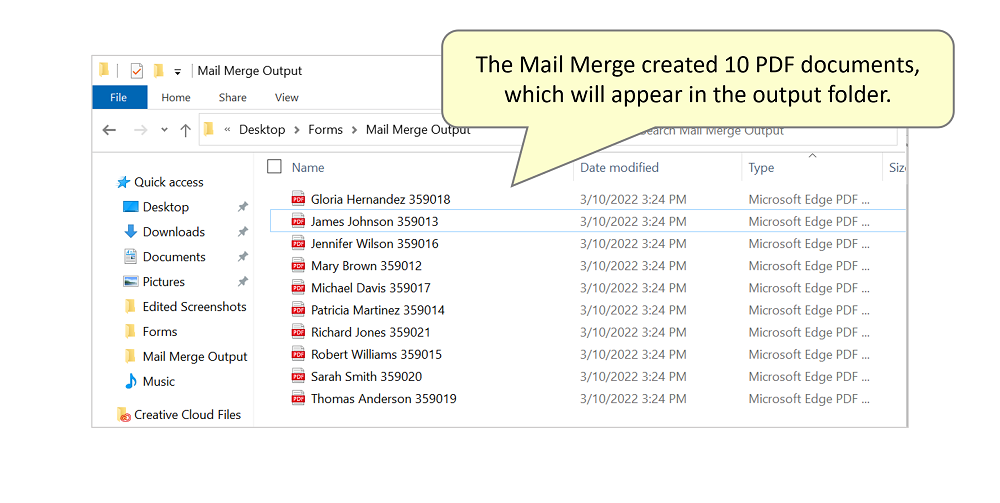
- Ten PDF files were created in your output folder, one file for each entry in the Excel data spreadsheet. The files are named according to the naming scheme that you specified in Step 9.
- Check the Output PDF Files
- Open one of the output files. The template PDF form that you created should be filled with the corresponding patient information from the Excel file. The URL should link to the webpage containing the test results for that patient (ie. the URL should contain the Test ID for that patient).
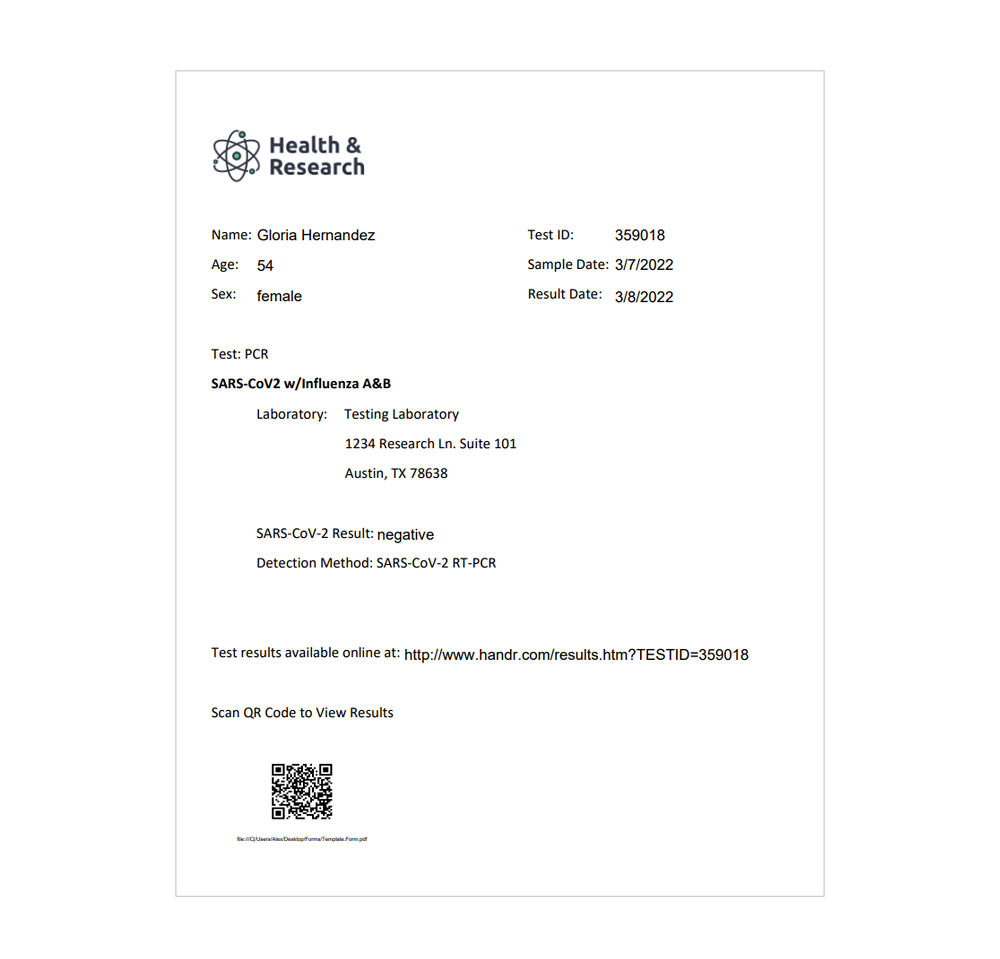
- To confirm that the QR code encodes the correct information, use your smart phone to scan it. The QR code should attempt to connect to the URL containing that patient's test results.
- Click here for a list of all step-by-step tutorials available.