Securing PDF Files Using a Keyword-to-Password Mapping Table
AutoMassSecure™ plug-in for Adobe® Acrobat®
- Introduction
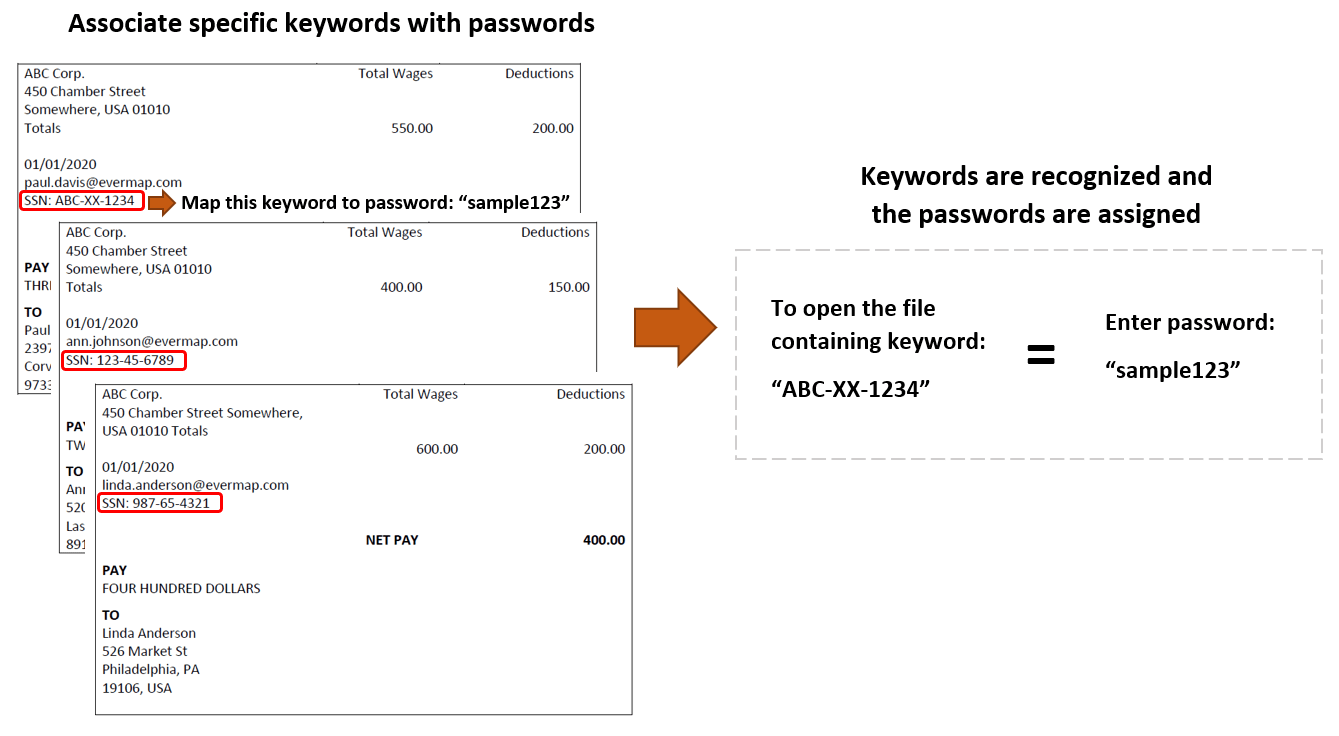
- Manually securing PDF files can be a slow process. It is not practical when multiple PDF documents need to be secured. The AutoMassSecure™ plug-in for Adobe® Acrobat® is designed to automatically secure a set of PDF files in various ways. The following tutorial demonstrates how to password-protect multiple PDF documents by identifying specific keywords within the documents, and assigning them a user-specified password. The keywords could be anything such as names, address components or identification numbers.
- This method uses a ‘mapping table’ where the required passwords are matched to each keyword. The mapping table is simply a list of keywords to search for, and corresponding passwords in plain text format. This is a useful way to secure documents regularly, that always contain the same set of ‘keywords’.
- Input Documents Description
- The input folder used in this tutorial contains a few PDF files. These are single-page sample paystubs that each contain a unique sample Social Security Number (SSN). The ‘mapping table’ will be prepared to associate each SSN to a specific password. The plug-in recognises the keyword located in each one, and secures each PDF file with the corresponding password from the user-specified list of keywords and passwords. The list could be prepared in any text editor and saved in plain text format, or in Microsoft Excel.
- Prerequisites
- You need a copy of Adobe® Acrobat® (Standard or Professional) along with the AutoMassSecure™ plug-in installed on your computer in order to use this tutorial. Both are available as trial versions.
- Step 1 - Open the “AutoMassSecure Plug-in Settings”
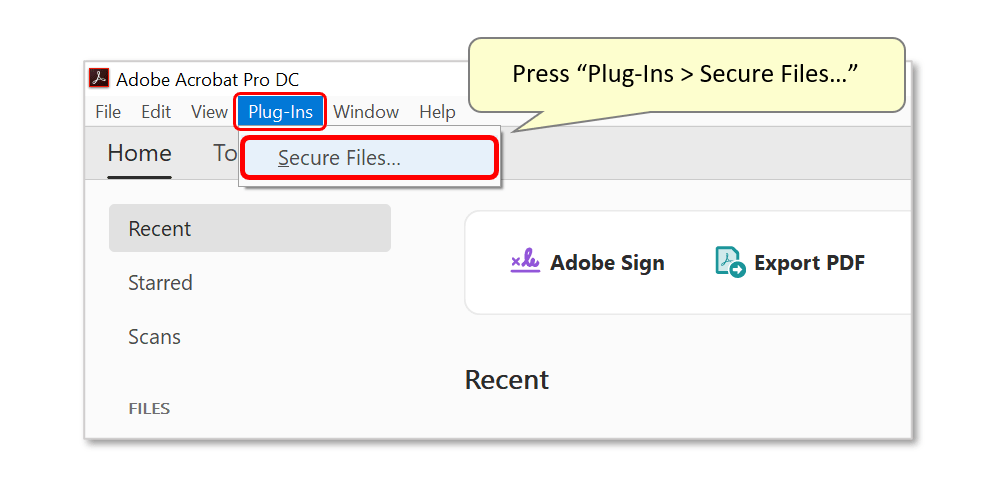
- Start the Adobe® Acrobat® application and press "Plug-ins > Secure Files..." in the main Acrobat menu.
- [⚡ How to locate Plugins menu in Adobe® Acrobat® ⚡]
- Step 2 - Specify General Output Settings
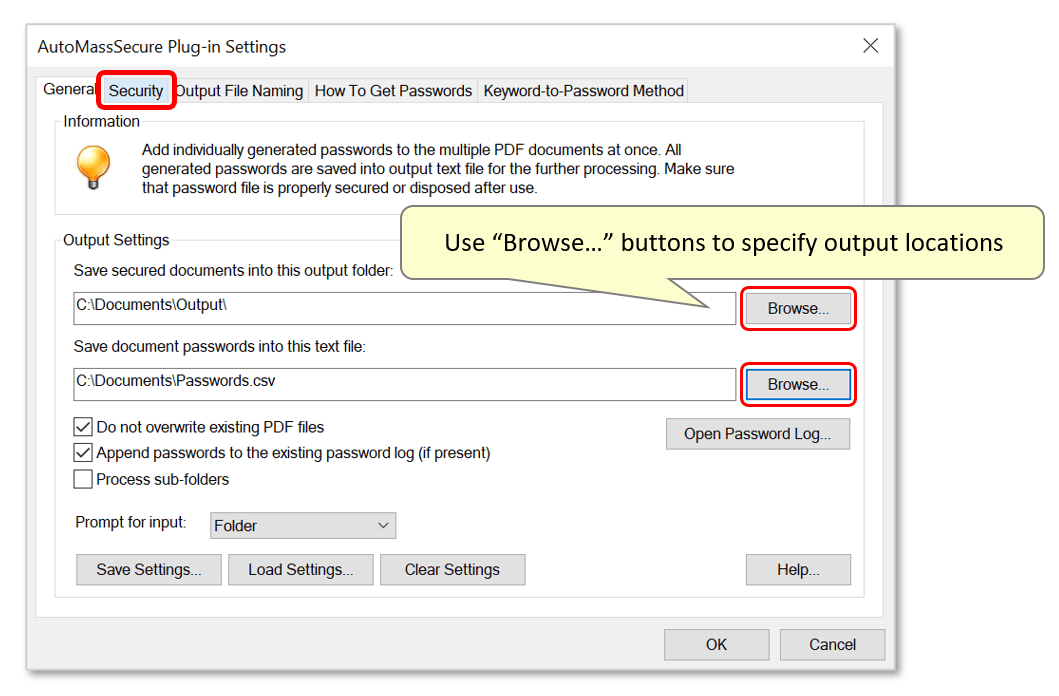
- Use this dialog to customise output settings for the encrypted files. Under the "General" tab, use the "Browse..." buttons to specify output locations for: 1) the secured output files 2) an auto-generated text file displaying the output filenames and their new passwords. The default filename "Passwords.csv" can be manually modified in the dialog box that opens. This automatically generated file is a useful record of all assigned passwords, and can be used for further processing using other applications. This metadata can be saved either in *.csv (default) or Excel-compatible *.xml format.
- Proceed to the “Security” tab once done.
- Step 3 - Specify Security Settings
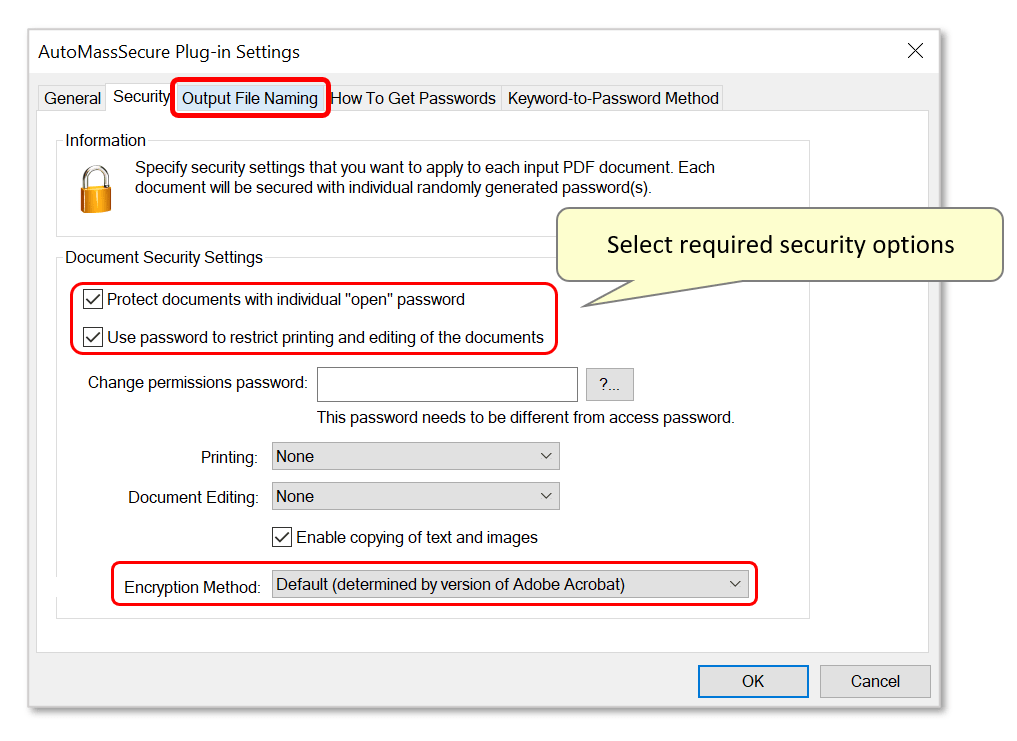
- Optionally, specify document security settings here.
- Note: The "Encryption Method" offers 3 different choices for the encryption algorithm. Not all PDF viewers can support the latest encryption methods. Set the encryption to "128 bit RC4" if you want to let users open encrypted files on mobile phones.
- Proceed to the “Security” tab once done.
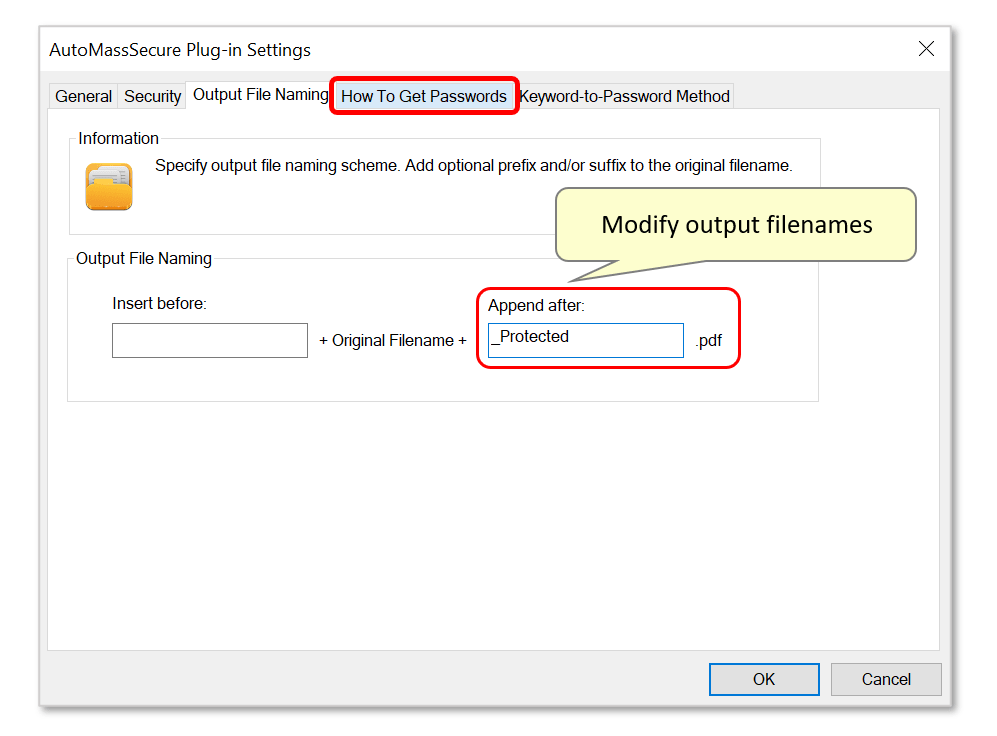
- Step 4 - Specify Output File Naming
- Specify a customised output file naming scheme for the secured files by adding a prefix and/or a suffix to the original file name. In this example, the encrypted files will have "_Protected" appended to the output filenames.
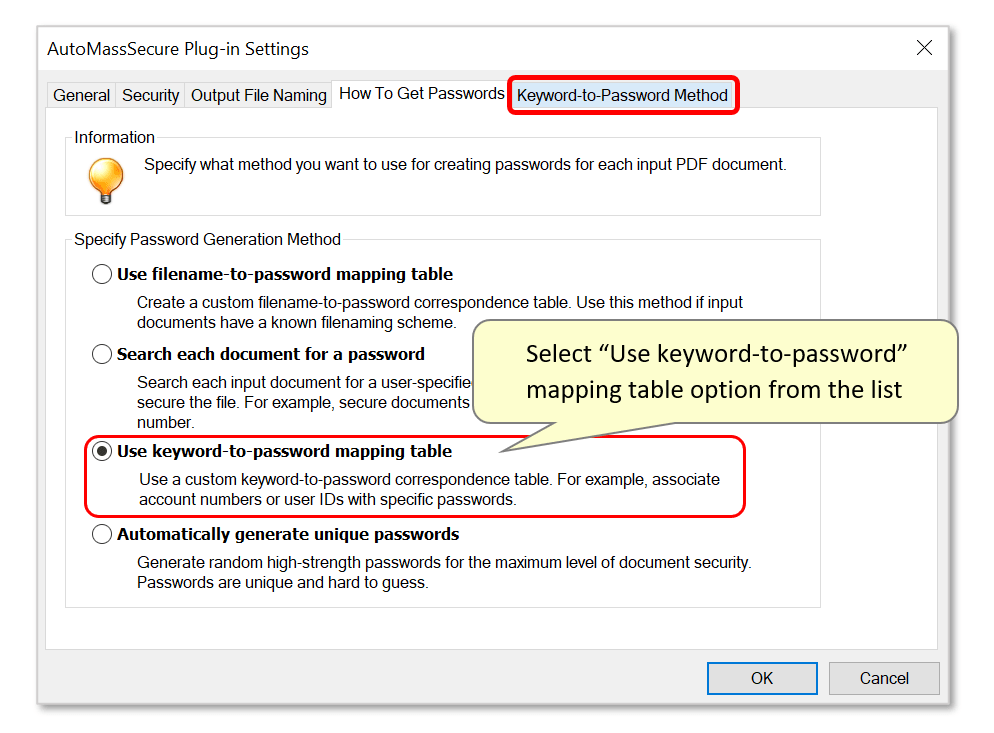
- Step 5 - Specify the Password Generation Method
- Select the “Use keyword-to-password mapping table” method. Proceed to the “Keyword-To-Password Method” tab once done.
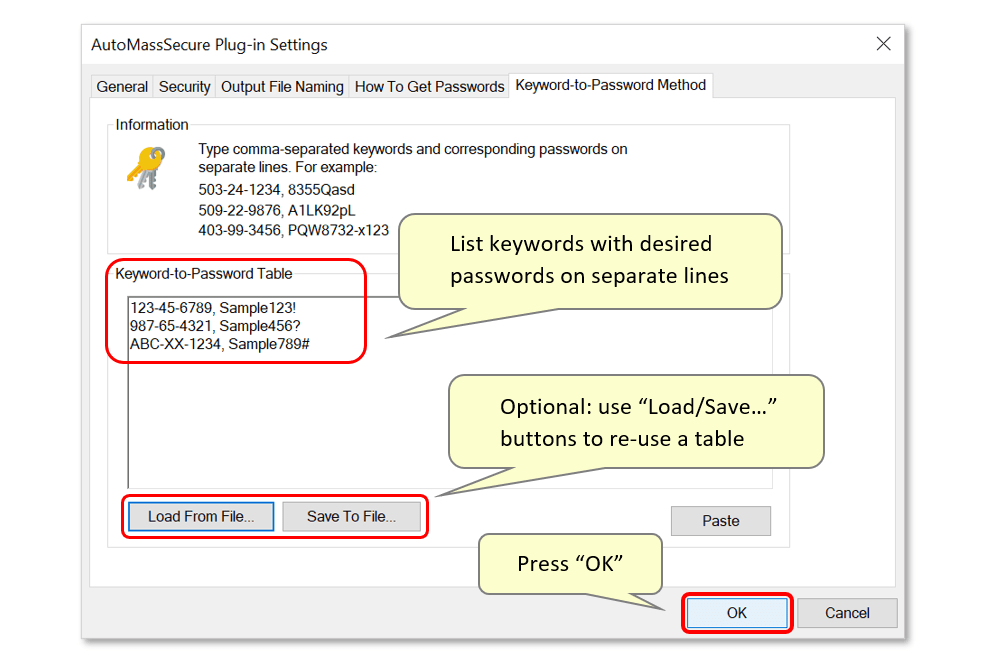
- Step 6 - Create the Keyword-To-Password Table
- Type comma-separated keywords and corresponding passwords on separate lines in the "Keyword-to-Password Table" box. This example shows SSN's from the three input files listed along with a sample password to be assigned to each one. Alternatively, use the "Paste" button provided to quickly copy & paste text written using a different document/application.
- Optional: this configuration can be saved as a settings file in *.csv format for future re-use via the "Save Settings..." button. A previously-saved settings file can be loaded by pressing "Load Settings...".
- Press "OK" once done.
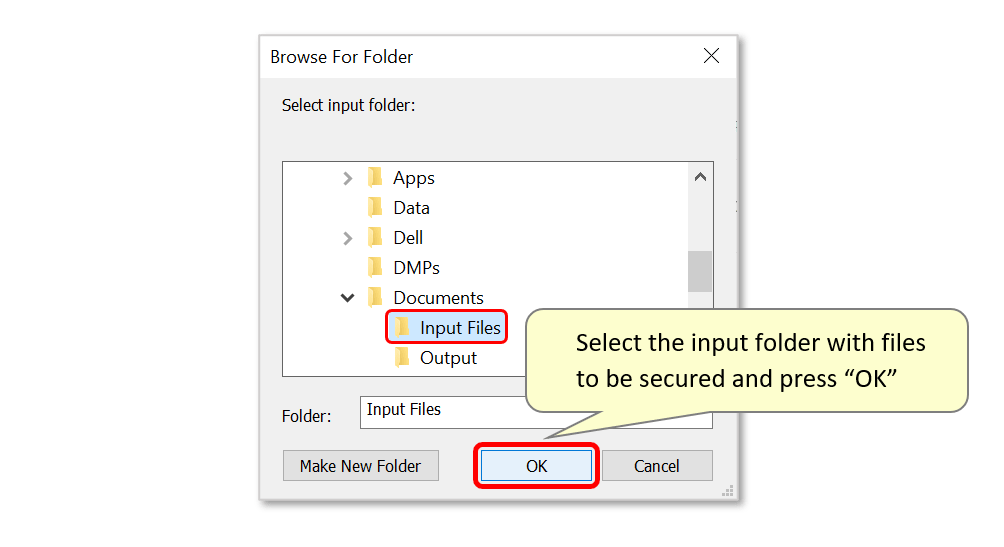
- Step 7 - Specify the Input Folder
- The document explorer window opens. Re-size it if necessary, and use it to select the desired input folder containing the files that need to be secured. Click "OK" once done.
- Step 8 - Inspect the Results
- The report box that opens shows the total number of input files, secured files, and failed files. Click "OK" to open the automatically-generated processing log.

- Step 9 - Review the Processing Log
- The processing log contains detailed information about all input/output files, the password-protection method used, and processing dates etc.
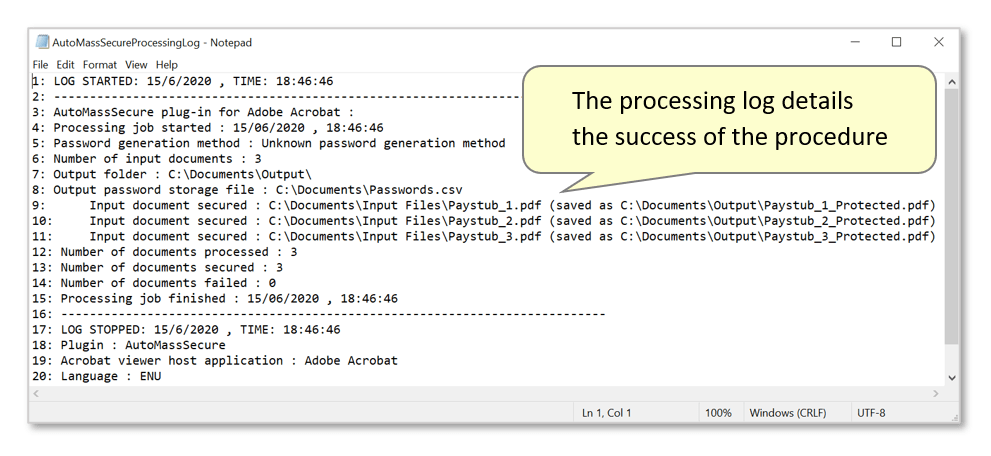
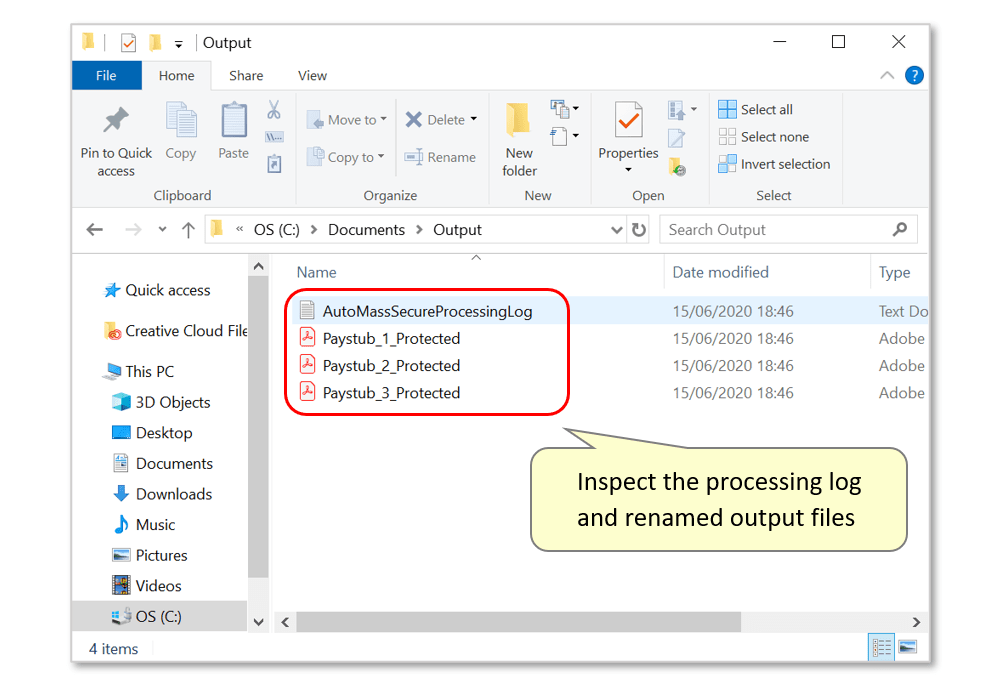
- It will be automatically saved in the designated output location along with newly-encrypted files, with the default "AutoMassSecureProcessingLog.txt" filename. Check this folder's contents to ensure that any file renaming options have been executed correctly. In this example, the new filenames are appended with the custom "_Protected" text.
- Step 10 - Opening Encrypted Files
- Opening a newly-encrypted file will now prompt for the required password to be entered. In this example, the 'keyword' SSN "ABC-XX-1234" was mapped to password: "Sample789#" - this now needs to be entered to open the 'Paystub_1_Protected.pdf" file.

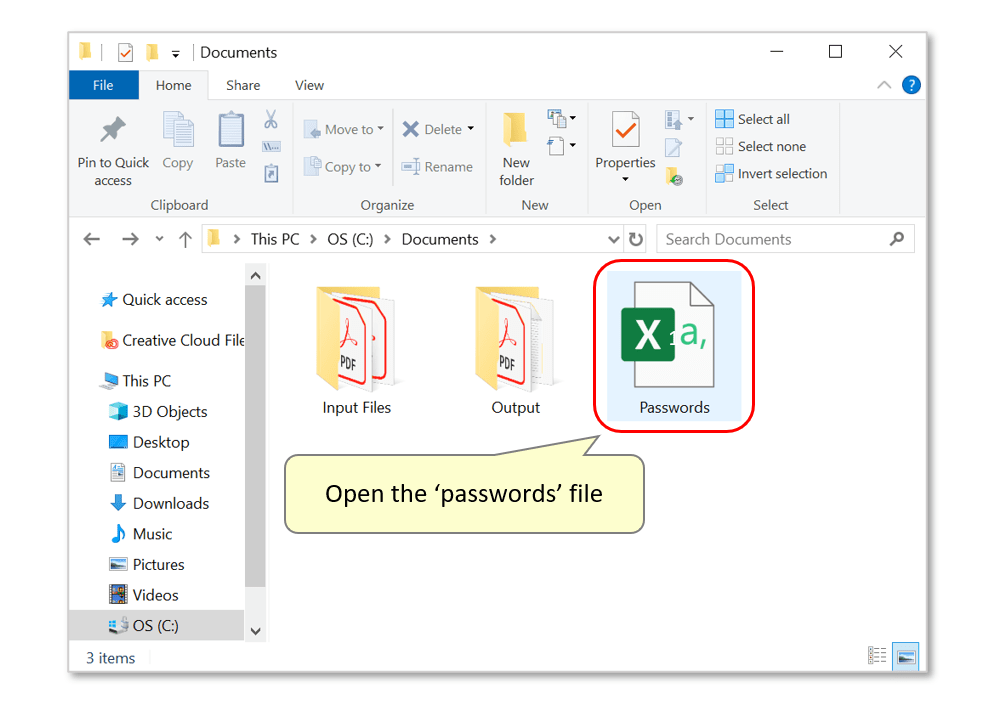
- Step 11 - View the Document Passwords Text File
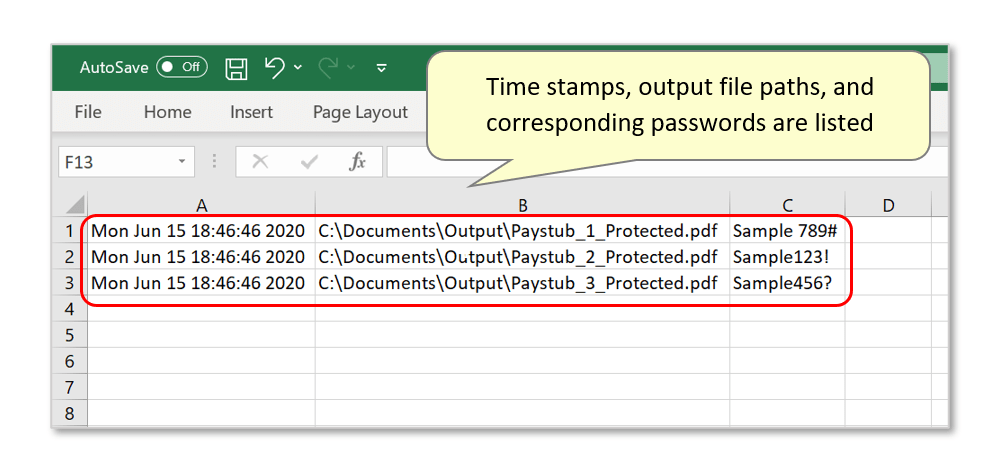
- Open the auto-generated text file displaying the output filenames and their new passwords. It will be saved in the location specified under the 'General' tab in step 2 above.
- It contains simple processing information, such as a time stamp, output filename and associated access passwords useful for further processing by external applications.
- Click here for a list of all step-by-step tutorials available.