Changing Page Sizes in PDF Documents with AutoPageX™ Plug-in
- Introduction
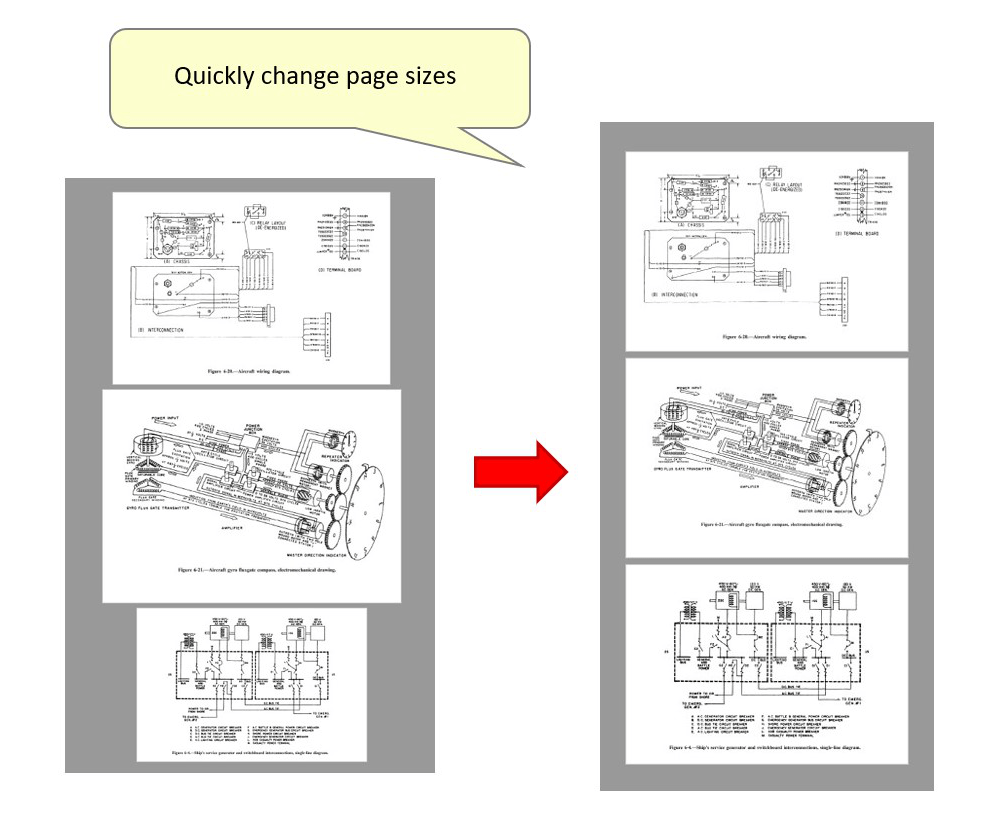
- The AutoPageX plug-in "Change Page Size" tool can be used to quickly re-size one or more pages of a PDF document. Various preset page dimensions are available, and custom sizes can also be used. For example, any PDF page can be resized and its content re-scaled to match proportionally. This operation may be useful if PDF page sizes are irregular, or it's desired to make PDF pages a specific size for further processing. For example, create a document with a legal/letter format, or turn any input PDF page into a typical A3/A4/A5 size. Another example is where images (or other file formats) may be converted into a PDF and do not have ideal page dimensions. This tool offers a quick and effective way to create desirable page sizes.
- In this tutorial, we will demonstrate how to use the tool to resize the pages of a sample input PDF. Each page has a different overall size - the goal is to make all pages A4, with their content also resized to the same proportions.
- Note that this tool can be used to resize a single-page document in Acrobat, or even one page of a larger document (or specific page range). Here, we will process all pages of the input document.
- Prerequisites
- You need a copy of Adobe® Acrobat® along with the AutoPageX™ plug-in installed on your computer in order to use this tutorial. Both are available as trial versions.
- Step 1 - Open the Tool
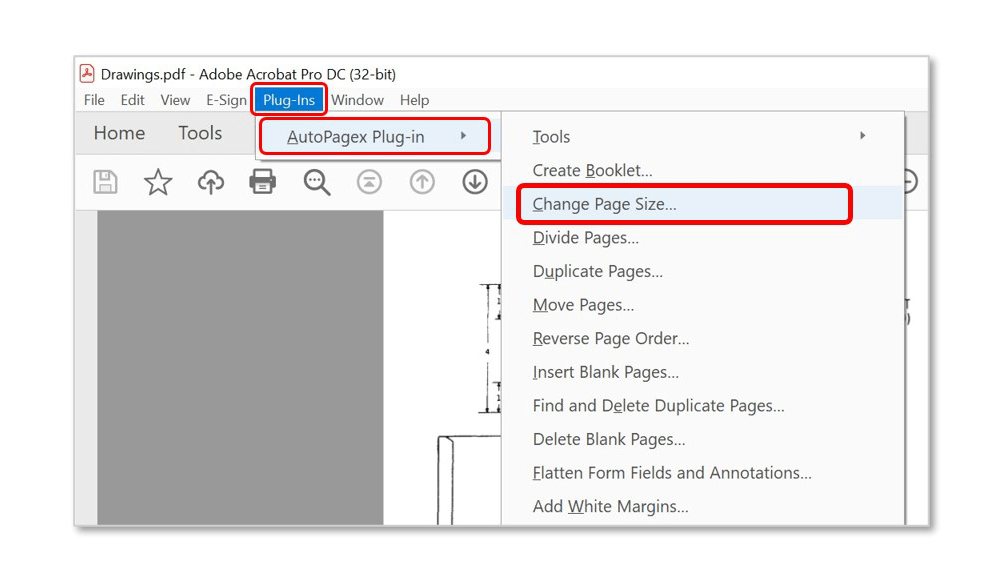
- Open the PDF document for processing in Acrobat, and select "Plug-Ins > AutoPagex Plug-in > Change Page Size..." to open the "Change Page Size" dialog.
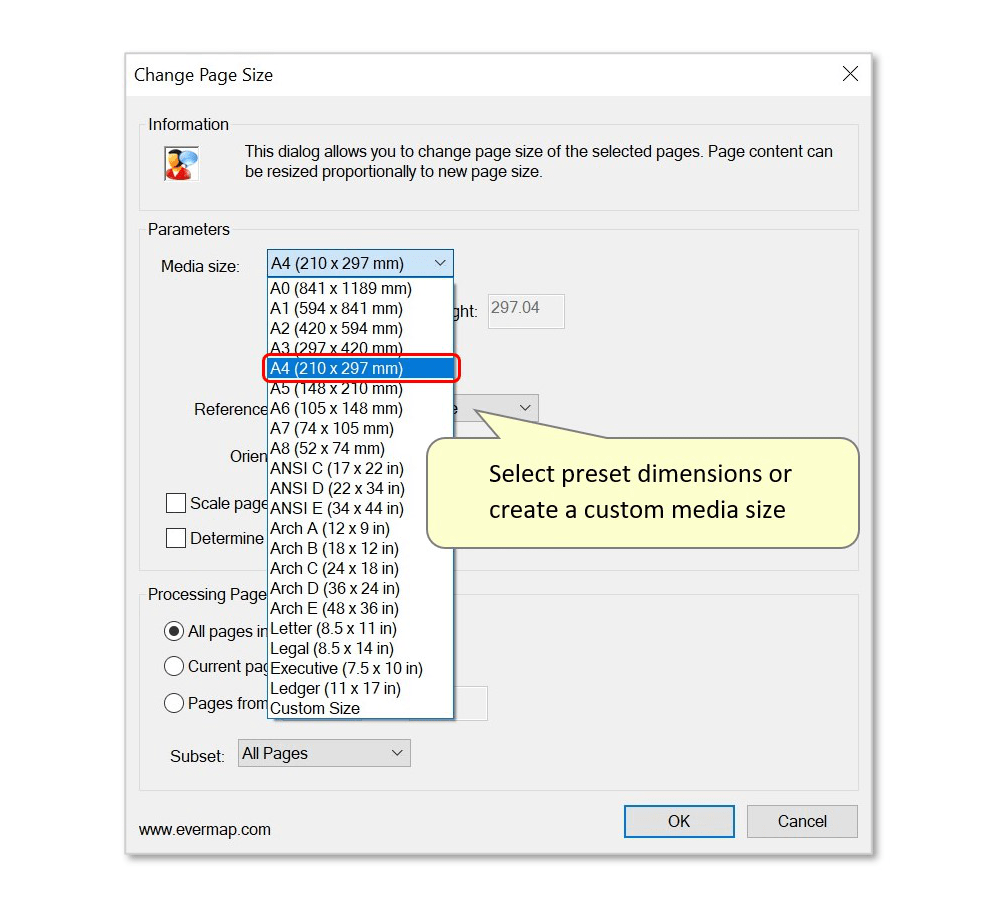
- Step 2 - Select Page Size
- Use the drop-down list next to "Media size:" to select a preset page size. Select "Custom Size" to manually configure page dimensions.
- Here, we will use "A4 (210 x 297mm)".
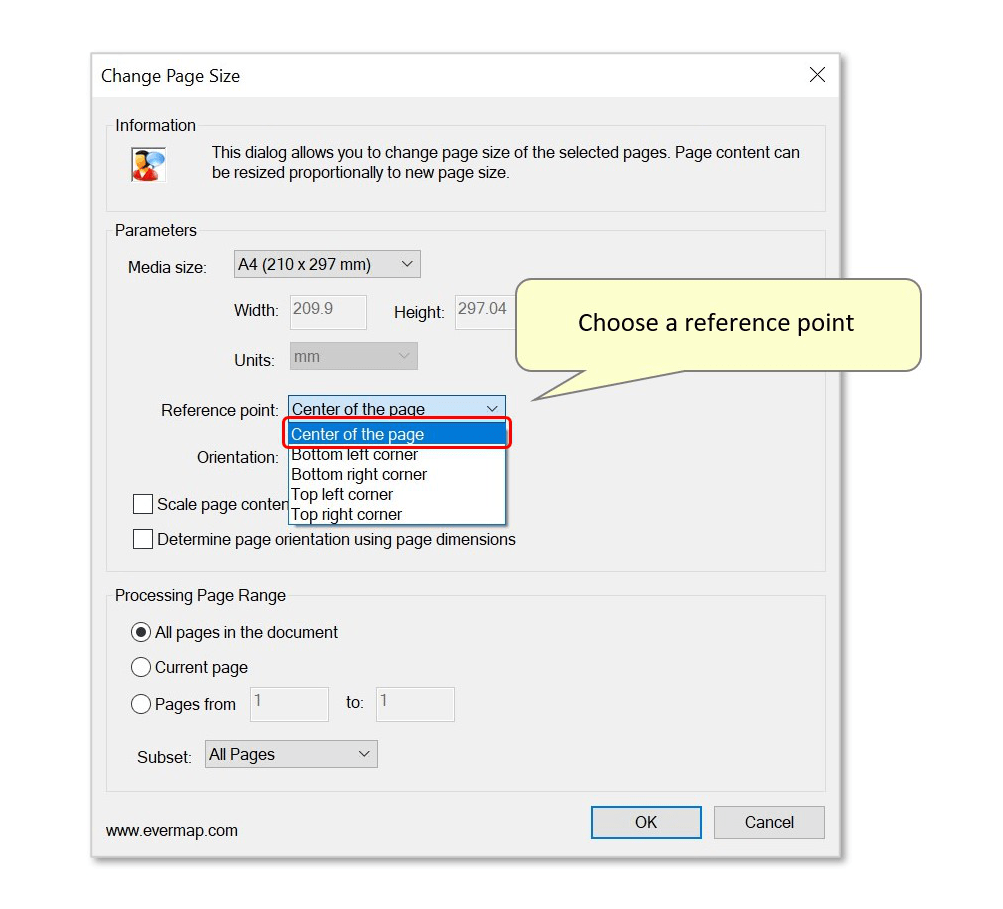
- Step 3 - Select Reference Point
- It's also necessary to select a reference point for rescaling page content - this “origin” point is required as it affects the content's position on the page. In the input PDF used here, all page content is central, so we will use the default "Center of the page" option.
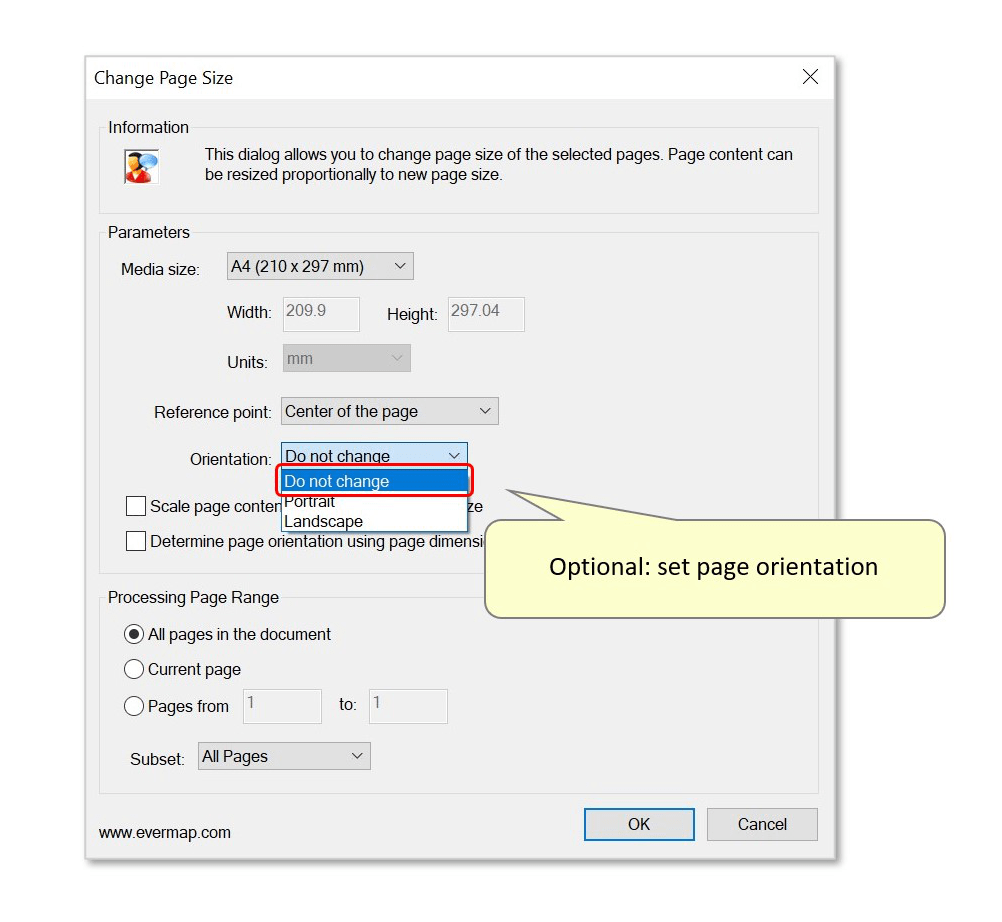
- Step 4 - Optional: Set Page Orientation
- It's also possible to manually select the desired page orientation of all resized pages (the default A4 output is portrait).
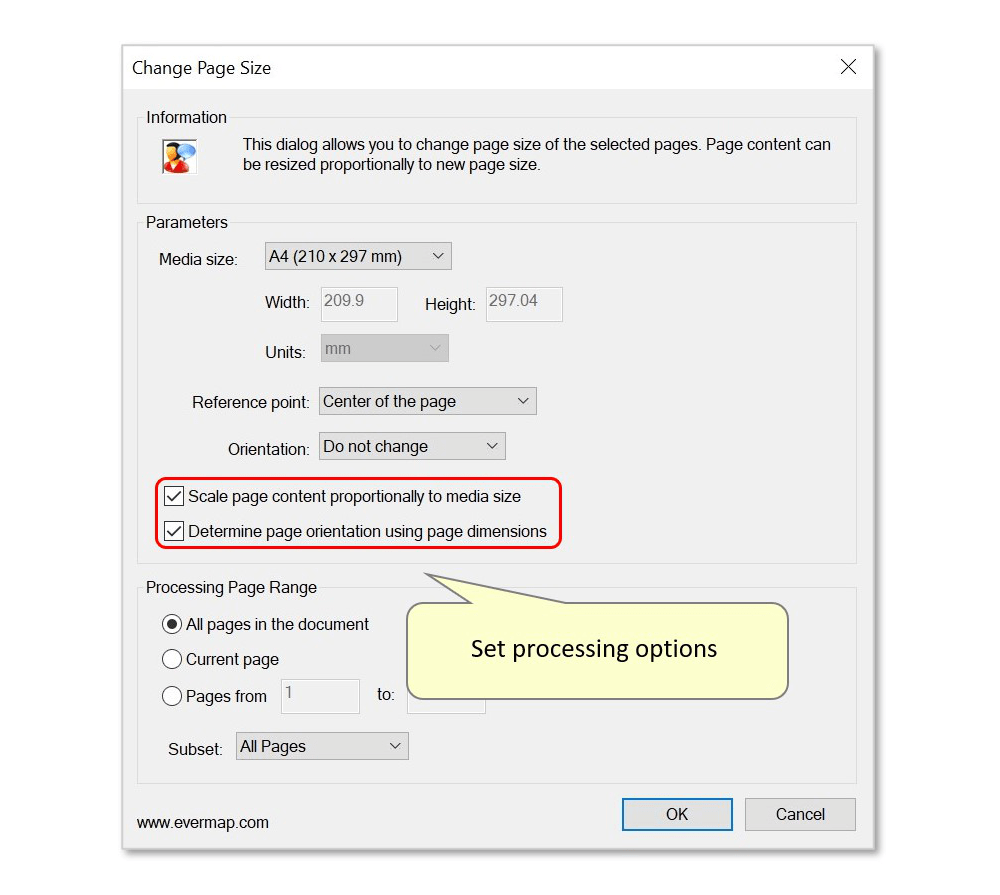
- Step 5 - Select Processing Options
- Optionally select the following processing options as necessary:
- "Scale page content..." can be used to maintain the existing page content's proportions in the output. Use this option to avoid having white margins added to page content if made bigger, or cropped page content if made smaller. The content is rescaled to match the new page size.
- "Determine page orientation..." can be used to identify the orientation of the input PDF pages, by using the existing page dimensions. The orientation of the output pages will be kept the same - even if the original pages have varying orientations.
- Here, we have selected both options. The resulting resized pages will be A4, with their content scaled to the original proportions. The existing orientation of each page will also be identified and kept the same (landscape).
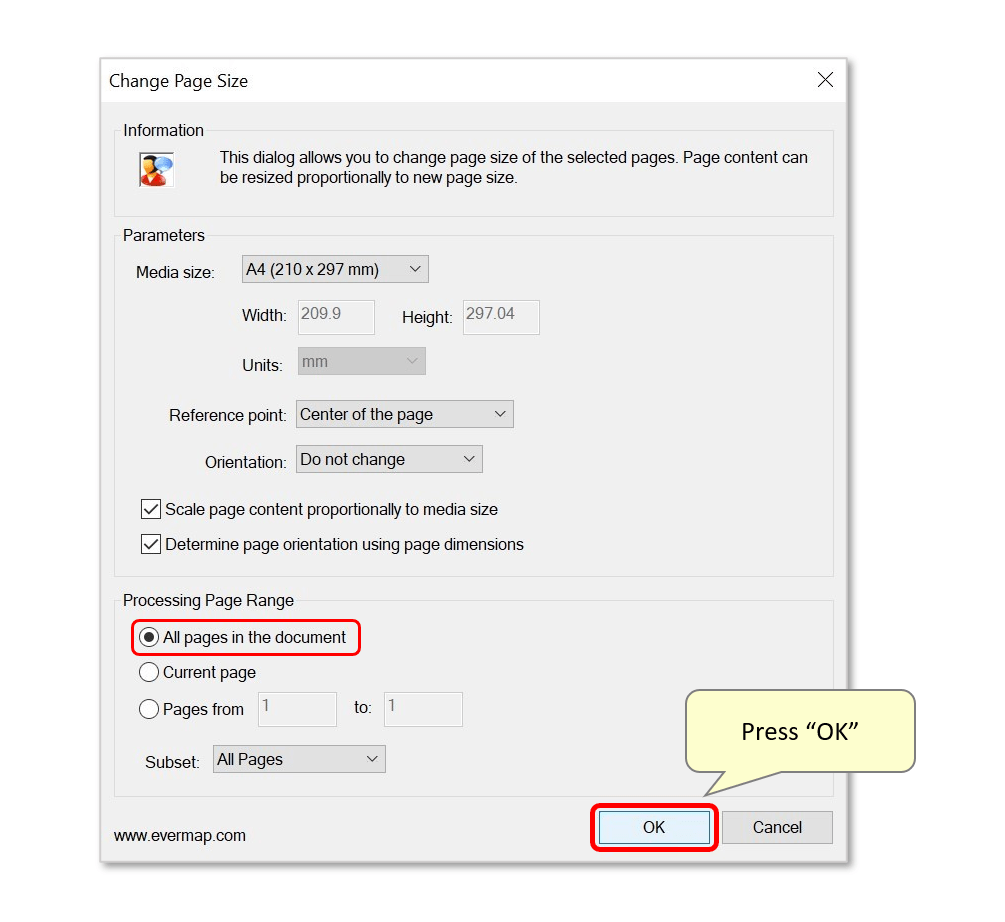
- Step 6 - Resize Pages
- Lastly, select the pages to be processed and press "OK" to proceed.
- Step 7 - Check the Results
- Check that the resized pages are now in the desired format. Here, all pages of the document are now consistently A4. Press the "Save" symbol or use "File > Save/As..." to save these changes.

- Click here for a list of all step-by-step tutorials available.