Divide PDF Pages into Multiple with AutoPageX™
- Introduction
- Pages in a document can be divided into several pages of equal or different sizes by using a "Divide Pages" operation with the AutoPageX plug-in. This task can be carried out using one of two modes: automatic and custom. This may be useful for splitting large (e.g.: A2) files into individual (A3/A4) documents. For example, use this tool to split: large engineering drawings into separate parts; or documents that contain multiple logical pages in each single physical page. In the tutorial steps below, we will look at how each mode can be used to create different output documents.
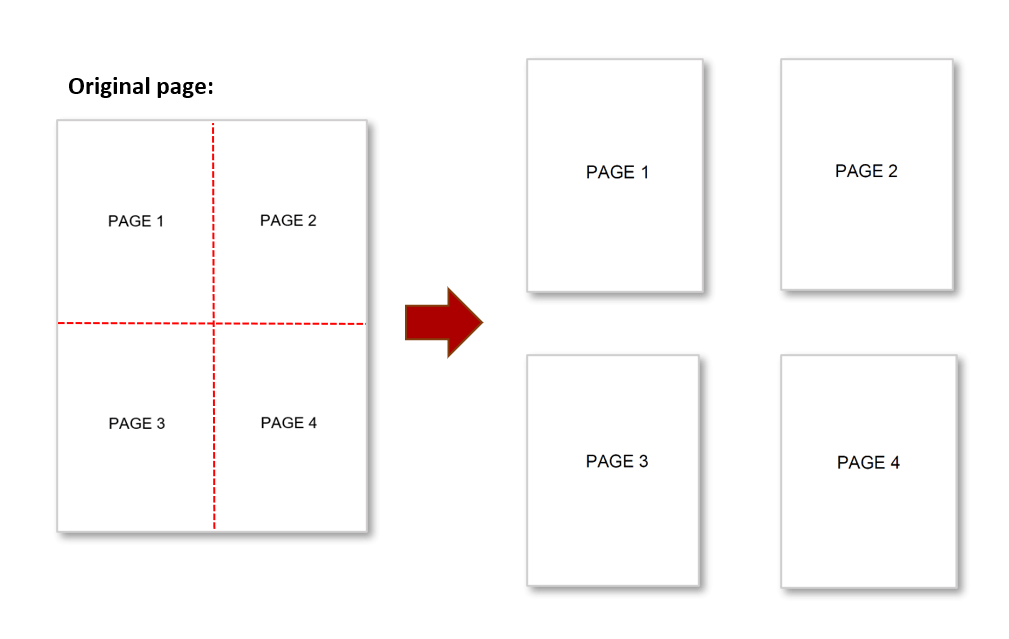
- To demonstrate using the "automatic" mode, we will split one page into four equally-sized smaller ones:
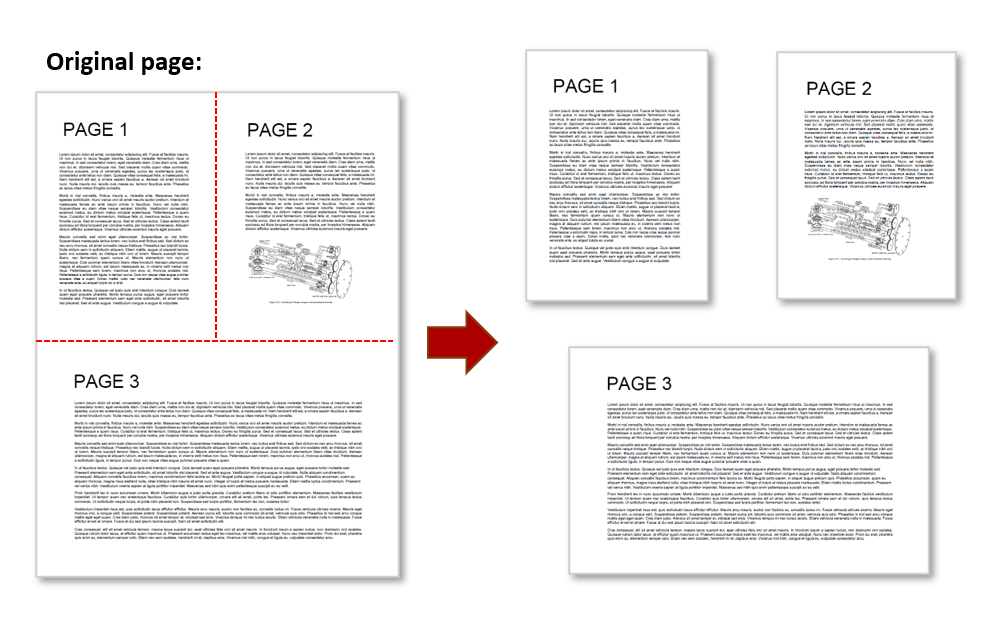
- To demonstrate using the "custom" mode, we will split one page into three smaller ones of a specific size/orientation:
- IMPORTANT: Dividing pages into multiple ones can significantly increase the file size of the output PDF document. This is due to the internal structure of PDF documents. Each page maintains its own data structures and has a certain overhead that depends on a number of different factors, such as: the number of fonts used, or the presence of bitmap images. AutoPagex™ deletes all objects that do not appear within a media box (are not visible) such as text elements and annotations. However, the software does not cut images - it moves them to a suitable position. Depending on the content of the particular PDF document, dividing pages can produce drastically different document sizes. For example, if the input PDF document has been created by capturing pages with a scanner, then dividing such a document will multiply the size of the output in proportion to the number of pages added. This is due to the fact that each page in such documents is represented by a single bitmap image.
- Prerequisites
- You need a copy of Adobe® Acrobat® along with the AutoPageX™ plug-in installed on your computer in order to use this tutorial. Both are available as trial versions.
- Step 1 - Open the "Divide Pages" Dialog
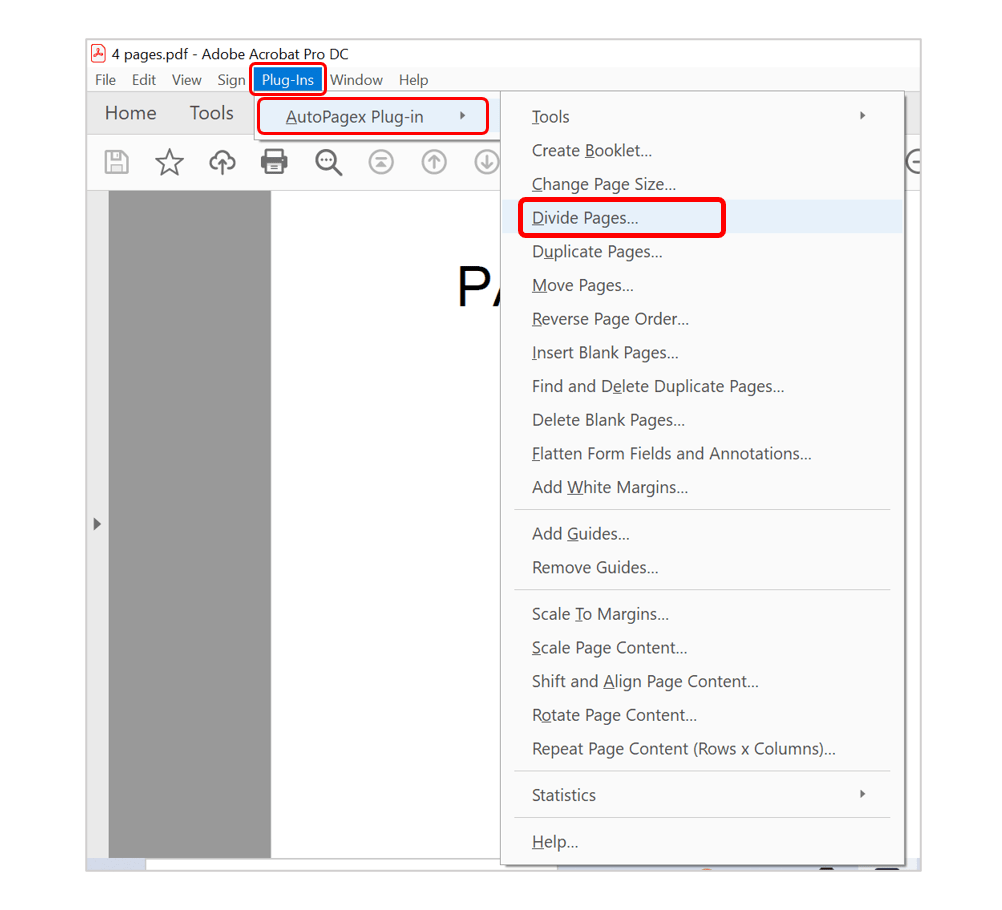
- With the PDF containing content to be divided open in Acrobat, select "Plug-Ins > AutoPagex Plug-in > Divide Pages...".
- EXAMPLE 1: USING AUTOMATIC SETTINGS
- Step 2 - Configure Output Pages
- The "Automatic" mode provides an easy way to automatically divide an original page into 2, 4 or 8 smaller pages. At each division step, the page is divided in half across the longest side.
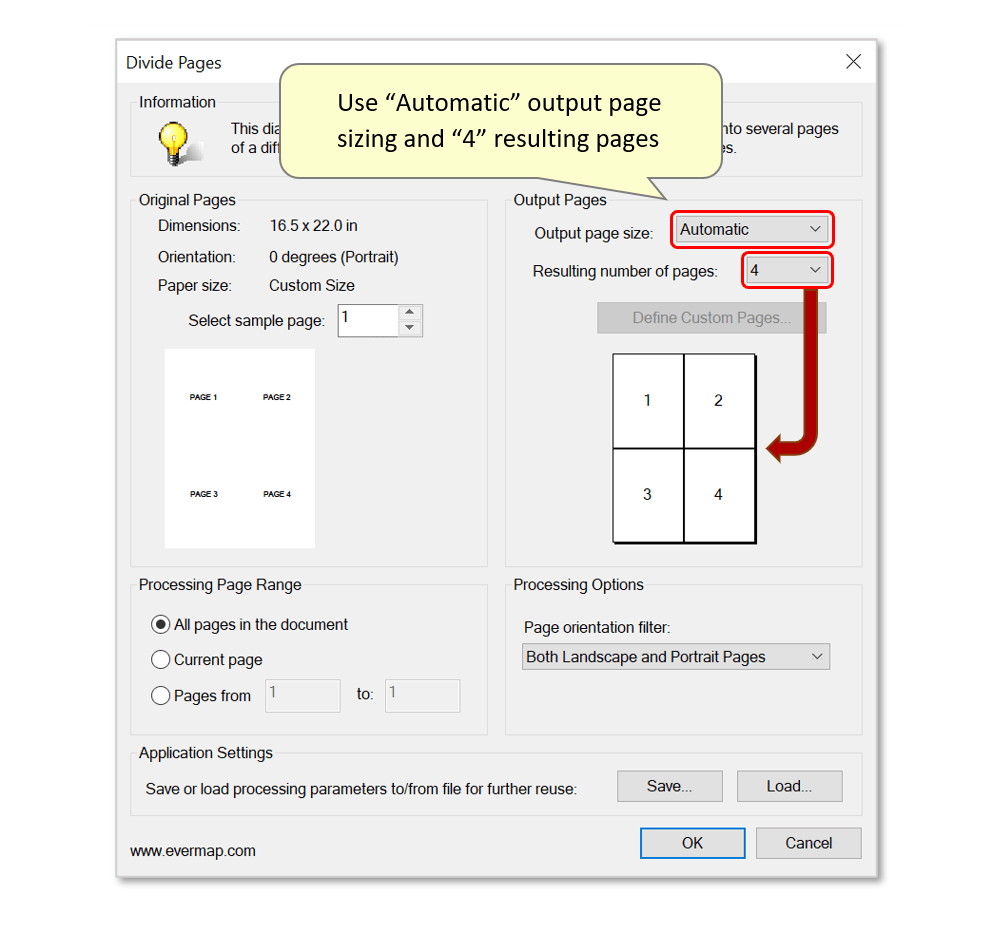
- A sample page from the currently-open document is used to specify the original page size. This page is displayed on the left side of the dialog, along with the input page dimensions.
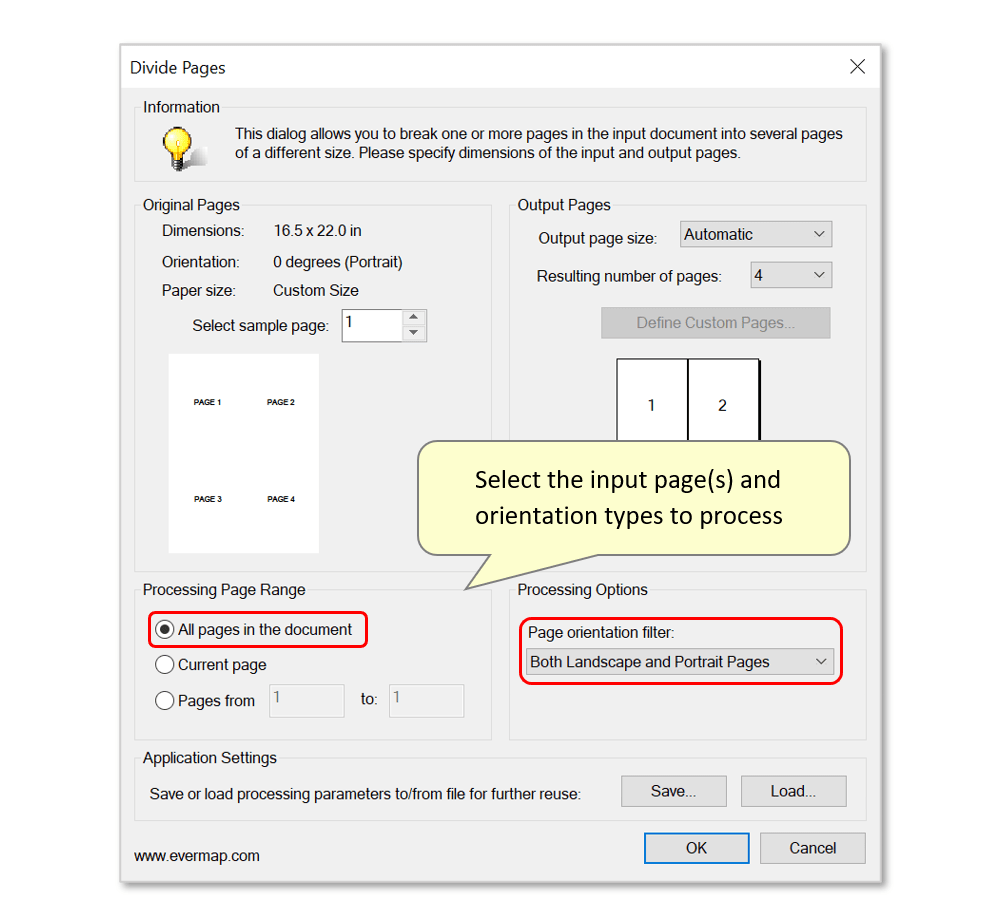
- Select the "Automatic" option next to "Output page size:", and set the "Resulting number of pages:" to "4". The preview display below will change to reflect how the input page will be divided into four pages.
- Step 3 - Select Processing Options
- Use this section to configure a processing page range. In this example, we will process "All pages of the document", but it's also possible to process only the currently open page or a specific range of pages.
- Under "Processing Options", it's possible to configure the tool to process only a specific page orientation choice. Use the pulldown list to process ONLY portrait or landscape pages.
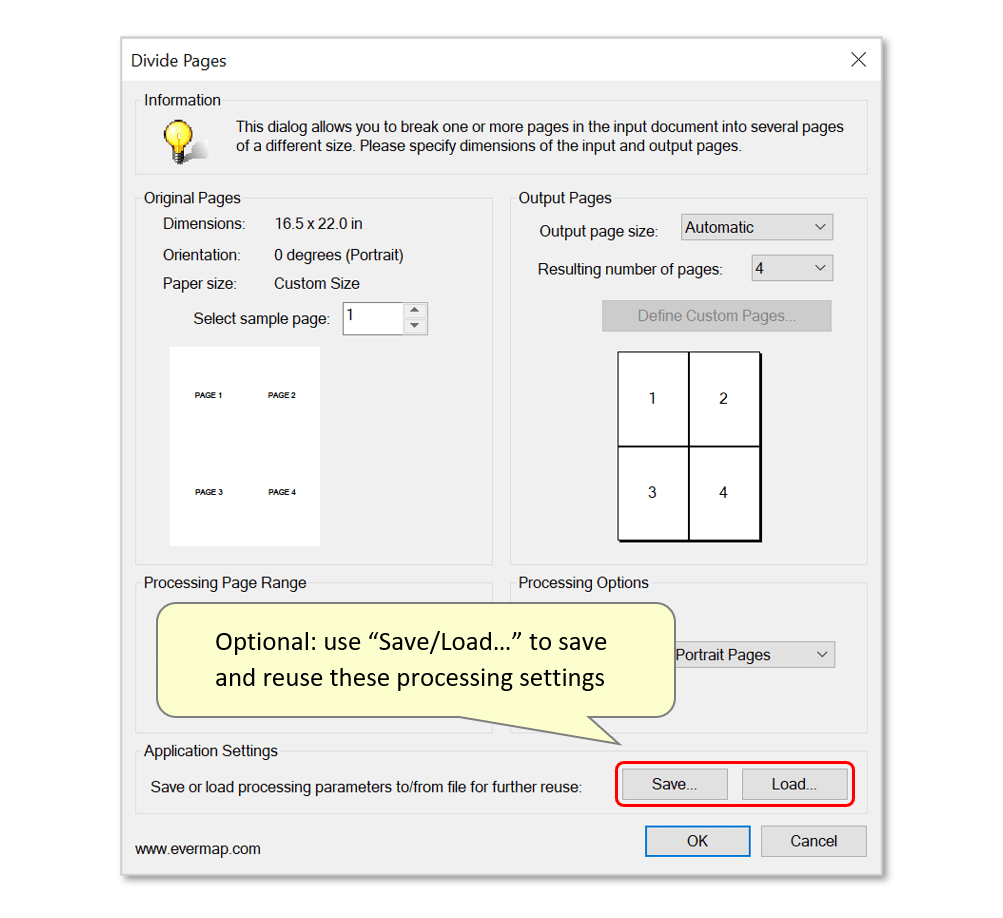
- Step 4 - Optional: Save/Reuse Settings
- Use the "Save/Load..." buttons to save a settings configuration for future reuse. Processing parameters will be saved as a settings file with an *.apd file extension.
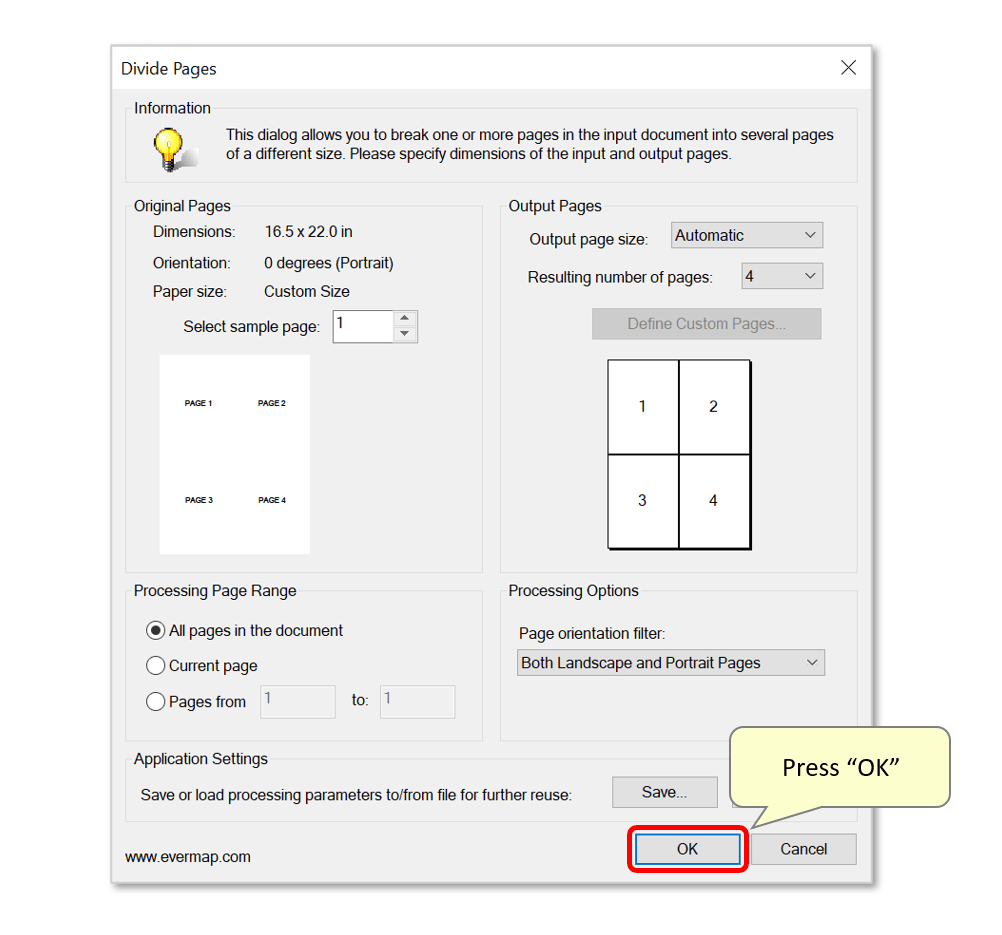
- Step 5 - Confirm Settings
- Press "OK" to continue using the current settings.
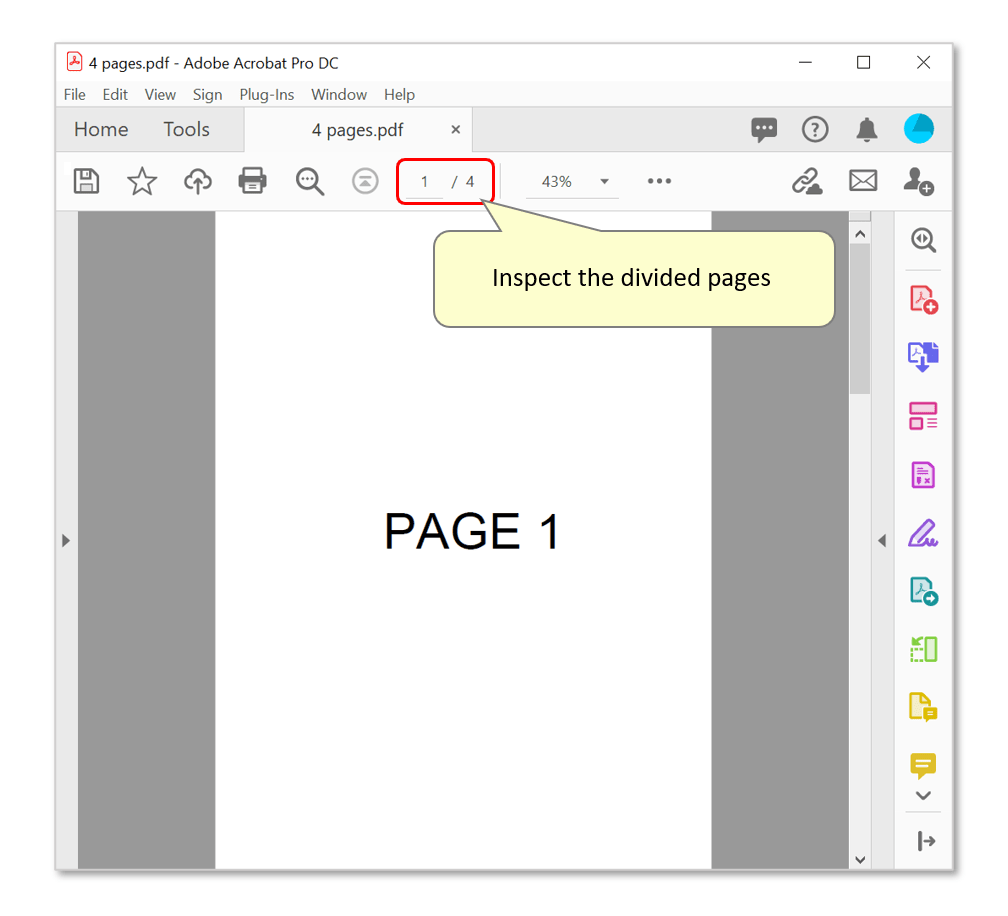
- Step 6 - Inspect the Results
- The file will change in Acrobat to display the four new output pages. Check that the input page has been divided in the desired way. It can be saved as a new document via the "File > Save As..." menu.
- EXAMPLE 2: USING CUSTOM SETTINGS
- Step 7 - Open the "Custom Settings" Dialog
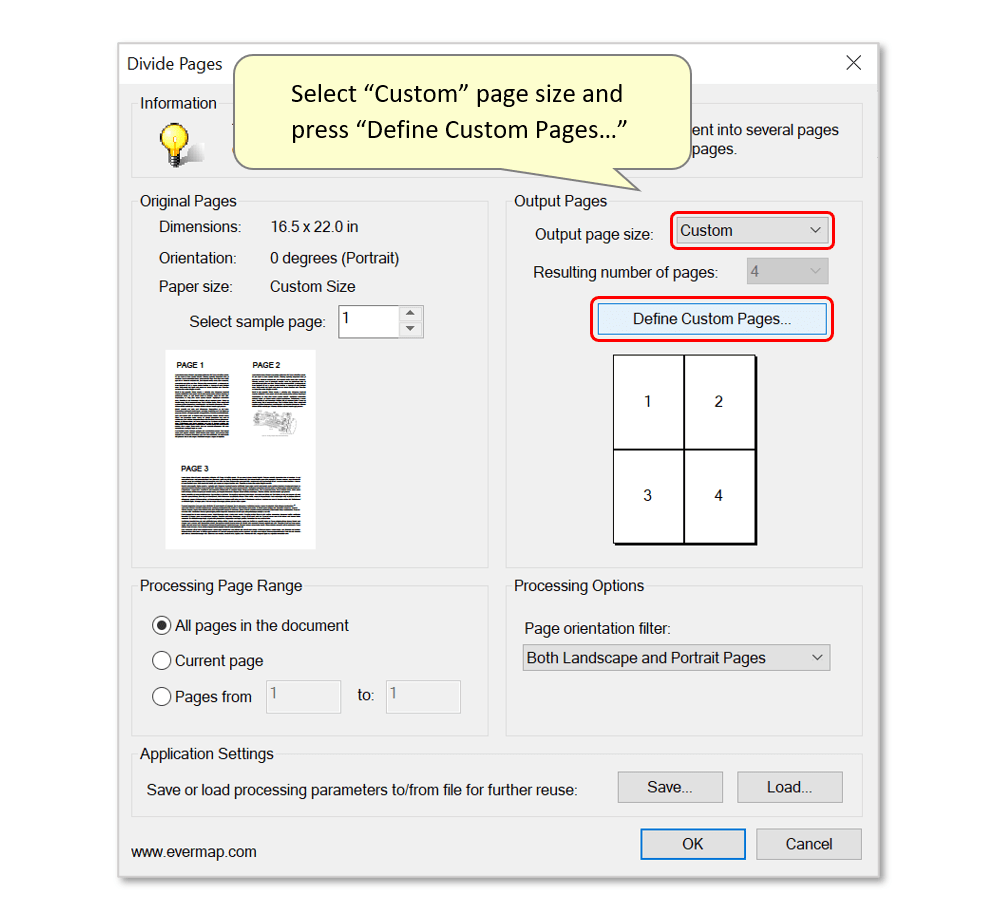
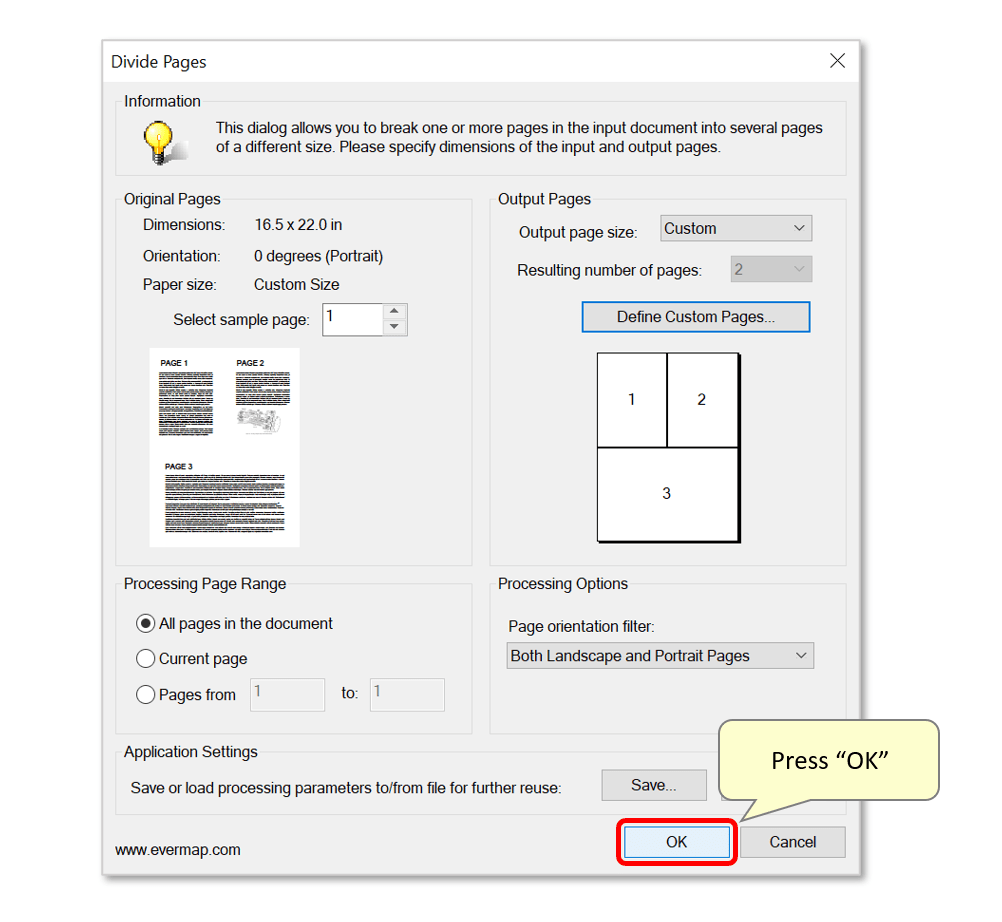
- The "Custom" mode provides full control over how to divide the input into various smaller pages. Select this option next to "Output page size:", and press "Define Custom Pages..." to define a custom page division method.
- Step 8 - Configure Custom Output Pages
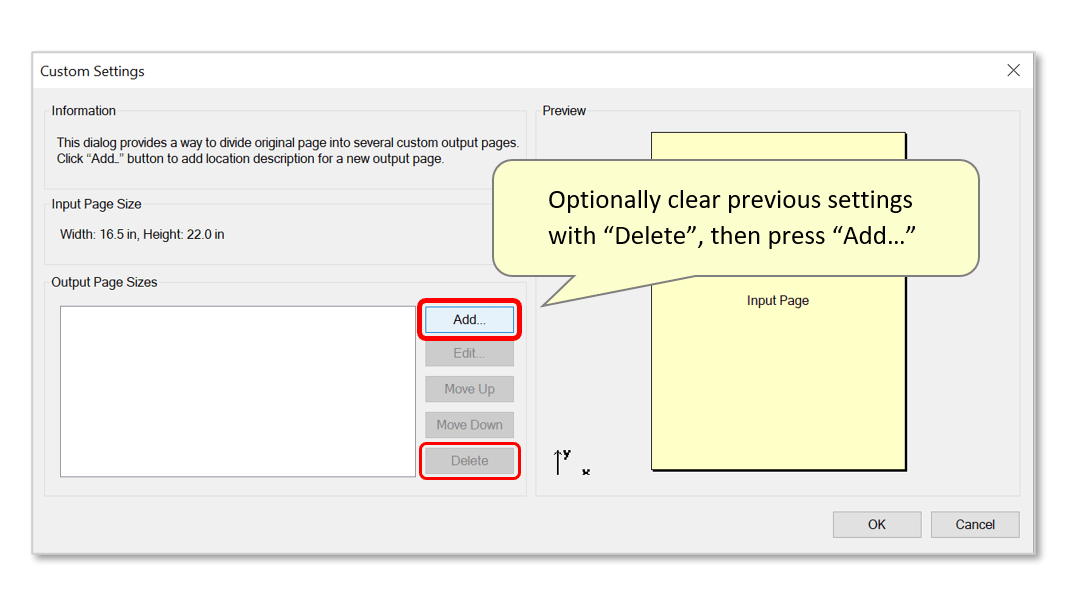
- Use this dialog to create the output page sizes. If necessary, press "Delete" repeatedly to remove previous page configurations. Press "Add" to configure a new page's dimensions.
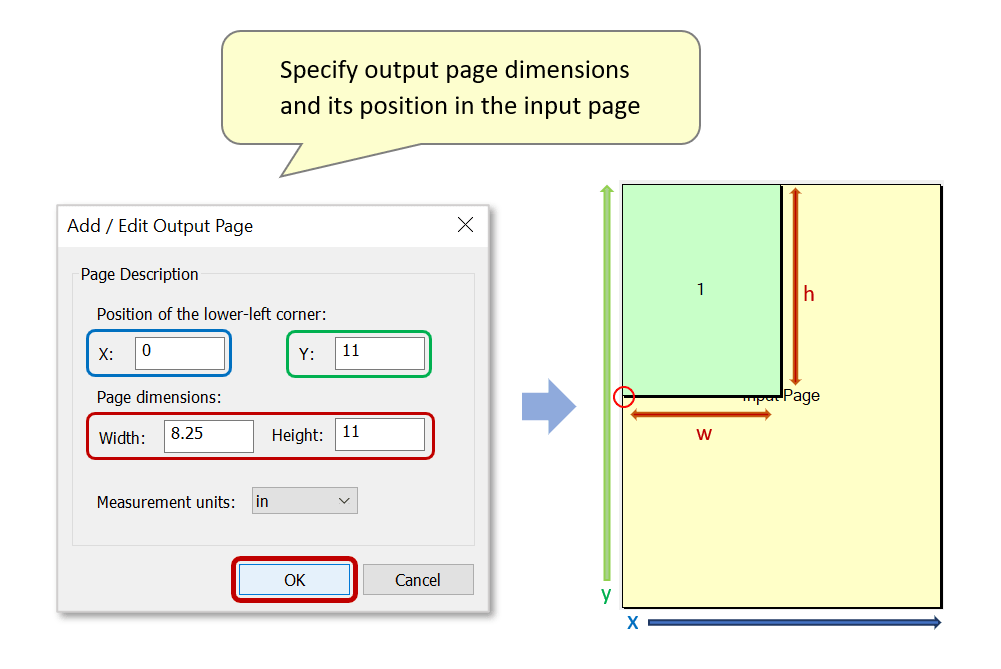
- Use the "Add / Edit Output Page" dialog to configure dimensions of the desired output page, and a description of its location within the input. The lower left corner (circled below) is used as an anchor point for defining the page's location. Enter points along the x/y axis to determine its location - here the first page we'll create has its lower left corner at "0" on the x axis and at "11" on the y axis (the input page is 22 inches in height).
- Enter the output page dimensions - this page will be 8.25 x 11 inches. Units of measurement for figures in this dialog can be changed via the "Measurement units:" pulldown list - the user can choose from cm, in, mm or pt (1/72 inch).
- Press "OK" to confirm this output page.
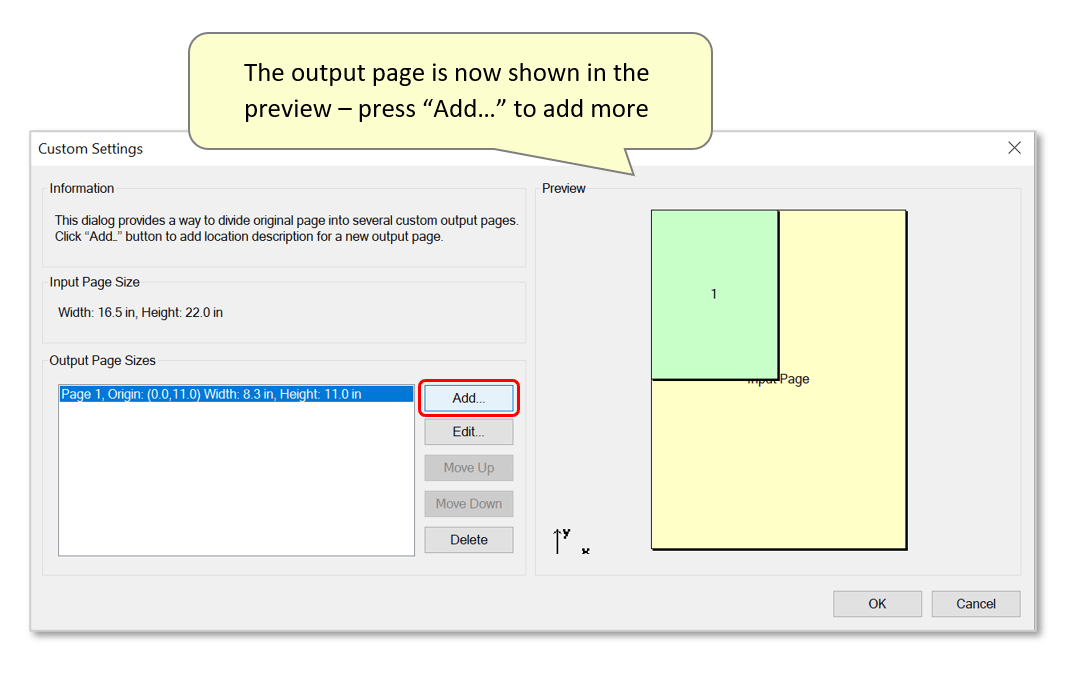
- The output page section is now visible on the preview diagram on the right. Press "Add..." to add more.
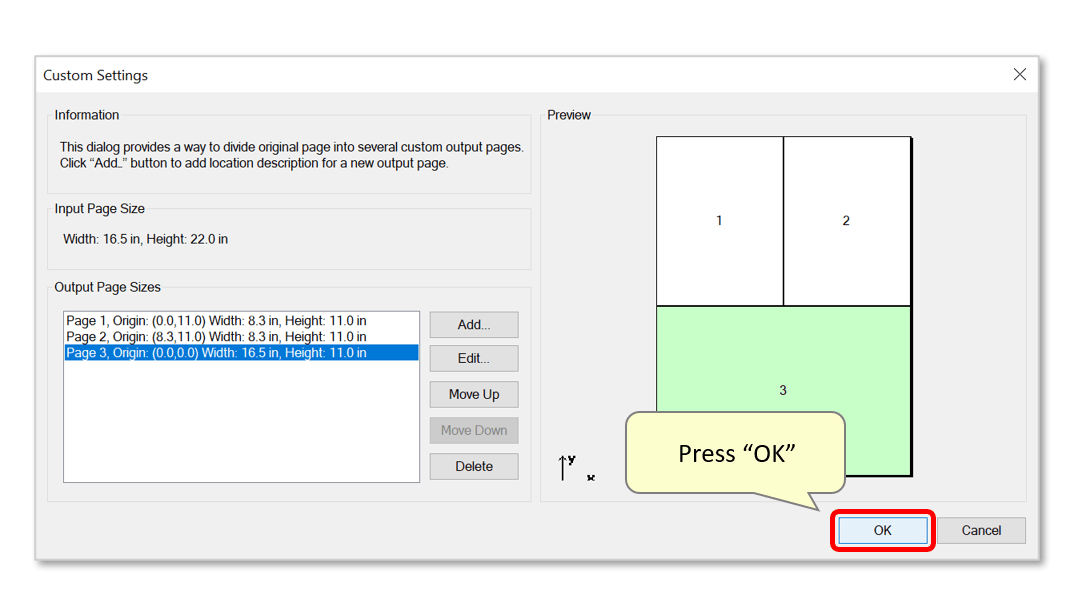
- We've added three output pages to cover three sections of the input page. The preview display now reflects how the input page will be divided into the three pages.
- Double-click on a page in the list, or select it and press "Edit..." to make changes to it.
- Press "OK" to use this configuration.
- Step 9 - Confirm Settings
- Select processing options and optionally save the configuration for future reuse (see steps 3 & 4 above).
- Press "OK" to divide the input using these settings.
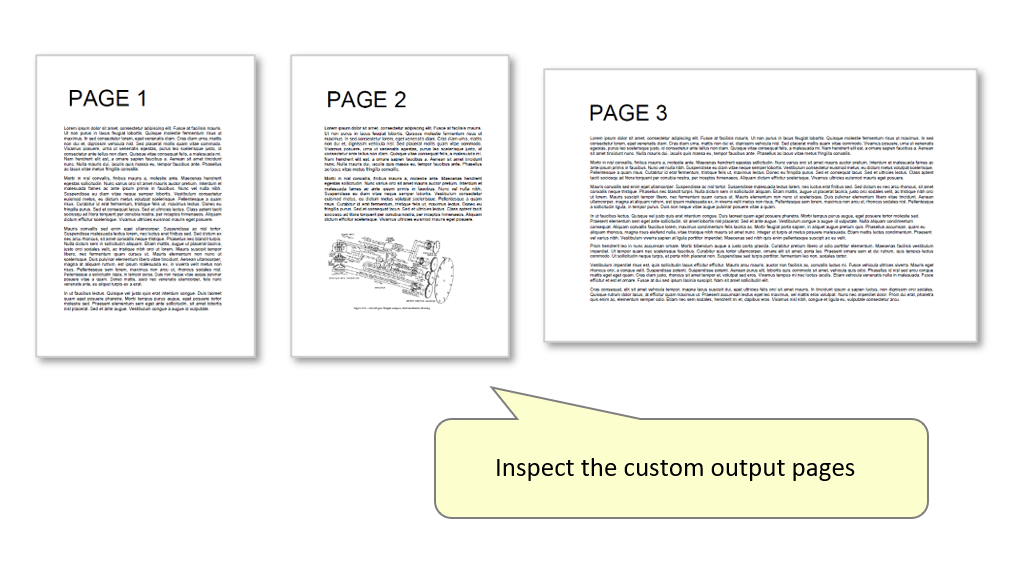
- Step 10 - Inspect the Results
- The file will change in Acrobat to display the three new output pages. Check that the input page has been divided in the desired way. It can be saved as a new document via the "File > Save As..." menu.
- Click here for a list of all step-by-step tutorials available.