Using the AutoPageX™ Interactive Tools for Adobe Acrobat
- Introduction
- The plug-in provides a set of interactive tools that can be used to easily make changes to page size and/or the appearance of content. They can be accessed quickly within the main Acrobat menu when viewing a PDF file.
- The tools available include:
-
- The "Deskew Tool" for quickly rotating page content to make it perfectly vertical or horizontal.
- The "Crop Page Tool" for instantly cropping the content of a page.
- The "Enlarge Page Area Tool" for enlarging a selected area to fit the whole page.
- The "Cover Areas Tool" for covering selected areas with white rectangles to make underlying page content invisible.
- The "Add White Margins Tool" for covering edges of the page with white opaque margins to make unwanted content invisible.
- The "Shift Content Tool" to move/shift page content within the page.
- In the examples below, we will demonstrate how each tool can be used to assist document processing.
- NOTE: All tools shown here support the "Undo / Redo" functionality in Acrobat - press "Ctrl-Z” or select "Edit > Undo..." from the menu to undo page adjustments.
- Prerequisites
- You need a copy of Adobe® Acrobat® along with the AutoPageX™ plug-in installed on your computer in order to use this tutorial. Both are available as trial versions.
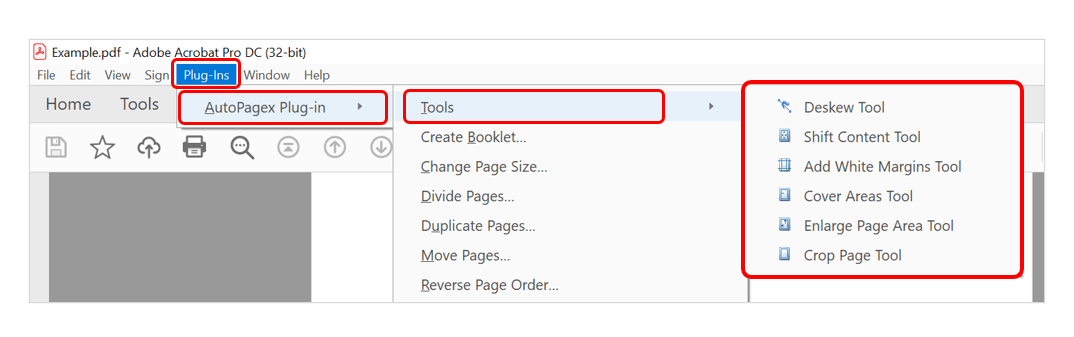
- Open the AutoPageX Tools
- With the PDF that you want to work with open in Acrobat, select "Plug-Ins > AutoPagex Plug-in > Tools > ..." to access the list of available tools.
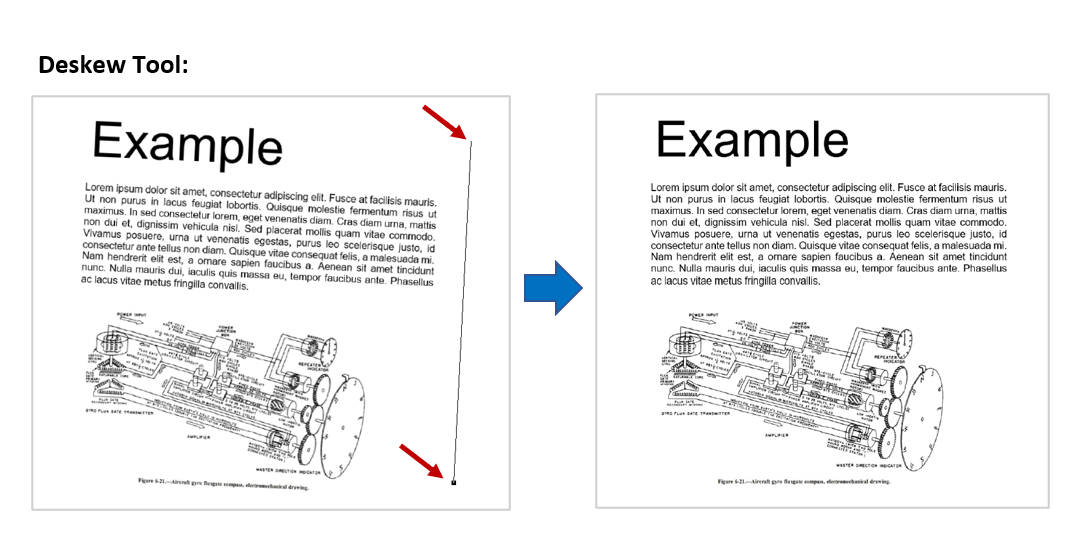
- Example 1: Using the "Deskew Tool"
- Scanning documents always introduces a certain skew (page rotation) to the output. The deskew tool provides a simple way to manually ‘deskew’ an individual page’s content. Select this tool in the plug-ins menu (see image above), and draw a line that follows the correct direction of the page content by clicking on a starting point, then on the desired ending point (see red arrows below). The line must correspond to a nearly vertical or horizontal feature on the current page. The page will be automatically rotated to make the drawn line either perfectly vertical or horizontal.
- The image below demonstrates the effects of using the tool on a document containing some sample text and an image. The line is drawn at an angle to match the orientation of the page content. This is then used as a guide for making the content perfectly vertical.
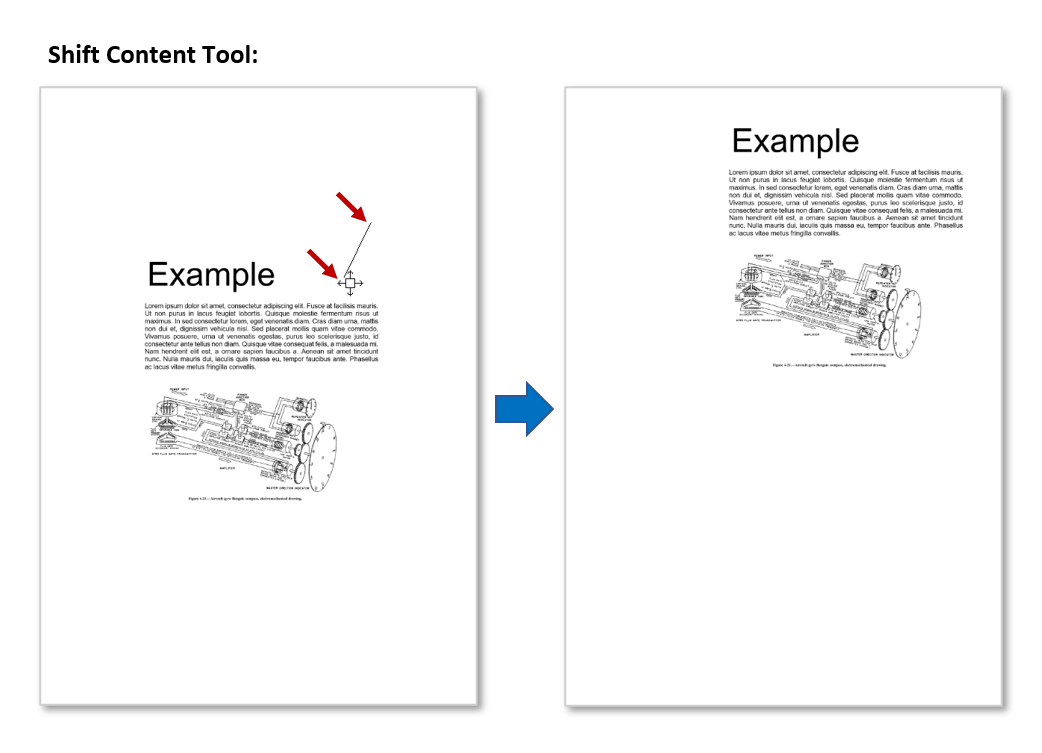
- Example 2: Using the "Shift Content Tool"
- Use this tool to move page content to a new page location by defining a "shift vector". Select the tool in the plug-ins menu (see first image) - now click anywhere on the page to use as an anchor point, and then click on another location in the direction you want to move content to (see red arrows below). The distance between the two clicking points corresponds to how far the content is moved across the page. This shifts all page content in the direction and distance defined by these two points.
- The image below demonstrates the effects of using the tool on a document containing some sample text and an image. The line is drawn in the desired direction for shifting content. Lines can be drawn repeatedly until the content becomes ideally placed.
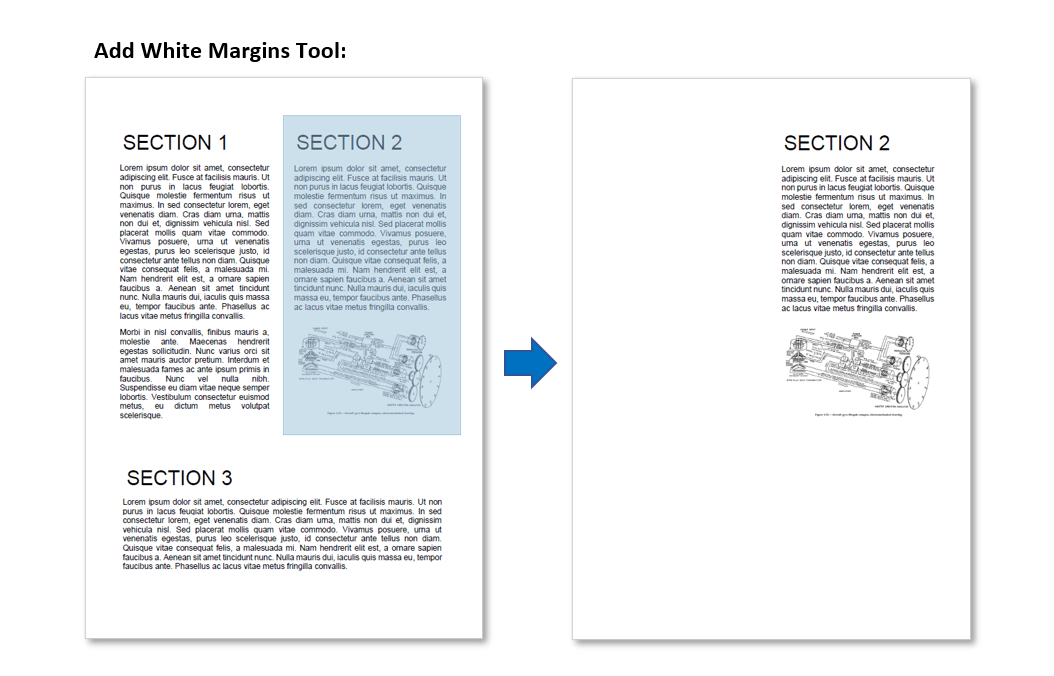
- Example 3: Using the "Add White Margins Tool"
- Use this tool to add opaque white margins to a page. It is similar to the "Cover Areas Tool" (see below) and uses white rectangles to cover unwanted page content, without actually deleting any existing page content. Select the tool in the plug-ins menu (see first image) and use it to draw a blue box around an area of the page that you want to stay visible by clicking and dragging the cursor. ALL other page content will then become obscured by whitespace.
- The image below demonstrates the effects of using the tool to draw a rectangle around a specific page area. All areas outside this rectangle are then covered with white "path" elements to make the underlying content disappear.
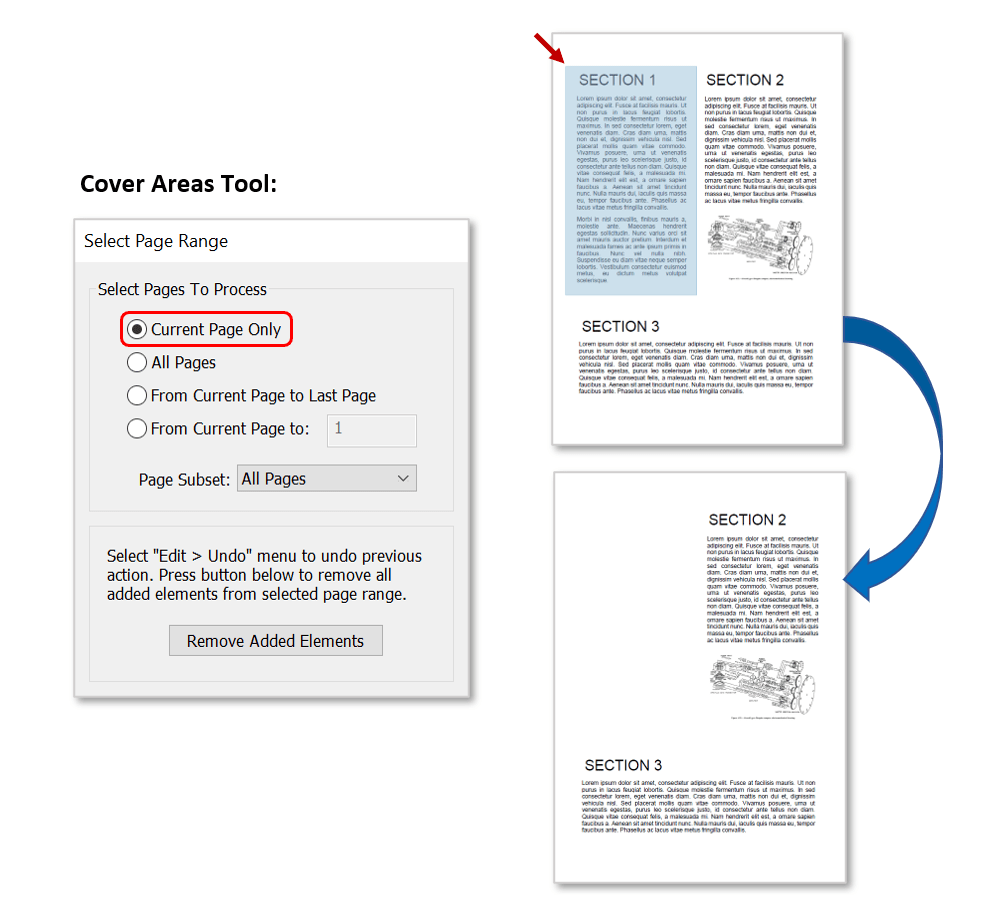
- Example 4: Using the "Cover Areas Tool"
- Use this tool to make unwanted page content invisible by concealing areas of the page under white rectangles. Note that this tool does not actually delete any existing page content, so is not recommended for redacting documents. (Try the AutoRedact™ plug-in for doing this properly.)
- Select the tool in the plug-ins menu (see first image) - then click on the upper-left corner of the area you want to cover (see red arrow below) and drag the cursor to draw a blue box over the area you want to make invisible. Once you release the mouse button, the white rectangle will be added to the page to make underlying content disappear.
- This tool also provides the ability to cover the same area on one or more pages at once. A floating dialog ("Select Page Range") is displayed that allows the user to select specific pages and (optionally) a subset (all, odd, or even pages only) for processing. Click "Remove Added Elements" in this dialog to remove all previously added white rectangles from the selected pages.
- The image below demonstrates the effects of using the tool to draw a rectangle representing a page area that should be covered. All areas outside this rectangle remain visible - a white "path" element is placed over the selected area to make the content disappear.
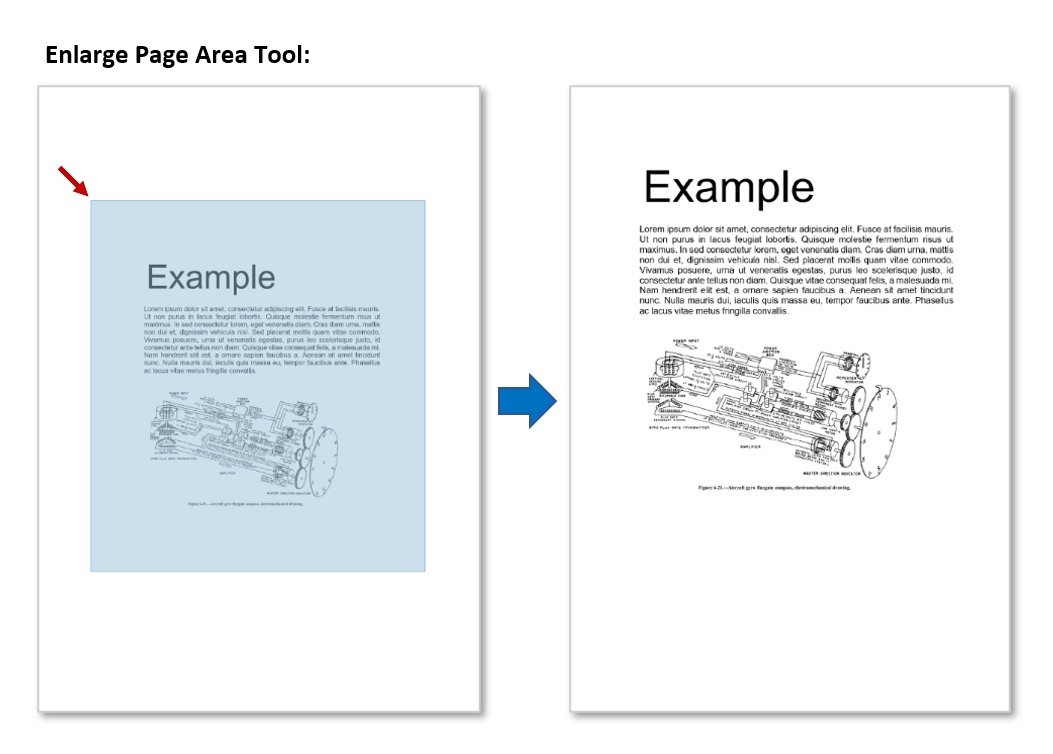
- Example 5: Using the "Enlarge Page Area Tool"
- Use this tool if you want to enlarge a certain area to fit the whole page. Select the tool in the plug-ins menu (see first image) - then click on the upper-left corner of the area you want to enlarge (see red arrow below) and drag the cursor to draw a rectangle that covers the desired area. Once you release the left mouse button, the selected area will be enlarged to fit the current page cropping box. This operation does not change the current page size - it only scales and shifts page content.
- The image below demonstrates the effects of using the tool to draw a rectangle around a page area that should be enlarged. The selected area immediately grows to fill the current page dimensions.
- Example 6: Using the "Crop Page Tool"
- Acrobat's built-in "Crop Tool" is sometimes too time consuming as it provides a multi-step interface for changing a cropping box. Use the “Crop Page Tool” tool to instantly change the cropping box size of the current page.
- Select the tool in the plug-ins menu (see first image) - then left-click and drag the cursor to draw a blue rectangle that represents a new cropping box for a page. Note that you can also draw outside of the currently visible page area to expand the cropping area outside of its present limits.
- The image below demonstrates the effects of using the tool to draw a rectangle around a page area that should be cropped. The dimensions of the page immediately change to match the selected area. This page will now cover only the selected area when displayed in Acrobat.

- Click here for a list of all step-by-step tutorials available.