Moving Pages Within PDF Documents with AutoPageX Plug-in
- Introduction
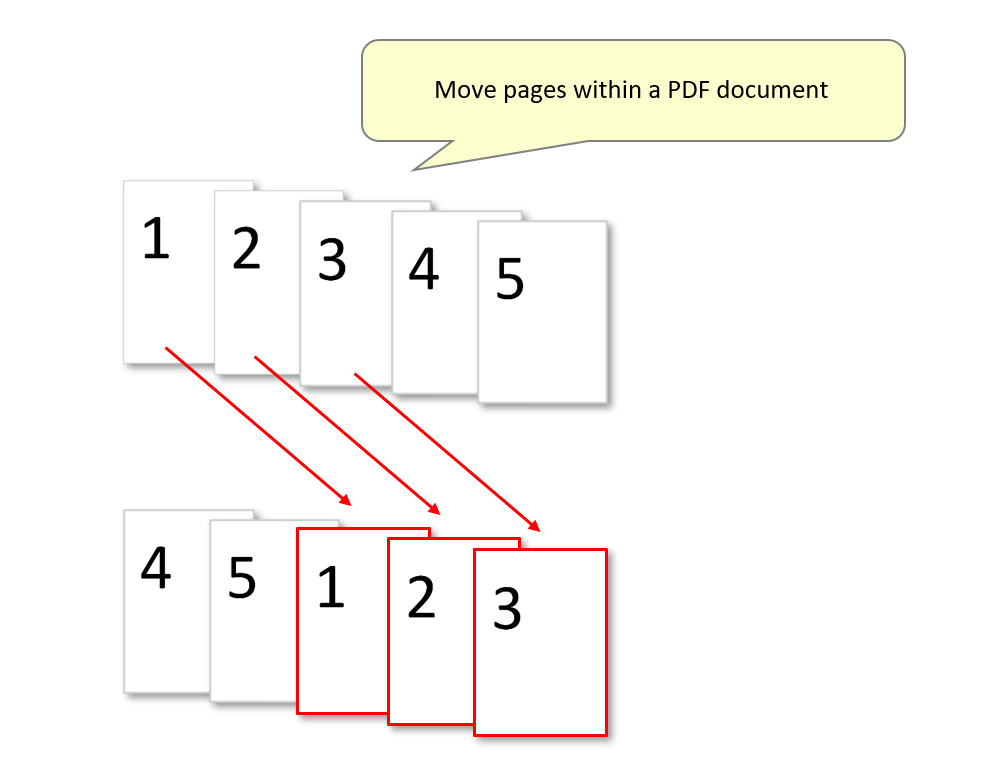
- The AutoPageX plug-in "Move Pages" tool can be used to quickly move pages within a PDF document. It is possible to move pages manually using basic Acrobat functionality provided by “Page Thumbnails” pane. However, it becomes tedious if many pages need to be moved. “Move Pages” tools provides a way to perform this operation without performing any manual page selection. In this tutorial, we will demonstrate how to use this tool by moving a range of pages to another part of a sample PDF document. The goal is to place the first three pages after the last page of the document - 12345 = 45123:
- Prerequisites
- You need a copy of Adobe® Acrobat® along with the AutoPageX™ plug-in installed on your computer in order to use this tutorial. Both are available as trial versions.
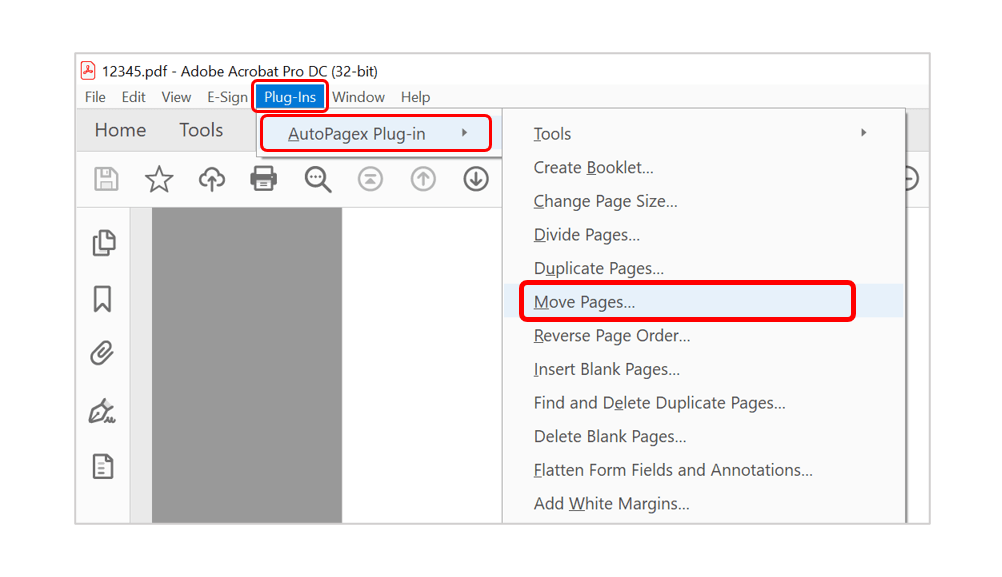
- Step 1 - Open the Tool
- Open the PDF document for processing in Acrobat, and select "Plug-Ins > AutoPagex Plug-in > Move Pages..." to open the "Move Pages" dialog.
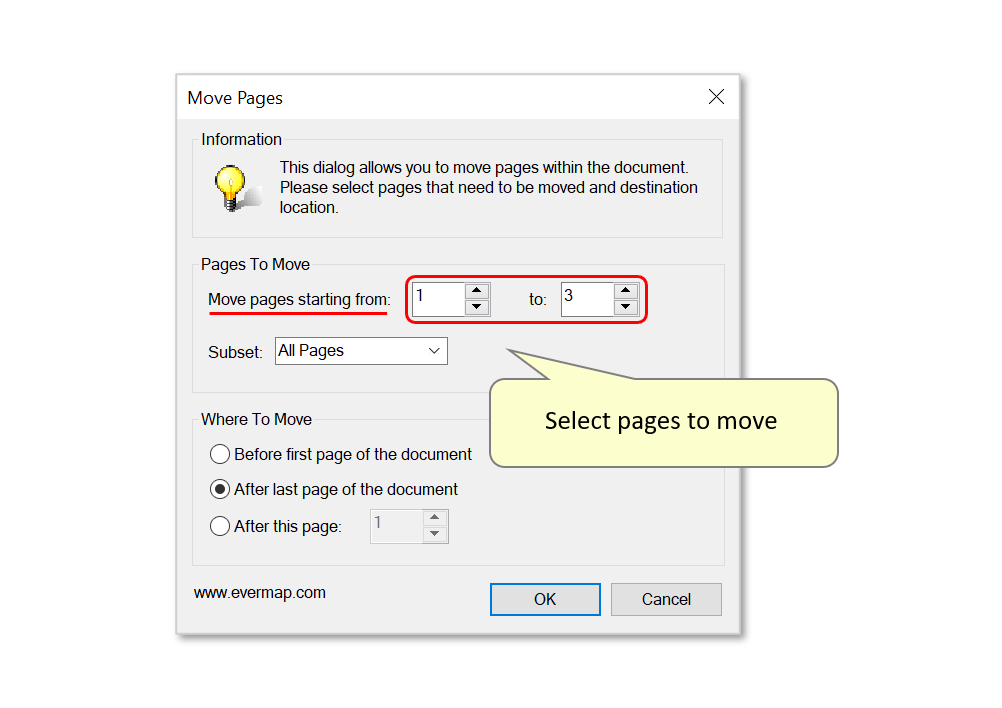
- Step 2 - Configure Pages to Move
- Select the pages to be moved - configure a page range using the page number boxes. It's also possible to move a specific page subset (e.g.: only odd/even pages within the page range). Here, we will move pages 1 - 3.
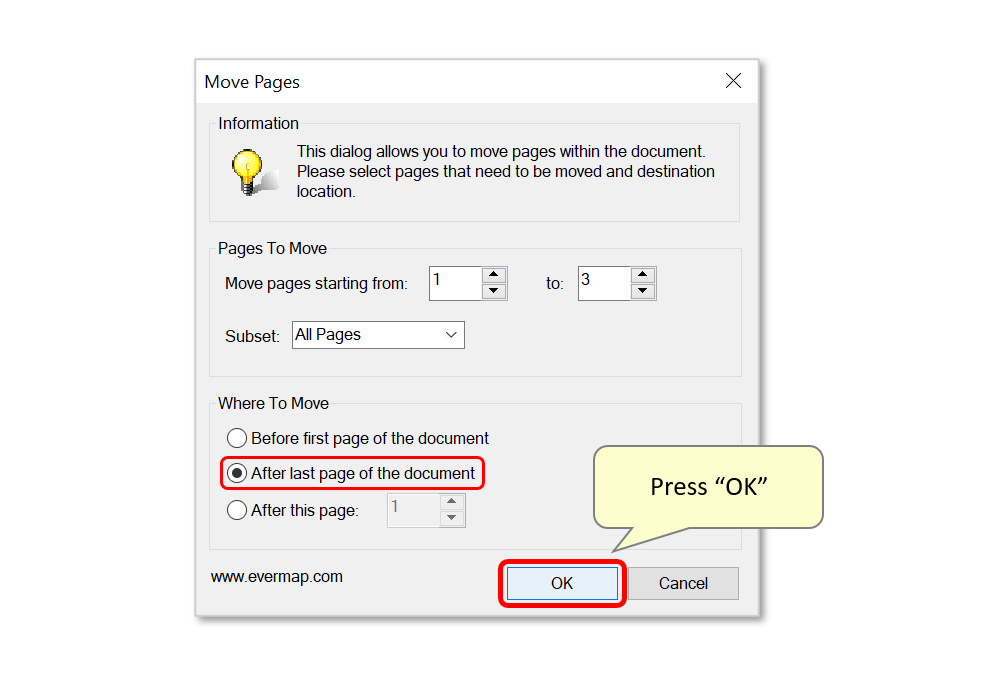
- Step 3 - Select a Destination
- Now configure the desired location for the moved pages. Here, we will place them after the last page of the document - alternatively, place them before the first, or after any specific page.
- Press "OK" to proceed.
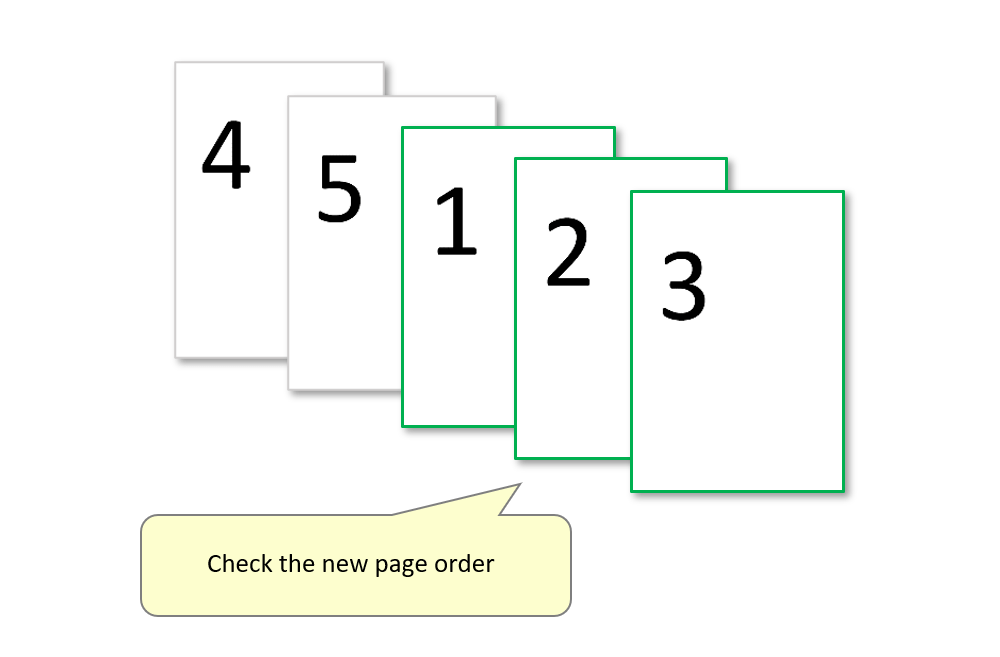
- Step 4 - Check the Results
- Check that the chosen pages have been moved correctly. Here, pages 1 - 3 are now located after the 4th & 5th pages of the input document. Press the "Save" symbol or use "File > Save/As..." to save these changes.
- Click here for a list of all step-by-step tutorials available.