Repeat PDF Page Content Multiple Times on a Single Page with AutoPageX™
- Introduction
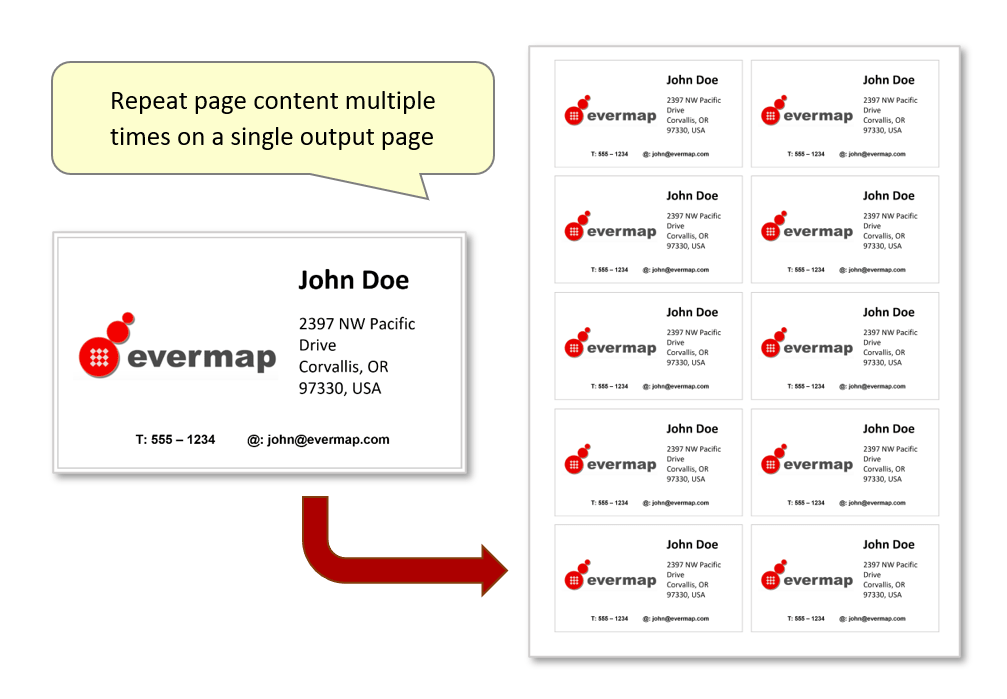
- Use this plug-in feature to repeat the content of a source page multiple times on a single output page, by arranging it into a grid pattern. The software places the source content into a number of user-specified rows and columns. This operation is useful if you need to create and fill new pages with the content of a single “template” page, to generate multiple versions of the input - such as mailing labels/flyers/leaflets etc. For example, you can design a single business card on a page ( 2 × 3½ inches to scale) and then create a new document that repeats it multiple times over many rows and columns. We will demonstrate how to do this in the steps below.
- Prerequisites
- You need a copy of Adobe® Acrobat® along with the AutoPageX™ plug-in installed on your computer in order to use this tutorial. Both are available as trial versions.
- Step 1 - Open the Tool
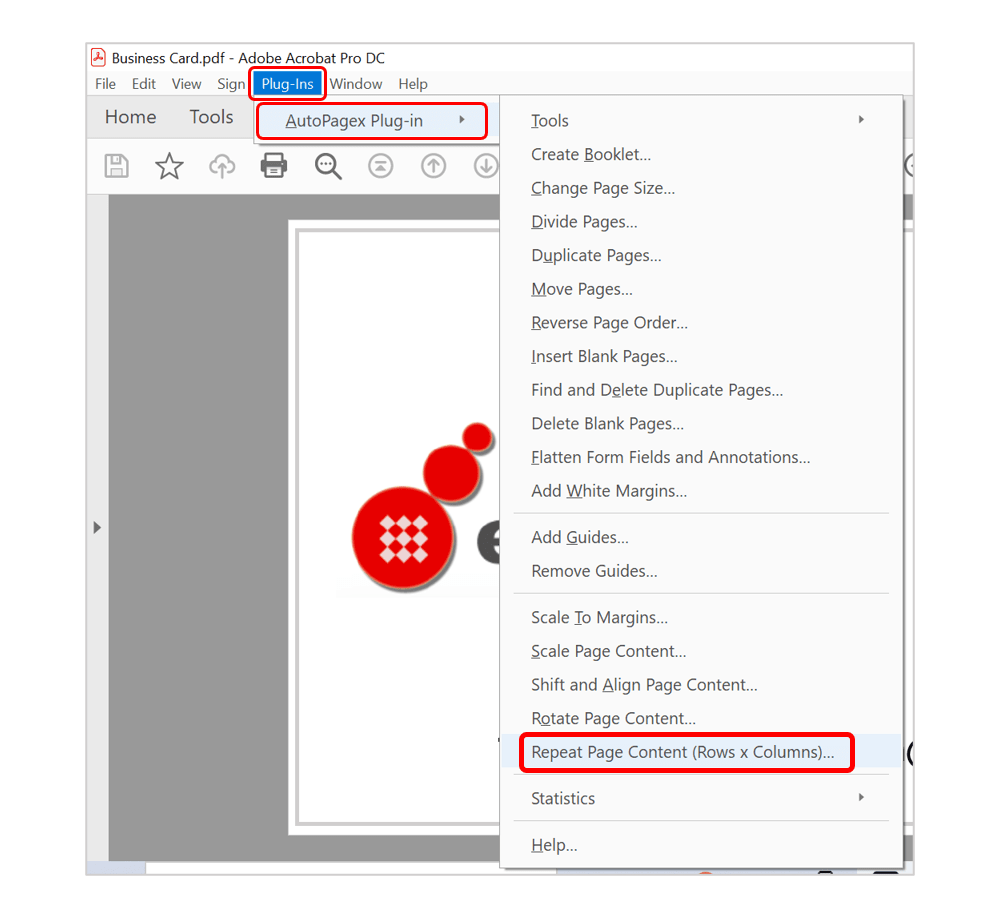
- With the PDF containing the content that you want to repeat open in Acrobat, select "Plug-Ins > AutoPagex Plug-in > Repeat Page Content (Rows x Columns)...".
- Step 2 - Configure Output Settings
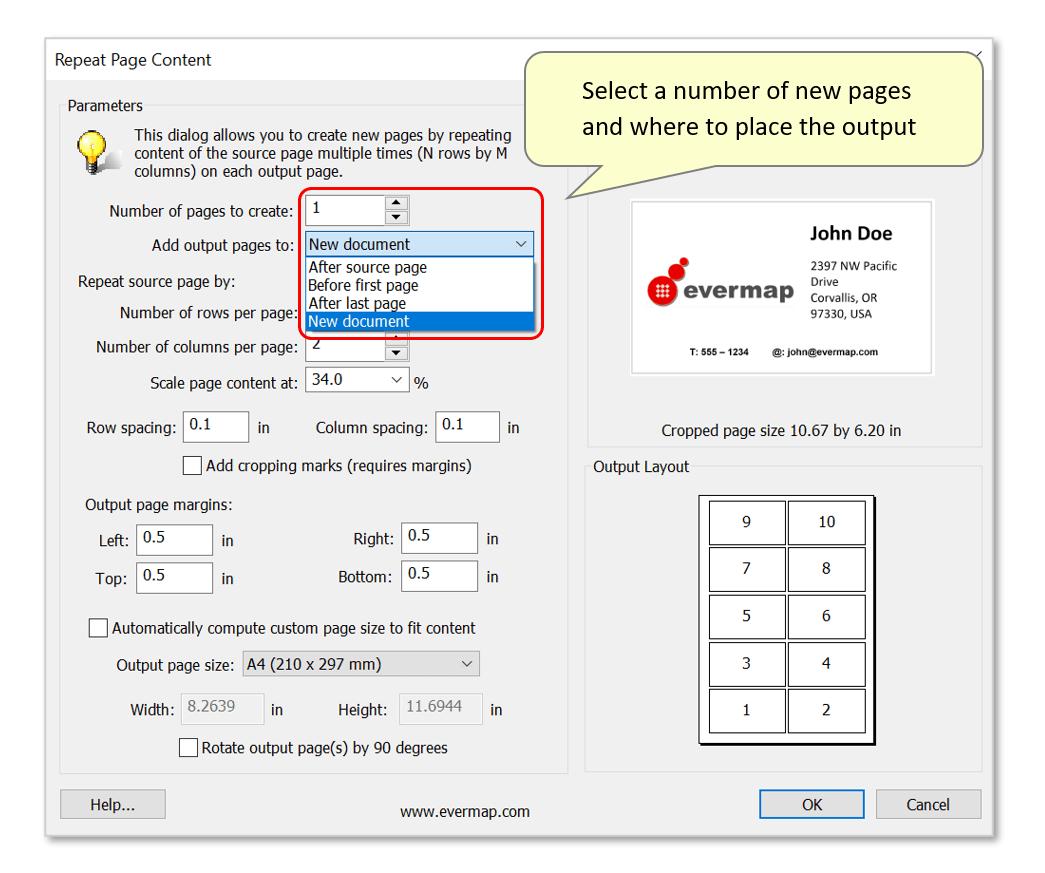
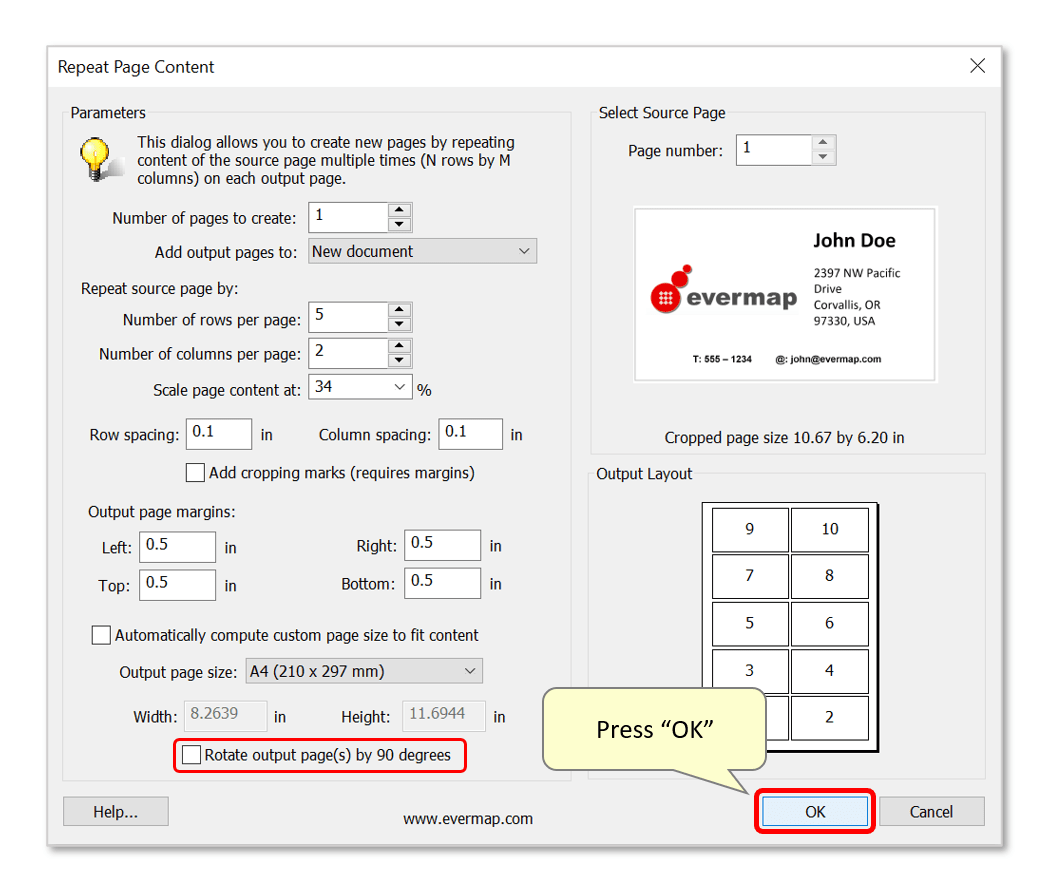
- Use the "Repeat Page Content" dialog to configure how the repeated content will appear in the output. First, select the number of pages to create by using the up/down arrows or manually typing inside this box. All pages will have an identical size and appearance. Here, we'll produce 1 output page.
- Now choose an option using the "Add Output Pages to:" pulldown menu. Choose from inserting output pages: after the source page in the input document; before the first page/after the last page of the input; or into an entirely new document (that will be opened in Acrobat). In this example, we'll create a new document containing the repeated page content.
- Step 3 - Format Content in the Output
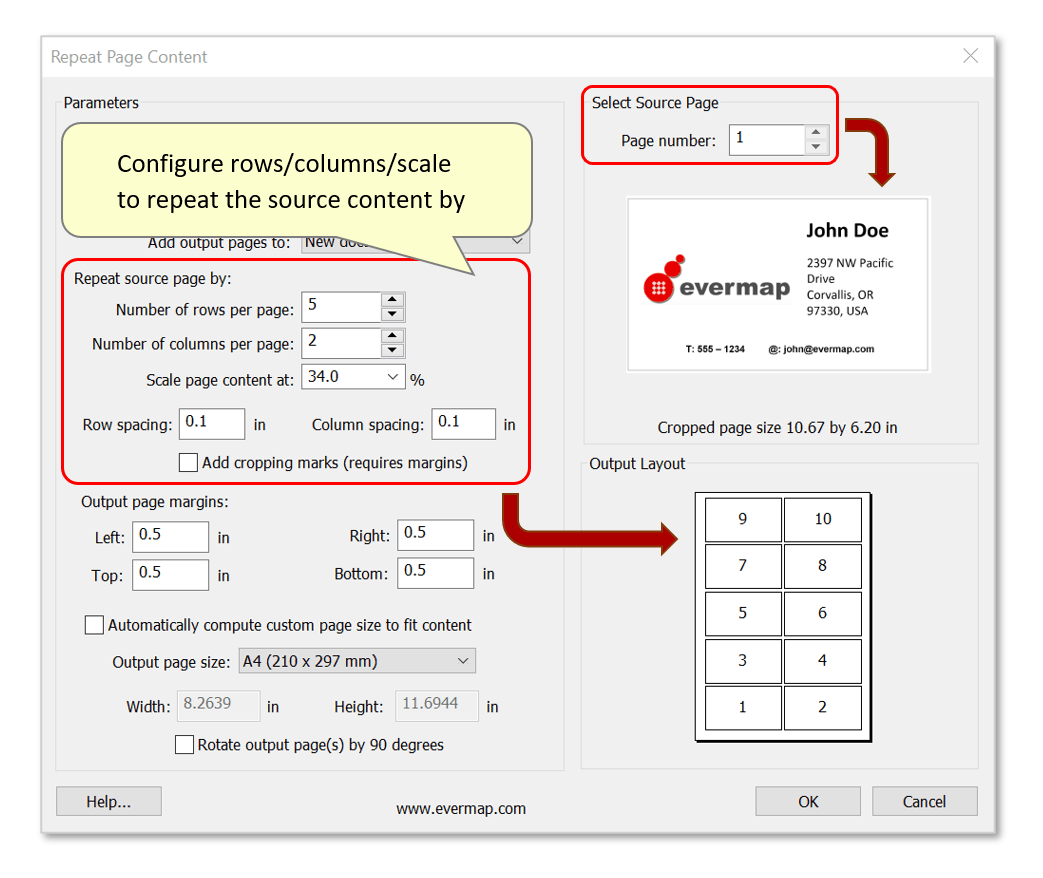
- Now configure how the source content is repeated. Specify a grid size by selecting a number of rows and columns to use per page. Here, we'll make 5 rows and 2 columns - a total of 10 repetitions. The source content is displayed in the upper right area of the dialog - this content is what will be repeated in the grid pattern shown in the "Output Layout" preview below it.
- Use "Scale page content at:" to select a percentage factor that the source page content is scaled (up or down) to before placing it on the new page. If 100 (the default value) is used, no scaling takes place - the output will display repetitions of the content the same size as in the input. So that this many columns/rows of repetitions can be displayed on an A4 page, we'll scale content to 34% of the original. Use the "Output Layout" preview to check that the output is clearly displayed within the page boundaries.
- Use the “Row spacing” boxes to define the amount of space to place between two adjacent rows or columns. Here, repetitions will have 0.1 inches between them on all sides.
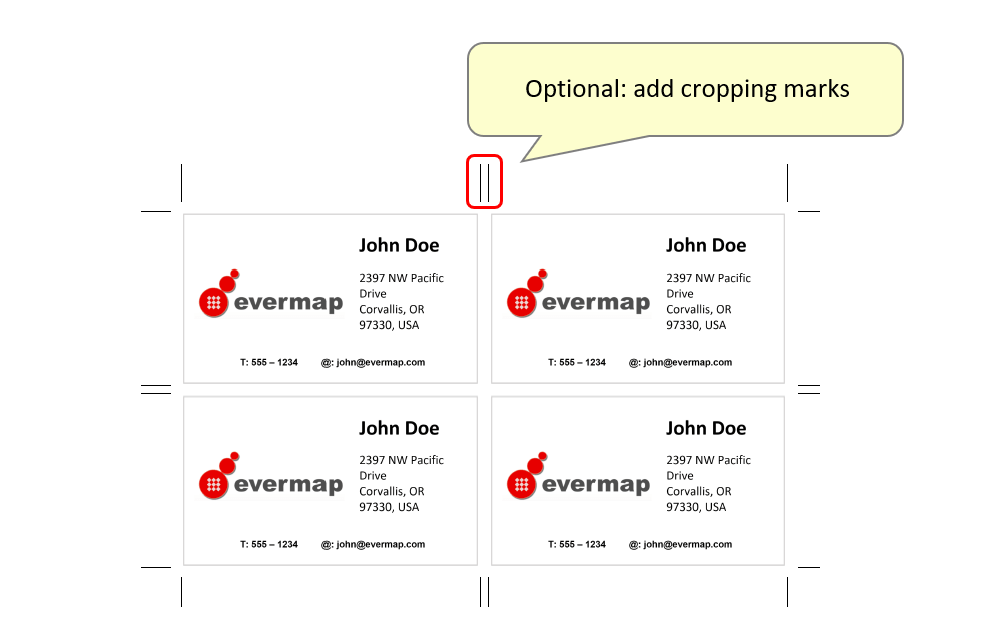
- Optional: check "Add cropping marks..." to add black lines to the output that help to clearly display the extents of spacing applied between rows and columns. Adding margins is required for this to work.
- Step 4 - Configure Page Size/Layout Settings
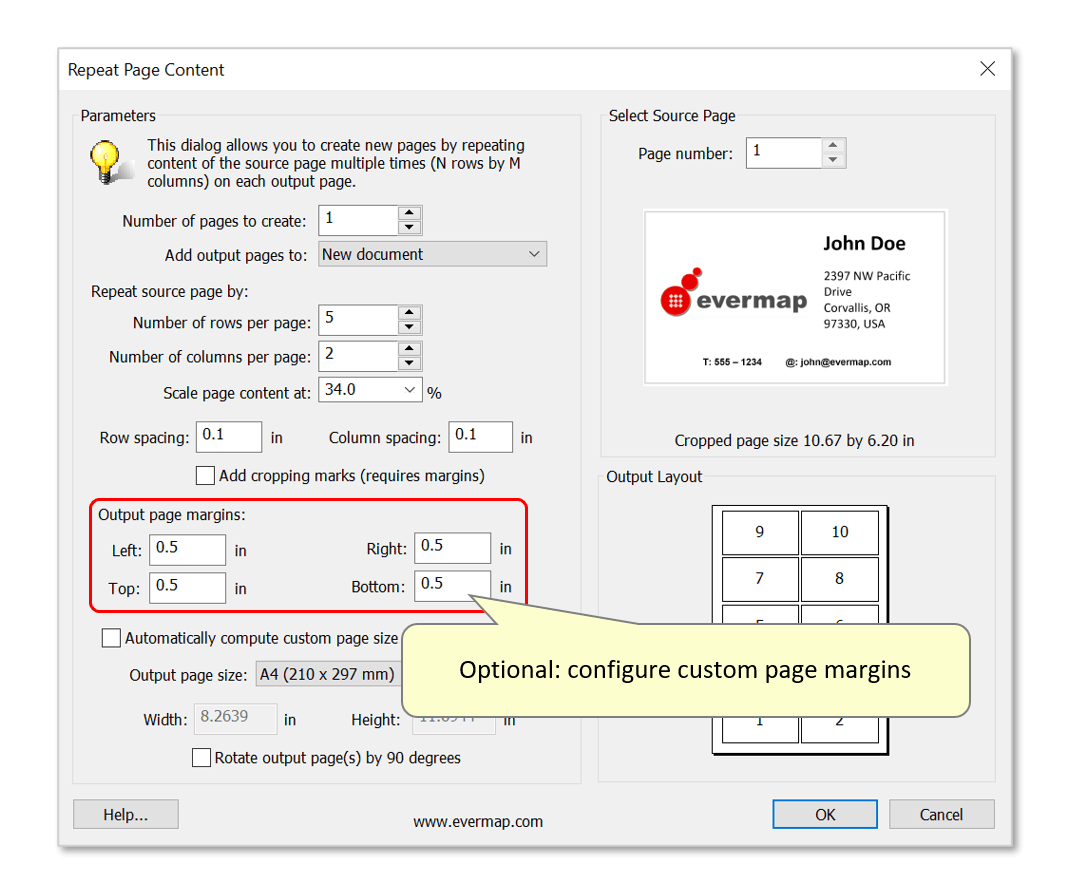
- Optional: add page margins to the output. In this example, we will add 0.5 inch margins to all sides of the page. Consider adding minimum 0.4 inch (1cm) margins to ensure all content is within a printable area.
- Note: only left and bottom margins are used if the “Automatically compute custom page size” option is off.
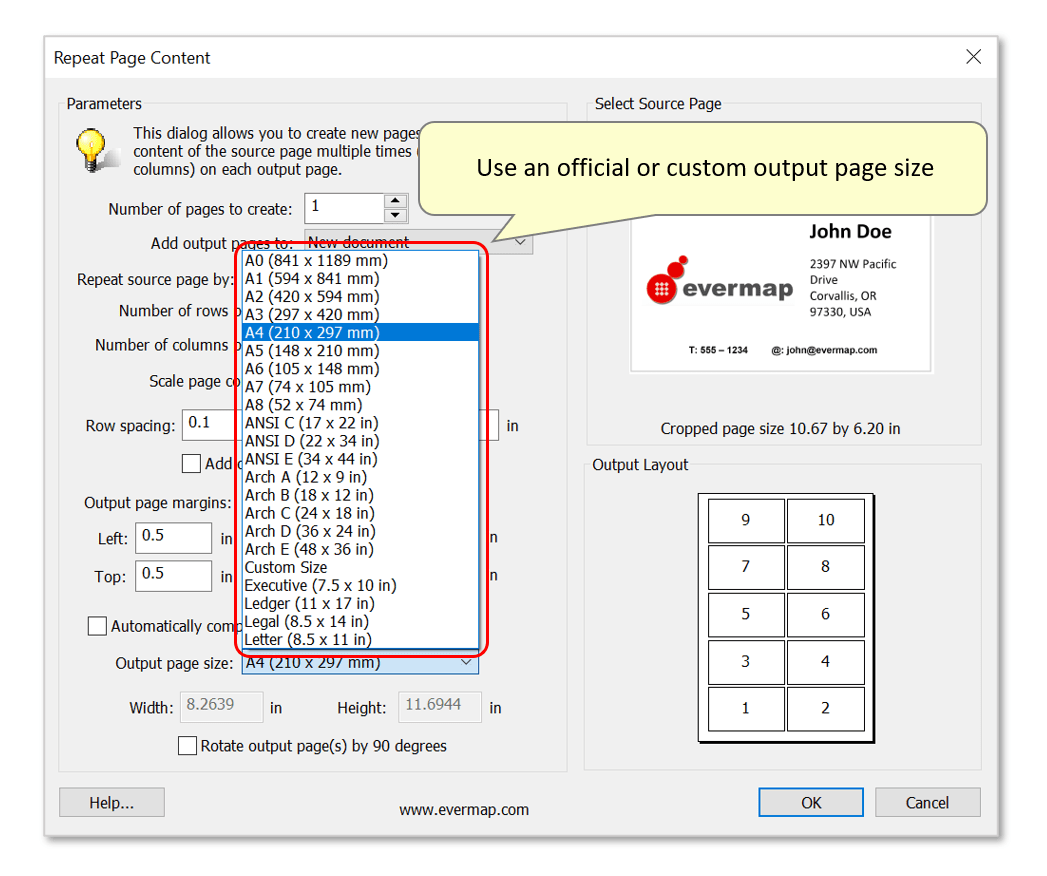
- Use the "Output page size" pulldown menu to select a desired output page size. The plug-in supports a number of widely used standard media sizes. Here, we will create an A4 output page.
- If using "Custom size", manually enter custom page dimensions into the width/height entry boxes.
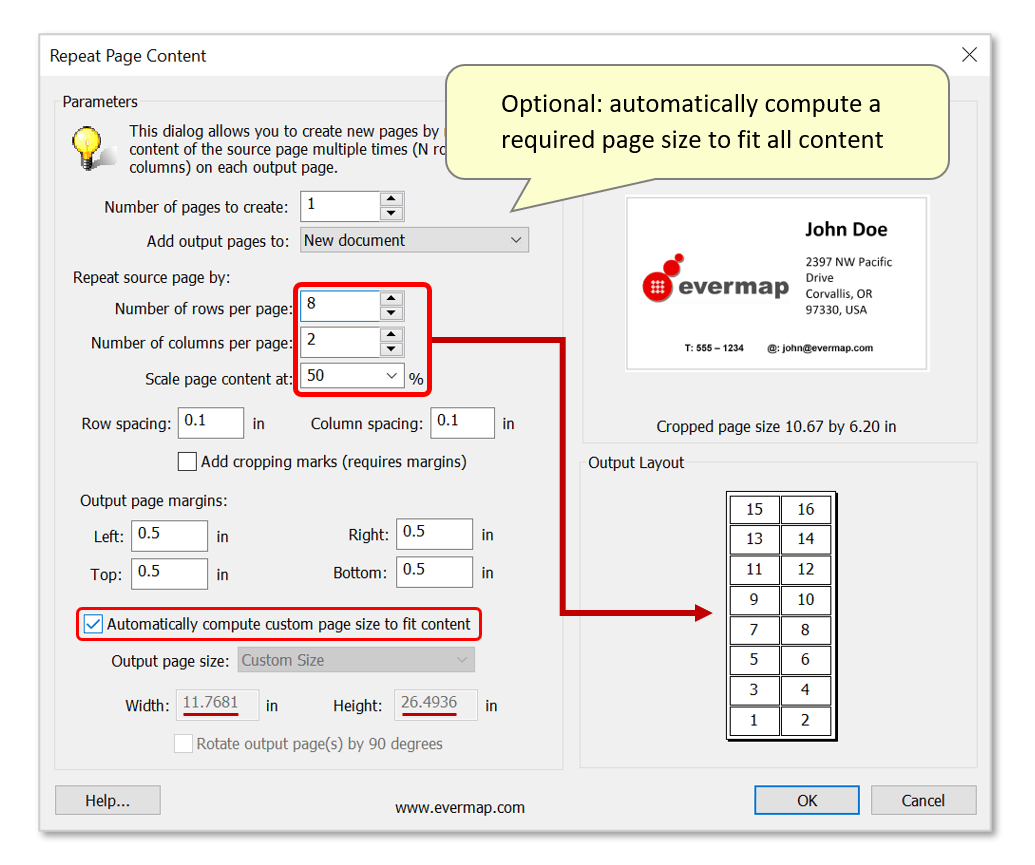
- There is also the option to "Automatically compute custom page size...". Do this if the exact dimensions of the output page(s) are not important. The software will automatically compute an output page size based on the input parameters used.
- In the sample settings shown below, creating many more rows of repeated content scaled to a larger size (50%) would produce a much larger output page. Page dimensions are displayed in the locked settings and can not be manually changed unless this option is unchecked.
- Step 5 - Confirm Settings
- Lastly, there is the option to "Rotate output page(s) by 90 degrees”. This changes the orientation of the output page to landscape – which will be reflected in the “Output Layout” preview. The repeated page content’s orientation will remain the same.
- Press "OK" to continue using the current settings.
- Step 6 - Inspect the Results
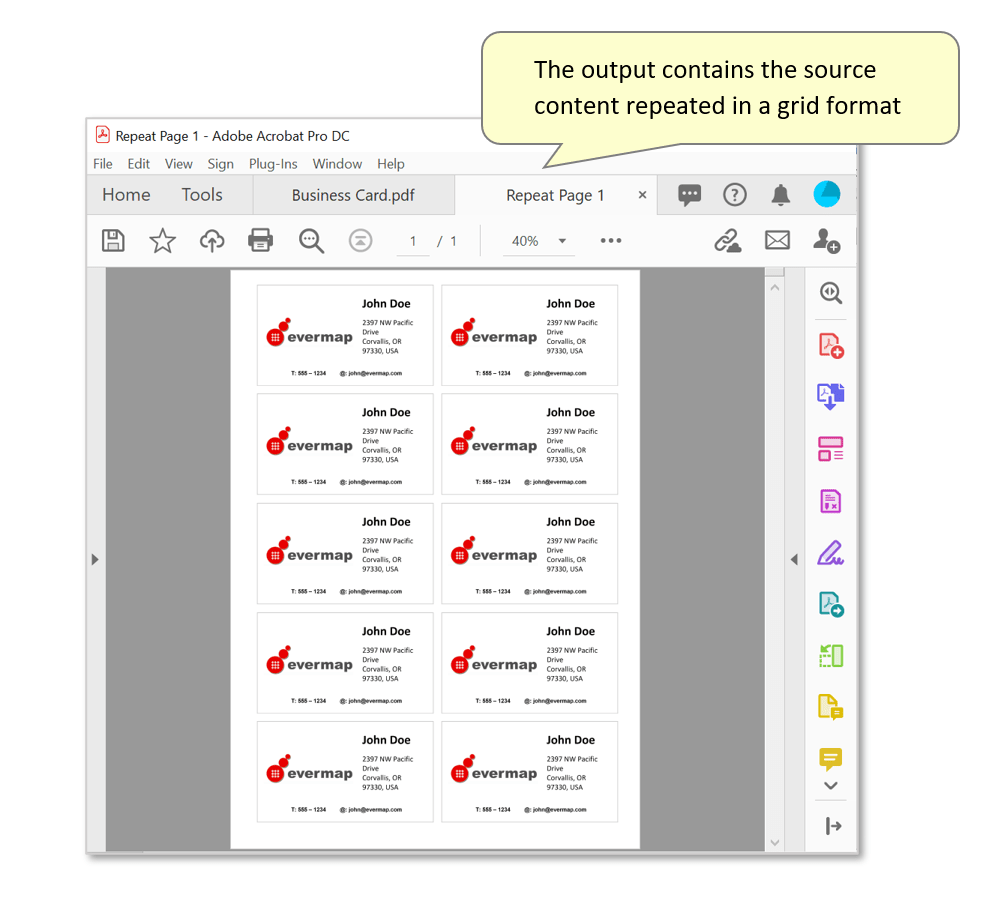
- If the "New document" option was selected in step 2, the output page will be opened in Acrobat. It will be named "Repeat Page 1" by default, and can be manually saved and renamed via the "File > Sava As..." menu. If this option was not used, Acrobat will display the new page inserted into the source document.
- Using the settings used in the steps above, the business card design on the input page has been repeated x10 times over 2 columns and 5 rows. Check that spaces between repeated content and page margins have been added correctly.
- Note: this operation does not significantly increase document size since it does not physically duplicate page content, but rather references the source page’s content multiple times.
- Click here for a list of all step-by-step tutorials available.