Scale PDF Page Content with AutoPageX™
- Introduction
- In this tutorial, we’ll look at how the AutoPageX™ plug-in can be used to change the size of all page content at once. All content such as text, images, graphics, forms and annotations can be enlarged or reduced in size without changing the size of the media (page size).
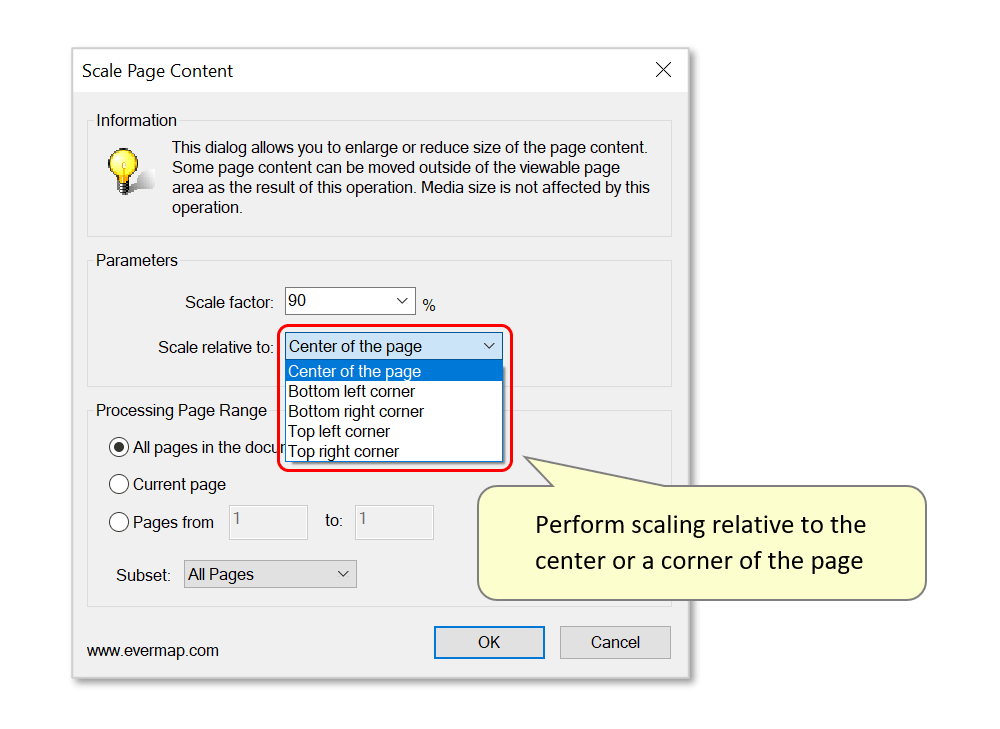
- Scaling is performed relative to the center of the page, or to any corner of it. The user can select a scale factor from a list of presets or enter a custom scaling parameter (a percentage). For example: a scaling factor of 100% corresponds to no changes in scale, while 50% corresponds to a size reduction of half and 200% results in doubling the size of the content. The user also has control over scaling all pages, single pages, or a specific page range of a document.
- To demonstrate, we use a sample PDF page containing differently sized text, as well as detailed images/drawings. We will change the scale of all page content to make it more appropriate for the page size. All content is resized simultaneously, and its position is proportionately changed relative to the centre of the page. Changing the scaling factor controls how much the content size is reduced/enlarged - note that page content can also be moved outside of the visible/printable page area if made too big:

- Prerequisites
- You need a copy of Adobe® Acrobat® along with the AutoPageX™ plug-in installed on your computer in order to use this tutorial. Both are available as trial versions.
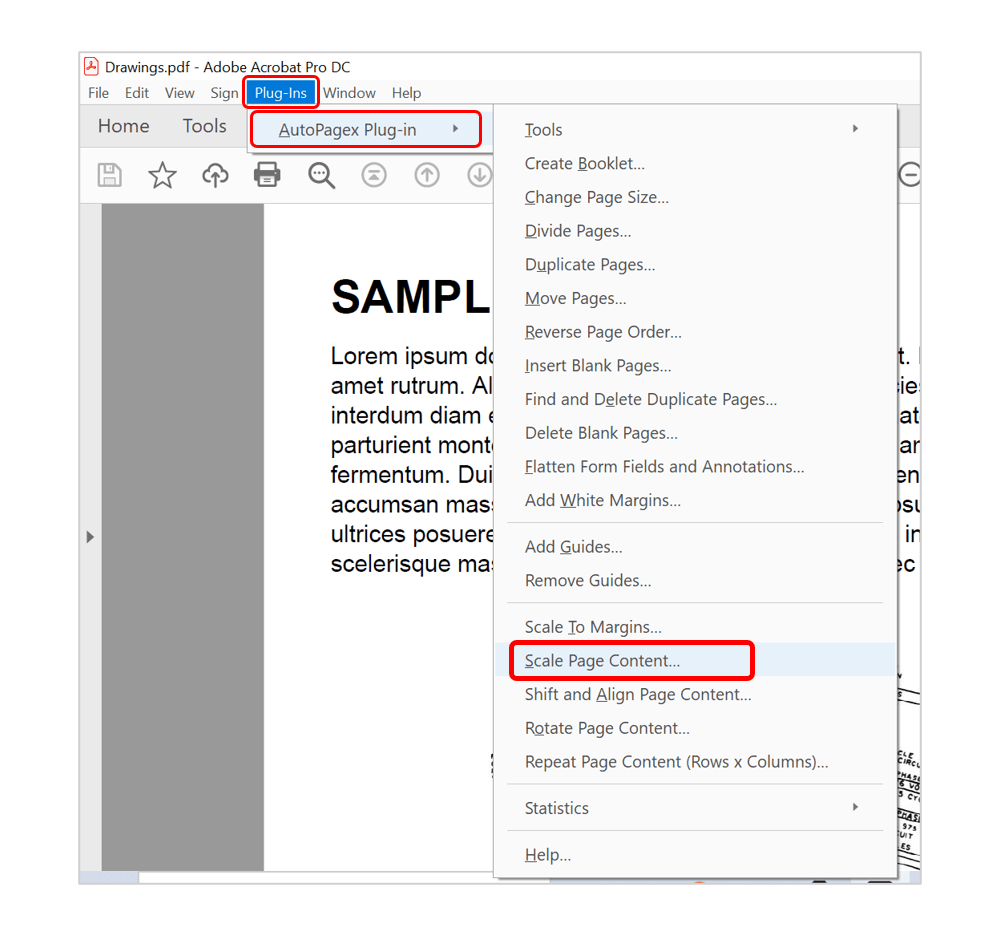
- Step 1 - Open the Tool
- With the PDF that you want rescale open in Acrobat, select "Plug-Ins > AutoPagex Plug-in > Scale Page Content...".
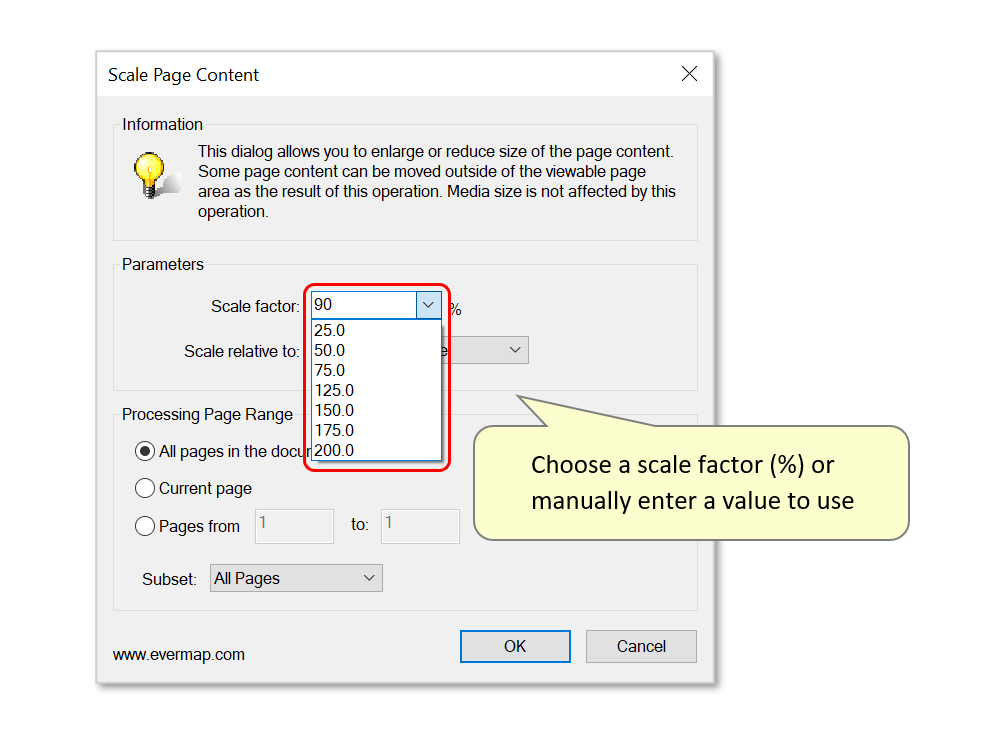
- Step 2 - Configure Scaling Parameters
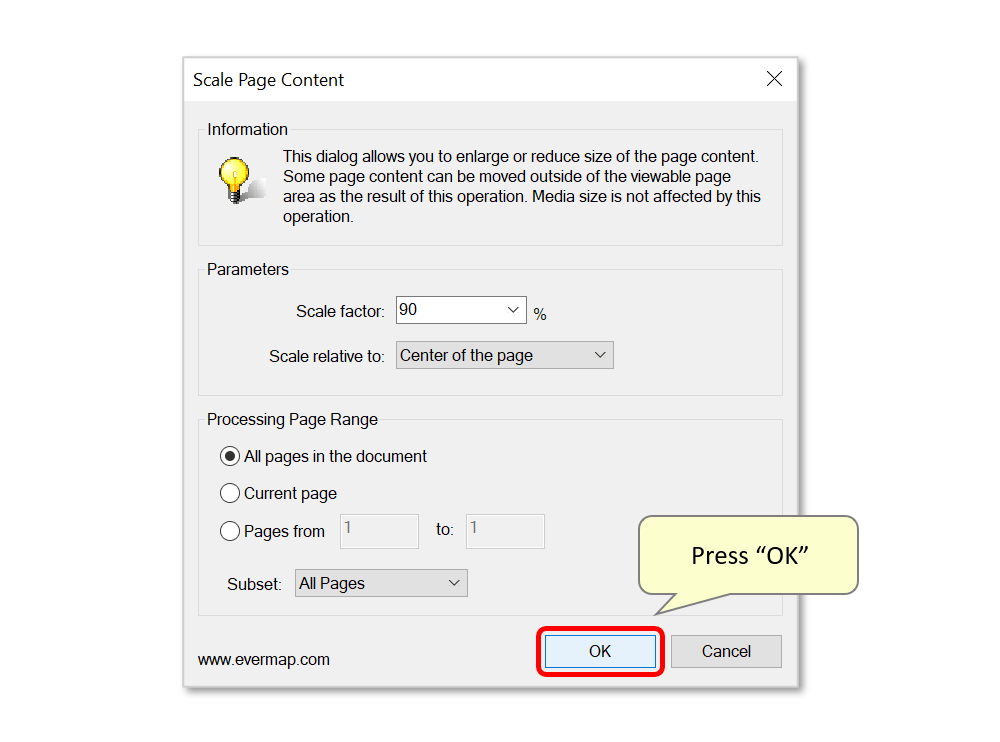
- Use the "Scale Page Content" dialog to configure scaling options. First, select a percentage scale factor to use - the drop-down list provides some typical options, but a value can be entered manually by typing it in the box. Note that page content can be moved outside of the visible/printable page area as a result of this operation. In this example, we'll reduce content size to 90% of the original.
- Now select a scaling point for performing scaling relative to a page location. In this example, content will be scaled relative to the center of the page.
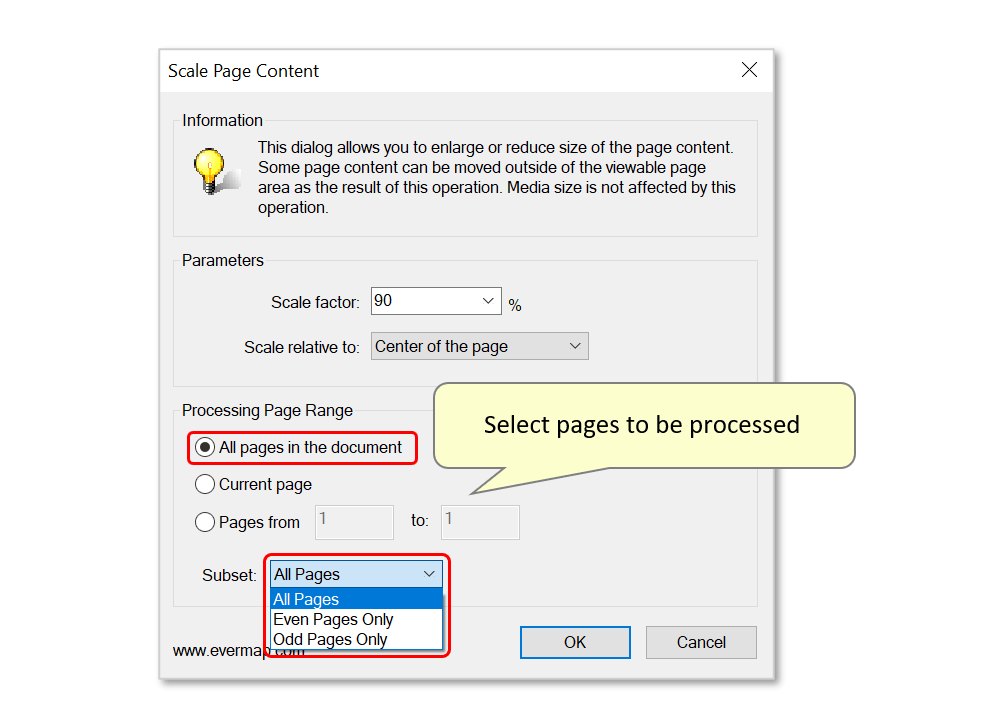
- Step 3 - Select Pages for Processing
- Use the lower section to configure a processing page range. In this example, we will process "All pages of the document". It's also possible to process only the currently open page, or a specific range of pages. Optionally use the "Subset" drop-down menu to process only odd or even pages of the document. By default, "All Pages" will be processed.
- Step 4 - Confirm Scaling Settings
- Press "OK" to continue using the current settings.
- Step 5 - Inspect the Results
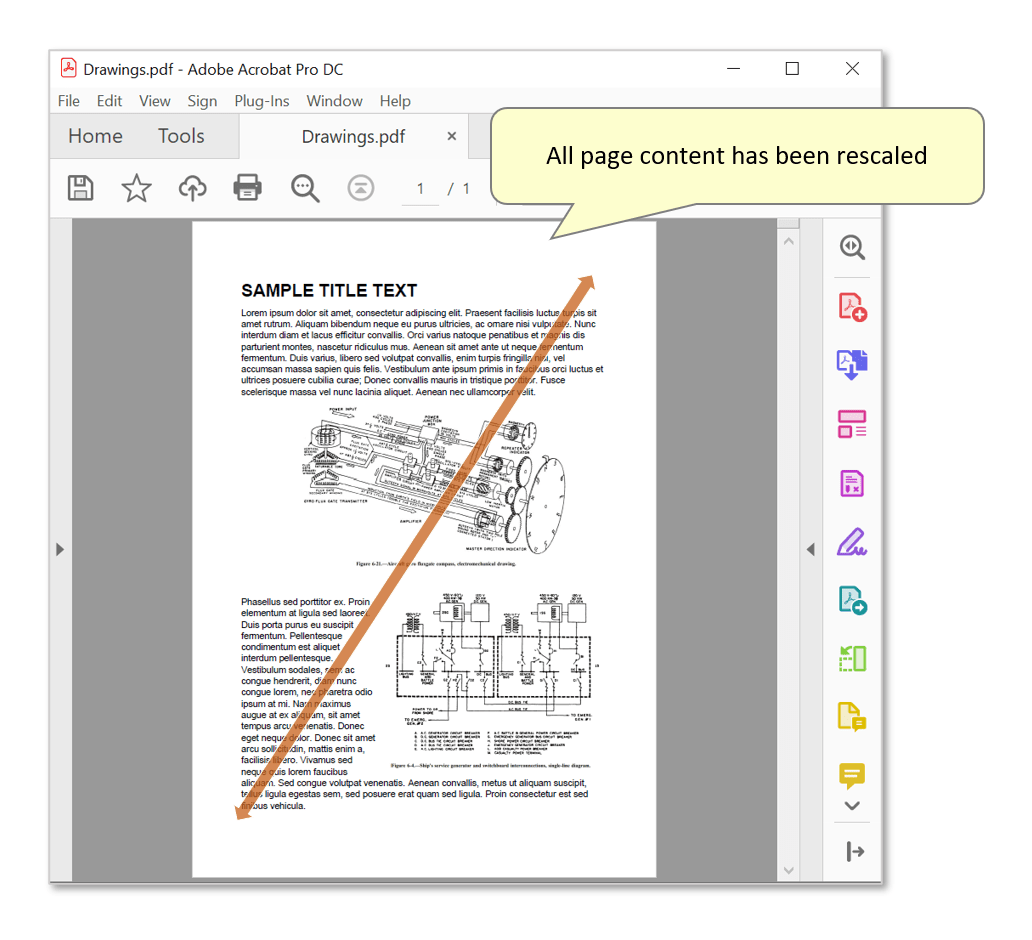
- Check that page content has been rescaled correctly. Note that page size (media size) remained the same, but content size has been reduced (by 10%) and it's position has been proportionally changed relative to the center of the page:
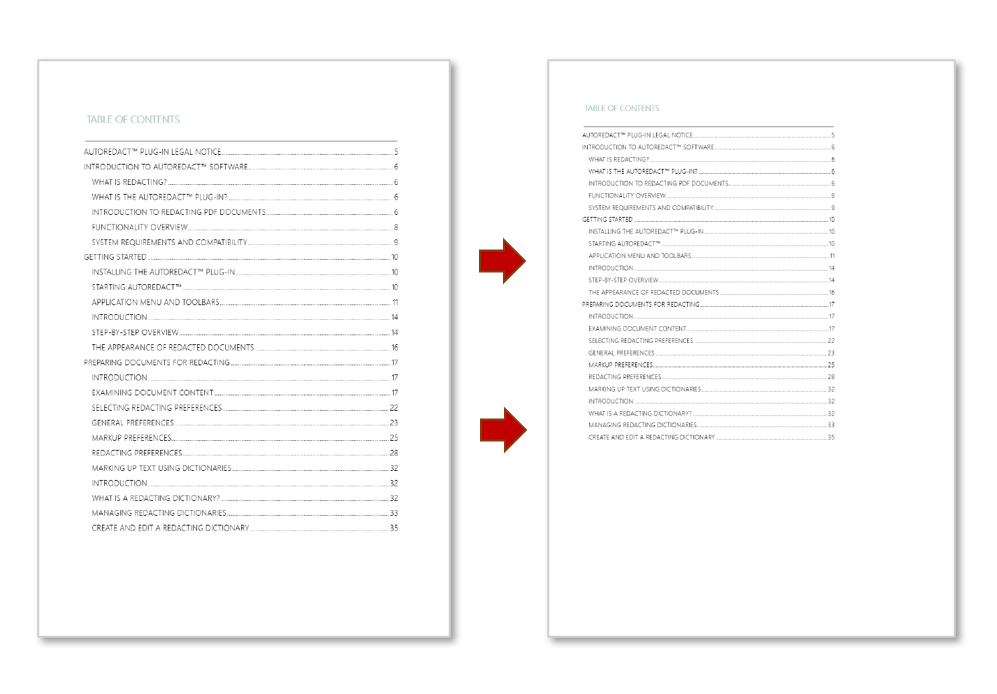
- Here is another example where page content has been scaled to 75% of its original size, relative to the top left corner of the page:
- Click here for a list of all step-by-step tutorials available.