Scale PDF Page Content to Margins with AutoPageX™
- Introduction
- Courts and many government agencies have very strict requirements for document margins. For example, you might have an engineering drawing or a scanned document that goes nearly edge to edge and needs to be modified according to specifications. Typically, a margin of at least 3/4 of an inch on the left side of a page avoids obscuring information when pages are subsequently printed and bound. Trying to achieve this without proper tools might be a time-consuming challenge - even for experienced users.
- In this tutorial, we look at how page content can be enlarged or reduced to fit specific page margins by using a "Scale To Margins" operation with the AutoPageX™ plug-in. This is a quick way to adjust page content to fit specified margins. All page content such as text, images, and graphics is automatically scaled in the best way possible and aligned on the page to create the desired output margin sizes. This plug-in feature can also be used to create various presets for margin generation and scaling, for future reuse.
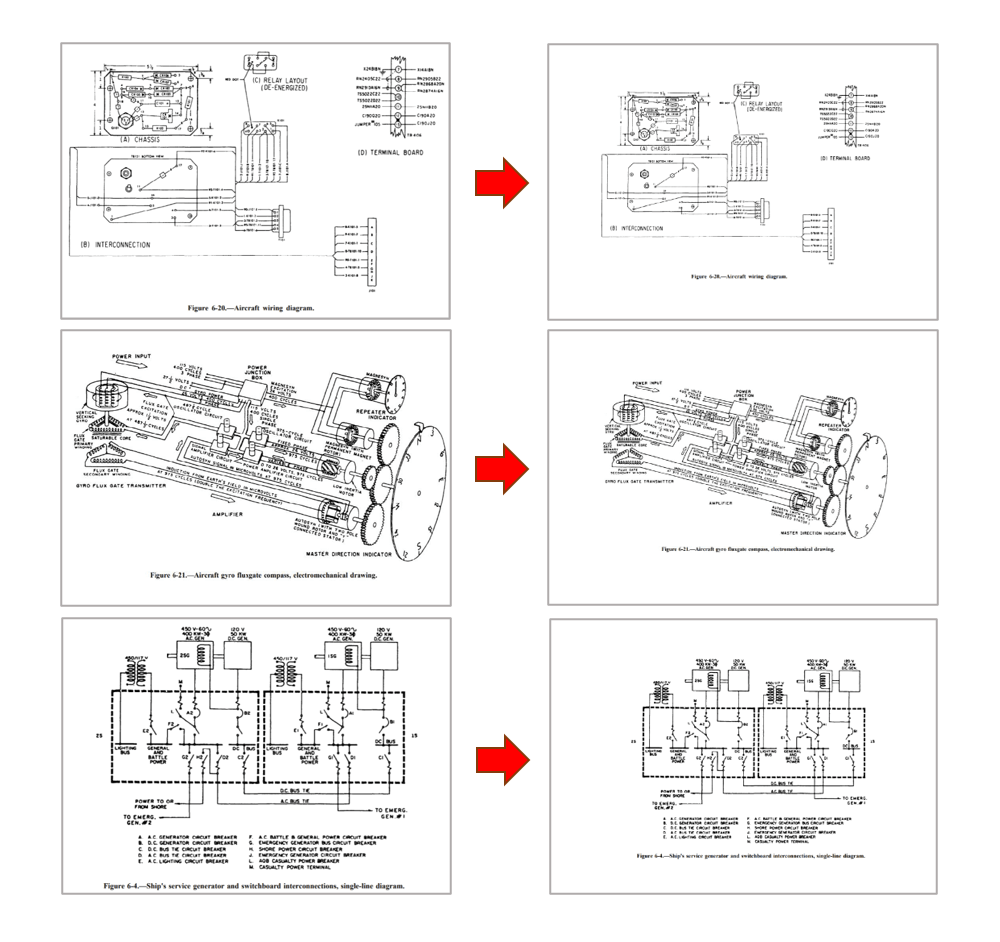
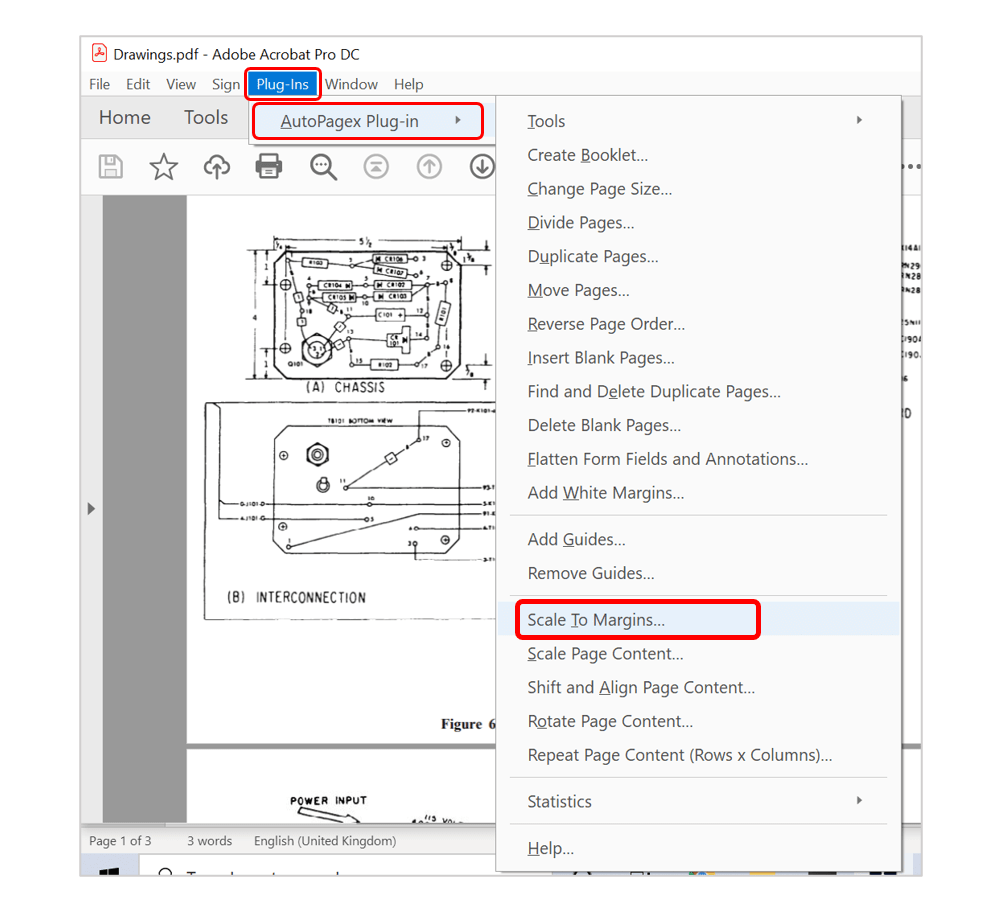
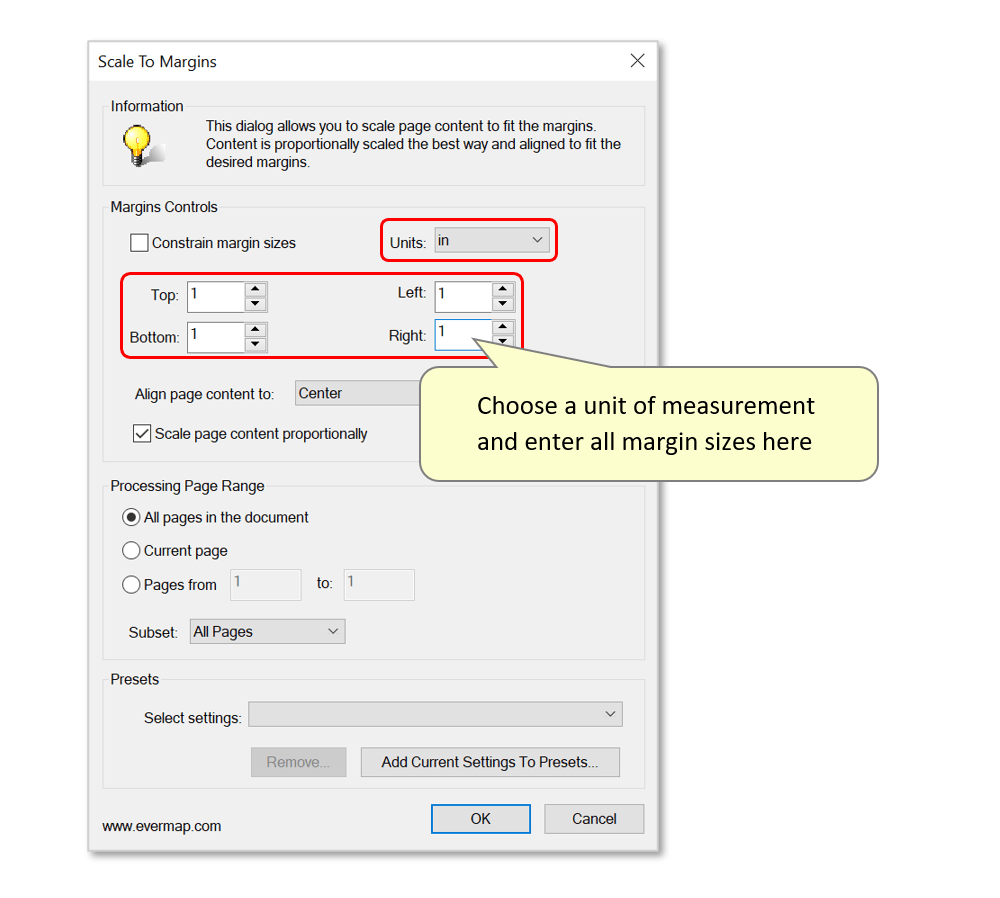
- To demonstrate, we'll use a 3-page PDF file containing technical drawings that almost reach the edges of the page, and add 1 inch margins on all sides. The output pages will still have correctly scaled images/drawings:
- Prerequisites
- You need a copy of Adobe® Acrobat® along with the AutoPageX™ plug-in installed on your computer in order to use this tutorial. Both are available as trial versions.
- Step 1 - Open the Tool
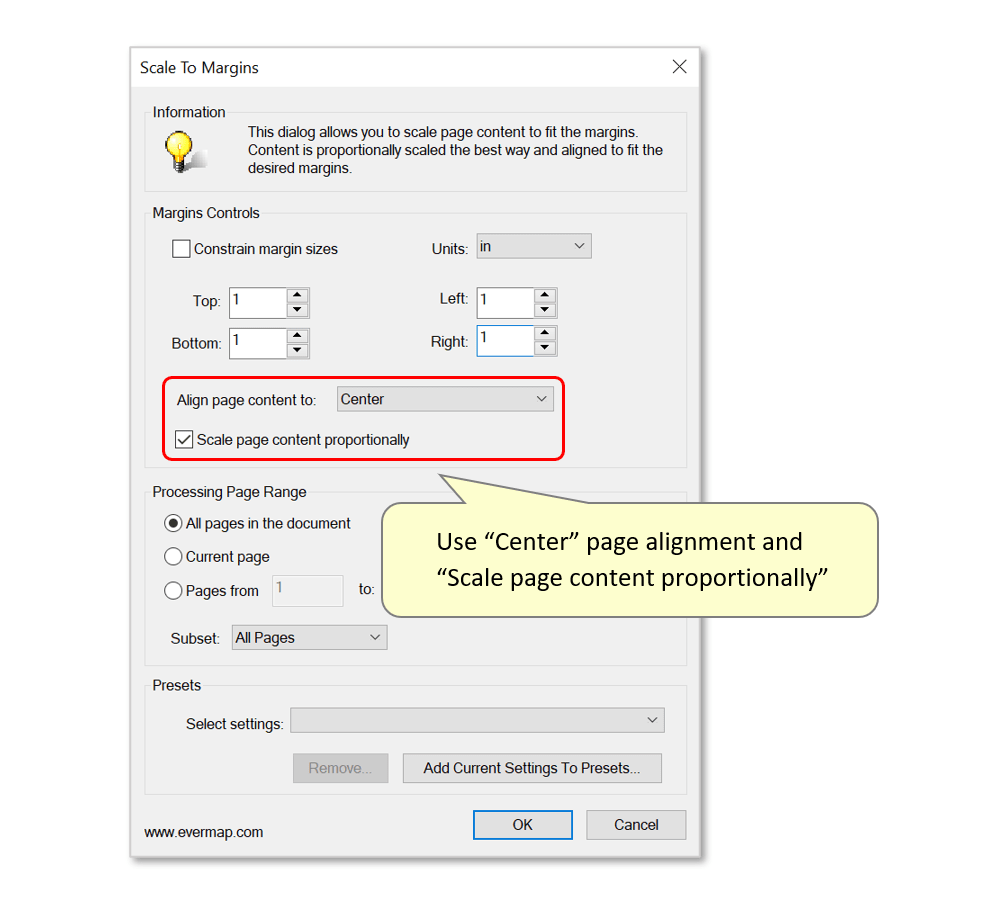
- With the PDF that you want to add margins to open in Acrobat, select "Plug-Ins > AutoPagex Plug-in > Scale To Margins...".
- Step 2 - Configure Margin Size
- Use the "Scale To Margins" dialog to configure page margin size and pages to be processed. In the "Margins Control" section, choose a unit of measurement (in/cm/mm/pt) with the "Units:" drop-down menu, then edit margin sizes in the boxes provided (top/bottom/left/right). In this example, we will create 1 inch margins on all sides of the page's content.
- Note: depending on the page content proportions and required margins it's not always possible to ensure that all four margins (top, bottom, left, and right) exactly match the configured size. For example, to create specific top and bottom margins, the left and right margins may need to be slightly smaller or bigger to accommodate them.
- Select an option using the "Align page content to:" drop-down menu. In this example, content will be kept in the page "Center" - but you can align content with any corner of the page instead.
- Check the "Scale page content proportionally" option to scale content without constraining page proportions. This avoids images and text becoming distorted during processing. Uncheck this option if it is acceptable to scale pages differently in vertical and horizontal directions.
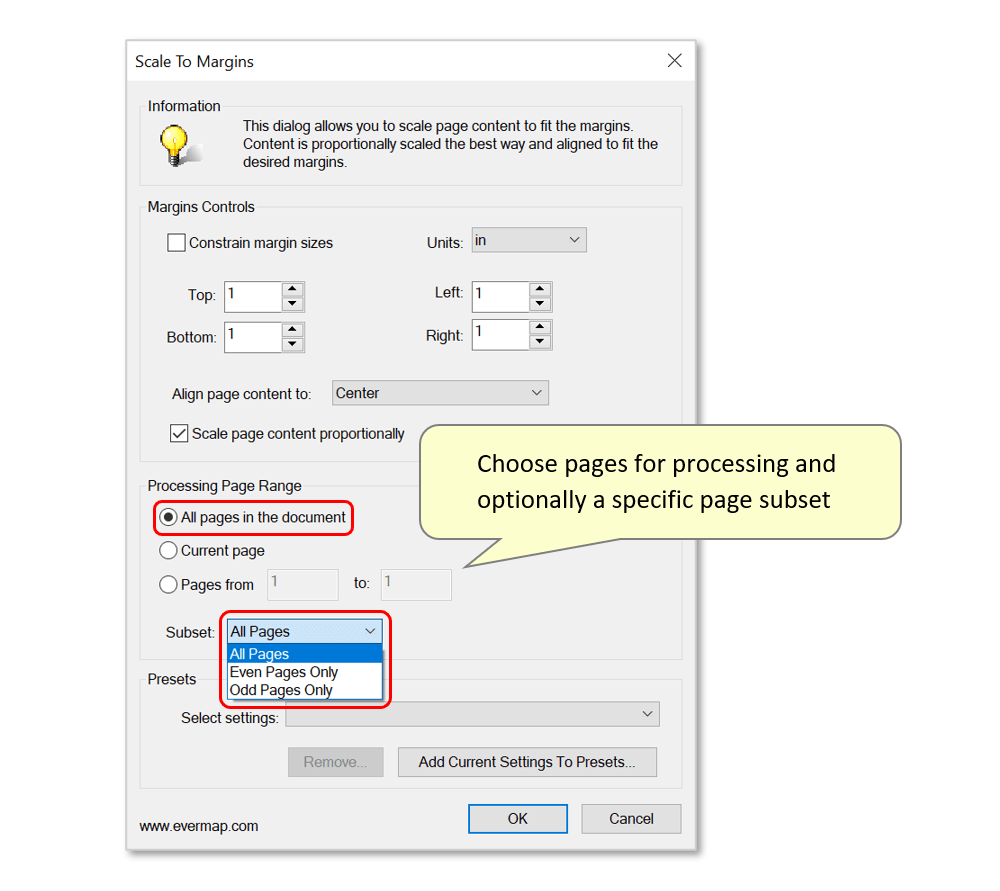
- Step 3 - Select Pages for Processing
- Use the lower section to configure a processing page range. In this example, we will process "All pages of the document" to add margins to every page of the PDF. It's also possible to process only the currently open page, or a specific range of pages. Optionally use the "Subset" drop-down menu to process only odd or even pages of the document. By default, "All Pages" will be processed.
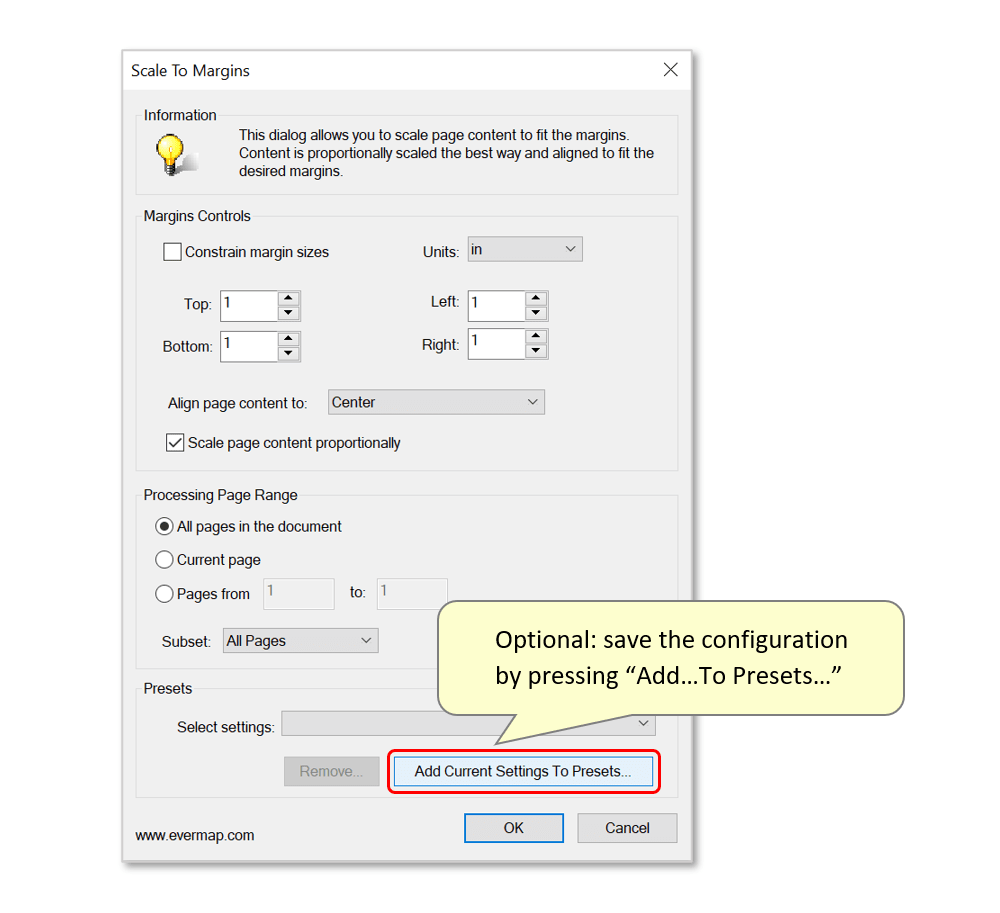
- Step 4 - Optional: Save Settings as a Preset
- It's also possible to save these processing parameters as a unique preset which can be reused to process other documents in the future. Any saved presets will be saved to the "Select settings:" drop-down list. To do this, press "Add Current Settings To Presets...".
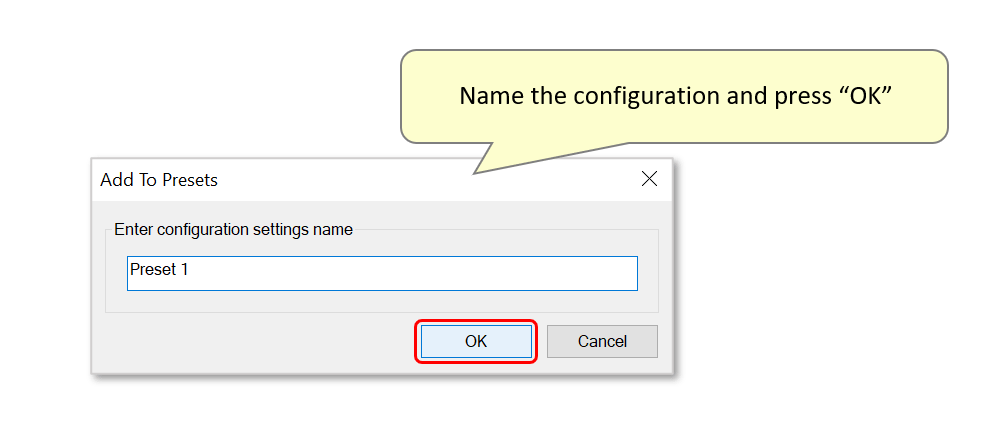
- A preset naming window will open - give it a custom name and press "OK".
- Step 5 - Confirm Margins Settings
- Press "OK" to continue using the current settings.

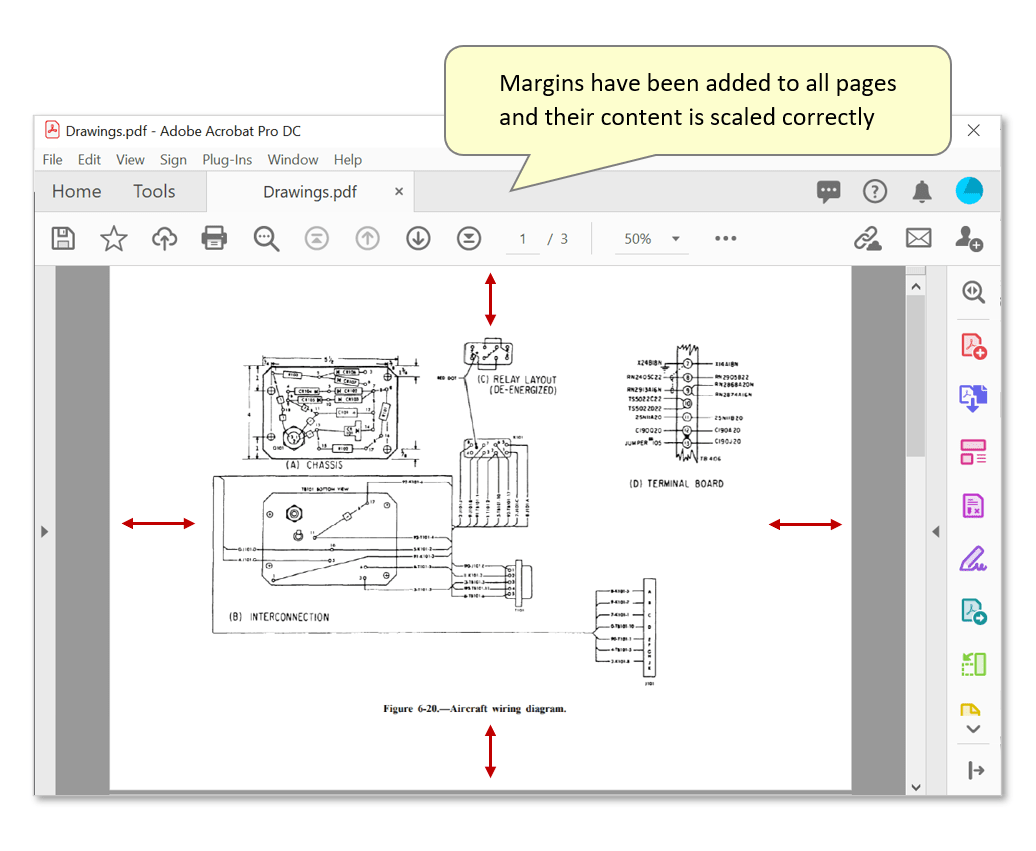
- Step 6 - Inspect the Results
- Check that margins have been added to all selected processing pages. In this example, the content of all pages has been properly scaled to fit within the new margins.
- Click here for a list of all step-by-step tutorials available.