Rename PDF Files by Text Pattern Search
AutoSplit plug-in for Adobe® Acrobat®
- Introduction
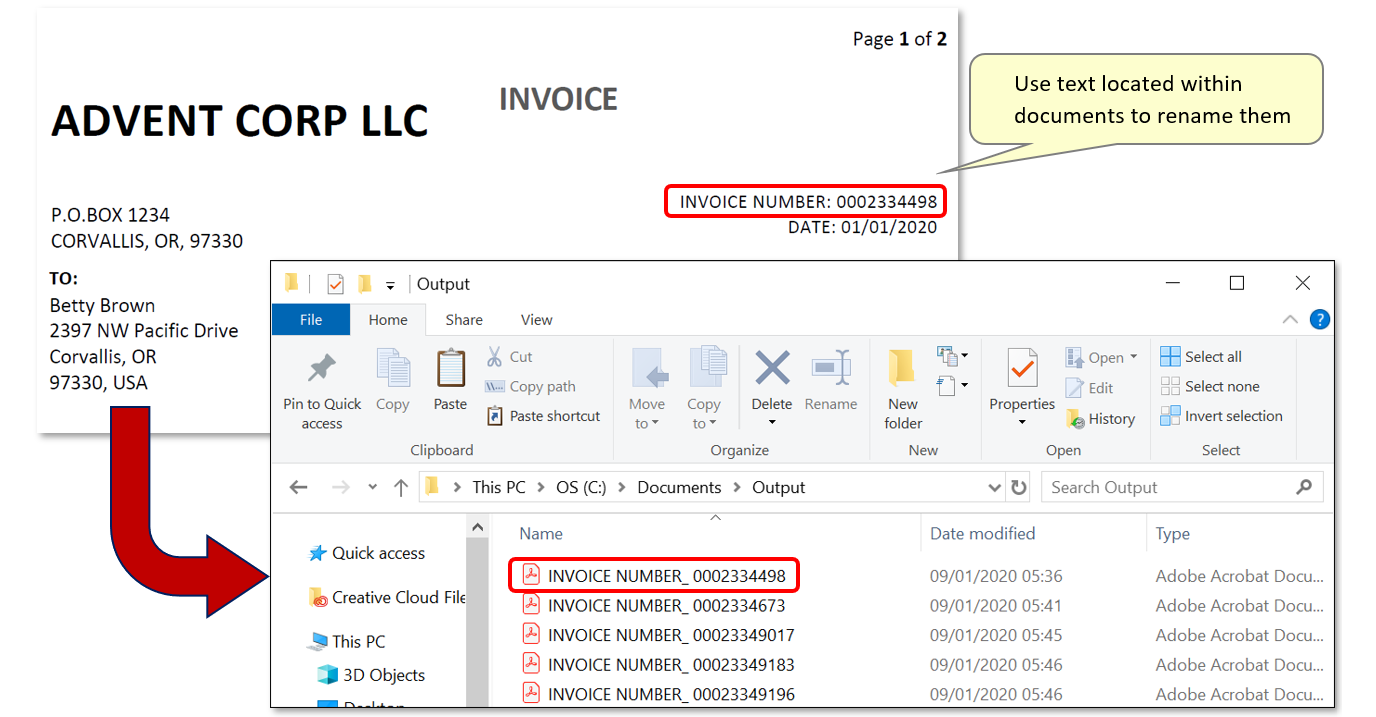
- PDF file names often need to be replaced if they do not properly reflect the content of the document. Doing this manually for many similar files can be time consuming. Use this method to search for text located within each document such as account numbers, client names/numbers or dates etc. and use it to replace filenames. The AutoSplit™ plug-in for Adobe® Acrobat® can be used to automatically rename multiple files at once, following a specified configuration that uses text from within documents following the same format.
- Input Document Description
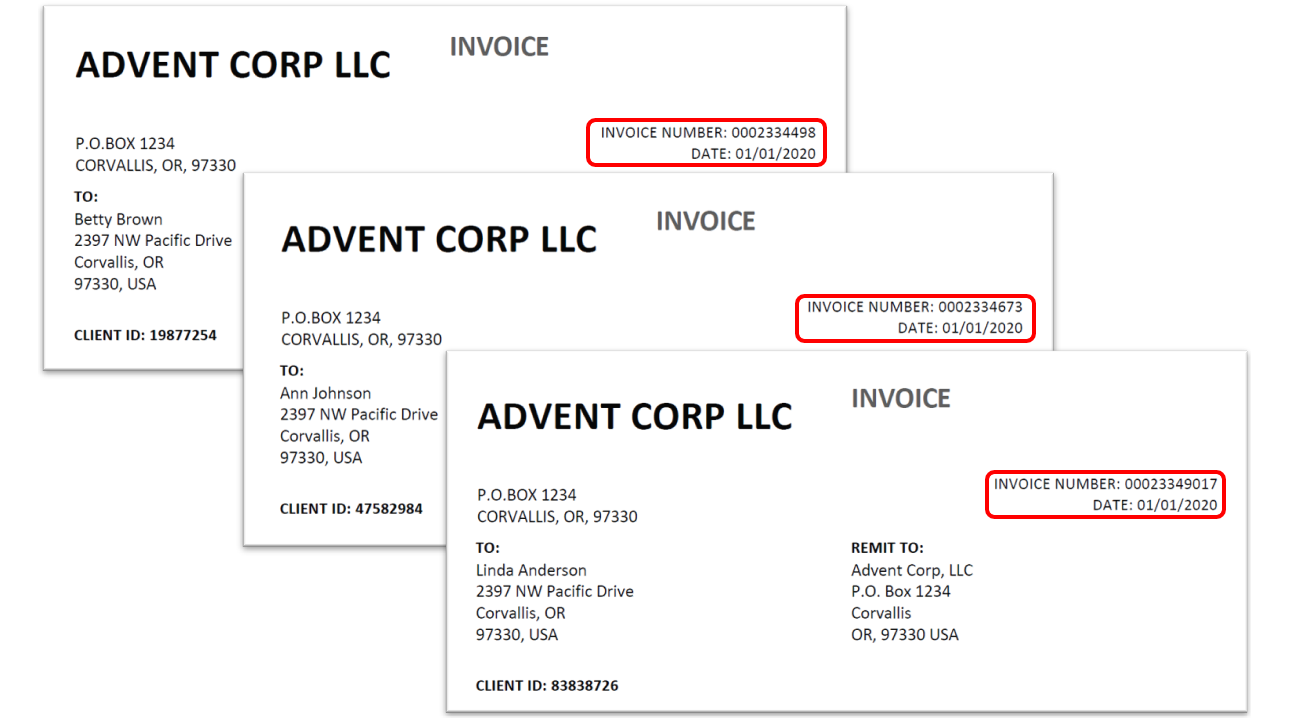
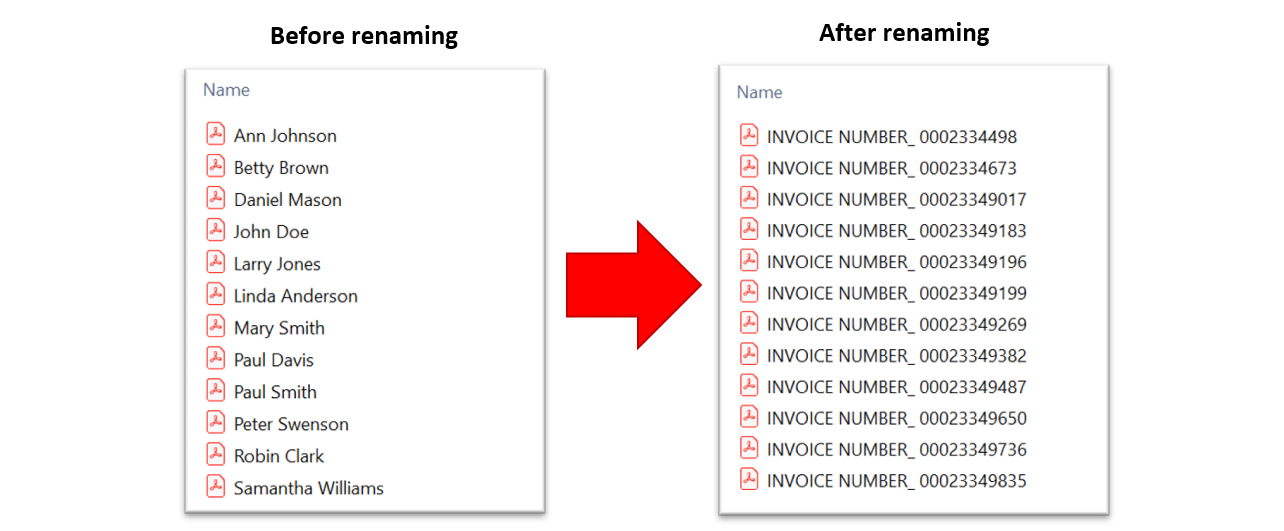
- The sample PDF files used in this tutorial are invoices named only by customer name. The goal is to rename these files so the names include more relevant information such as an invoice number and/or an invoice date.
- Renaming Approach
- In this tutorial, we are assuming that each invoice has an invoice number and a date located somewhere on the first page. It does not need to be a fixed location that is identical on all invoices. The plug-in can be configured to search each PDF file for both invoice number and date, and use it in the new file names. The renaming settings can be saved and reused later on the different set of files. The text is going to be extracted via a text search, using regular expression syntax. Regular expressions is a widely popular language used for text pattern searching. You can learn more about the syntax on specialized websites such as the following one: https://www.regular-expressions.info/quickstart.html .
- Batch Processing Support
- Automate this operation with Acrobat's batch processing tool (Action Wizard) to process similar files using the same configuration with only one click.
- Prerequisites
- You need a copy of Adobe® Acrobat® along with the AutoSplit plug-in installed on your computer in order to use this tutorial. You can download trial versions of both Adobe® Acrobat® and AutoSplit™.
Step-by-Step Tutorial
- Step 1 - Open the “Auto-Rename PDF Files” Menu
- Close all open PDF documents to avoid possible file access conflicts.
Start Adobe® Acrobat® and select “Plug-ins > Auto-Rename PDF Files…” from the main Acrobat menu.
[⚡ How to locate Plugins menu in Adobe® Acrobat® ⚡] - Step 2 - Add a New Naming Component
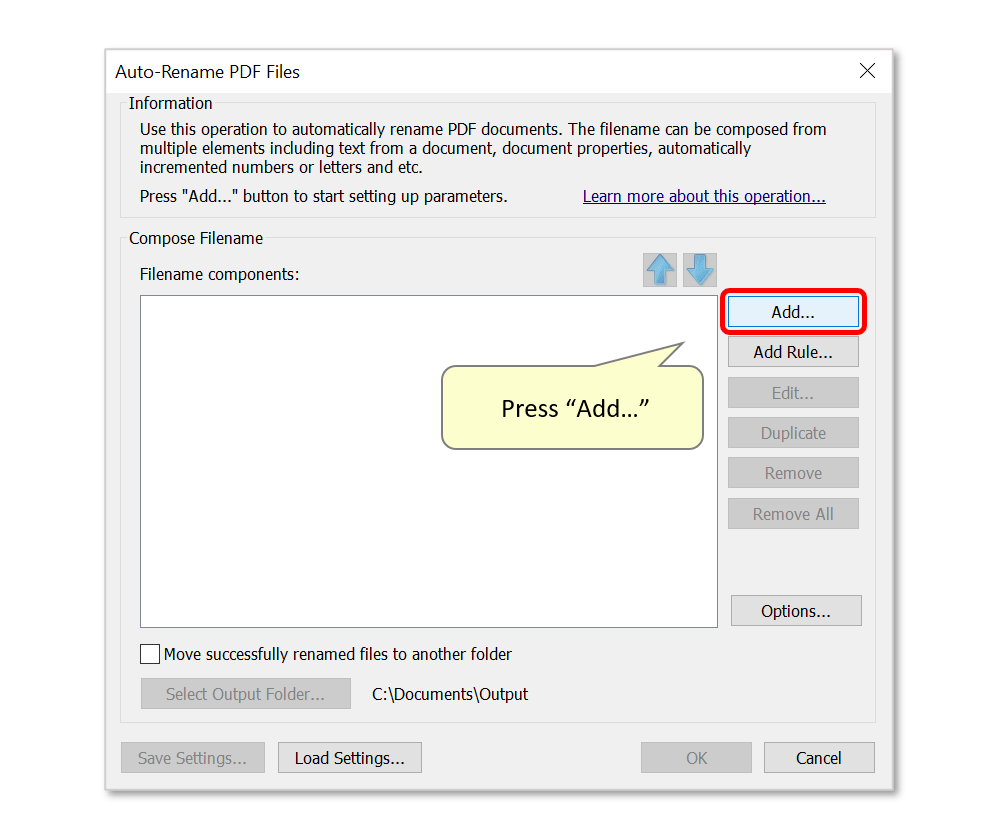
- Press “Add…” to add a new naming component to the output file name.
- Step 3 - Select Text by Search Option
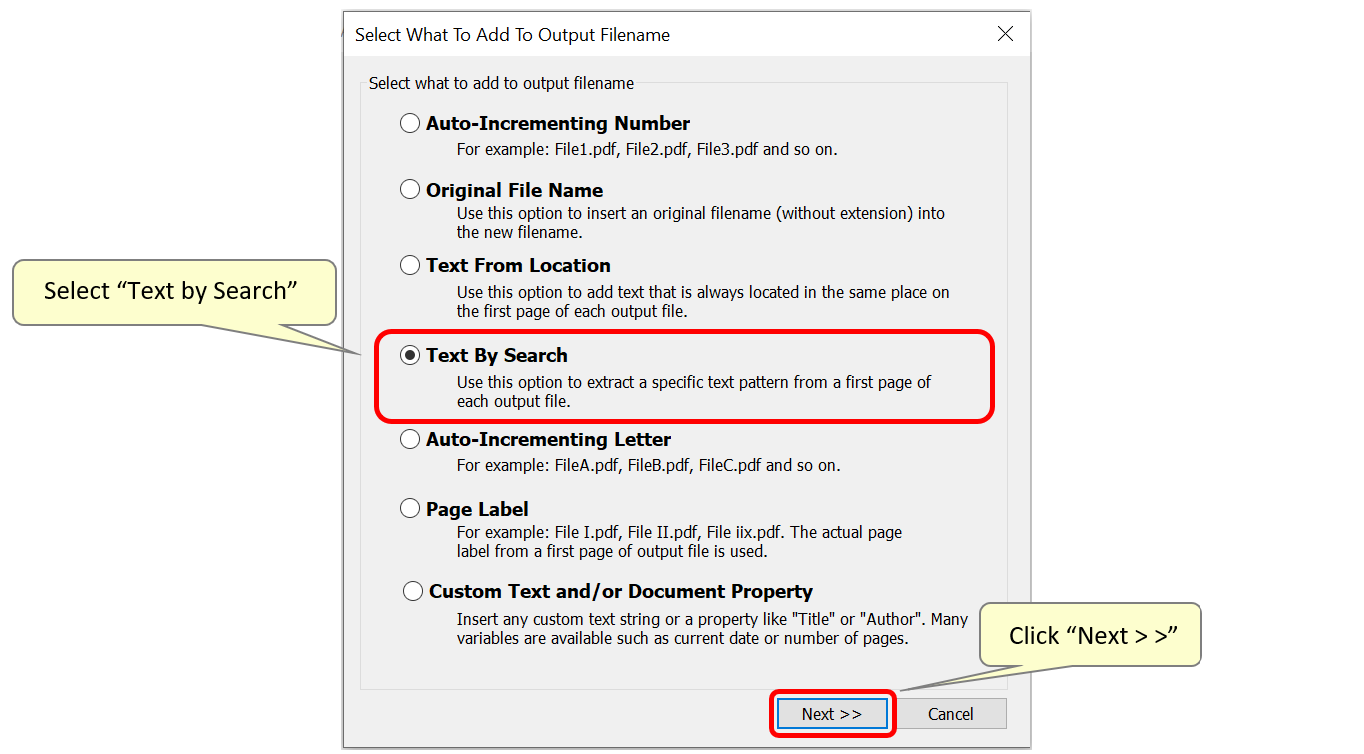
- Select the “Text By Search” option and click “Next” to enter parameters.
- Step 4 - Enter a Search Expression
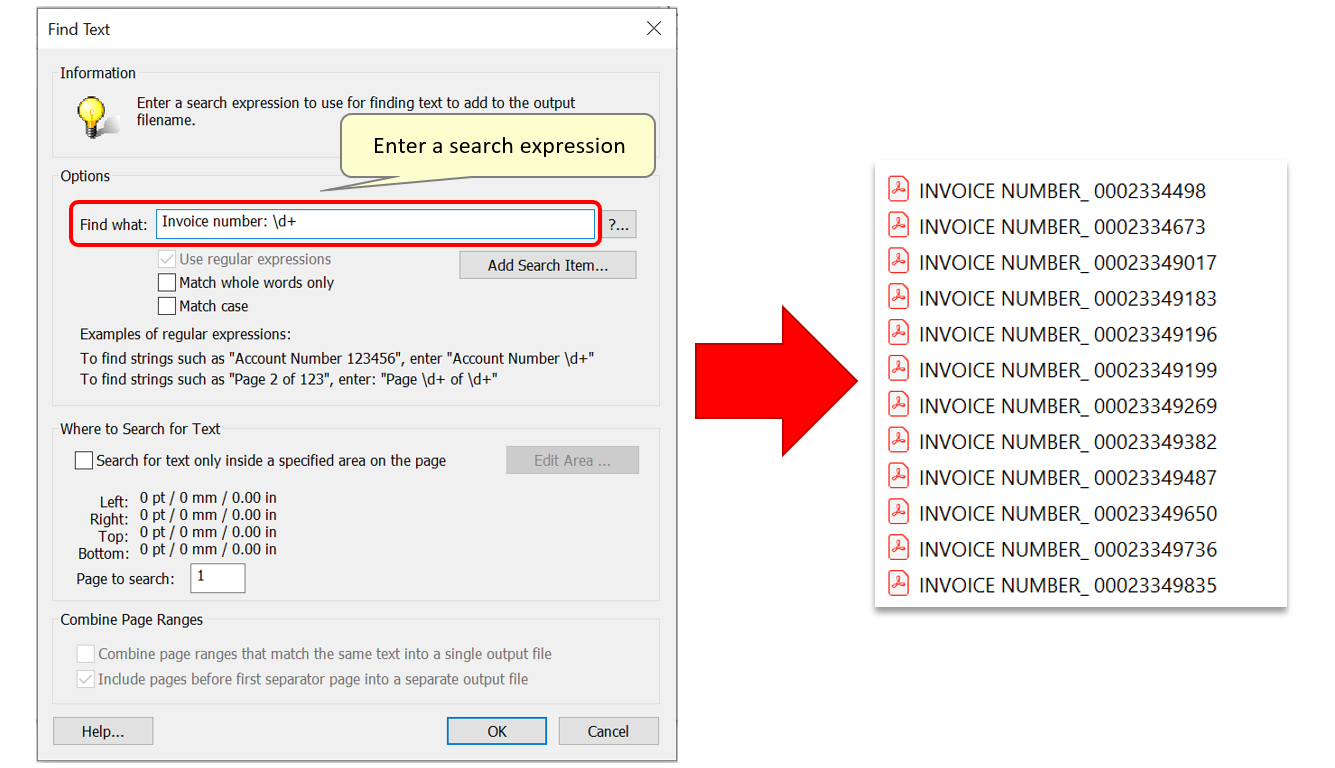
- In the "Find Text" dialog, configure search parameters for locating text within documents that is to be used as a filename component. Enter a relevant search expression in the "Find what:" entry box. In this example, we'll use the expression "Invoice number: \d+" to extract invoice numbers from each invoice, to be used as filenames. These numbers are always located on the first page of each document.
- This expression consists of the text to search for ("Invoice number:") which is followed by a number consisting of one or more digits ("\d+"), with the "+" indicating 'one or more' as the invoice numbers may vary in length.
- This expression will also extract the "Invoice number:" text as well as the corresponding number. As ":" is not a permitted symbol for use in filenames, they are automatically replaced with an underscore "_".
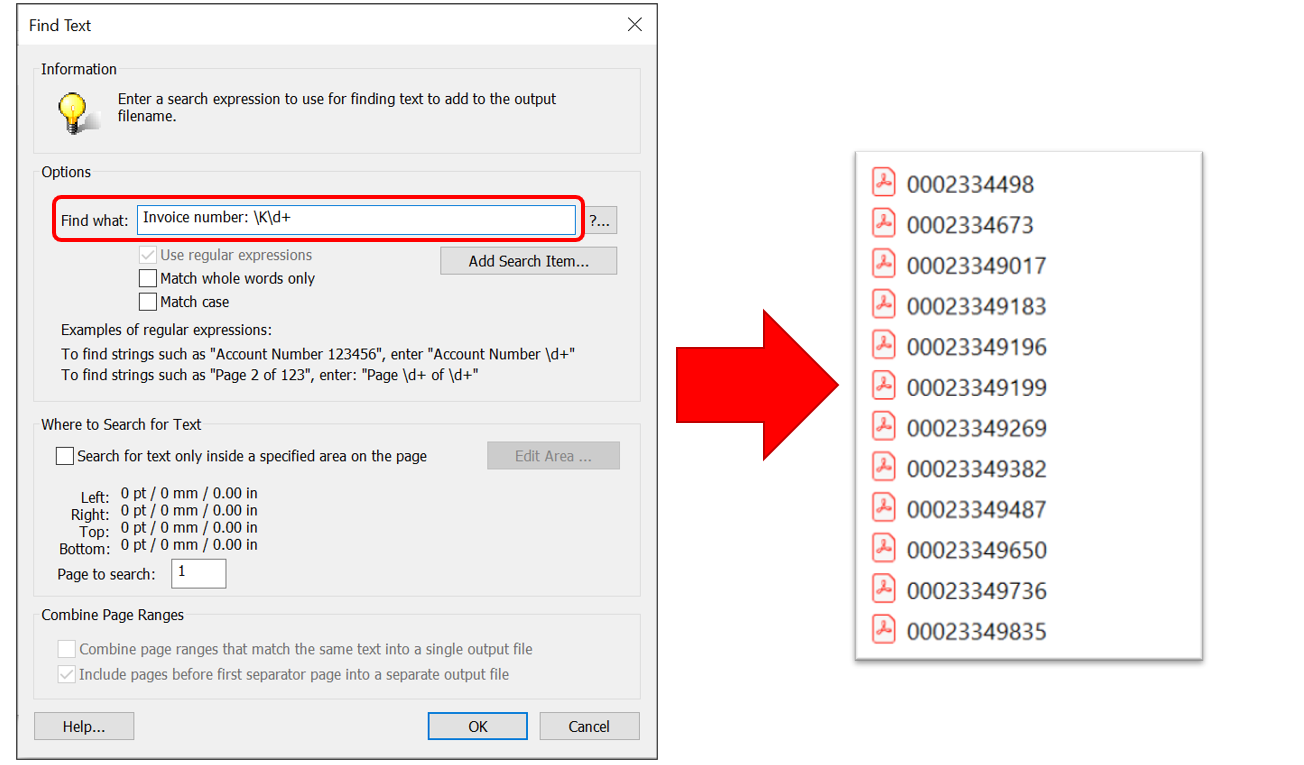
- It is also possible to extract only the invoice number itself (e.g.: "123456789") without the "Invoice number:" text by changing the expression to "Invoice number: \K\d+".
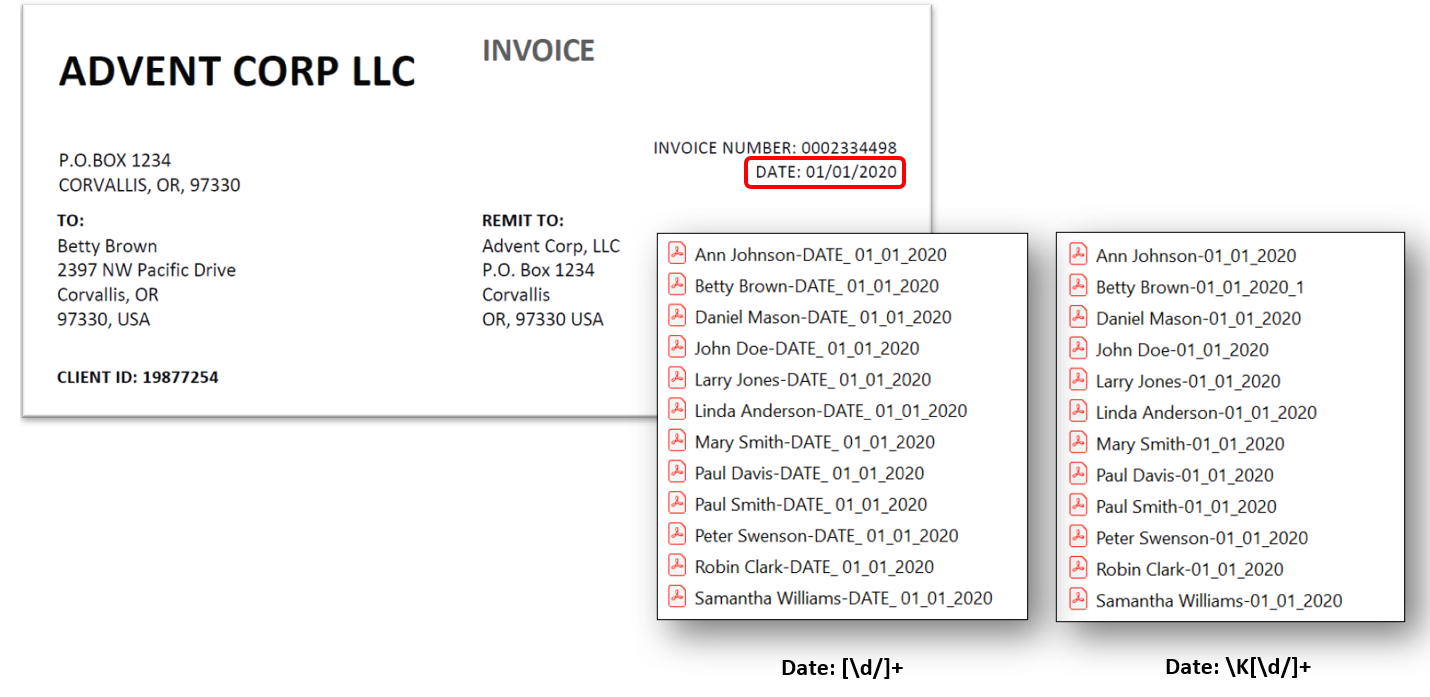
- To extract dates and use them to name documents in the same way, use either:
- Date: [\d/]+
- Or, Date: \K[\d/]+ to include only digits and skip the Date: text. In these examples below, the client name data has also been used as a filename component. Each slash "/" has also been auto-replaced by an underscore "_".
- Step 5 - Confirm Search Options
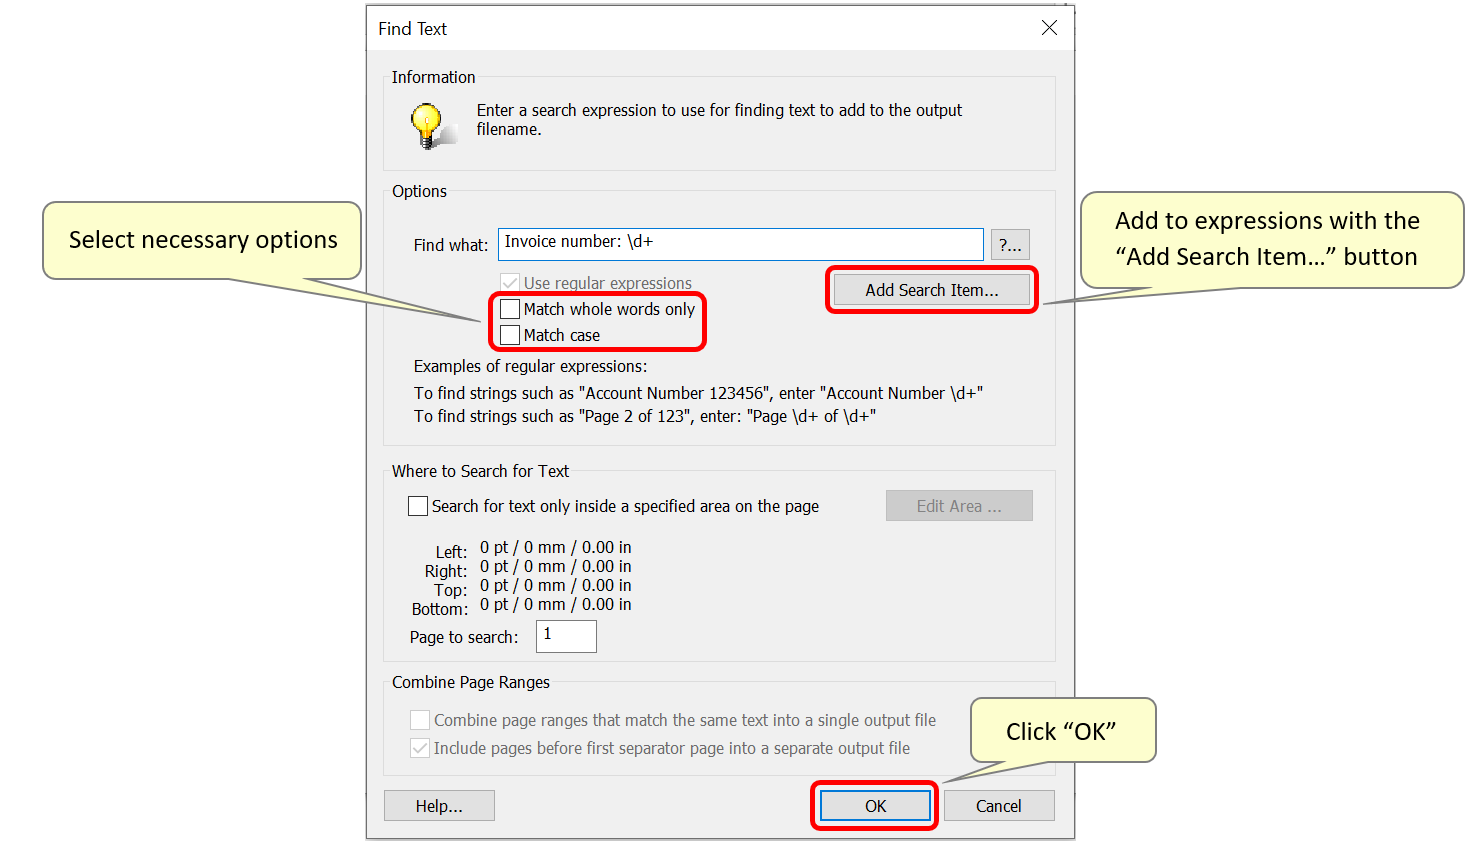
- Confirm necessary options such as "Match whole words only" or "Match case" - in this example, both are left unchecked ("Invoice number/date" text is uppercase in these sample documents, but the expression would still work if the text case was inconsistent across all files being renamed).
- Optionally, add components to search expressions via the "Add Search Item..." button. This opens a dialog containing a detailed list of stock search items that can be selected.
- Click "OK" to proceed.
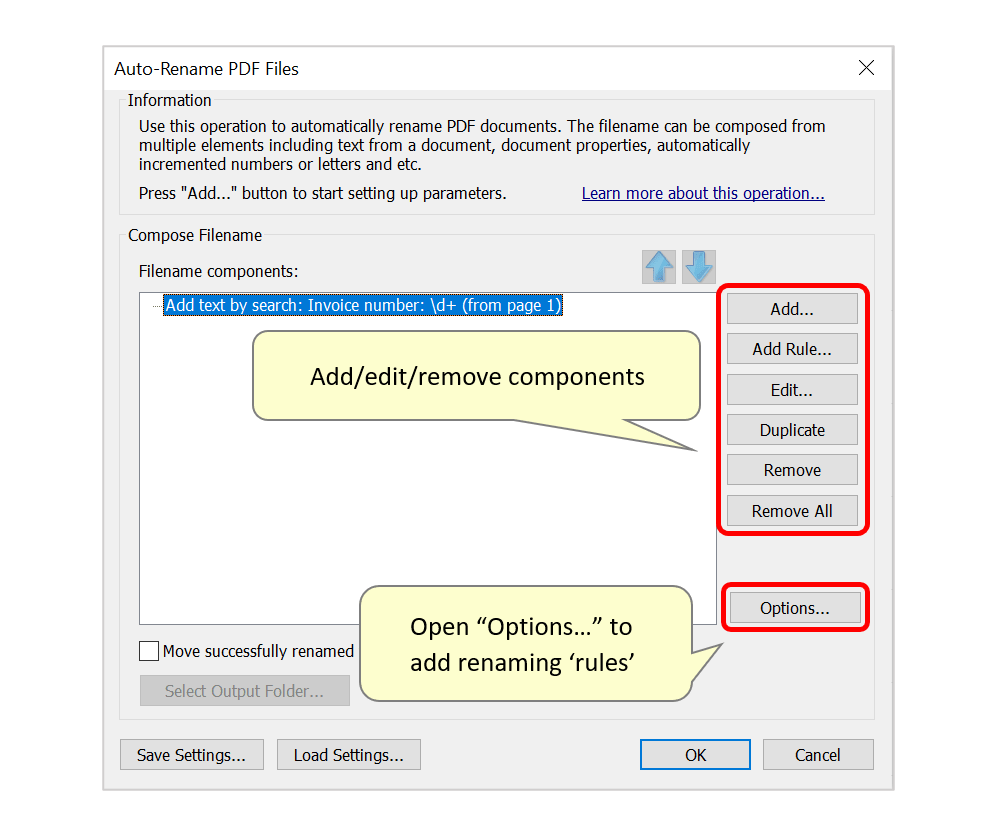
- Step 6 - Configure Processing Options
- The text search filenaming component will now be shown in the list. Optionally, repeat the procedure to add more (e.g.: add custom text to each filename) and use the additional buttons to add/edit/remove components. The blue arrow buttons can be used to re-order components.
- The plug-in provides options to replace or remove certain characters or text patterns from the new filenames. Click "Options..." button to specify an optional search and replace rules.
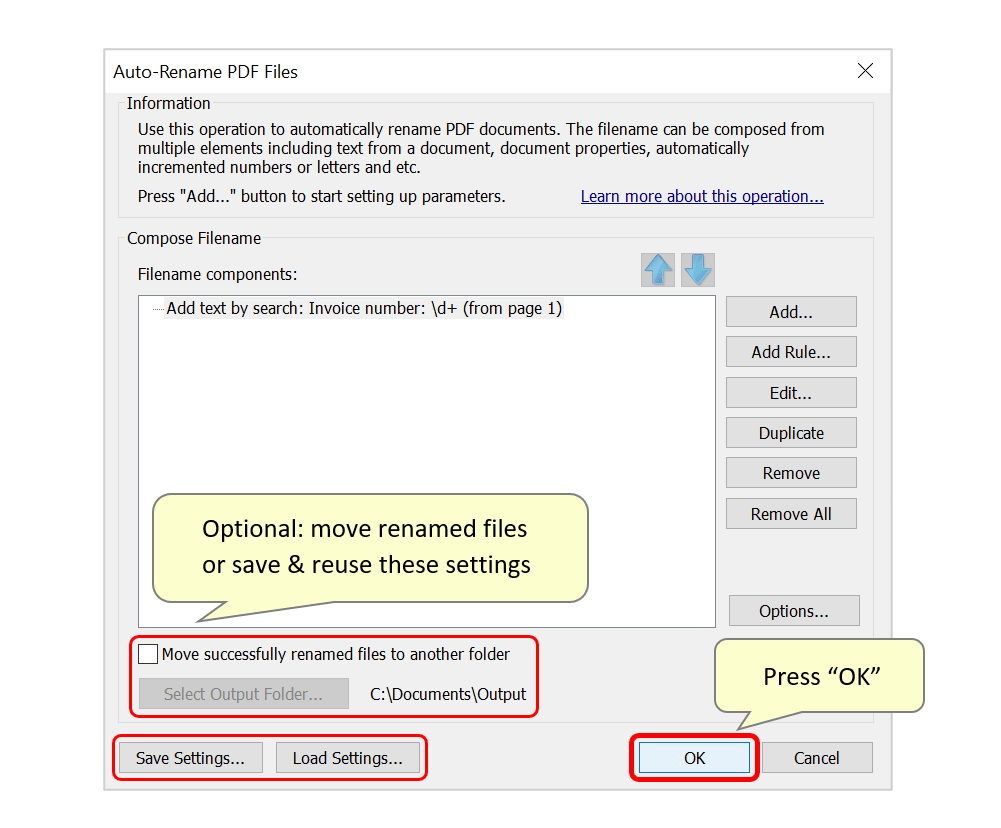
- Step 7 - Optional: Save Renaming Options
- Optionally, press "Save Settings..." button to save this configuration as a *.docren settings file for future re-use. Settings can be loaded via the "Load Settings..." button.
- Optionally, save renamed files in a separate location, instead of replacing existing files. Check "Move successfully renamed files to another folder" option and press "Select Output Folder..." button. Specify an output folder for the renamed files. Note that files are going to be moved, not just copied.
- Click "OK" to proceed.
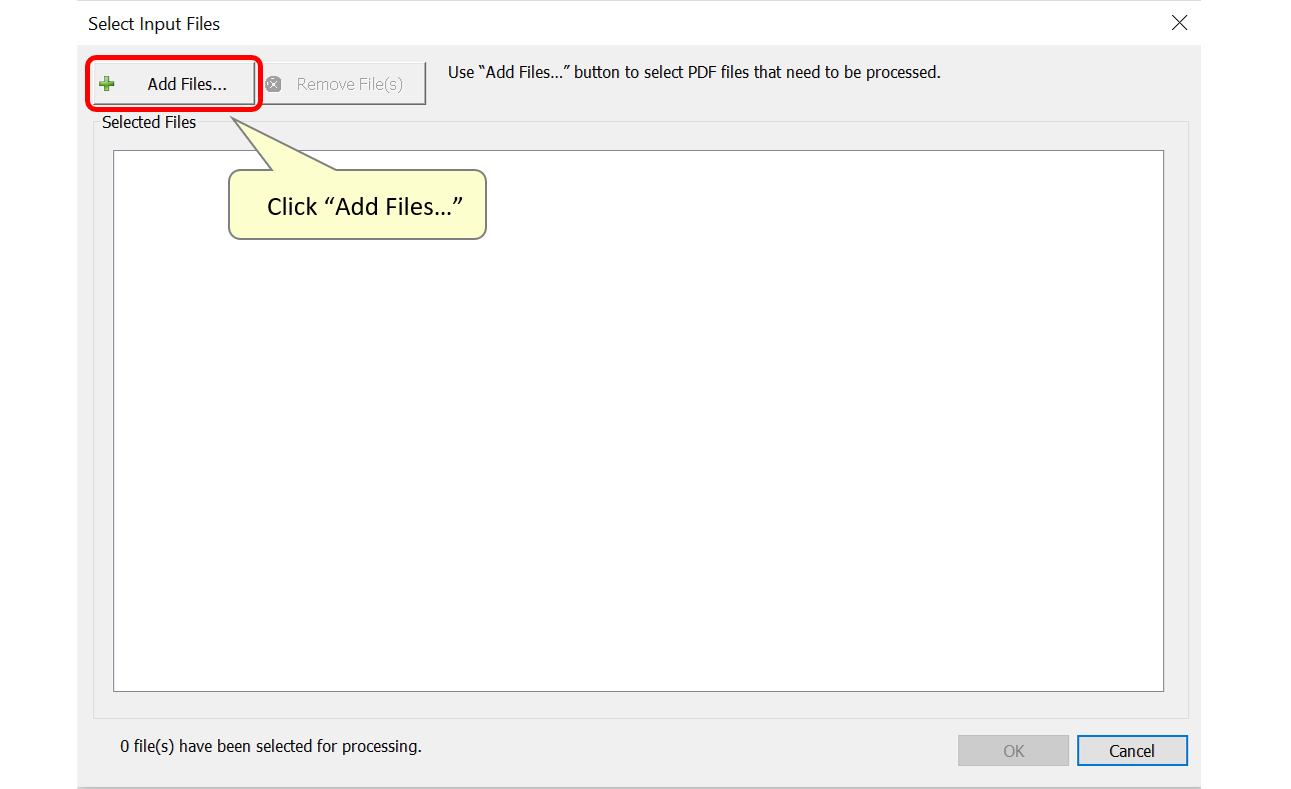
- Step 8 - Add Files for Renaming
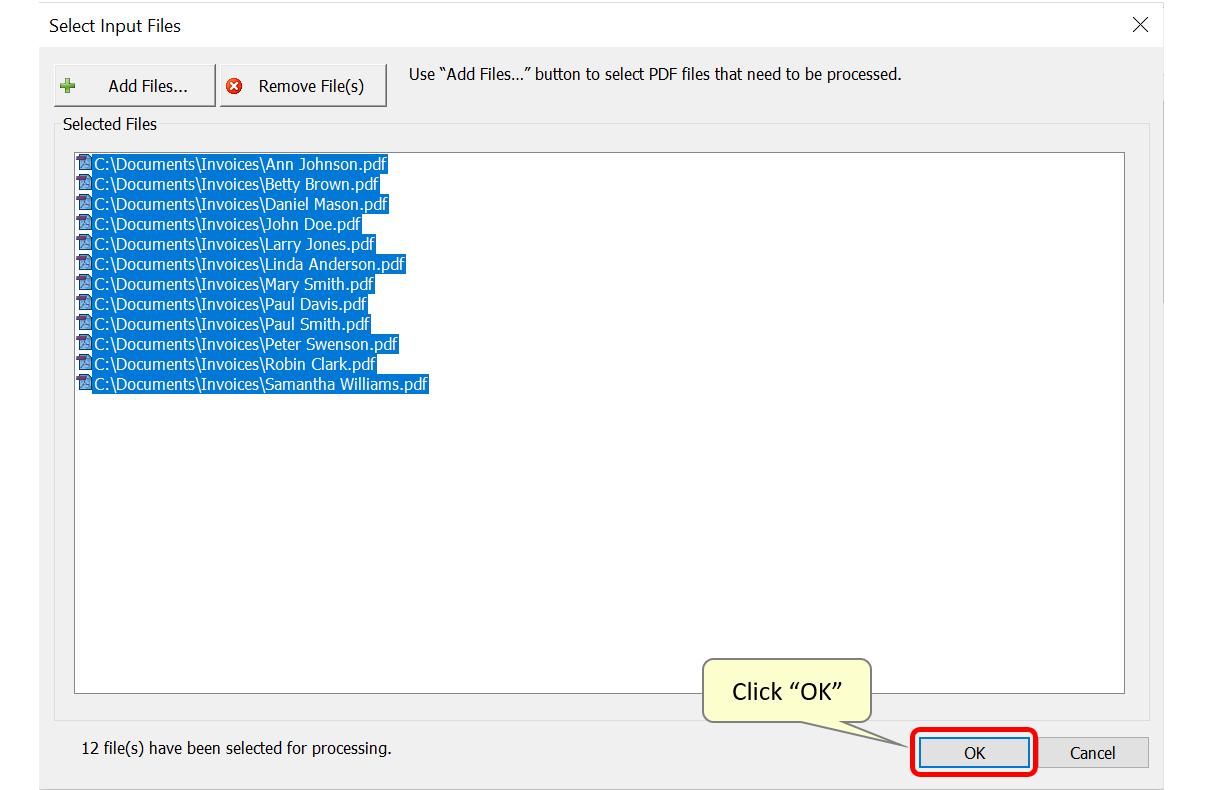
- Press “Add Files…” in the “Select Input Files” dialog to select files that need to be renamed. Consider also making backup copies of the input files before processing.
- Select PDF files that need to be renamed and click "Open" once done. Note that files from multiple folders can be added with repeated use of the "Add Files..." button.
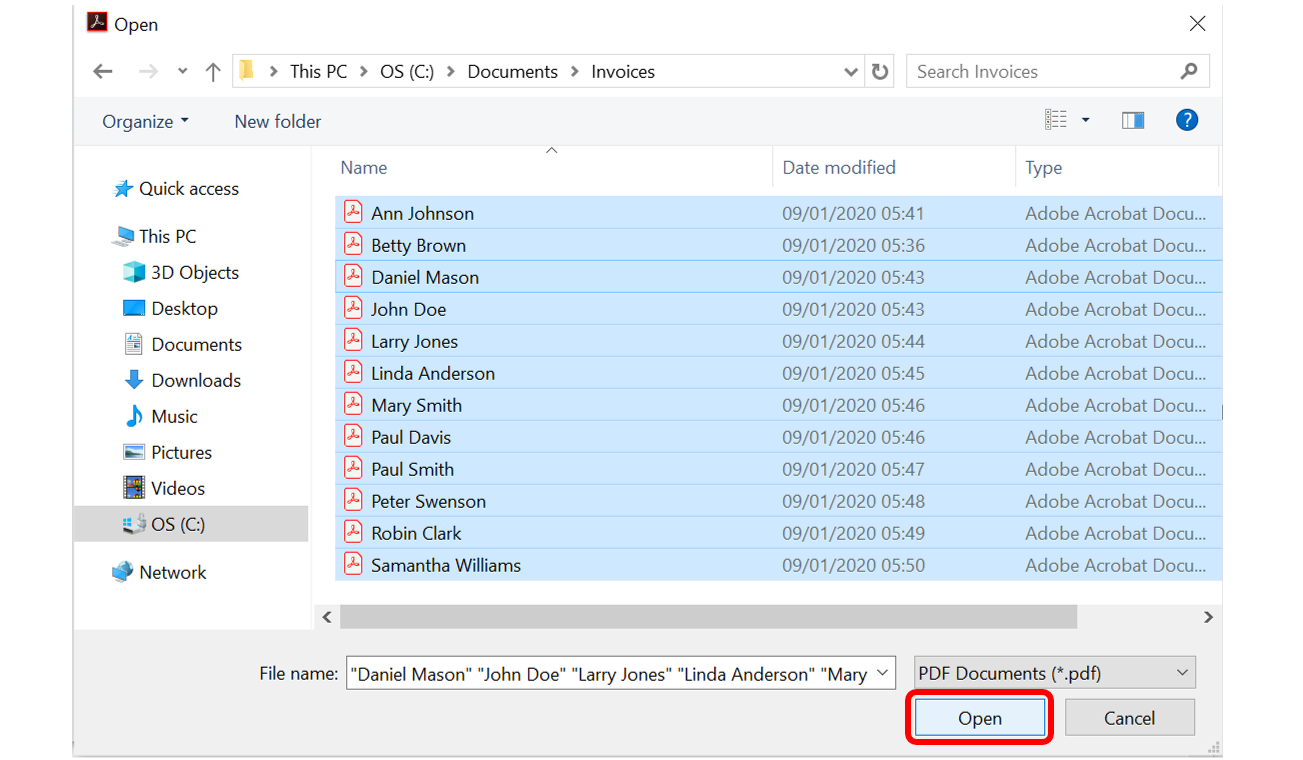
- Selected PDF files will be listed in the "Select Input Files" dialog. Press "OK" once all necessary files have been selected.
- Step 9 - Confirm New File Names
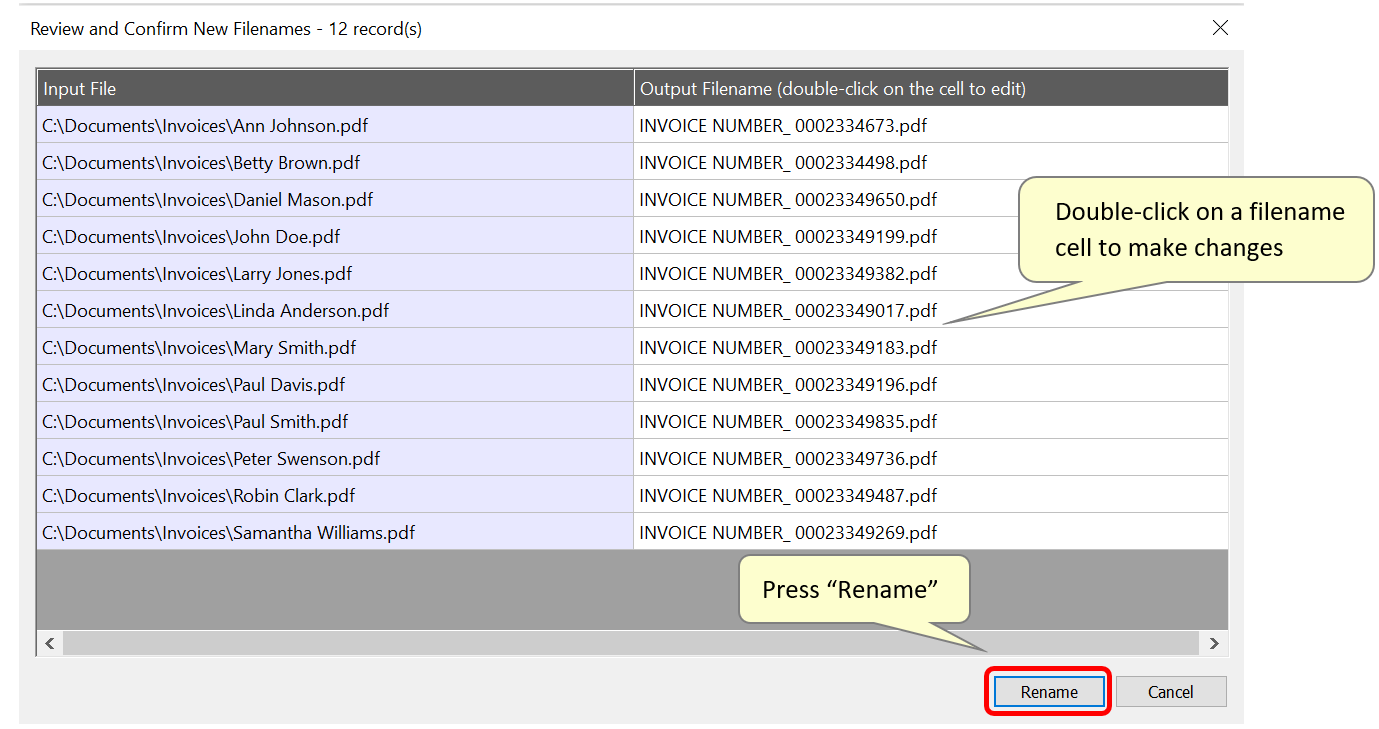
- The software will process input files without renaming them yet, and present new file names in the "Review and Confirm New Filenames" dialog. No files have been renamed at this step. Review the generated file names and edit them manually by double-clicking on an output filename cell.
- Press “Rename” to confirm and start the actual renaming process.
- Step 10 - Review the Processing Report
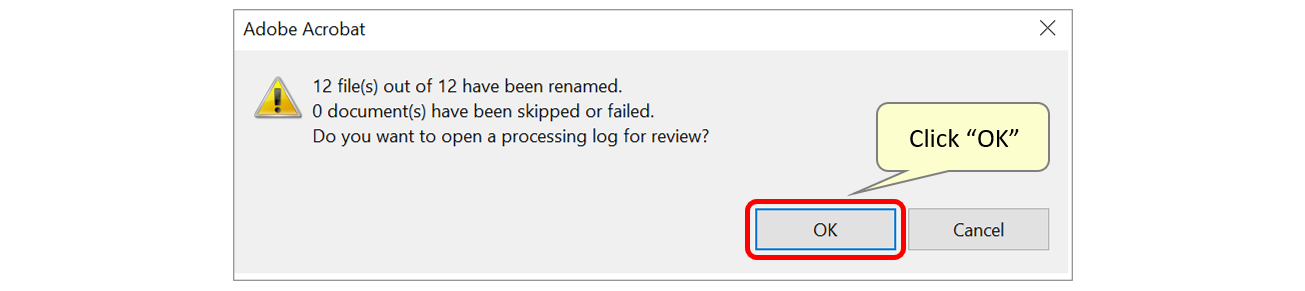
- Check the renaming statistics. Click “OK” to open a processing report.
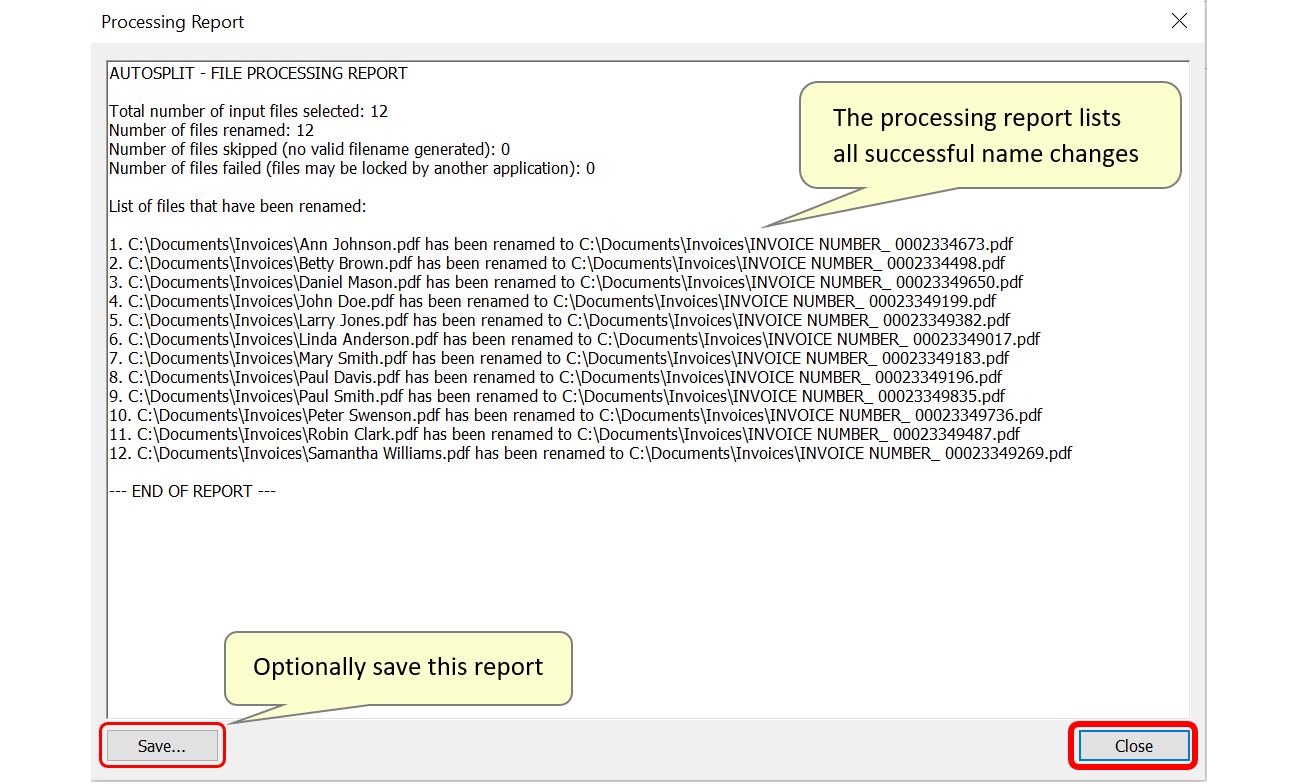
- The processing report shows detailed information on how many files have been renamed or failed, along with input/output file names for each document.
- Optionally save this report by pressing the "Save..." button. Click "Close" to close it.
- Step 11 - Inspect the Results
- Open the output folder to check the new filenames. The AutoSplit™ plug-in will have automatically renamed all input PDF files using the text pattern search.
- You can find more AutoSplit tutorials here.