Deleting Pages Via a Text Search Using a Command-line BAT File
AutoSplit plug-in for Adobe® Acrobat®
- Introduction
- Manually deleting PDF pages can be a slow process. This tutorial explains how the AutoSplit™ plug-in can be used to automatically delete pages containing specific text, using a command-line BAT file. This is a script file containing 'instructions' for searching pages of a document for specific text (or a text pattern), and deleting them. The first step is to make a custom "Delete Pages by Text Search" configuration in AutoSplit, which will be used to create the BAT file. The BAT file instructs AutoSplit to run this search on a specific input file, delete the relevant pages, and place the remaining ones in a unique output location.
- Input Files and Page Deletion Method
- The input file used to demonstrate this method contains a collection of invoices. Some invoices contain the text: "PAID" or "TOTAL DUE: 0.00".
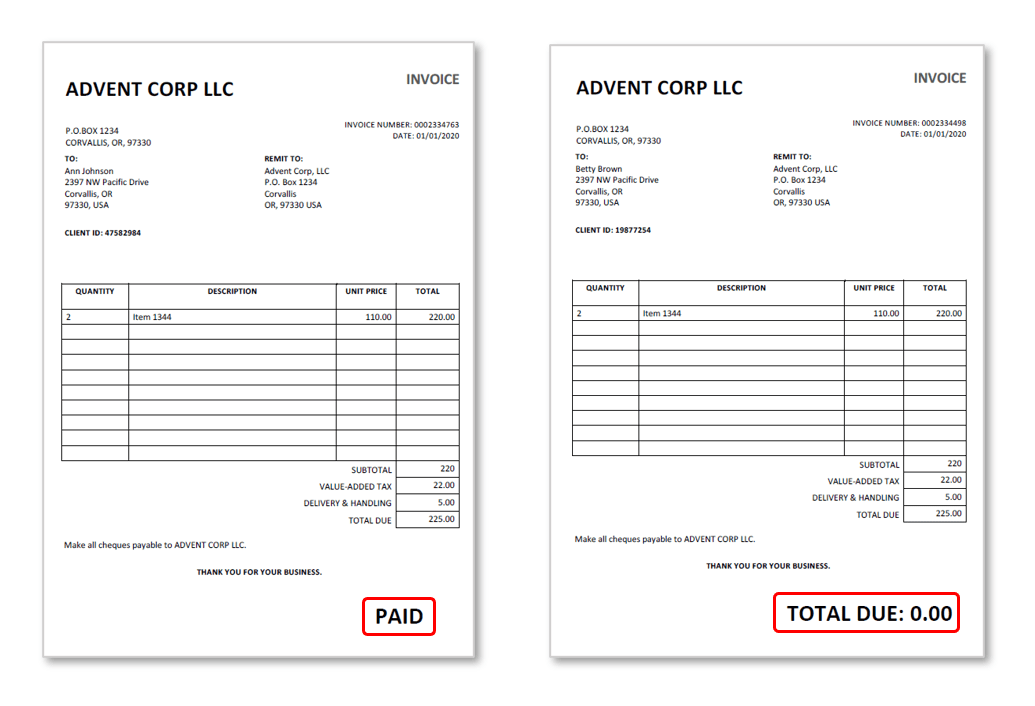
- The goal is to have these pages removed so that the output file contains only the invoices without this text.
- Prerequisites
- You need a copy of Adobe® Acrobat® along with the AutoSplit plug-in installed on your computer in order to use this tutorial. Both are available as trial versions.
- Step 1 - Open the "Find And Delete Pages with Matching Text" Dialog
- With the file to be processed open in Acrobat, select
"Plug-Ins > Split Documents > Delete Pages By Text Search" from the main menu.
[⚡ How to locate Plugins menu in Adobe® Acrobat® ⚡] - Step 2 - Specify Text Search Options
- Use this dialog to configure the text search. In this example, the goal is to delete pages that contain the words “PAID” or “Total due: 0.00”. Type the text to search for in the entry box, one item per line.
- Pages found to contain any of these search items will be deleted. See the separate tutorial on how to delete PDF pages via a text search for detailed help with configuring these settings and more examples.
- Press "Save..." to save these settings as a text search settings file.

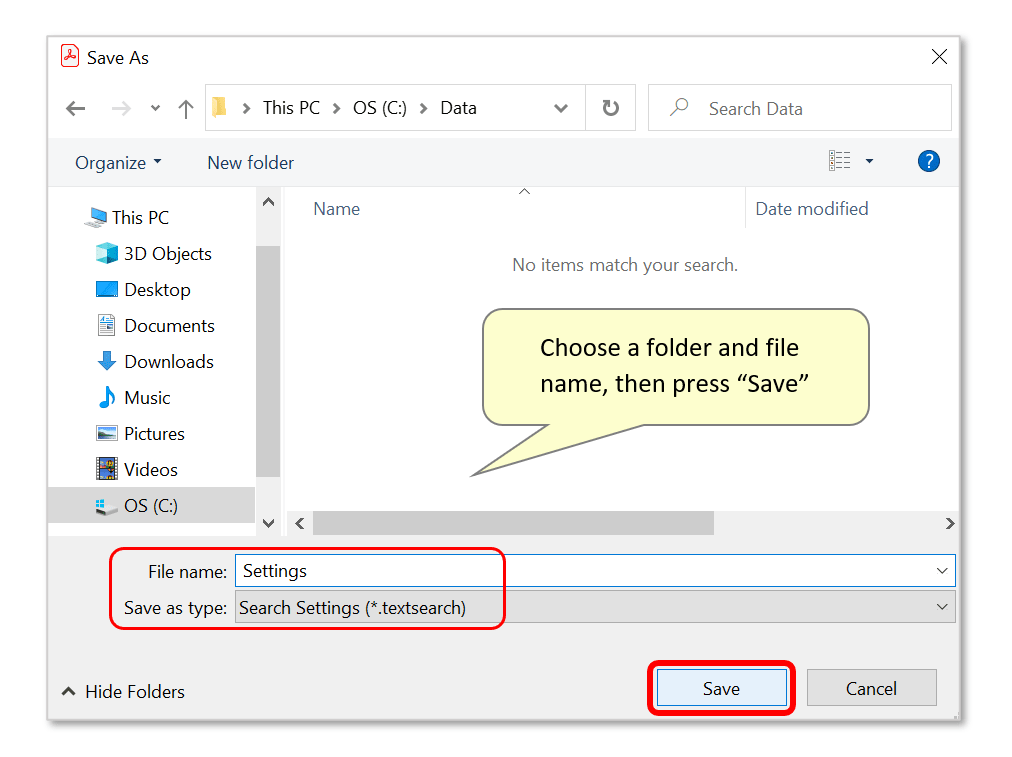
- Step 3 - Save the Text Search Settings
- Choose a folder and rename the file, which will be saved with a *.textsearch extension. We will save this example as "Settings.textsearch".
- Press "Save" to proceed.
- Step 4 - Create the BAT File
- See the separate tutorial for detailed help on running an operation from a command-line BAT file.
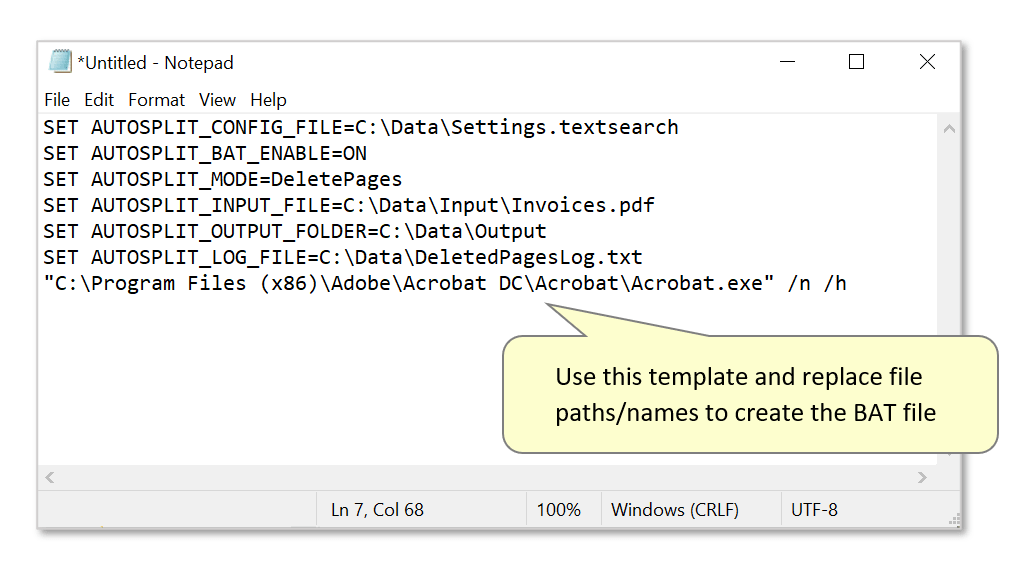
- Create a BAT file using any plain text editor (such as Notepad). Begin by creating a blank text file, then add the following lines
making sure to replace file paths and filenames with the relevant filenames you are using:
SET AUTOSPLIT_CONFIG_FILE=C:\Data\Settings.textsearch
SET AUTOSPLIT_BAT_ENABLE=ON
SET AUTOSPLIT_MODE=DeletePages
SET AUTOSPLIT_INPUT_FILE=C:\Data\Input\Invoices.pdf
SET AUTOSPLIT_OUTPUT_FOLDER=C:\Data\Output
SET AUTOSPLIT_LOG_FILE=C:\Data\DeletedPagesLog.txt
"C:\Program Files (x86)\Adobe\Acrobat DC\Acrobat\Acrobat.exe" /n /h
- AUTOSPLIT_CONFIG_FILE specifies a full file path to the text search settings file created in steps 2 & 3.
- The AUTOSPLIT_MODE variable specifies the processing 'type' - a "DeletePages" operation.
- AUTOSPLIT_INPUT_FILE specifies a full file path to the input file.
- The AUTOSPLIT_OUTPUT_FOLDER file path specifies the output folder (C:\Data\Output) for the modified files to be saved in. Input files are not overwritten, regular Windows-style duplicate filename resolution is applied if there is already a file with the same name in the output folder.
- Overall, the BAT file needs to specify three file paths for: the settings file, an input PDF file/folder, and an output folder.
- Use the AUTOSPLIT_LOG_FILE variable to specify a log file location - useful for troubleshooting and record keeping. If a log file does not exist, it will be automatically created. If a log file already exists, then new records will be appended to the file.
- Step 5 - Save the BAT File
- Press "File > Save As..." to save the text as a BAT file.
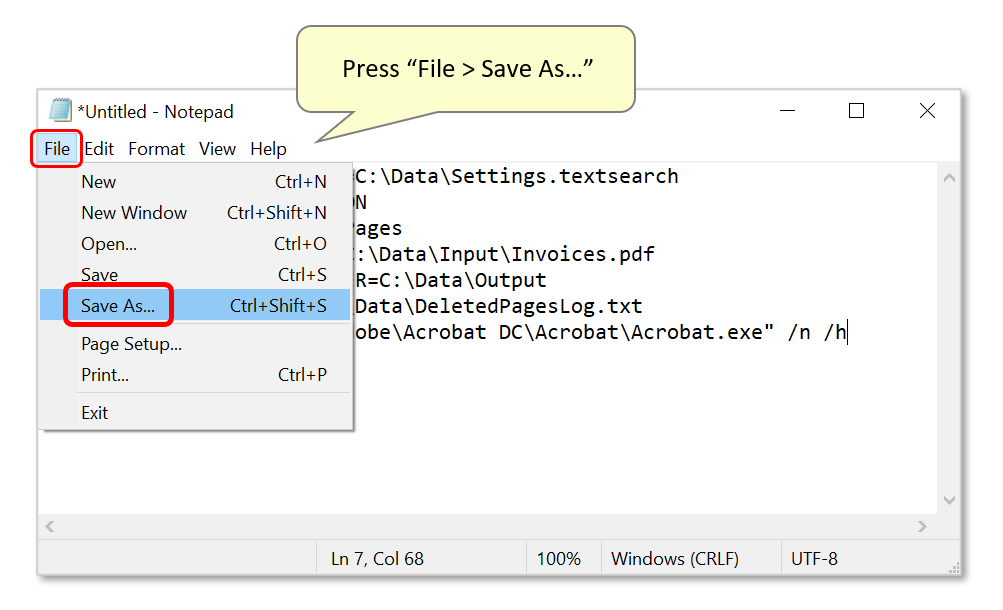
- Notepad prompts you to save the text as a *.txt file. Choose a folder and use the "Save as type:" list to select "All Files". Name the file and manually add a *.bat file extension, then press "Save".

- Step 6 - Run the BAT File
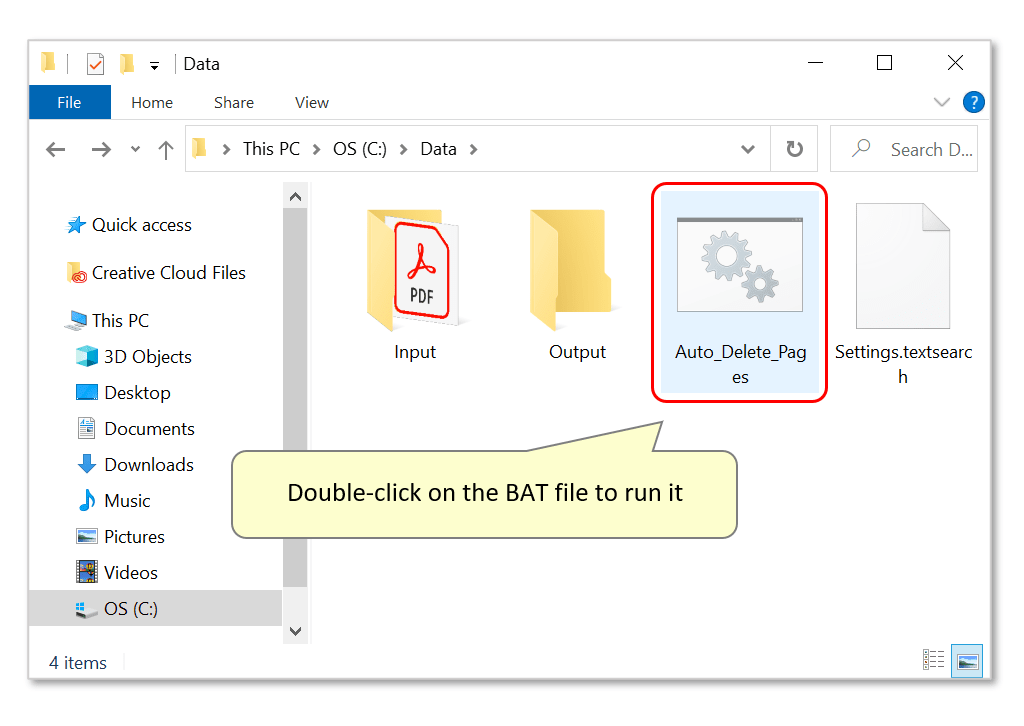
- Double-click on the BAT file to run it.
- Note that the BAT file will open Adobe Acrobat and may display a progress bar whilst processing. Optionally use the /h switch on Acrobat's command line to run it in a minimized window.
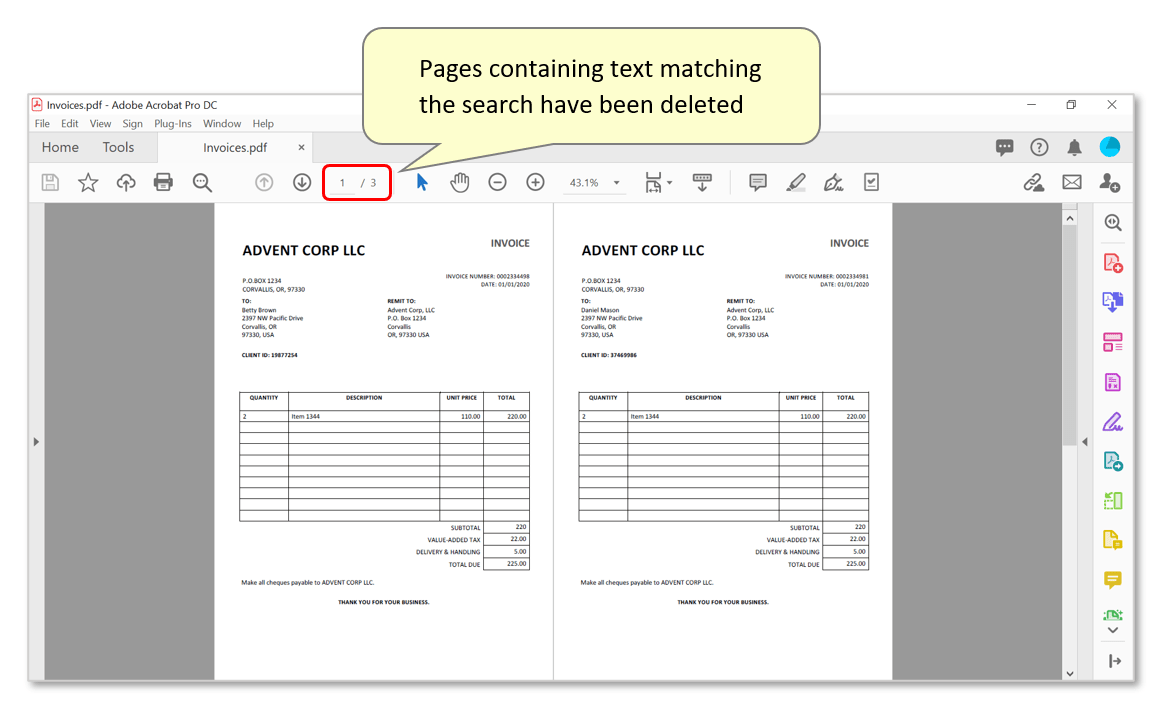
- Step 7 - Inspect the Results
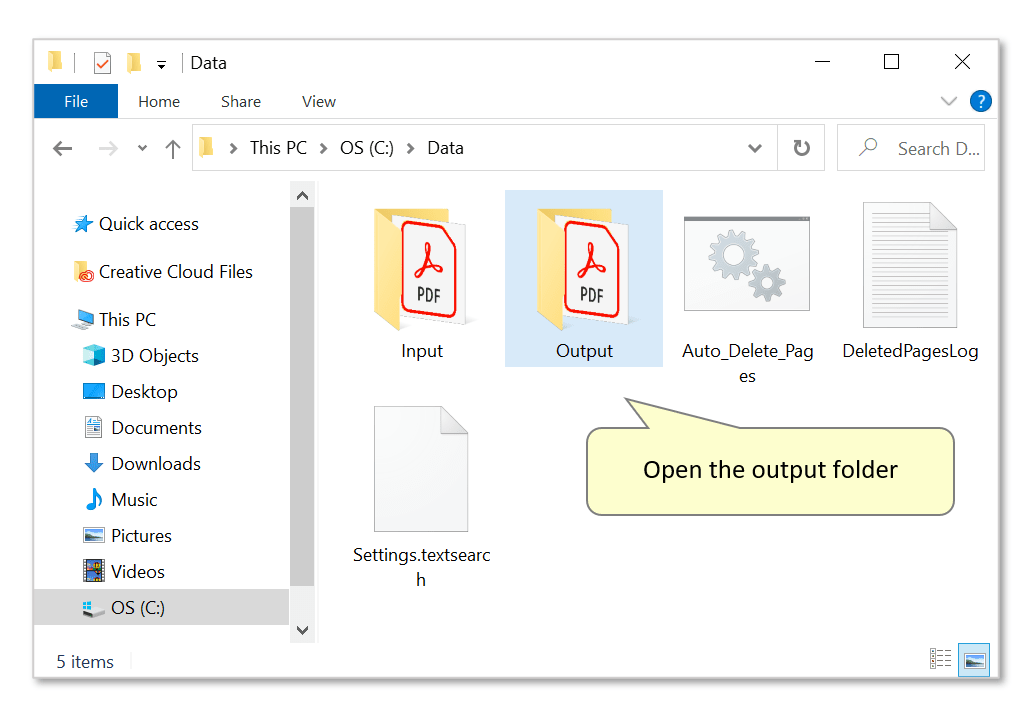
- Open the output folder to view the new file. Note that the log file has also been created.
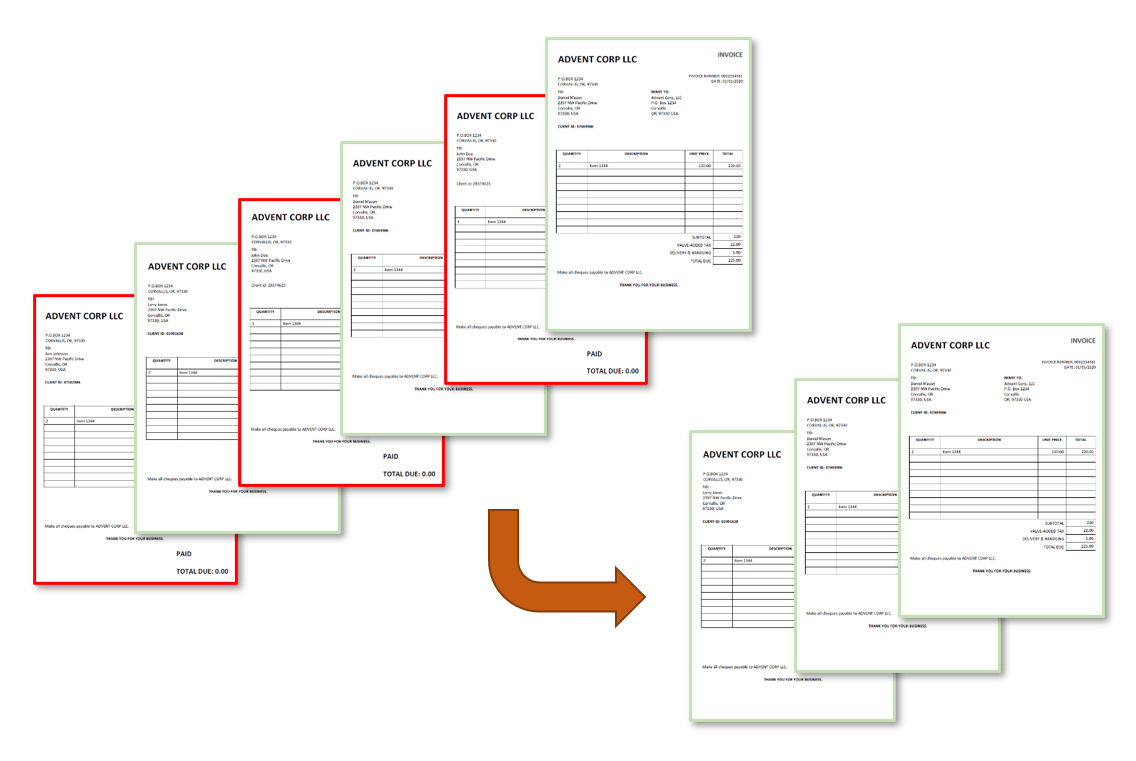
- Open the output file.
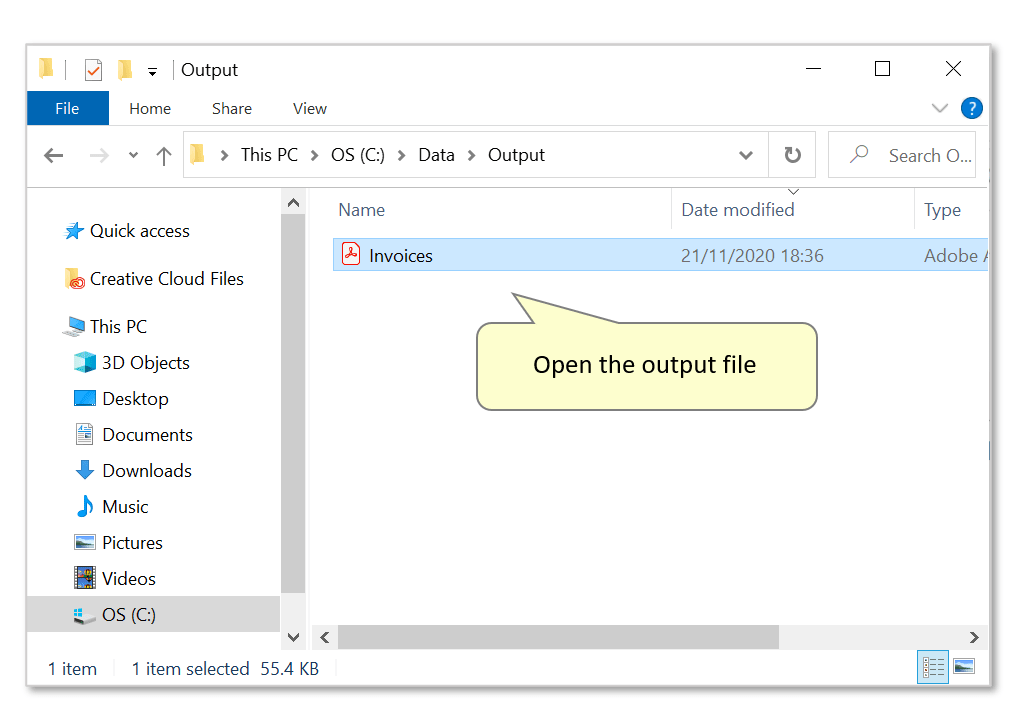
- All pages containing the text specified in step 2 have been deleted from the document.
- You can find more AutoSplit tutorials here.