Extract Pages from a PDF Document Using a Text Search
AutoSplit plug-in for Adobe® Acrobat®
- Introduction
- Manually extracting specific PDF pages into separate documents can be a slow process. This tutorial explains how the AutoSplit™ plug-in can be used to automatically extract pages containing unique text. The software searches a PDF document for pages matching a user-specified search list and extracts them from the document. Both text patterns (using regular expressions syntax) and plain text strings can be used in the search list.
- Input Files and Page Extraction Method
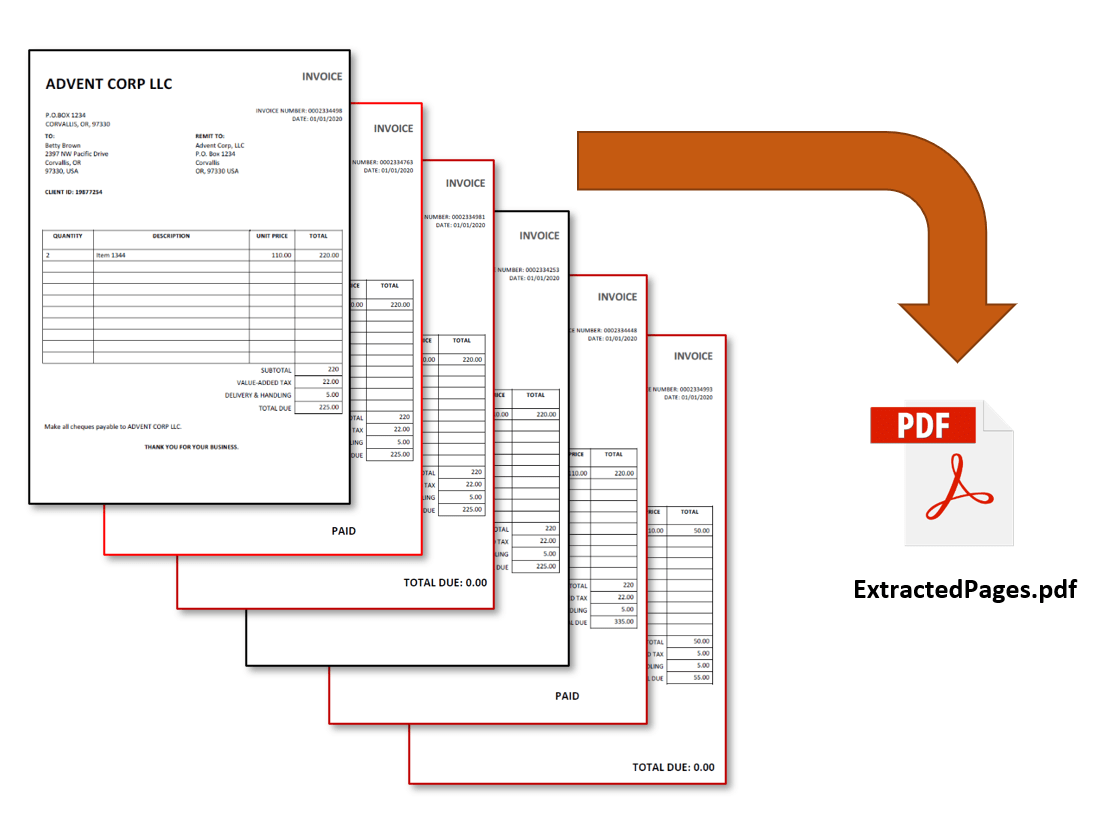
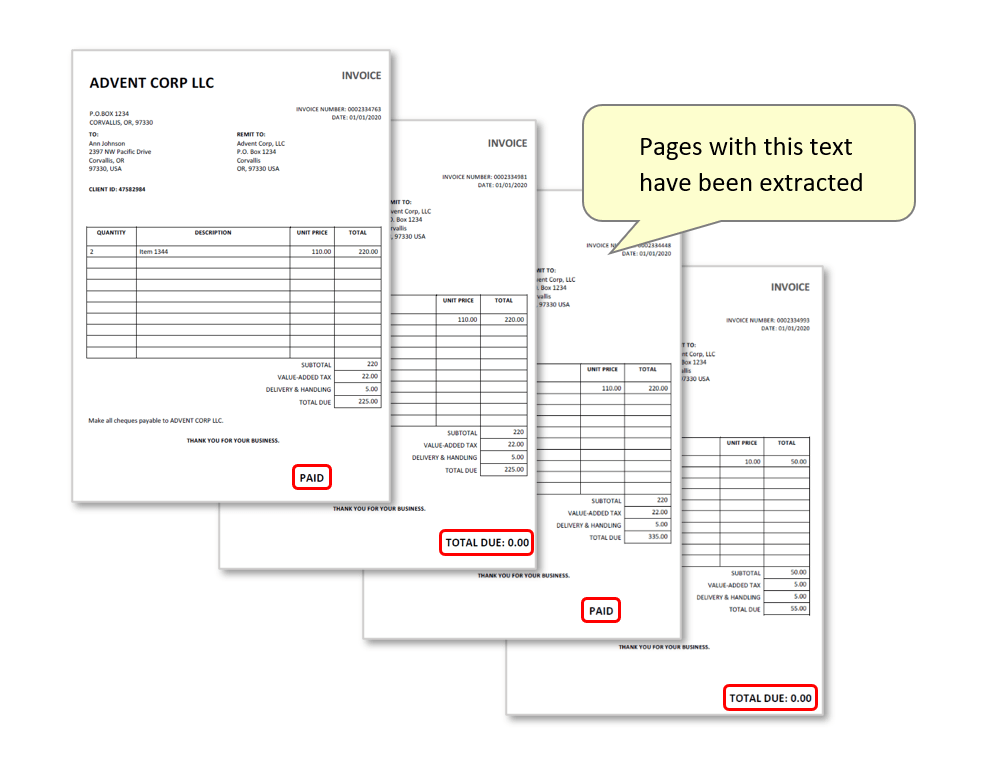
- The input file used to demonstrate this method contains a collection of invoices. Some invoices contain the text: "PAID" or "TOTAL DUE: 0.00".
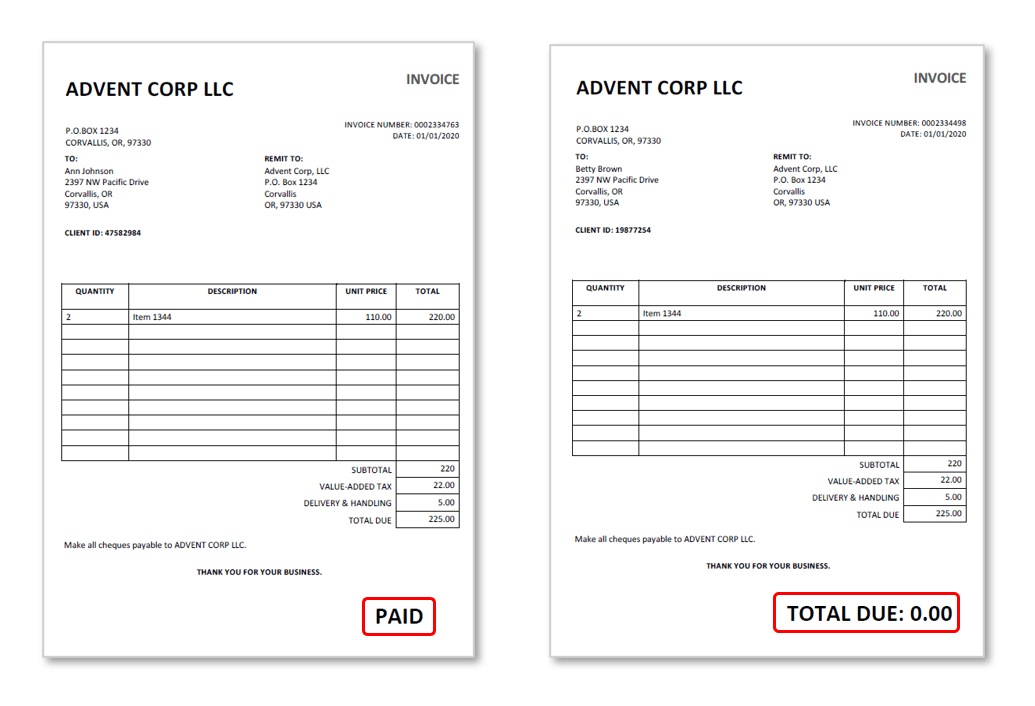
- The goal is to have these pages extracted so that the output file contains only the invoices that contain this text.
- Prerequisites
- You need a copy of Adobe® Acrobat® Pro along with the AutoSplit Pro™ plug-in installed on your computer in order to use this tutorial. Both are available as trial versions.
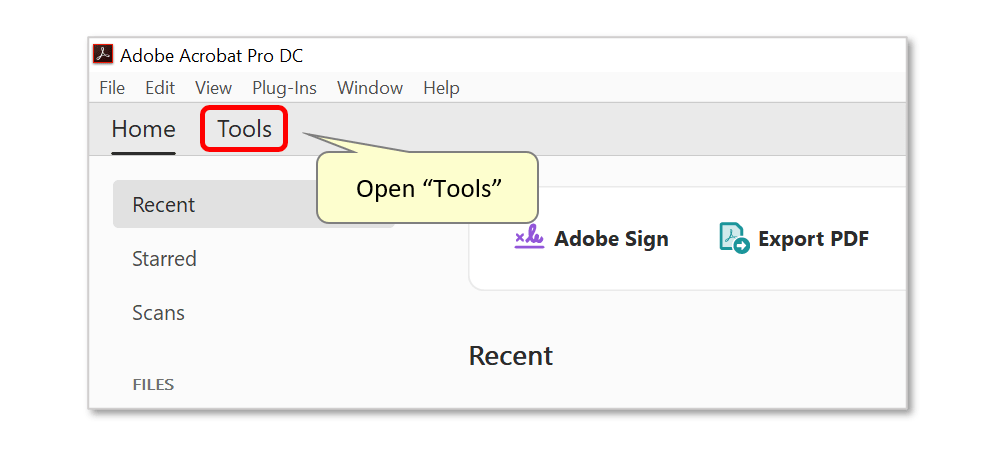
- Step 1 - Open the "Extract Pages by Text Search" Dialog
- With the file to be processed open in Acrobat, select "Plug-Ins >
Split Documents > Extract Pages By Text Search..." from the main menu.
[⚡ How to locate Plugins menu in Adobe® Acrobat® ⚡] - Step 2 - Configure the Text Search
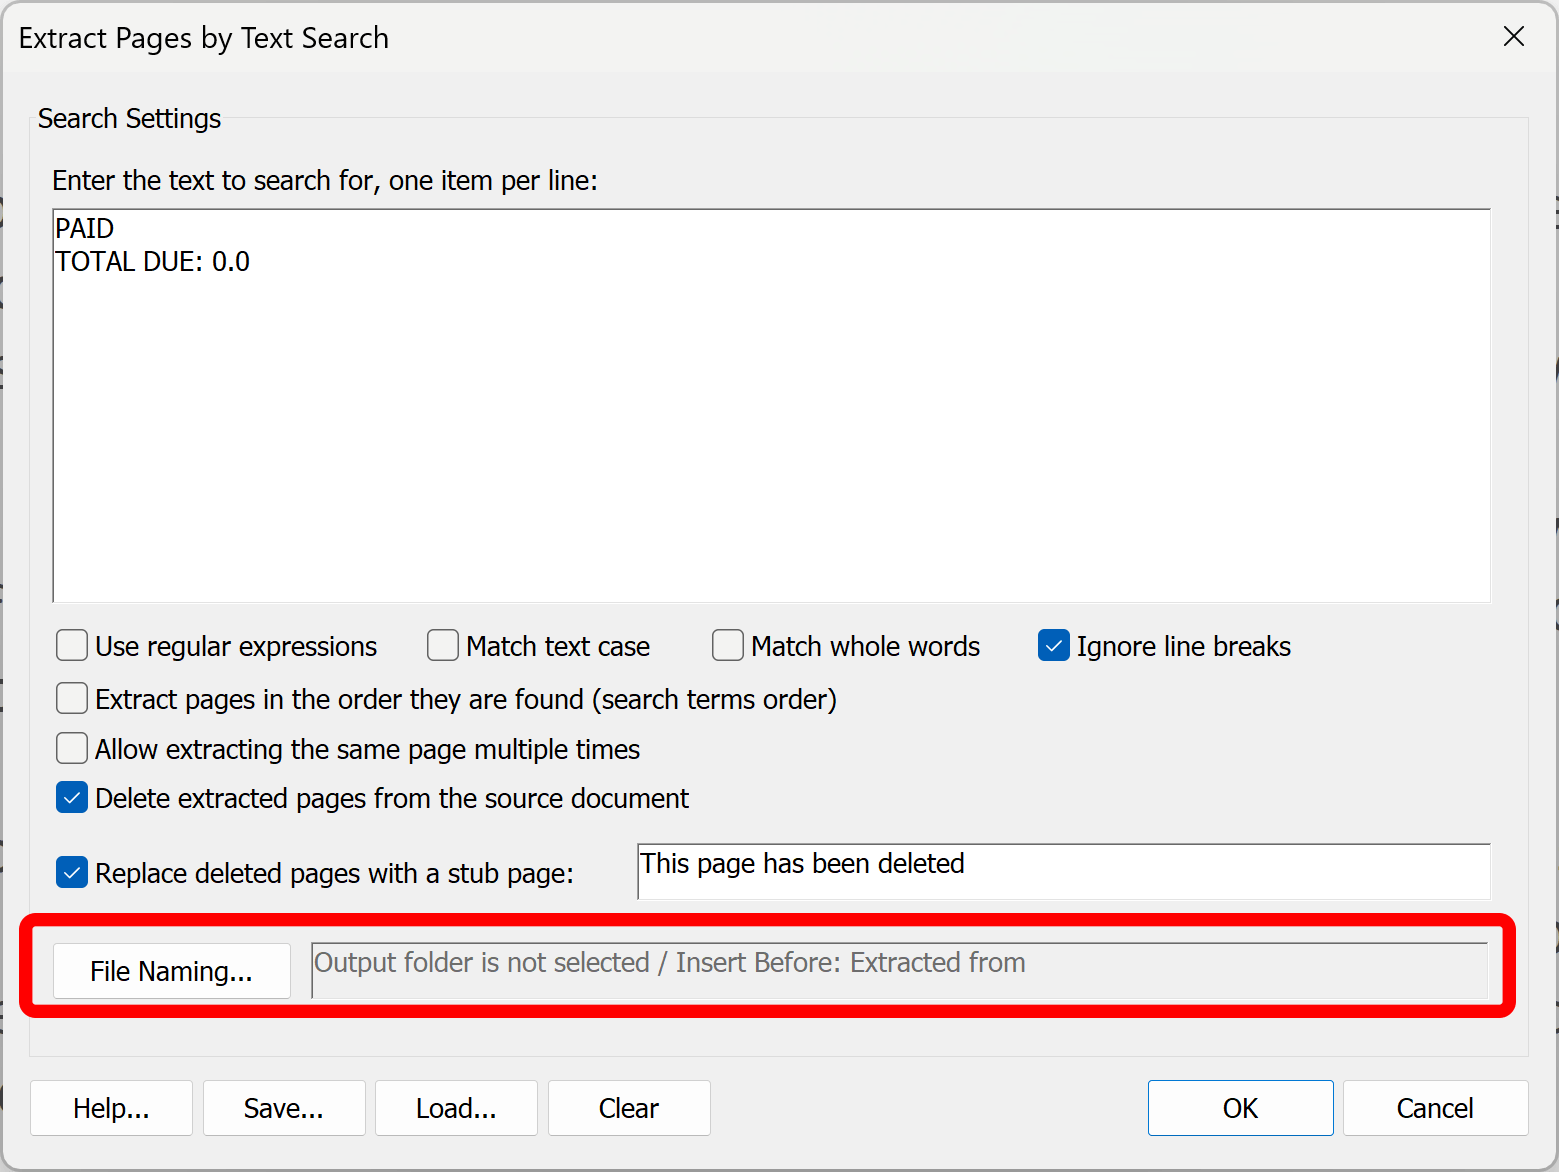
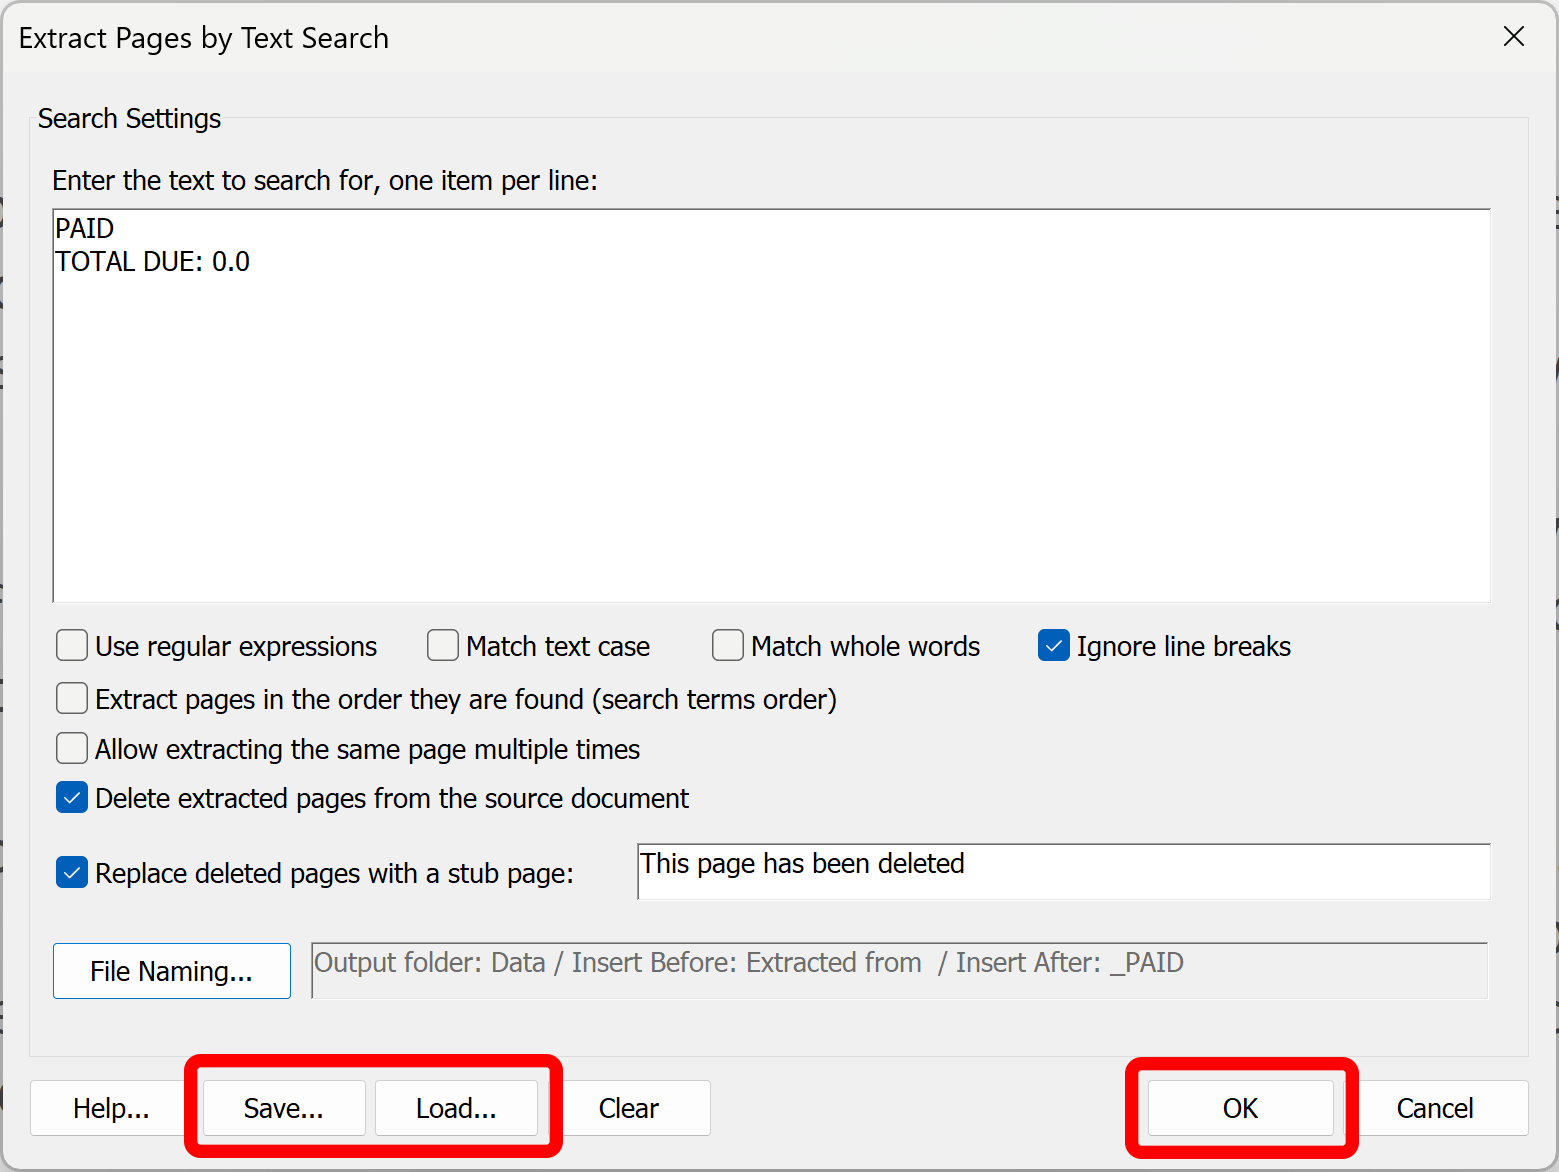
- Use this dialog to configure the text search. In this example, the goal is to extract any pages that contain the words “PAID” or “Total due: 0.00”. Type the text to search for in the entry box, one item per line. Pages found to contain any of these search items will be extracted.
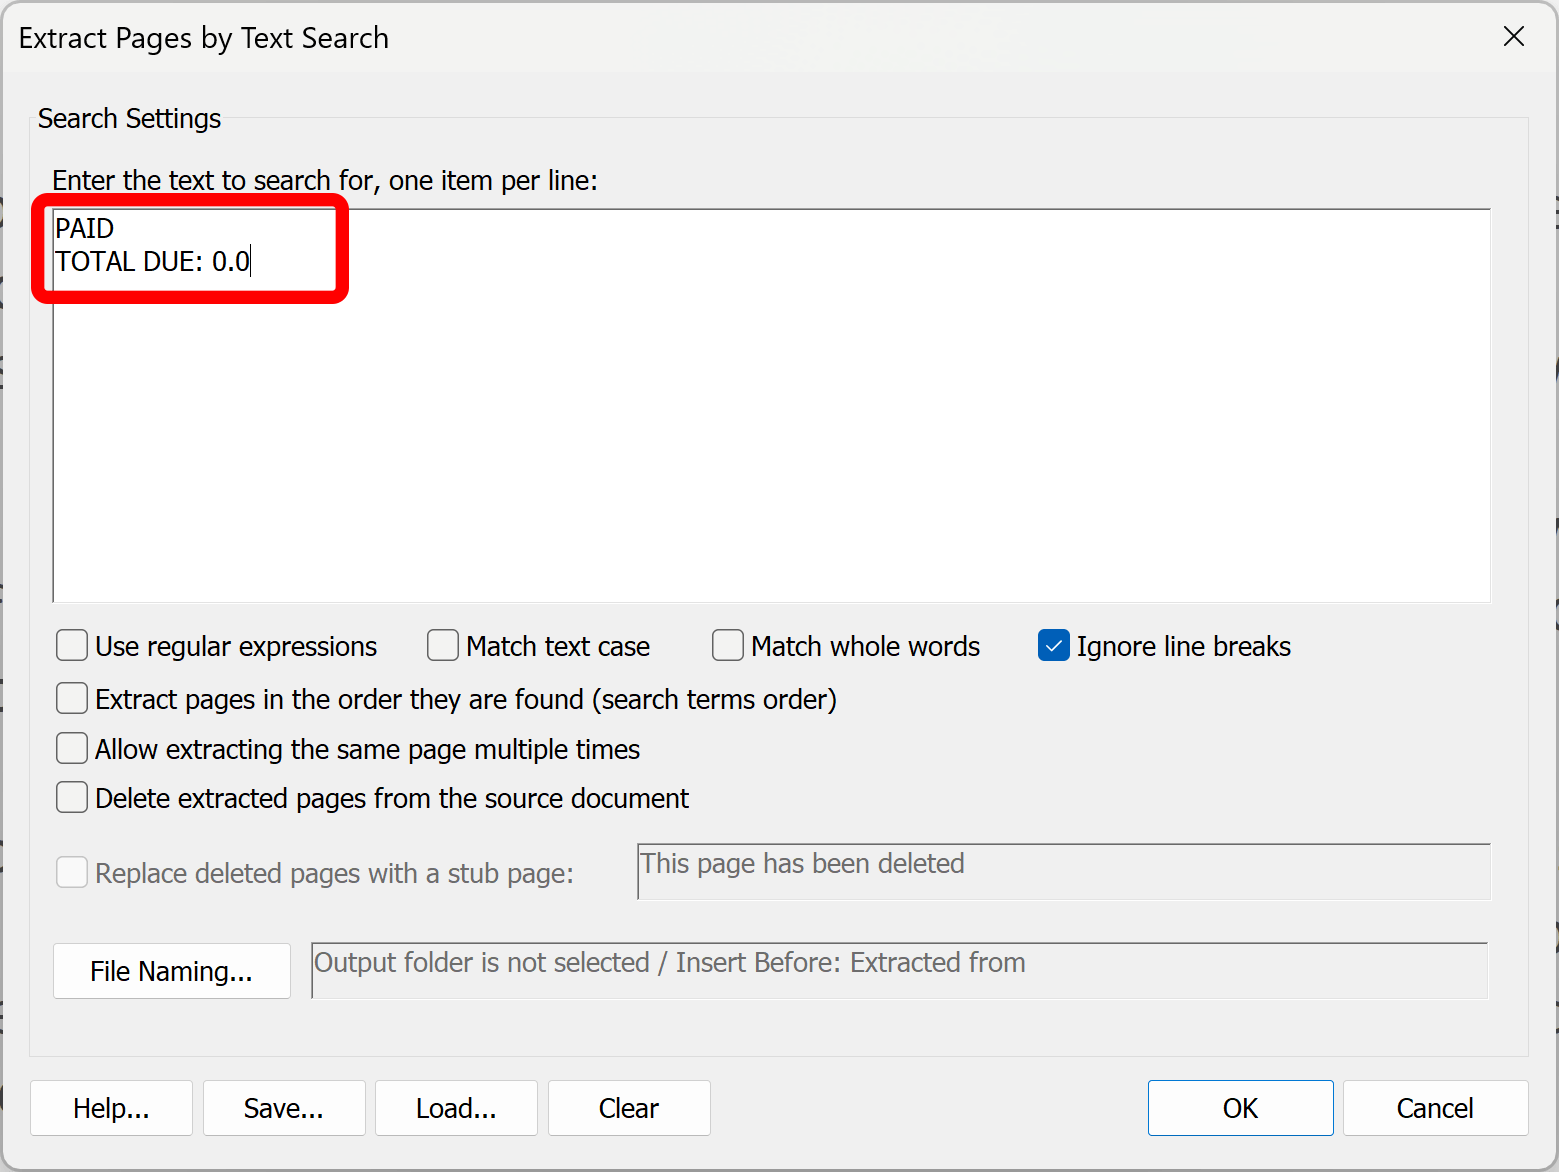
- Check any necessary processing options. For example, search for text patterns using the "Use regular expressions" option. Use regular expression syntax to search for things like social security numbers, phone numbers, or account numbers etc. For example, to find all pages with social security numbers (using this pattern: 123-45-6789) enter the following regular expression: \d{3}[-]\d{2}[-]\d{4}.
- Check the "Match text case" option to match text case exactly as it is entered into the search list.
- Check the "Match whole words" option to match text that represents a complete word. Use this option to avoid partial matches.
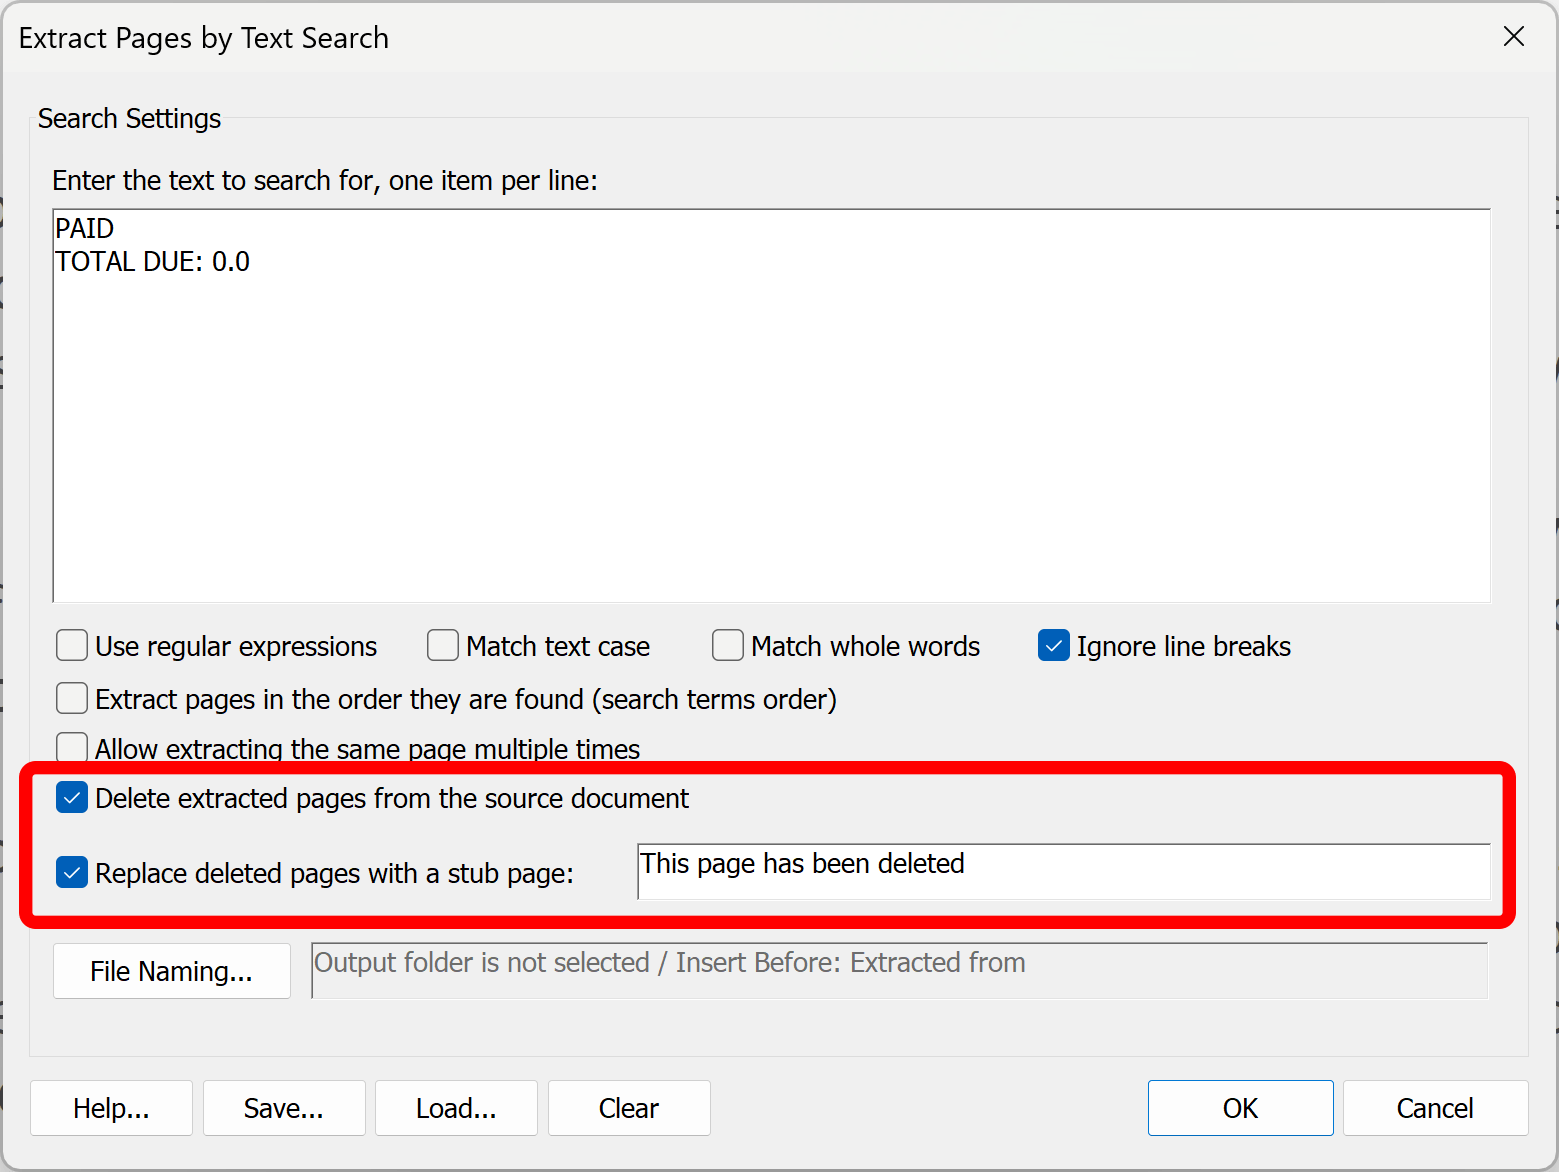
- Step 3 - Optional: Delete Extracted Pages
- By default, the pages that are extracted from the input document will be deleted from the original file. Uncheck this option if it is not desirable.
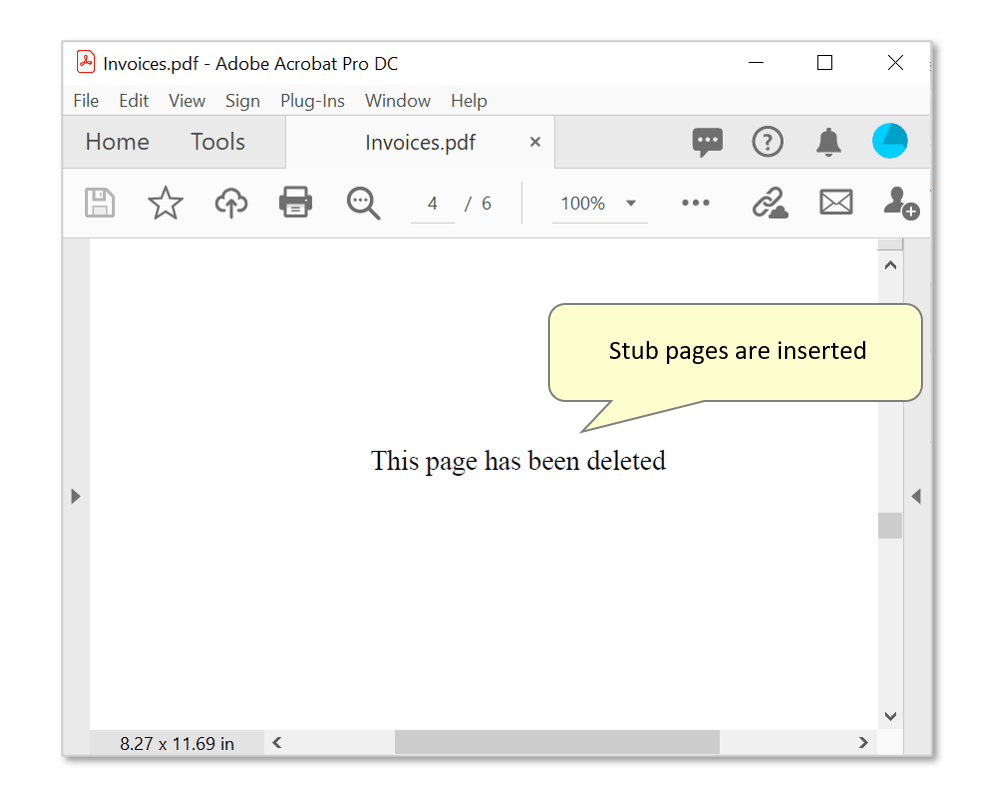
- Check "Replace deleted pages with a stub page:" to have stub pages inserted in their place. By default, "This page has been deleted" will be inserted on each page - this text can be manually edited in the entry box.
- Here is an example of a stub page:
- Step 4 - Configure Output Options
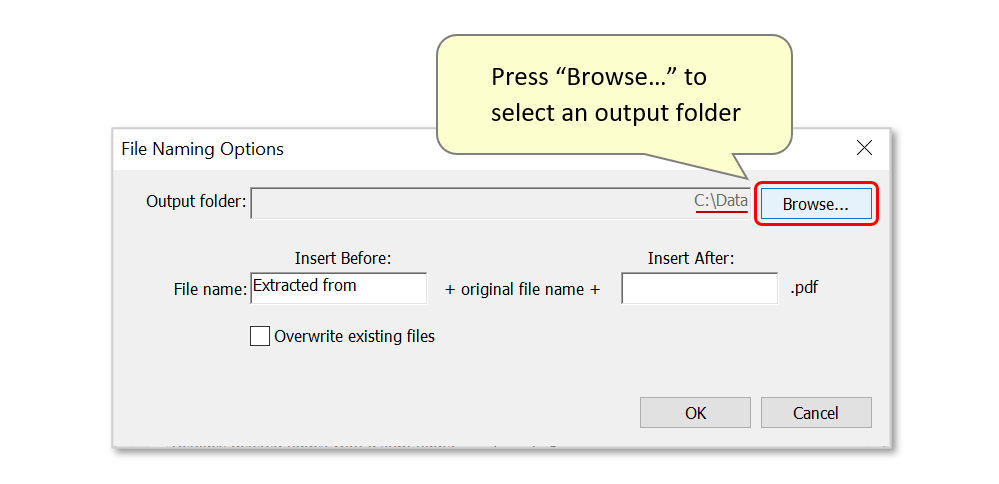
- Press "File Naming..." to configure an output location and file name.
- Press the "Browse..." button to select an output folder. The file path will be displayed next to it.
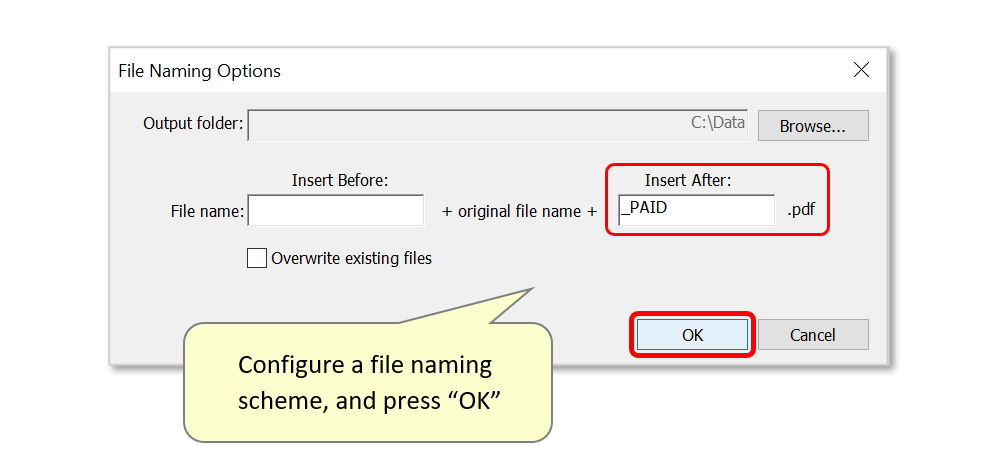
- Now configure a file naming scheme. In this example, the output file will contain the input filename, followed by "_PAID" (Invoices_PAID.pdf).
- In this example, we will proceed without deleting the extracted pages from the input.
- Step 5 - Confirm the Extraction
- Optionally press the "Save..." button to reuse this configuration again. Saved extraction settings will have a *.textsearch extension. Use "Load..." to reload them.
- Press "OK" to proceed.
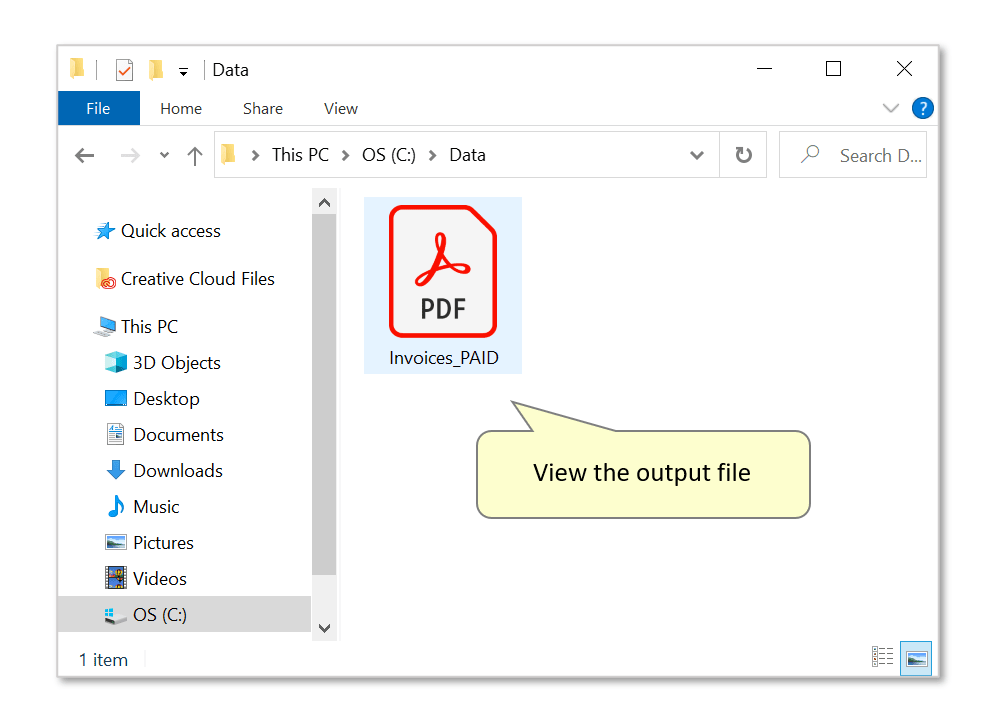
- Step 6 - Inspect the Results
- The extracted pages will be automatically opened in Acrobat. Check the chosen output folder to see that the new file has been created.
- Inspect the extracted pages to check that the text search has worked and the correct pages were extracted.
- Using Guide Actions to Process Multiple PDF Documents
- Adobe Acrobat Pro comes with a powerful batch processing tool called Guided Actions. It was also known as Action Wizard in older versions of Adobe Acrobat. AutoSplit Pro™ adds most of its functionality as batch commands to Guided Actons / Action Wizard. Use this separate tutorial to learn how to use Guided Actions to create batch actions.
- Guided Actions tool makes it possible to process multiple files at once without the need to manually open the files and use menus and dialogs each time. Once a processing action is created, it can be re-used with a single click.
- The steps below show how to create an "Extract Pages By Search" command with Guided Actions.
- Create New Action with Guided Actions (New Acrobat)
- If you are using "new" Adobe Acrobat, then show all tools and double-click on "Use Guided Actions" tool icon to open tool controls.
- Select Use Guided Actions tool:
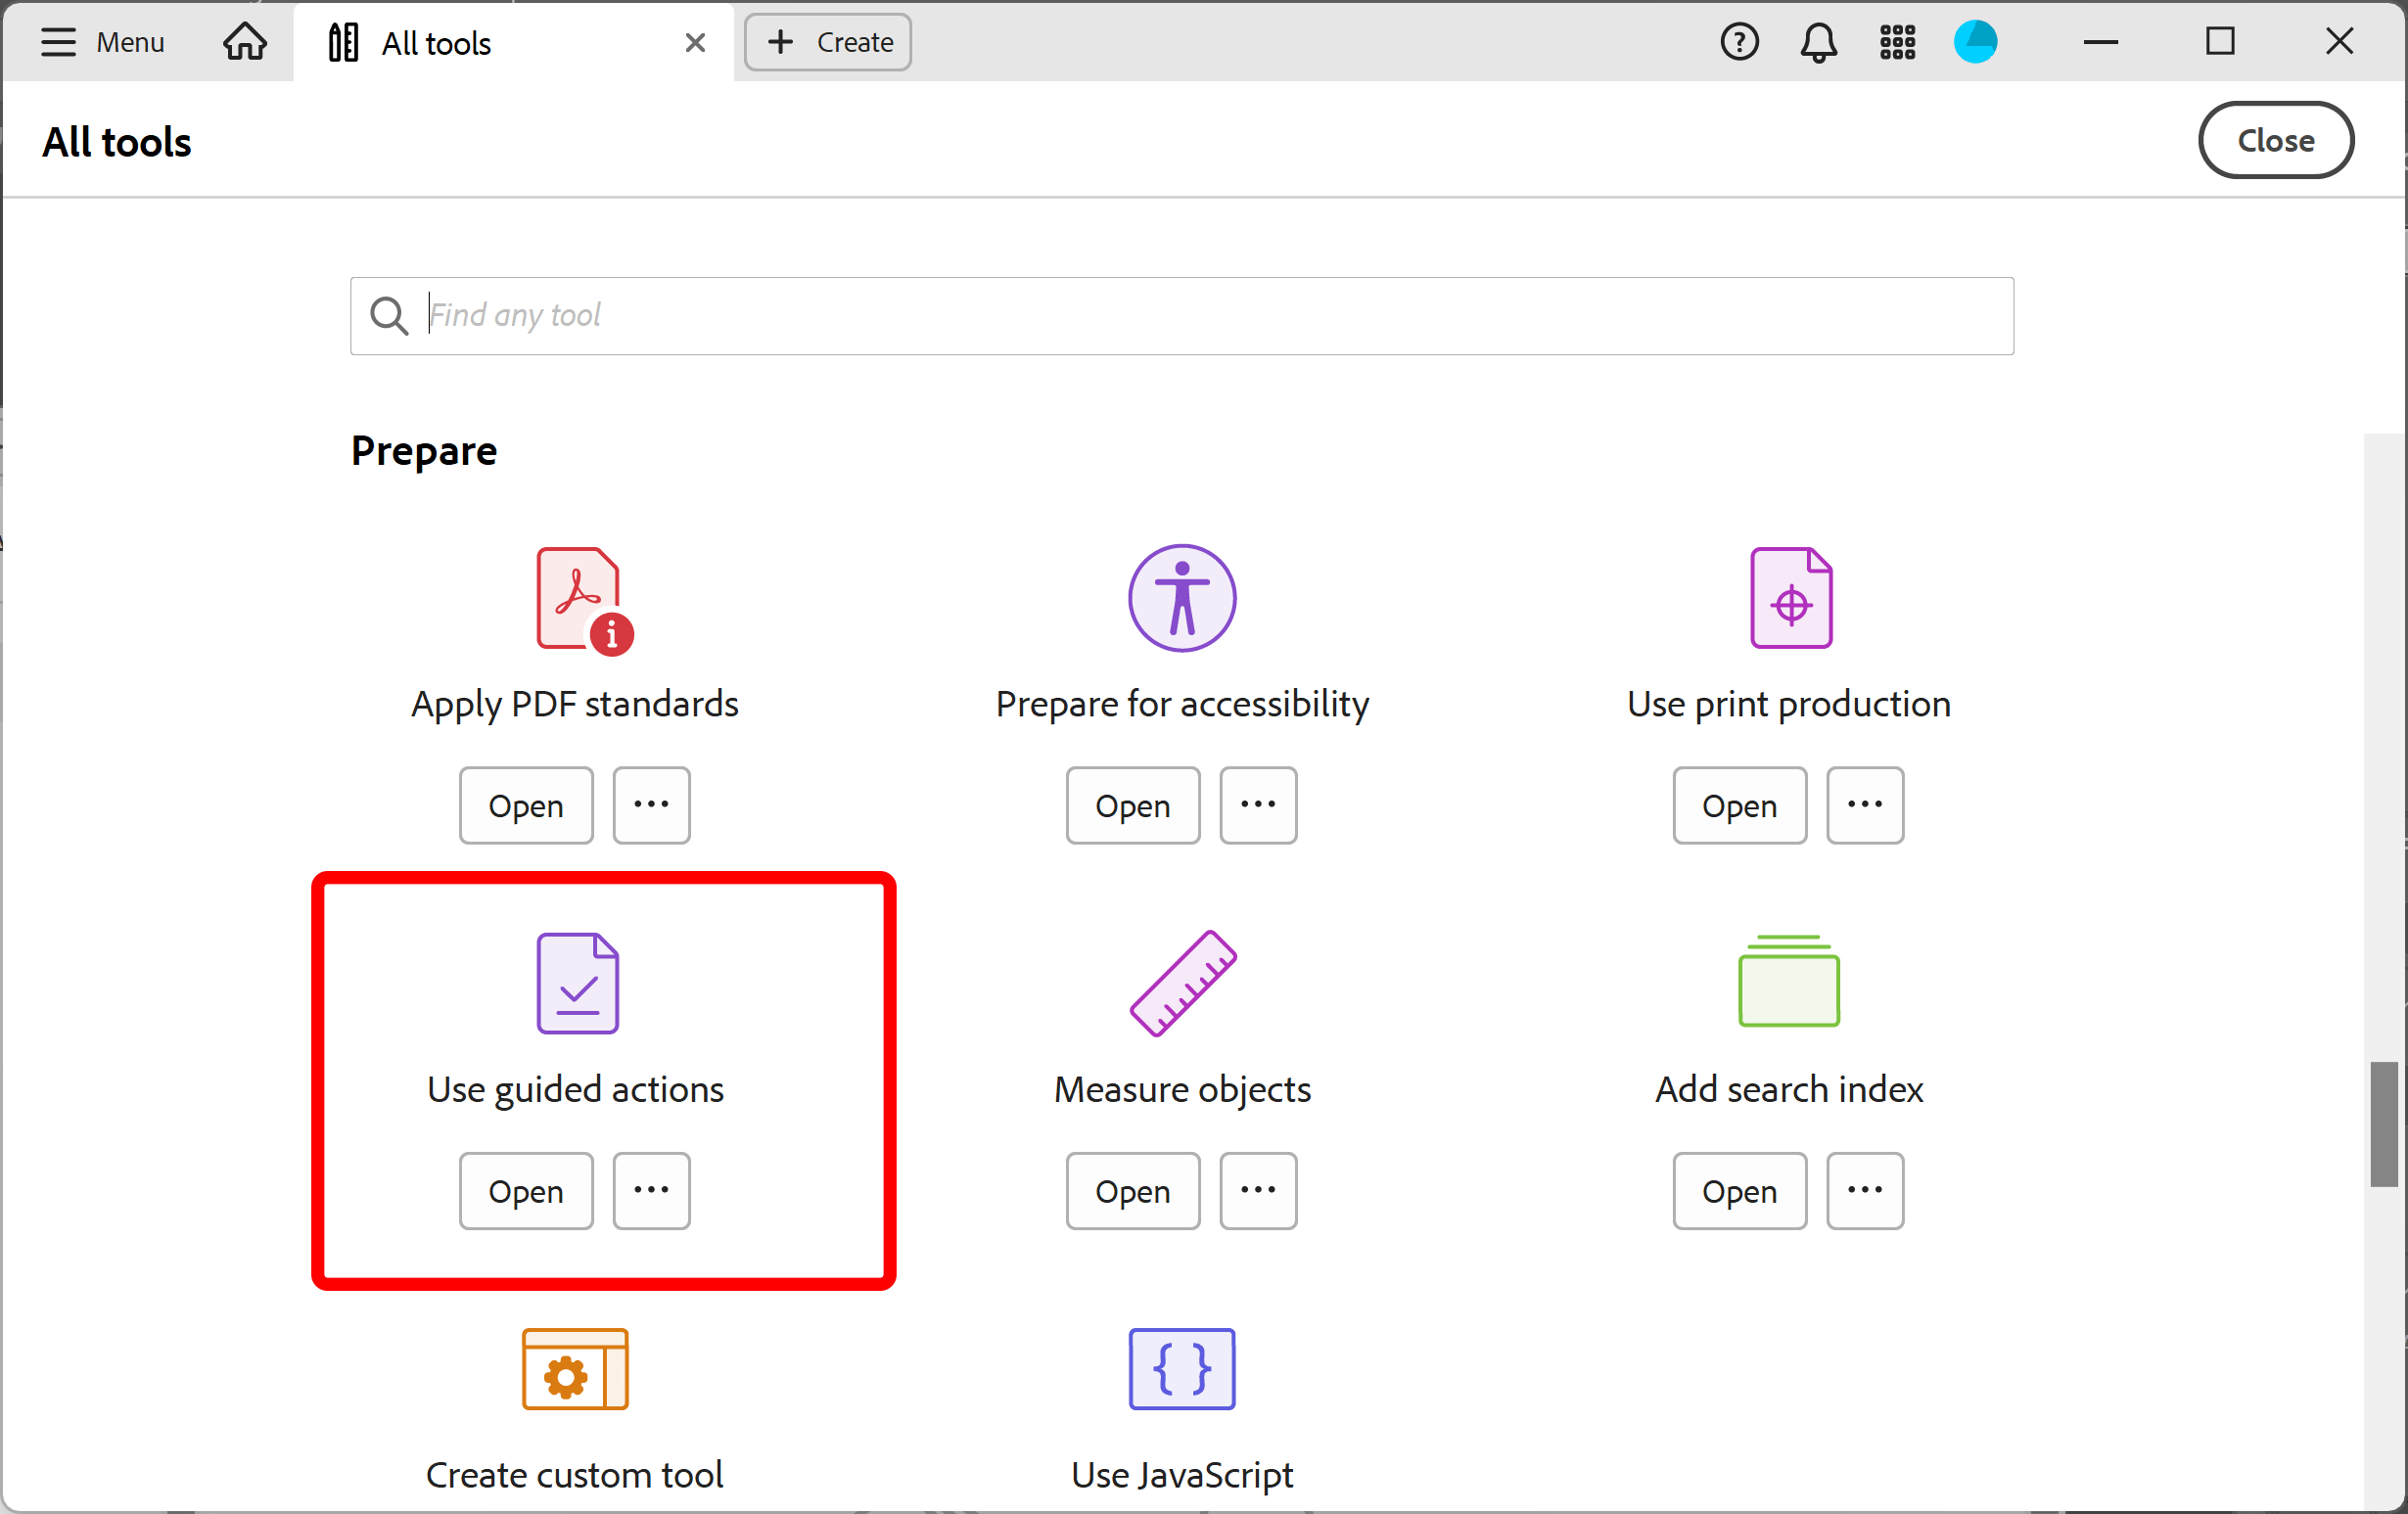
- Click on the "New Action" icon to create a new "action".
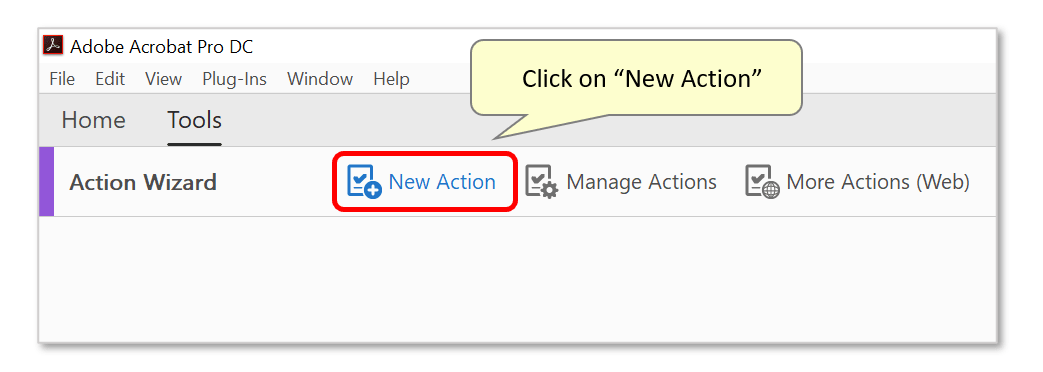
- Create New Action with Action Wizard Tool (Classic Acrobat)
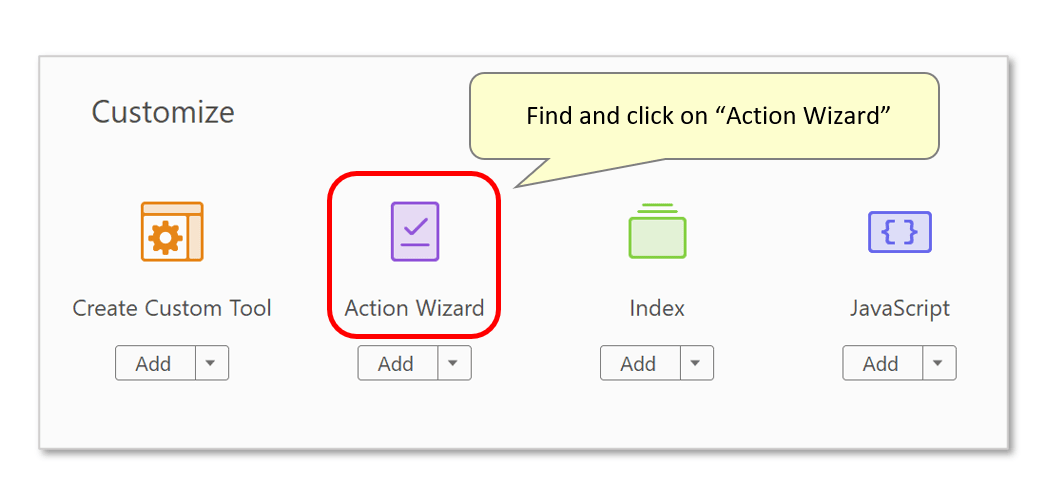
- If you are using "classic" Adobe Acrobat, tnen you must use Action Wizard tool. If you are using "new" Adobe Acrobat, then skip this section. Begin by opening the "Tools" panel, selecting "Action Wizard", and pressing "New Action..." on the toolbar:
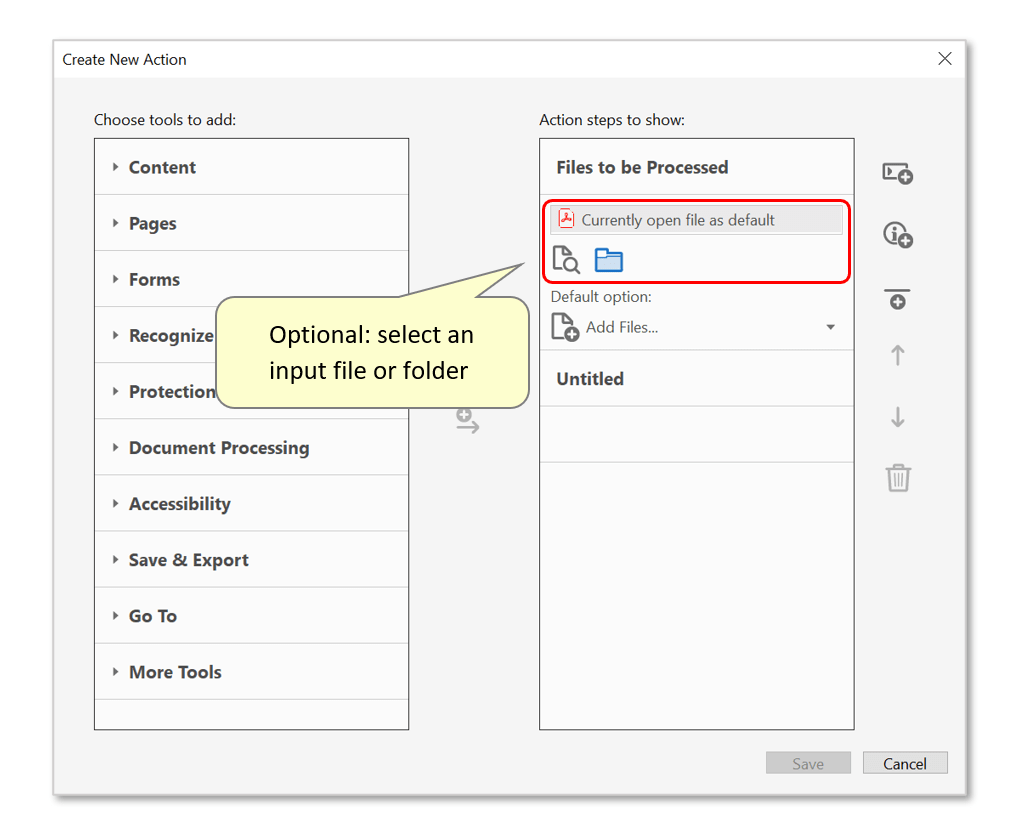
- Select Input Files
- By default, this action would run on the "currently open file". Use the select file/folder icons to run it only on specific files/folders.
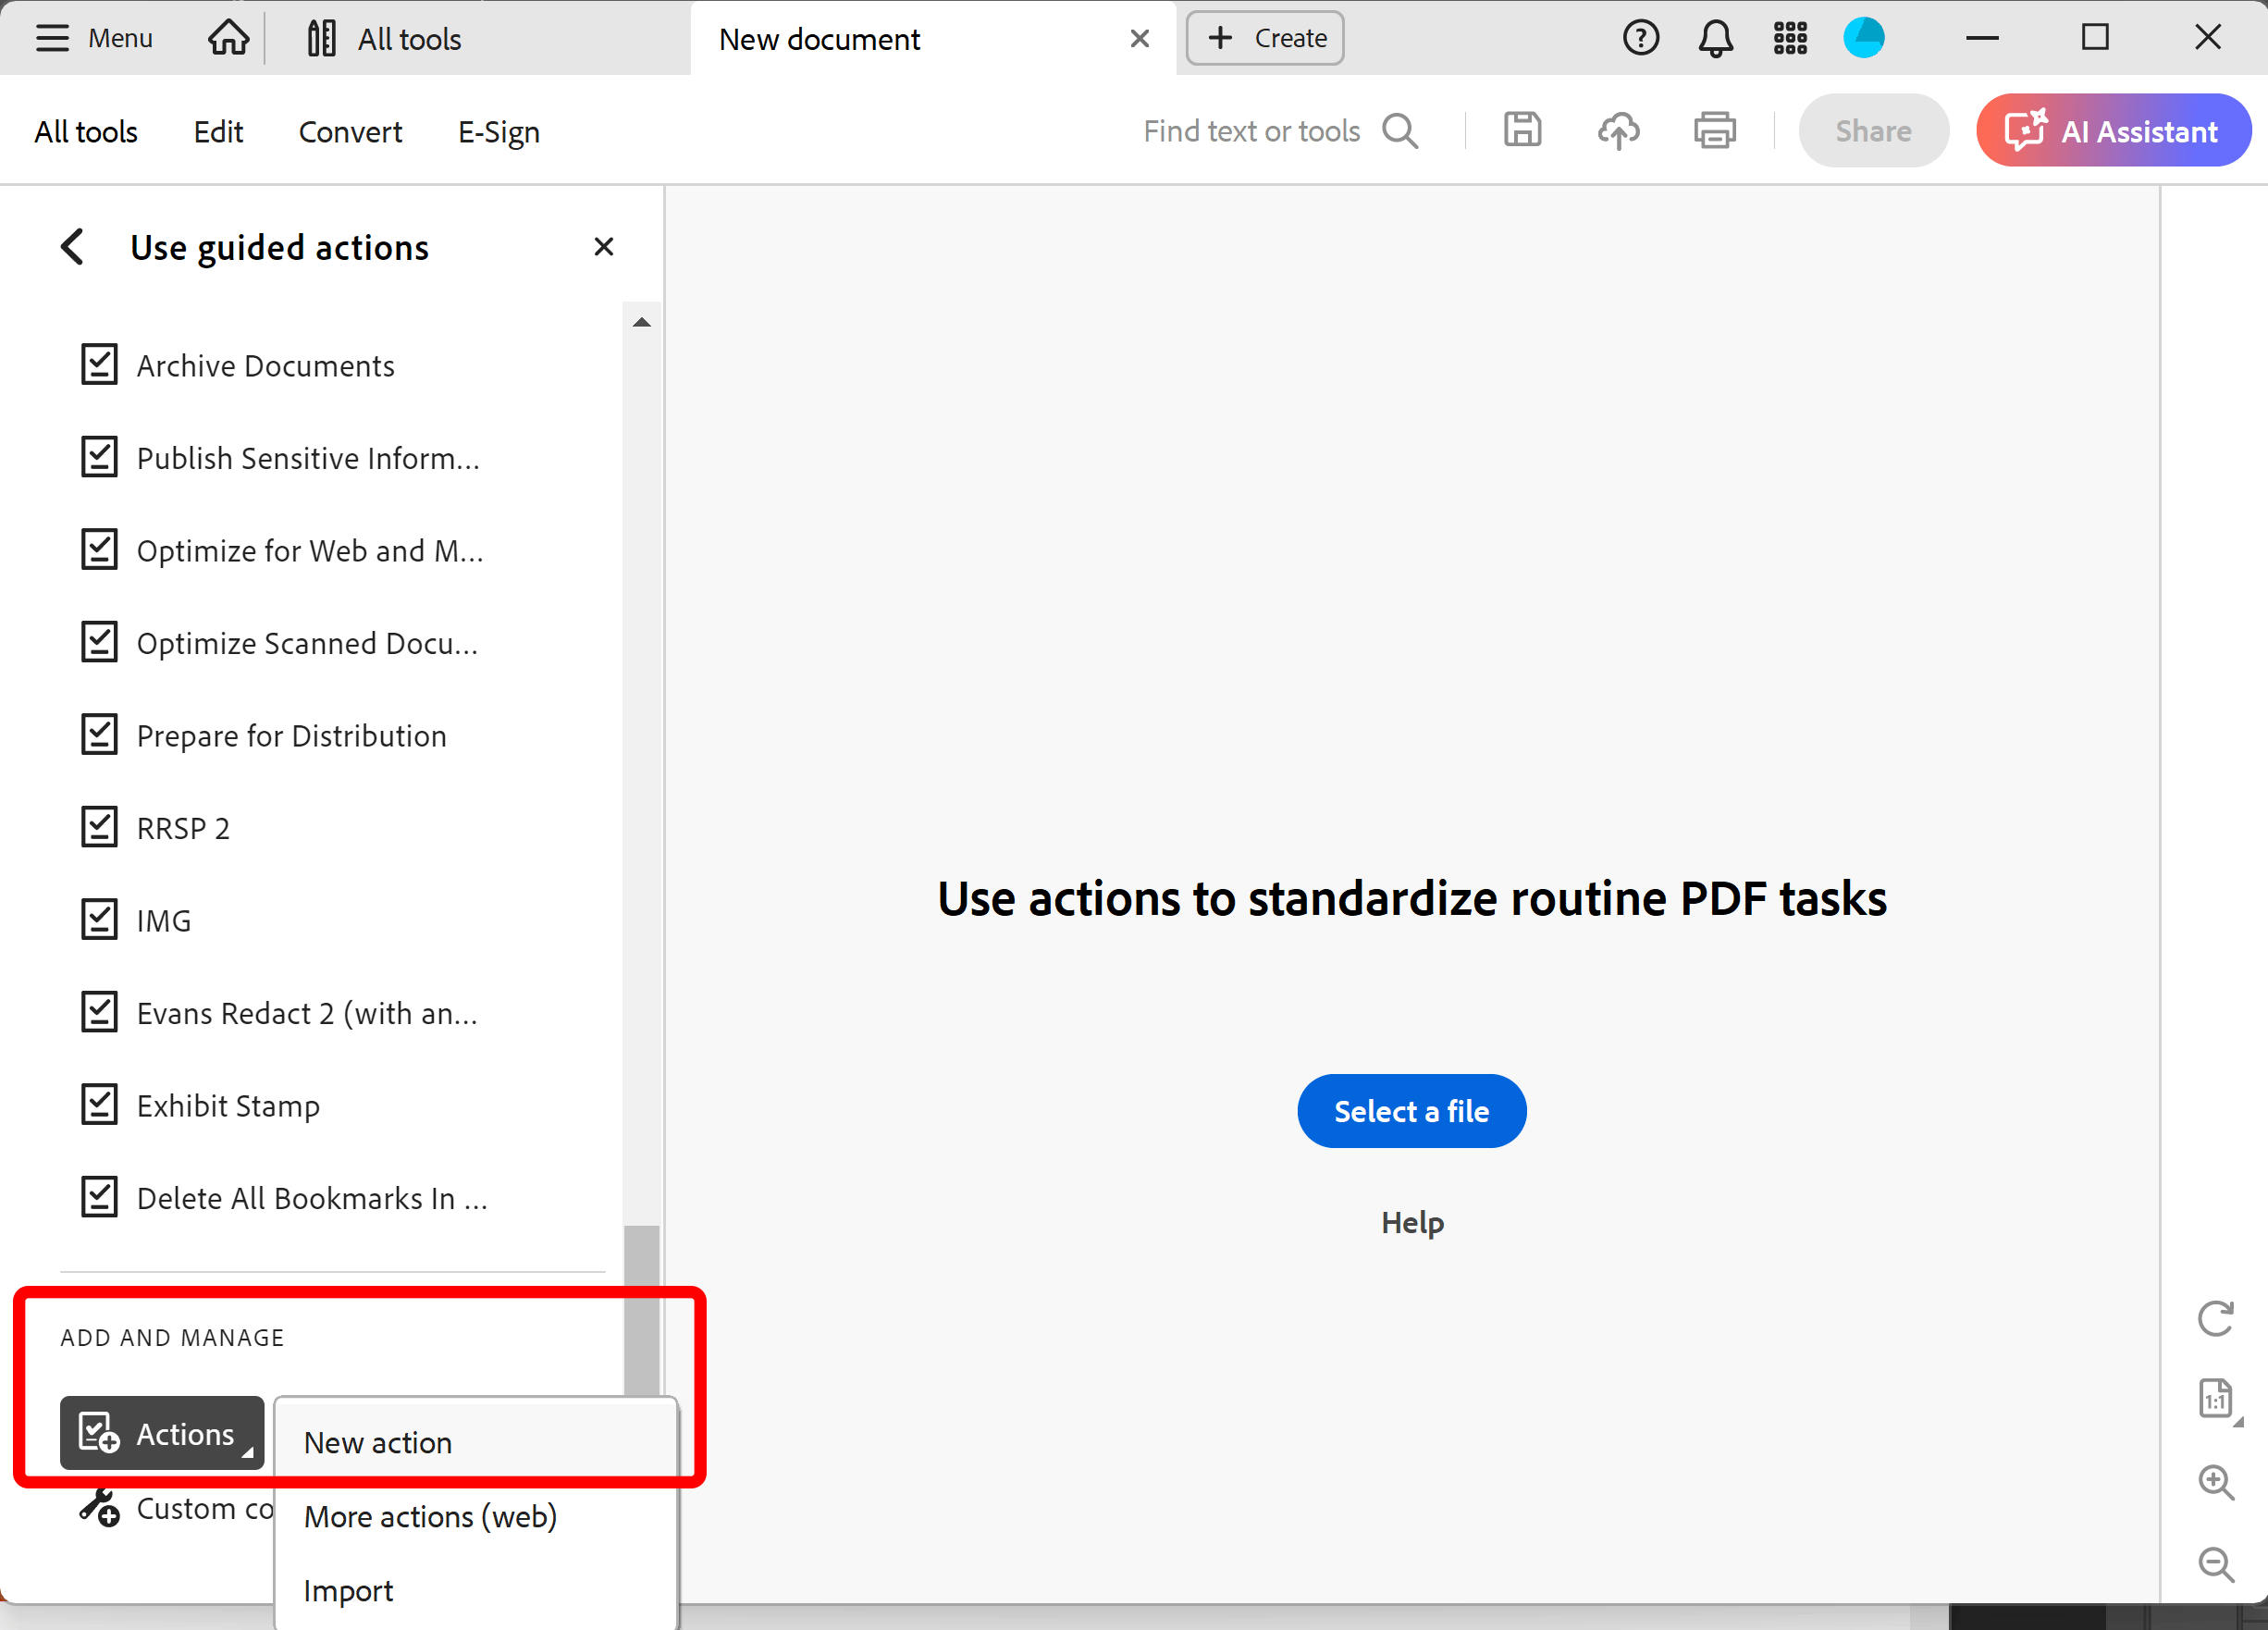
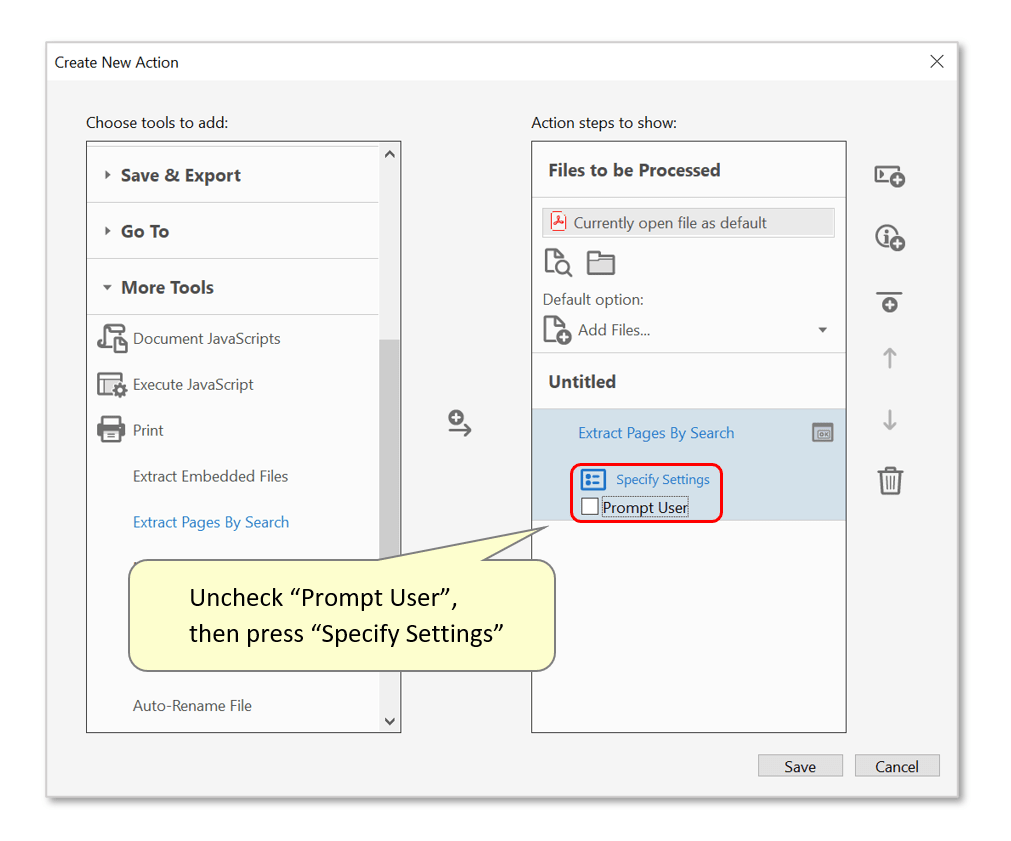
- Click on the "More Tools" category to expand the list of available commands.
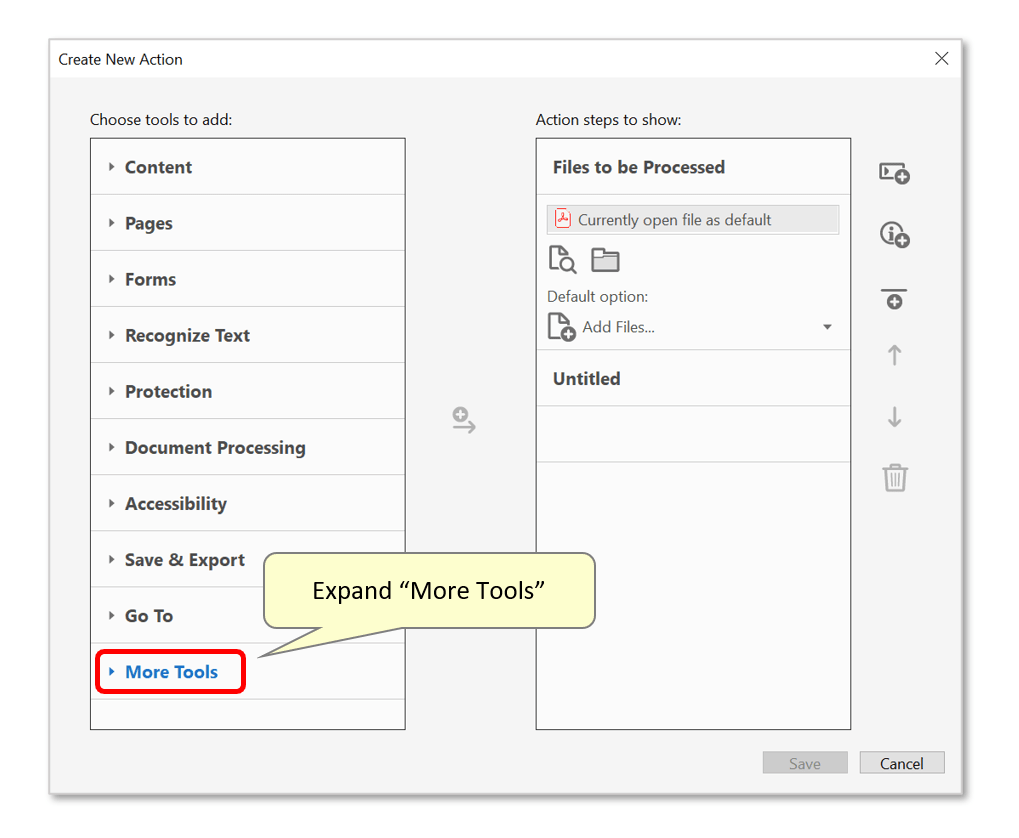
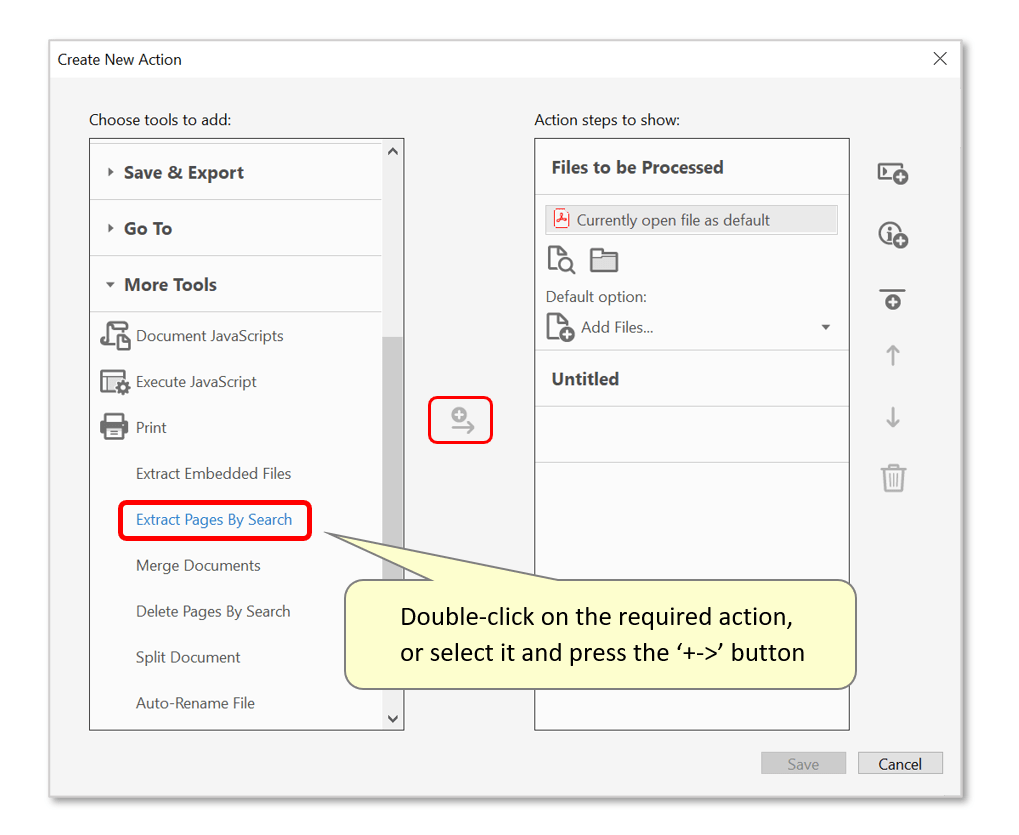
- Find and double-click on the "Extract Pages By Search" command - or select it and press the "+->" button. This adds it to the list of action steps on the right.
- Uncheck the "Prompt User" checkbox, otherwise the program would always prompt you to modify settings when this action is executed. Now press "Specify Settings".
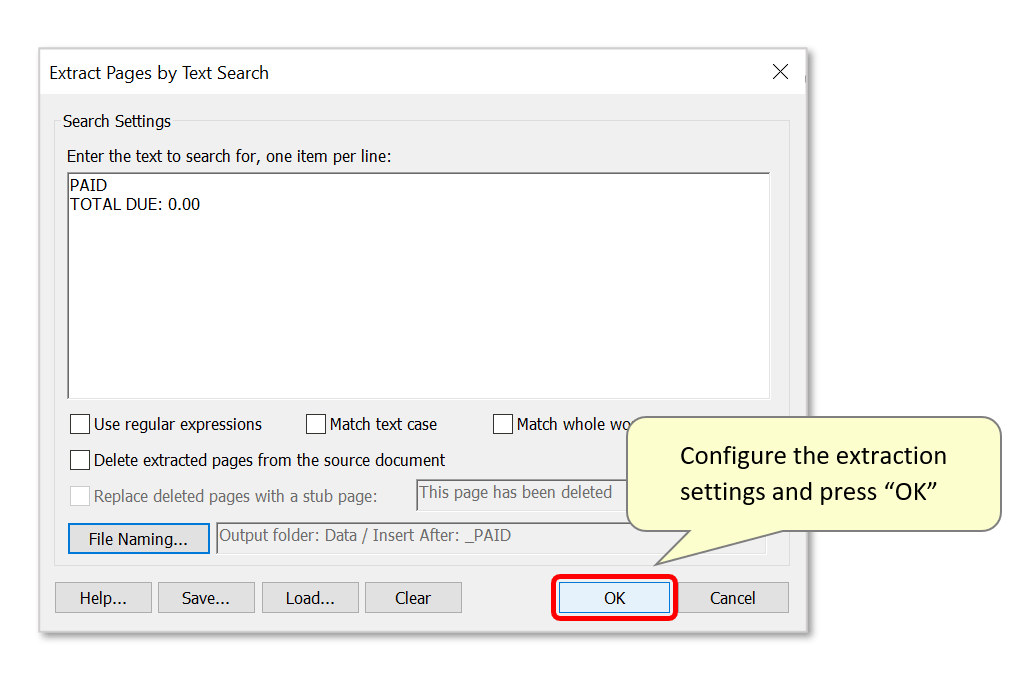
- Configure the desired extraction settings (see steps 2 - 5 above). Note that the output folder specified here is where the extracted pages are placed after the action is executed.
- Press "OK" to proceed.
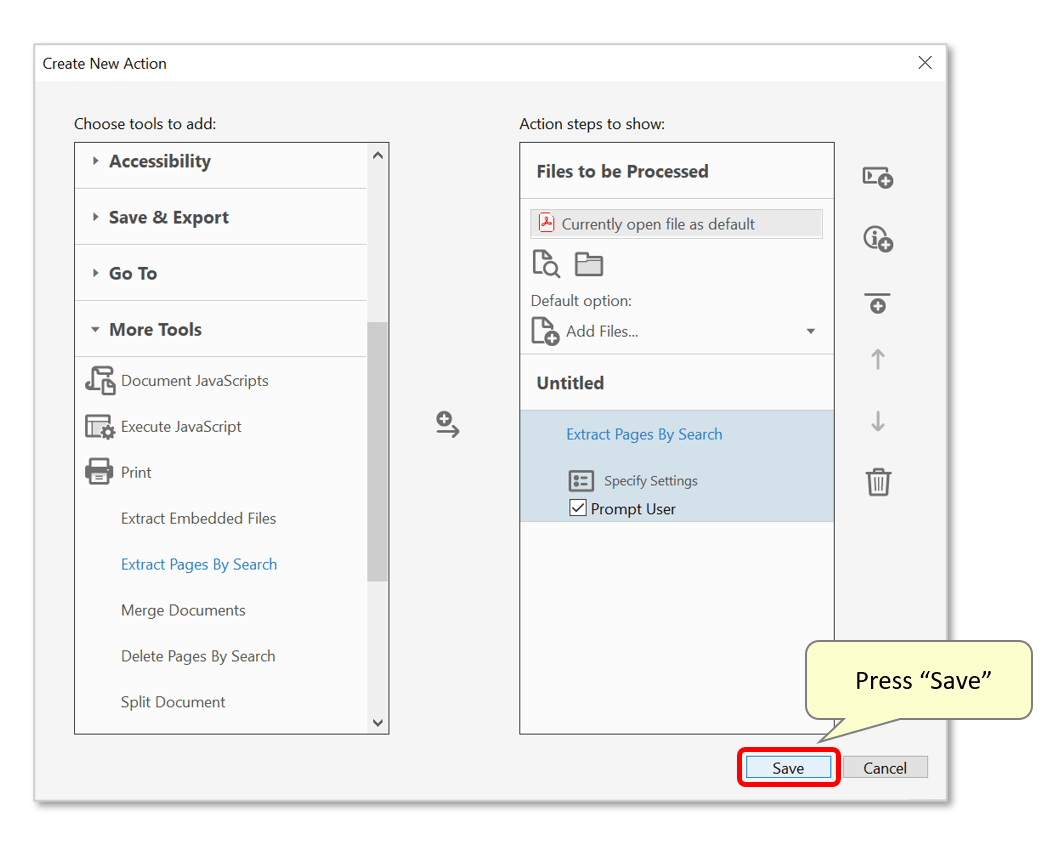
- IMPORTANT: Note that if you want to delete extracted pages from the input PDF file, then make sure to add a “Save” command to the “action” to actually save changes back to the input file.
- Press "Save" button to save the action.
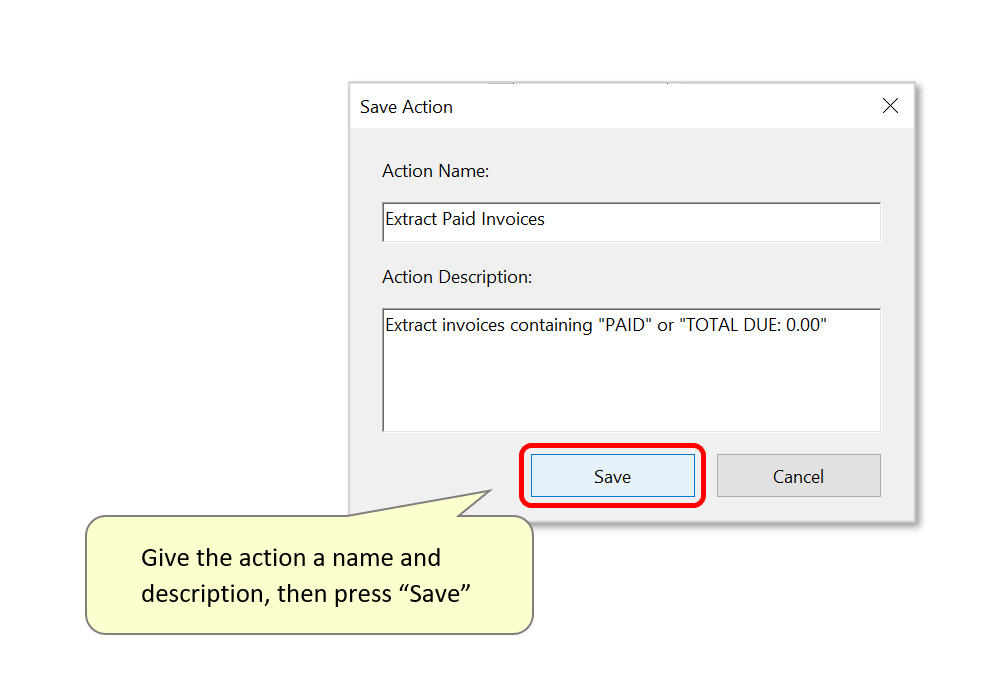
- Type a suitable "Action Name" and optionally a description into the "Save Action" dialog. Press "Save" to continue.
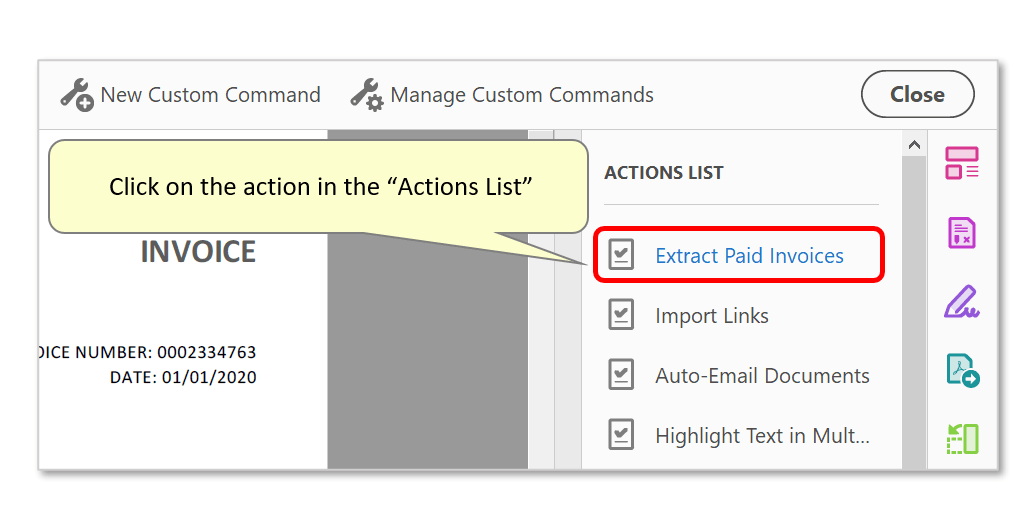
- The new action will have been added to the "Actions List" on the right. Click on it to use it.
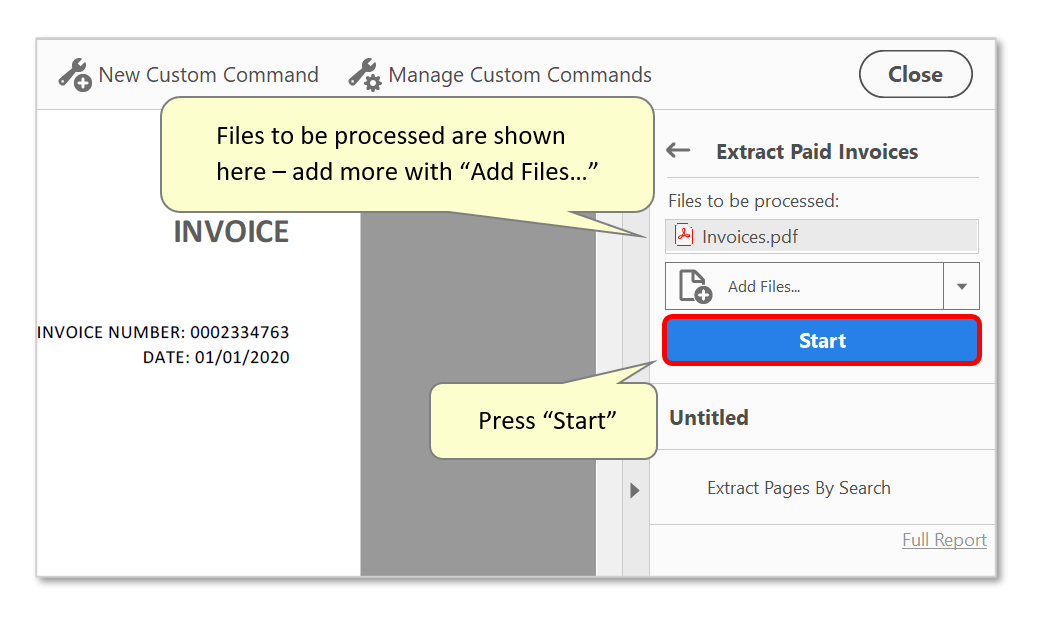
- The currently opened file will be shown under "Files to be processed:" - unless a specific file/folder was configured when configuring the action settings. Optionally press "Add Files..." to process more. Note that files from different folders can be processed at the same time, by repeatedly using the "Add Files..." button.
- Press the "Start" button to begin running the action.
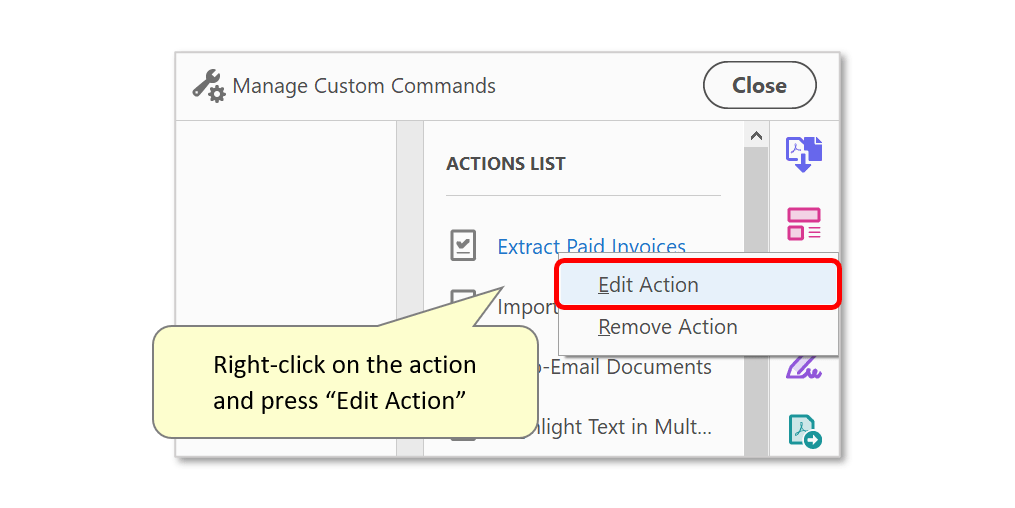
- Instead of creating new actions to extract pages containing different text, edit the existing one. To do this, open Guided Actions (or Action Wizard) tool and right-click on the action in the "Actions List". Then press "Edit Action" to re-configure it.
- Extracting Pages via BAT file
- It is also possible to execute this operation from a command-line BAT file.
- You can find more AutoSplit tutorials here.