Using 'Search and Replace Rules' to Rename PDF Files
AutoSplit plug-in for Adobe® Acrobat®
- Introduction
- Manually renaming many files individually can be time consuming especially when filenames need to be created based on file content. The AutoSplit™ plug-in provides various ways to rename multiple PDF documents at once, with the option to also use 'search and replace' rules to assist file renaming. This tutorial explains how to create these renaming rules and optionally save the configuration for future re-use, when similar files need to renamed using the same method.
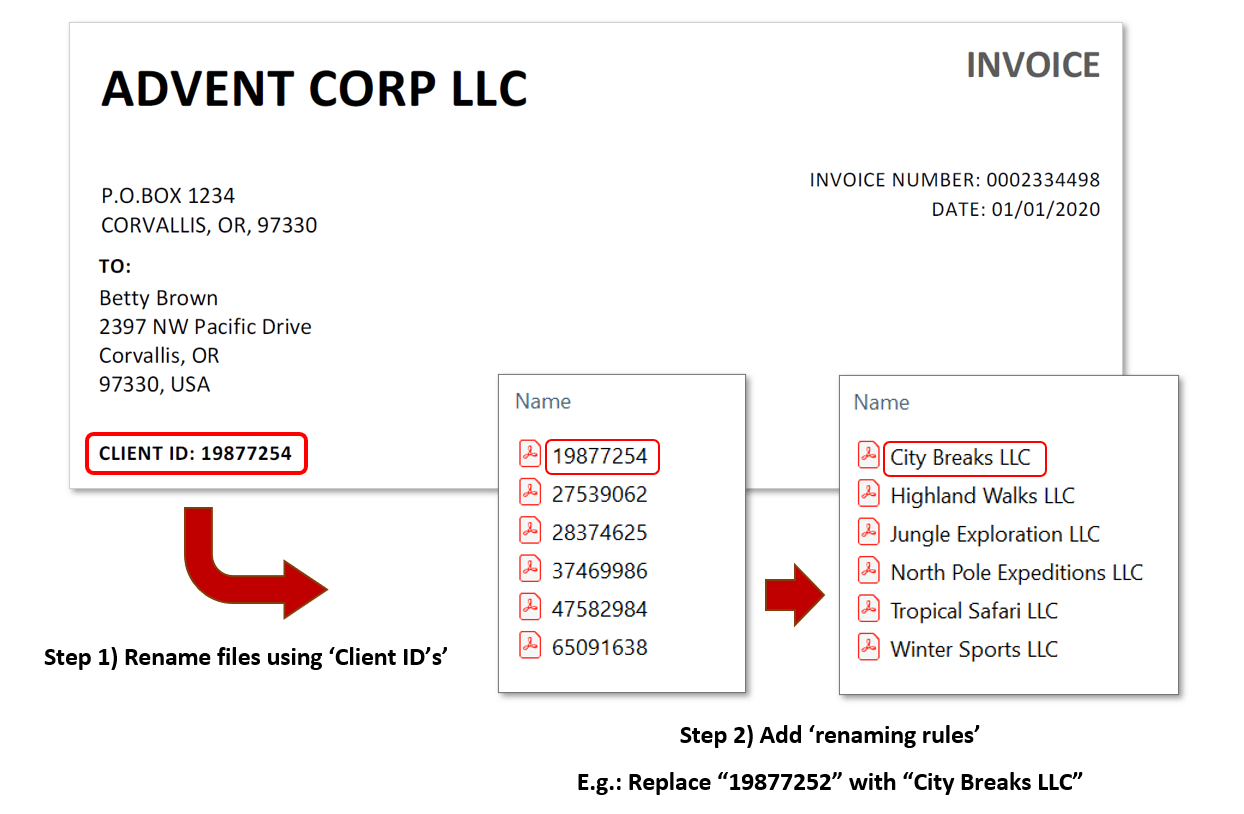
- In this example, we will rename sample PDF invoices using business names. The business names do not appear in the invoices, so can not be directly extracted. However, each invoice contains a unique ‘Client ID’ number that would appear in every invoice to that business. We will rename the files using these ID numbers, then create a ‘search and replace’ rule to replace these numbers with their corresponding business names. Saving the configuration means that any future invoices featuring the relevant ‘Client ID’s’ can be renamed to contain the correct business name.
- Saving these rules as a settings file or as an action in ‘Action Wizard’, means that they can be used as a ‘lookup table’ by the plug-in. Any future invoices can be processed under the same instructions for better document organization. It is not ideal for saving hundreds of search and replace rules to convert multiple options, but is useful when documents of up to a few dozen categories need to be renamed.
- Input Document Description
- The sample files used here are invoices named only by customer names. Each invoice contains an 8-digit 'Client ID' located somewhere on the first page, which would always feature in invoices for that particular business.
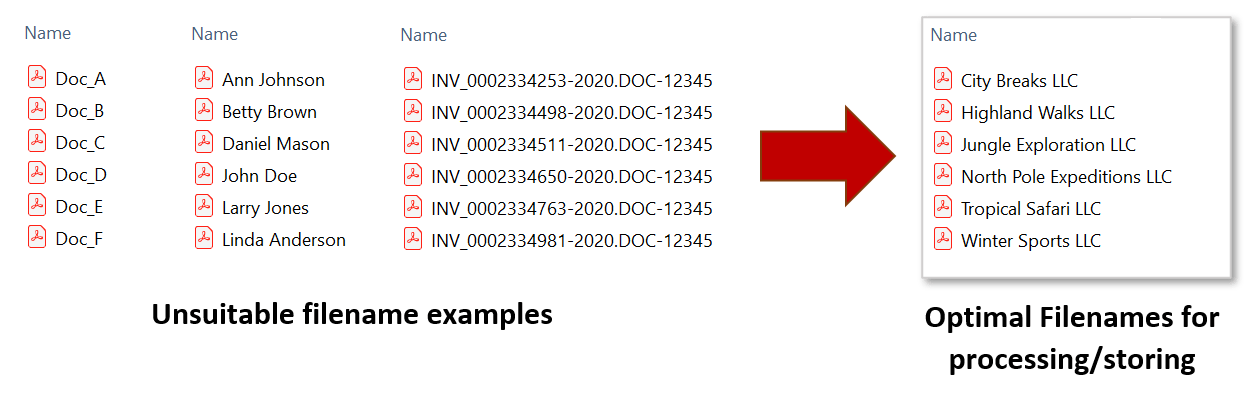
- Search and replace rules will be applied to replace any occurrence of these client ID’s in output filenames, with a business name. Such file names may be more useful for optimal organisation in document archives, or when used by an accounting department etc.
- Batch Processing Support
- Automate this operation with Acrobat's Guided Actions (aka Action Wizard) tool to process similar files using the same configuration with only one click.
- Prerequisites
- You need a copy of Adobe® Acrobat® along with the AutoSplit plug-in installed on your computer in order to use this tutorial. Both are available as trial versions.
- Step 1 - Open the "Auto-Rename PDF Files" Menu
- Close all PDF documents open in Acrobat to avoid possible file access conflicts.
Start Adobe® Acrobat® and select
“Plug-ins > Auto-Rename PDF Files…” from the main Acrobat menu.
[⚡ How to locate Plugins menu in Adobe® Acrobat® ⚡] - Step 2 - Add a New Filename Component
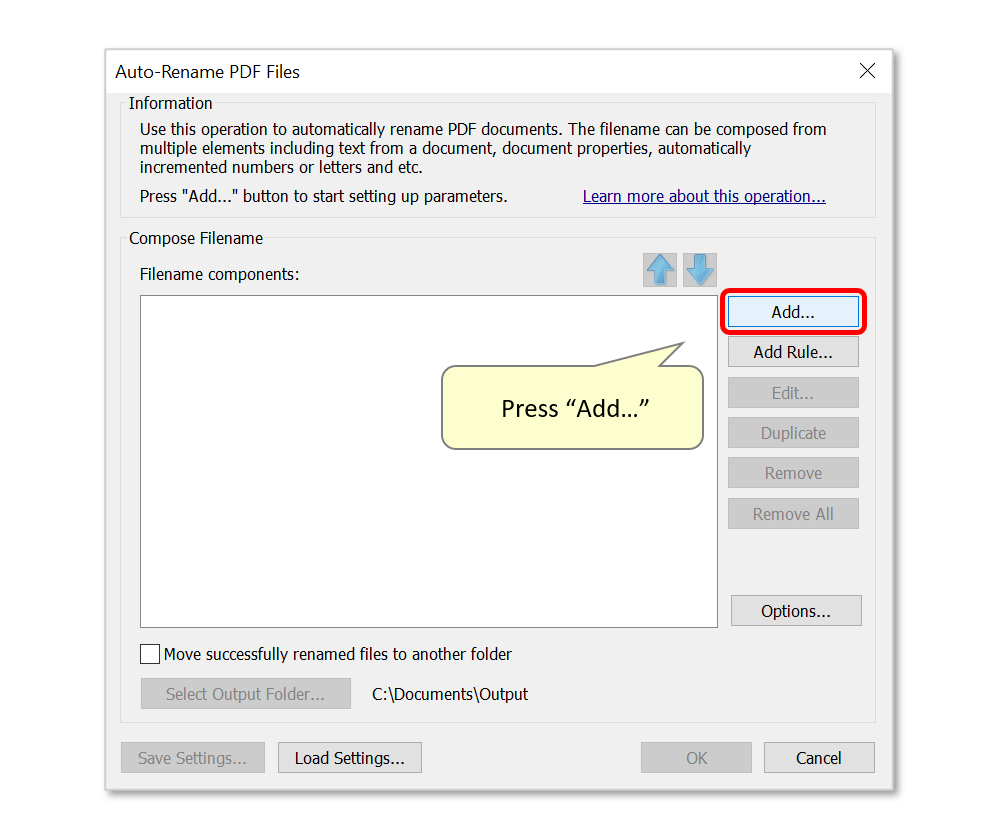
- This method initially replaces filenames with each 'Client ID' number. A set of processing rules will later be created so that the plug-in detects the presence of these specific numbers, and replaces them with a corresponding business name. This first step is is to instruct the plug-in on how to locate these ID numbers.
- Press “Add…” to add a new component to the output file name.
- Step 3 - Select a Filenaming Option
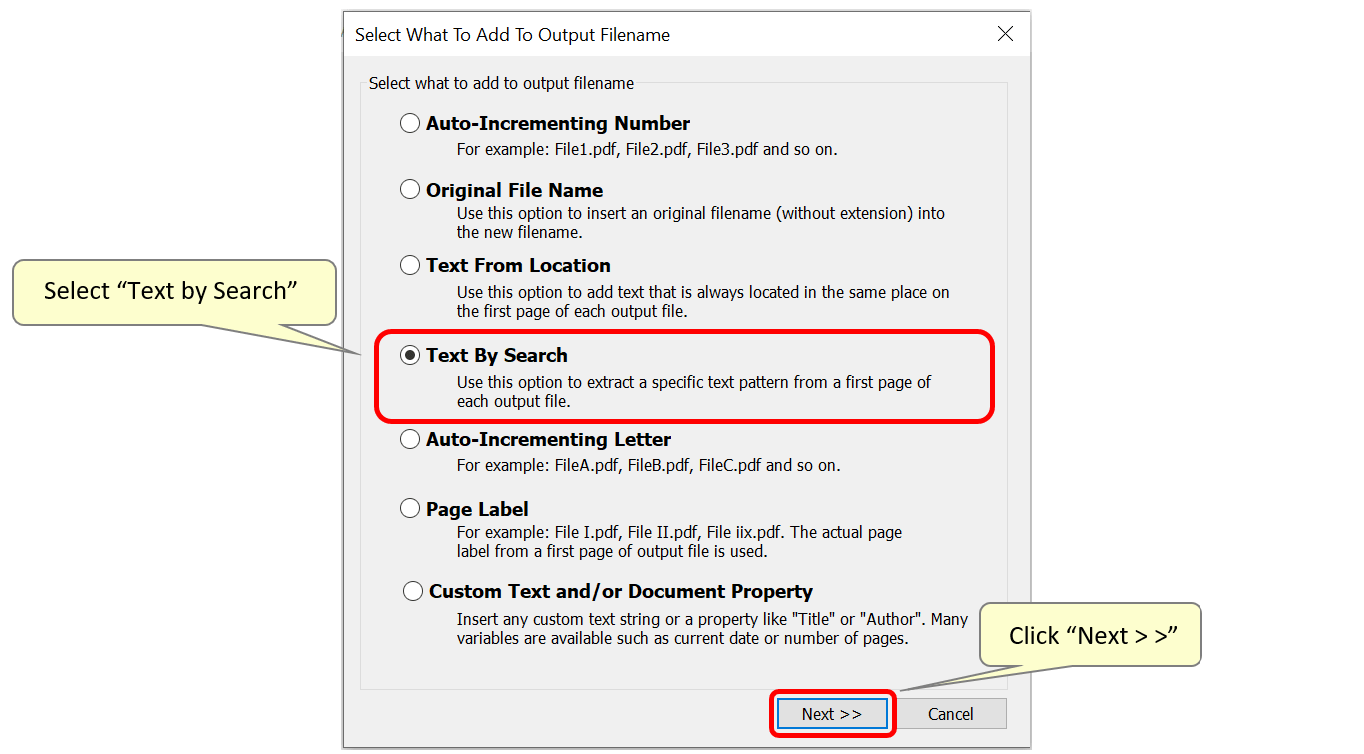
- Select the “Text By Search” option and click “Next” to enter parameters.
- Step 4 - Enter a Search Expression
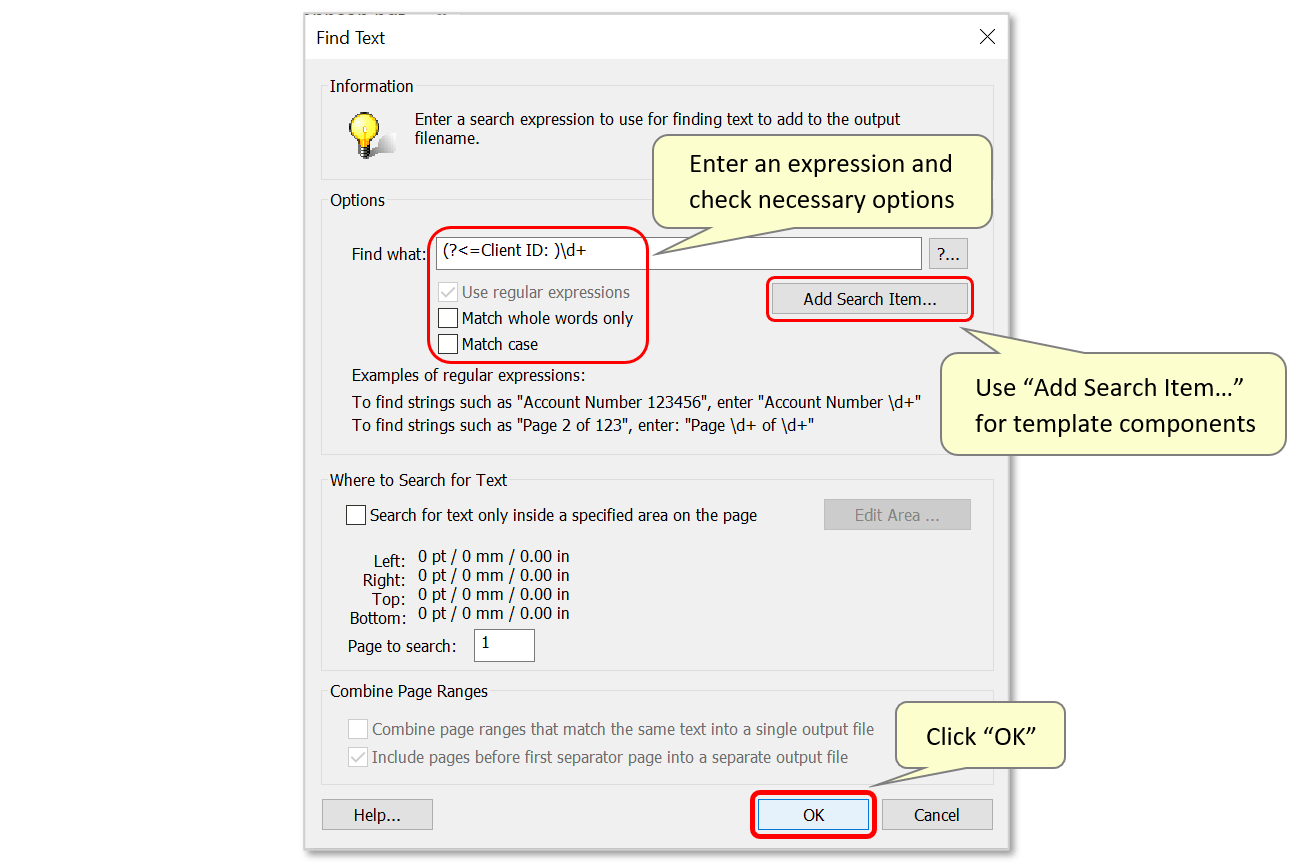
- In the "Find Text" dialog, configure search parameters for locating text within documents that is unique to each one. In this example, we will seach for the Client ID numbers located on page '1' of each invoice. Enter a relevant search expression in the "Find what:" entry box. To locate the client ID numbers, we will use the search expression shown below. It contains the text to search for ("Client ID:") which will be immediately followed by a number consisting of one or more digits, as indicated by "\d+". The plug-in uses this expression to identify these ID numbers and use them for the new filenames.
- The first part of this expression is formatted so that the "Client ID:" text is not used as part of the output filename. It is simply used to locate the relevant numbers. There are other ways to deal with unwanted text:
- 1) Exclude it from the search by adding “\K” to the search expression. For example, “Client ID: \K\d+” will exclude all matching text before the “\K” from the output filename. Only the client ID number would be extracted in this case, and not the “Client ID:” text.
- 2) A 'search and replace' rule could also be added to remove this text. For example, search for any presence of “Client ID:” and replace it with ‘nothing’ by leaving the ‘replace with’ field empty, or containing only a space (see step 7).
- Optionally, add components to search expressions via the "Add Search Item..." button. This opens a dialog containing a detailed list of template search items that can be selected according to the user's requirements.
- Confirm necessary options such as "Match whole words only" or "Match case" - in this example, both are left unchecked (the "CLIENT ID:" text is uppercase in these sample documents, but the expression would still work if the text case was inconsistent across all files being renamed).
- Click "OK" to proceed.
- Step 5 - Open Renaming Options
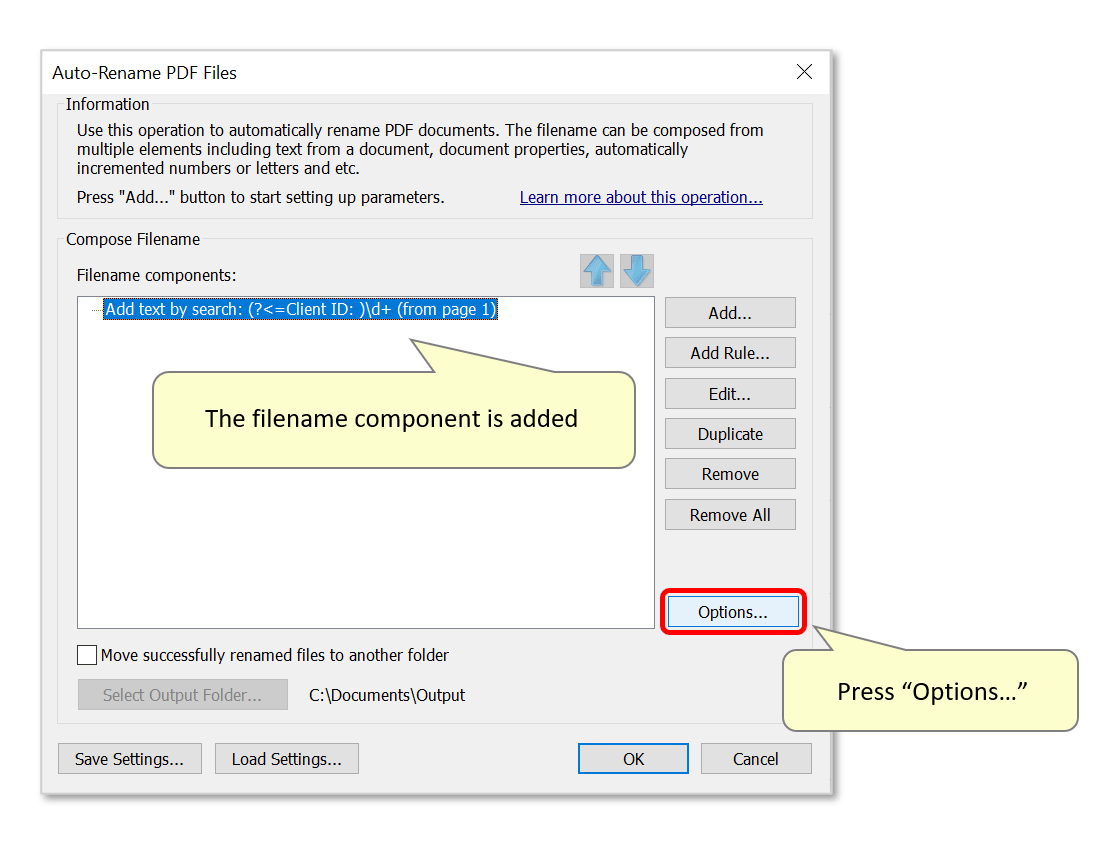
- The text search filenaming component will now be listed.
- Now use the plug-in to replace certain characters in the the new filenames according to a specific set of rules. To do this, click on the "Options..." button to specify a renaming "rule".
- Step 6 - Access the "Renaming Rules" Dialog
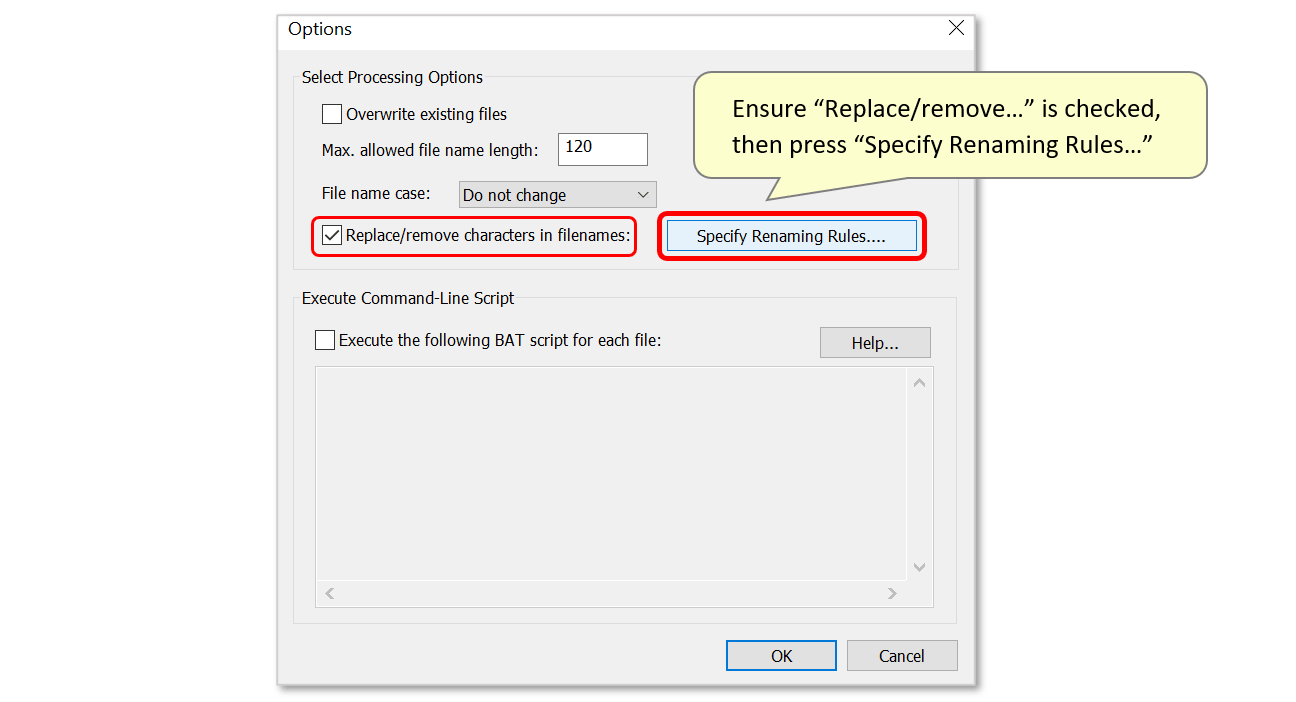
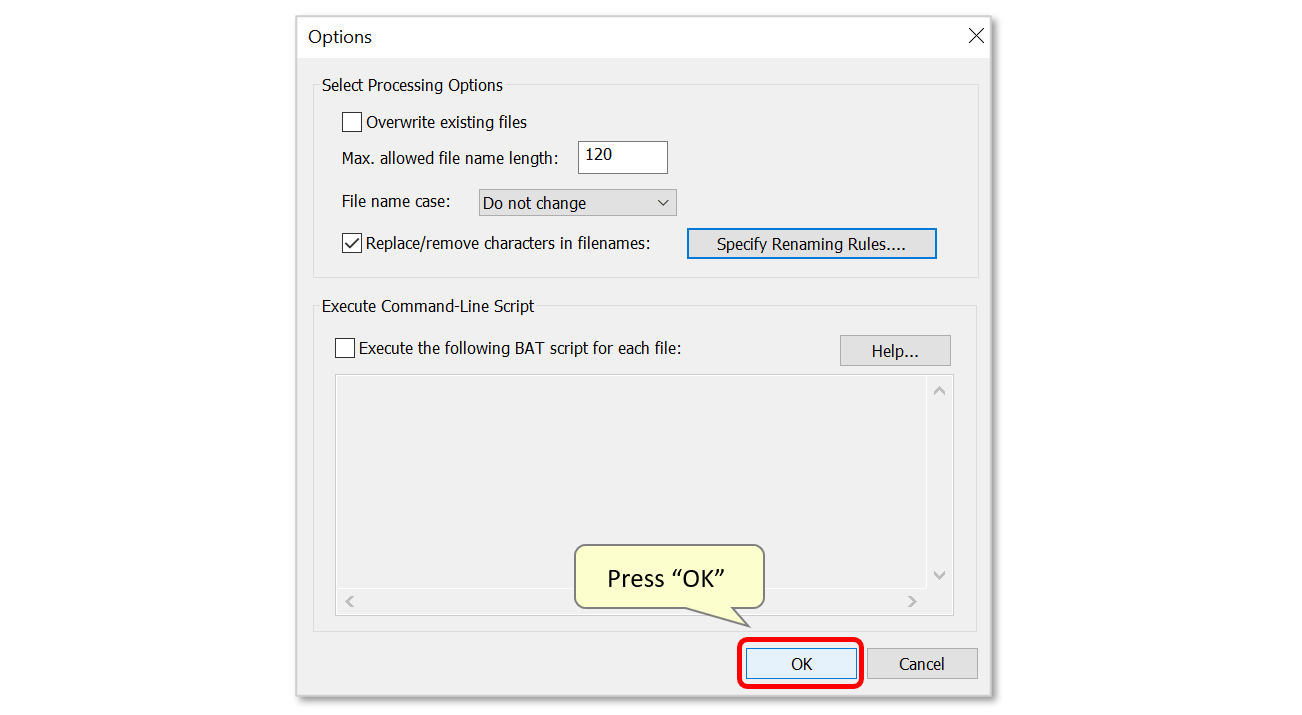
- Ensure that the "Replace/remove characters in filenames" option is checked, then press the "Specify Renaming Rules..." button.
- Step 7 - Create a Renaming Rule
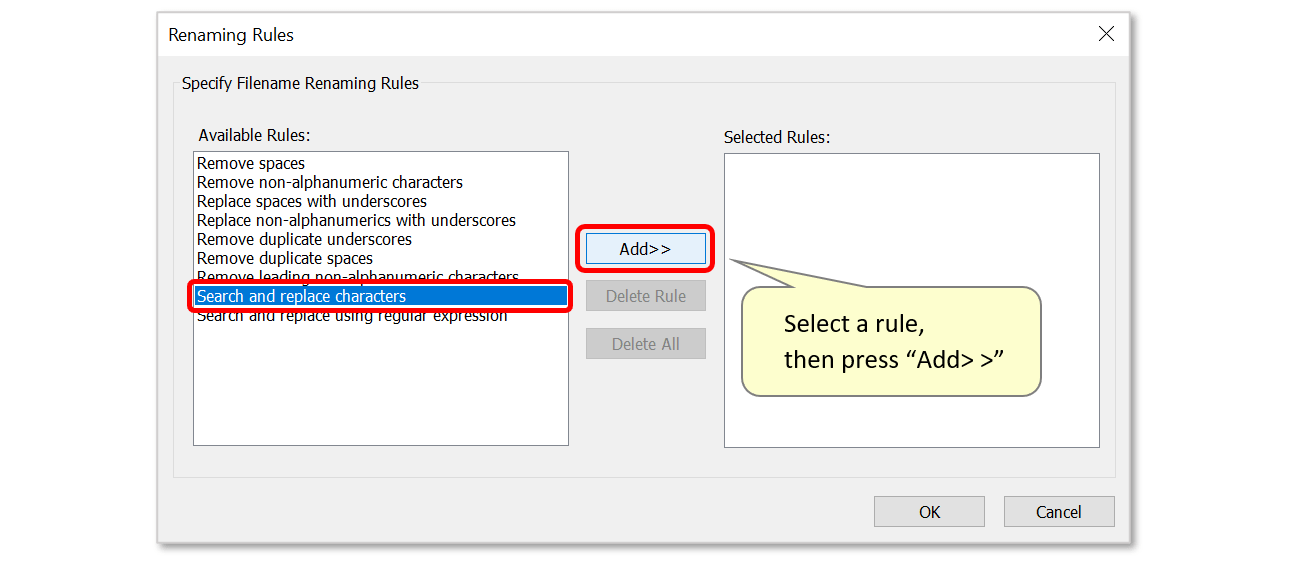
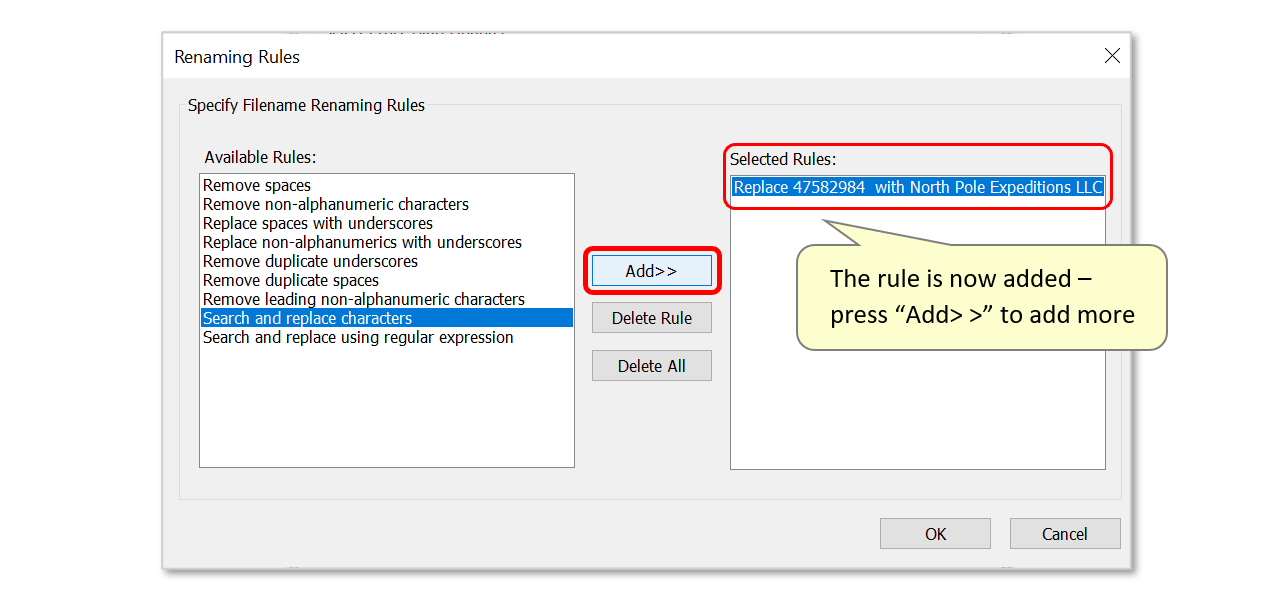
- Use the "Renaming Rules" dialog to create rules that will modify the output filenames. Select an option from the list on the left, then press the "Add>>" button. Here, we will create a set of "Search and replace characters" rules so that specific Client ID numbers (e.g.: 12345678) will be replaced by a relevant company name. When the presence of these ID numbers is detected in output filenames, this content will be automatically changed to the specified company name text.
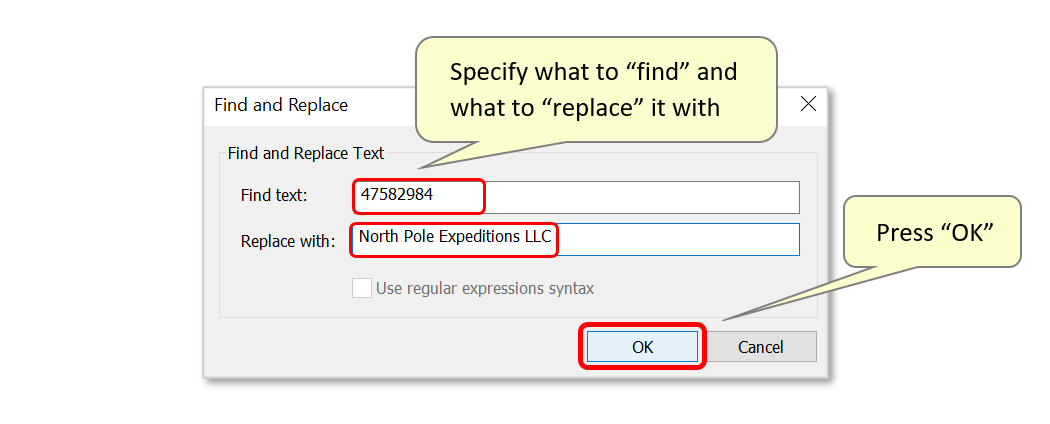
- In the "Find and Replace" dialog, type the text that is to be replaced into the "Find text:" entry box. Then enter the text that is to replace the searched for text in the "Replace with:" box. Here, a specific ID number will be turned into the company name that the invoice is issued to.
- Click "OK" to add the rule.
- The rule will be added to the list on the right side of the dialog. Press "Add>>" to add another.
- Step 8 - Confirm Rules
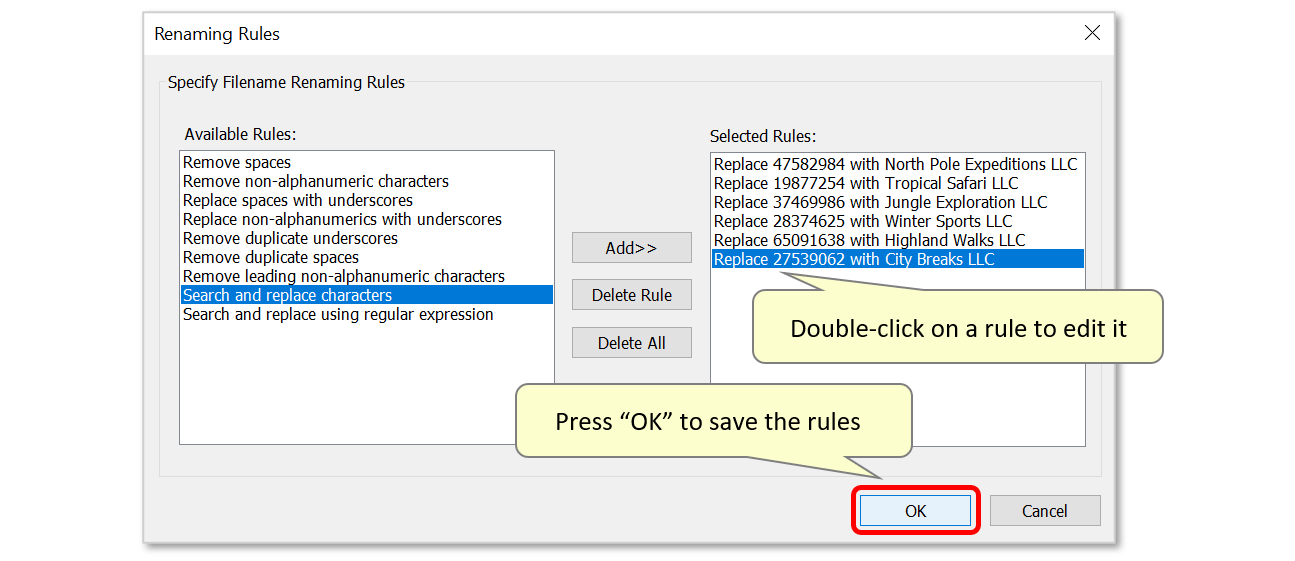
- To demonstrate, we've added a list of rules to rename multiple invoices using this method. Each rule instructs the plug-in to convert the presence of a specific Client ID number into it's corresponding company name. Double click on a rule in the list to edit it.
- Note that any spaces/punctuation etc. included in both the "Find text:" and "Replace with:" fields will affect the output. Take care when copying and pasting text as extra spaces before or after text (" Evermap LLC" / "Evermap LLC ") will be included in the output filename (" Evermap LLC.pdf" / "Evermap LLC .pdf").
- Press "OK" to save the configured rules.
- Press "OK" again.
- Step 9 - Select an Output Location
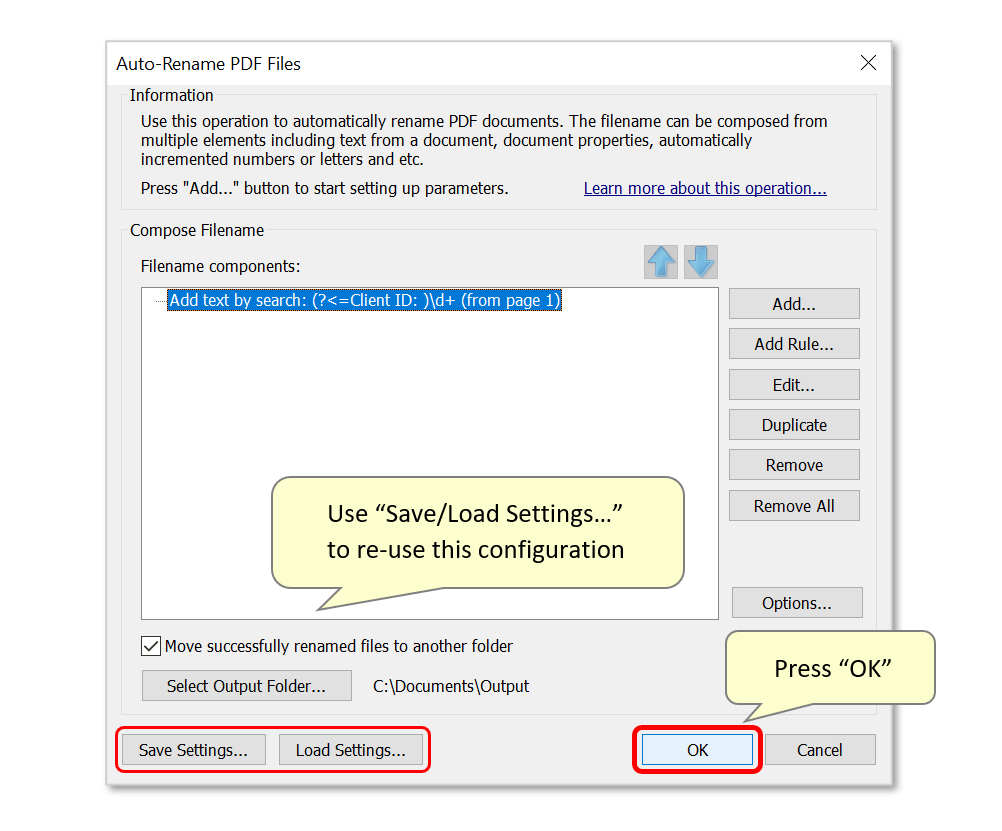
- By default, the files that will later be selected for processing will be renamed in their existing location. Alternatively, the plug-in provides the option to move these renamed files to a different location. To do this, check the "Move successfully renamed files to another folder" option. This activates the "Select Output Folder..." button. Press it to select a desired output location.
- Consider also making backup copies of files before carrying out this procedure.

- Step 10 - Confirm Settings
- Use the "Save Settings..." button on the lower left to save this configuration as a *.docren settings file for future re-use. This configuration can be re-loaded via the "Load Settings..." button.
- When all necessary rules have been applied, press "OK" to proceed.
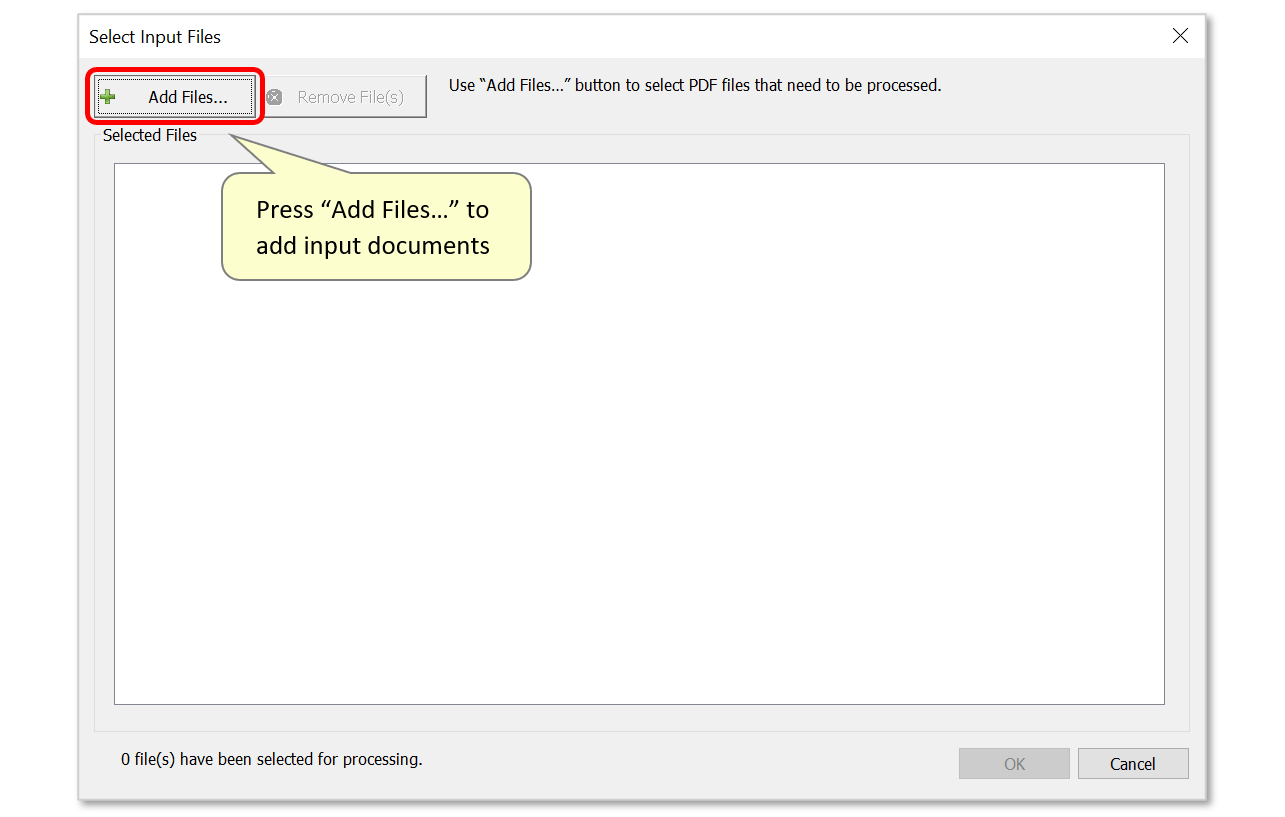
- Step 11 - Add Input Files
- The "Select Input Files" dialog will now be open. Use the "Add Files..." button to select the files to be processed.
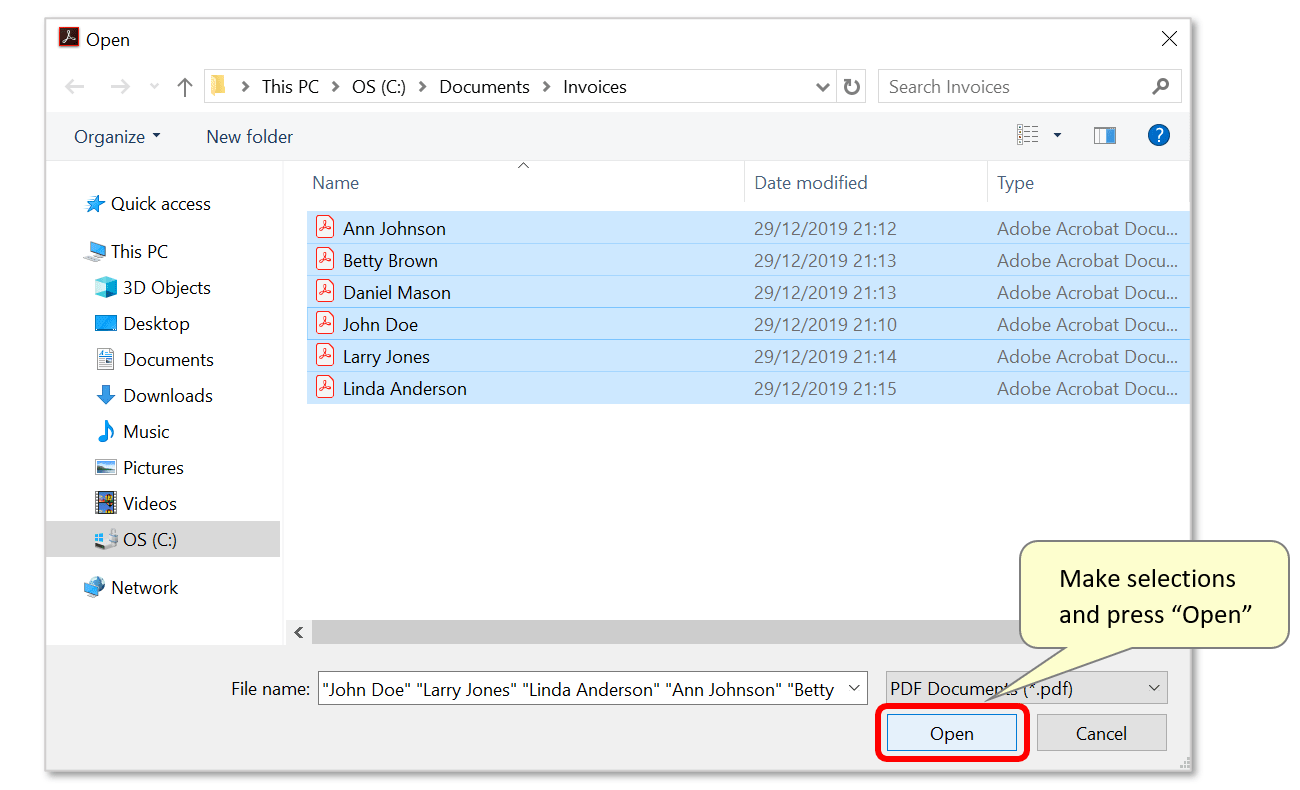
- Select all necessary files and press "Open". Note that files from different folders can be added by using the "Add Files..." button multiple times.
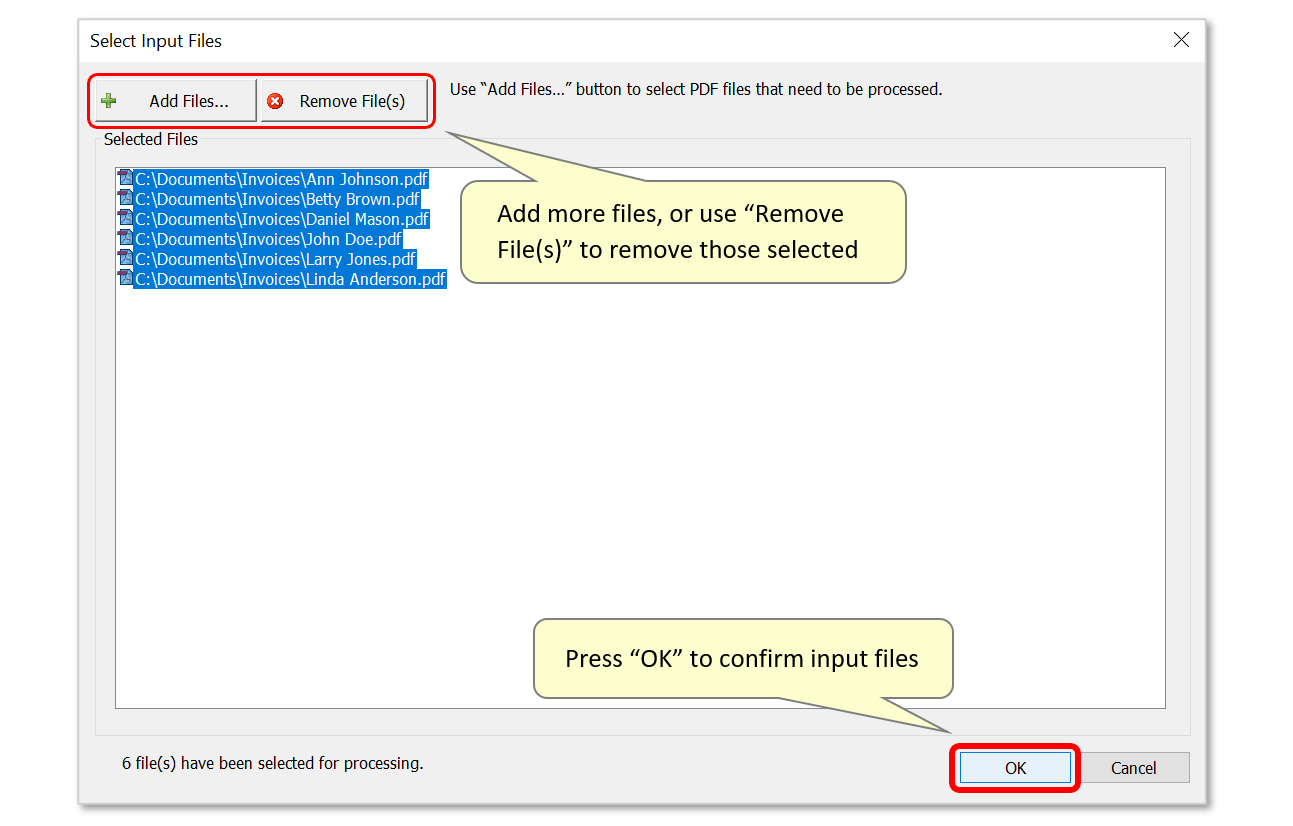
- Step 12 - Confirm Input Files
- The selected PDF files will now be listed in the "Select Input Files" dialog. Remove selected files via the "Remove Files(s)" button. Press "OK" once all necessary files have been added.
- Step 13 - Review and Confirm New Filenames
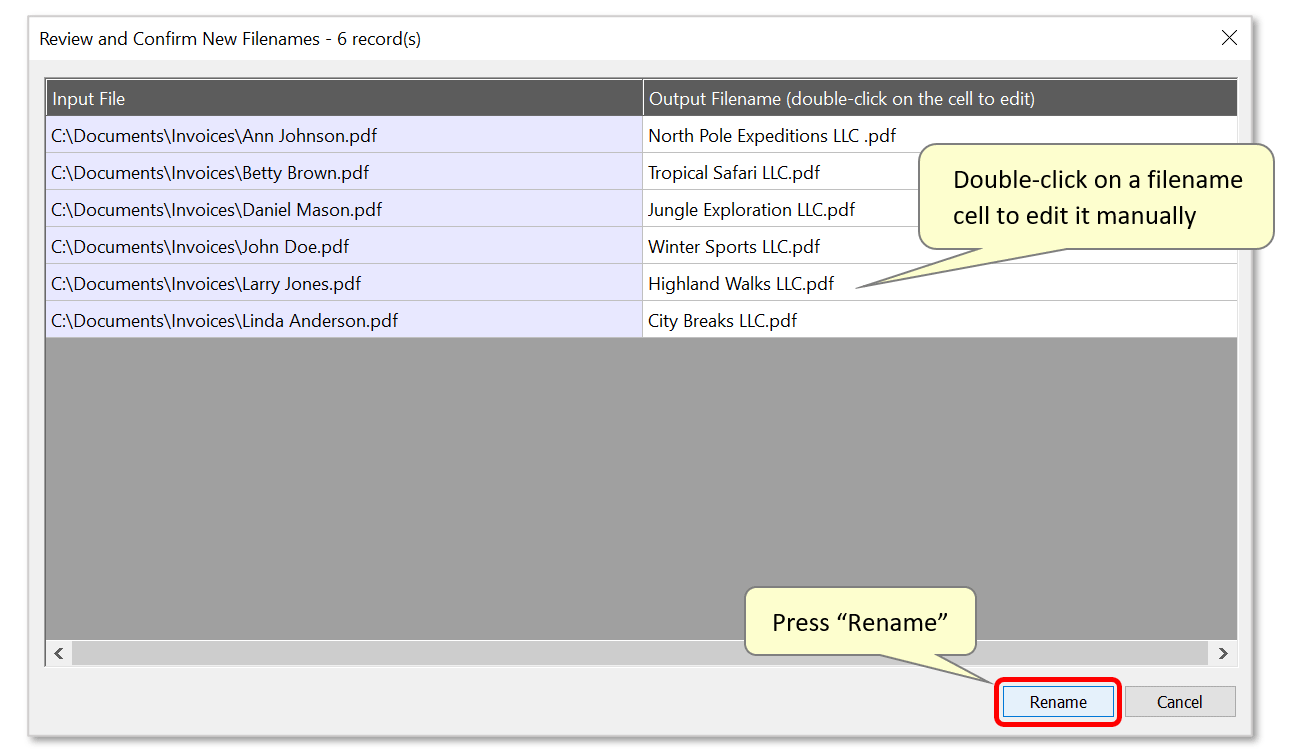
- The software will process the input files so the new filenames can be previewed. The computed filenames are presented in the "Review and Confirm New Filenames" dialog. Note that the files have NOT been renamed at this step. Observe here how the plug-in has correctly used the search expression to extract the 'Client ID' numbers, which have then been converted to business names according to the renaming rules added in step 7.
- Review the generated filenames and edit them manually by double-clicking on an output filename cell.
- Press “Rename” to confirm and start the renaming process.
- Step 14 - Review the Processing Report
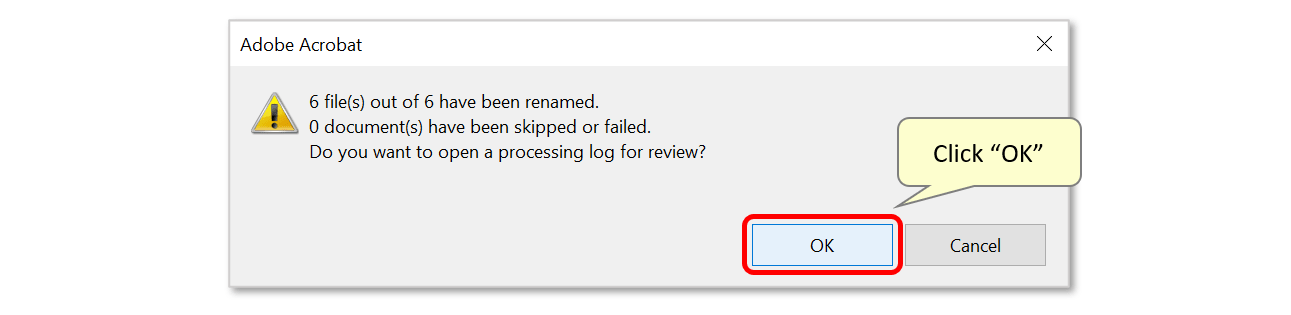
- A report box shows the renaming statistics and prompts the user to open a processing report by clicking "OK".
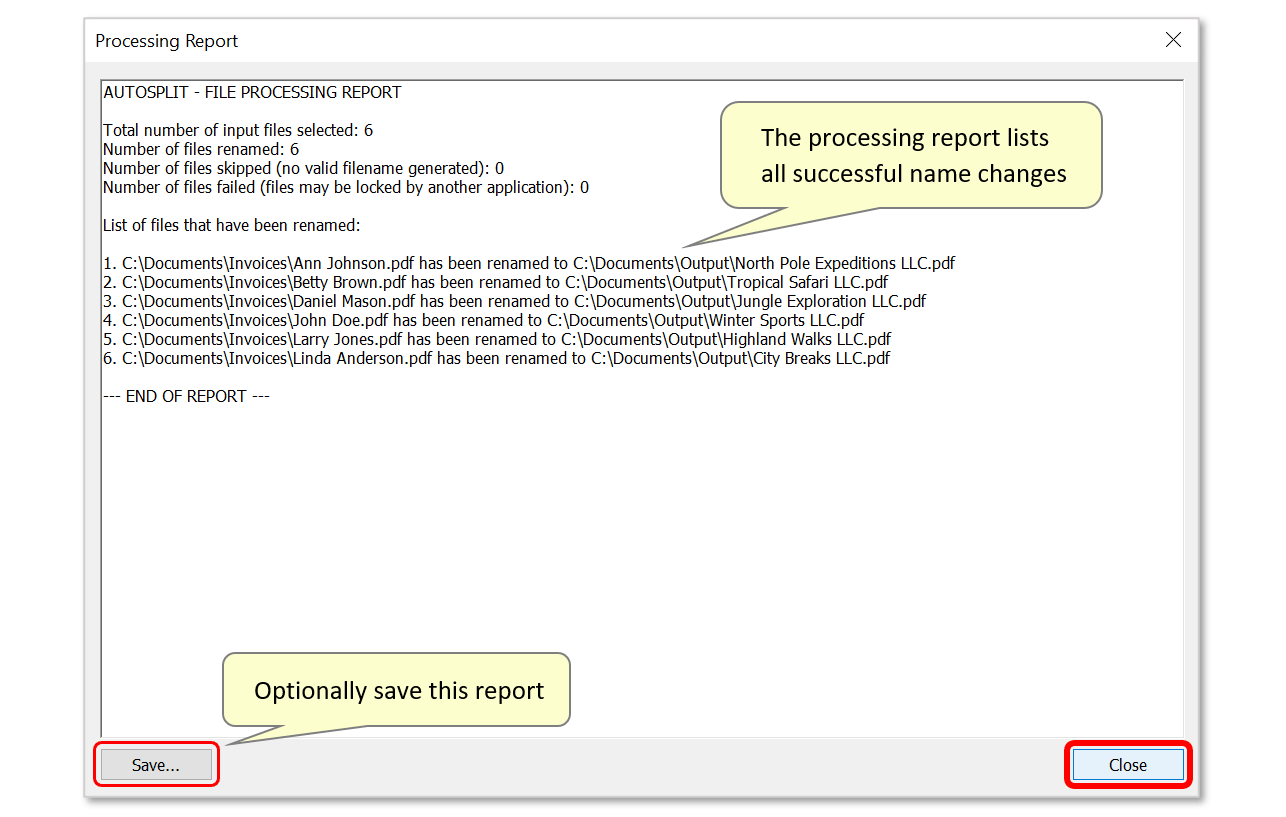
- The processing report shows detailed information on how many files have been renamed or failed, along with input/output file names for each document.
- Optionally save this report by pressing the "Save..." button. Click "Close" to close it.
- Step 15 - Inspect the Results
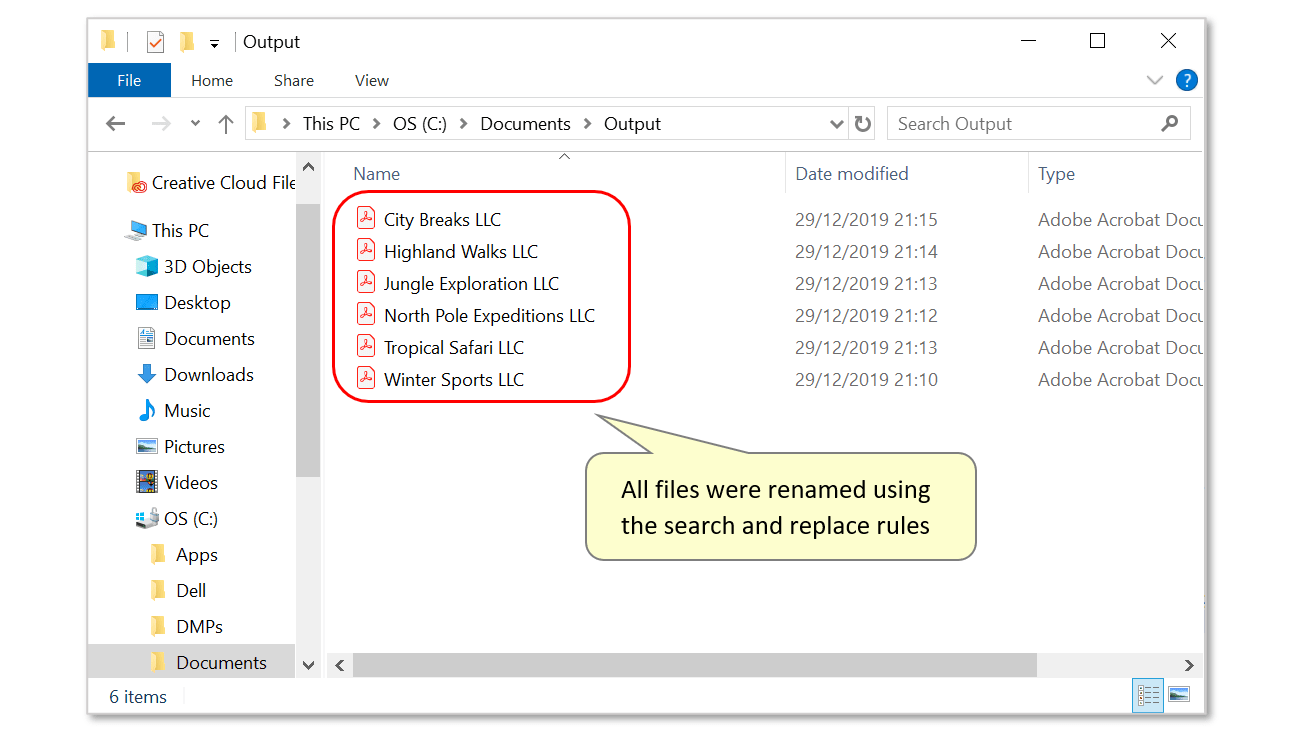
- Open the relevant folder location to check the new filenames. The AutoSplit™ plug-in will have automatically renamed all input PDF files using the configured text search and search and replace rules to convert the relevant text.
- You can find more AutoSplit tutorials here.