Downloading and Installing Evermap Plug-ins Using Internet Explorer
- This tutorial provides step-by-step instructions for existing customers to downloading and installing EverMap plug-ins (full product version) using Internet Explorer web-browser. Click on the following links to see similar tutorials for Google Chrome and Mozilla Firefox web-browsers.
- Requirements: Adobe® Acrobat® 9 and up, Internet Explorer browser.
- Platforms: Windows 7,8,10, 11
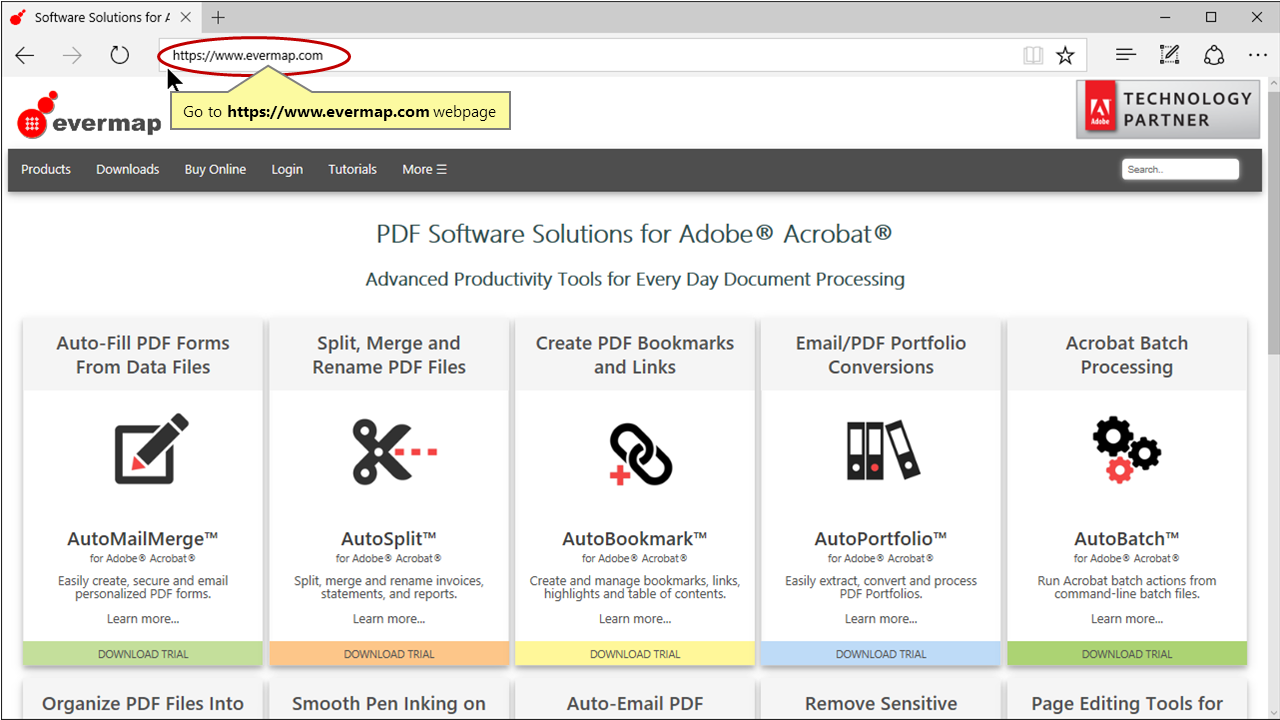
- Step 1 - Open www.evermap.com Webpage
- Start Internet Explorer application and navigate to : www.evermap.com.
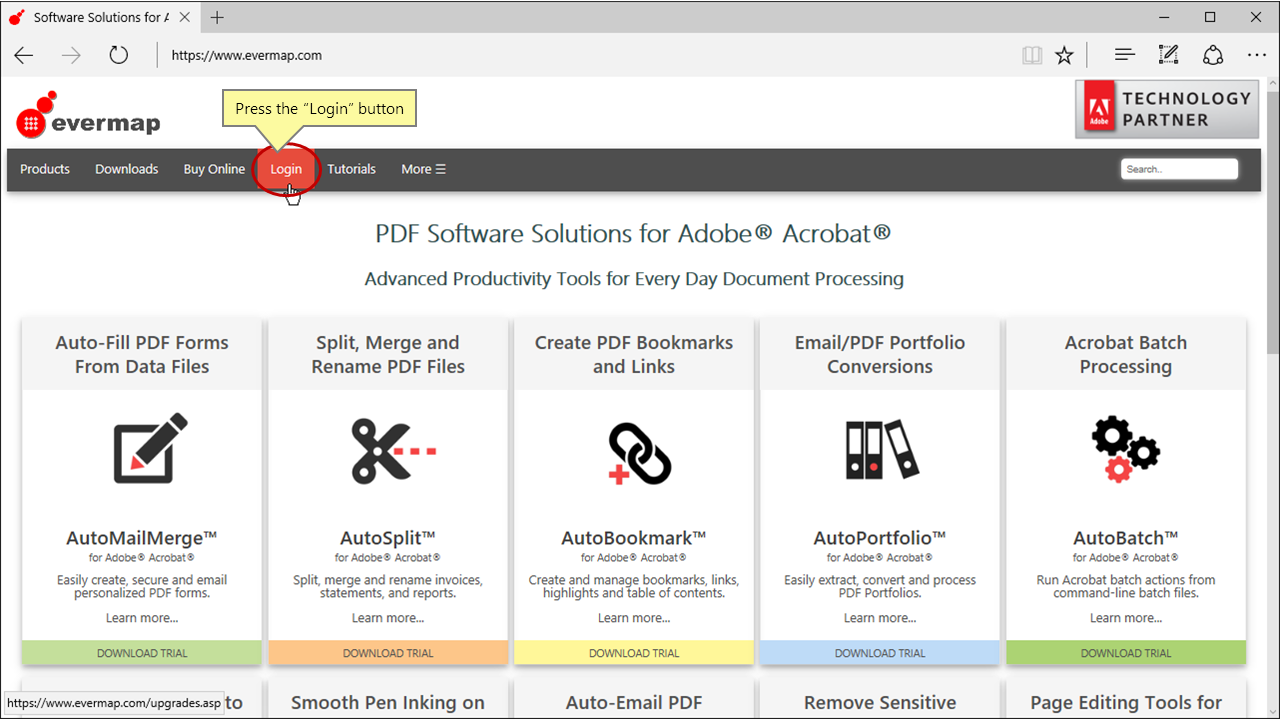
- Step 2 - Go to the Customer Login Page
- Press the “Login” button located on the website menu bar.
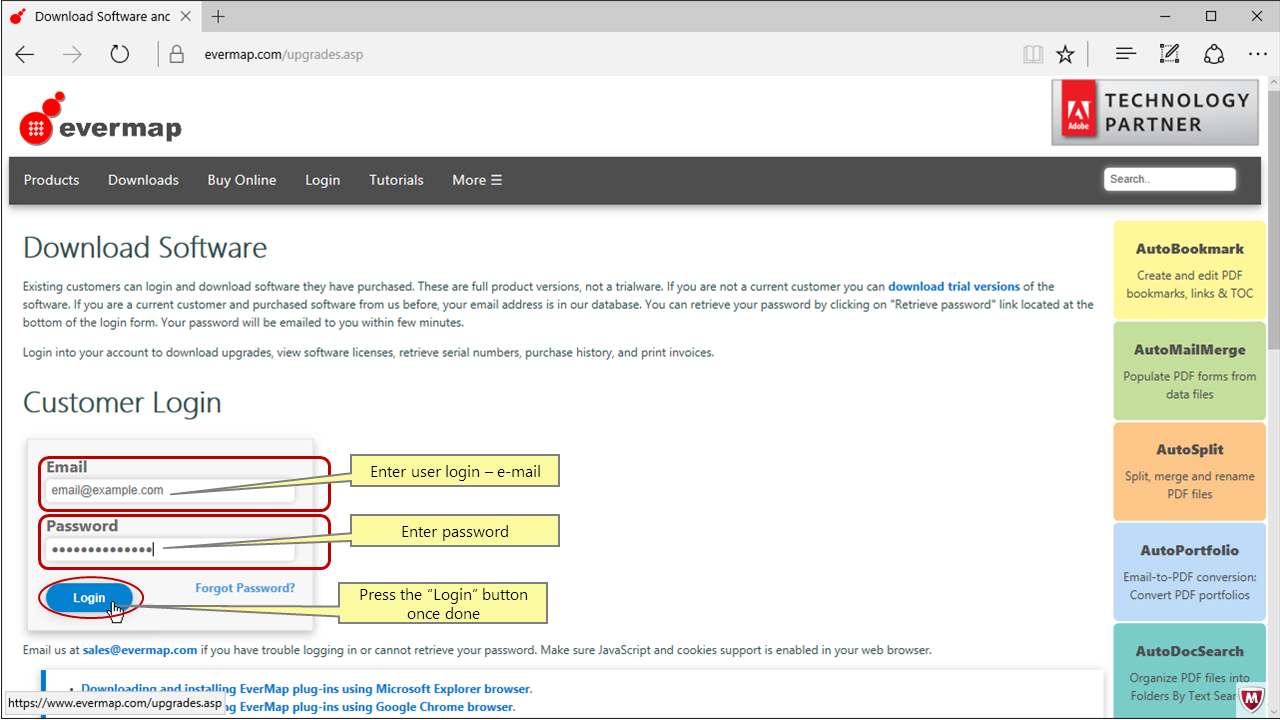
- Step 3 - Login Into Customer Account
- Existing customers can login and download full product versions of the software they have purchased. The account is automatically created at the time of the purchase using email address provided on the payment form. If you do not know the password, click on "Retrieve password" link located at the bottom of the login form. Your password will be emailed to you within few minutes. Login into your account to download upgrades, view software licenses, retrieve serial numbers, purchase history, and print invoices.
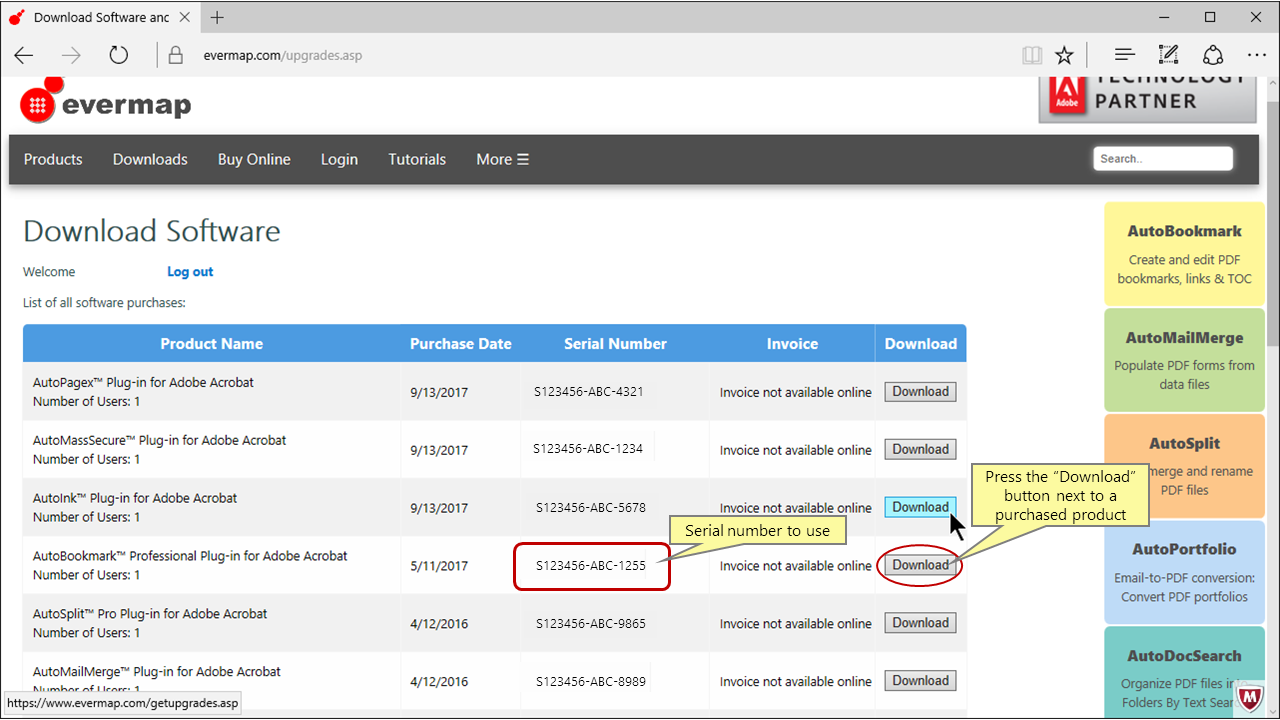
- Step 4 - Download Software Installer
- The list of the purchases is displayed in the customer account. Press the “Download” button next to a purchased product to start downloading the plug-in on your computer.
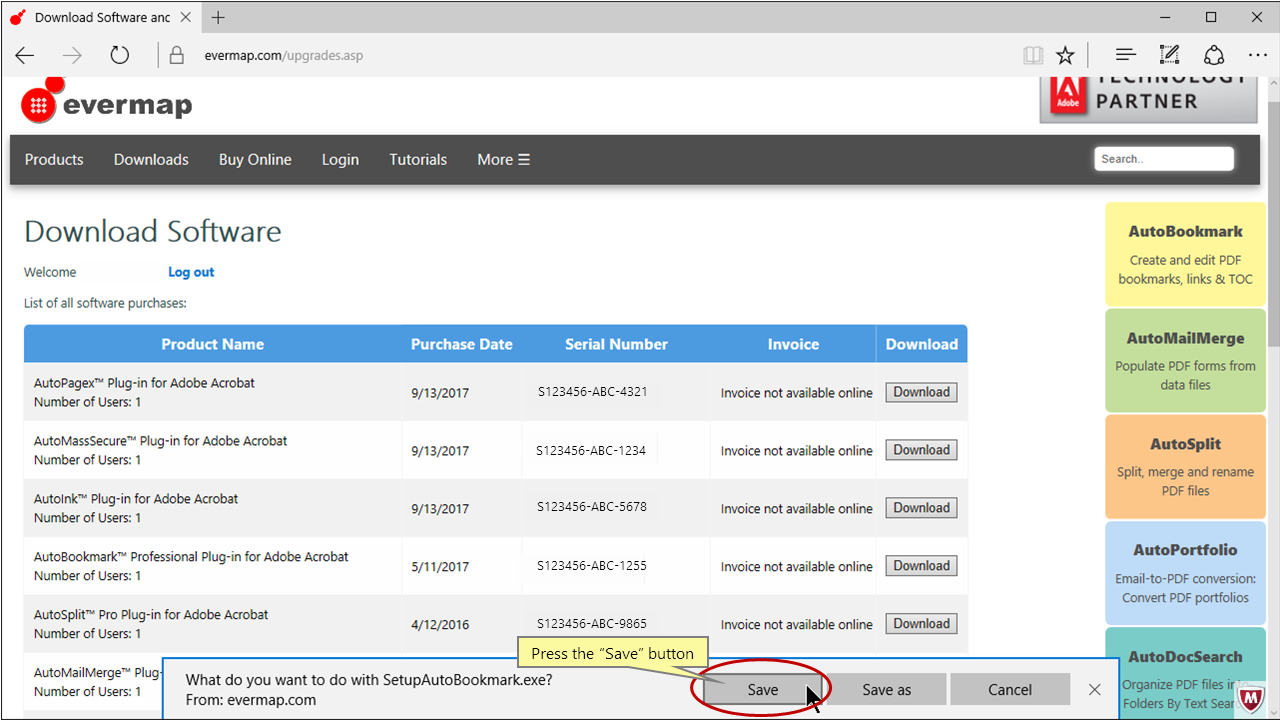
- Step 5 - Save File
- The saving options dialog will appear at the bottom of your Internet Explorer window. Press the "Save" button.
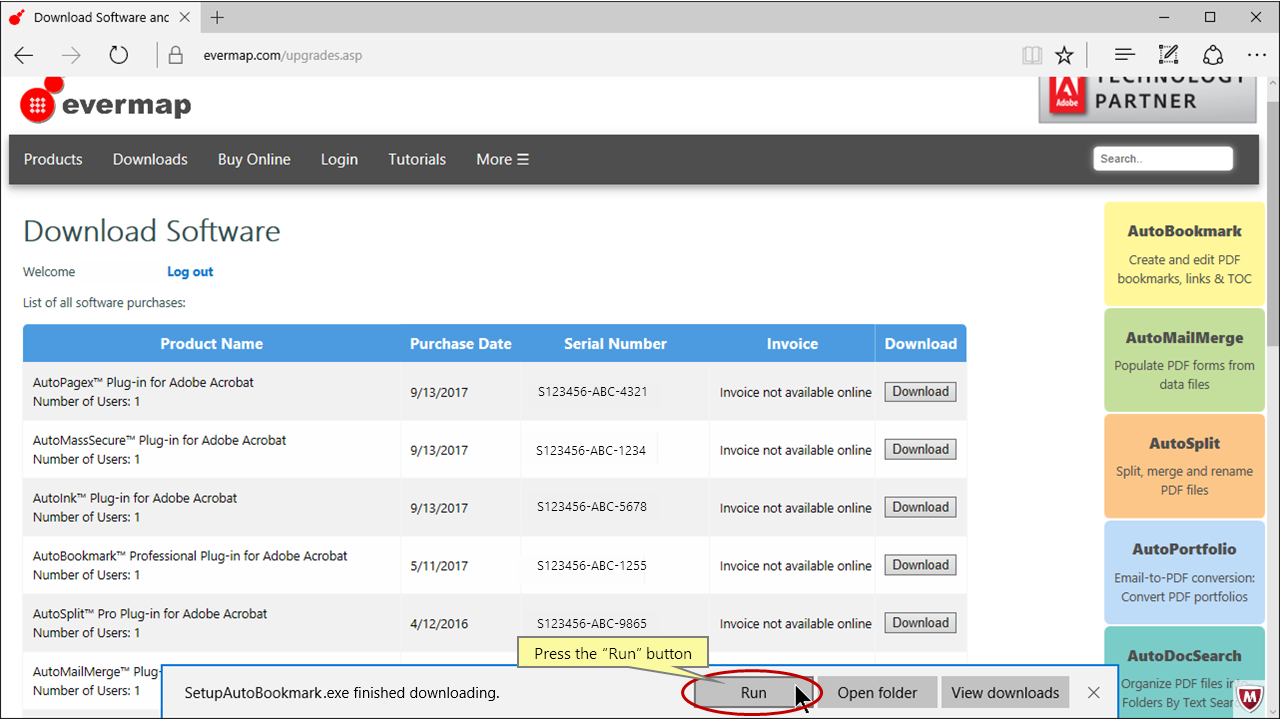
- Step 6 - Execute Downloaded File
- Press the "Run" button to execute downloaded file and open the "Plug-in Setup Wizard" dialog.
- Step 6 - Start the "Plug-in Setup Wizard"
- The "Plug-in Setup Wizard" dialog will appear. It is recommended that you close Adobe Acrobat and all web browser windows before continuing. Click "Next" to proceed with installation.

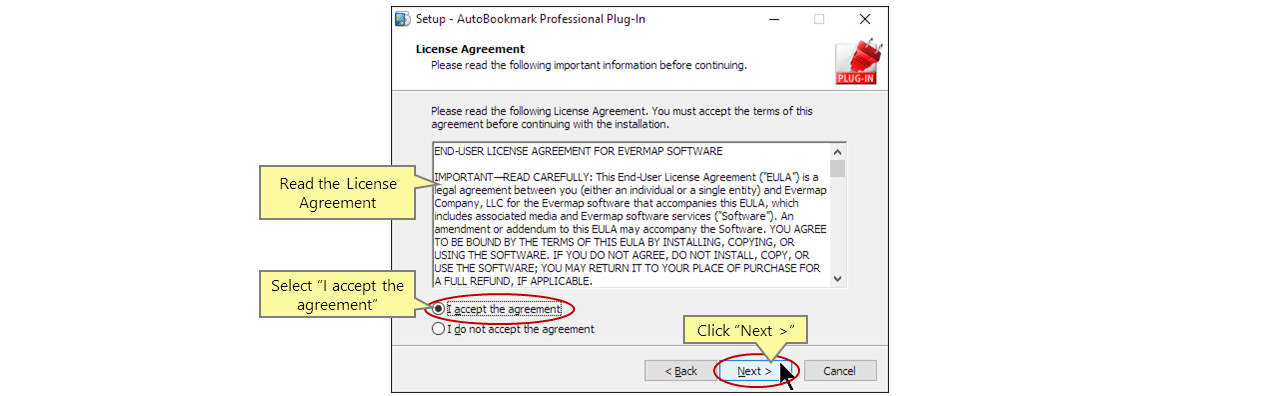
- Step 7 - Confirm the License Agreement Terms
- Read the License Agreement and select “I accept the agreement” to confirm the license agreement terms. Click "Next" to continue.
- Step 8 - Enter User Information
- Enter user name, organization name and serial number in the certain boxes. Please note that serial number is listed in the customer account, next to "Download" button. Click "Next" once done.

- Step 9 - Start Installation
- The "Setup Wizard" is now ready to begin installing the plug-in on your computer. Click "Install" to start installation.

- Step 10 - Exit the "Setup Wizard" And Start Adobe® Acrobat®
- Click "Finish" to exit the "Setup Wizard" after installation is completed. The plug-in introduction document will be opened automatically in Adobe® Acrobat®.

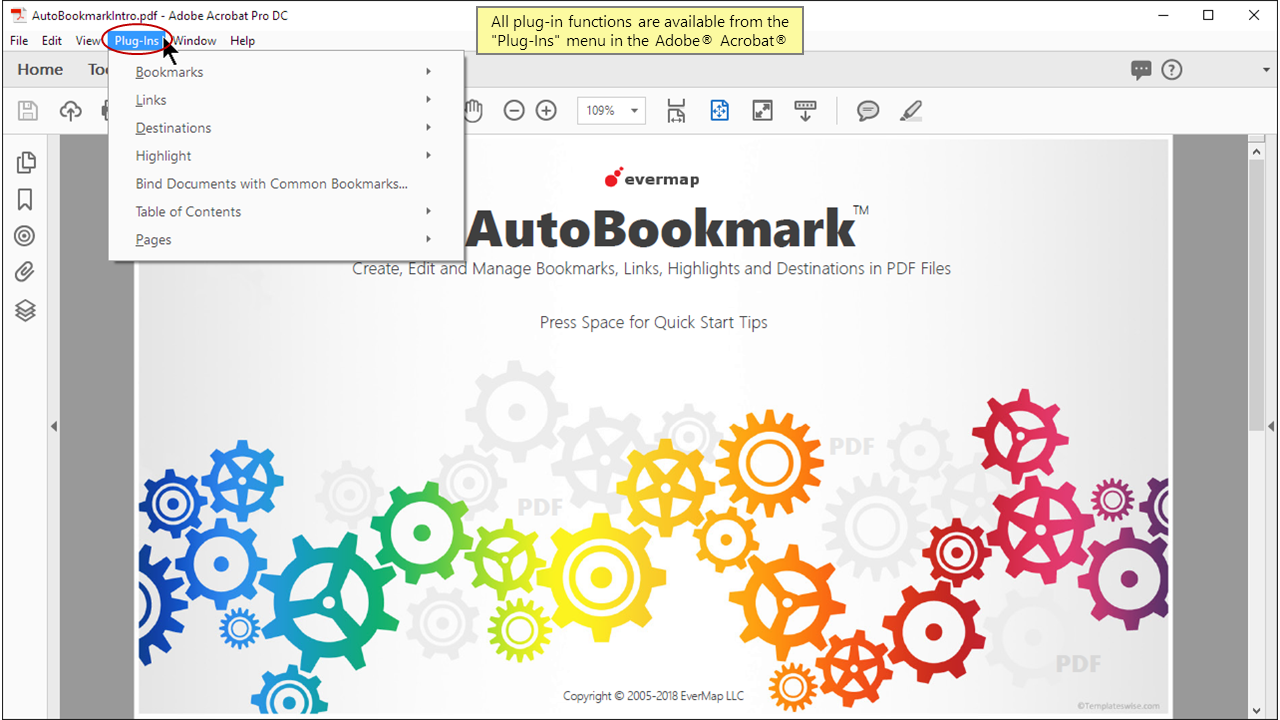
- Step 11 - Start Using the Plug-in
- All plug-in functions are available from the "Plug-Ins" menu in Adobe® Acrobat®.