Sort Pages in Alphabetical Order via a Text Search (Timecard example)
AutoBookmark plug-in for Adobe® Acrobat®
- Introduction
- Manually changing the order of pages in a large PDF file can be a slow process. This tutorial explains a useful method for alphabetically ordering the pages of a PDF via a text search.
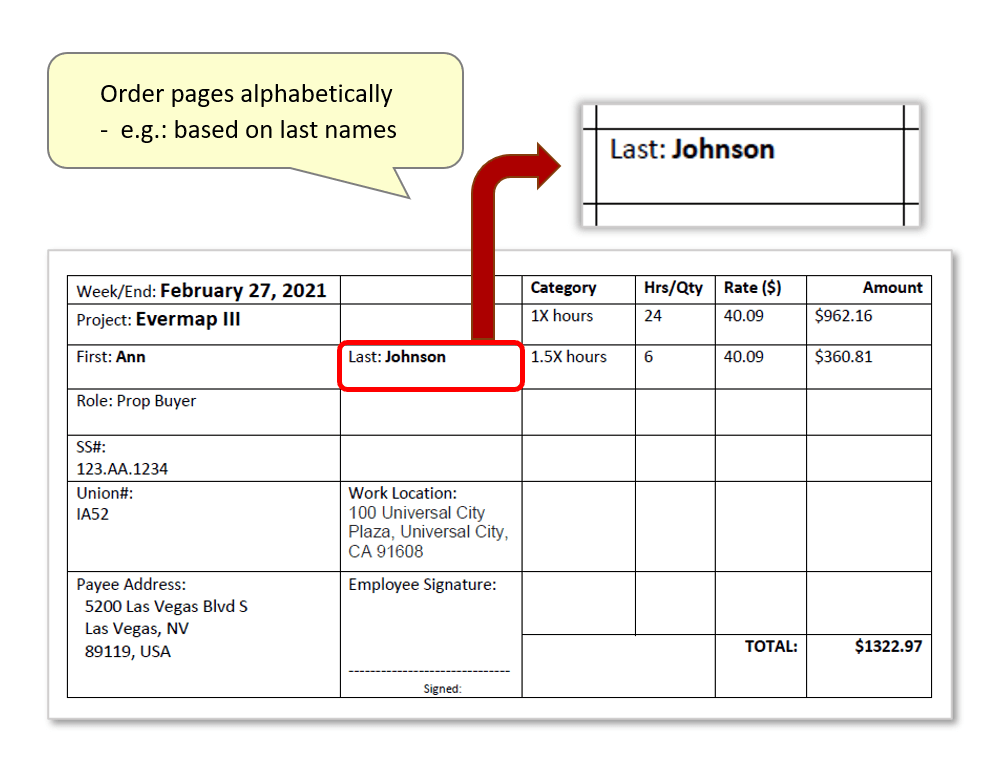
- The goal is to place all pages of a document in alphabetical order according to the last names that feature on each one. Each page of the input document contains a ‘timecard’ for an individual person – a large informative table displaying sample payroll information. Multiple items of text appear on each timecard, but we will use the AutoBookmark™ plug-in to identify last names and order all pages alphabetically. The same method could be used to organise any document type with identical text patterns occurring on each page – such as: payslips, invoices, reports or account statements etc.
- Method Description
- The process outlined below completes a set of separate tasks to achieve the end result: 1) create bookmarks named after the last name on each corresponding page; 2) order all bookmarks alphabetically; 3) place all pages of the PDF in the same order as the bookmarks.
- See the final section on how to automate this task using the Action Wizard tool – also known as “Batch Processing” in previous versions of Acrobat. Using this tool, bookmark creation and page reordering can be executed on (one or more) input documents at once with a single click.
- Input Document Description
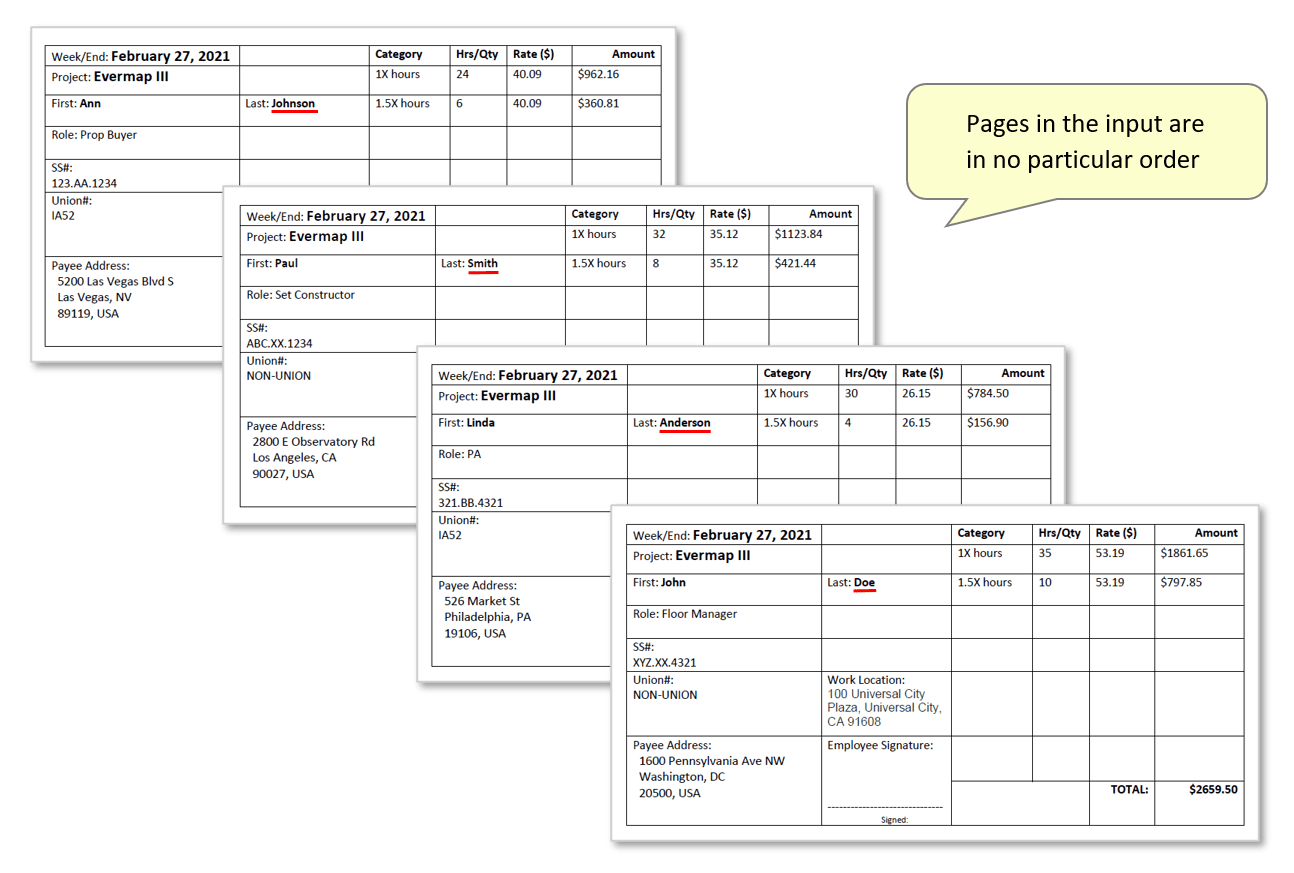
- The input document used here contains a series of different timecards – one on each page. The timescards are placed in no particular order, and each one features “Last:” followed by a unique name. The software will search each page for text following this pattern, and use the name to bookmark each page.
- Prerequisites
- You need a copy of Adobe® Acrobat® along with the AutoBookmark™ plug-in installed on your computer in order to use this tutorial. Both are available as trial versions.
- Step 1 - Open the "Bookmark Text Patterns" Dialog
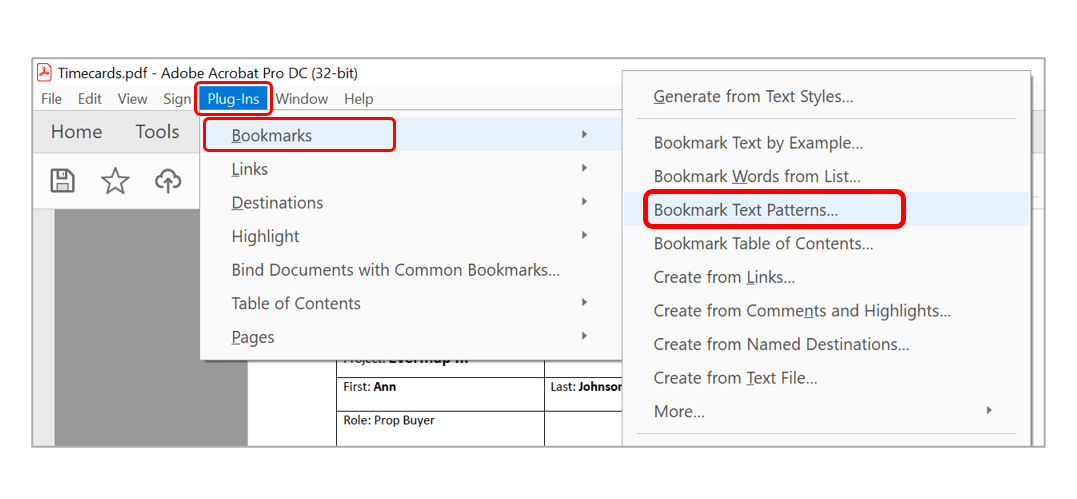
- The first step is to bookmark each page of the input document using the specific text that you want to alphabetically sort them by (last names). Open the document in Adobe® Acrobat®, then select "Plug-Ins > Bookmarks > Bookmark Text Patterns..." from the main menu.
- Step 2 - Add a Bookmarking Text Pattern
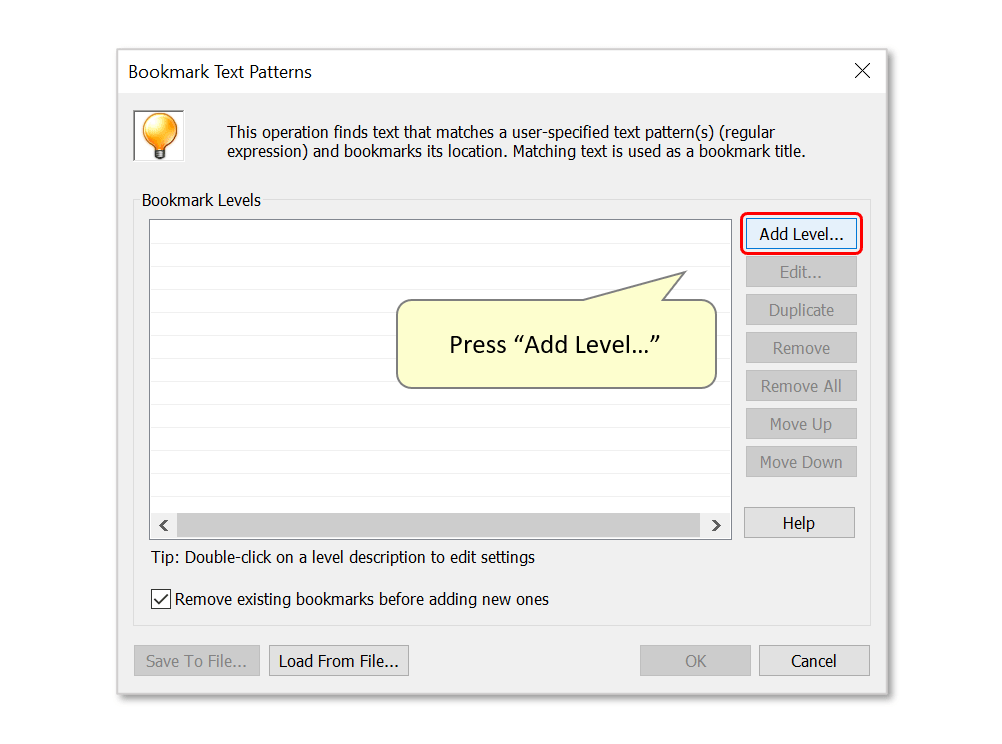
- Use the "Bookmark Text Patterns" dialog to configure search parameters that will bookmark the relevant text. Press "Add Level..." to add a pattern.
- Use the settings dialog that opens to enter a text pattern (regular expression). This text search will produce "level 1" bookmarks - if creating more complex bookmark trees, use the "Bookmark level:" drop-down list to change where bookmarks will be placed in the hierarchy.
- The search expression used here is Last: \K[^\n ]+:
- Last: - instructs the software to search for occurrences of this text.
- \K – removes all matching text to the left in the search results. Using this element means that the new bookmark names will not contain the text "Last:" - e.g.: only "Doe" instead of "Last: Doe".
- [^\n]+ – instructs the software that "Last:" will be followed by one or more characters that is NOT a new line.
- Optionally check the checkboxes below to use any of the available processing options (e.g.: use "Match text case" to make the search case sensitive). In this example, we will use the default options as shown.
- Press "OK" to proceed.

- Step 3 - Confirm the Search Pattern(s)
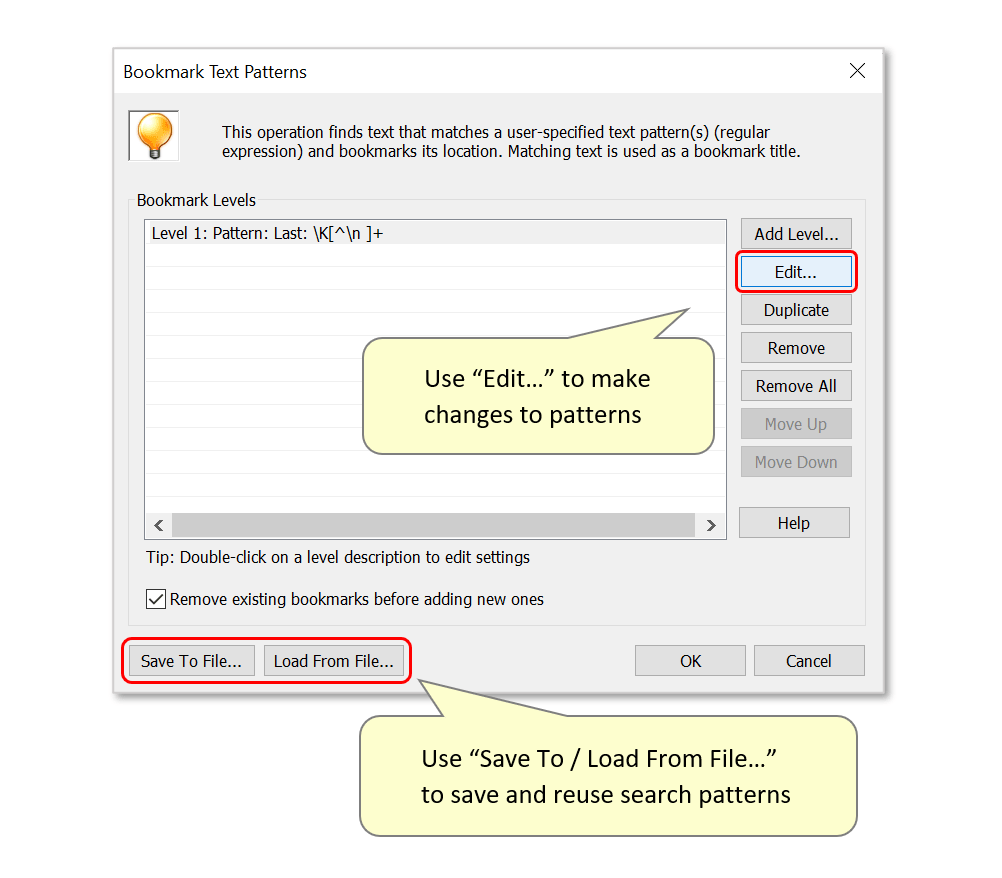
- Optionally select a bookmark level search pattern in the list on the left and press "Edit..." to make any changes. The other available buttons can be used to duplicate or remove the selected search patterns.
- Use the "Save To File..." button to save the current search pattern(s) as an *.abtp settings file for future reuse. This can be loaded via the "Load From File..." button to process new documents in the same way.
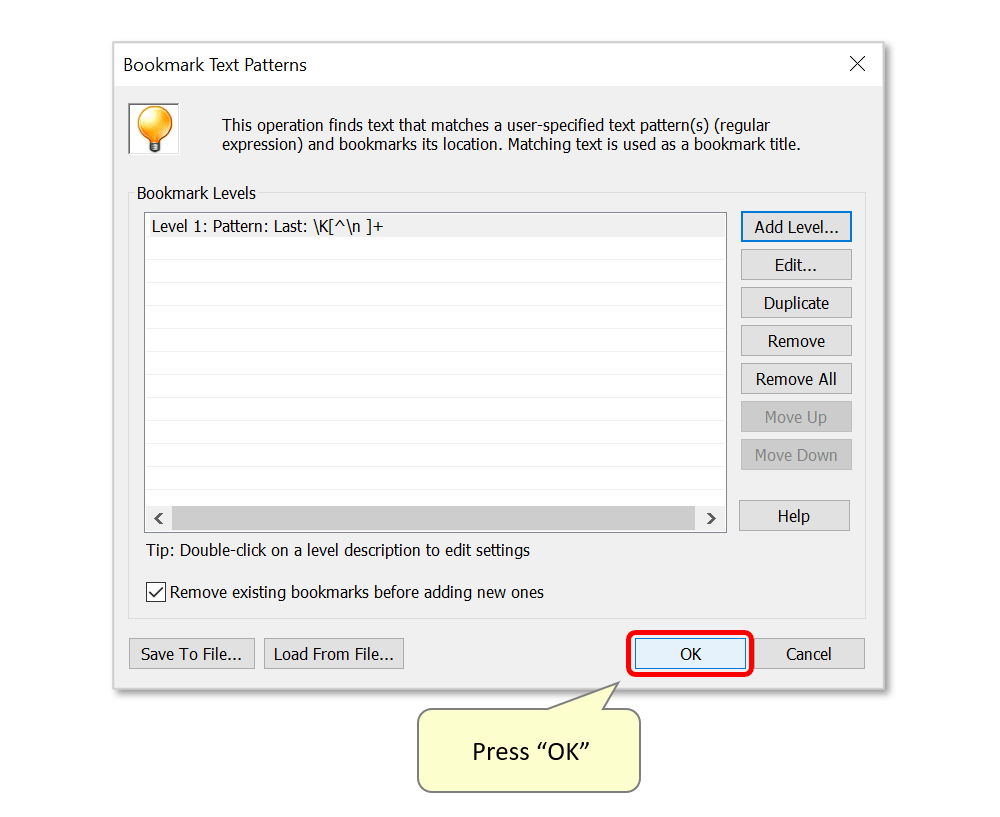
- Press "OK" to run the search and create bookmarks.
- Step 4 - Inspect the New Bookmarks
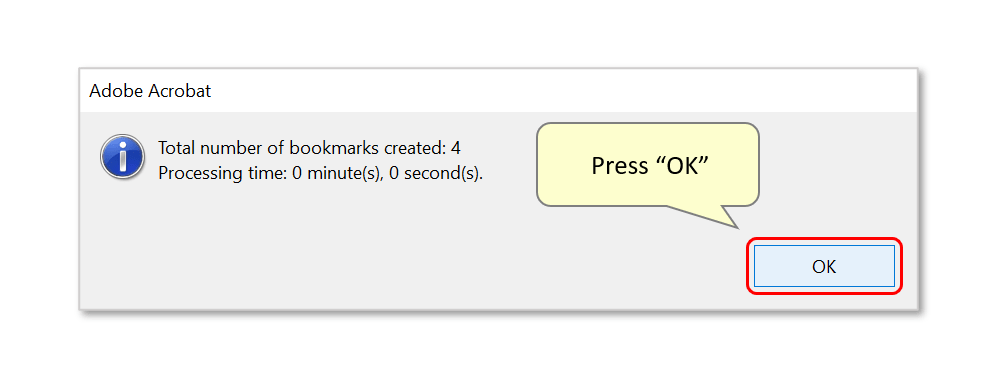
- A report box will show the number of bookmarks successfully created. Press "OK" to close it.
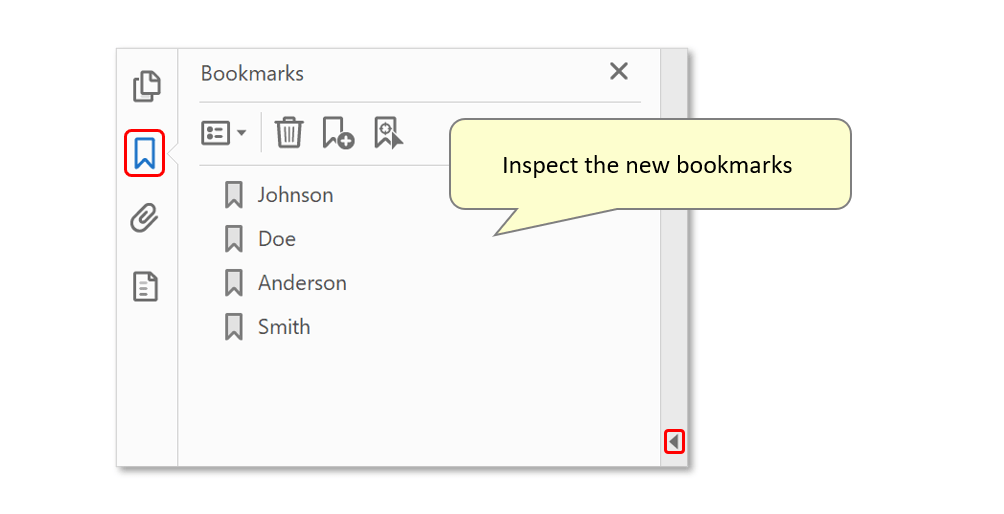
- Inspect the new bookmarks added to the document - if necessary, expand the "Bookmarks" navigation pane using the symbol/arrow on the left. In this example, all four pages of the input document have been bookmarked. Bookmarks have been named using the surname located on each page.
- Step 5 - Sort Bookmarks Alphabetically
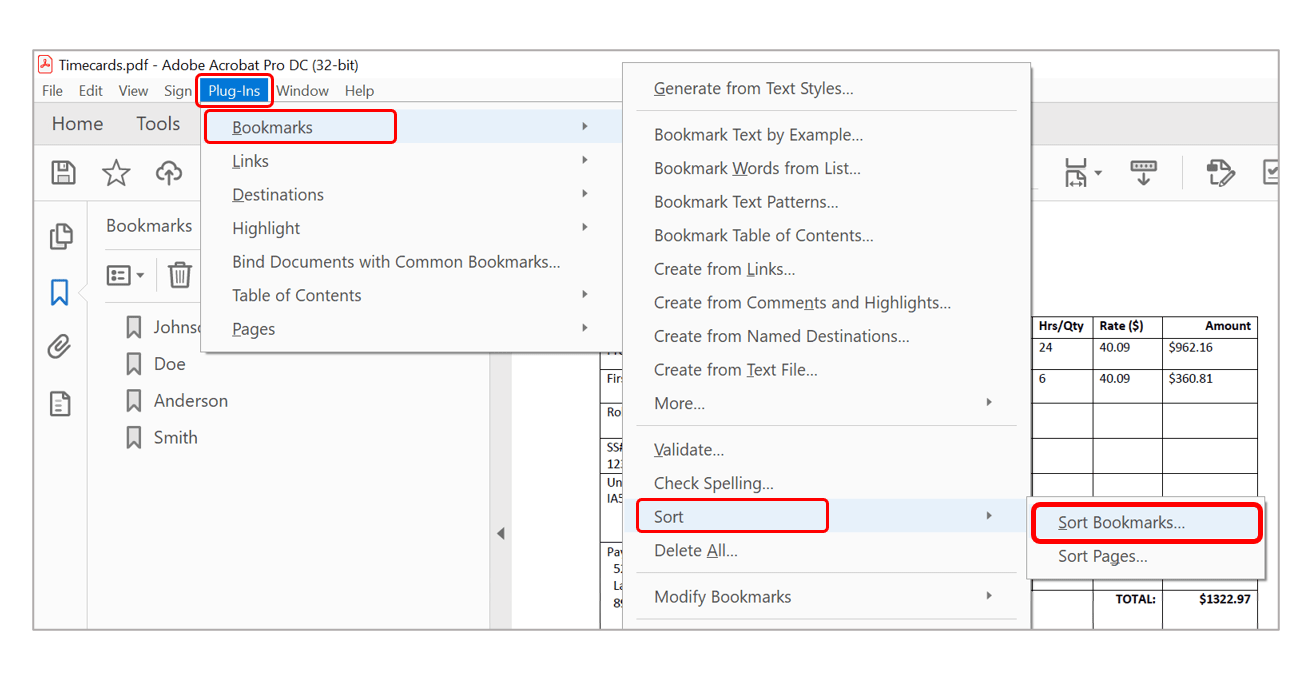
- The next step is to place the document's bookmarks in alphabetical order. To do this, select "Plug-Ins > Bookmarks > Sort > Sort Bookmarks..." from the main menu.
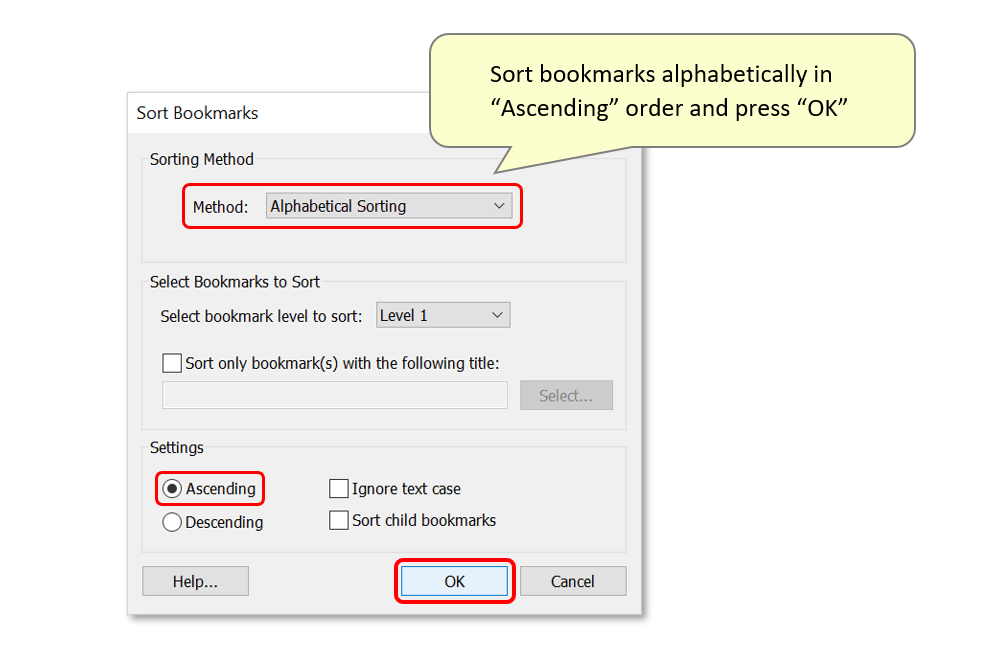
- The "Sort Bookmarks" dialog will open. Ensure that the "Alphabetical Sorting" method is selected. Here we only have to sort "Level 1" bookmarks, so no specific bookmark selection is necessary. Ensure that bookmarks will be sorted in "Ascending" order and press "OK".

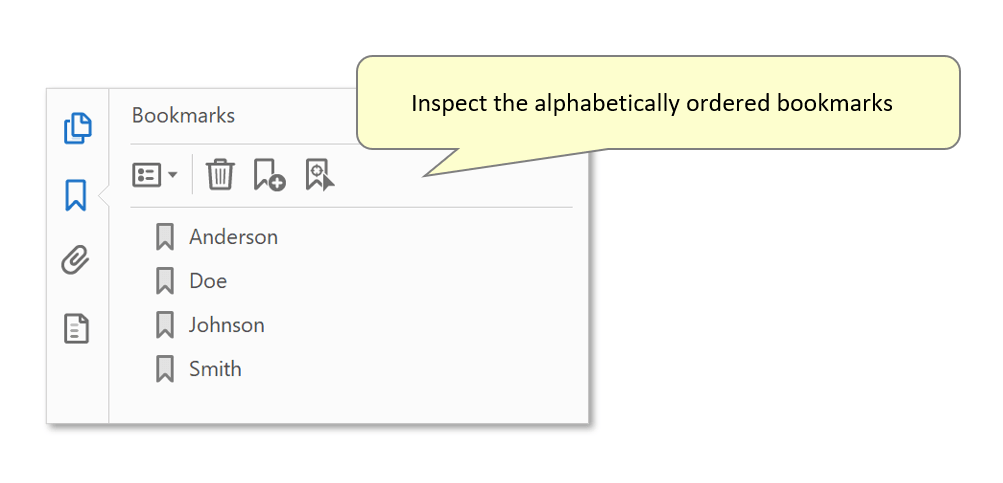
- Inspect the bookmarks - they will now be ordered alphabetically.
- Step 6 - Sort Pages Based on Bookmark Order
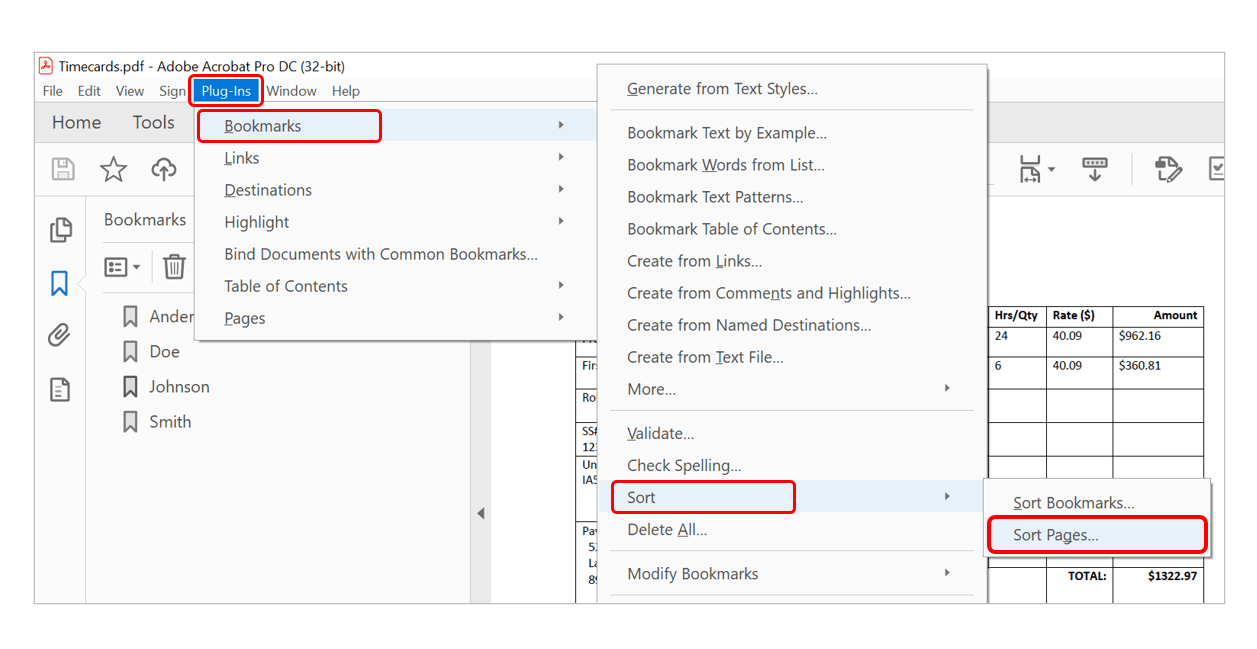
- The final step is to reorder the pages of the document to match the new order of the bookmarks. To do this, select "Plug-Ins > Bookmarks > Sort > Sort Pages..." from the main menu.
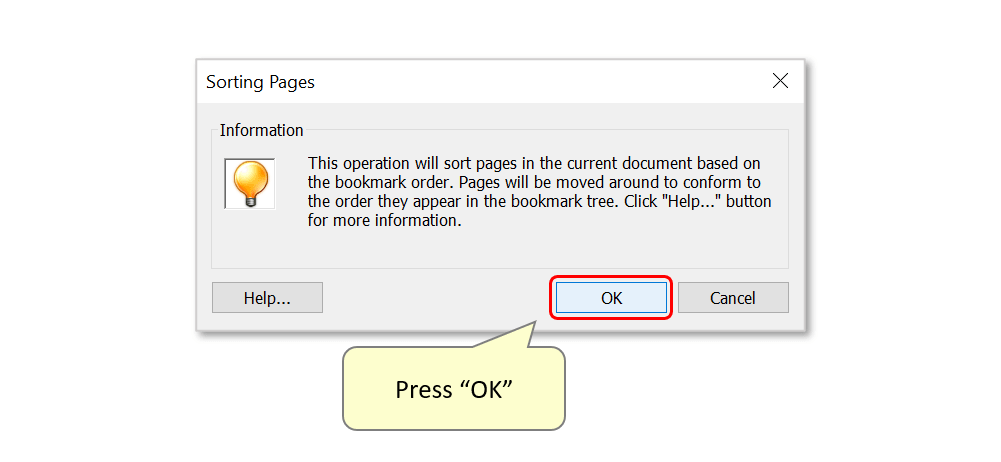
- A confirmation dialog will open - press "OK" to allow the plug-in to reorder the document's pages.
- Step 7 - Inspect the Results
- Inspect the document - the pages will now be placed in alphabetical order according to the last names that feature on each page:

- Automate This Task with Action Wizard (Batch Processing)
- This procedure can also be automated as an "action" using the Action Wizard tool. Use Action Wizard to search documents for specific text (last names), bookmark each page using this text, reorder bookmarks alphabetically, then reorder the document's pages to match the bookmark order - all with only a single click. We will demonstrate how to configure such an action in the steps below.
- Known as "Batch Processing" in previous versions of Acrobat, Action Wizard allows you to create processing commands ("actions") with user-specific settings. "Actions" can be executed on multiple files at once, or on the contents of an entire folder. Once an action is created, it can be executed either manually from the Adobe® Acrobat® Pro toolbar, or from a command-line batch file using the AutoBatch™ plug-in.
- Note that this functionality requires the AutoBookmark Professional plug-in (or a free trial) to be installed on your device.
- Step 1 - Open Action Wizard
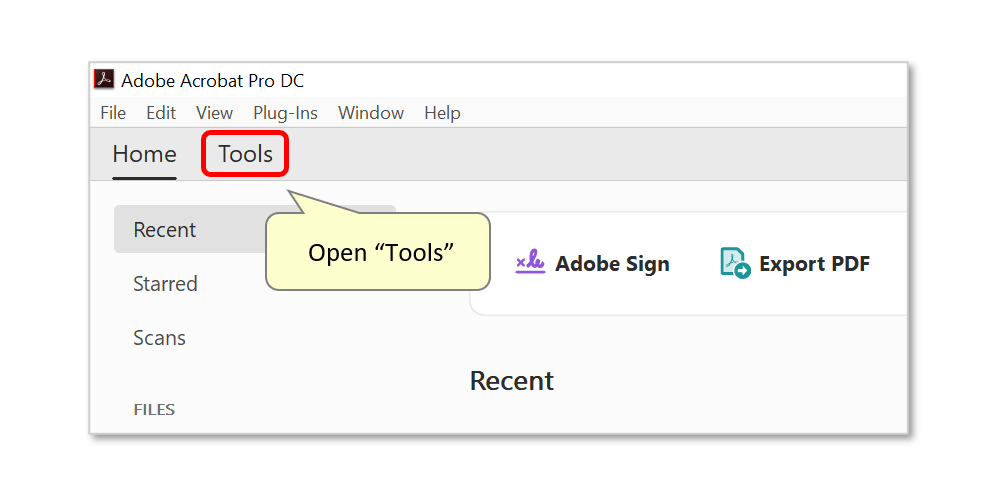
- In Acrobat, open the "Tools" panel located on the main toolbar.
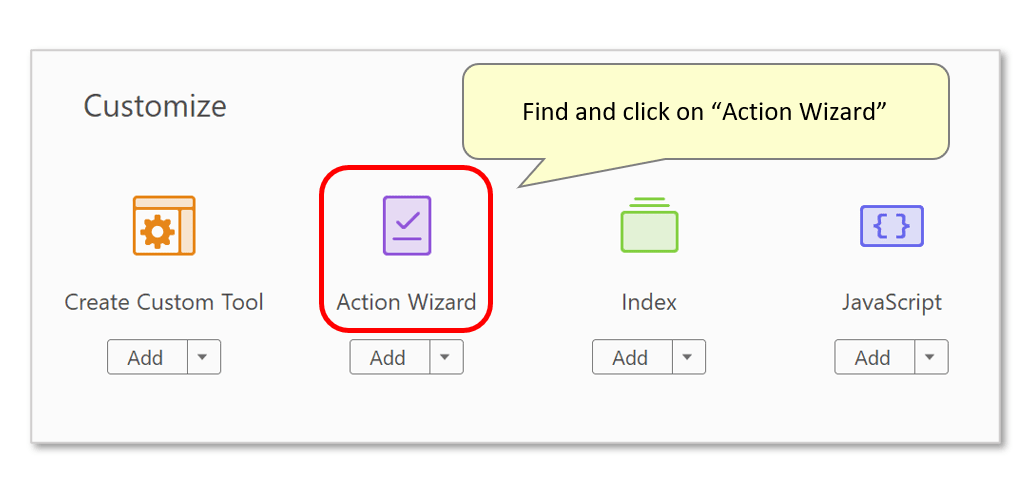
- Scroll down and click on the "Action Wizard" tool icon.
- Step 2 - Create a New 'Action'
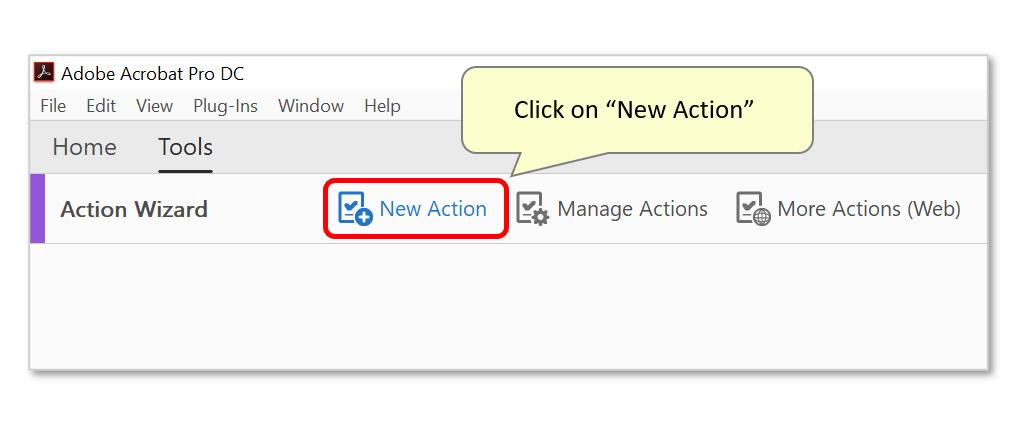
- Click on the "New Action" icon on the Action Wizard toolbar to create a new batch processing "action".
- Step 3 - Add a Bookmarking Command
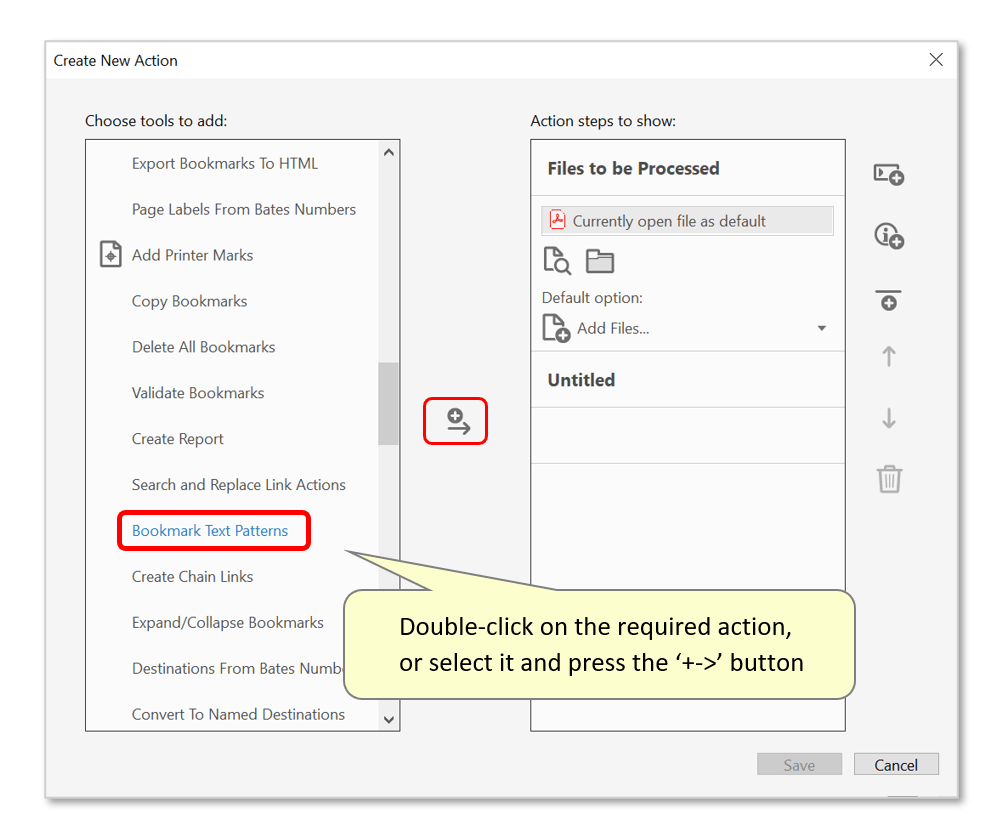
- Click on the "More Tools" category to expand the list of available commands.
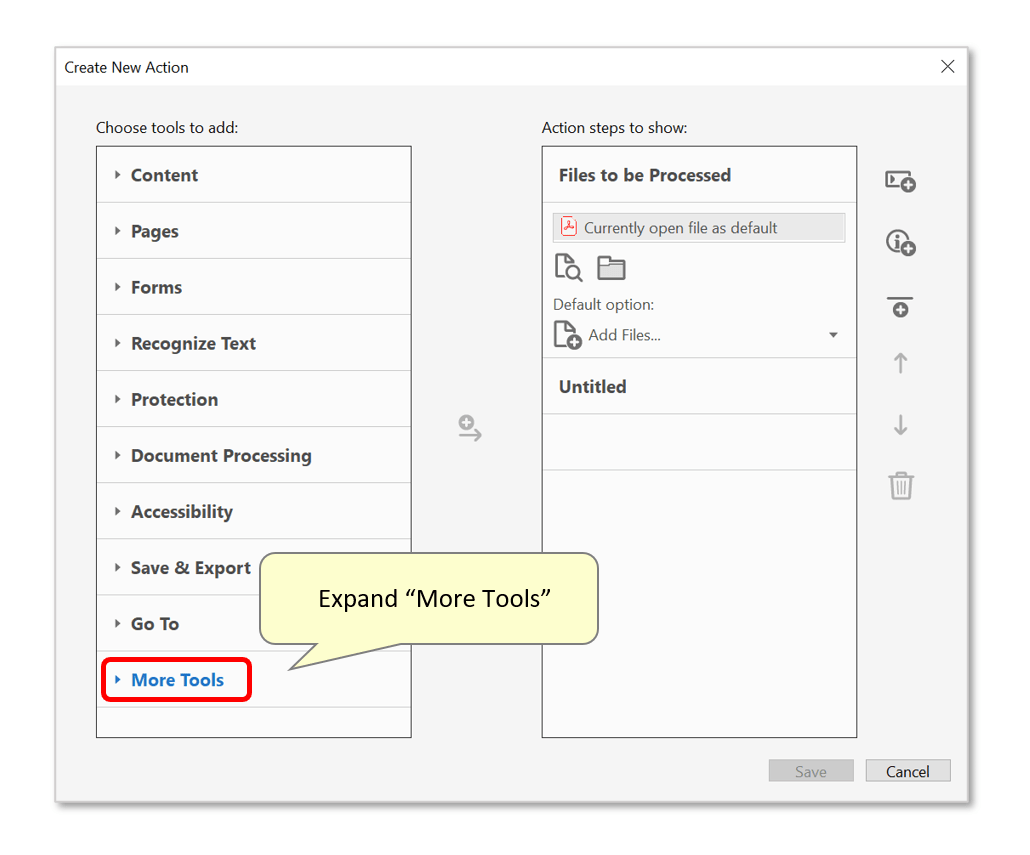
- Find and double-click on the "Bookmark Text Patterns" command - or select it and press the "+->" button to add it to the list of action steps on the right.
- Step 4 - Open the Bookmarking Settings
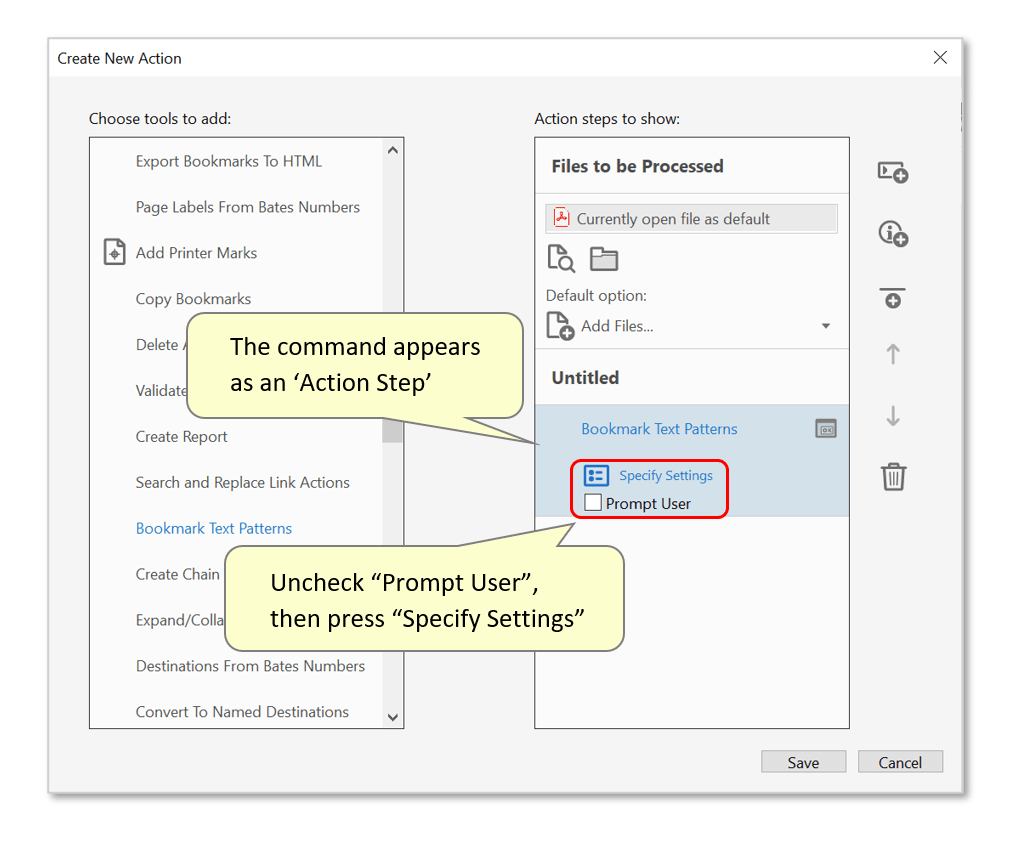
- The "Bookmark Text Patterns" command will appear in the "Action steps to show:" list. Uncheck the "Prompt User" checkbox, otherwise the program would always prompt for the user to modify settings when this action is executed. Then press the "Specify Settings" button to open the settings dialog.
- Step 5 - Configure a Bookmarking Text Pattern
- Use the "Bookmark Text Patterns" dialog to configure search parameters that will bookmark the relevant text. Press "Add Level..." to add a pattern.

- Use the settings dialog that opens to enter a text pattern (regular expression). See step 2 in the tutorial above for further detail about the expression used here.
- Press "OK" to proceed.

- Press "OK" again to confirm bookmark creation settings.

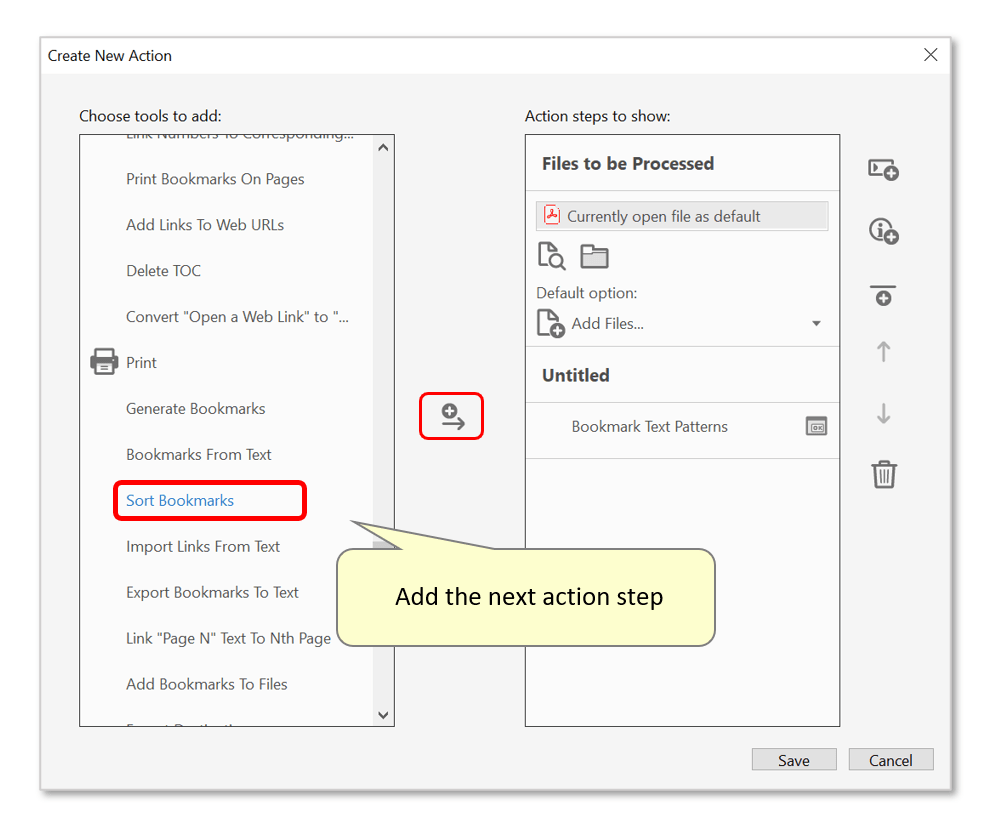
- Step 6 - Add a Bookmark Sorting Command
- Find and double-click on the "Sort Bookmarks" command - or select it and press the "+->" button to add it to the list of action steps.
- Uncheck "Prompt User", and press "Specify Settings".
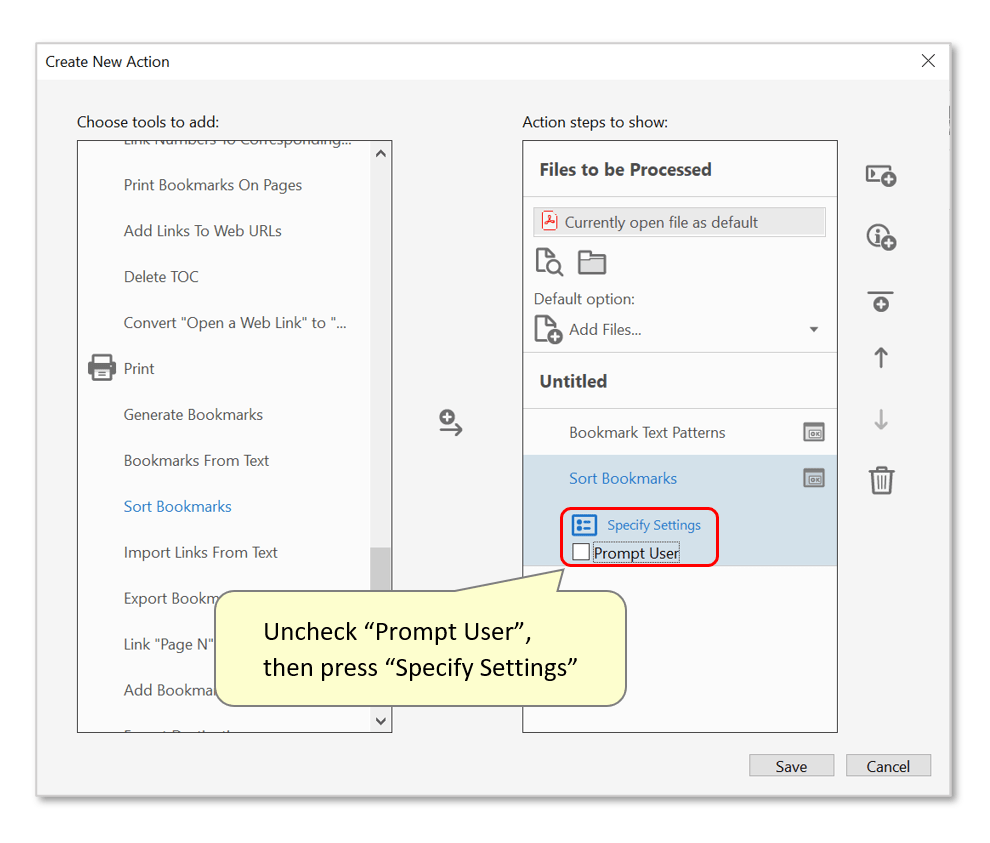
- Use the "Sort Bookmarks" dialog to sort bookmarks alphabetically in "Ascending" order (see step 5 in the tutorial above), then press "OK".
- Step 7 - Add a Page Sorting Command
- Find and double-click on the "Sort Pages" command - or select it and press the "+->" button to add it to the list of action steps. This command will automatically sort pages in the document based on the bookmark order - no further steps are required to configure it.

- Step 8 - Save the Action
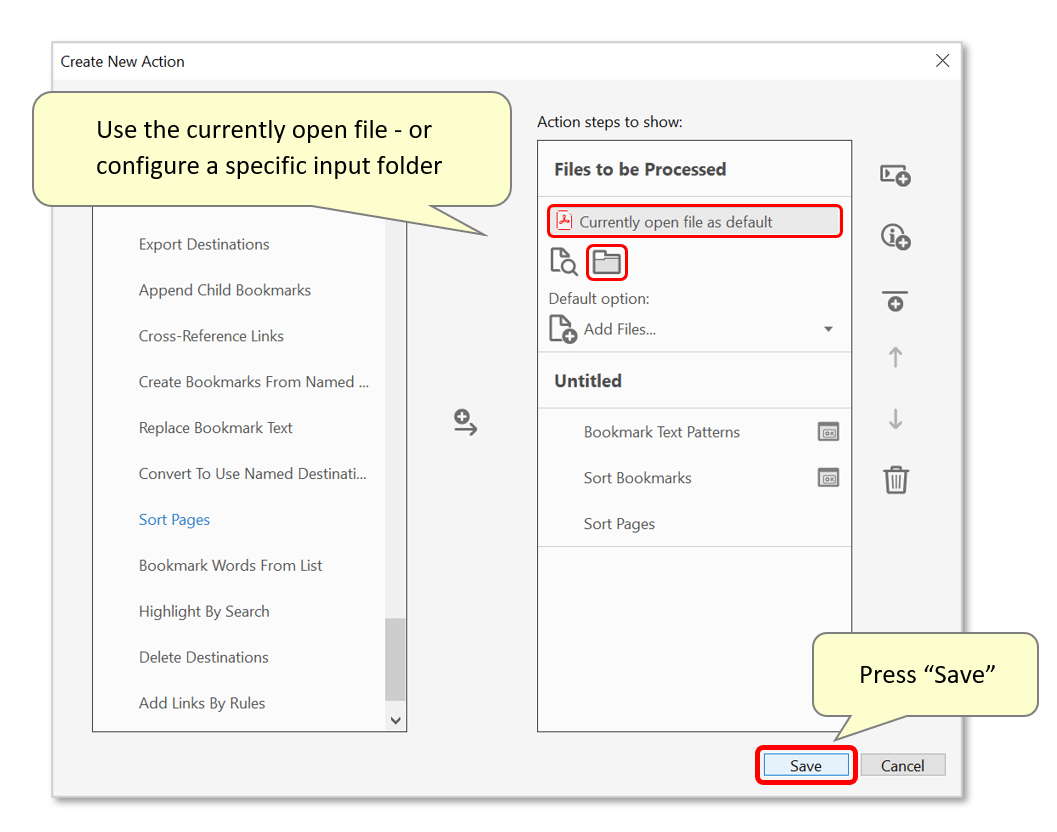
- By default, this action will be executed on the "currently open file". It's also possible to process files located within a specific folder. Select one by pressing on the "Add Folder" icon under "Files to be Processed".
- Press "Save" to save the action.
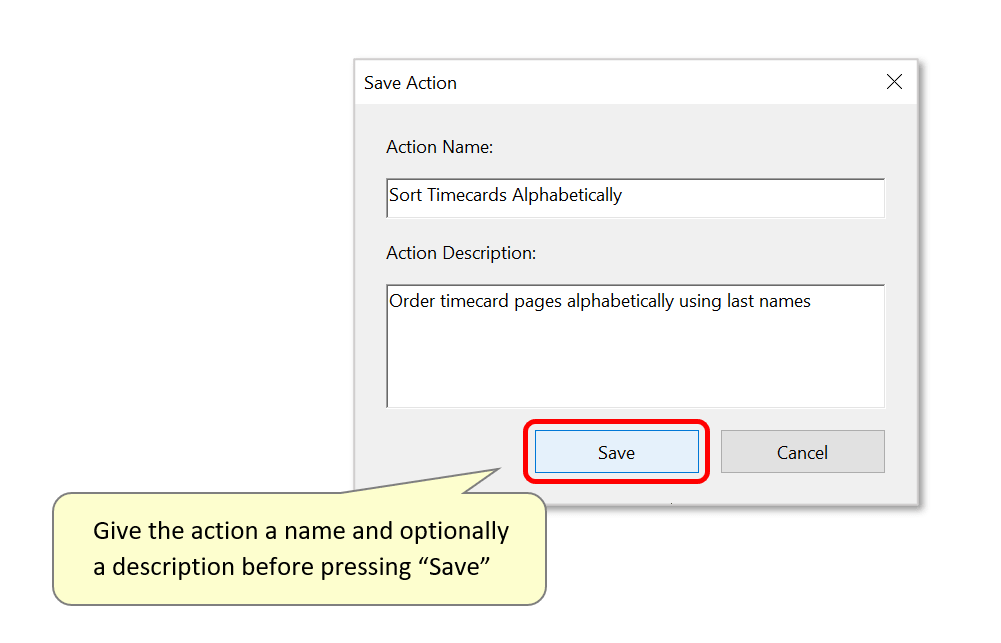
- Now type a suitable "Action Name" and (optionally) a description into the "Save Action" dialog, then press "Save".
- Step 9 - Execute the Action
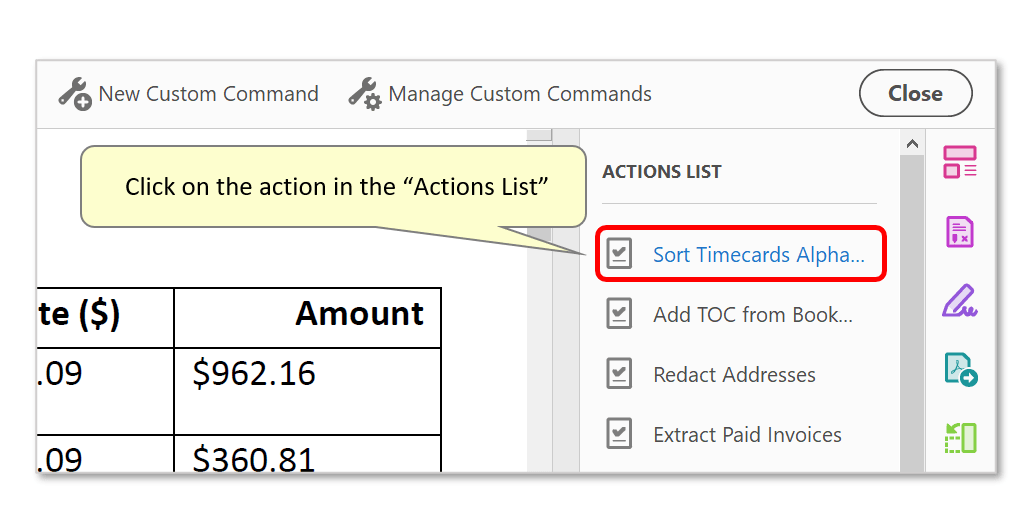
- The new action will have been added to the "Actions List" on the right. Click on it to use it.
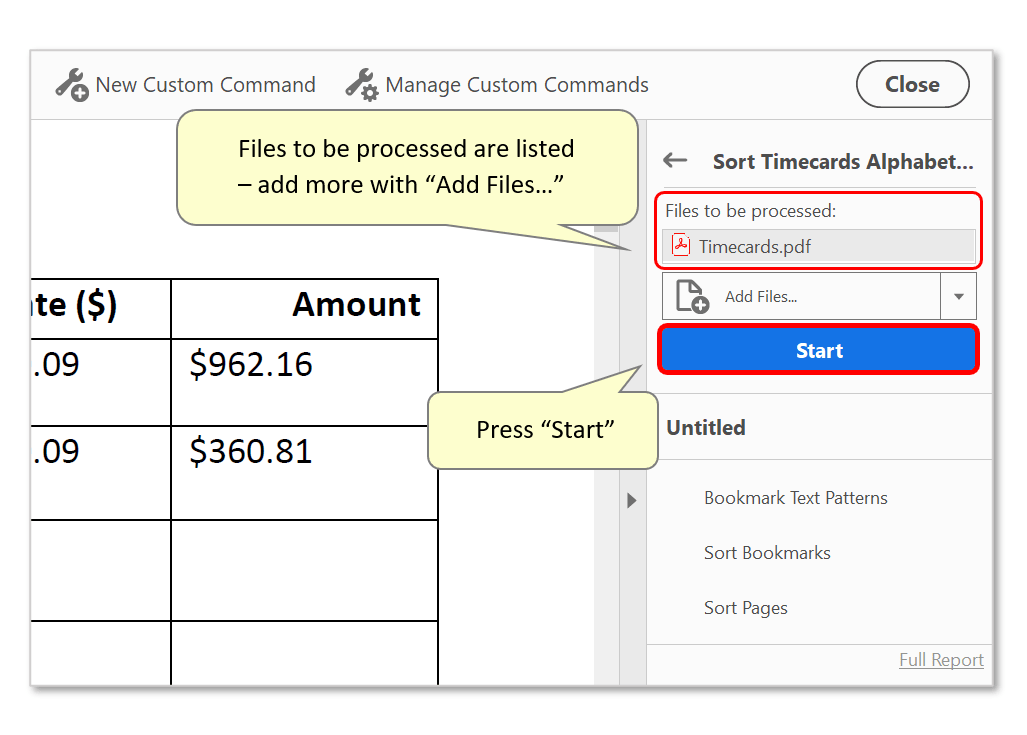
- The currently open file will be listed under "Files to be processed:". Optionally press "Add Files..." to select more. Note that files from different folders can be processed at the same time, via the repeated use of the "Add Files..." button.
- Press the "Start" button to begin running the action.
- Step 10 - Inspect the Results
- Inspect the document - the pages will now be placed in alphabetical order according to the last names that feature on each page:

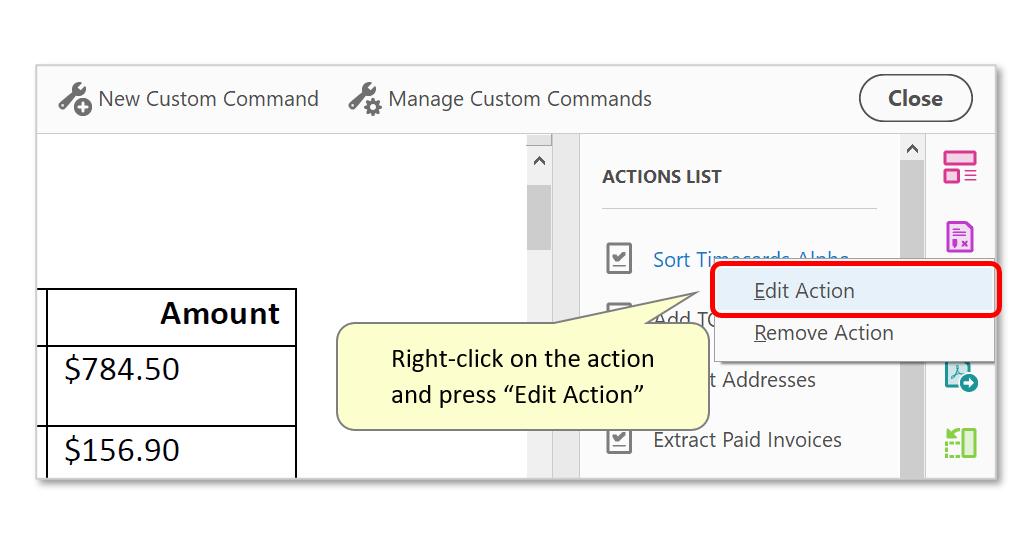
- It may be necessary to order pages alphabetically according to different page content (e.g.: first names). Instead of creating new actions, edit the existing one by modifying the text search. To do this, open Action Wizard and right-click on the action in the "Actions List". Then press "Edit Action" to re-configure it (click on "Specify Settings" under the "Bookmark Text Patterns" action step to make the necessary changes).
- Click here for a list of all step-by-step tutorials available.