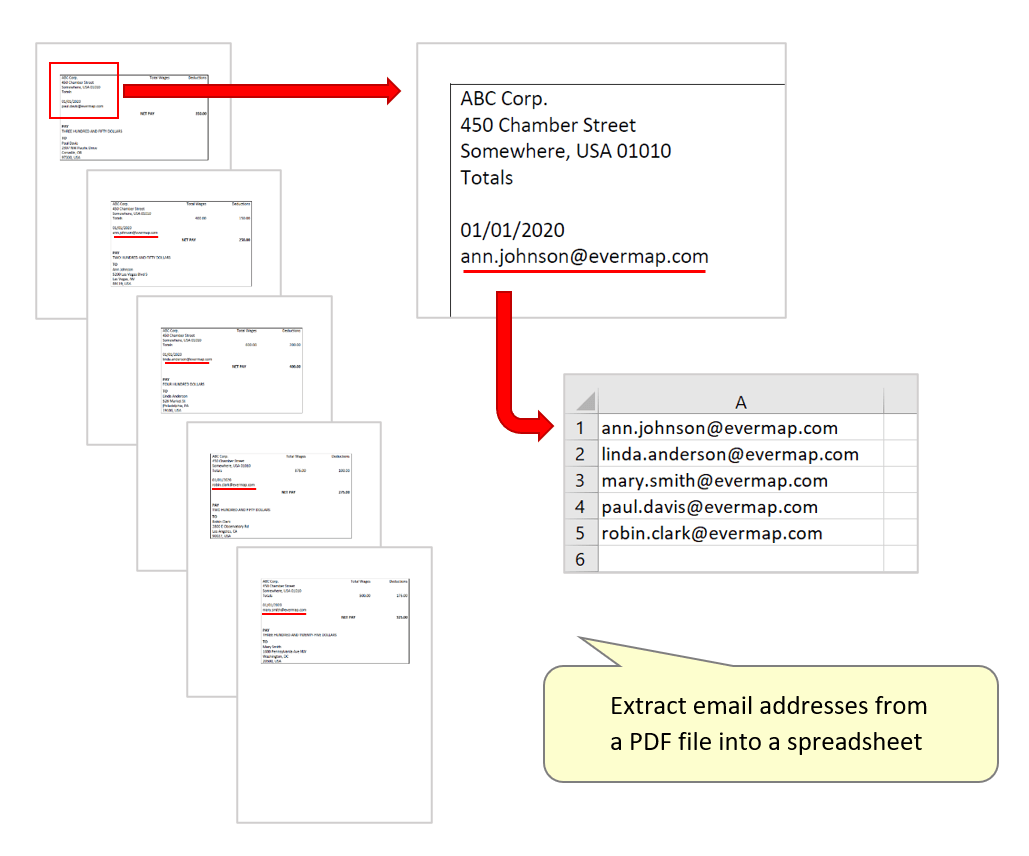
Extract Email Addresses from a PDF Document into a Spreadsheet
- Introduction
- This tutorial explains how the AutoDocSearch™ plug-in can be used to search one or more PDF documents for email addresses, and export them into a spreadsheet.
- This may be useful for extracting email addresses from large PDF files, and creating contact records. The plug-in makes this procedure much faster than manually searching for email addresses and copying them to another document.
- The sample PDF we will use to demonstrate contains multiple single-page sample payslips - each one contains the recipient's email address. The goal is to use a search expression to identify email addresses on each page, extract them, and save them in a CSV spreadsheet.
- Prerequisites
- You need a copy of Adobe® Acrobat® along with the AutoDocSearch™ plug-in installed on your computer in order to use this tutorial. Both are available as trial versions.
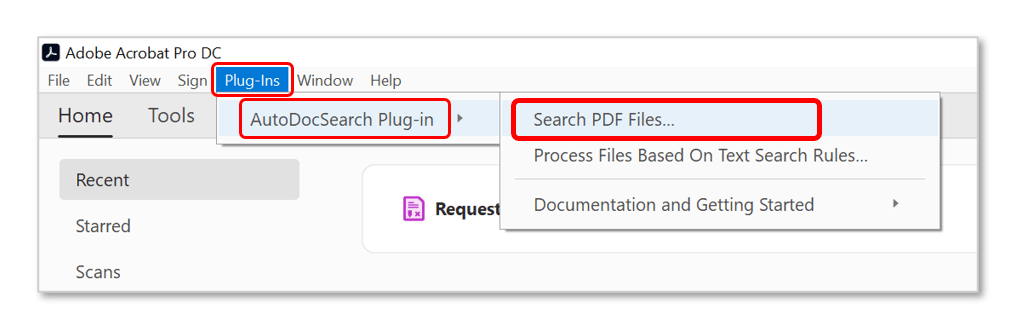
- Step 1 - Open the Tool
- In Acrobat, select "Plug-Ins > AutoDocSearch Plug-in > Search PDF Files..." from the main menu.
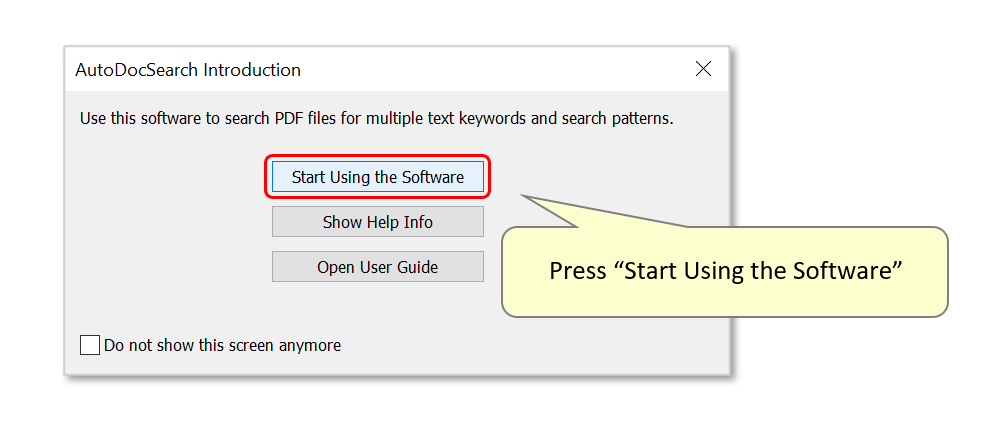
- Press "Start Using the Software" to open the tool.
- Optionally use the other two buttons for further help with using AutoDocSearch™.
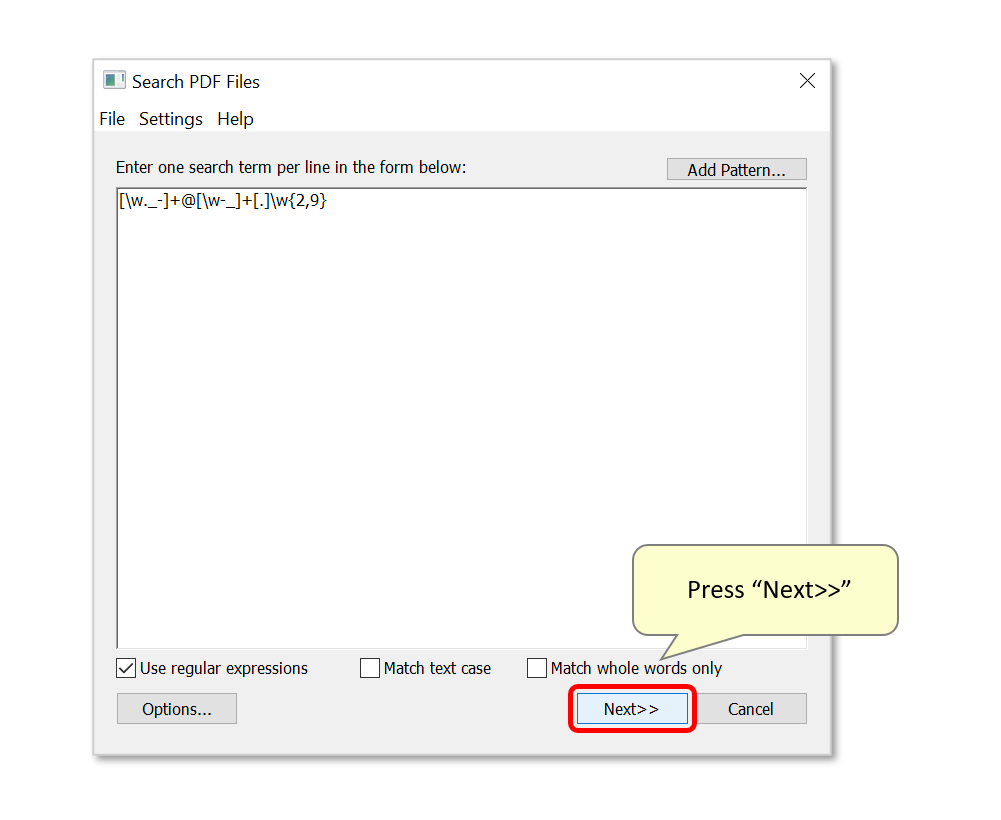
- Step 2 - Add Search Expression
- Enter a search expression in the entry box - here, we will use [\w._-]+@[\w-_]+[.]\w{2,9} to create matches with a typical email format. This is a basic regular expression that is provided here for the purpose of this tutorial only. There are copious examples of regular expressions for matching email addresses available on countless web sites devoted to text search.
- Ensure that the "Use regular expressions" option is checked.
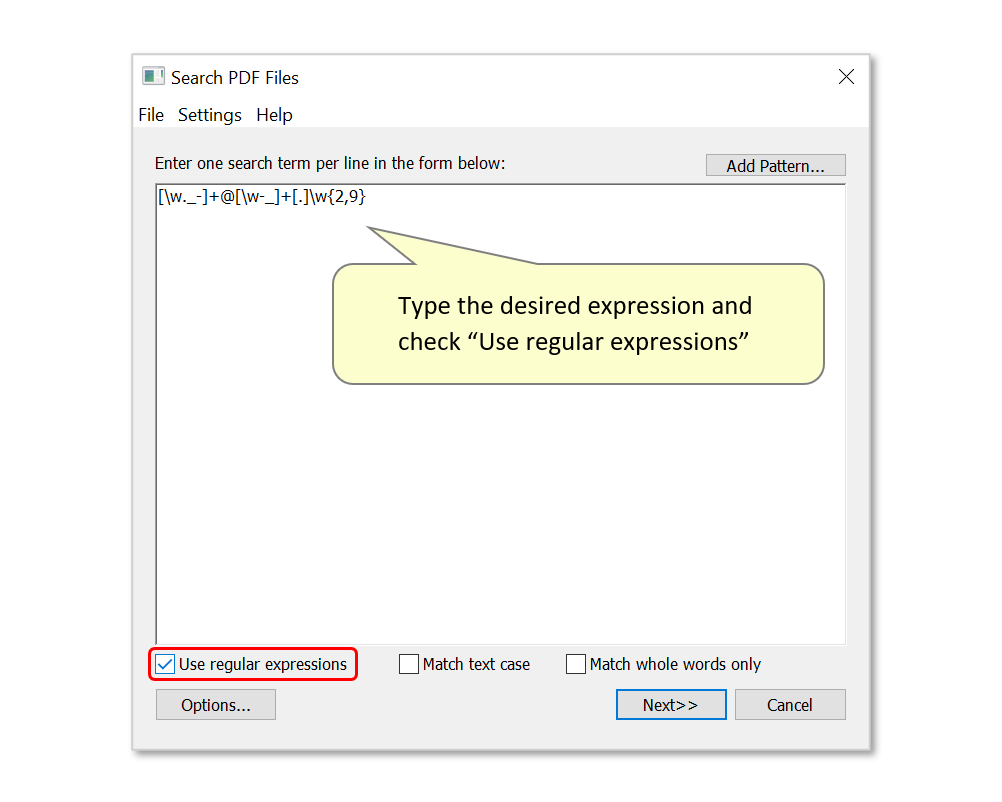
- Press "Next>>" to proceed.
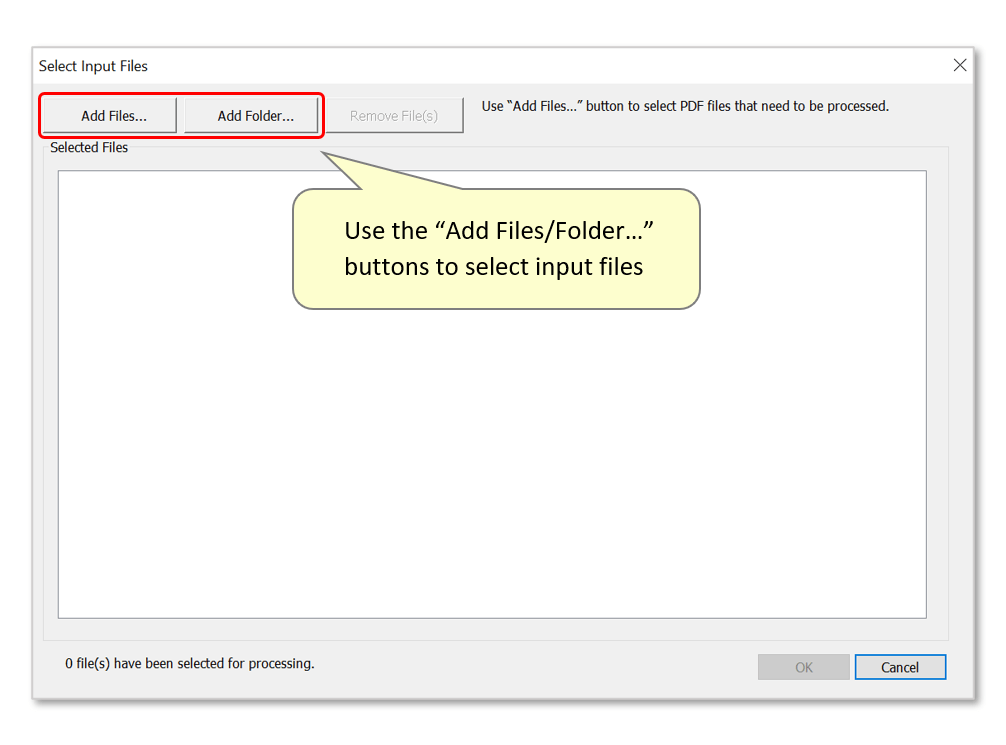
- Step 3 - Select Input Files
- Use the "Select Input Files" screen to select files for processing via the "Add Files/Folder..." buttons. In this example, we will add one input PDF containing all the payslips to be processed.
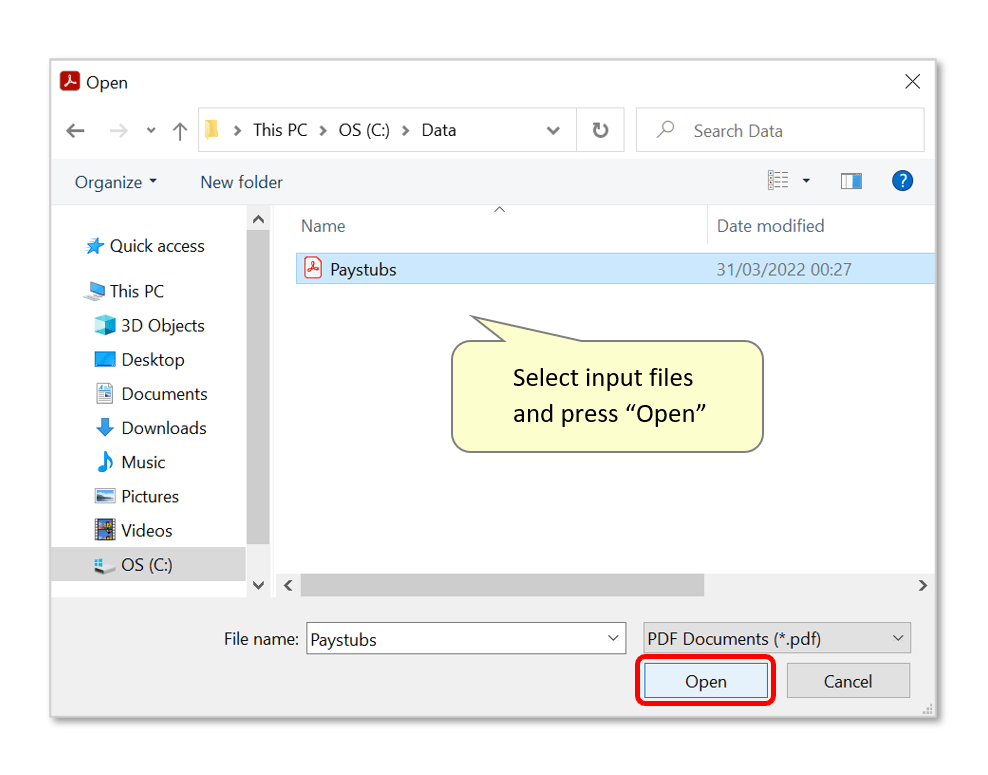
- Locate and select the desired input file(s) and press "Open".
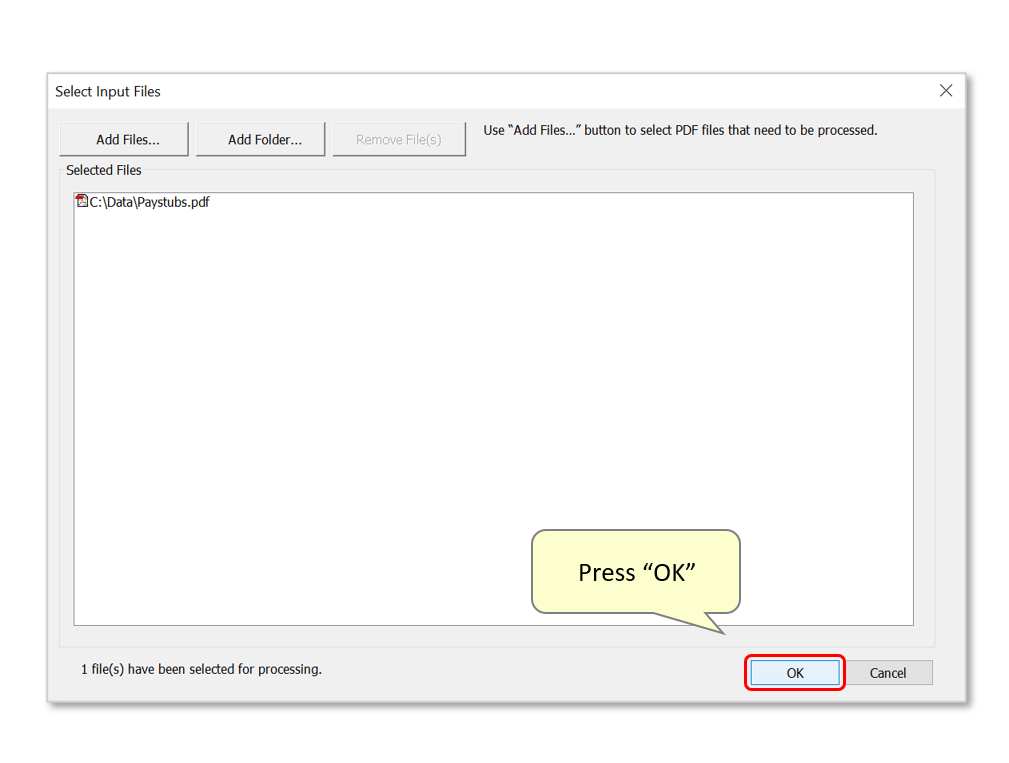
- All selected files/folders and their file paths will be shown in the "Selected Files" box. Press "OK" to proceed.
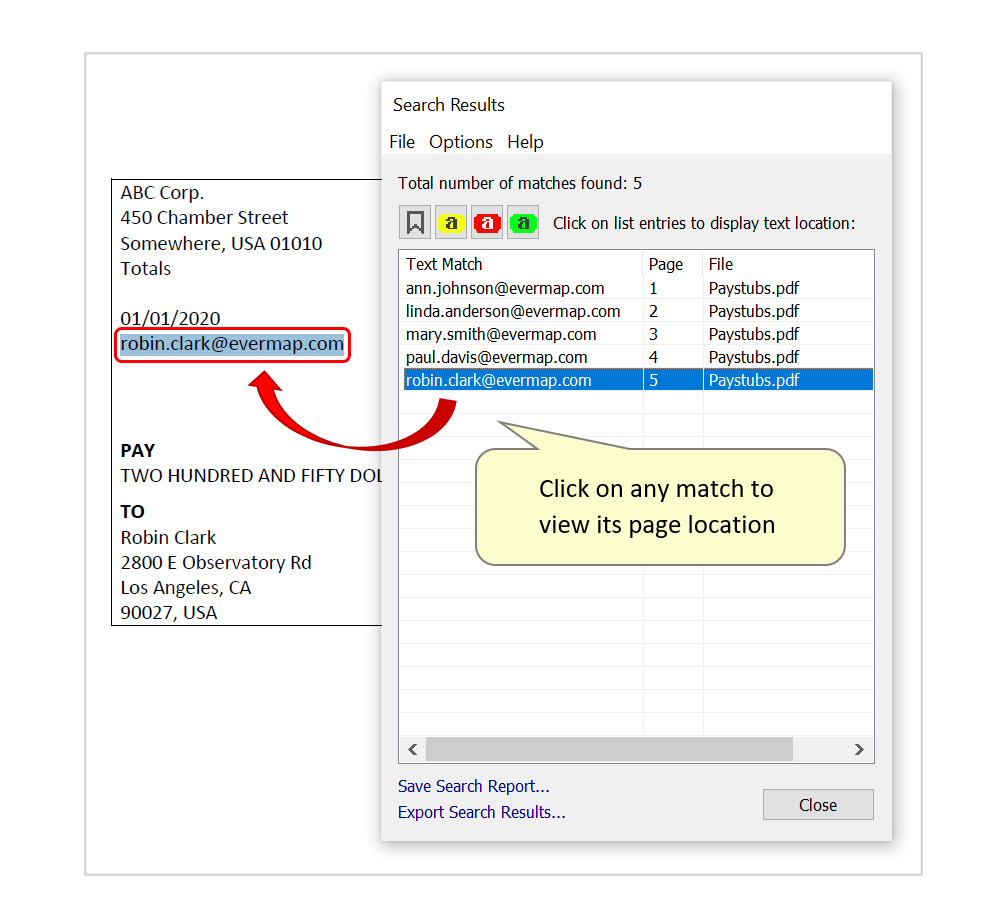
- Step 4 - View Search Results
- After searching the input document(s), the "Search Results" box opens. Clicking on any text matches in the list will open the corresponding file/page in Acrobat, with matching text highlighted. Here, the plug-in has identified an email address in each page of the PDF.
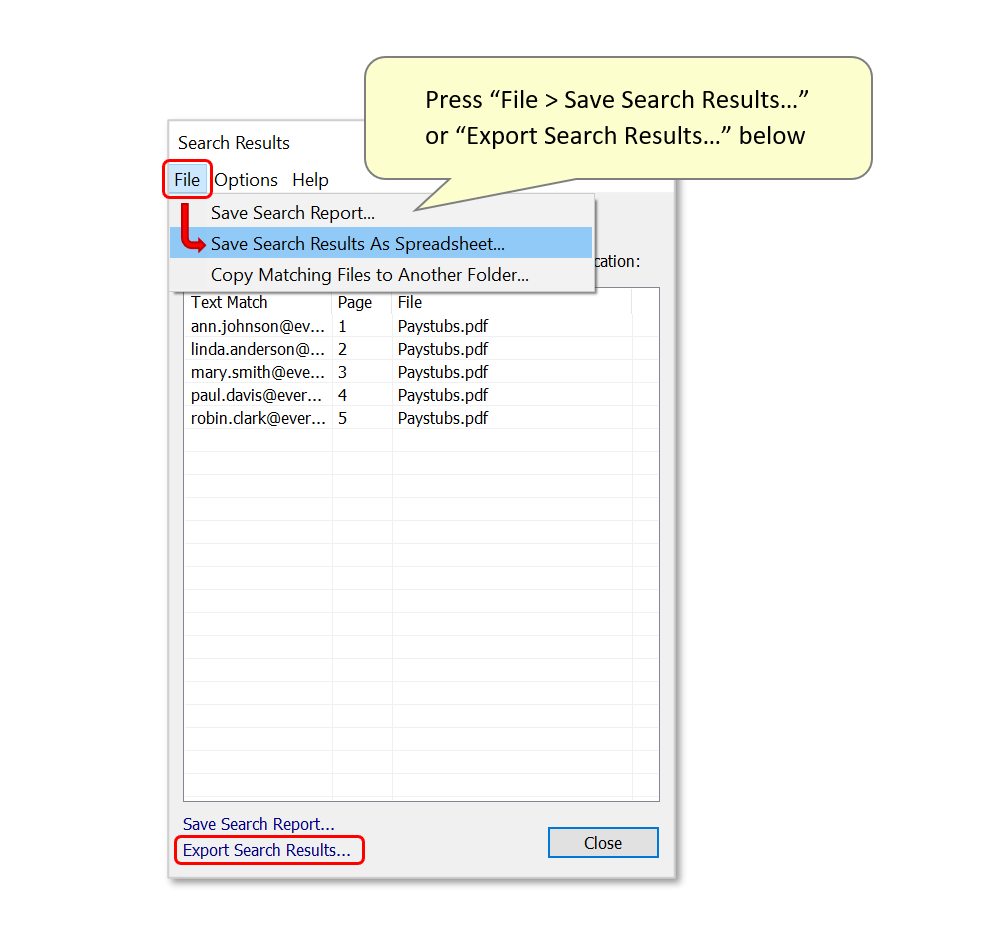
- Step 5 - Export Search Results
- Use either "File > Save Search Results as Spreadsheet..." or "Export Search Results..." below to export these results as a spreadsheet.
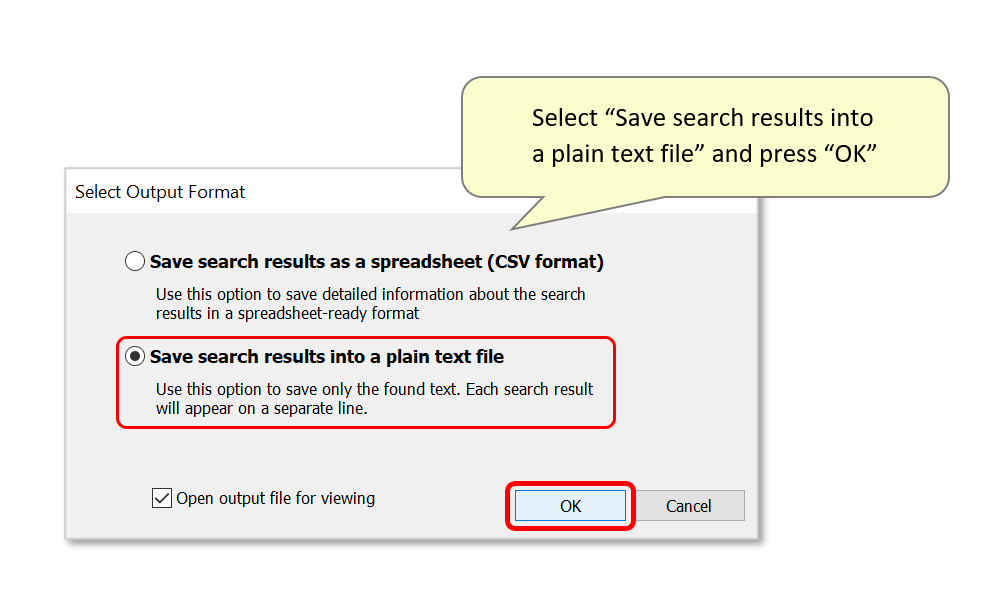
- In the "Select Output Format" dialog that opens, select "Save search results into a plain text file", and press "OK".
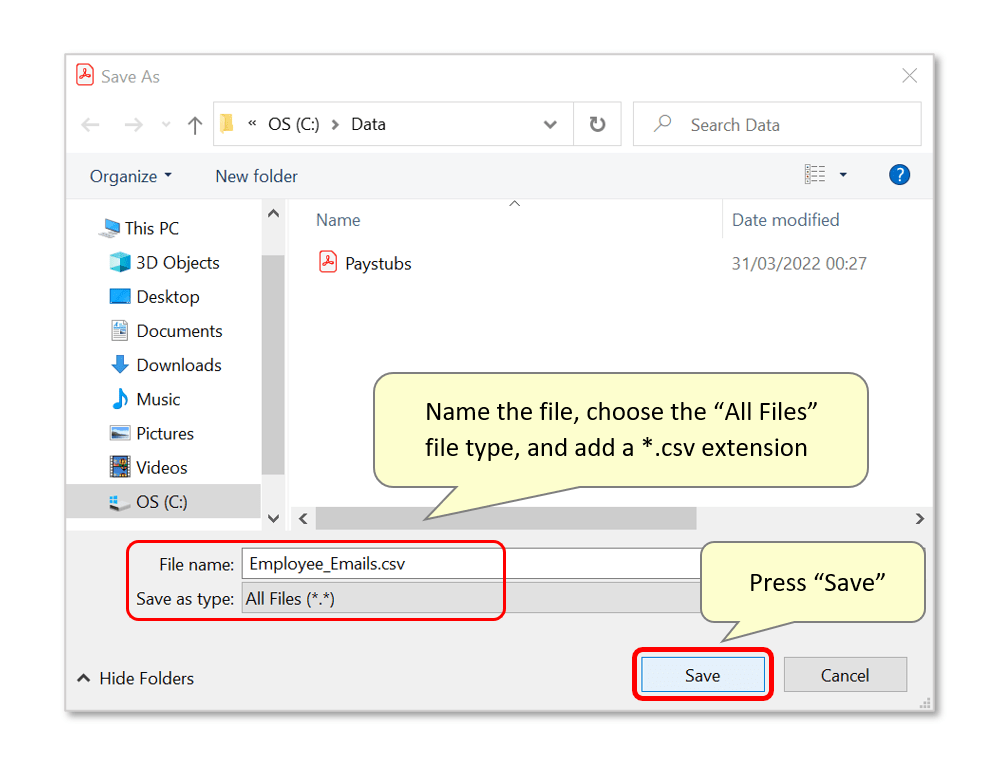
- Use the "Save As" window to select a folder location for the results to be saved in. Name the output file, then select the "All Files" file type from the "Save as type:" drop-down list, and manually add a *.csv extension to the filename.
- Press "Save" to continue.
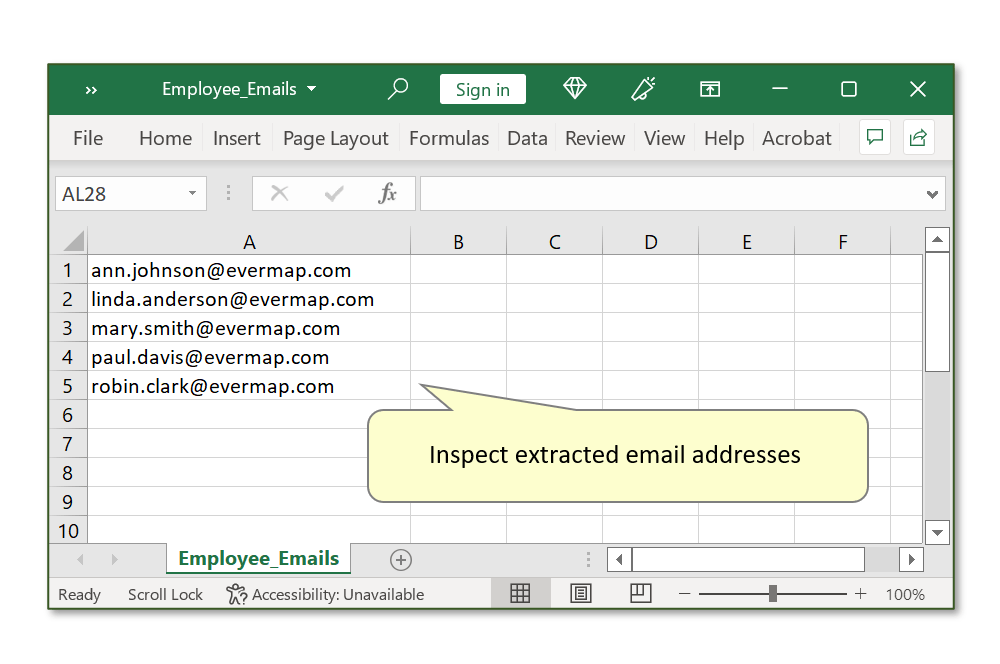
- Step 6 - Inspect the Spreadsheet
- The spreadsheet will be automatically opened in Excel, and saved in the chosen folder. Check that the email addresses have been successfully extracted:
- Click here for a list of all step-by-step tutorials.