Conditionally Hide/Show Form Fields Based on Data Values
AutoMailMerge for Adobe® Acrobat®
- Introduction
- This tutorial demonstrates a way to conditionally hide/show specific form fields during a mail merge based on data values. This can achieved by executing a user-specified JavaScript code, either before or after each PDF document is filled.
- For example, it might be ideal to use this method to alter the outcome of various PDF forms being generated via a mail merge. It may be suitable to have different types of form fields appear in the generated forms, depending on their requirements. To demonstrate this, the tutorial steps below show two different PDF forms being produced during a mail merge. Each contains one form field for the user to either: 1) select an address from a list, or 2) manually type an address into the field.
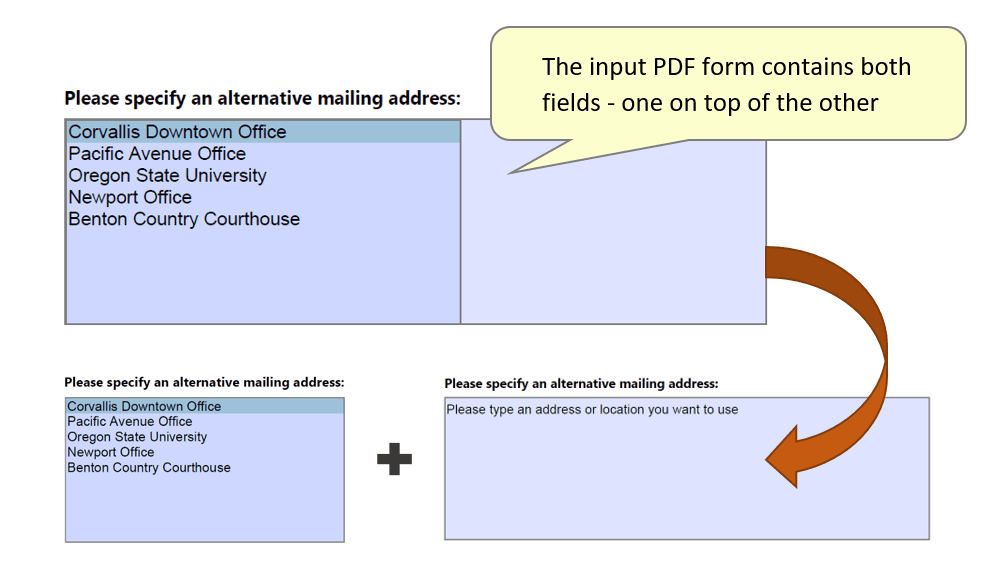
- The input PDF form contains both fields:
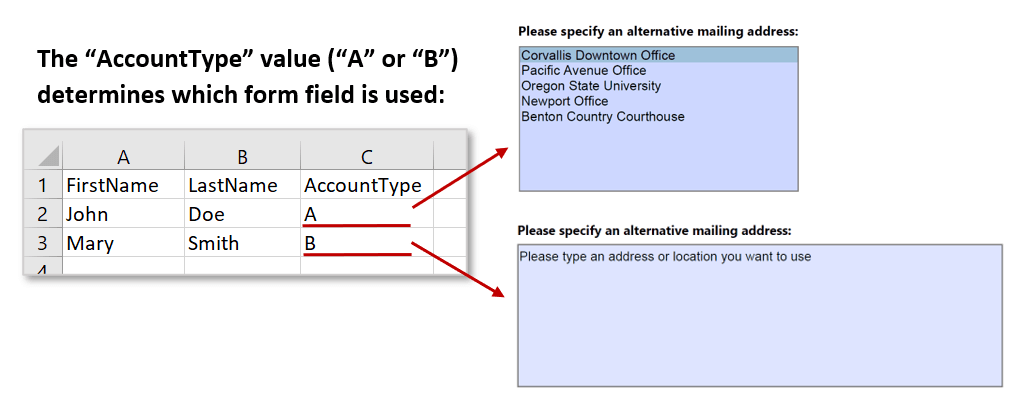
- Custom JavaScript code is used to identify the correct address field option that each output form requires. It uses values from the data source (spreadsheet) to know which field type the output forms should contain. This is shown as an "Account Type" column with either an "A" or "B" value entered for each data entry (John Doe/Mary Smith).
- Input Document Description
- To demonstrate this function with the AutoMailMerge plug-in, we use an input PDF that contains two 'select/enter address' form fields, one on top of the other. The data source is a spreadsheet that contains an "Account Type" value for it's two entries (see images above). This is either "A" or "B", and is used to instruct the plug-in on which form field the output PDF's should contain. An output PDF will be generated for each of the two spreadsheet entries, and they will contain only one of the address field types.
- Prerequisites
- You need a copy of the Adobe® Acrobat® along with the AutoMailMerge™ plug-in installed on your computer in order to use this tutorial. Both are available as trial versions.
- Step 1 - Open the "Mail Merge" Dialog
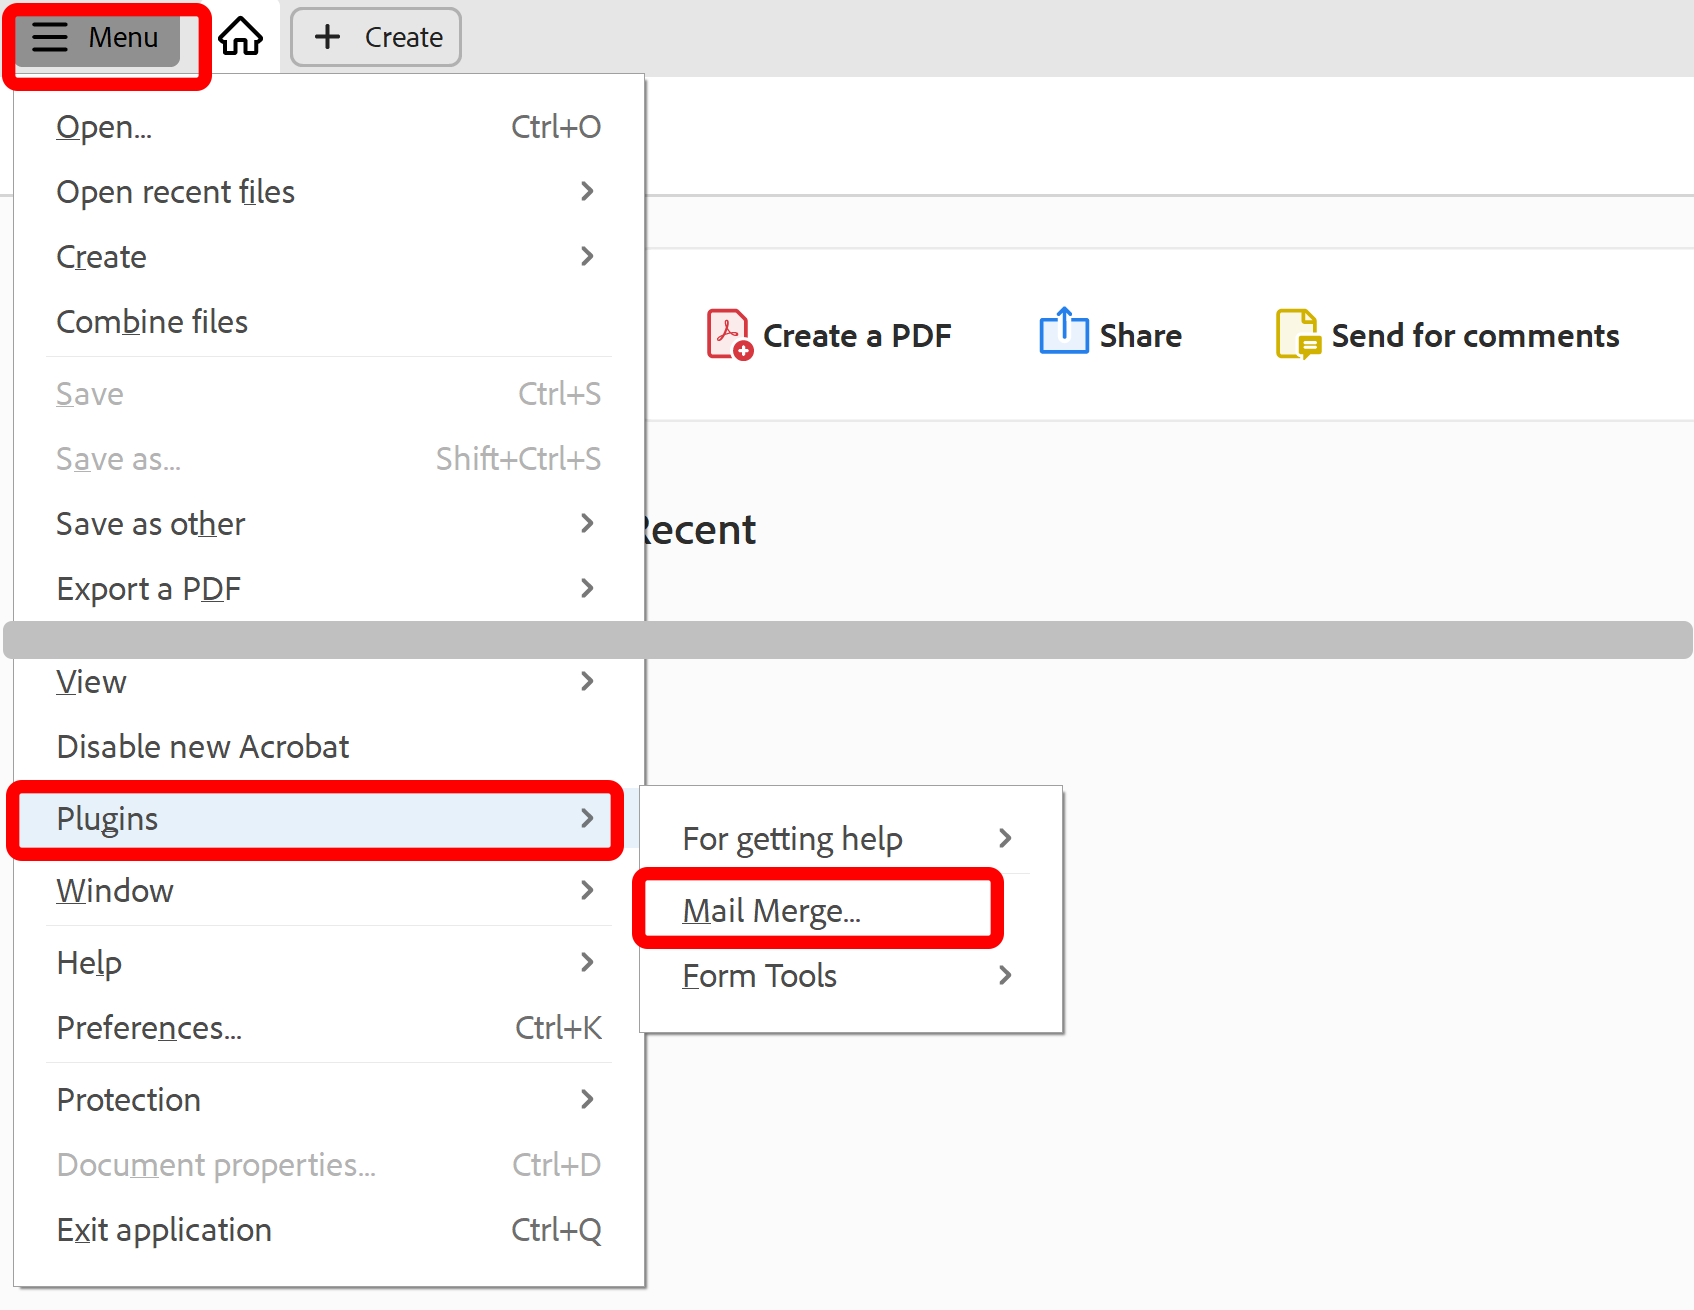
- Select Plugins > Mail Merge… to open the Mail Merge dialog.
- If you are using a new Adobe Acrobat interface, then you can locate Mail Merge menu here:
- Please see the following page for a short video tutorial on how to locate Plugins menu in the new Adobe® Acrobat® interface.
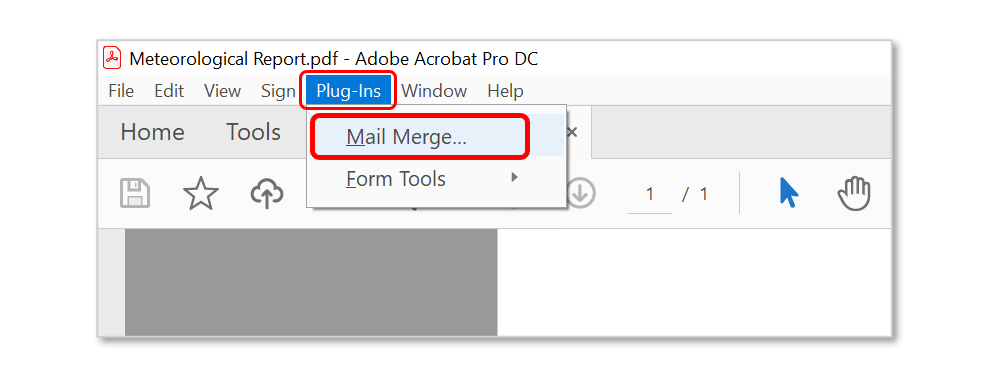
- If you are using a "classic" Adobe Acrobat interface (pre-2022), then you can locate Mail Merge menu here:
- Step 2 - Edit Mail Merge Settings
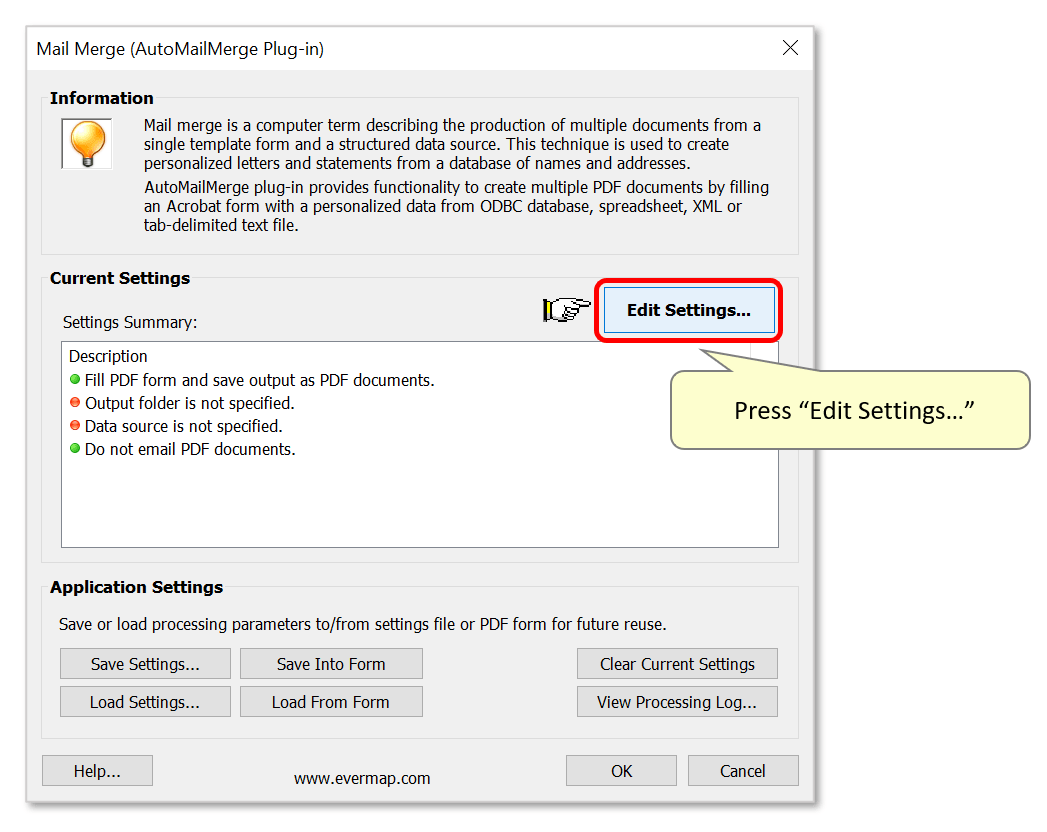
- If necessary, clear current settings and then press the "Edit Settings…" button.
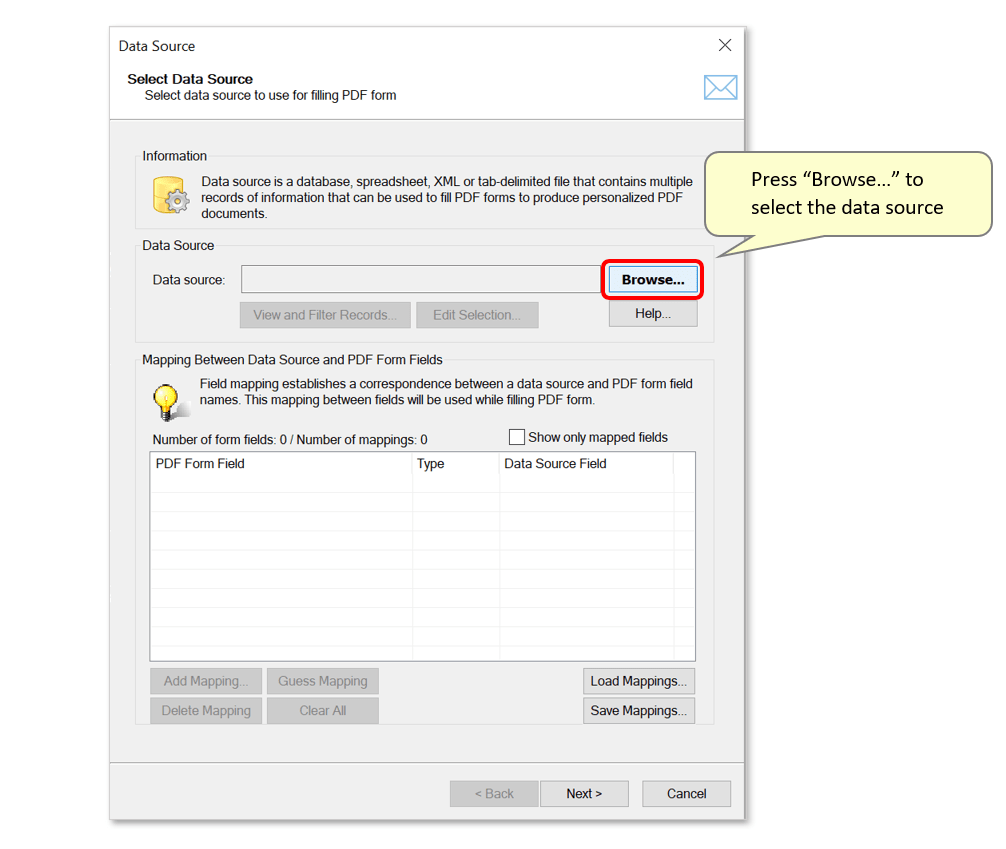
- Press the "Browse…" button in the "Data Source" dialog to select the input data file.
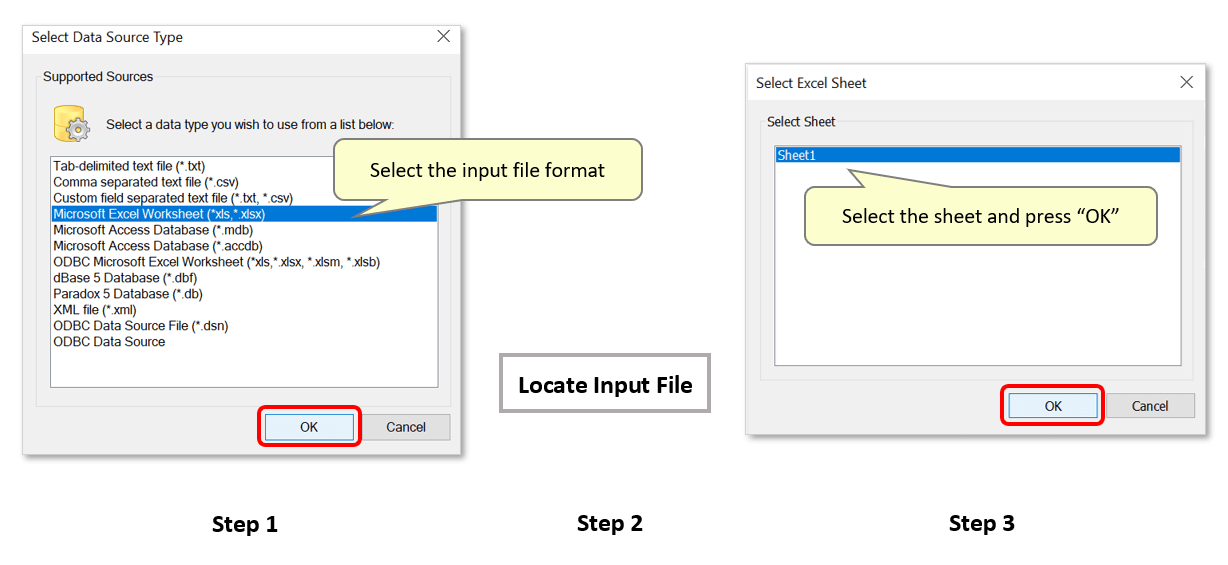
- Select a data type to use from the list (e.g.: Microsoft Excel Worksheet), then press "OK". Use the dialog that opens to locate and select the source file, then select the worksheet in the final dialog that opens.
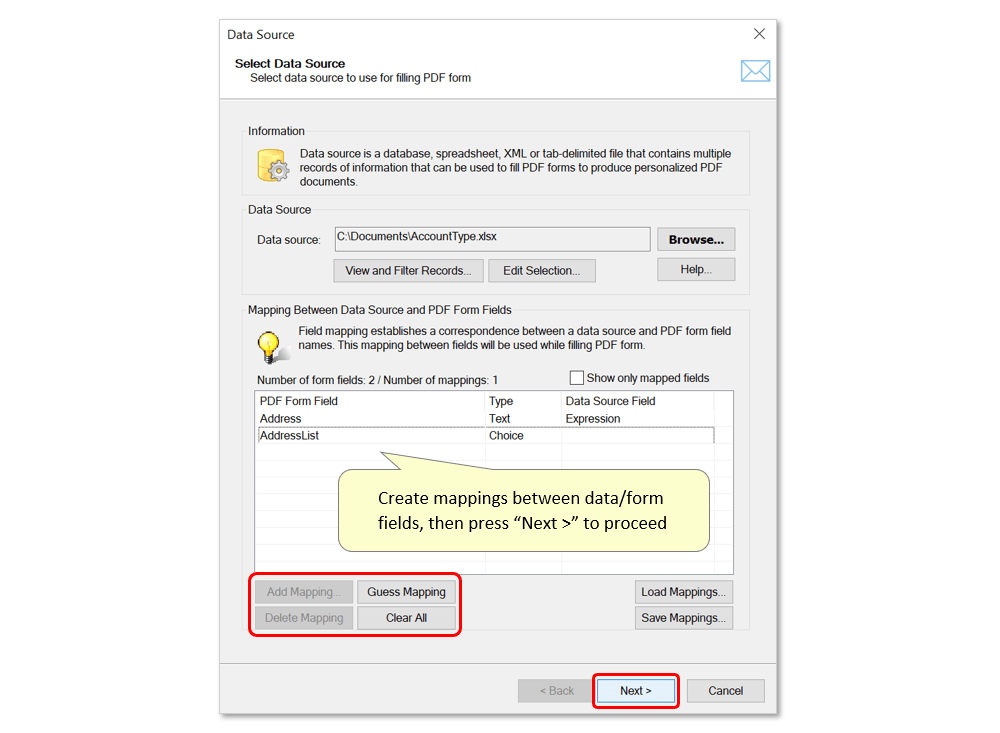
- Step 3 - Add Mappings
- Use the buttons provided to map data fields to form fields. Press Next > to proceed through the next settings pages.
- Step 4 - Specify Output Options
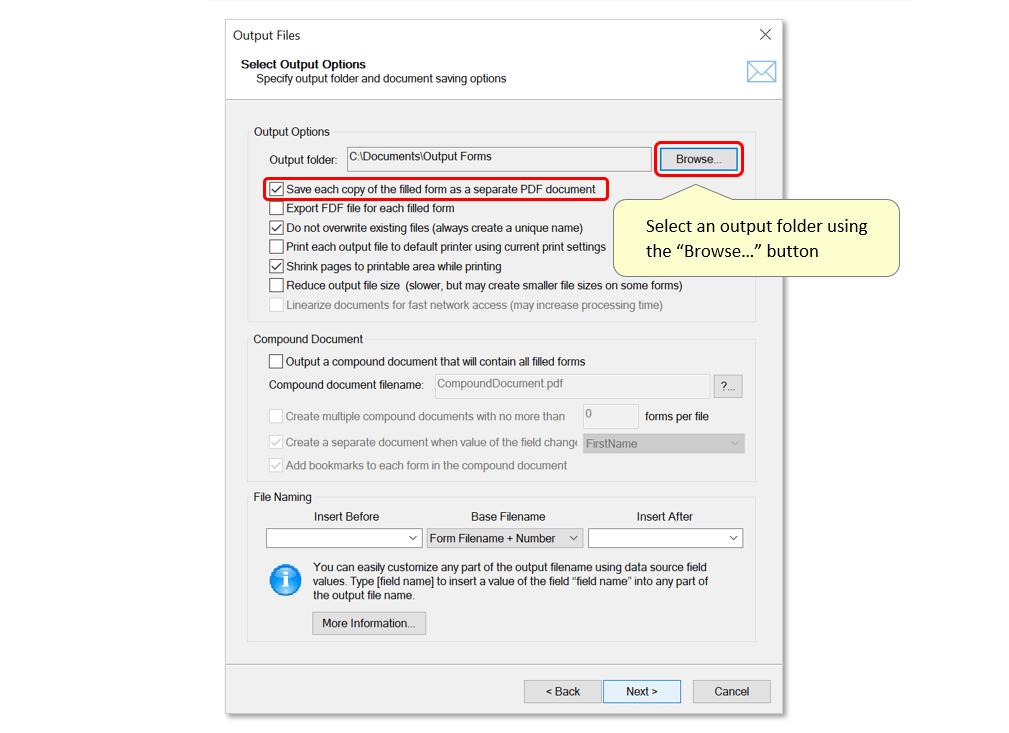
- Continue to the "Output Files" page to modify output options. Begin by selecting a suitable output location via the "Browse..." button.
- Also ensure that the "Save each copy of the filled form as a separate PDF document" option is selected.
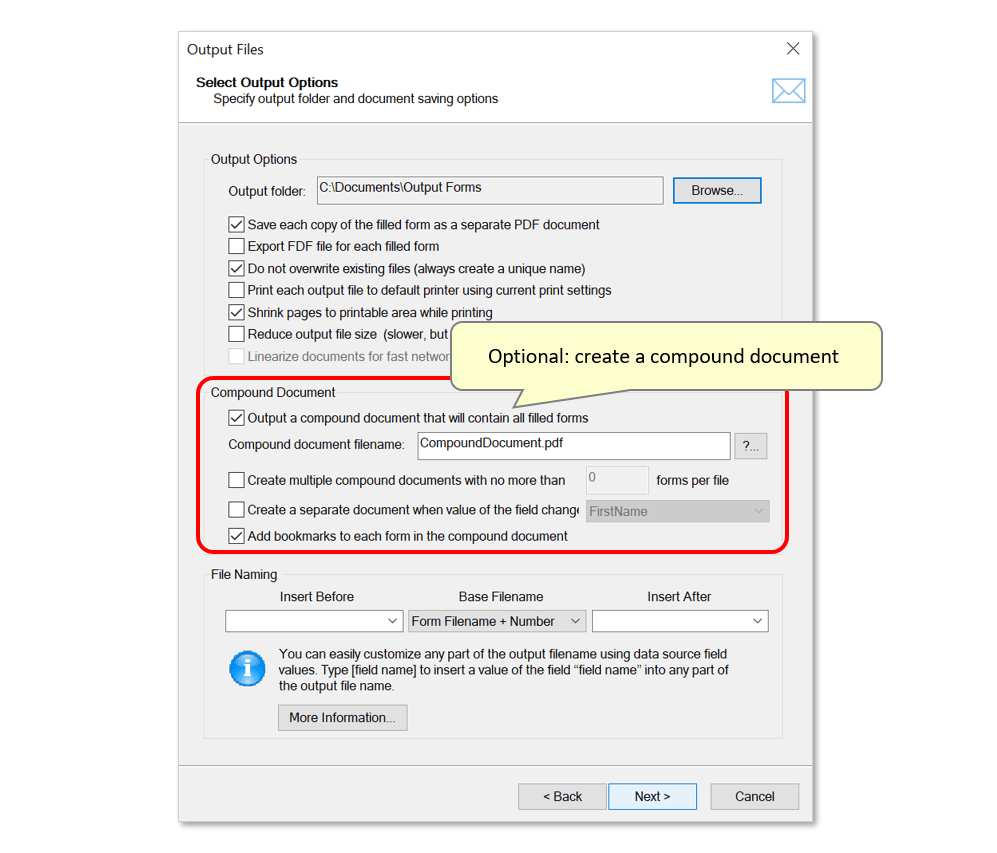
- Optional: create a 'compound document' that contains all filled forms combined into one file. Enter a filename into the entry box provided. In this example, the "Add bookmarks..." option is checked so that the compound document can be easily navigated.
- Use the "File Naming" section to create a file naming scheme for the output files. In this example, files will be named using customer name data from the "FirstName" and "LastName" fields in the data source file.
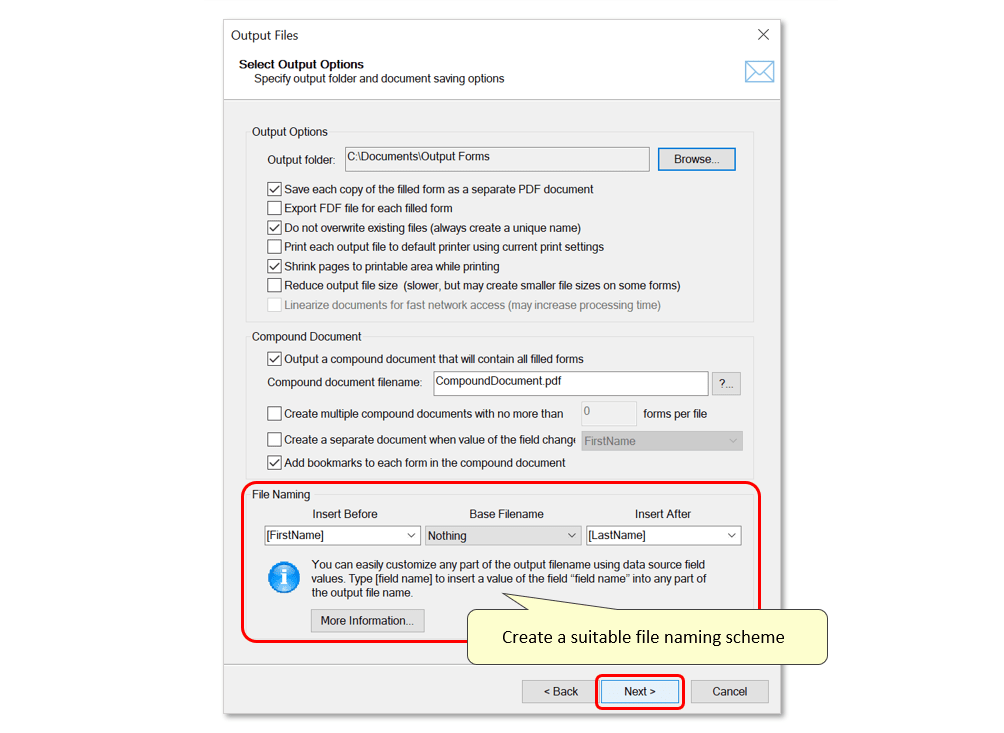
- Press Next > button multiple times to proceed to the final "Advanced" settings page (skip other settings screens that are irrelevant for this tutorial).
- Step 5 - Add JavaScript Code
- On the "Advanced" screen, check the desired JavaScript action for adding code to be executed either before or after filling forms. In this example, we use the "Execute this JavaScript code AFTER..." option.
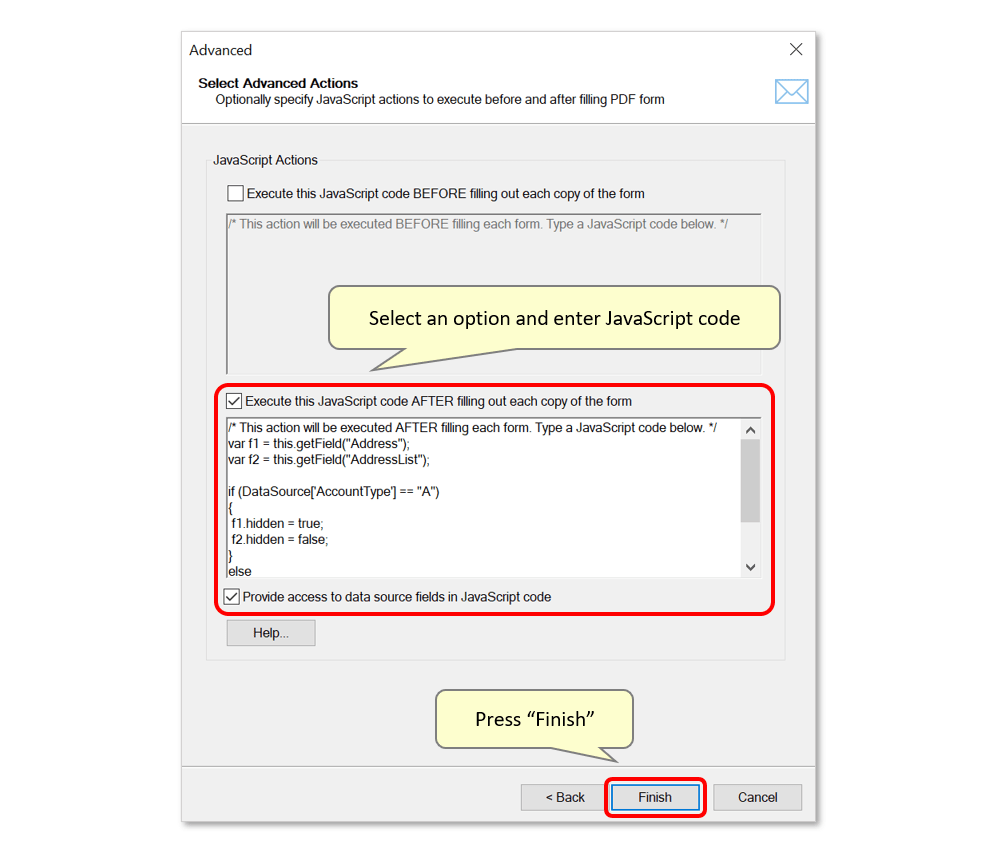
- Here is the sample script we have used to show/hide fields depending on the value of AccountType data field:
-
var f1 = this.getField("Address");
var f2 = this.getField("AddressList");
if (DataSource['AccountType'] == "A")
{
f1.hidden = true;
f2.hidden = false;
}
else
{
f1.hidden = false;
f2.hidden = true;
}
- Please ensure that field names you are using in the script (both PDF form field fields and data source fields) actually exist and spelled correctly. Field names are case-sensitive. In the code above, this.getField("Address") and this.getField("AddressList") refer to PDF form fields with names Address and AddressList. While the if (DataSource['AccountType'] == "A") refers to a data field named AccountType.
- Ensure that the "Provide access to data source fields in JavaScript code" option is checked if it is necessary to access the data source record directly in the JavaScript. If this option is ON, then a DataSource object is automatically generated and added to the script. For example, if a data source record contains 3 fields: "First Name", "Last Name" and "Email", then the values of these fields can be accessed in the JavaScript code as DataSource['First Name'], DataSource['Last Name'] and DataSource['Email'].
- The maximum allowed text string that is stored in the DataSource field variable is 1024 characters. The maximum allowed name of the field is 128 characters. Longer text strings will be truncated.
- If a data source record has a lot of fields/data, adding a DataSource object to the JavaScript environment may take extra time required for parsing a much longer code. If speed is an issue, turn this option off and use an alternative way to get data source values. The alternative approach is to add a number of hidden form fields to the form and fill them using a regular mail merge approach. This way their values will be available in the script, but not visible on the form.
- Press "Finish" once done.
- Step 6 - Run the Mail Merge
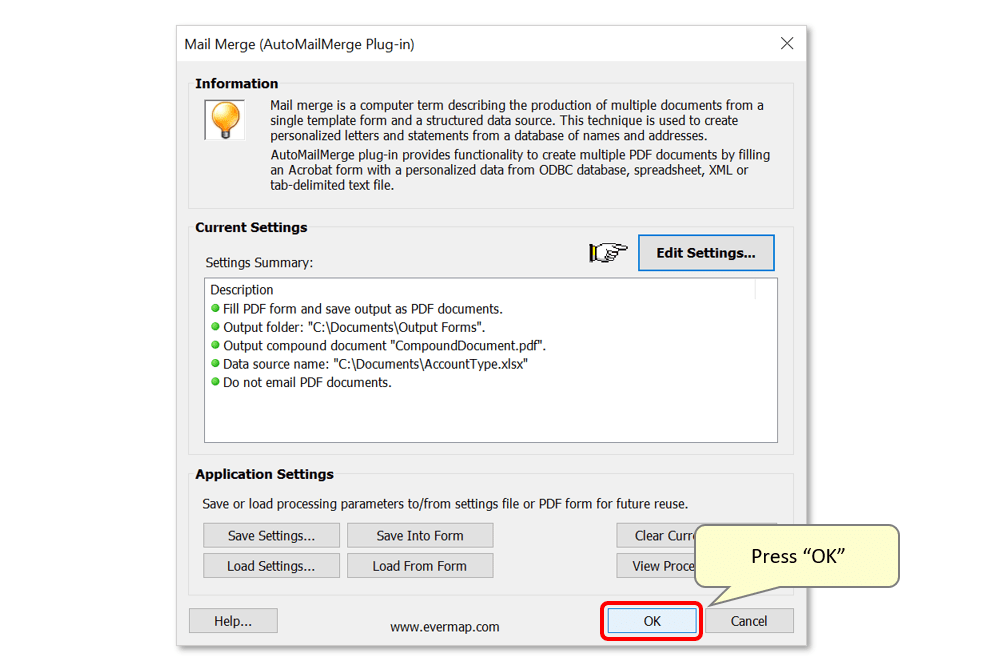
- The confirmed settings summary will now be listed with green circles. Optionally, save the mail merge settings as an *.mms file for later use by pressing the "Save Settings" button - use "Load Settings" to load them.
- Click "OK" to start the mail merge process.
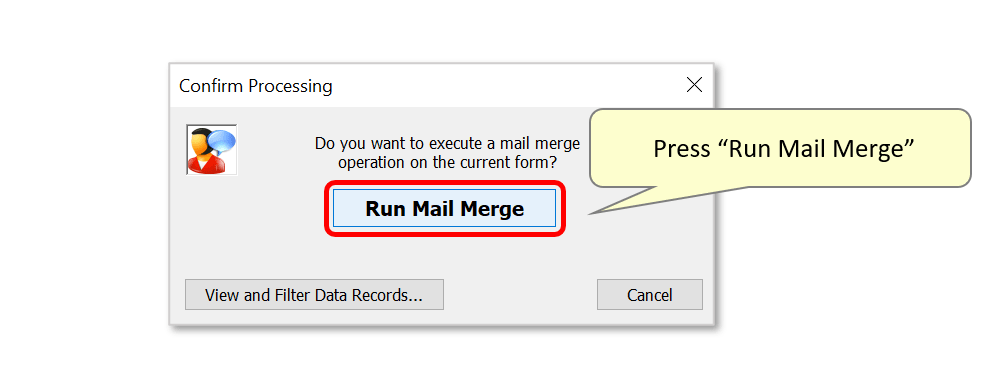
- Press "Run Mail Merge" to confirm.
- Step 7 - Open the Output Files
- A results box will confirm the success of the operation. By default, pressing "OK" will open the selected output location.
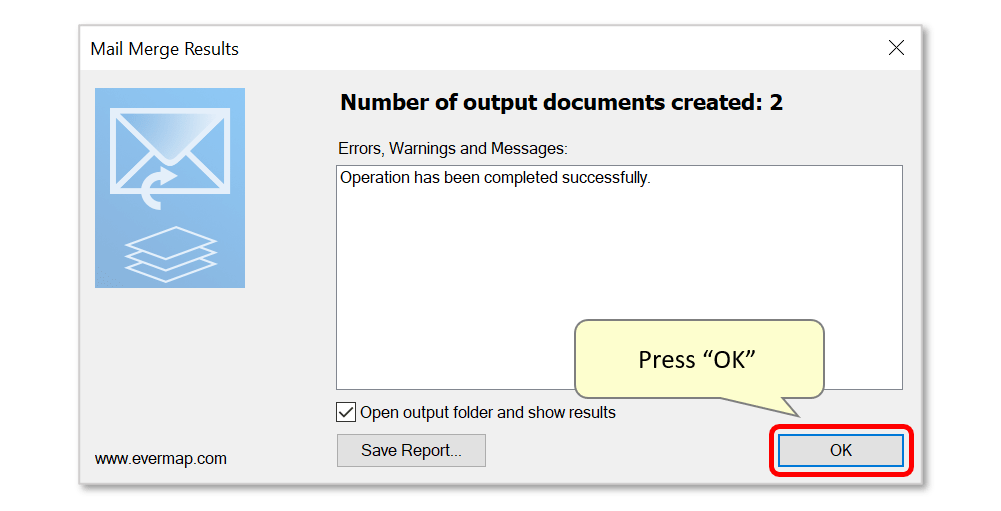
- Open the files to inspect them.

- Step 8 - Inspect the Results
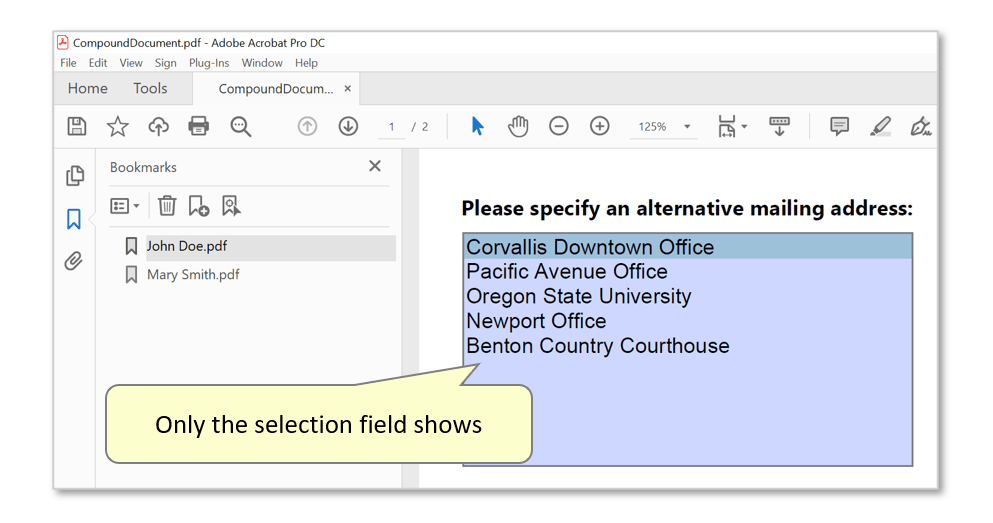
- Inspect the file(s) to check that the correct form fields are visible/hidden according to the JavaScript code used. Here, we examine the 'compound document' to check that it contains both of the forms generated for "John Doe" and "Mary Smith".
- The image below shows the form for John Doe. It contains only the address selection field due to the "Account Type 'A'" data value.
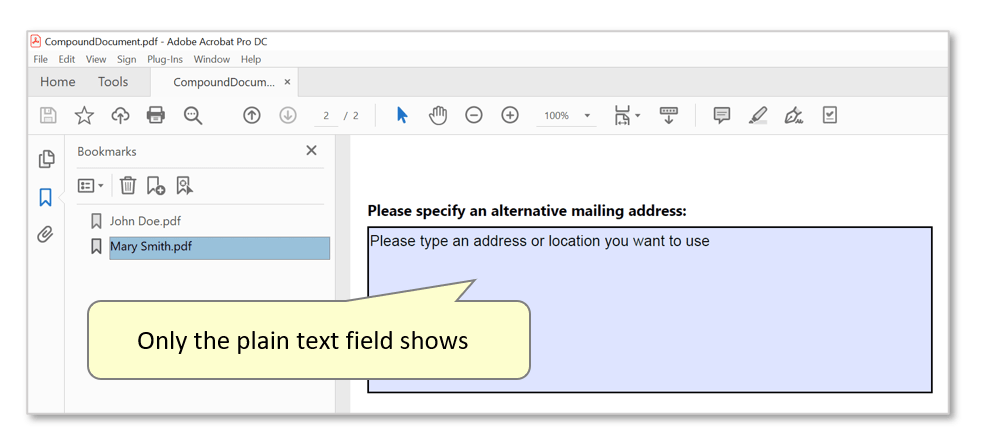
- The image below shows the form for Mary Smith. It contains only the plain text field for manually typing an address, due to the "Account Type 'B'" data value.
- Click here for a list of all step-by-step tutorials available.