Extracting PDF Page Ranges Into Different Folders
AutoSplit plug-in for Adobe® Acrobat®
- Introduction
- The AutoSplit plug-in can be used to extract pages from PDF documents, and place them in specific output folders. In this tutorial, we demonstrate how this process can be repeated multiple times so that output folders contain a precise set of extracted page ranges, from various input files. This method may be used when it’s useful to have certain pages from PDF documents archived within a specific folder.
- The steps below explain how to split a series of input PDFs, and place each page in a precise output location. The goal is to take four sample input documents containing x4 pages, and extract individual pages of the document so that a set of output folders each contain all the first pages, all the second pages, and so on. Note that we will use this method to split only four-page documents , but the same technique would work with files of any length.
- Input/Output Description
- The input PDF documents used here (FileA/B/C/D.pdf) all contain x4 pages. Each page is clearly labelled with a filename, and page number. The goal is to extract: the first page of all input files, and store them in an output folder (Page1); the second page of all input files, and store them in an output folder (Page2) and so on.
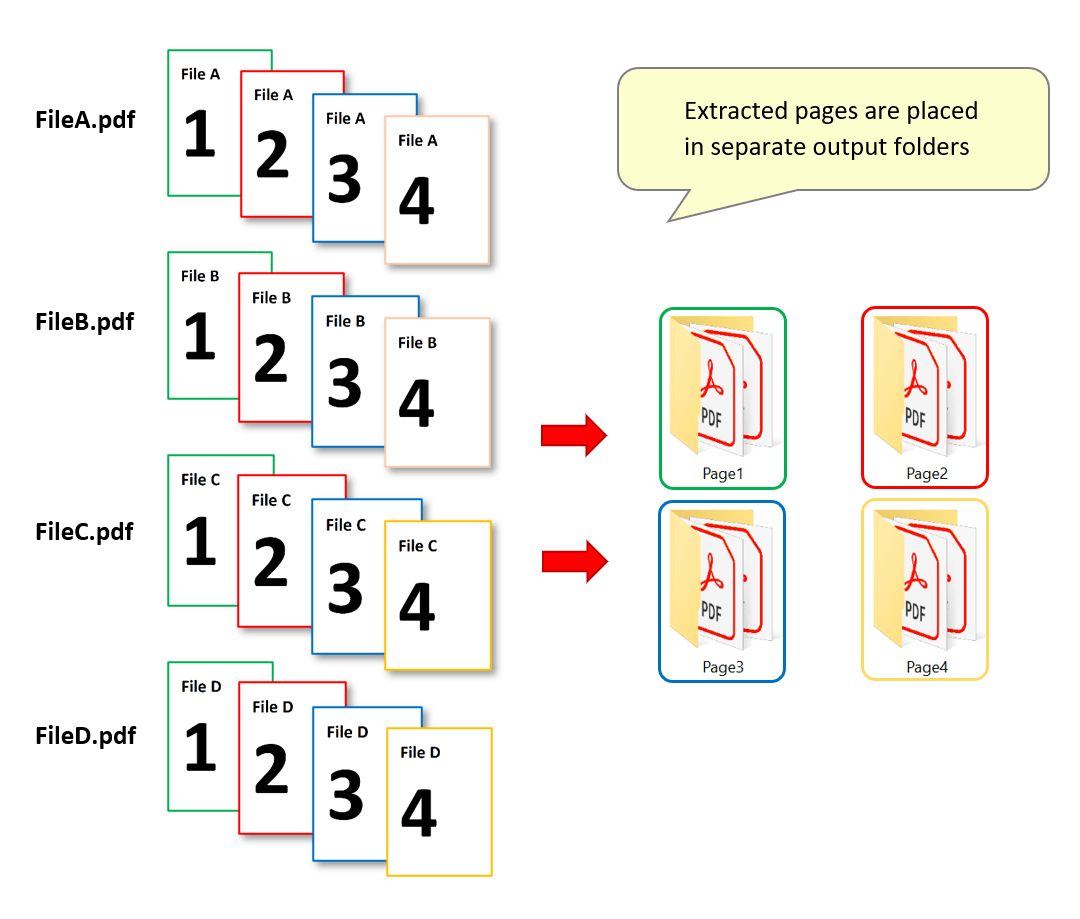
- The output will be x4 folders named “Page1/2/3/4”. Each folder will contain the same page number from all input documents. Output files have the same name as the input document that the page was extracted from – i.e.: “FileB.pdf” within the “Page2” folder contains only the second page from the original “FileB.pdf”.

- Prerequisites
- You need a copy of Adobe Acrobat along with the AutoSplit™ plug-in installed on your computer in order to use this tutorial. Both are available as trial versions.
- Step 1 - Open the “Split Document Settings” Menu
- Open the first PDF file that you want to split in Acrobat®,
then select “Plug-ins > Split Documents > Split Document…” from the main menu to open
the “Split Document Settings” dialog.
[⚡ How to locate Plugins menu in Adobe® Acrobat® ⚡] - Step 2 - Select Splitting Method
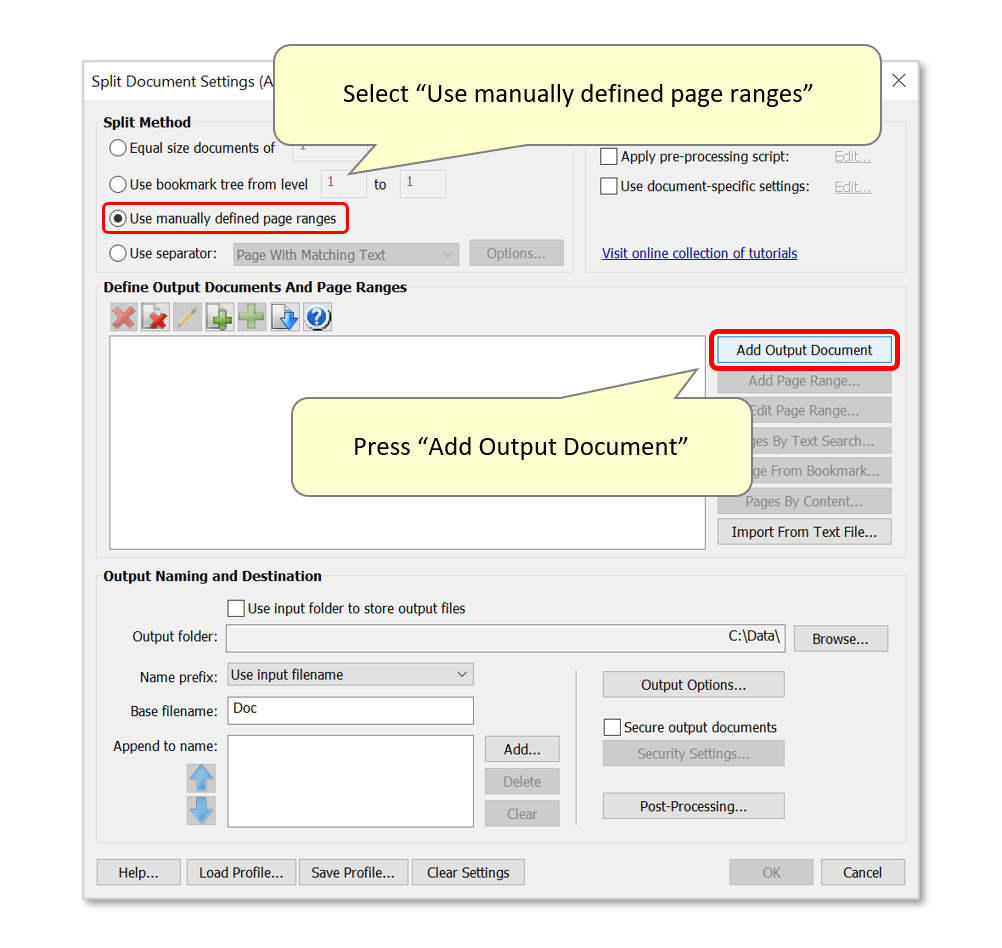
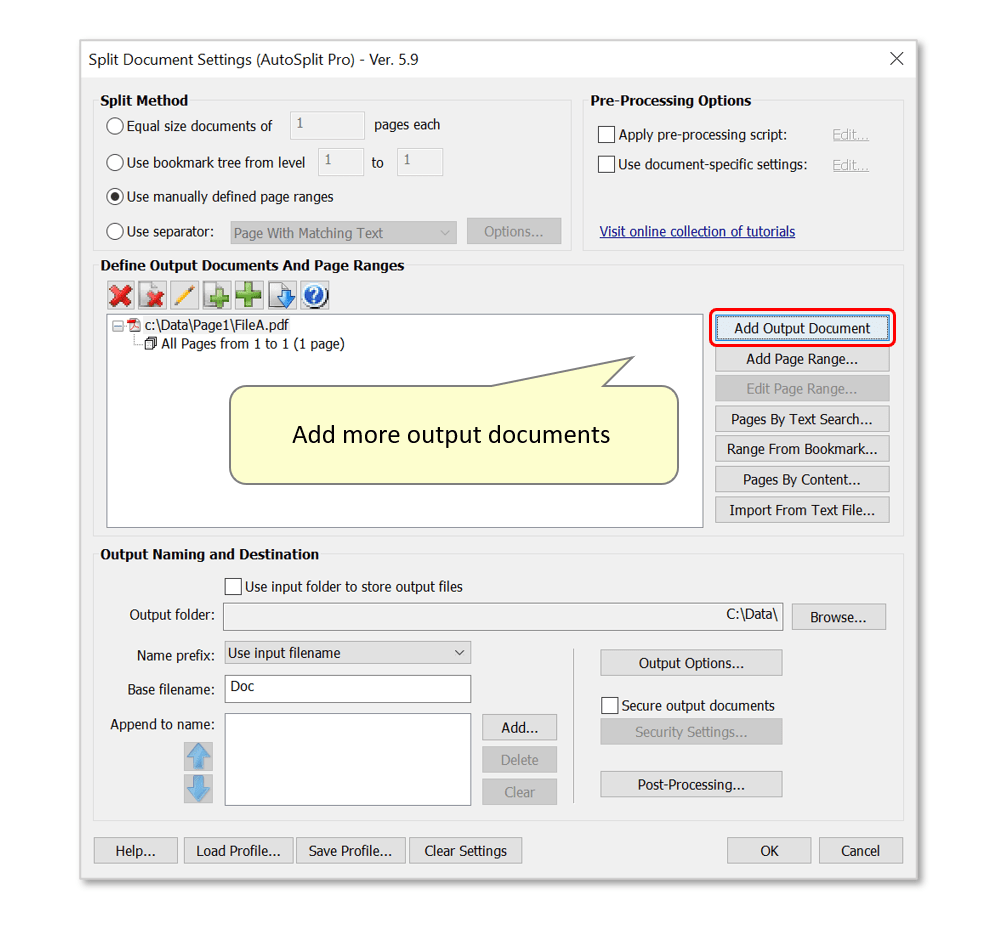
- Select the “Use manually defined page ranges” splitting method.
- Then press the "Add Output Document" button.
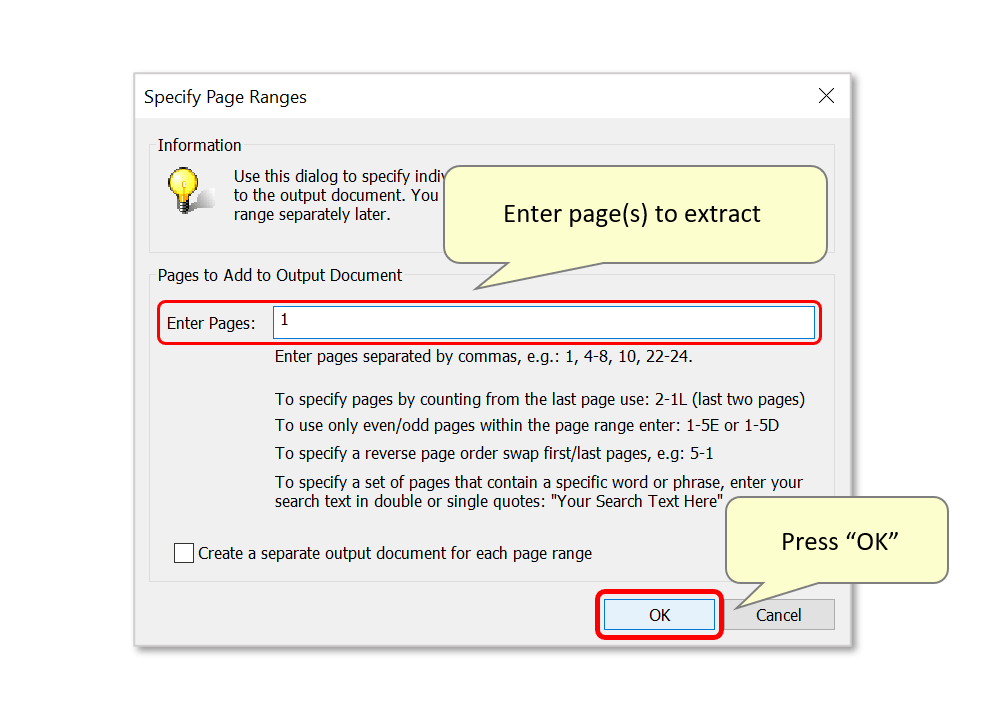
- Step 3 - Enter Page Range to Extract
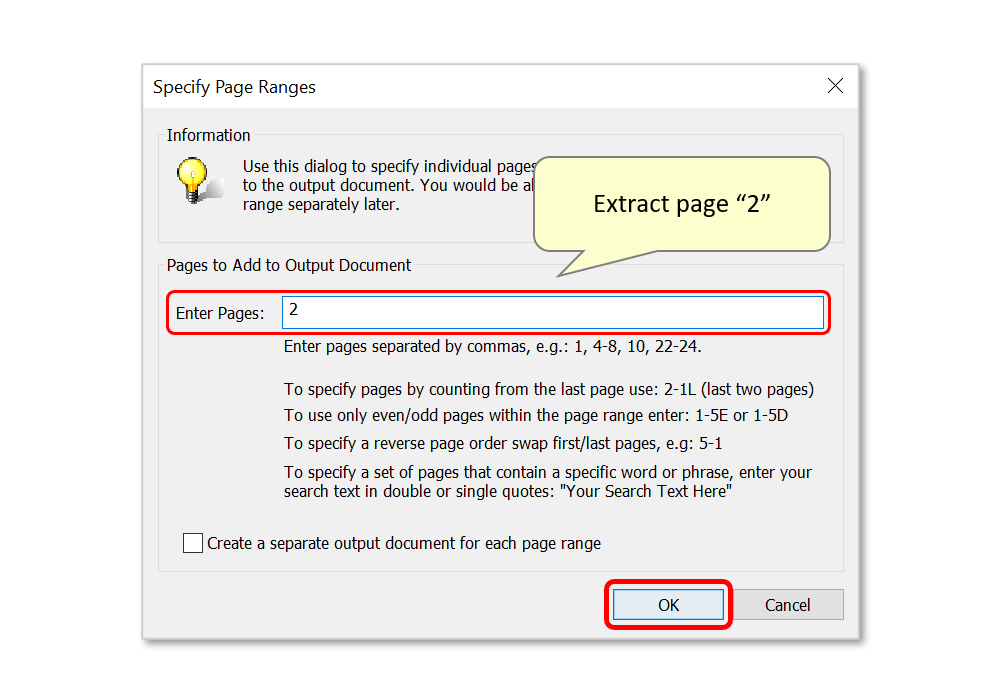
- The "Specify Page Ranges" dialog will appear on the screen. Enter one or more page ranges to be extracted here, separated by commas (e,g,: 5, 8-10). In this example, we'll only extract page "1".
- Press "OK" once done.
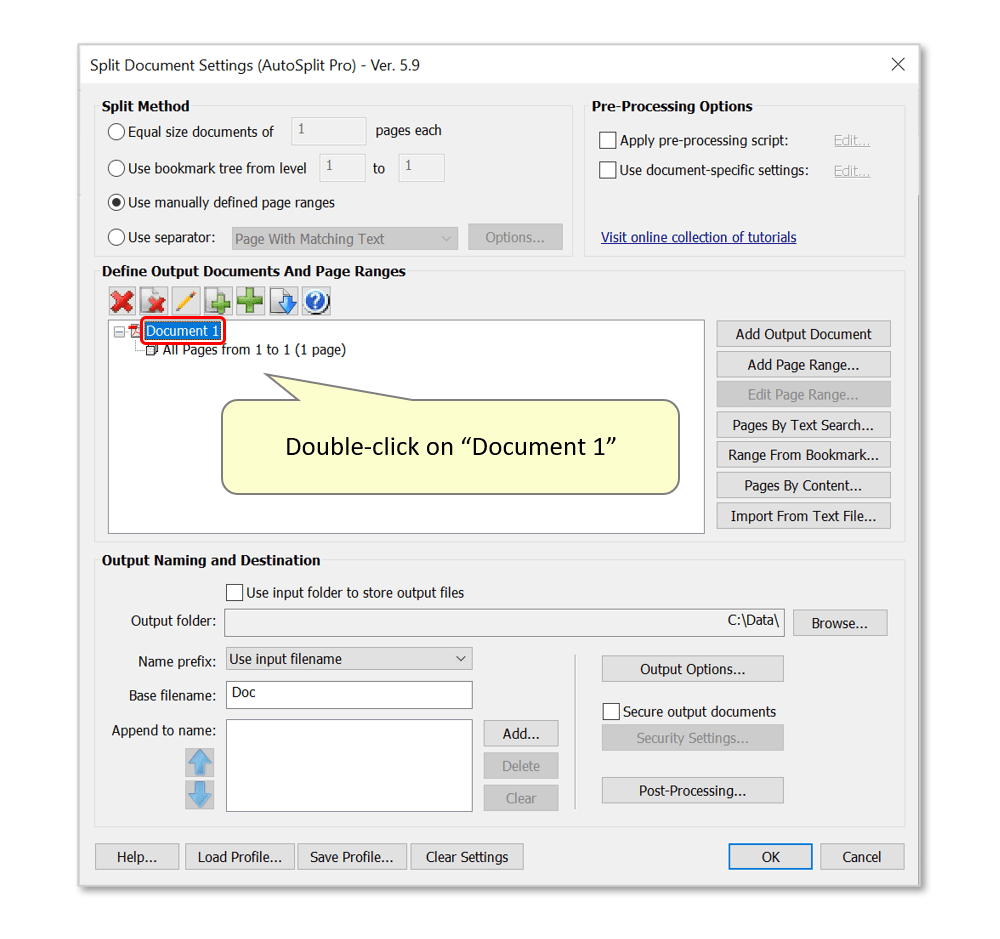
- Step 4 - Edit Output Settings
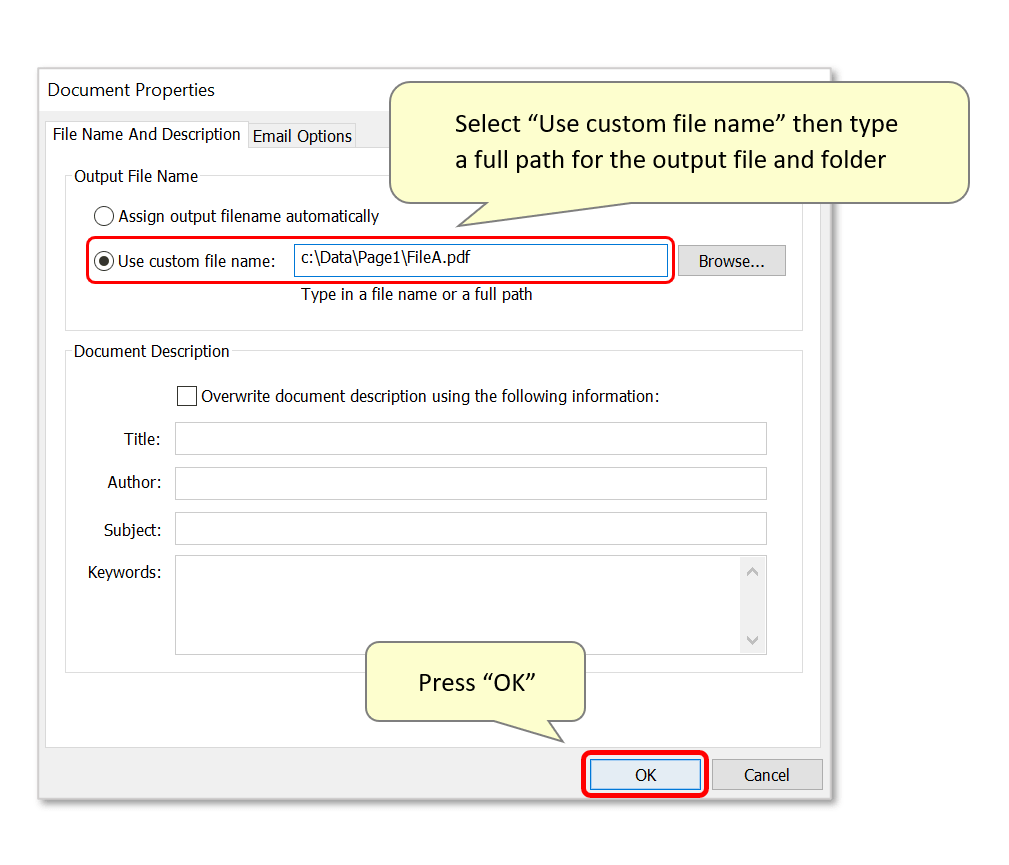
- Double-click on the default 'Document 1' output filename.
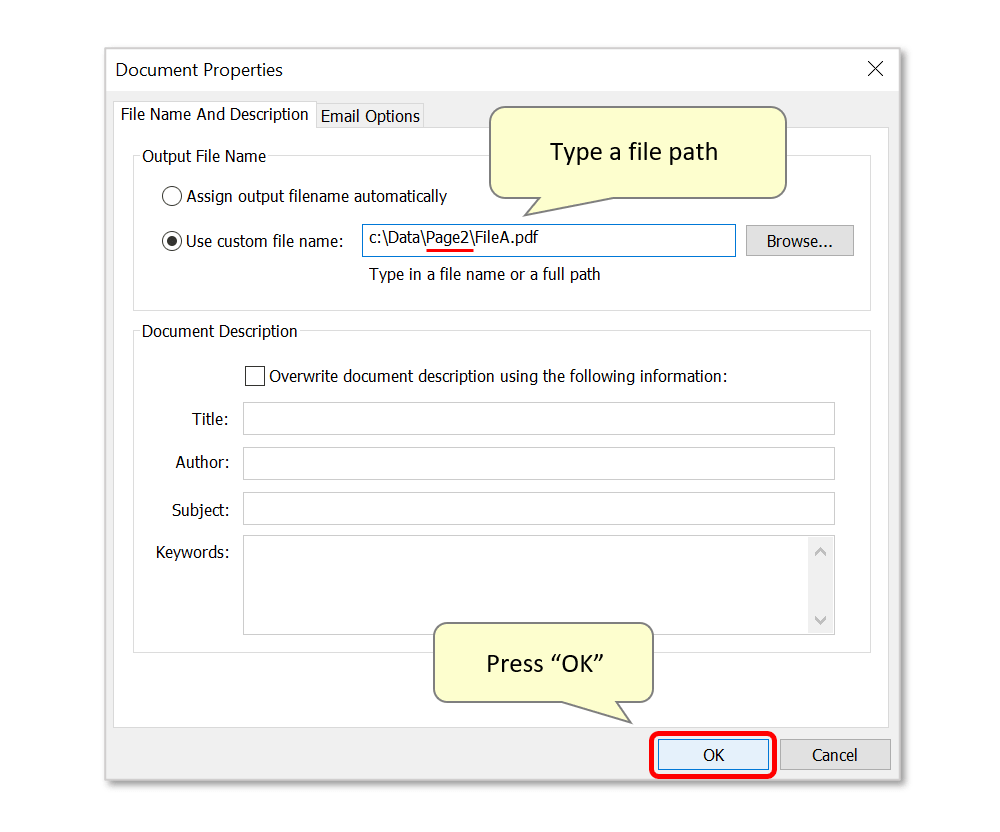
- Select the 'Use custom file name' option and type a full file path specifying where the extracted page(s) should be saved. Here we have entered "c:\Data\Page1\FileA.pdf" - this means that the 1st page of this document will be saved in the "Page1" folder. The extracted page will also be named "FileA.pdf".
- Press "OK" once done.
- Step 5 - Extract Another Page Range
- Press "Add Output Document" to repeat the procedure and extract further pages from the input.
- Now, we'll extract the 2nd page:
- Double-click on the 'Document 2' output filename to configure an output file path for the extracted page.
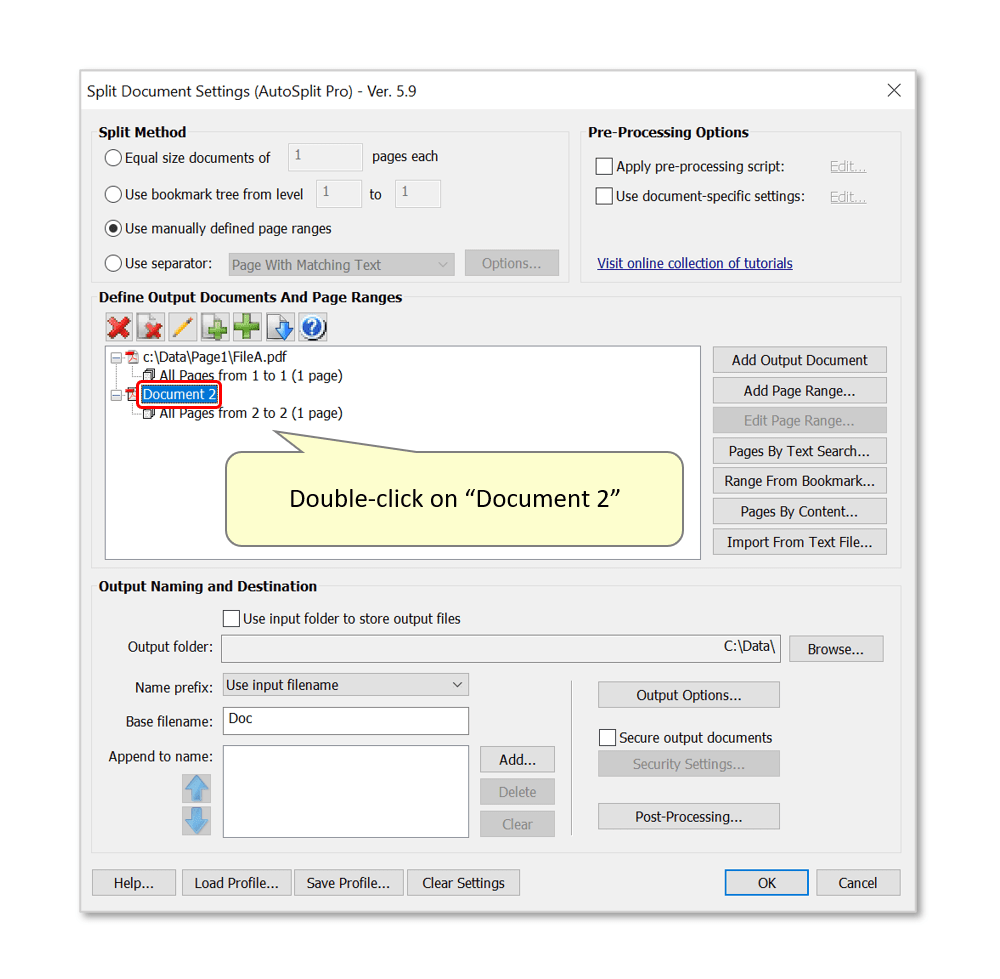
- We will save this one in a folder called "Page2" - it will also be called "FileA.pdf".
- Press "OK" to proceed.
- Step 6 - Run the Procedure
- Repeat the steps above to add output documents for all the necessary pages. In this example, all four pages of "FileA.pdf" will be placed in a corresponding "Page1/2/3/4" output folder.
- Note that the "Output Naming and Destination" section in the lower half of the dialog does not need to be used. An output filename and folder destination has already been specified in step 4, so any settings in this section will be ignored.
- Press "OK” to proceed with the extraction.

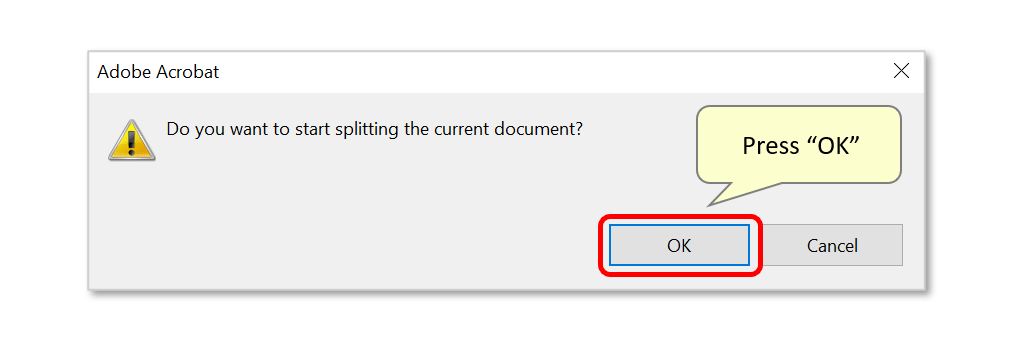
- Press “OK” again to confirm the split.
- Step 7 - Check Output Files
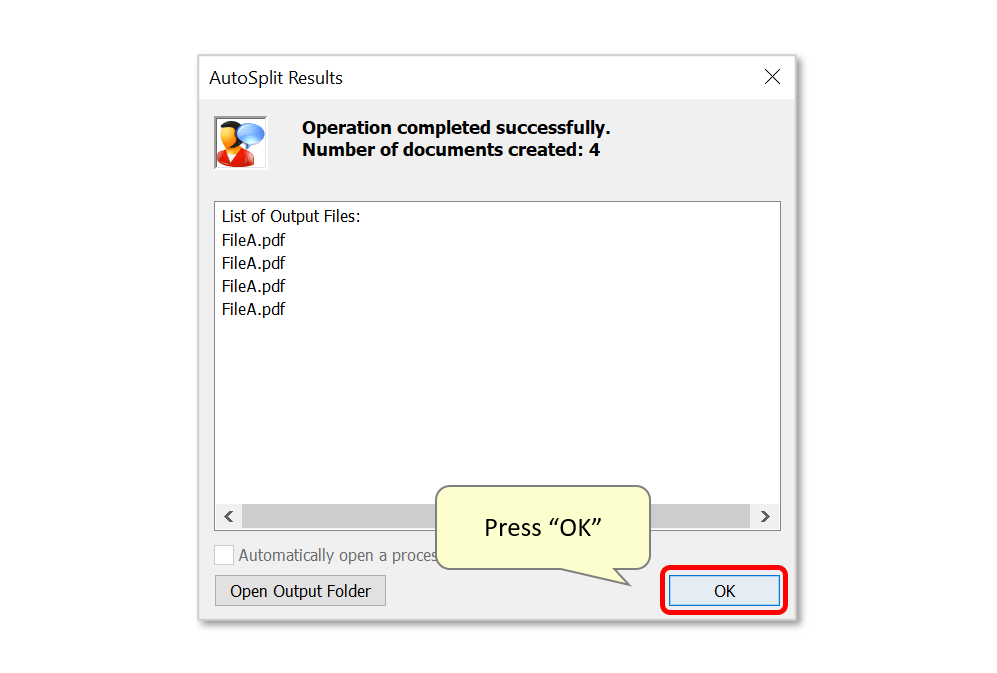
- The “AutoSplit Results” dialog appears on the screen once processing is complete, listing files that have been created. Press "OK" to close it.
- Step 8 - Repeat with Other Documents
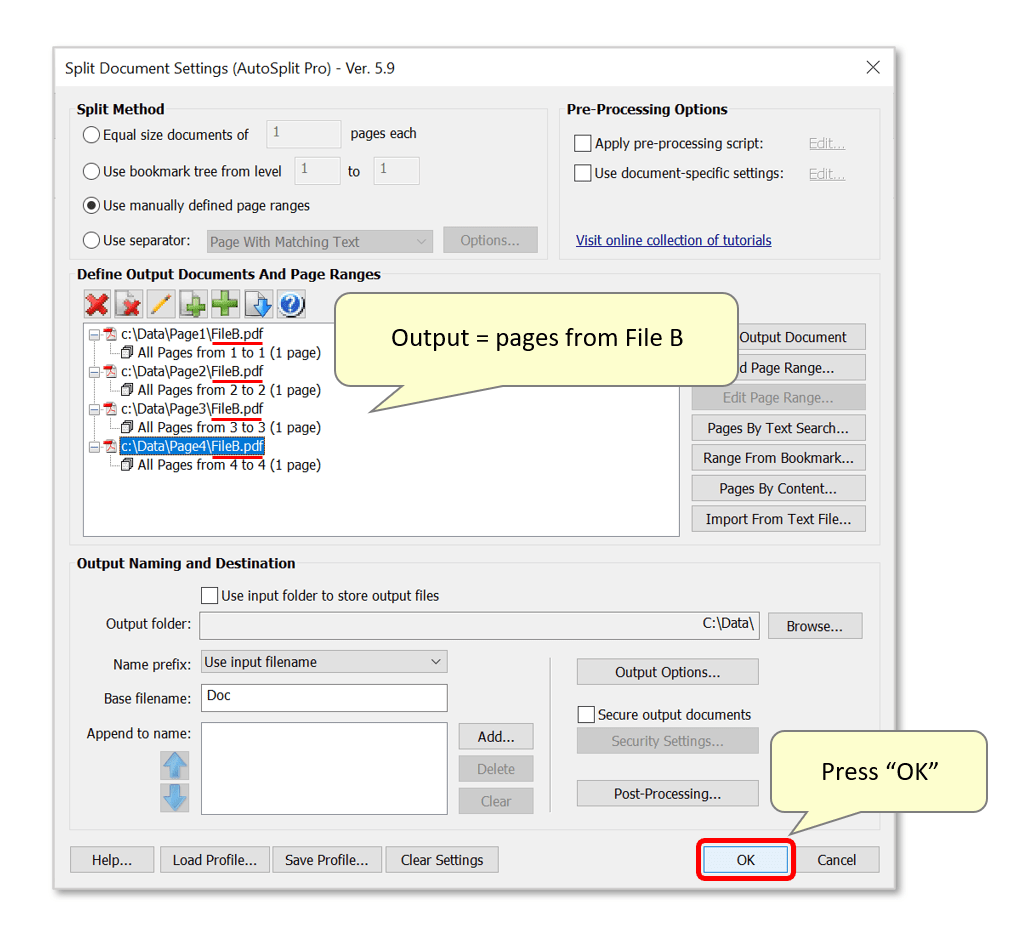
- Repeat the process outlined above for all input documents that need to be split. The image below shows a second input document "FileB.pdf" being split into x4 output pages. The output folders are the same as shown in step 6 above (Page1/2/3/4). All output files will have the same "FileB.pdf" filename.
- In this example, we will repeat this with x2 further input documents - "FileC.pdf" & "FileD.pdf":
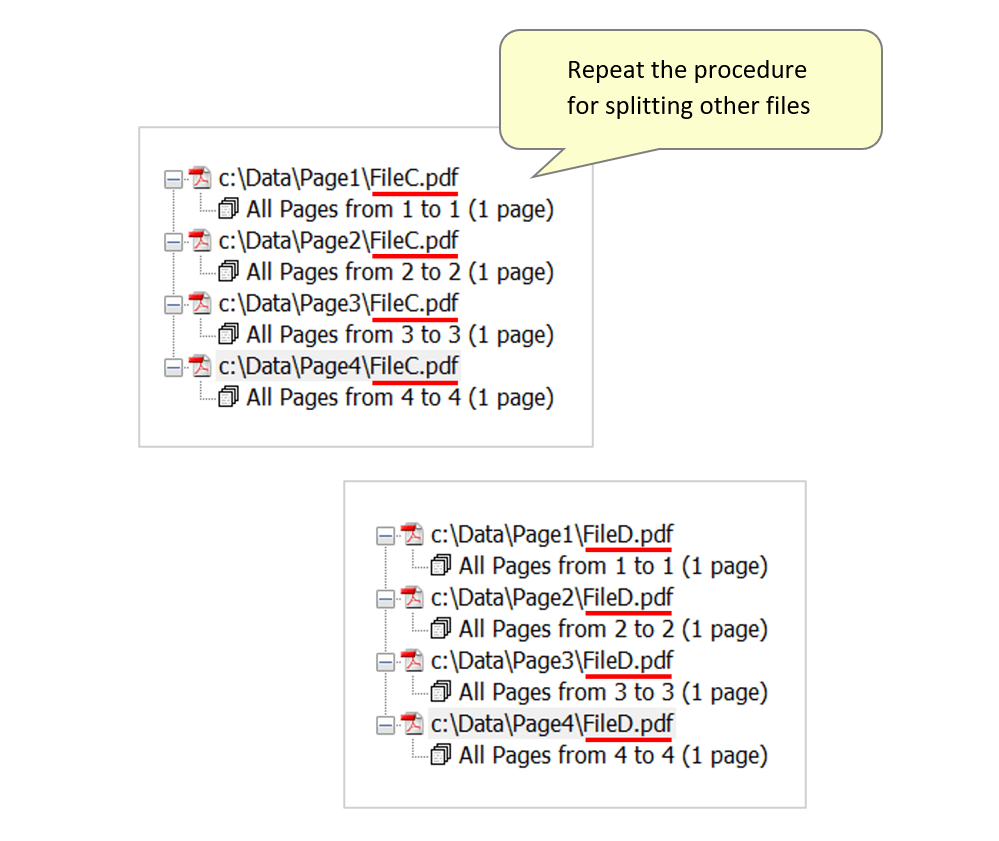
- Note that the last split settings used will remain in the "Split Document Settings" dialog each time it is opened. It's possible to simply open the next input document to be split, and manually change the output file names (i.e.: "FileA.pdf" becomes "FileB.pdf" etc.). Split settings can also be saved and reloaded later via the "Save/Load Settings..." buttons.
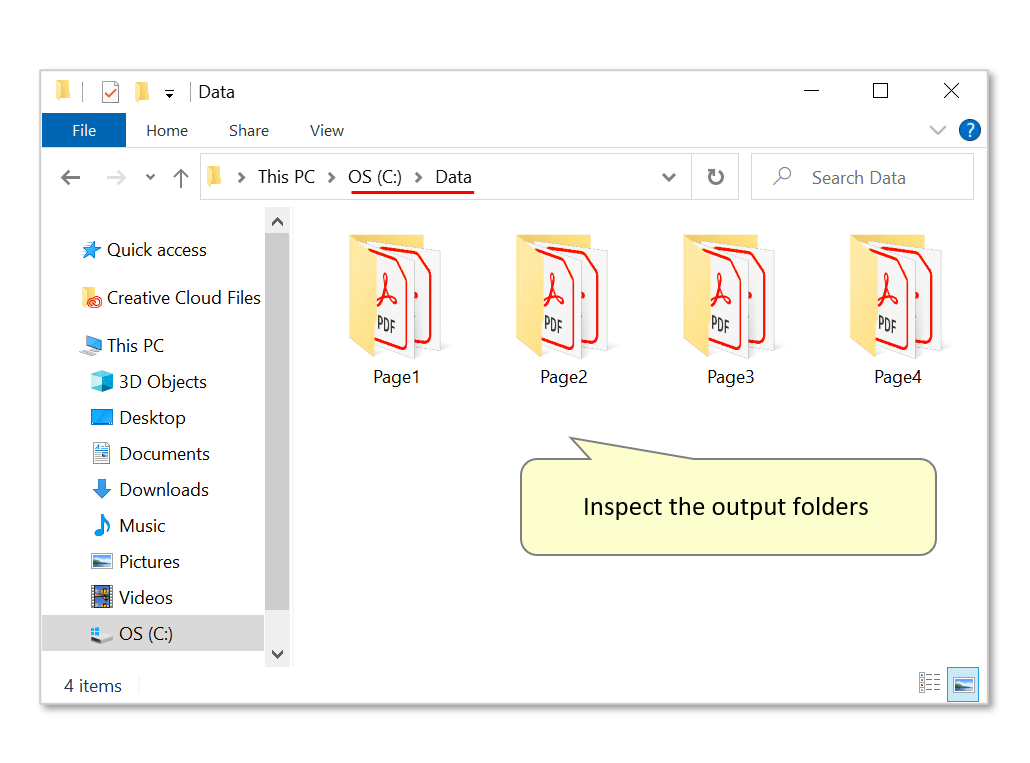
- Step 9 - Inspect the Results
- Check the output folders that have been created, containing extracted pages from each input document.
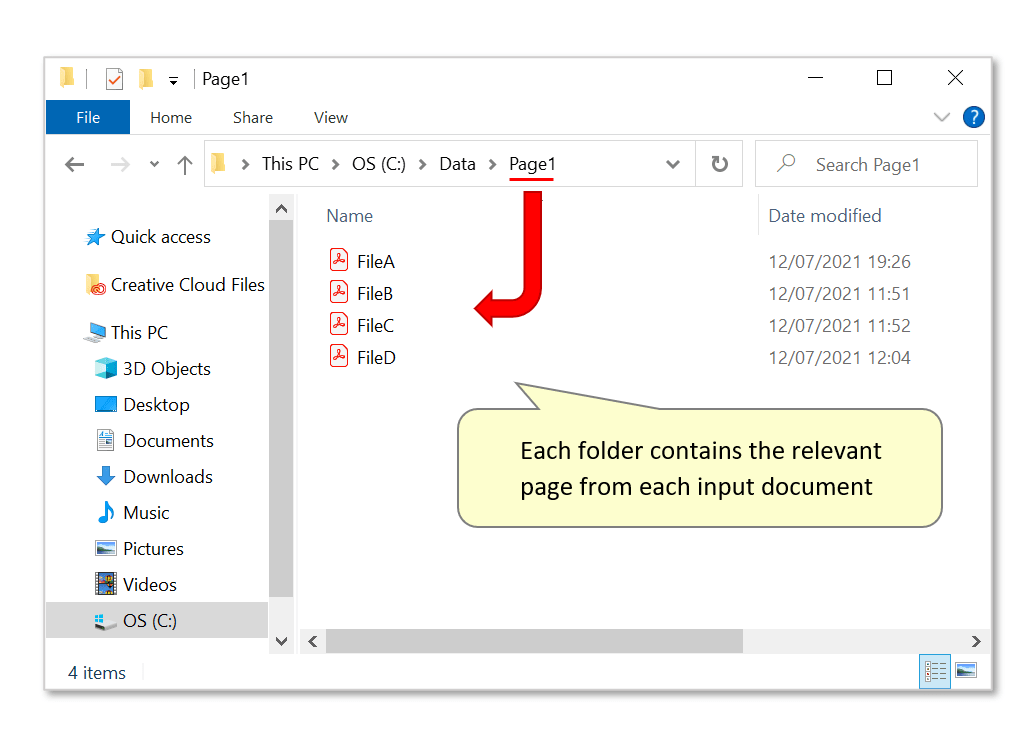
- The following image shows the contents of the "Page1" folder - the PDFs inside it are the first pages of each input file.
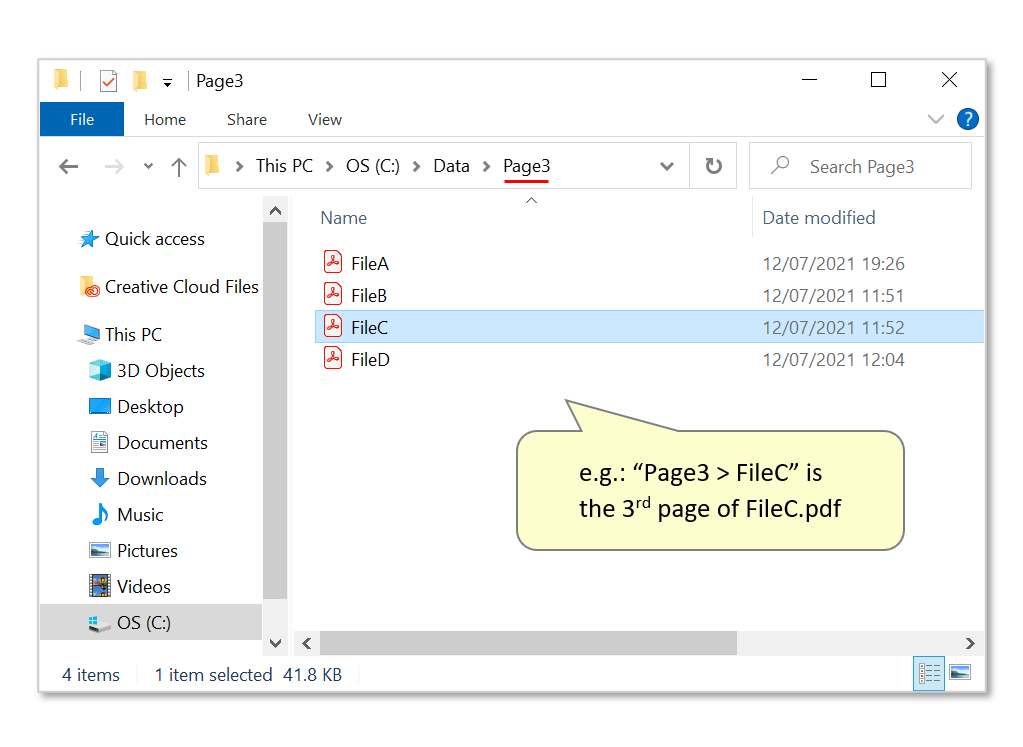
- For example, "FileC.pdf" within the "Page3" folder is the extracted 3rd page from the input "FileC.pdf" file.
- Batch Processing
- Use Guided Actions tool (aka Action Wizard) to run splitting on multiple files at once or on all files in folder. This functionality is available in AutoSplit Pro and Acrobat Pro versions.
- You can find more AutoSplit tutorials here.