Split and Name Output PDF Files Using a Lookup Table
AutoSplit plug-in for Adobe® Acrobat®
- Introduction
- In this tutorial, we will demonstrate how a lookup table can be used to replace text in filenames after splitting PDF documents with the AutoSplit™ plug-in. This method offers a way to list text items that may be present in filenames, and suitable replacement text. It can be used to customize filenames using text that is not directly present in the document's content or filename. Typical applications include customizing filenames based on social security numbers, account numbers, employee numbers etc.
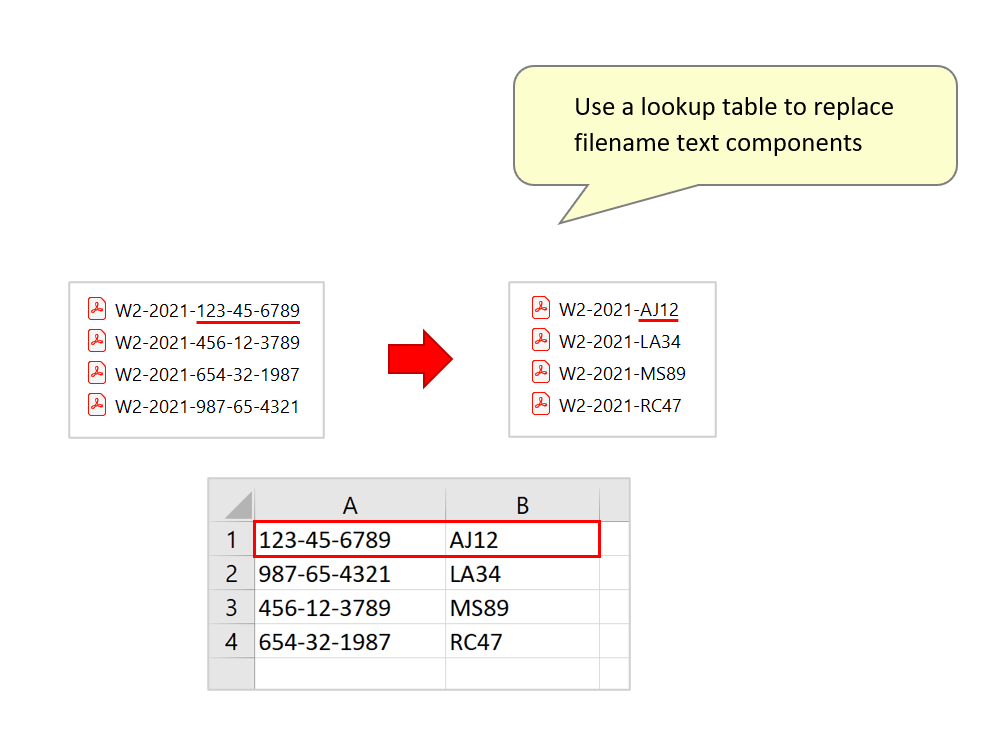
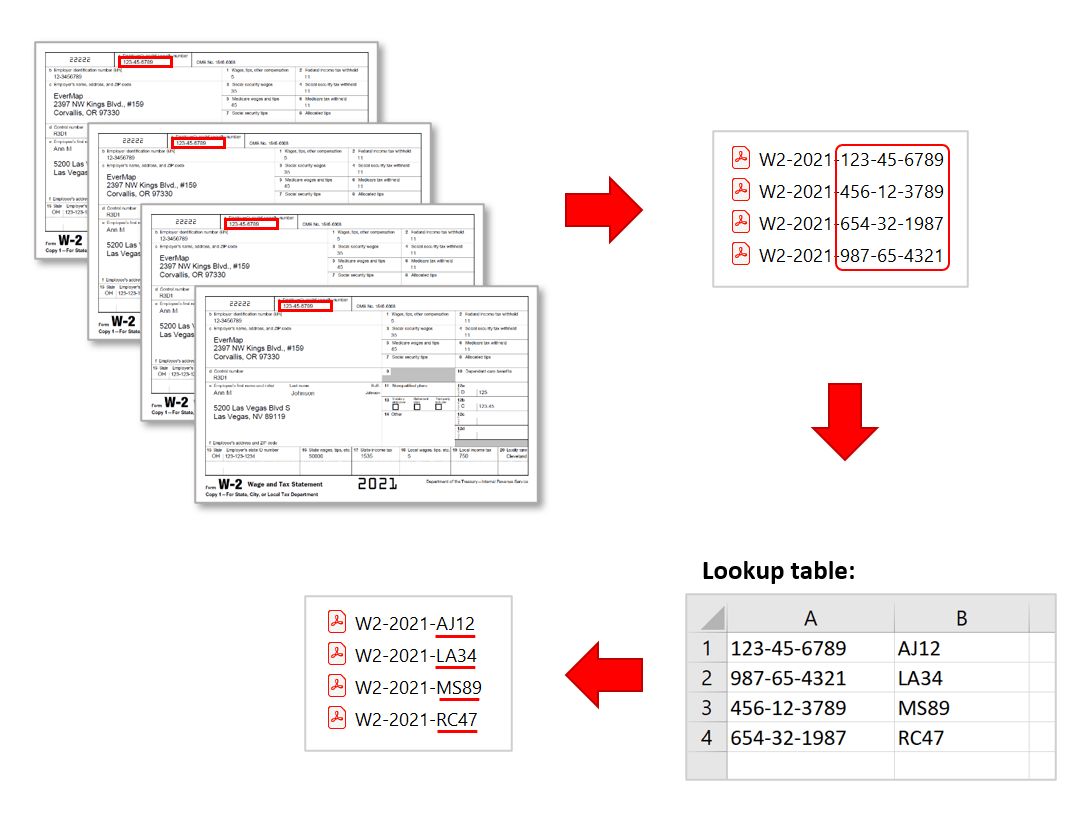
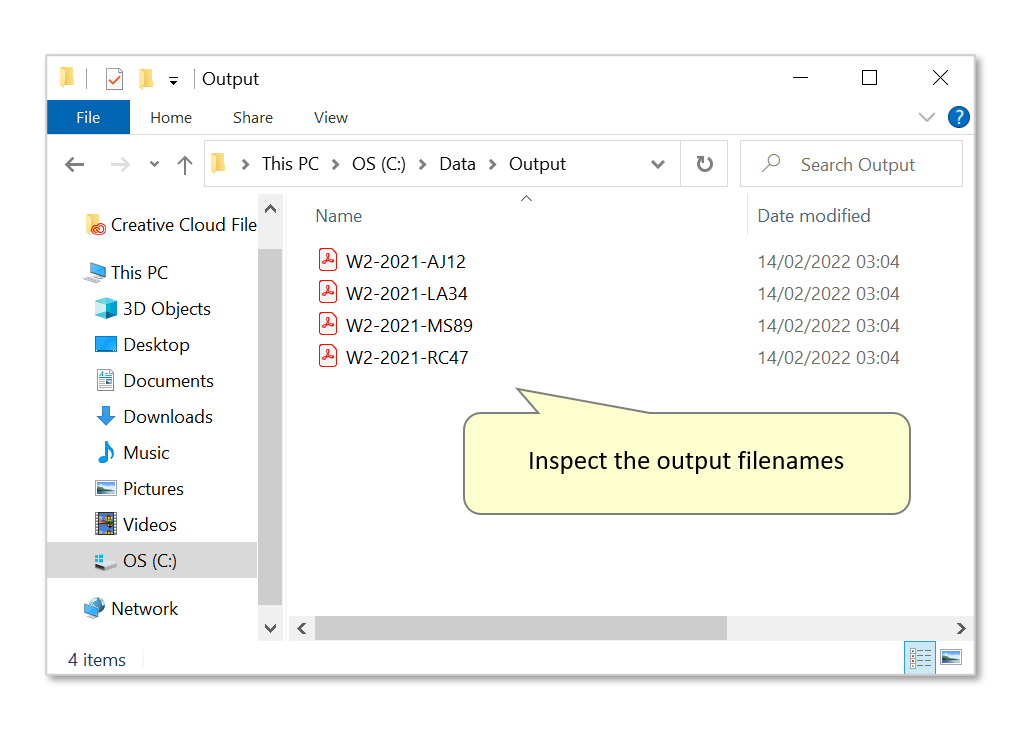
- For example, the input document used here is a PDF that contains multiple single-page form W-2 statements. Each one contains a unique social security number (SSN) located in the same place on each page. The goal is to split the PDF into multiple documents. The desired output names end in unique employee-specific codes - “AJ12/LA34/MS89/RC47”. This text is not located in the W-2s, so can’t be extracted as a filename component. Instead, we will extract a unique identifier (eg, SSNs), then use the lookup table method to replace them with the desired text. The lookup table used here contains a list of SSNs and unique counterparts:
- Note: the lookup table can be created manually within the plug-in's settings configuration screens (see step 6), or prepared as a spreadsheet list and saved as a *.csv text file.
- Prerequisites
- You need a copy of Adobe® Acrobat® along with the AutoSplit™ plug-in installed on your computer in order to use this tutorial. Both are available as trial versions.
- Step 1 - Open the "Split Document Settings" Dialog
- Open the PDF file to be processed in Acrobat and
select "Plug-Ins > Split Documents > Split Document..." from the main menu.
[⚡ How to locate Plugins menu in Adobe® Acrobat® ⚡] - Step 2 - Configure the Procedure
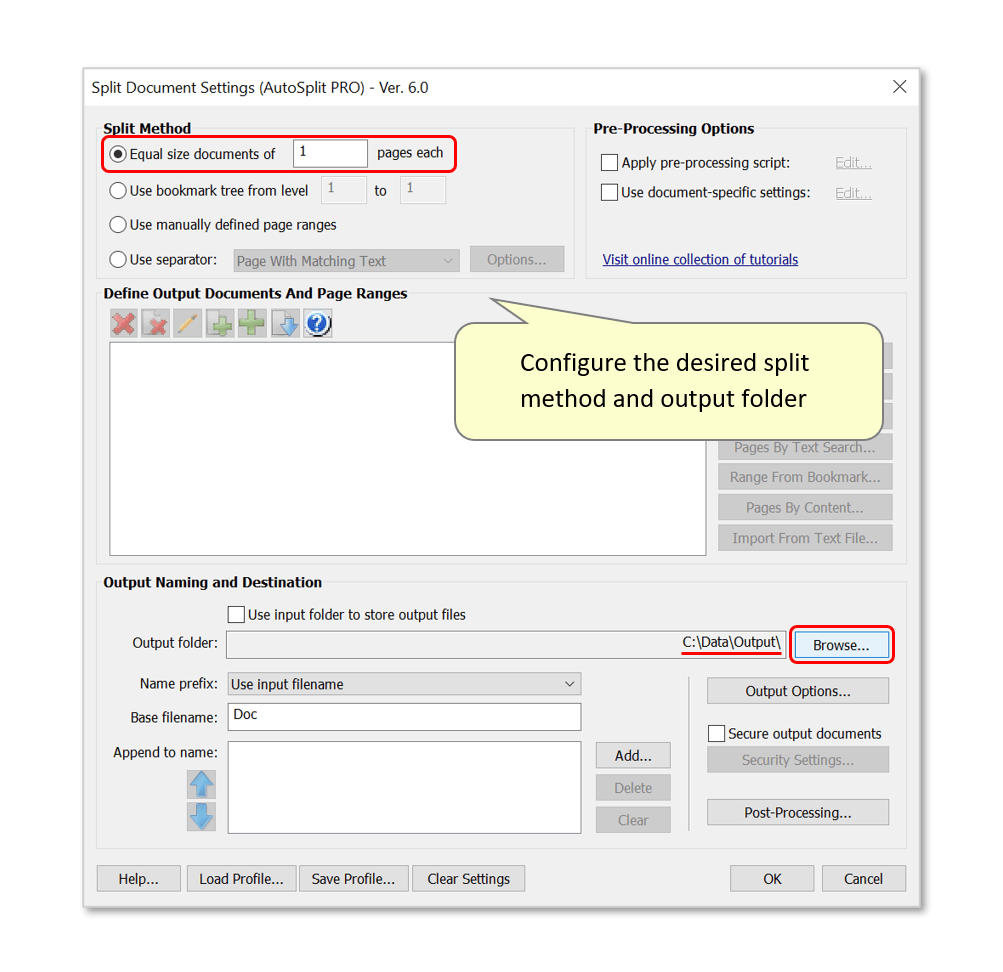
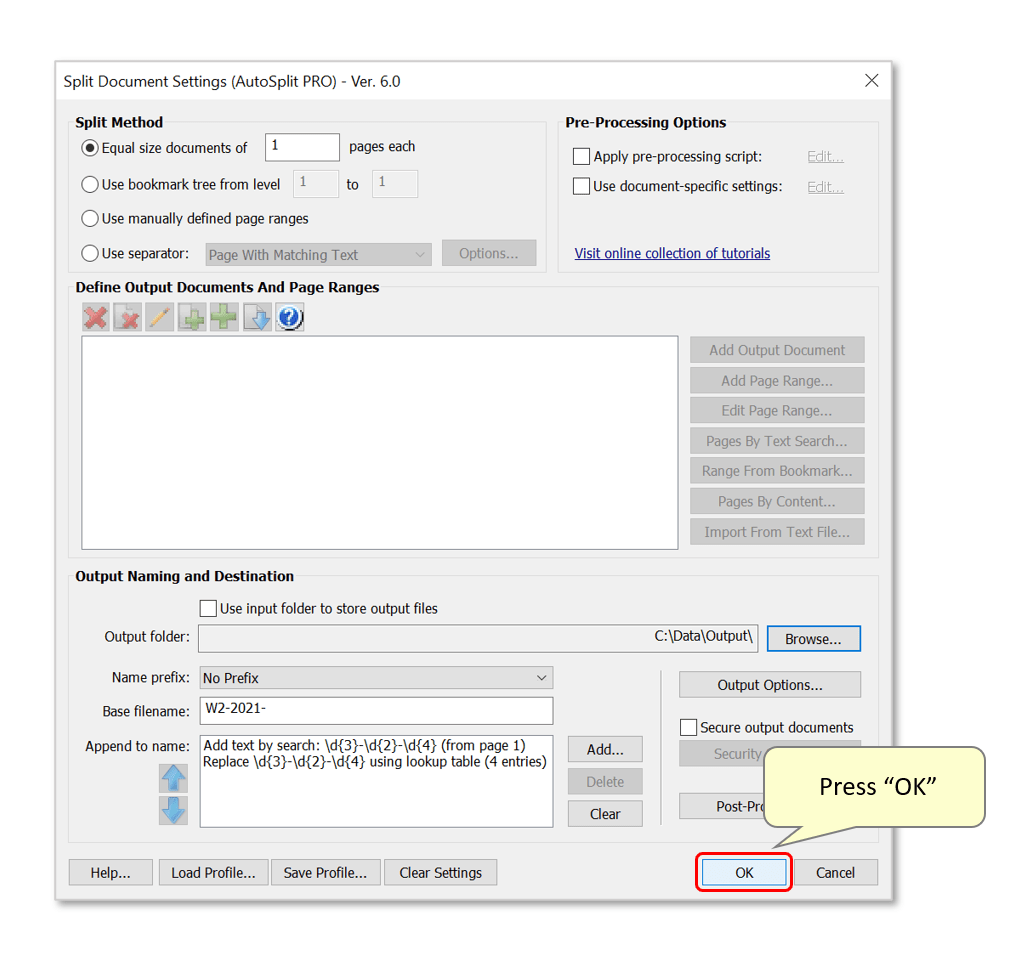
- Select a split method - here we will split the input PDF into single-page documents. This tutorial is focused on naming output files generated by document spliting operation. It does not matter what specific splitting method is used, file naming part works for all of them. As an example, we have selected to split the input document into equal size output documents (one page per file).
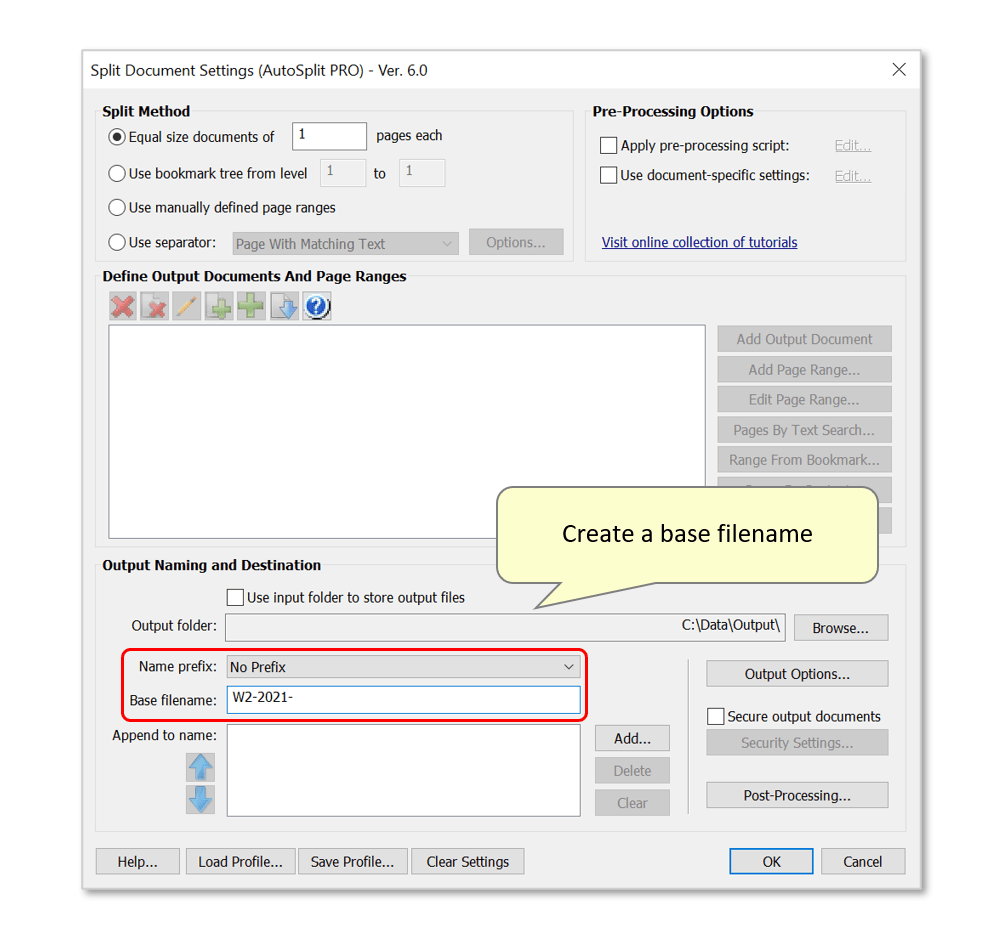
- Step 3 - Add a Base Filename
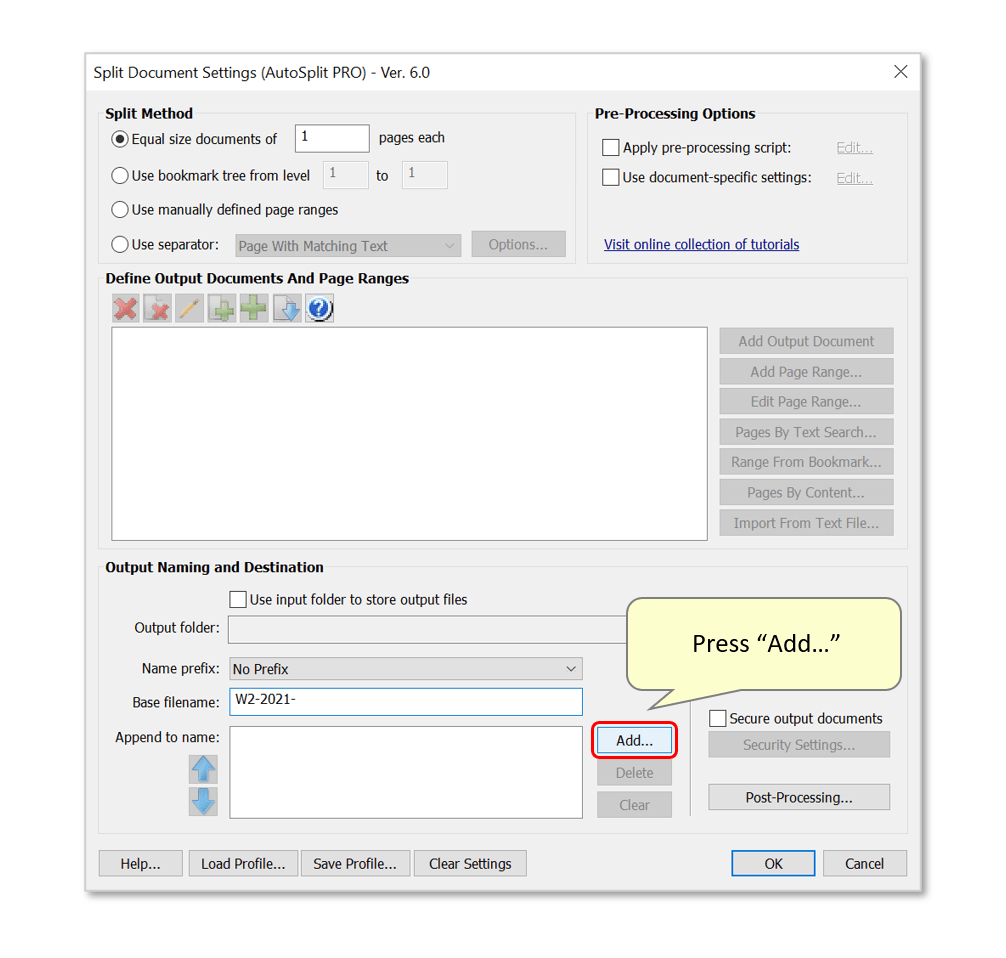
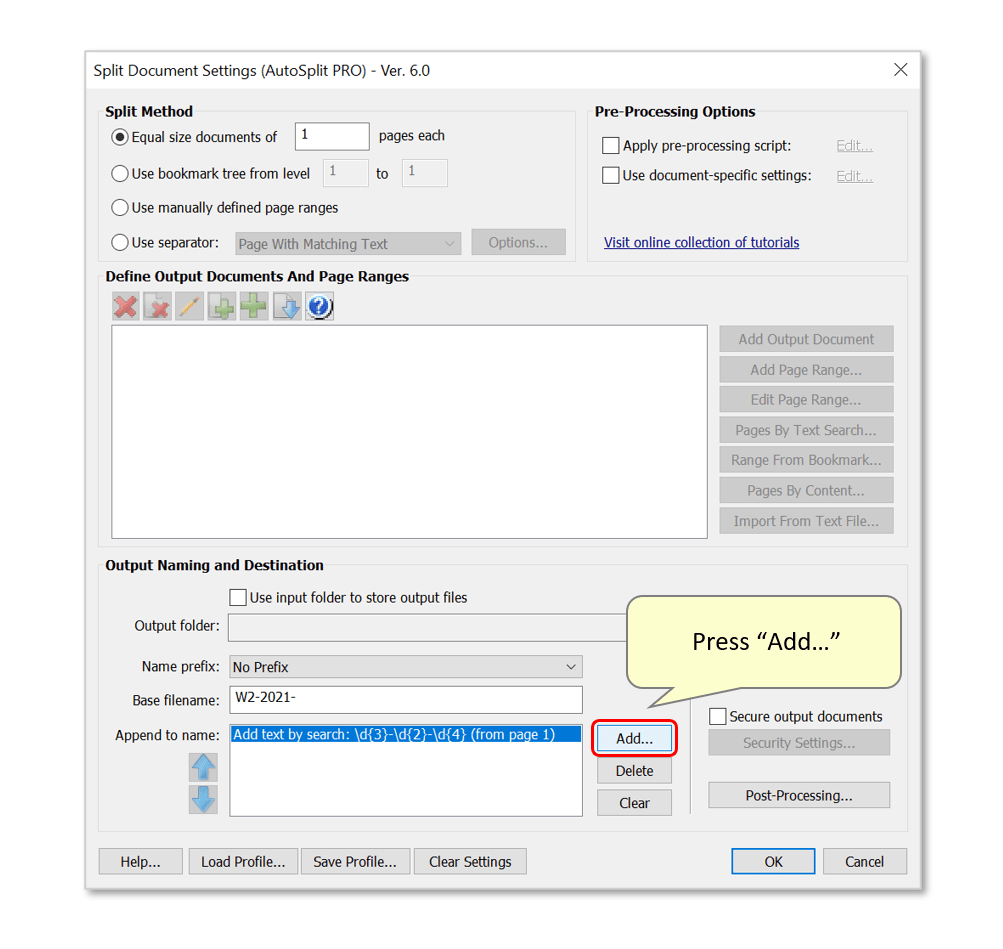
- Use the file naming section to configure a naming scheme for output documents. Optionally add a name prefix, and base filename. Here, output filenames will begin with "W2-2021-".
- Step 4 - Add a Filename Component
- Press "Add..." to add a filename component.
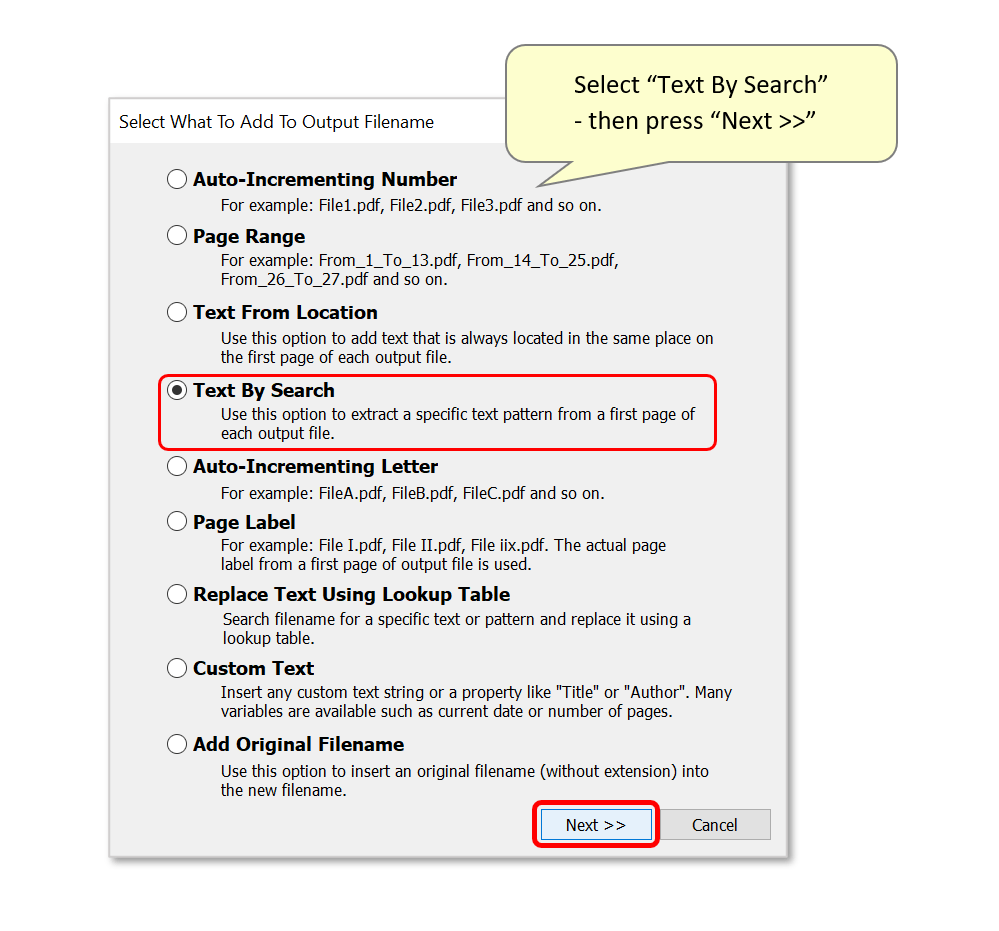
- Select the "Text By Search" option and press "Next > >".
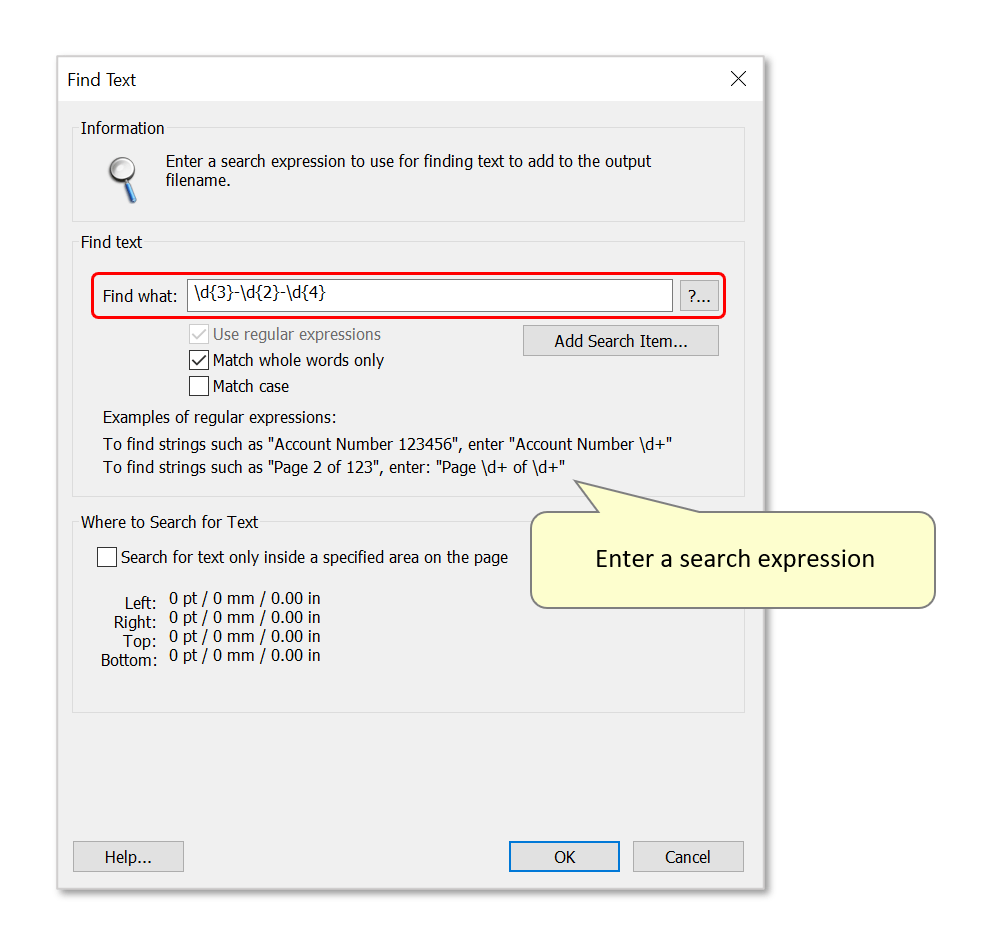
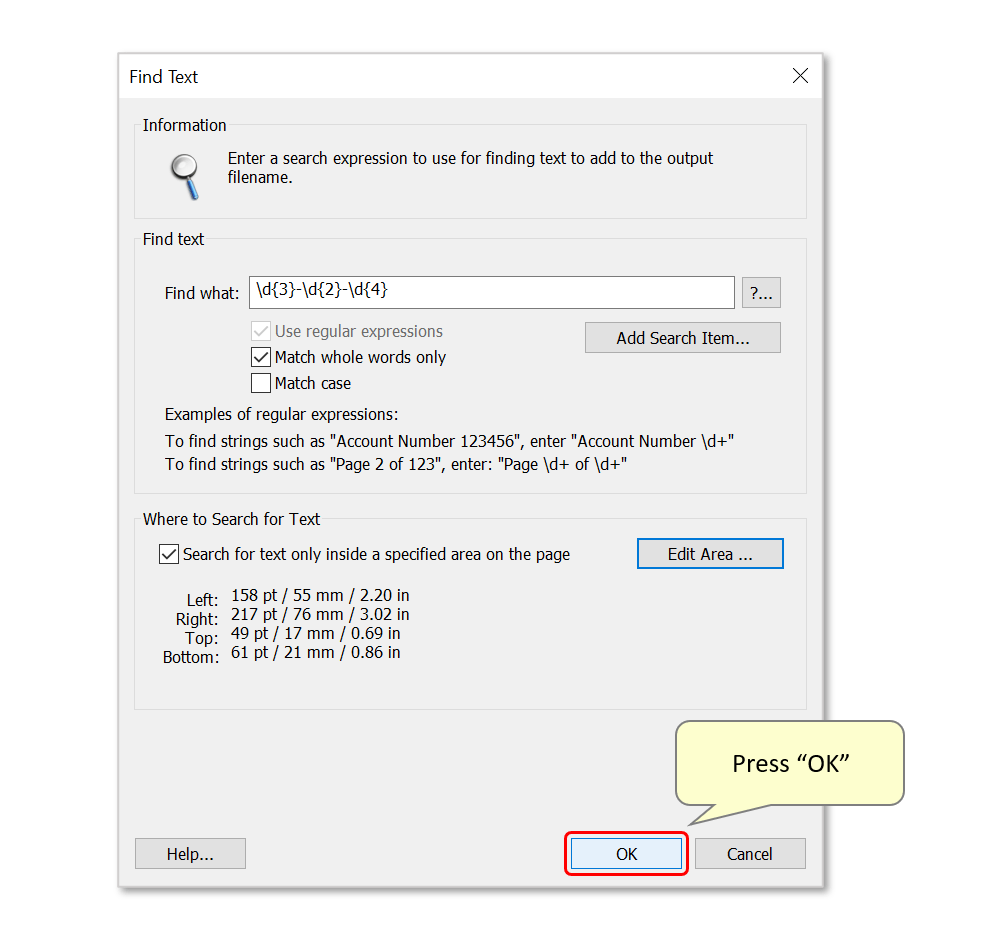
- Enter a search expression or specific text to search for next to "Find what:". Here, we have used \d{3}-\d{2}-\d{4} to search each page for social security numbers matching a "XXX-XX-XXXX" format. \d matches a single digit, {3/2/4} indicates the amount of digits - each one is separated by a dash (-).
- Optionally use "Match whole words only/text case" to avoid partial matches and/or match text case as it is entered here.
- Step 5 - Add a Search Area
- Optionally add a page area to search for matching text. For example, in these split documents, the SSN is located in the same place on each page. A search area allows you to search for matching text only in this specific area, and greatly decreases the probability of finding similar text patterns.
- Select "Search for text only inside a specified area on the page" and press "Edit Area..." to define a page location.

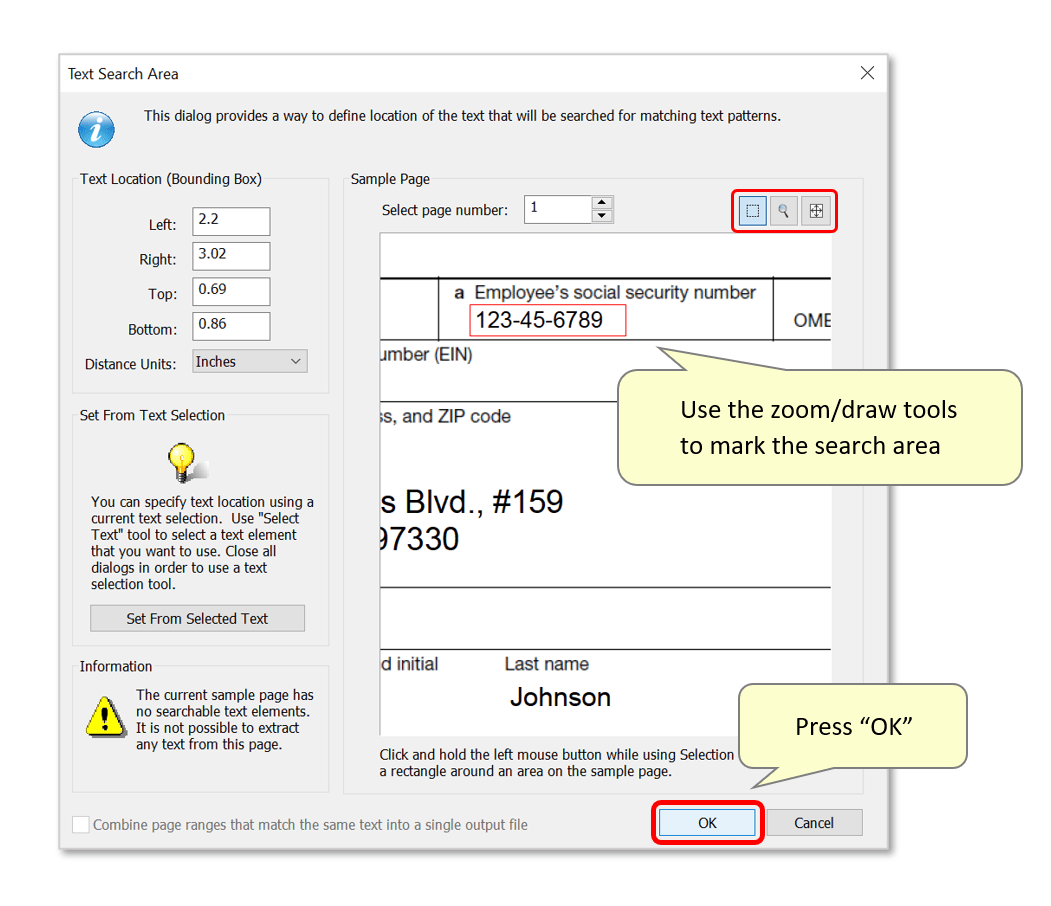
- Use the zoom and draw tools in the upper right corner of the dialog to draw a box around the desired search area. A sample page from the currently opened document will be displayed in the preview box. Here, we have drawn a box around where the SSN is located in each W-2 statement.
- Press "OK" to proceed.
- Press "OK" again.
- Step 6 - Create a Lookup Table
- Press "Add..." to add another filename component.
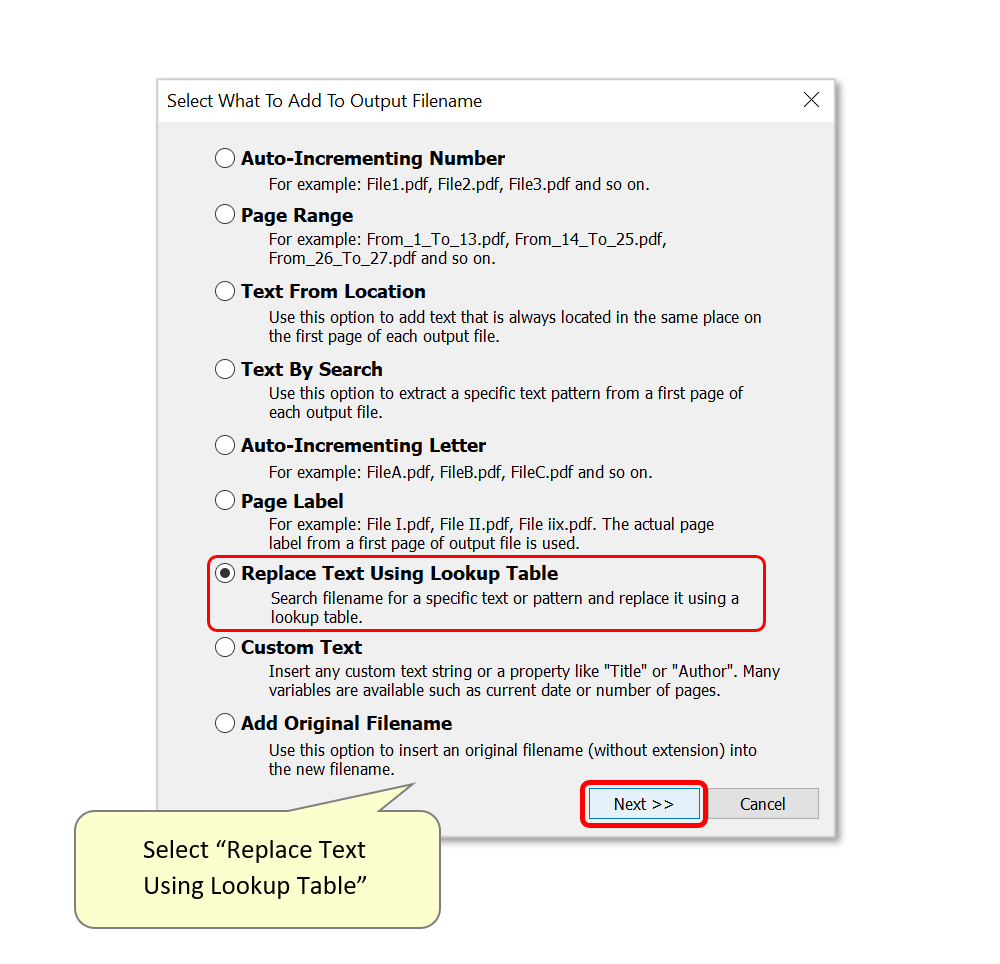
- Select the "Replace Text Using Lookup Table" option and press "Next > >".
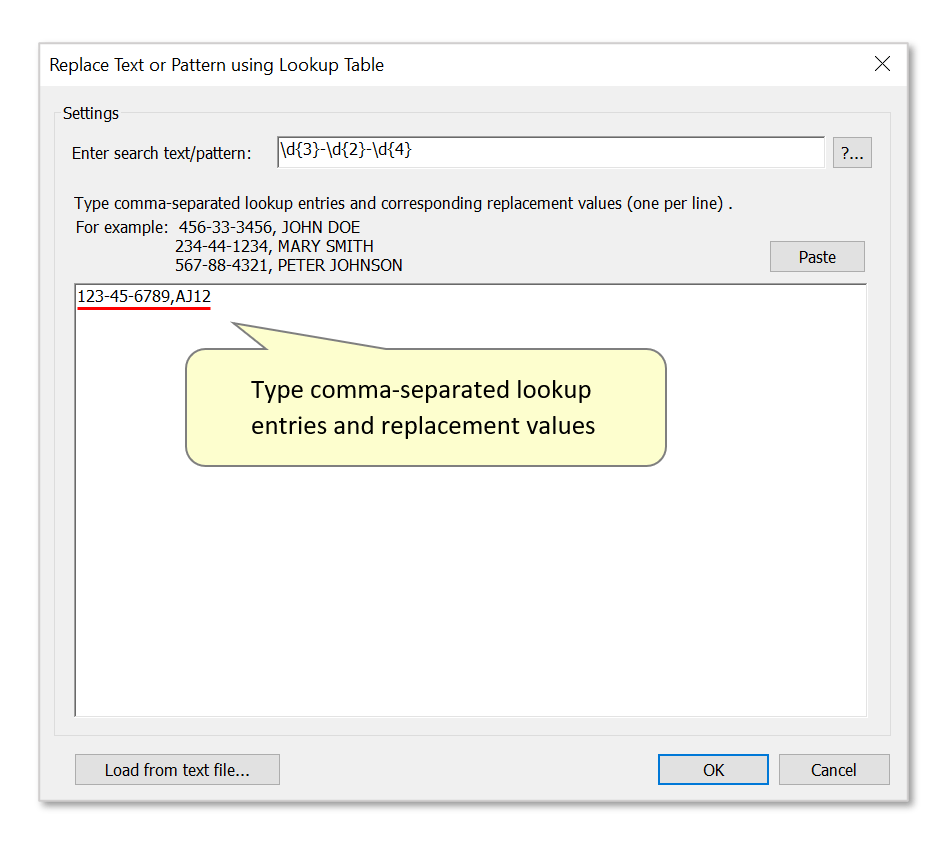
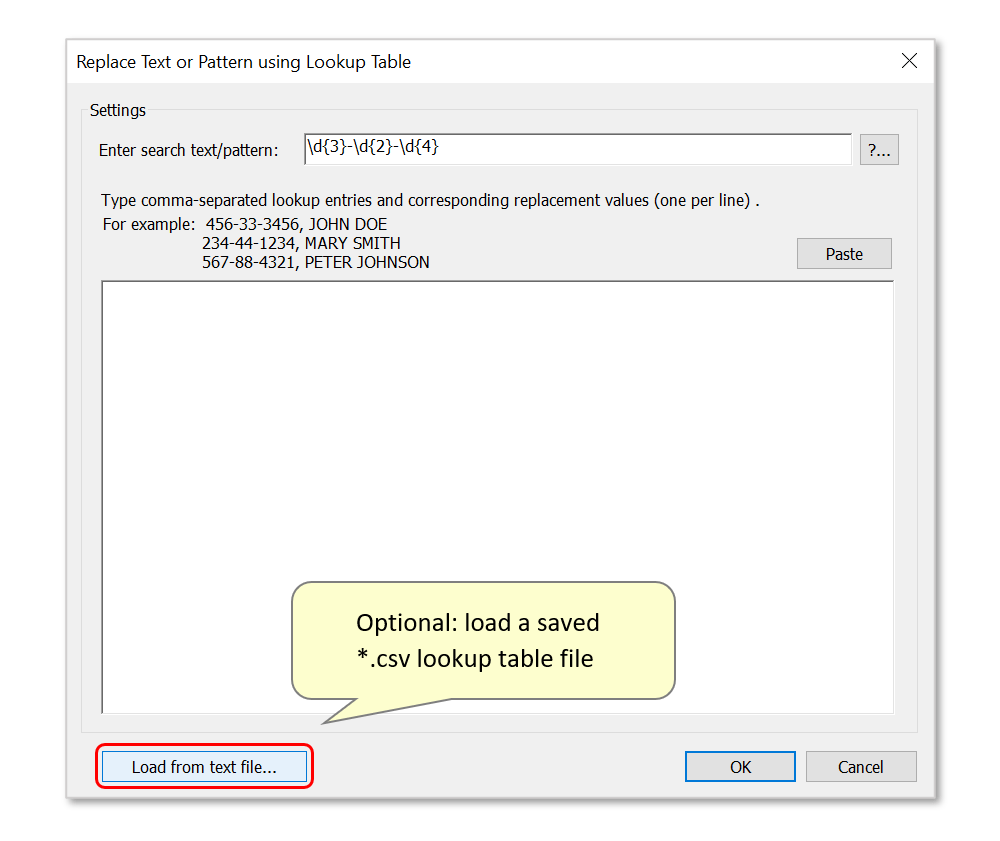
- Use this dialog to configure what text/pattern to search for, and what to replace it with. The first step is to enter a search expression or search text into "Find what:". Here, we have entered the \d{3}-\d{2}-\d{4} pattern that matches a social security number. The search expression will be used to search a "current" filename (after applying all previous filename components) to find XXX-XX-XXXX pattern and replace it with a value from the lookup table. If there is no matching text in the lookup table, then no replacement is performed.

- Next, it's possible to either manually type lookup entries, or load a pre-saved *.csv lookup table (see step 7). Type comma-separated lookup entries and replacement values in the box below, one-per-line. The example shown below would replace the "123-45-6789" SSN in an output filename, with "AJ12".
- Step 7 - Load a Lookup Table
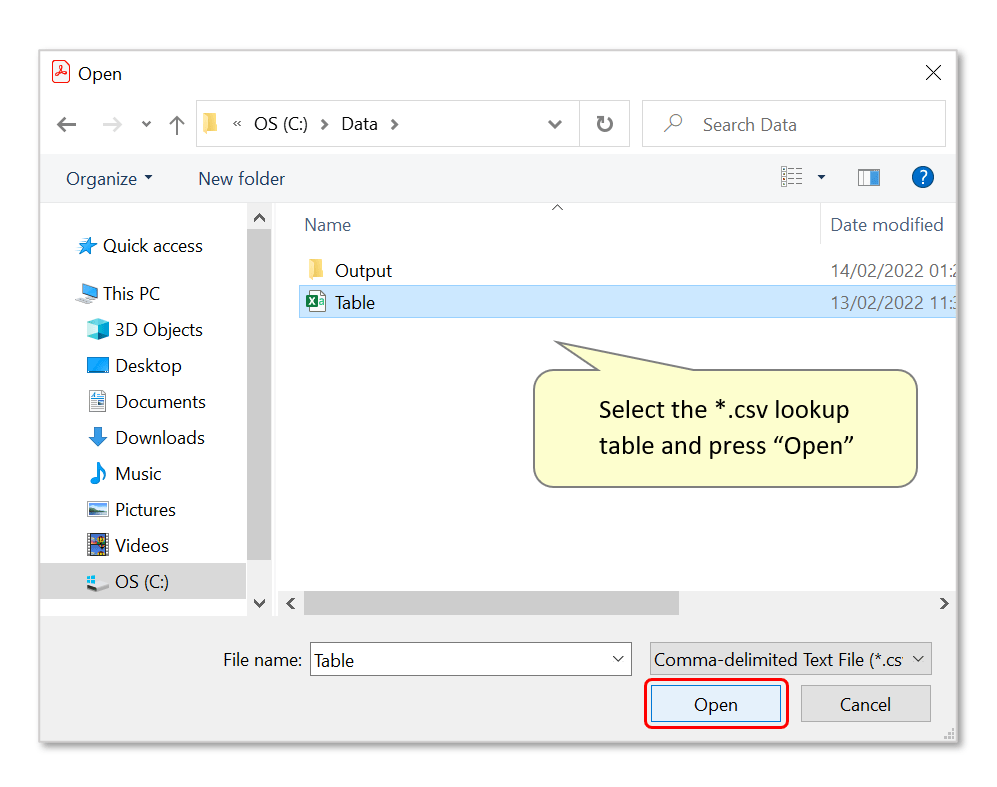
- To load a pre-configured lookup table, press "Load from text file...".
- Locate and select the desired *.csv text file, then press "Open".
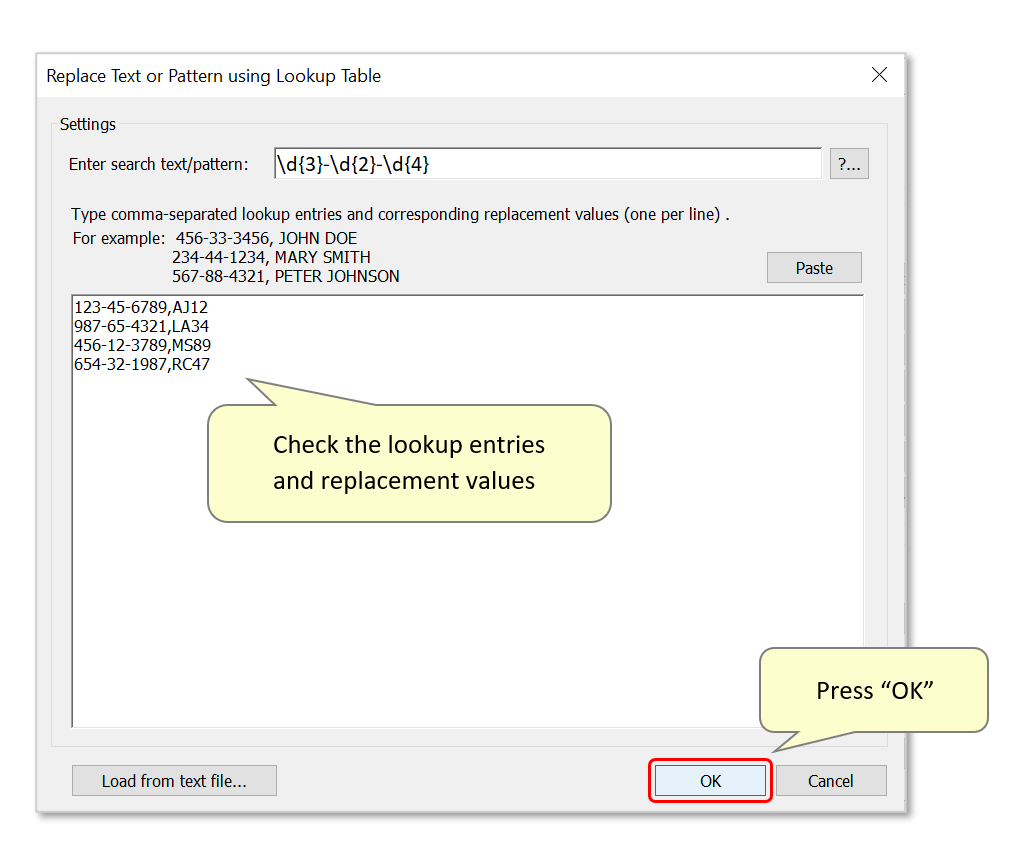
- The table entries will have been loaded - press "OK" to proceed.
- Step 8 - Split the Document
- Optional: press "Save Profile..." to save these settings. They can be loaded later via the "Load Profile..." button, to process future documents using the same method.
- Press "OK" to split the document.
- Press "OK" again to confirm.
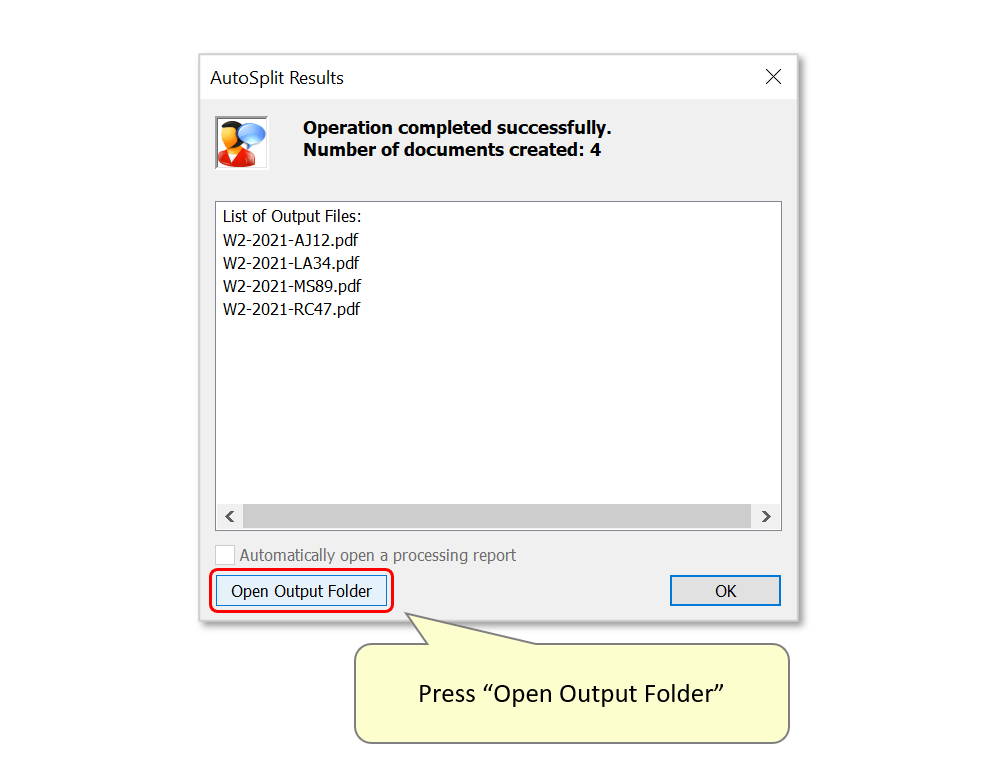
- A results dialog lists the output files that have been created. The SSN's have been successfully extracted, then replaced with the values in the lookup table. Press the "Open Output Folder" button to view them.
- Click here for a list of all step-by-step tutorials available.