Rename PDF Documents Using a Lookup Table
AutoSplit plug-in for Adobe® Acrobat®
- Introduction
- Manually renaming multiple documents can be a slow process - the AutoSplit™ plug-in offers a handy tool for quickly renaming multiple documents at once. In this tutorial, we will demonstrate how a lookup table can be used to replace text in file names based on PDF document text. This method offers a way to customize file names using text that is not directly present in the document's content or file name. Typical applications include customizing file names based on social security numbers, account numbers, or employee numbers etc.
- The input PDF documents used here are single-page W-2 statements. Each one contains a unique social security number (SSN) located in the same place on each page. The goal is to rename these documents so that they are using employee-specific codes - “AJ12/LA34/MS89/RC47”. These codes are not located in the W-2s, so can’t be directly extracted as a file name component. Instead, we will extract a unique identifier (eg, SSNs), then use the lookup table method to replace it with the desired text. The lookup table used in the tutorial contains a list of SSNs and their counterparts:
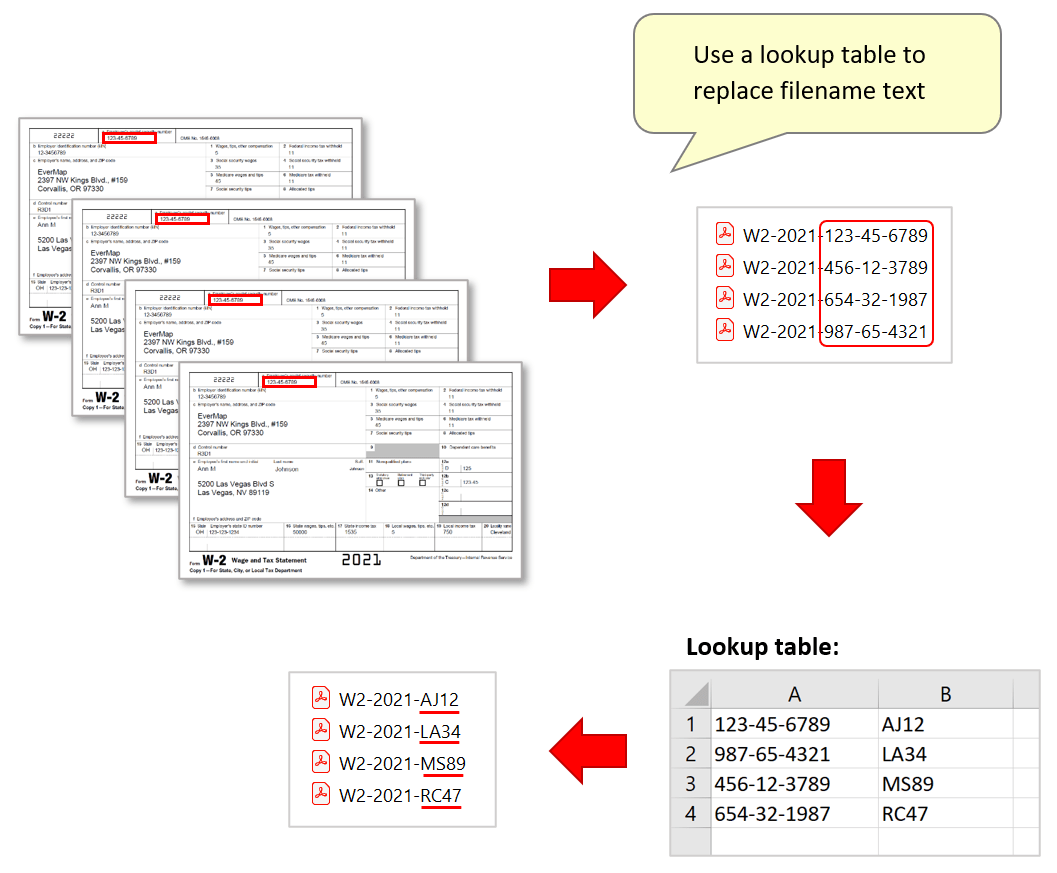
- Note: the lookup table can be created manually within the plug-in's settings configuration screens, or prepared using an external application as CSV spreadsheet file and then loaded into the plug-in.
- Batch Processing Support
- Automate this operation with Acrobat's batch processing tool (Action Wizard) to process similar files using the same configuration with only one click.
- Prerequisites
- You need a copy of Adobe® Acrobat® along with the AutoSplit™ plug-in installed on your computer in order to use this tutorial. Both are available as trial versions.
Step-by-Step Tutorial
- Step 1 - Open the “Auto-Rename PDF Files” Menu
- Close all open PDF documents to avoid possible file access conflicts.
Start Adobe® Acrobat® and select “Plug-ins > Auto-Rename PDF Files…”
from the main Acrobat menu.
[⚡ How to locate Plugins menu in Adobe® Acrobat® ⚡] - Step 2 - Add Custom File Name Text
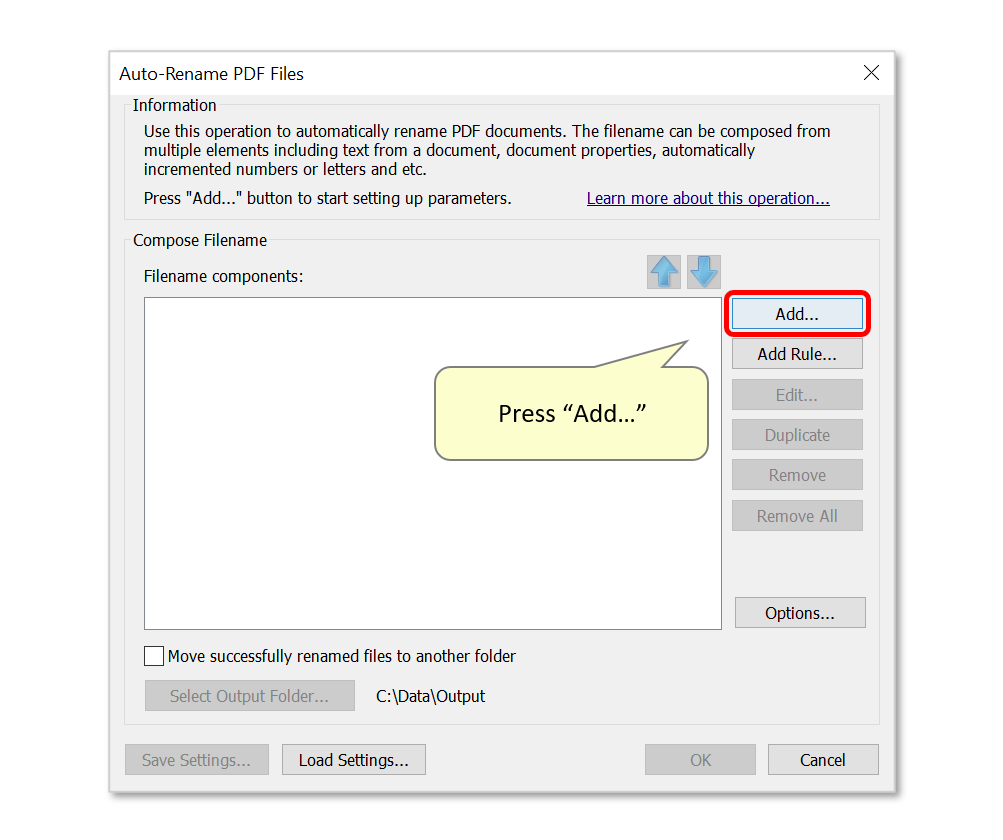
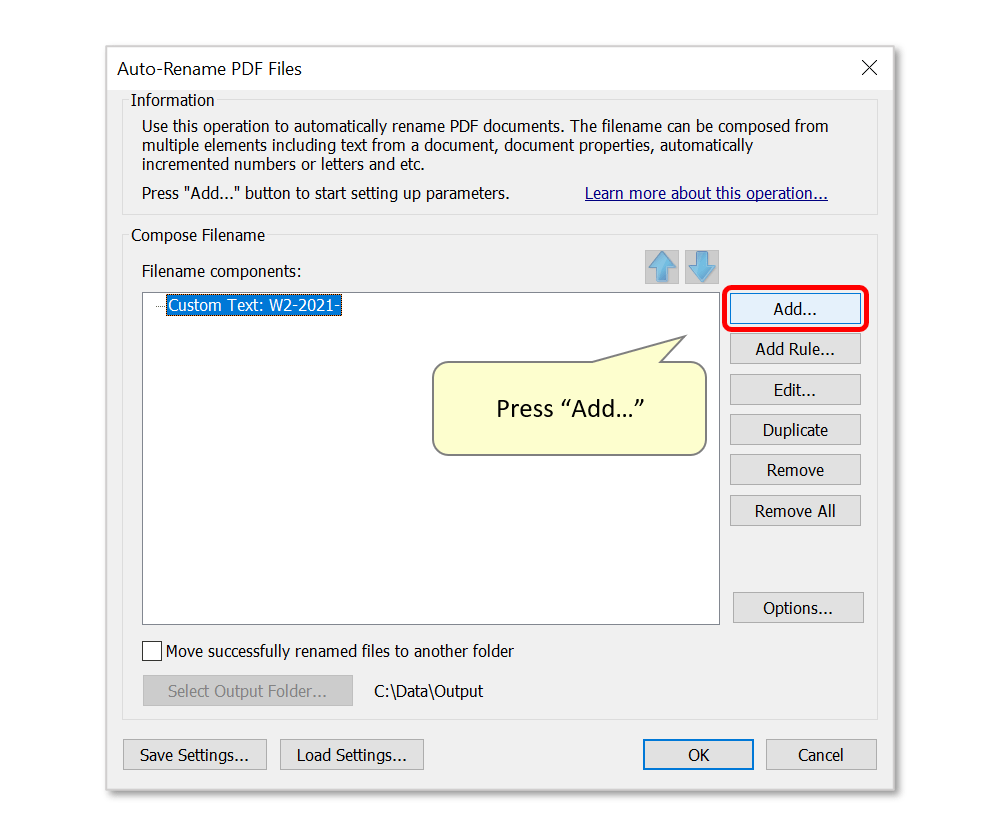
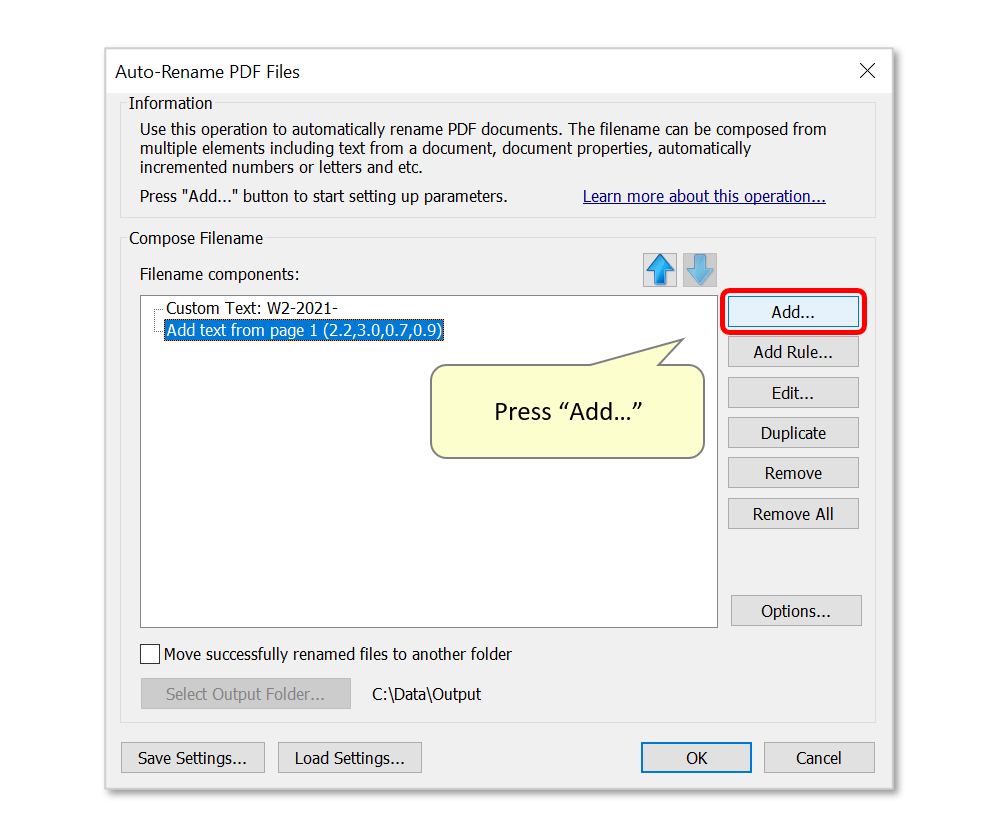
- Press "Add..." to add a file name component.
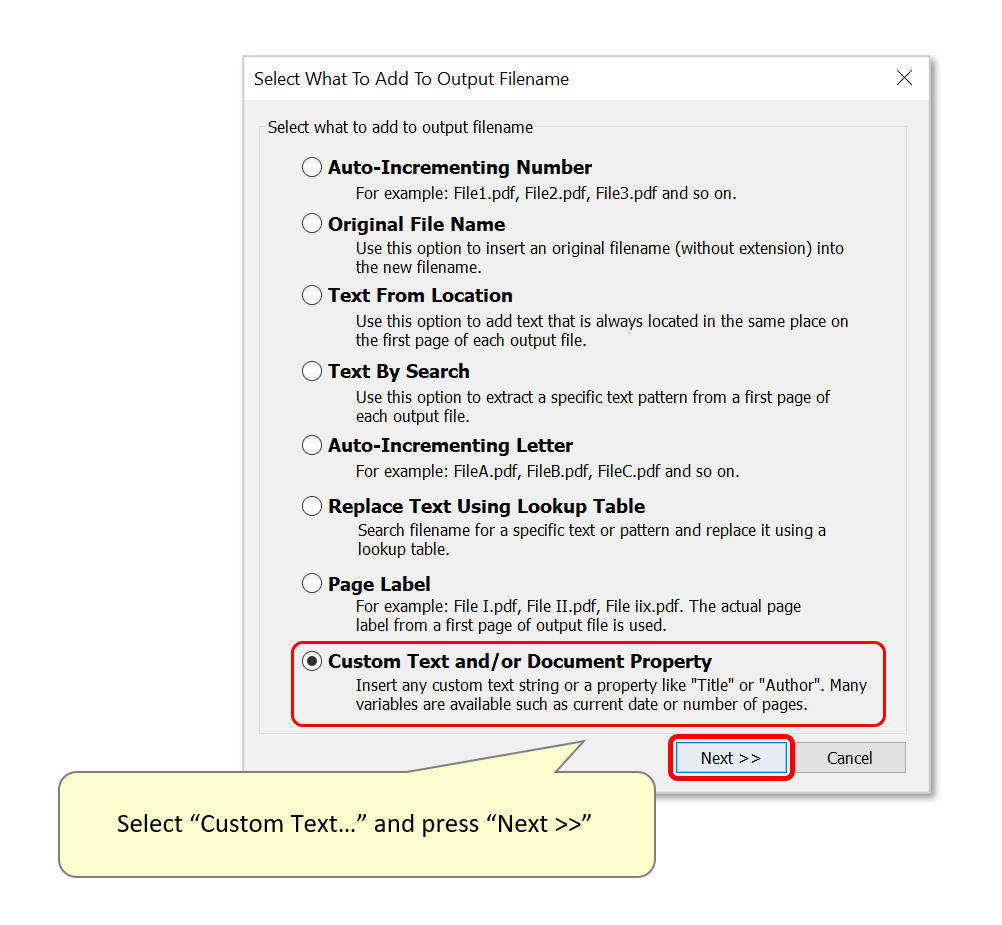
- Choose a method for adding a file name component. Here, we will demonstrate how to add custom text. In our example, all file names are going to start with the same prefix - W2-2021-. We are going to use a "Custom Text" filenaming component to specify that. Select the "Custom Text..." option and press "Next >>".
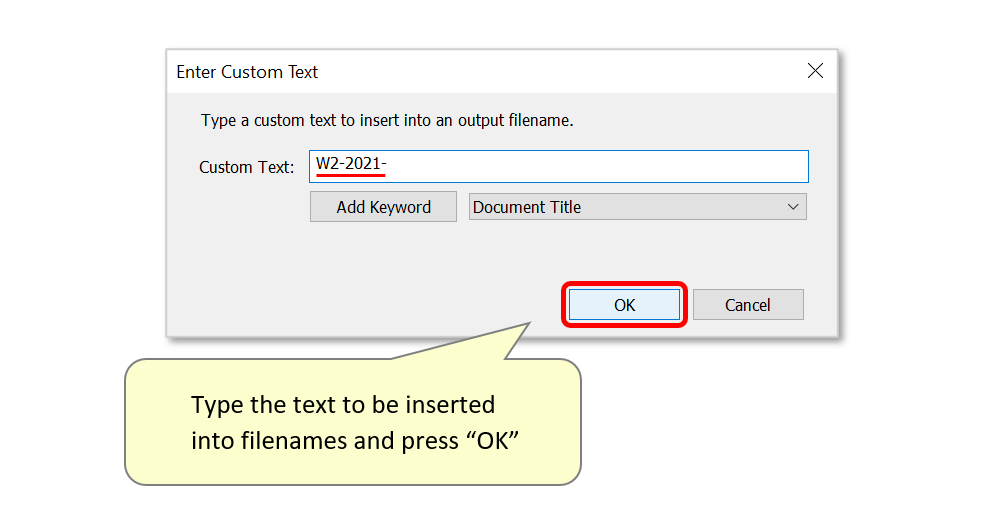
- Enter the custom text that you wish to add to file names. Here, we will add W2-2021-.
- Press "OK" to proceed.
- Step 3 - Add Text From a Page Location
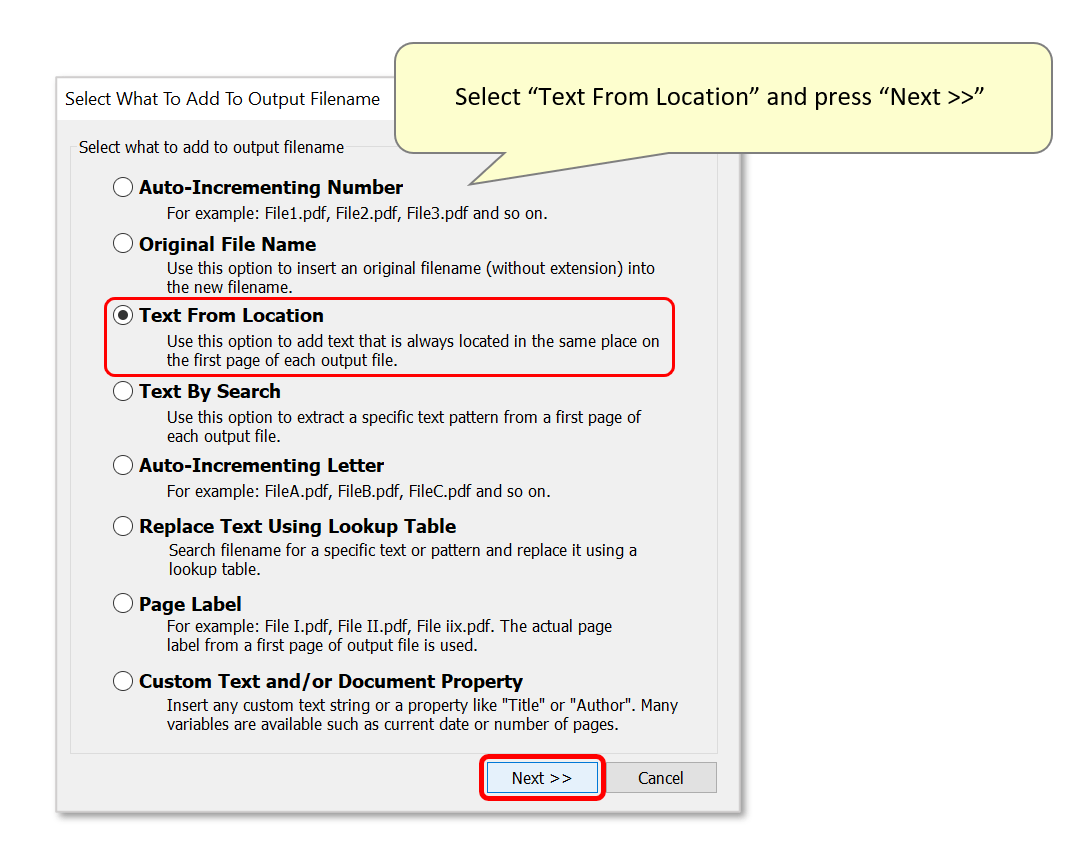
- Next, we are going to extract text (SSN - social security number) from a specific location in the PDF document. Press "Add..." to add a second file name component.
- Since this number always occurs at the same page location we are going to use "Text From Location" option and press "Next > >".
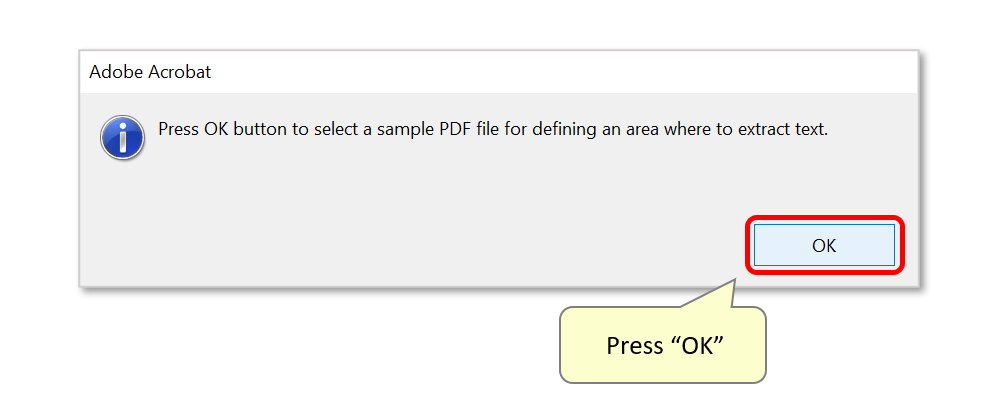
- A dialog prompts the user to select a sample PDF to use to define an extraction area. If you already have a sample PDF file open in Adobe Acrobat, then this prompt is not going to be displayed. Press "OK" to proceed.
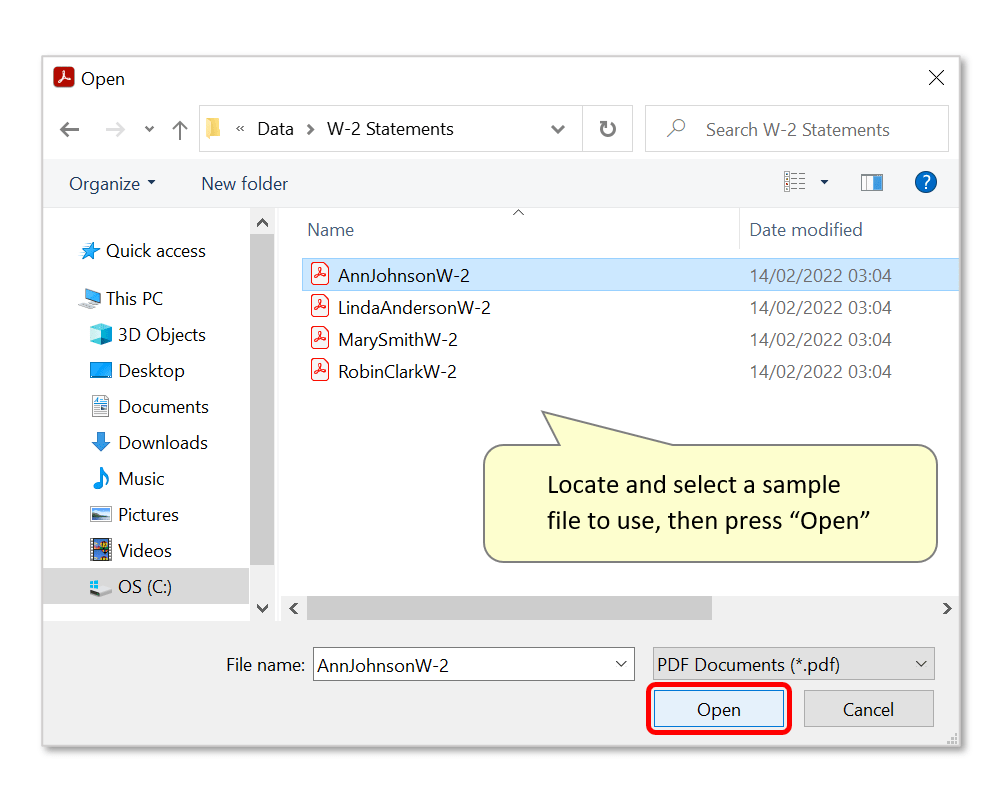
- Select a suitable sample PDF file, and press "Open".
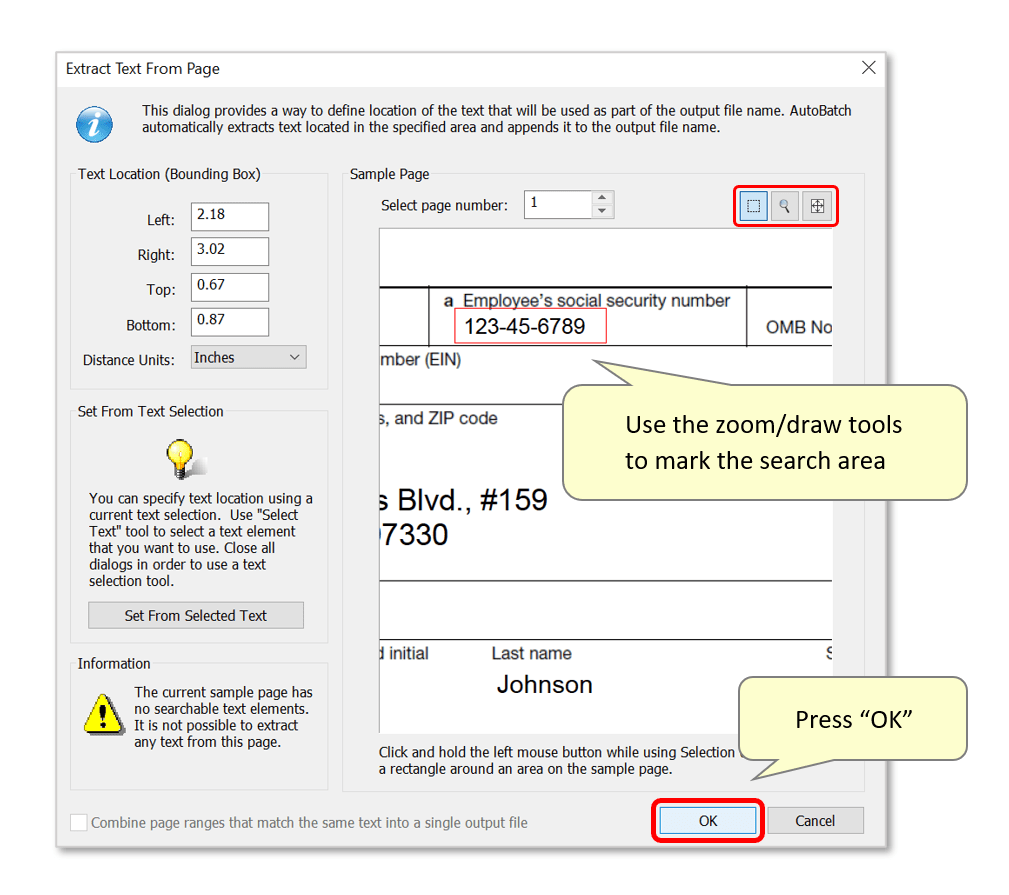
- Define a page area to extract text from. For example, in the PDF documents to be renamed, the SSN is located in the same place on each page. Use the zoom and draw tools in the upper right corner of the dialog to draw a box around the text to be extracted.
- Press "OK" to proceed.
- Step 4 - Create a Lookup Table
- Now we need a way to replace SSN number in the file name with a corresponding code using a lookup table. Press "Add..." to add another file name component.
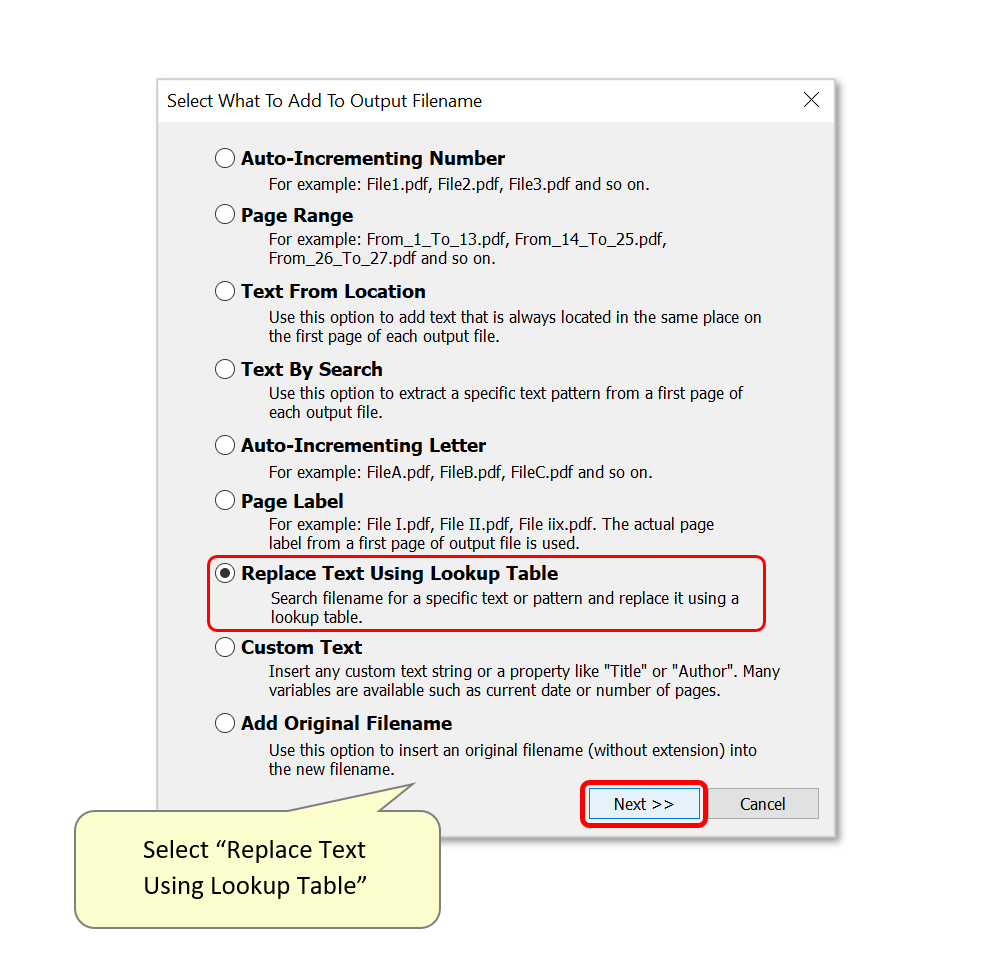
- Select the "Replace Text Using Lookup Table" option and press "Next > >". Note that this file name component performs search and replace on the current file name as it was created by previously applied file name components (Custom Text and Text From Location). At this time, file names look like the following: W2-2021-123-45-6789. Now we will add a lookup table to replace SSN numbers with other text.
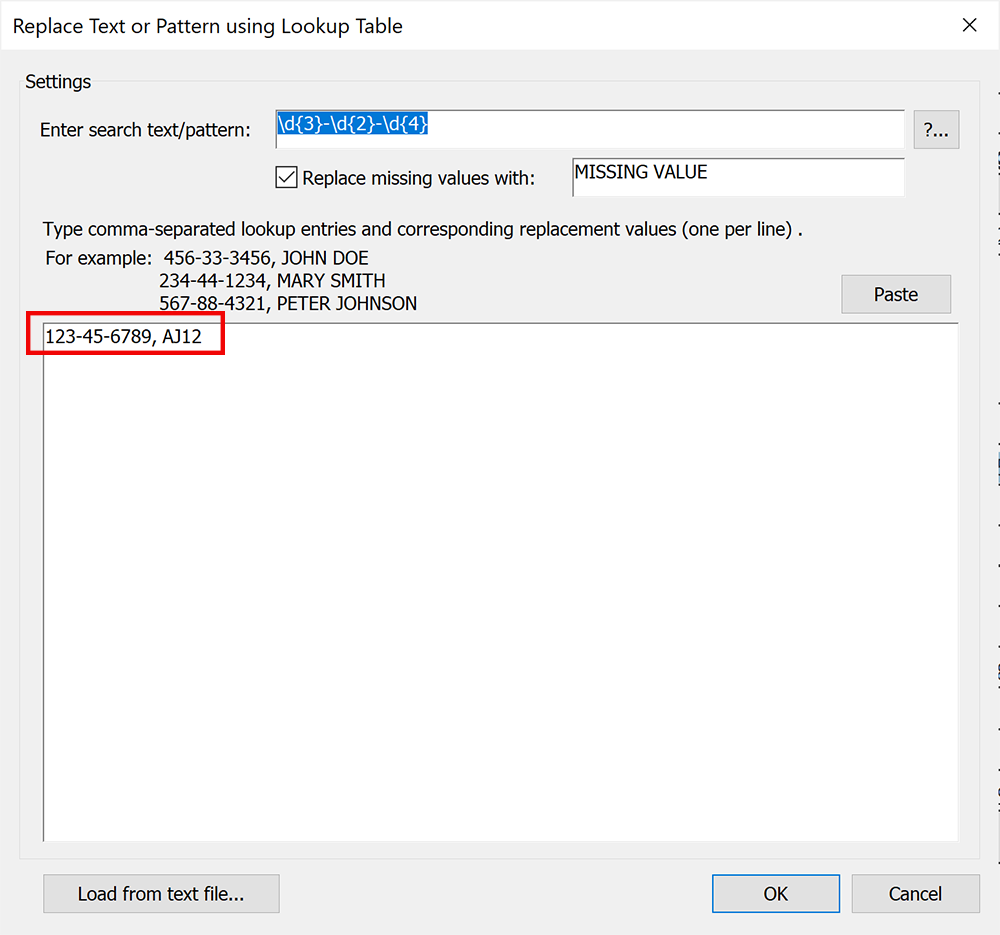
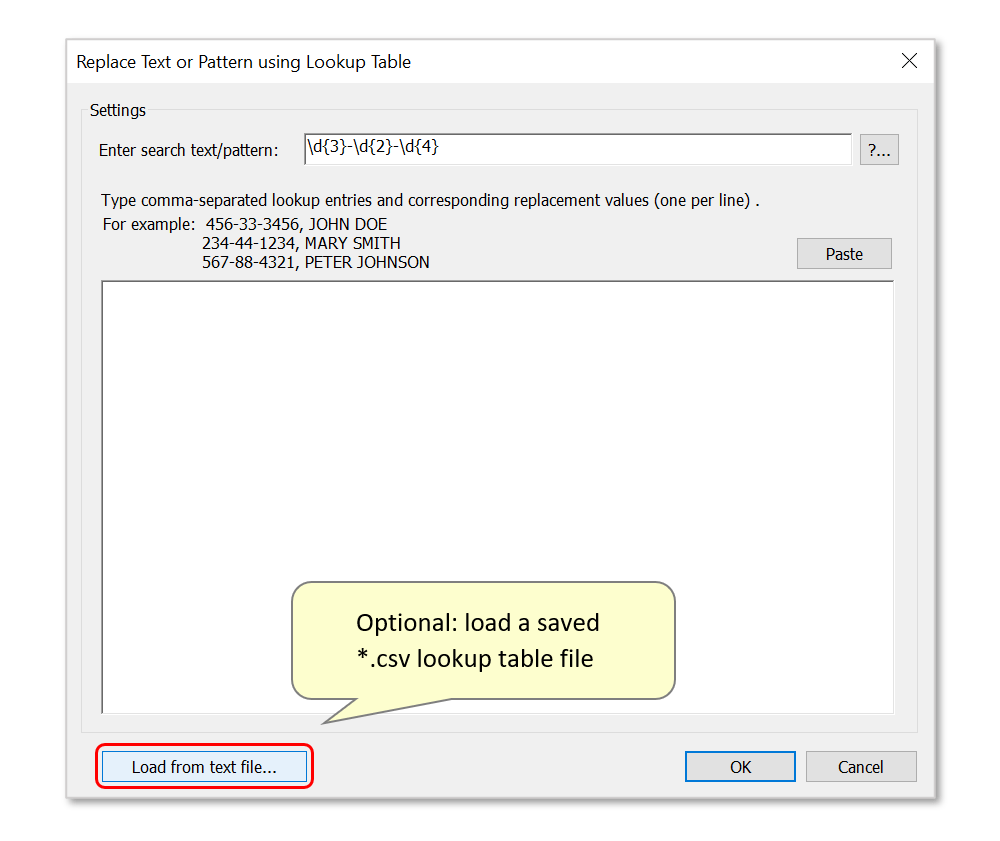
- Use this dialog to configure what text/pattern to search for, and what to replace it with. Enter a search expression or specific text to search for into "Find what:". Here, we have used \d{3}-\d{2}-\d{4} to search for social security numbers matching a "XXX-XX-XXXX" format. \d matches a single digit, {3/2/4} indicates the amount of digits - each one is separated by a dash (-).
- The search expression will be used to search a "current" file name (after applying all previous file name components) to find a XXX-XX-XXXX pattern and replace it with a value from the lookup table. If there is no matching text in the lookup table, then no replacement is performed. Check "Replace missing values with" option and type a default value to use in case there is no match in the lookup table. For example, if SSN number is not listed in the lookup table, and this option is checked, then a default value ("MISSING VALUE") will be used for the replacement creating W2-2021-MISSING VALUE.pdf filename.

- Next, it's possible to either manually type lookup entries, or load a pre-saved *.csv lookup table (see step 5). Type comma-separated lookup entries and replacement values in the box below, one-per-line. The example shown below would replace the "123-45-6789" SSN in a file name, with "AJ12".
- Step 5 - Load a Lookup Table from CSV Text File
- Optionally, use "Load from text file..." button to load a pre-configured lookup table from CSV text file (comma-separated values). Please note that this operation only loads lookup table into the settings. If you want change the CSV file later, it is not going to have any effect on the loaded settings. If you want to update lookup table using edited CSV file, then repeat this step again.
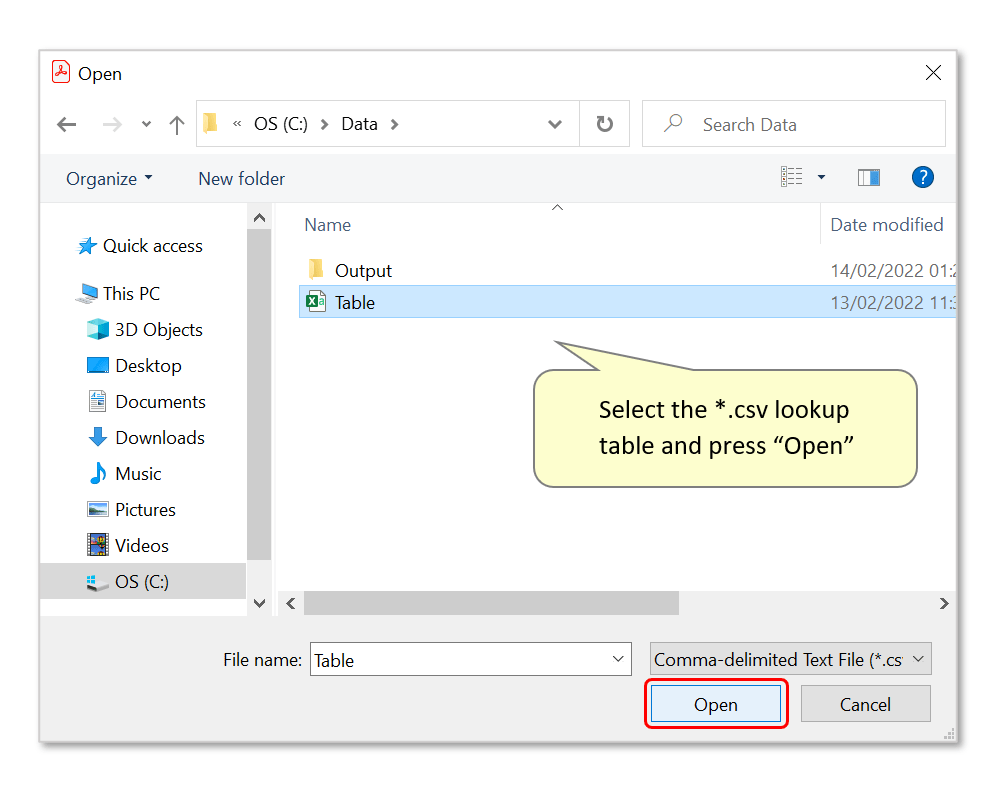
- Locate and select the desired *.csv text file, then press "Open".
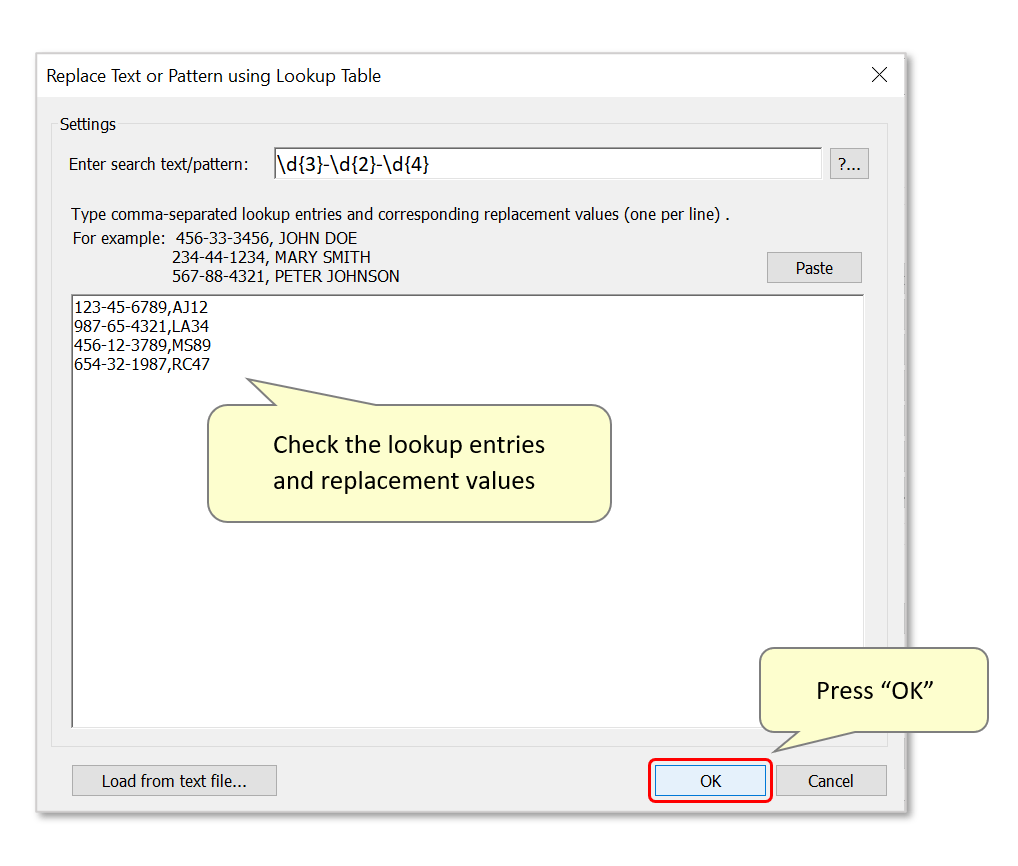
- The table entries will have been loaded - press "OK" to proceed.
- Step 6 - Optional: Save Renaming Settings
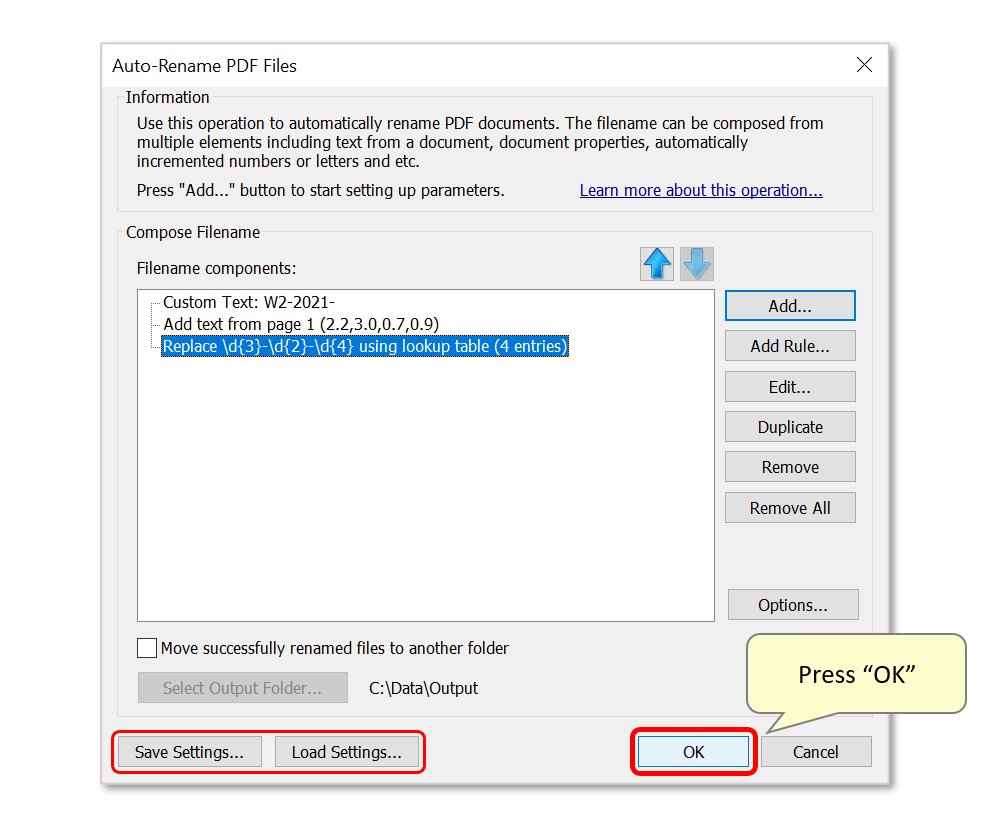
- Optionally use the "Save Settings..." button to save this configuration as a *.docren settings file for future re-use. This can be loaded via the "Load Settings..." button.
- Click "OK" to use these settings to rename files.
- Step 7 - Select Files for Renaming
- Press “Add Files…” in the “Select Input Files” dialog to select files that need to be renamed. Consider also making backup copies of the input files before processing.
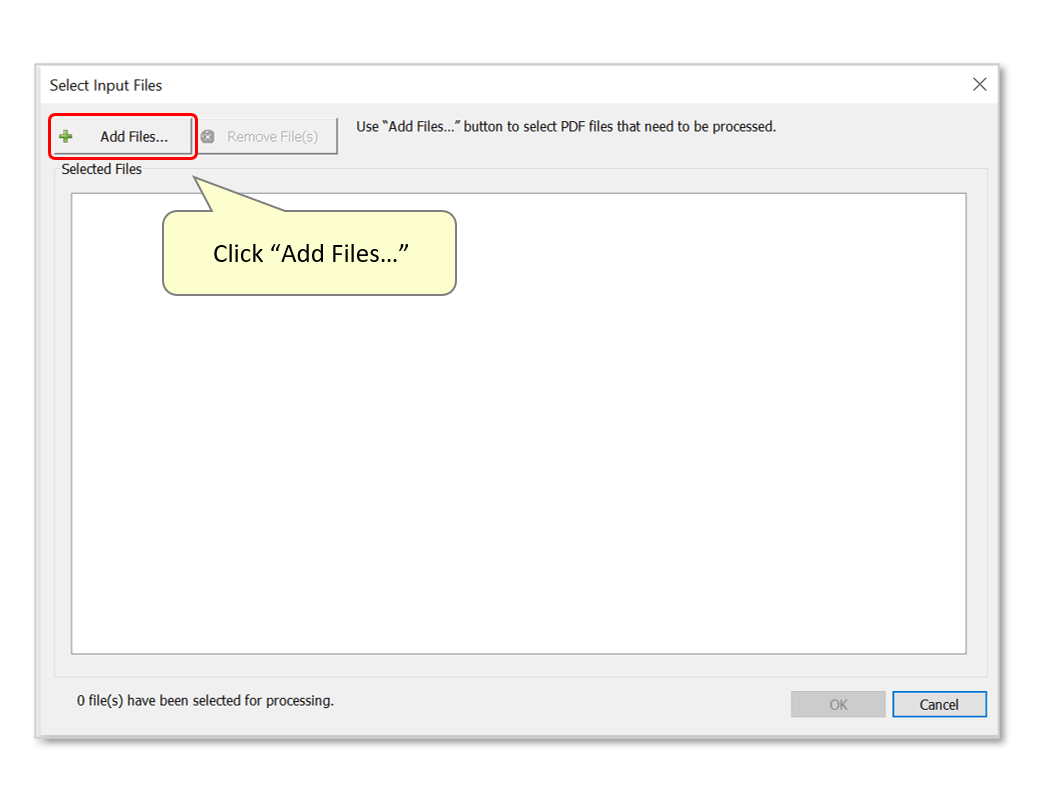
- Select PDF files that need to be renamed and click "Open" once done. Note that files from multiple folders can be added with repeated use of the "Add Files..." button.

- Selected PDF files will be listed in the "Select Input Files" dialog. Press "OK" once all necessary files have been selected.

- Step 8 - Confirm New File Names
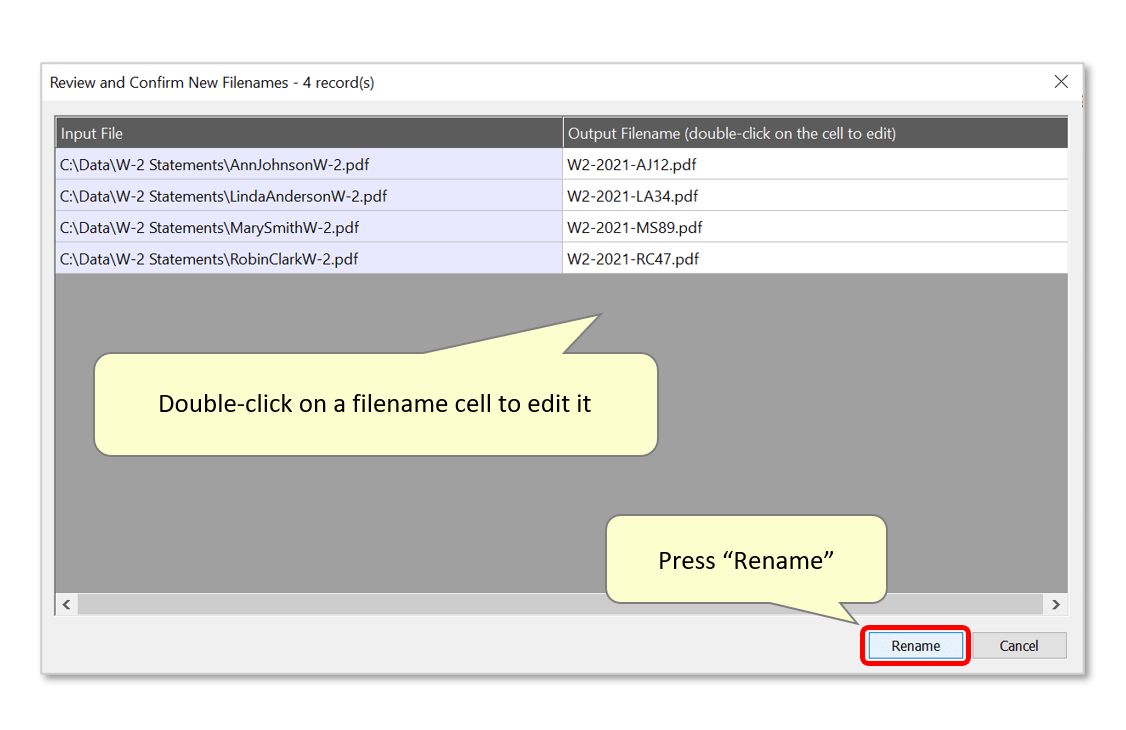
- The software will process input files without renaming them yet, and present "computed" file names in the "Review and Confirm New Filenames" dialog. The selected files have had new file names generated for them - the SSN's have been successfully extracted, then replaced with the values in the lookup table.
- Note that no files have actually been renamed at this step.
- Review the generated file names and edit them manually by double-clicking on an output file name cell.
- Press “Rename” to confirm the renaming process.
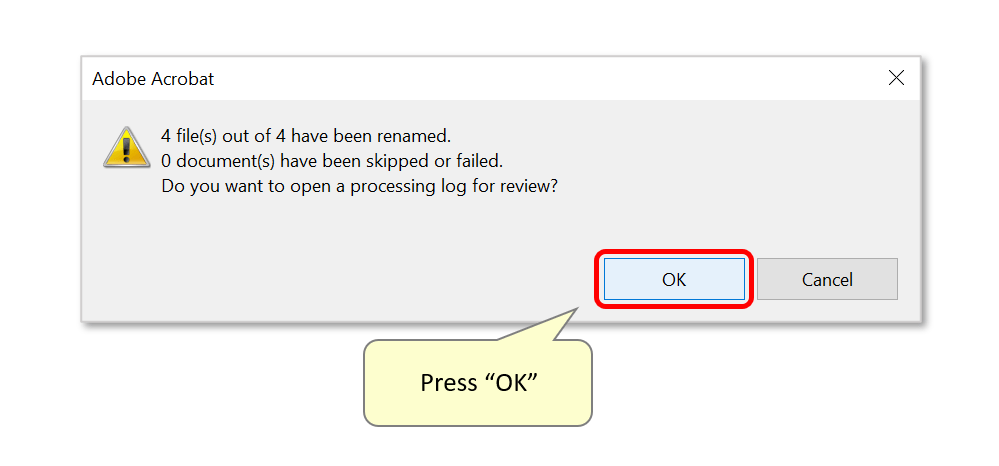
- Check the renaming statistics. Click “OK” to open a processing report.
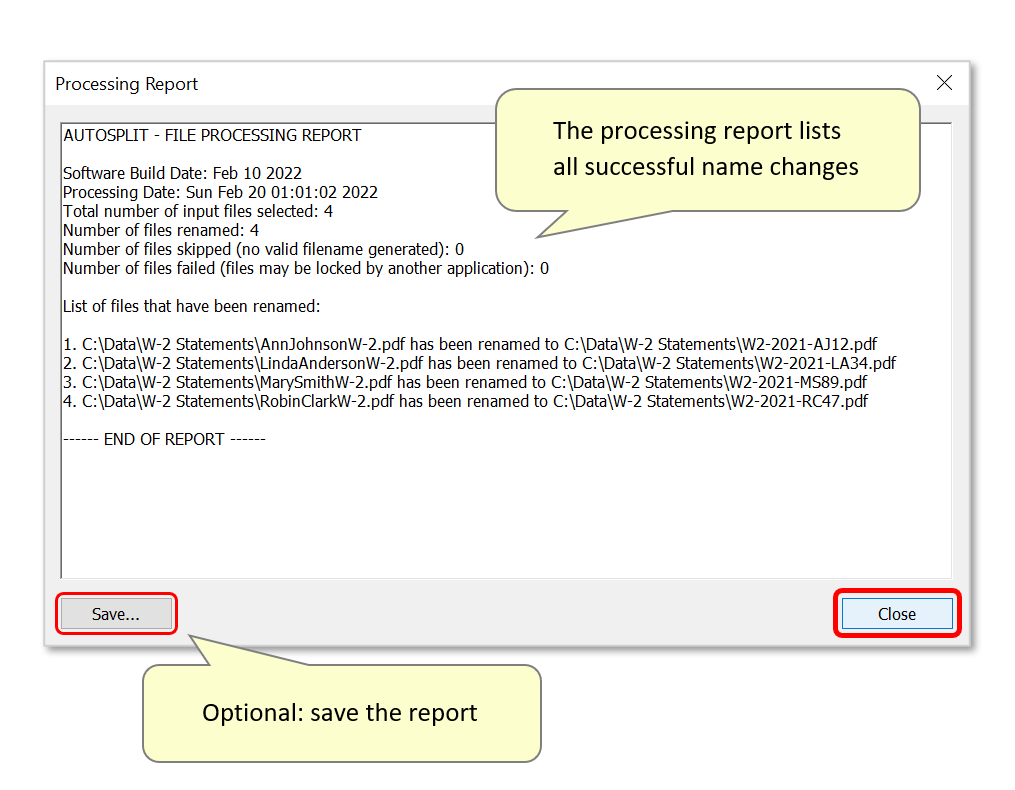
- The processing report shows detailed information on how many files have been renamed or failed, along with input/output file names for each document.
- Optionally save this report by pressing the "Save..." button. Click "Close" to close it.
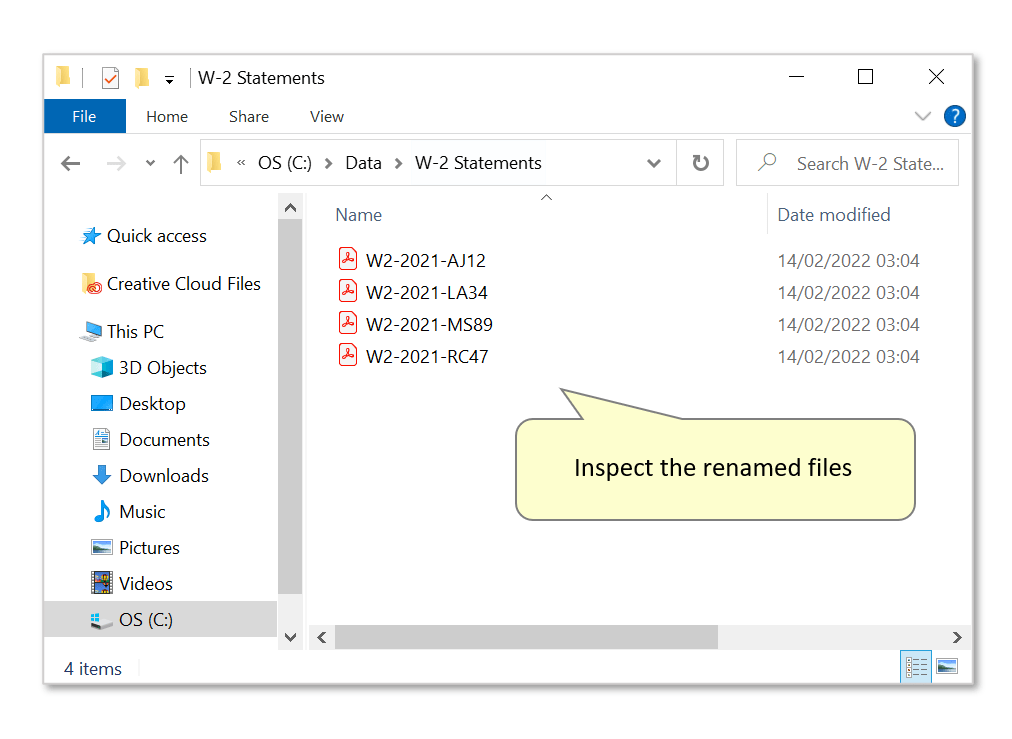
- Open the relevant folder to inspect the new file names. Here, they now follow the "W2-2021-XXXX" format:
- Click here for a list of all step-by-step tutorials available.