Extracting Text From Multiple Documents of Variable Length
- Introduction
- The AutoExtract™ plug-in can be used to extract data from PDF file(s) that consists of multiple combined business documents or forms and create organized spreadsheet records. It’s the most straightforward when all documents stored in the single PDF are of the same length, but settings can also be created that identify where each individual document begins and ends. This means that data can be extracted from combined documents of varying page length, and clearly placed into an output spreadsheet. One data record is produced for each input "document" within the ‘parent’ PDF file.
- Terminology:
- PDF File - a file in PDF file format stored on disk. May contain one or more logical "documents".
- Document - a business document or form stored inside a PDF file. For example, it can be a collection of invoices or tax forms. Each document may occupy one or more pages.
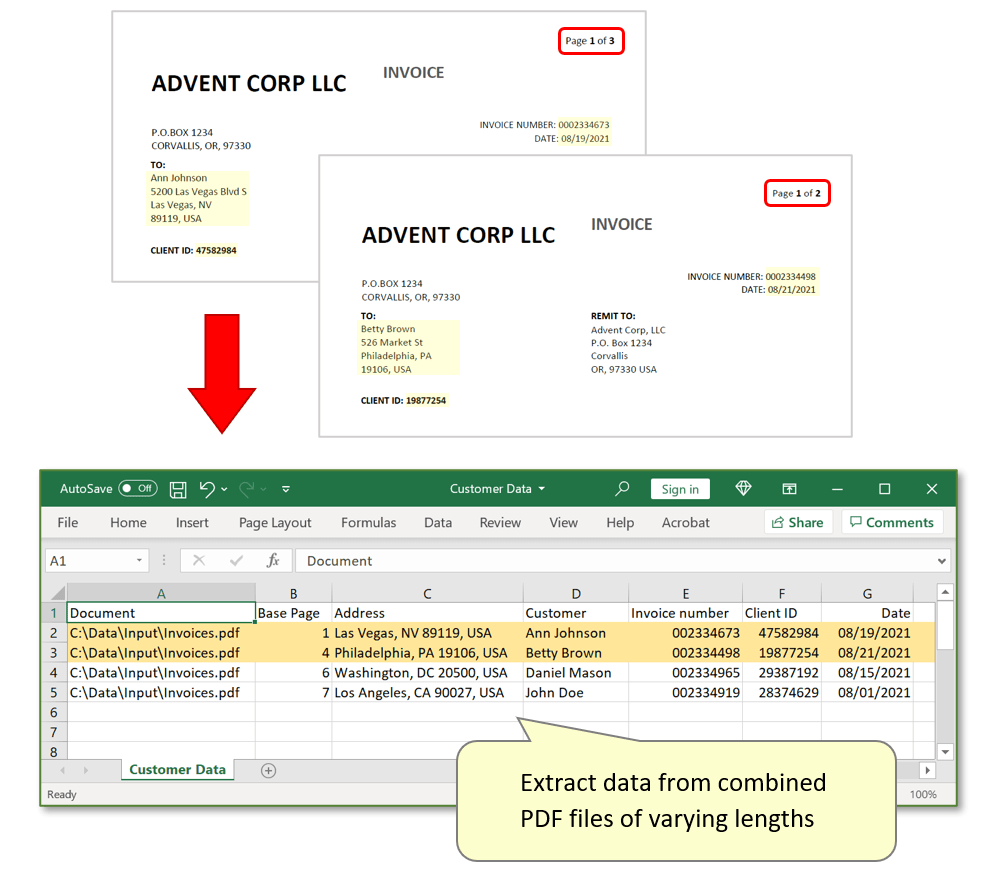
- In this tutorial, we will demonstrate how to configure the plug-in to identify the beginning of each document inside a single PDF file. The input PDF file used here is a collection of invoices, containing one or more pages. Each invoice features an identical format – we will use a text search to search the pages of the ‘parent’ document for text following a specific pattern. The plug-in then assumes that any pages found containing matches are the first page of a new "document".
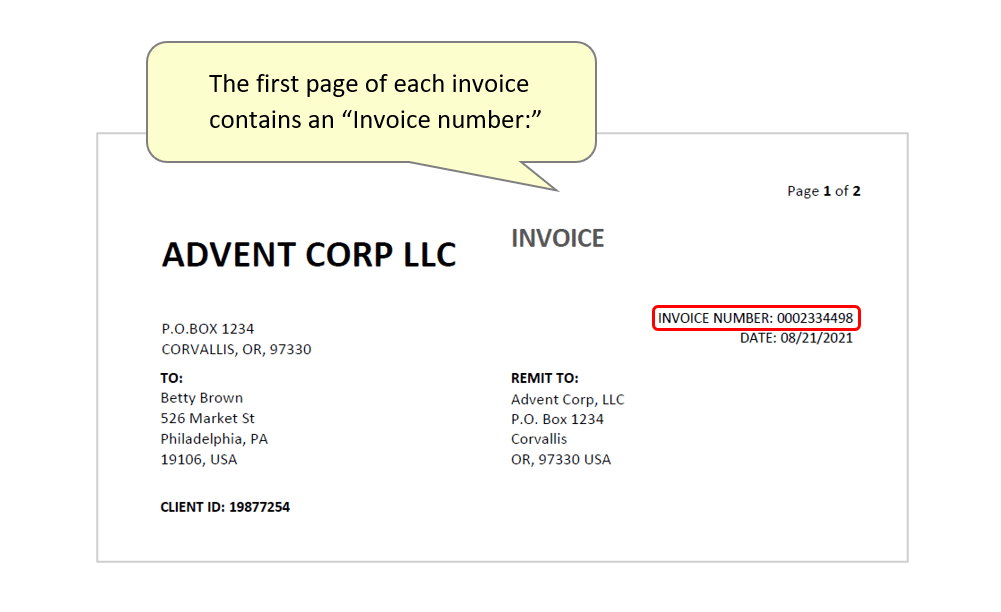
- For example, the combined invoices used here all contain “Invoice number:” on the first page, followed by a unique number. We will create settings that search for the presence of this text, so that the plug-in understands when to begin a new record and extract data. It is important to examine the input documents and come up with an unique text that is only present on the first pages. Another good candidate is "Page 1 of" since it is very commonly used and occurs only on the first pages.
- The goal is to create data records for each invoice in an output *.csv spreadsheet file. The first step is to use an interactive PDF form to create a settings profile. These settings define where each data field is located, and will be used to identify where the desired text is situated in each invoice. This is the easiest method to prepare extraction settings.
- Tutorial Overview:
-
- Create an interactive PDF form that will be used to define data field locations.
- Configure data extraction settings based on this interactive PDF form.
- Specify record size parameters to identify the first pages of each document inside an input PDF file.
- Run the extraction procedure on the input files.
- Review the resulting Excel spreadsheet containing extracted PDF text.
- Prerequisites
- You need a copy of Adobe® Acrobat® along with the AutoExtract™ plug-in installed on your computer in order to use this tutorial. Both are available as trial versions.
- Step 1 - Create an Interactive PDF Form
- If you have the interactive PDF form used to create the files that you want to extract text from, open it in Acrobat and proceed to step 2.
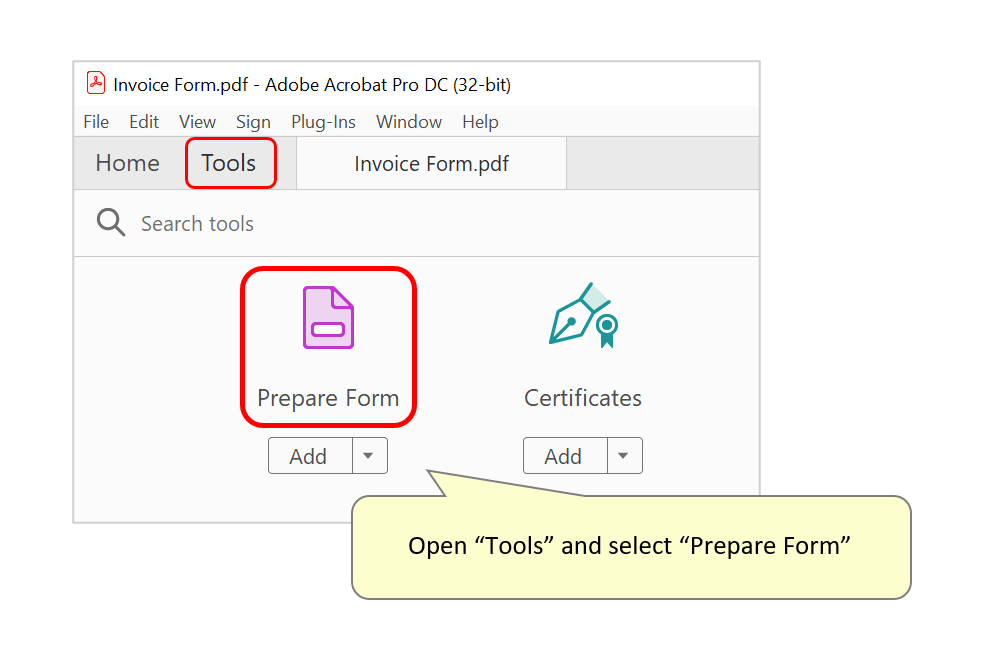
- To create one, open a sample PDF document (i.e: an invoice) that has the same format as the files that you want to extract data from. Then open the "Tools" panel on the main toolbar, and click on the "Prepare Form" tool icon.
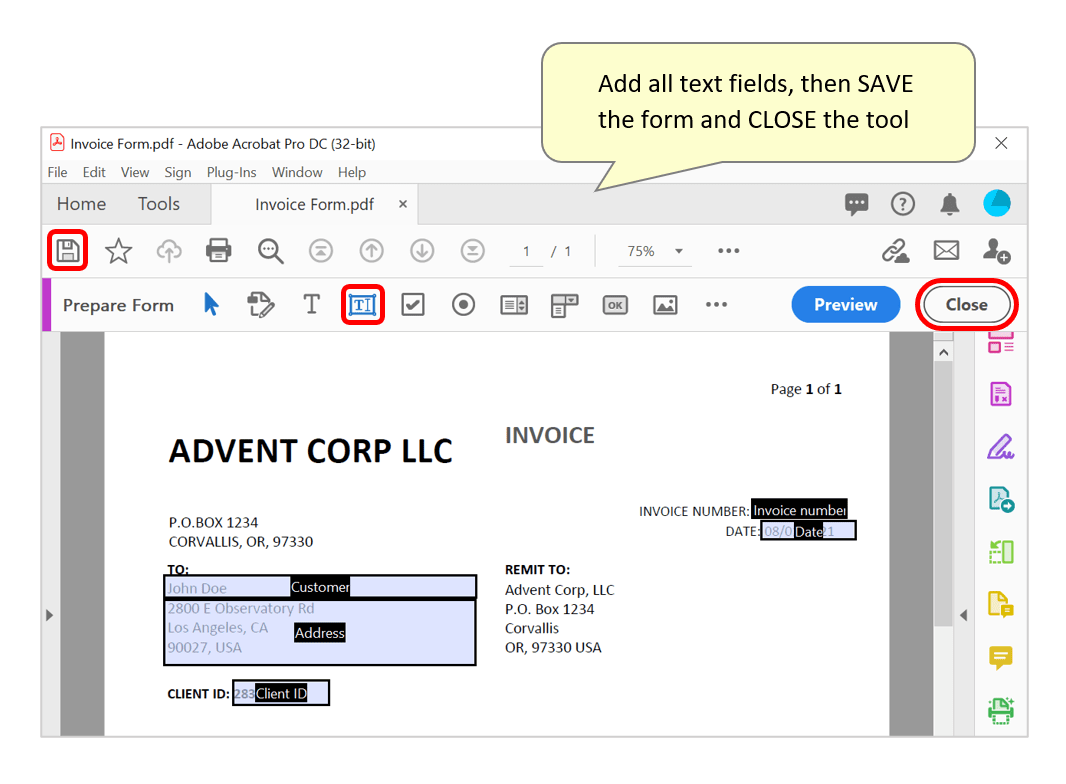
- Click on the "Add a Text field" icon, then click and drag to draw a box around a text item on the page. Give each field a suitable name - this can be edited at any time by double-clicking on it, or right-clicking and pressing "Properties...". See this separate tutorial for more detailed help with creating PDF forms.
- Once all necessary text fields are added, press the "Save" symbol on the left to save changes, then press "Close" to exit the tool.
- Step 2 - Open AutoExtract
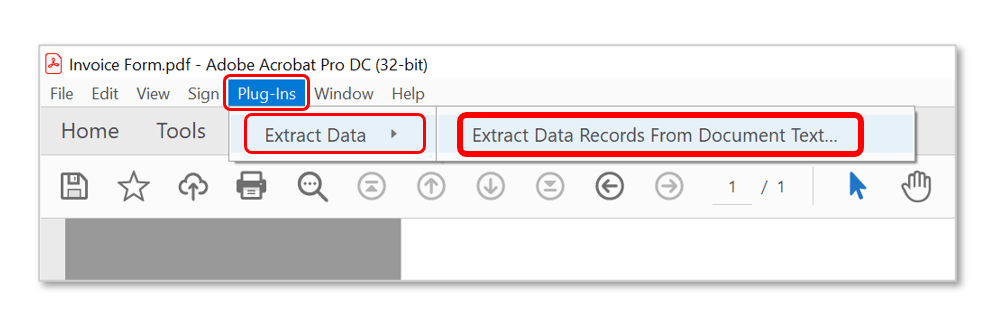
- With the PDF form open in Acrobat, select "Plug-Ins > Extract Data > Extract Data Records From Document Text…" to open the "AutoExtract Plug-in" dialog.
- Step 3 - Extract Fields From Form
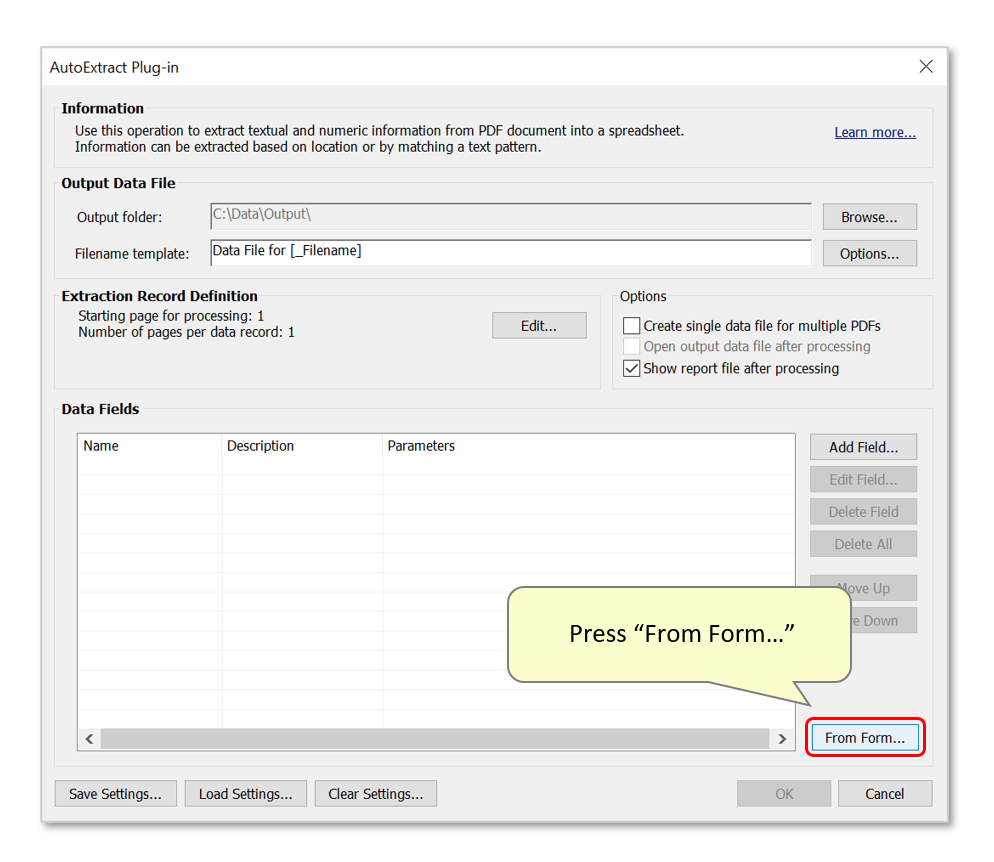
- Press the "From Form..." button to add fields to the settings configuration based on fields within the currently open PDF form. Note that only text fields will be used.
- Press "OK" to proceed.
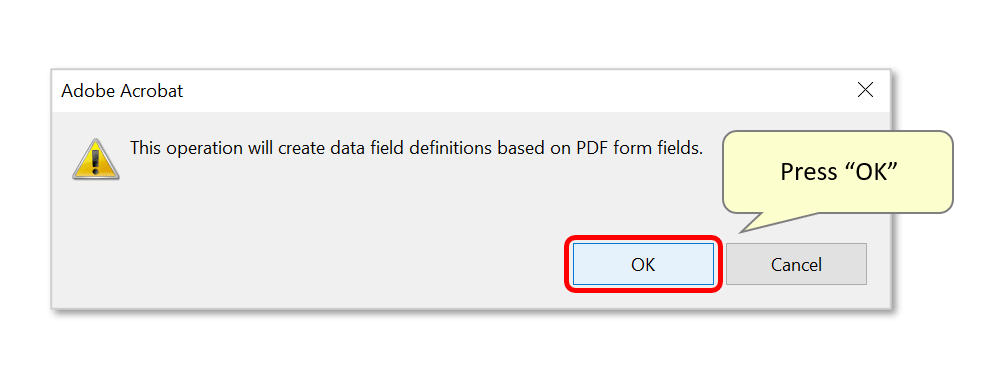
- A report box displays the number of fields that have been added. Press "OK" to close it.

- Important: there is no any requirement for the data field names to be unique. It is allowed to have multiple data fields with the same name. This can be useful when extracting data value from potentially multiple locations within the document.
- Step 4 - Configure Output Options
- Press "Browse..." to select a suitable output folder for spreadsheet data files to be saved in.
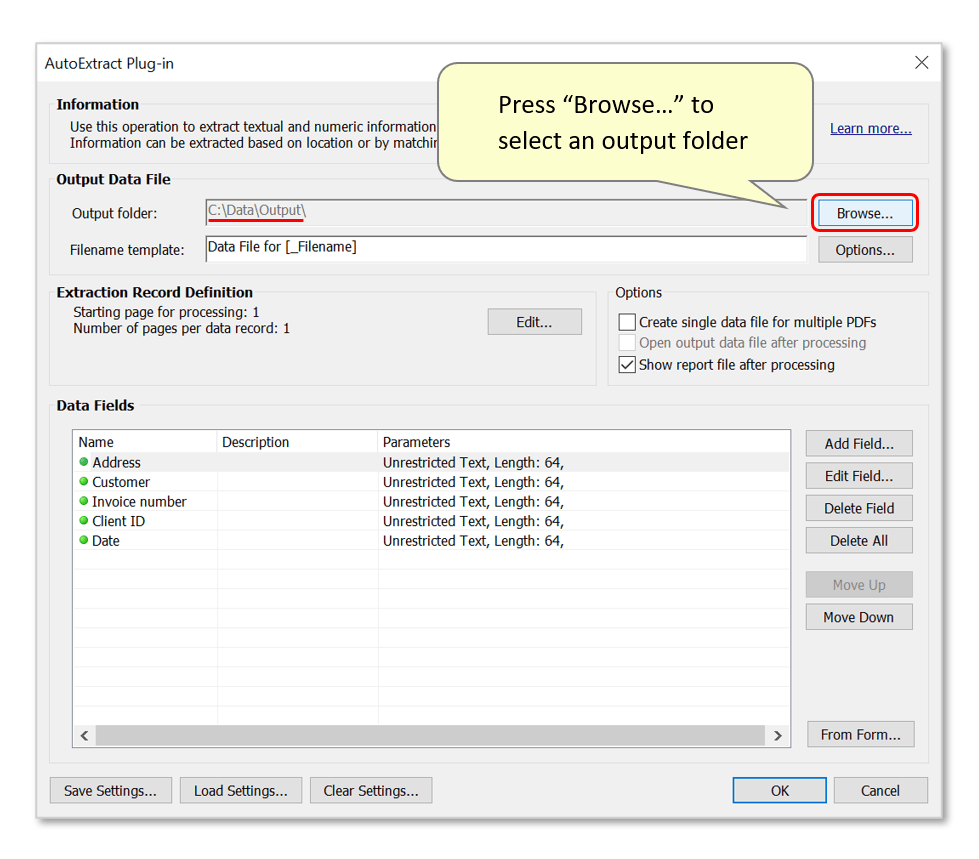
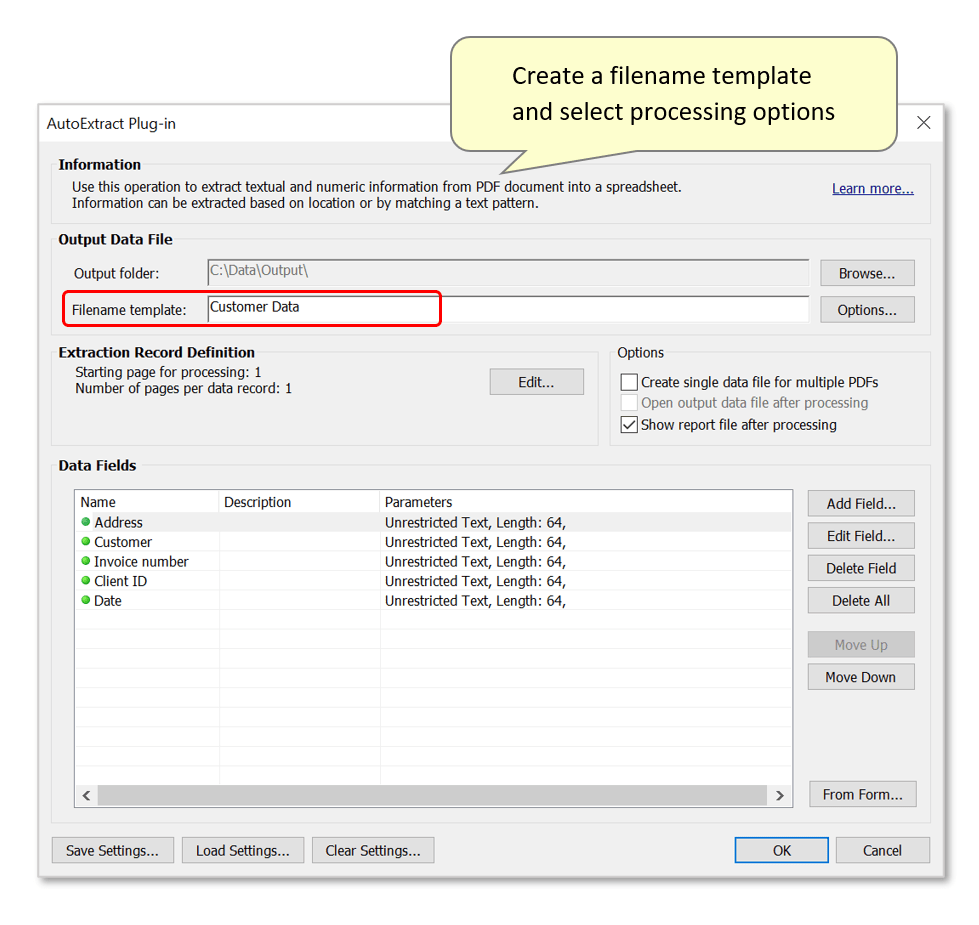
- Optionally customize the filenaming template for output files. Any text entered in the "Filename template:" box will be inserted into output filenames.
- In this example, we will create an output spreadsheet titled "Customer Data.csv". It will contain a series of listed records - one for each invoice within the input PDF.
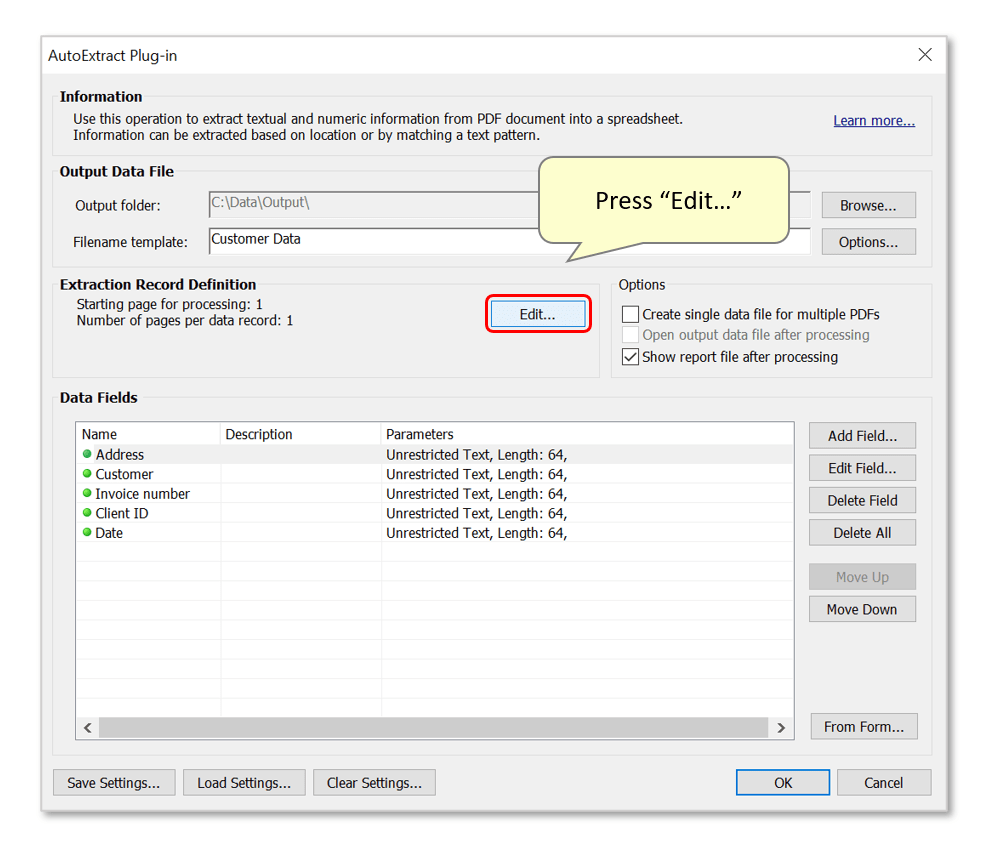
- Step 5 - Define Data Record Length
- The next task is to instruct the software on how to identify the first page of each file within the input PDF document. To do this, press "Edit...".
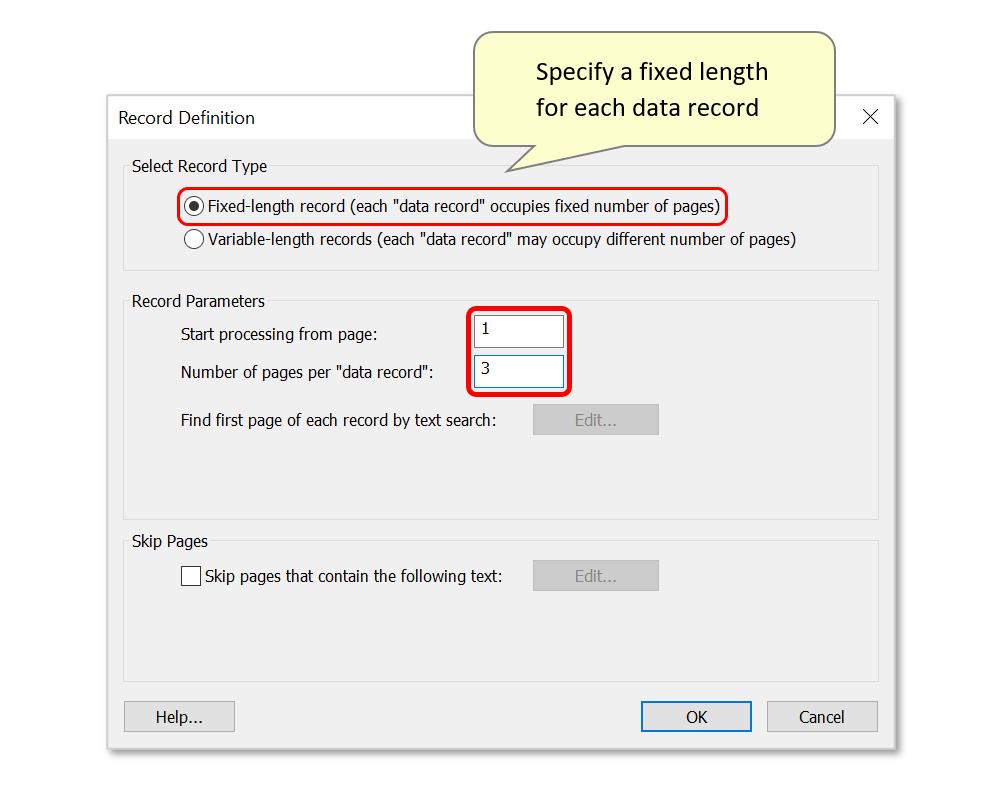
- Step 6 - Defining Fixed-length Records
- The default "Fixed-length record..." option could be used if the page-length of each invoice in the input file is the same. For example, if the file contains a collection of three-page documents, enter "1" and "3" into the relevant boxes:
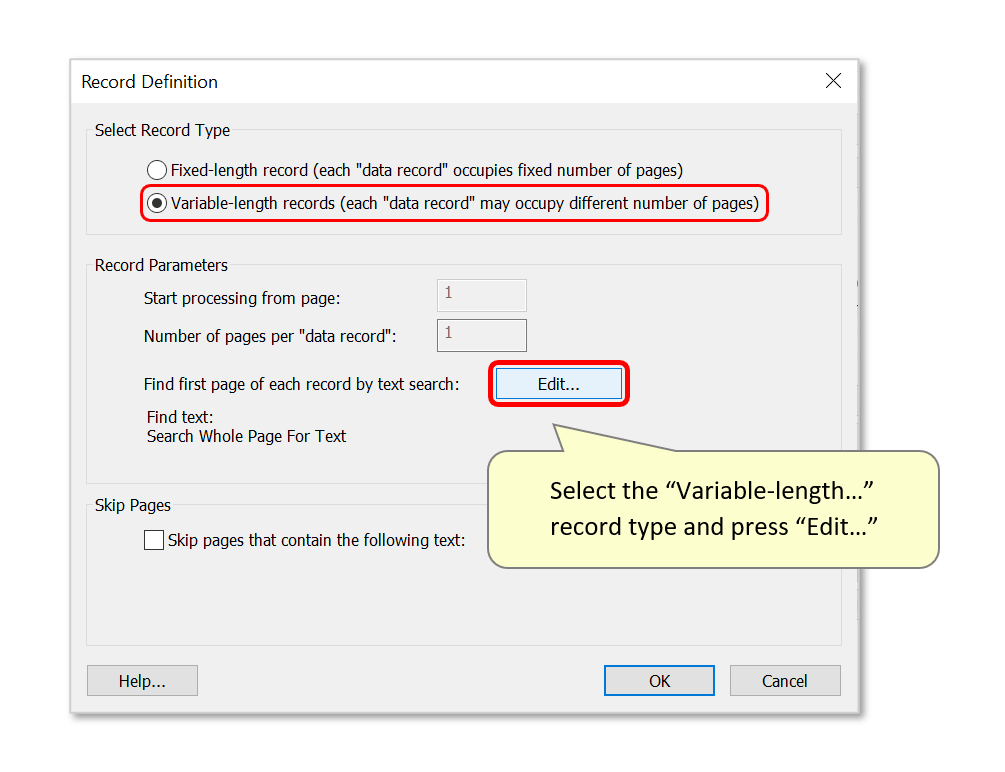
- Step 7 - Defining Variable-length Records
- If the input documents are of different lengths, select the "Variable-length records..." option and press "Edit...".
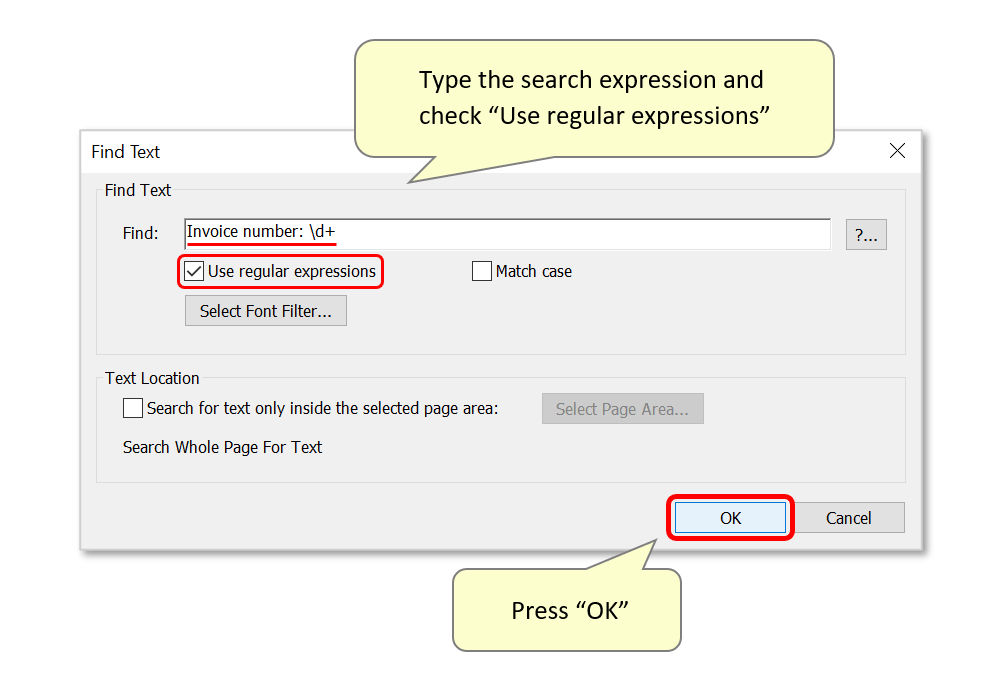
- Here, we will use a search expression to search pages of the input document for text that matches a specific pattern. The expression Invoice number: \d+ searches for the presence of the text "invoice number:" followed by a number containing one or more digits. If this is identified anywhere in the document, it will assume it is the first page of a "data record" - lasting until the next page that an invoice number is also recognised.
- Any expression can be typed here, using regular expression syntax. Ensure that "Use regular expressions" is checked - use "Match text case" to create matches with text only as it is typed here.
- Press "OK" to proceed.
- Step 8 - Optional: Search for Specific Font Attributes
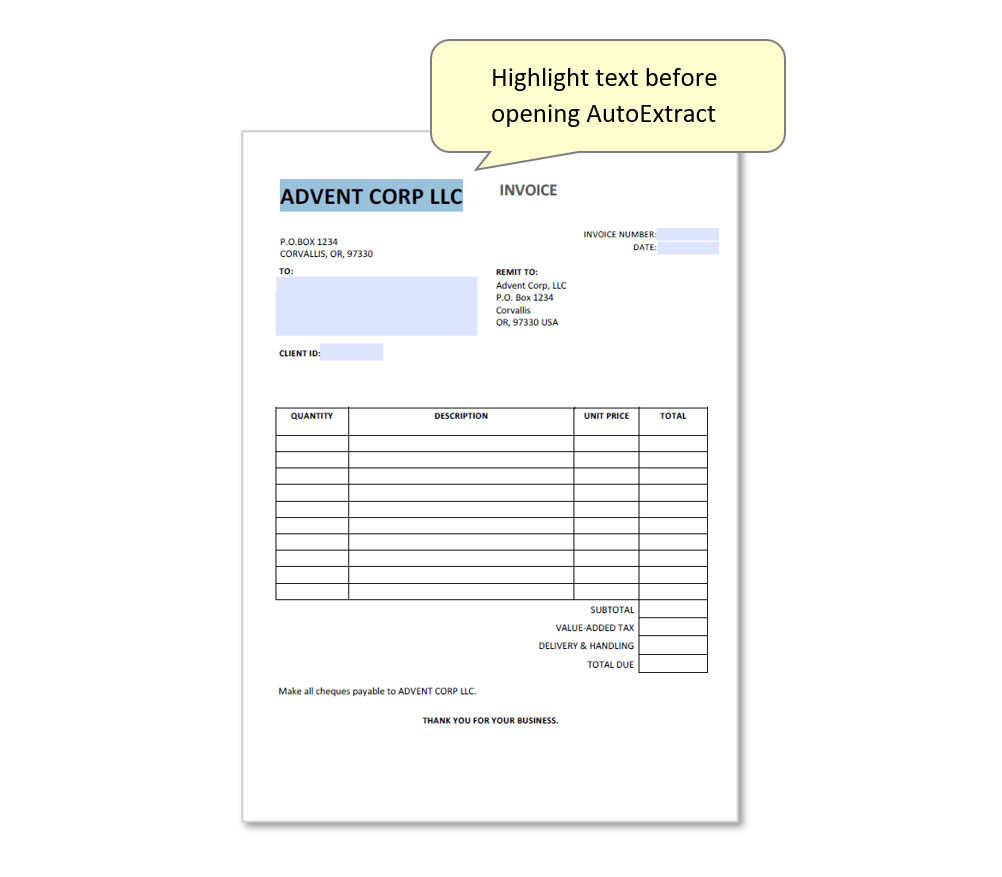
- It's possible to search for the presence of specific font styles/size, in order to identify the first pages of data records. For example, each input invoice being processed here contains "ADVENT CORP LLC" in a large font at the top of the first page. This font style and size is not used anywhere else in each file. To search for matching fonts, first highlight the desired text in the input PDF form before opening AutoExtract™:
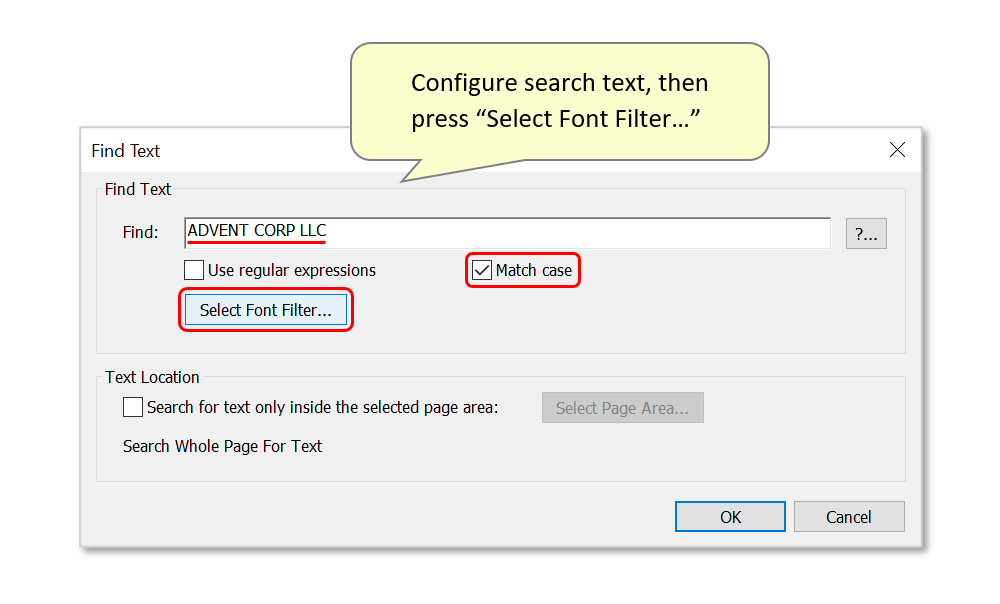
- Then select "Plug-Ins > Extract Data > Extract Data Records From Document Text…" to open the AutoExtract™ dialog. Once you reach the "Find Text" dialog (see steps 2-7), enter text to search for into the "Find:" box. If necessary, check "Match text case", then press "Select Font Filter...".
- Font parameters can be configured manually, or by pressing "Set Font Attributes From Selected Text" to use the previously highlighted text. The font type and size will be recognized by the software, and then appear in the relevant boxes. Check the boxes next to "Match font name/size:" to use these settings, then press "OK".

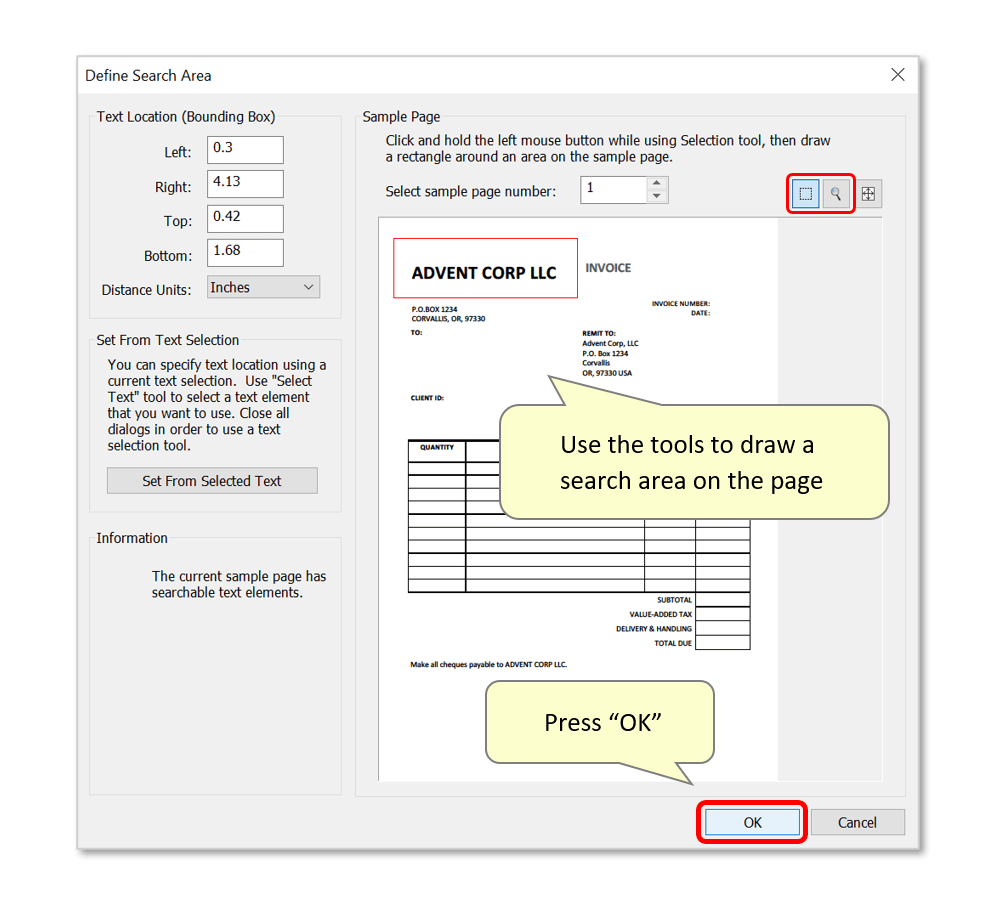
- Step 9 - Optional: Search only a Specific Page Area
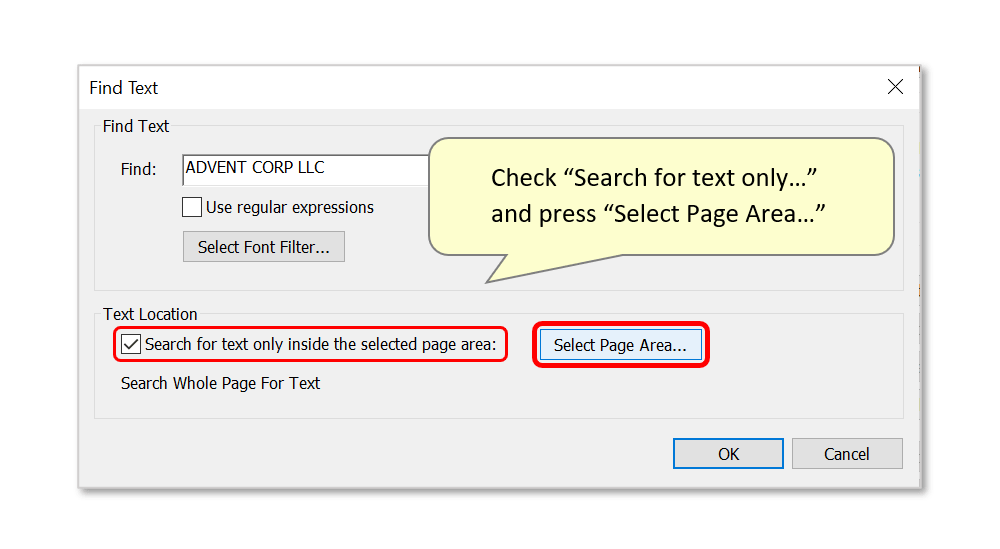
- It's possible to search only a specific area of each page of input files. This may be useful if search text may appear multiple times on the same page.
- To do this, check "Search for text only inside the selected page area:" and press "Select Page Area...".
- Use the zoom/draw tools to mark an area on the sample page that should be used for the text search, then press "OK".
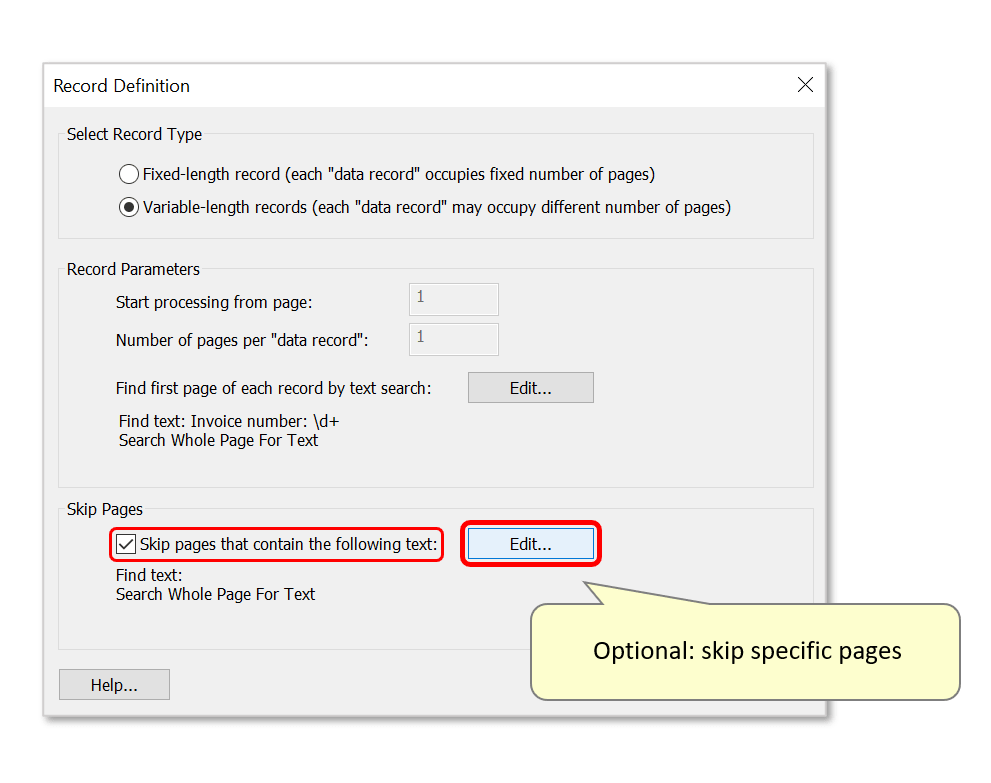
- Step 10 - Optional: Skip Pages
- It's possible to skip pages of the input file(s) that contain specific text. This may be useful if data must not be extracted from certain pages of the input files (e.g.: invoices for a specific customer). To do this, check "Skip pages that contain the followung text:" and press "Edit...". This opens a dialog identical to "Find Text" in step 7. Use it to configure a text search - any pages found containing matching text will be skipped during the extraction procedure.
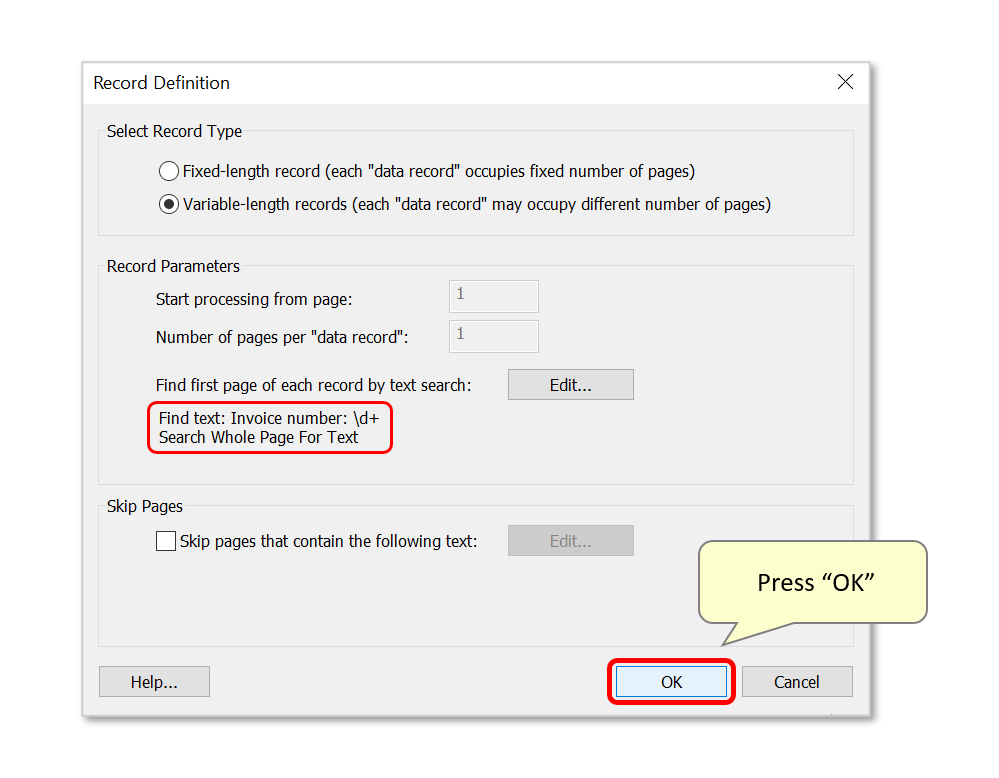
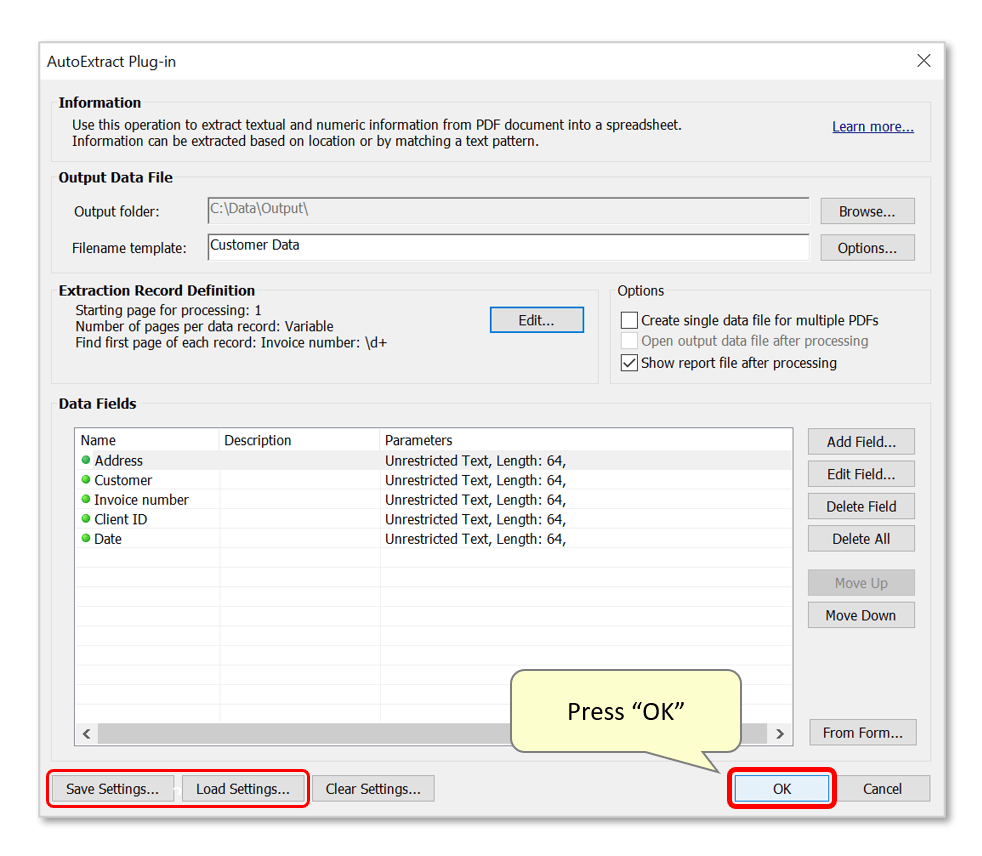
- Step 11 - Confirm Extraction Settings
- The record parameters will now be summarized here - press "OK" to proceed.
- Optionally use the "Save Settings..." button to save the current configuration as an AutoExtract Settings file. Settings will be saved with a *.zones file extension, and can be loaded by pressing "Load Settings...".
- Press "OK" to proceed.
- Step 12 - Add Files for Processing
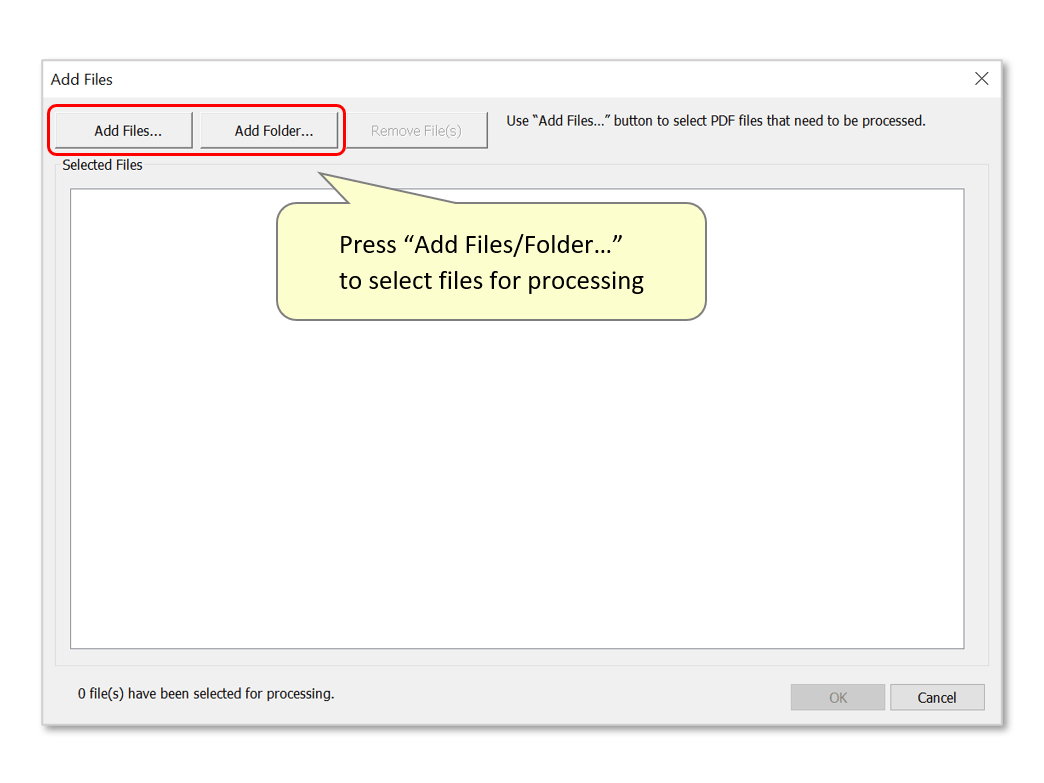
- Use the "Add Files..." button to choose files for processing. Alternatively, add an entire folder by pressing "Add Folder...".
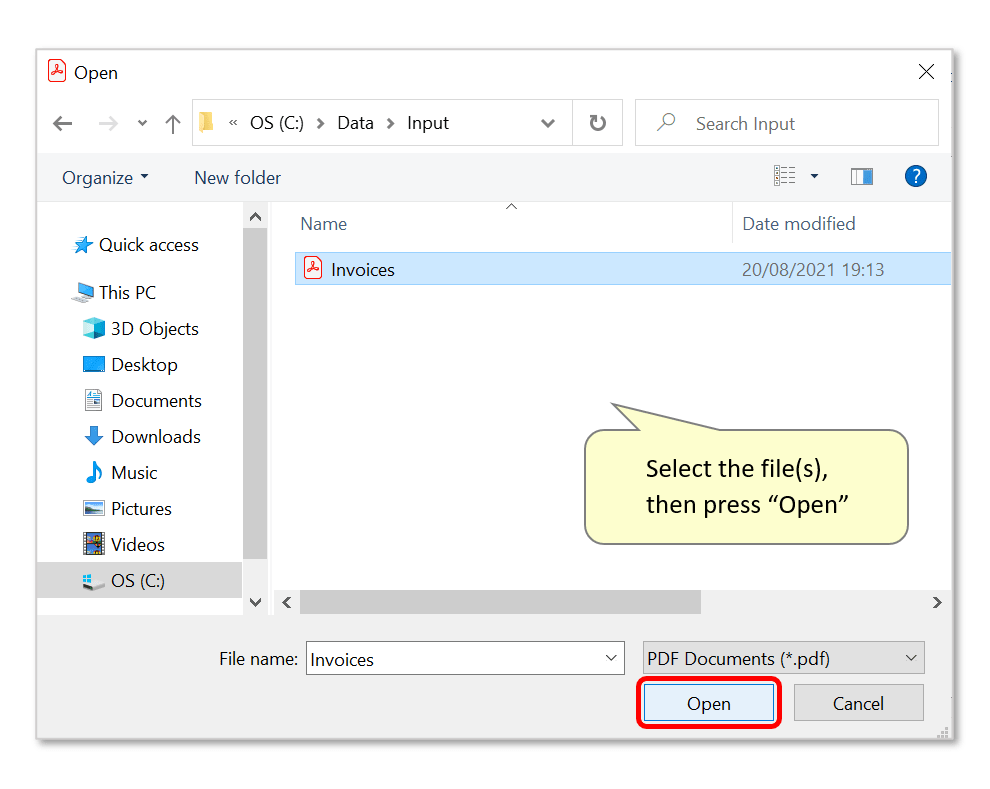
- Locate and select files for processing, then press "Open". In this example, we will extract data from one file that contains multiple combined invoices. Note that it's possible to add files from various folders and process them at the same time by repeatedly using the "Add Files/Folder..." buttons.
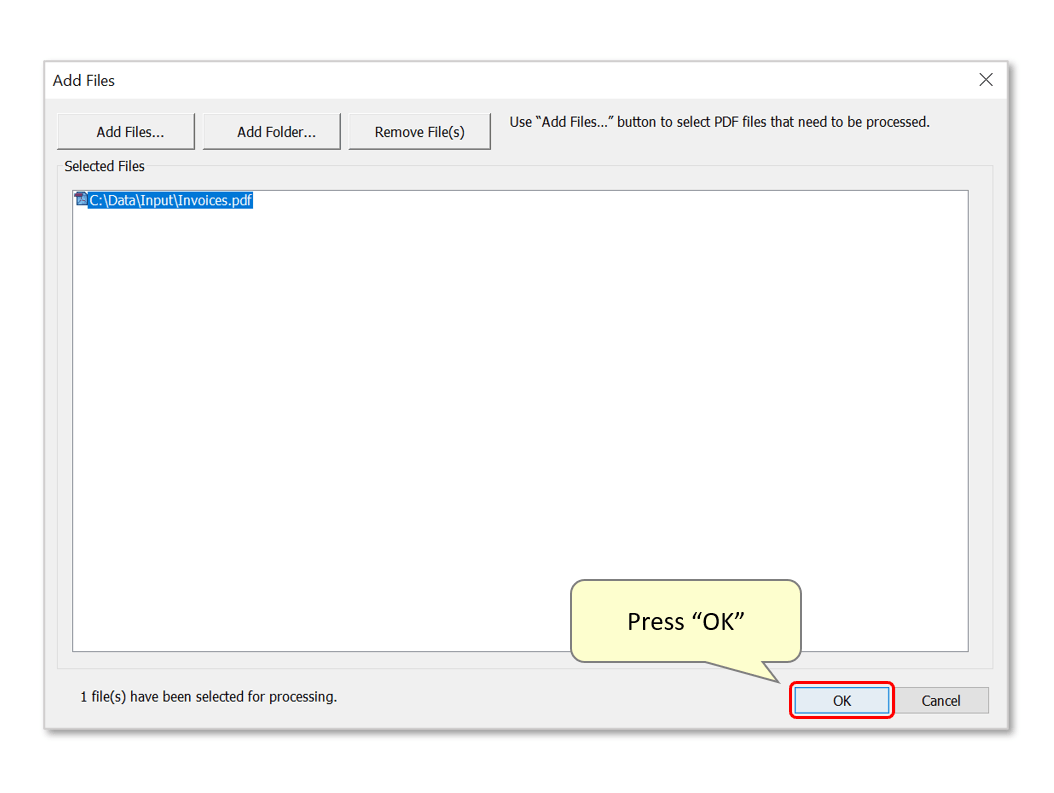
- Press "OK" to extract the data records.
- Step 13 - Inspect the Results
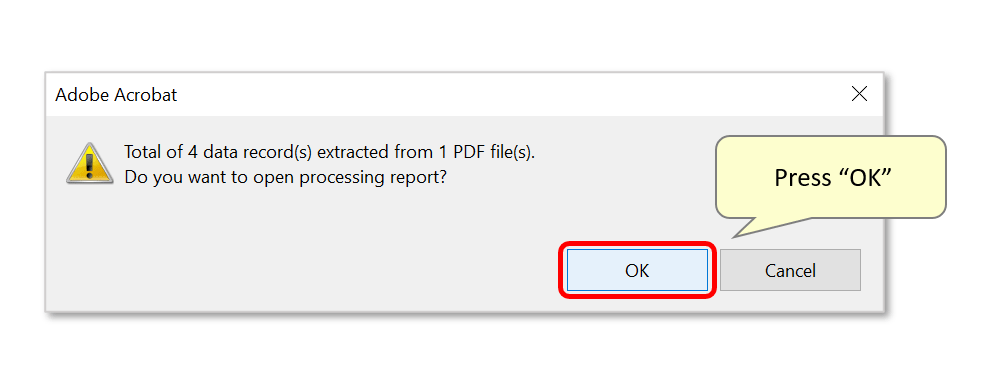
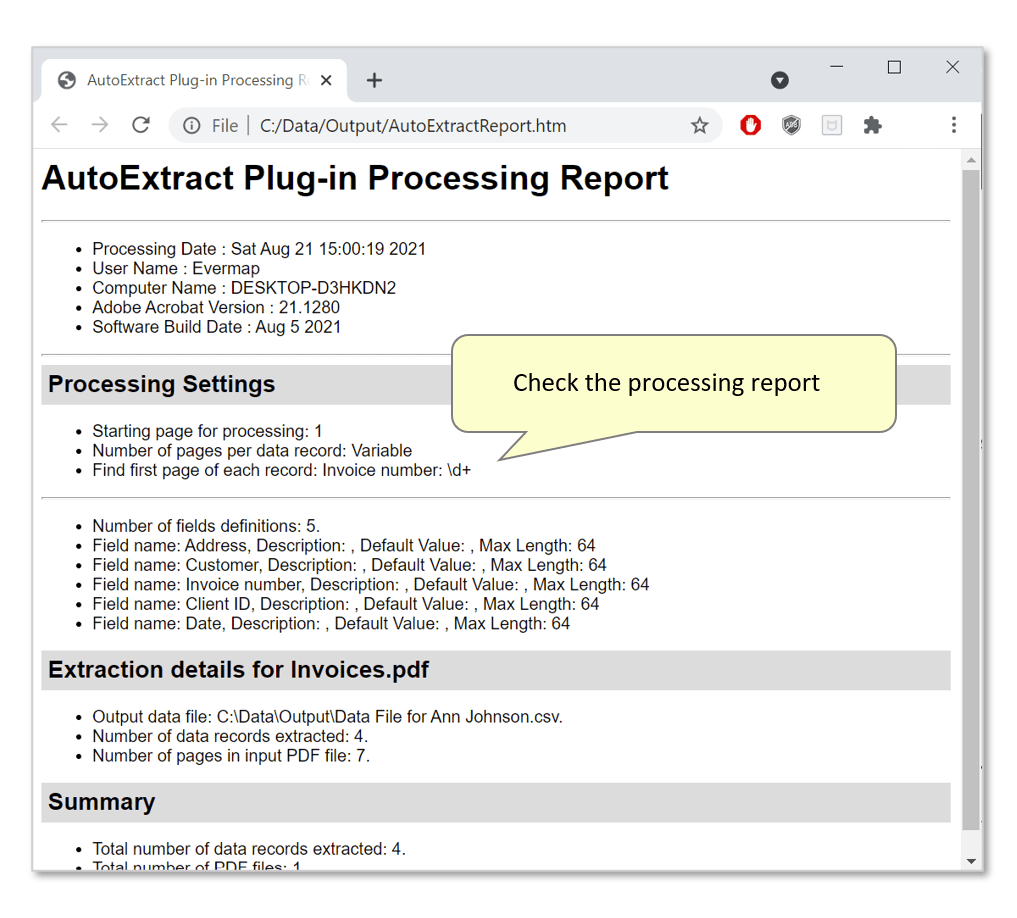
- A report box displays the number of spreadsheet records created. Press "OK" to close it, and open an auto-generated processing report in your default browser.
- Check the processing report.
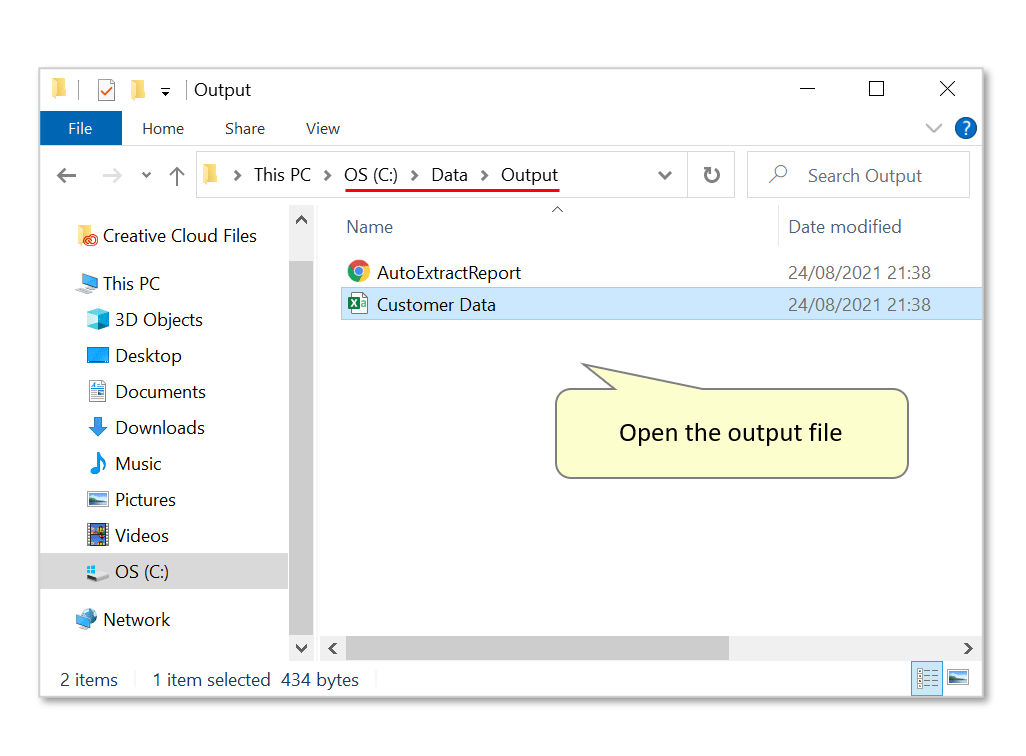
- Open the output folder chosen in step 4. The processing report will be saved here, as well as the output spreadsheet file. Open it to check its contents.
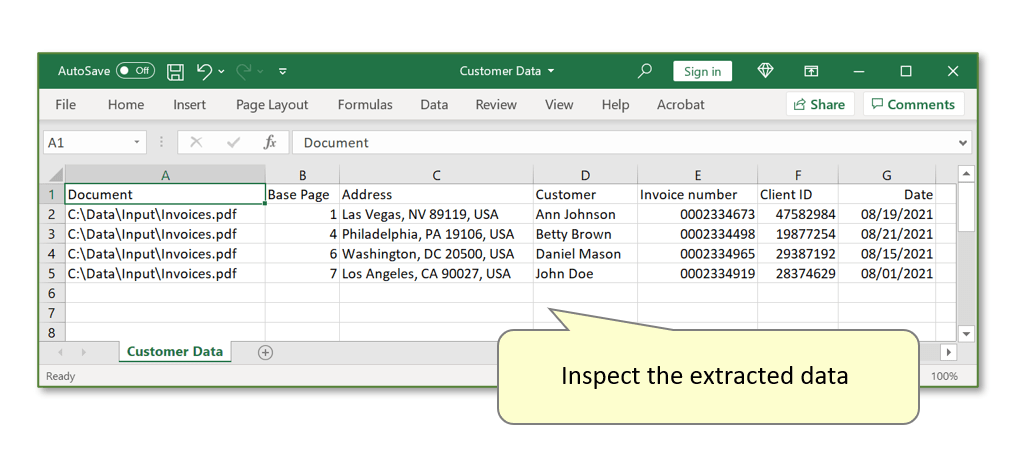
- Inspect the extracted data. Every row displays one record for each separate invoice, presented across various field headers that correspond to each text field location in the input PDF form. The "Base Page" field shows the page number from the input PDF that is the first page of each individual file.
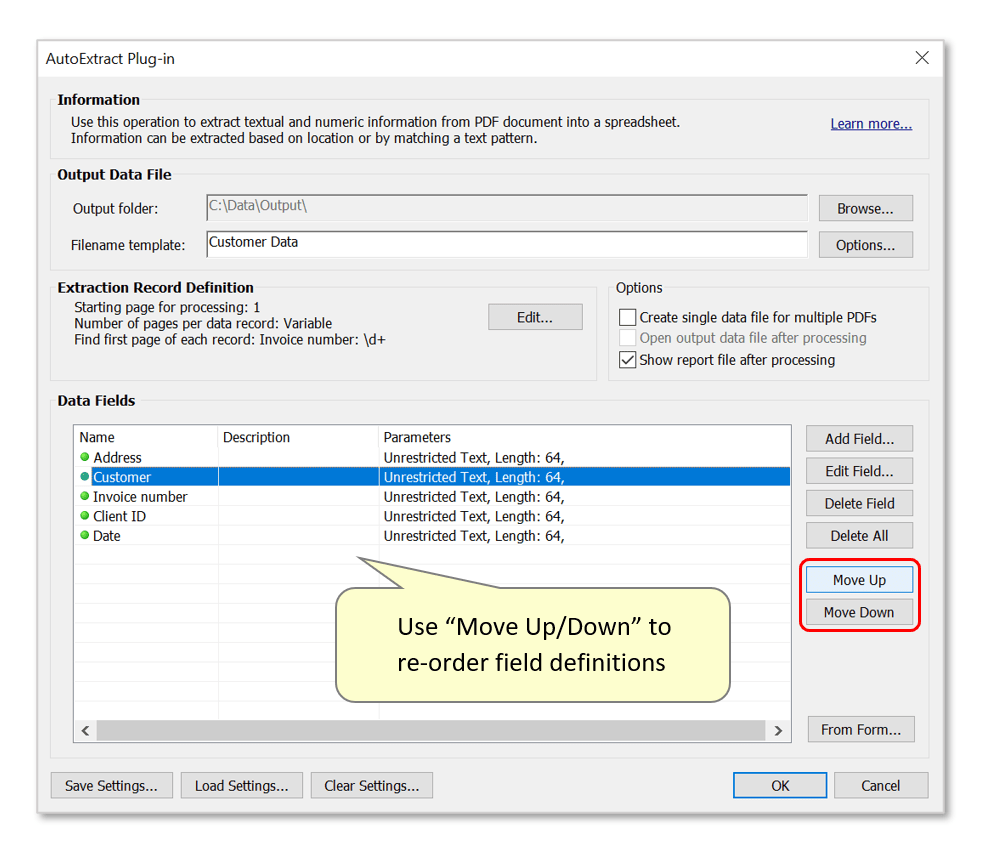
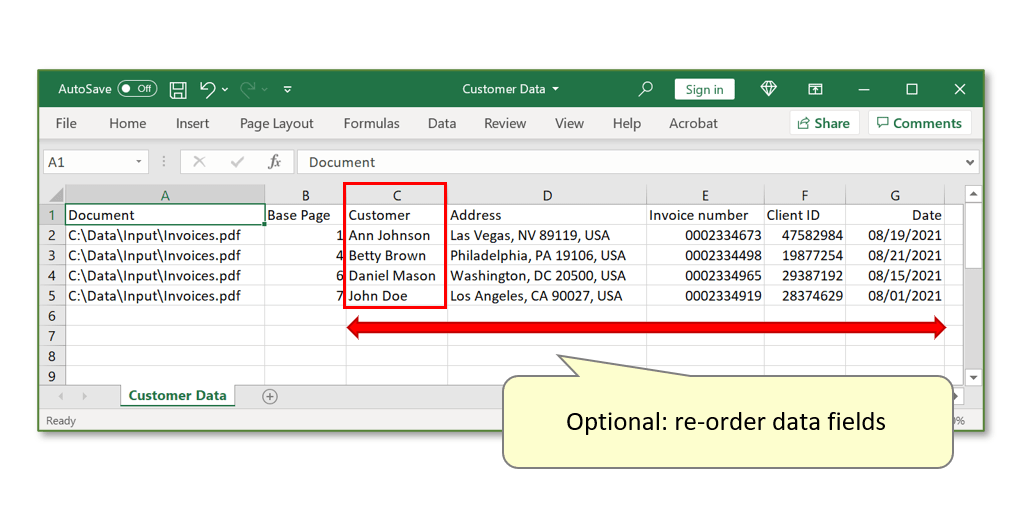
- Step 14 - Optional: Re-order Output Data Fields
- Before processing files, it's possible to adjust the order of extracted data fields. Do this by selecting a data field in the list, and pressing the "Move Up/Down" buttons. The following images display the result of moving the "Customer" field UP, so that it is placed before the "Address" field in the output spreadsheet:
- Click here for a list of all step-by-step tutorials available.