Setting Empty Fields to Show a Default Value
AutoMailMerge plug-in for Adobe® Acrobat®
- What is a Mail Merge?
- A mail merge is a computer term describing the production of multiple (and potentially large numbers of) documents, from a single template form and a structured data source. This technique is used to create personalized letters, documents, bills and pre-addressed envelopes or mailing labels for mass mailings (or document creation).
- The steps below outline a basic mail merge procedure, used to generate output documents that have default values in place of empty text strings. For help with more advanced operations, see this list of mail merge tutorials.
- Introduction
- In this tutorial, we'll use the AutoMailMerge™ plug-in to demonstrate how to display default values in empty form fields. We will carry out a mail merge using a sample PDF form, and data from an Excel spreadsheet. If some data fields are empty, the corresponding form fields in the output forms would remain blank. The only way to set a default value for an empty field is by using custom Acrobat JavaScript code. It is not possible to use a text field’s “default value” property for this purpose, because it is overwritten by any text - including an empty string in the spreadsheet.
- To achieve this, a custom script is entered into the “Advanced Settings” screen when configuring mail merge settings with AutoMailMerge™. The script is executed on forms after they have been filled out. The example below inserts a default field value only if the field is left blank or contains just white space.
- The script used here can be used to place suitable words/phrases in one or more blank fields - we'll make Client ID numbers show as "UNREGISTERED", and 'paid' dates "UNPAID" where no data has been provided in the data source.

- Input Documents Description
- To carry out the mail merge, we will use:
- 1) An *.xlsx spreadsheet file containing sample data across five columns. Each column corresponds to a form field that will be filled with data in the output invoices. Some data is left blank - "ClientID" numbers and "Paid" dates for the 3rd and 4th invoices. This would produce invoices with no data here.
- 2) An invoice template PDF form containing various form fields. For simplicity, we will only fill in the topmost part of the invoice (customer/document details). See this separate tutorial for help with creating PDF forms.

- Without using JavaScript to insert default values into blank fields, the output would contain no data where values are missing from the data source:

- Prerequisites
- You need a copy of Adobe® Acrobat® along with the AutoMailMerge™ plug-in installed on your computer in order to use this tutorial. Both are available as trial versions.
- Step 1 - Open the "Mail Merge" Dialog
- Open PDF form template that you want to use for the mail merge processing.
- Select Plugins > Mail Merge… to open the Mail Merge dialog.
- If you are using a new Adobe Acrobat interface, then you can locate Mail Merge menu here:
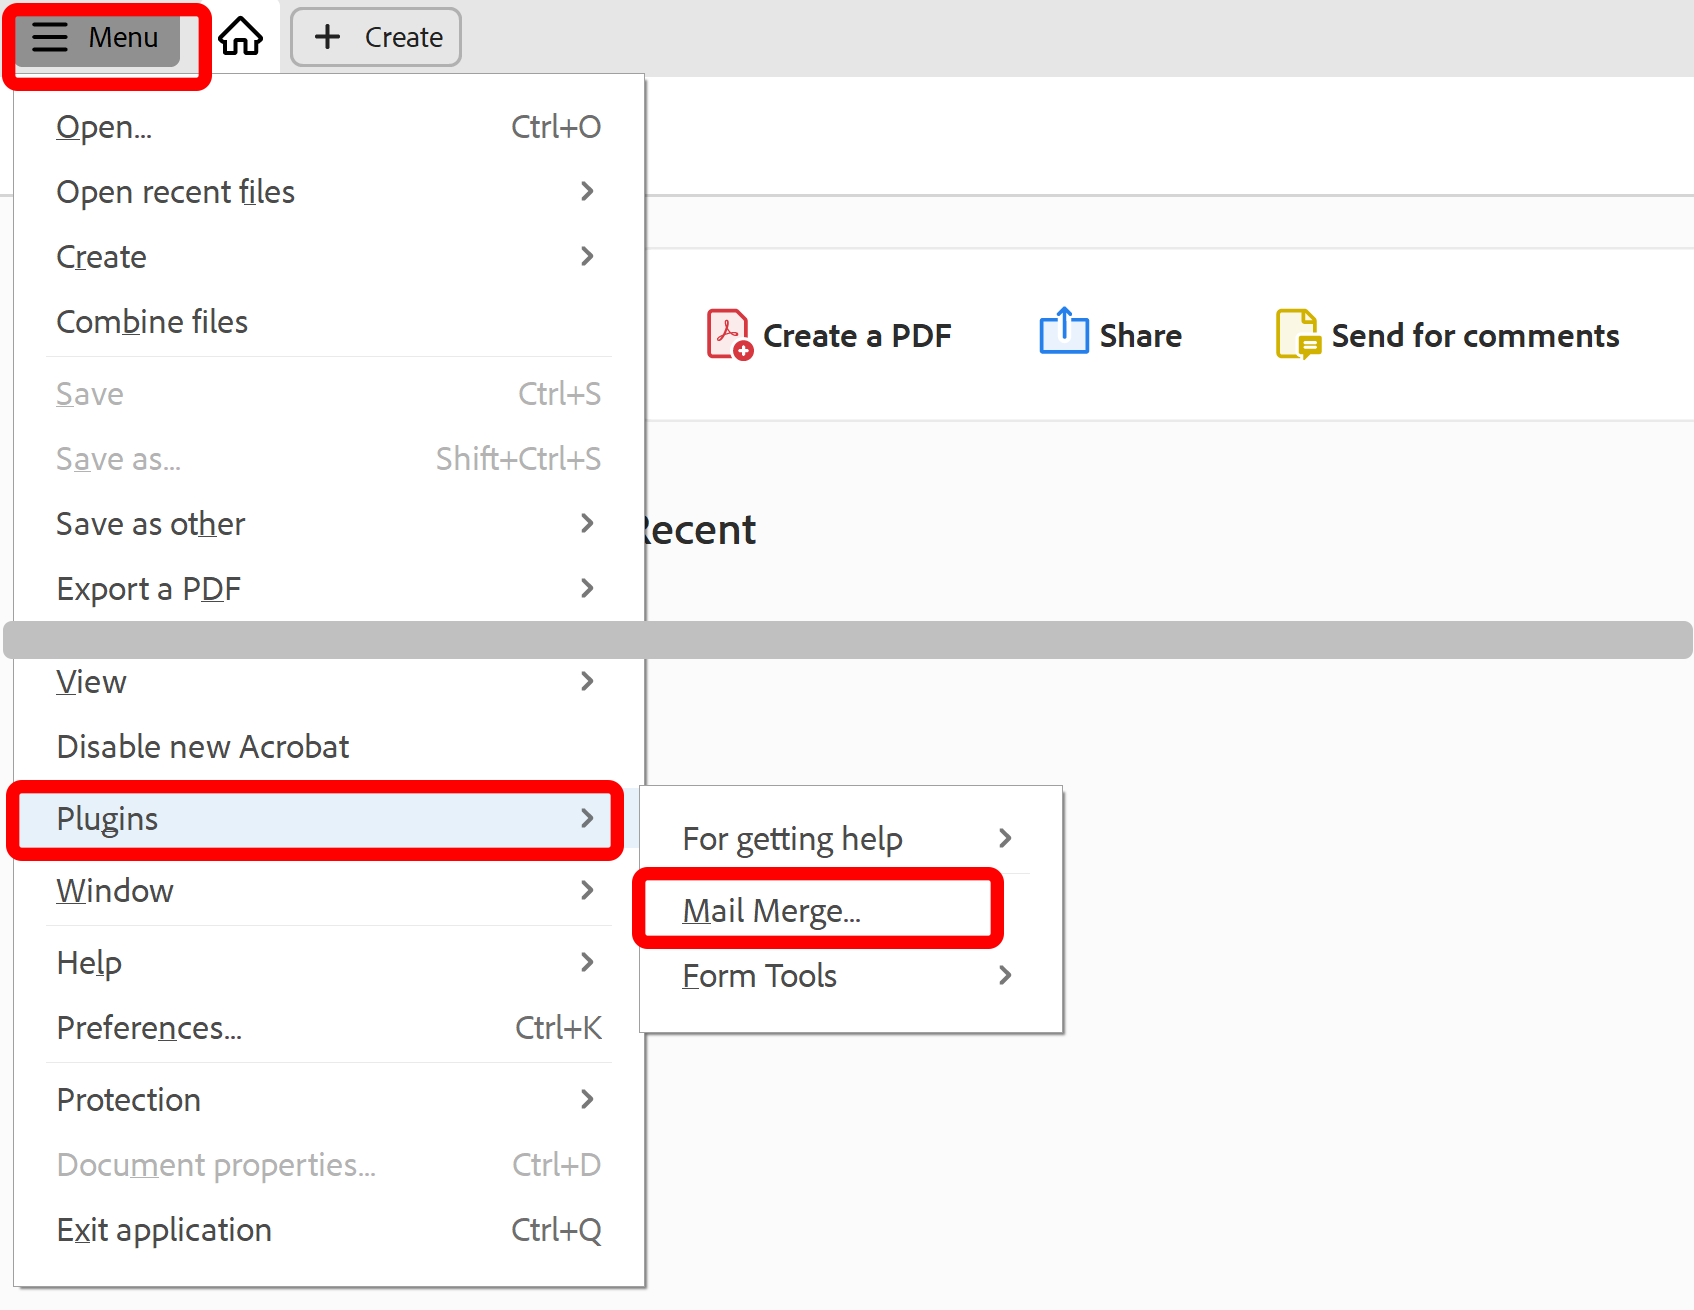
- Please see the following page for a short video tutorial on how to locate Plugins menu in the new Adobe® Acrobat® interface.
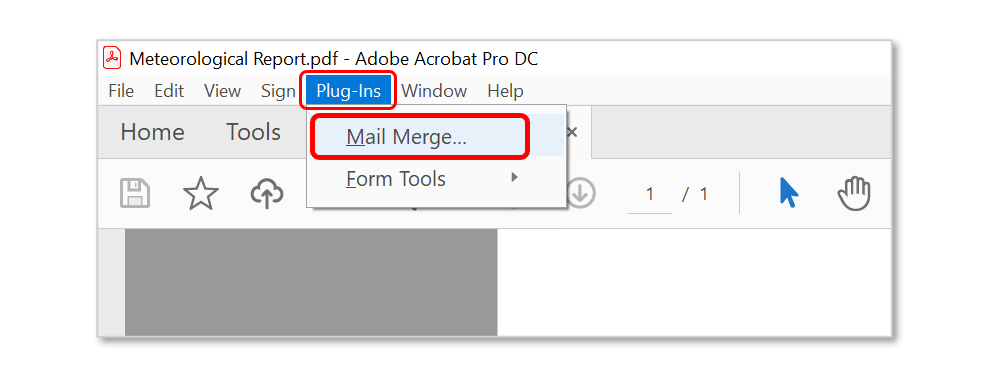
- If you are using a "classic" Adobe Acrobat interface (pre-2022), then you can locate Mail Merge menu here:
- Step 2 - Edit Mail Merge Settings
- Now we'll look at how to configure a basic mail merge procedure to produce separate output invoices. For more detailed help with additional AutoMailMerge™ features, see this list of AutoMailMerge™ tutorials.
- If necessary, clear current settings and then press the "Edit Settings…" button.

- Press the "Browse…" button in the "Data Source" dialog to select the input data file.

- Select a data type to use from the list (e.g.: Microsoft Excel Worksheet), then press "OK". Use the dialog that opens to locate and select the source file, then select the worksheet in the final dialog.

- Step 3 - Add Field Mappings
- Any fields in the PDF form will now be listed here. Use the buttons provided to assign correspondence between spreadsheet data fields and PDF form fields.
- We'll use the "Guess Mapping" button to automatically assign data fields to form fields as their names match.

- Optional: use the "Save Mappings..." button to save the current mapping configuration for future reuse. The "Load Mappings..." button can be used to load a saved configuration. If you're mapping particularly long or complex field names, consider using the visual field mapping tool tutorial to create a mapping profile that can be loaded in the same way.
- Press "Next >" to proceed.

- Step 4 - Specify Field Options
- Use this dialog to configure form field options in output documents. Use the "Flatten output PDF documents..." option to convert form fields into regular text in the output merged document(s) so that they are no longer "editable". If this option is unchecked, filled forms can still be manually edited after being created. Use the checkboxes in the lower section to set specific fields to "read-only" status.
- Press "Next >" to proceed.

- Step 5 - Specify Output Options
- In the "Output Files" dialog, press "Browse..." to select an output folder for filled forms to be saved in. The file path will be displayed here - in this example, we'll use the "C:\Data\Output" folder.
- Ensure that the "Save each copy of the filled form as a separate PDF document" option is selected if you want individual filled forms saved in the output folder.
- Optional: use the 'Compound Document' feature to produce one file containing all filled forms.
- Use the "File Naming" section to create a naming scheme for the output files. In this example, files will be named using "Invoice_" followed by their corresponding invoice number from the "InvoiceNumber" data field (e.g.: "Invoice_1234567.pdf").
- Press "Next >" repeatedly to to reach the final "Advanced" settings screen.

- Step 6 - Add JavaScript Code
- On this screen, check the "Execute this JavaScript code AFTER filling out each copy of the form" option. Then enter the necessary script into the box below.
- See the entire code used in this example detailed below. It is the same script repeated twice, to work with two separate form fields. To use it in your own project, simply change the form field name ('Paid') on the 1st line, and the default form field value "PENDING" on the 8th line. Repeat the script to work on as many form fields as necessary.
-
var pdfFormField = this.getField('Paid');
if (pdfFormField != null)
{
var text = pdfFormField.value;
text.trim();
if (text == "")
{
pdfFormField.value = "PENDING";
}
}
var pdfFormField = this.getField('ClientID');
if (pdfFormField != null)
{
var text = pdfFormField.value;
text.trim();
if (text == "")
{
pdfFormField.value = "UNREGISTERED";
}
}
- Ensure that the "Provide access to data source fields in JavaScript code" option is checked.
- Press "Finish" once done.

- Step 7 - Complete the Mail Merge
- Review the settings summary listed with green circles. Press "Edit Settings..." again to make any changes.
- Optionally save the configuration as an *.mms file for later reuse by pressing the "Save Settings" button - use "Load Settings" to load them. Settings can also be saved to the open PDF form by pressing "Save Into Form". They would then be auto-loaded the next time this form is used for a mail merge.
- Press "OK" to continue.

- Press "Run Mail Merge" to confirm.

- Step 8 - Open the Output Files
- A results box confirms the success of the operation. By default, pressing "OK" will open the selected output location.

- Open any output file(s) to inspect the filled forms.

- The default values included in the JavaScript code have been entered in the "ClientID" and "Paid" fields, where the data fields were blank in the input spreadsheet:

- Click here for a list of all step-by-step tutorials available.