Batch Processing: Merging PDF Documents using Guided Actions
AutoSplit plug-in for Adobe® Acrobat®
- Introduction
- The Adobe® Acrobat® Pro offers a powerful way for automating repetitive tasks. This functionality is called Guided Actions. It is also known as Action Wizard in previous versions of Adobe® Acrobat®. It allows to apply a series of PDF processing commands with user-specific settings to one or more PDF files without user interaction. The "action" can be executed on multiple files at once or on an entire content of the folder(s). Once an action is created, it can be executed either manually from the Adobe® Acrobat® toolbar or from a command-line batch file using AutoBatch™ plug-in.
- The tutorial shows how to create a batch processing action that merges multiple PDF documents via Action Wizard using AutoSplit Pro plug-in .
- Prerequisites
- You need a copy of Adobe® Acrobat® Professional along with AutoSplit Pro plug-in installed on your computer in order to use this tutorial. You can download trial versions of both Adobe® Acrobat® Pro and AutoSplit™ Pro.
Step-by-Step Tutorial
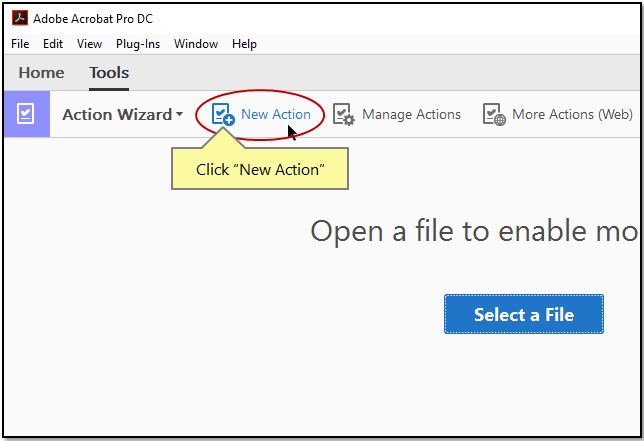
- Step 1 - Open Guided Actions Tool (Action Wizard)
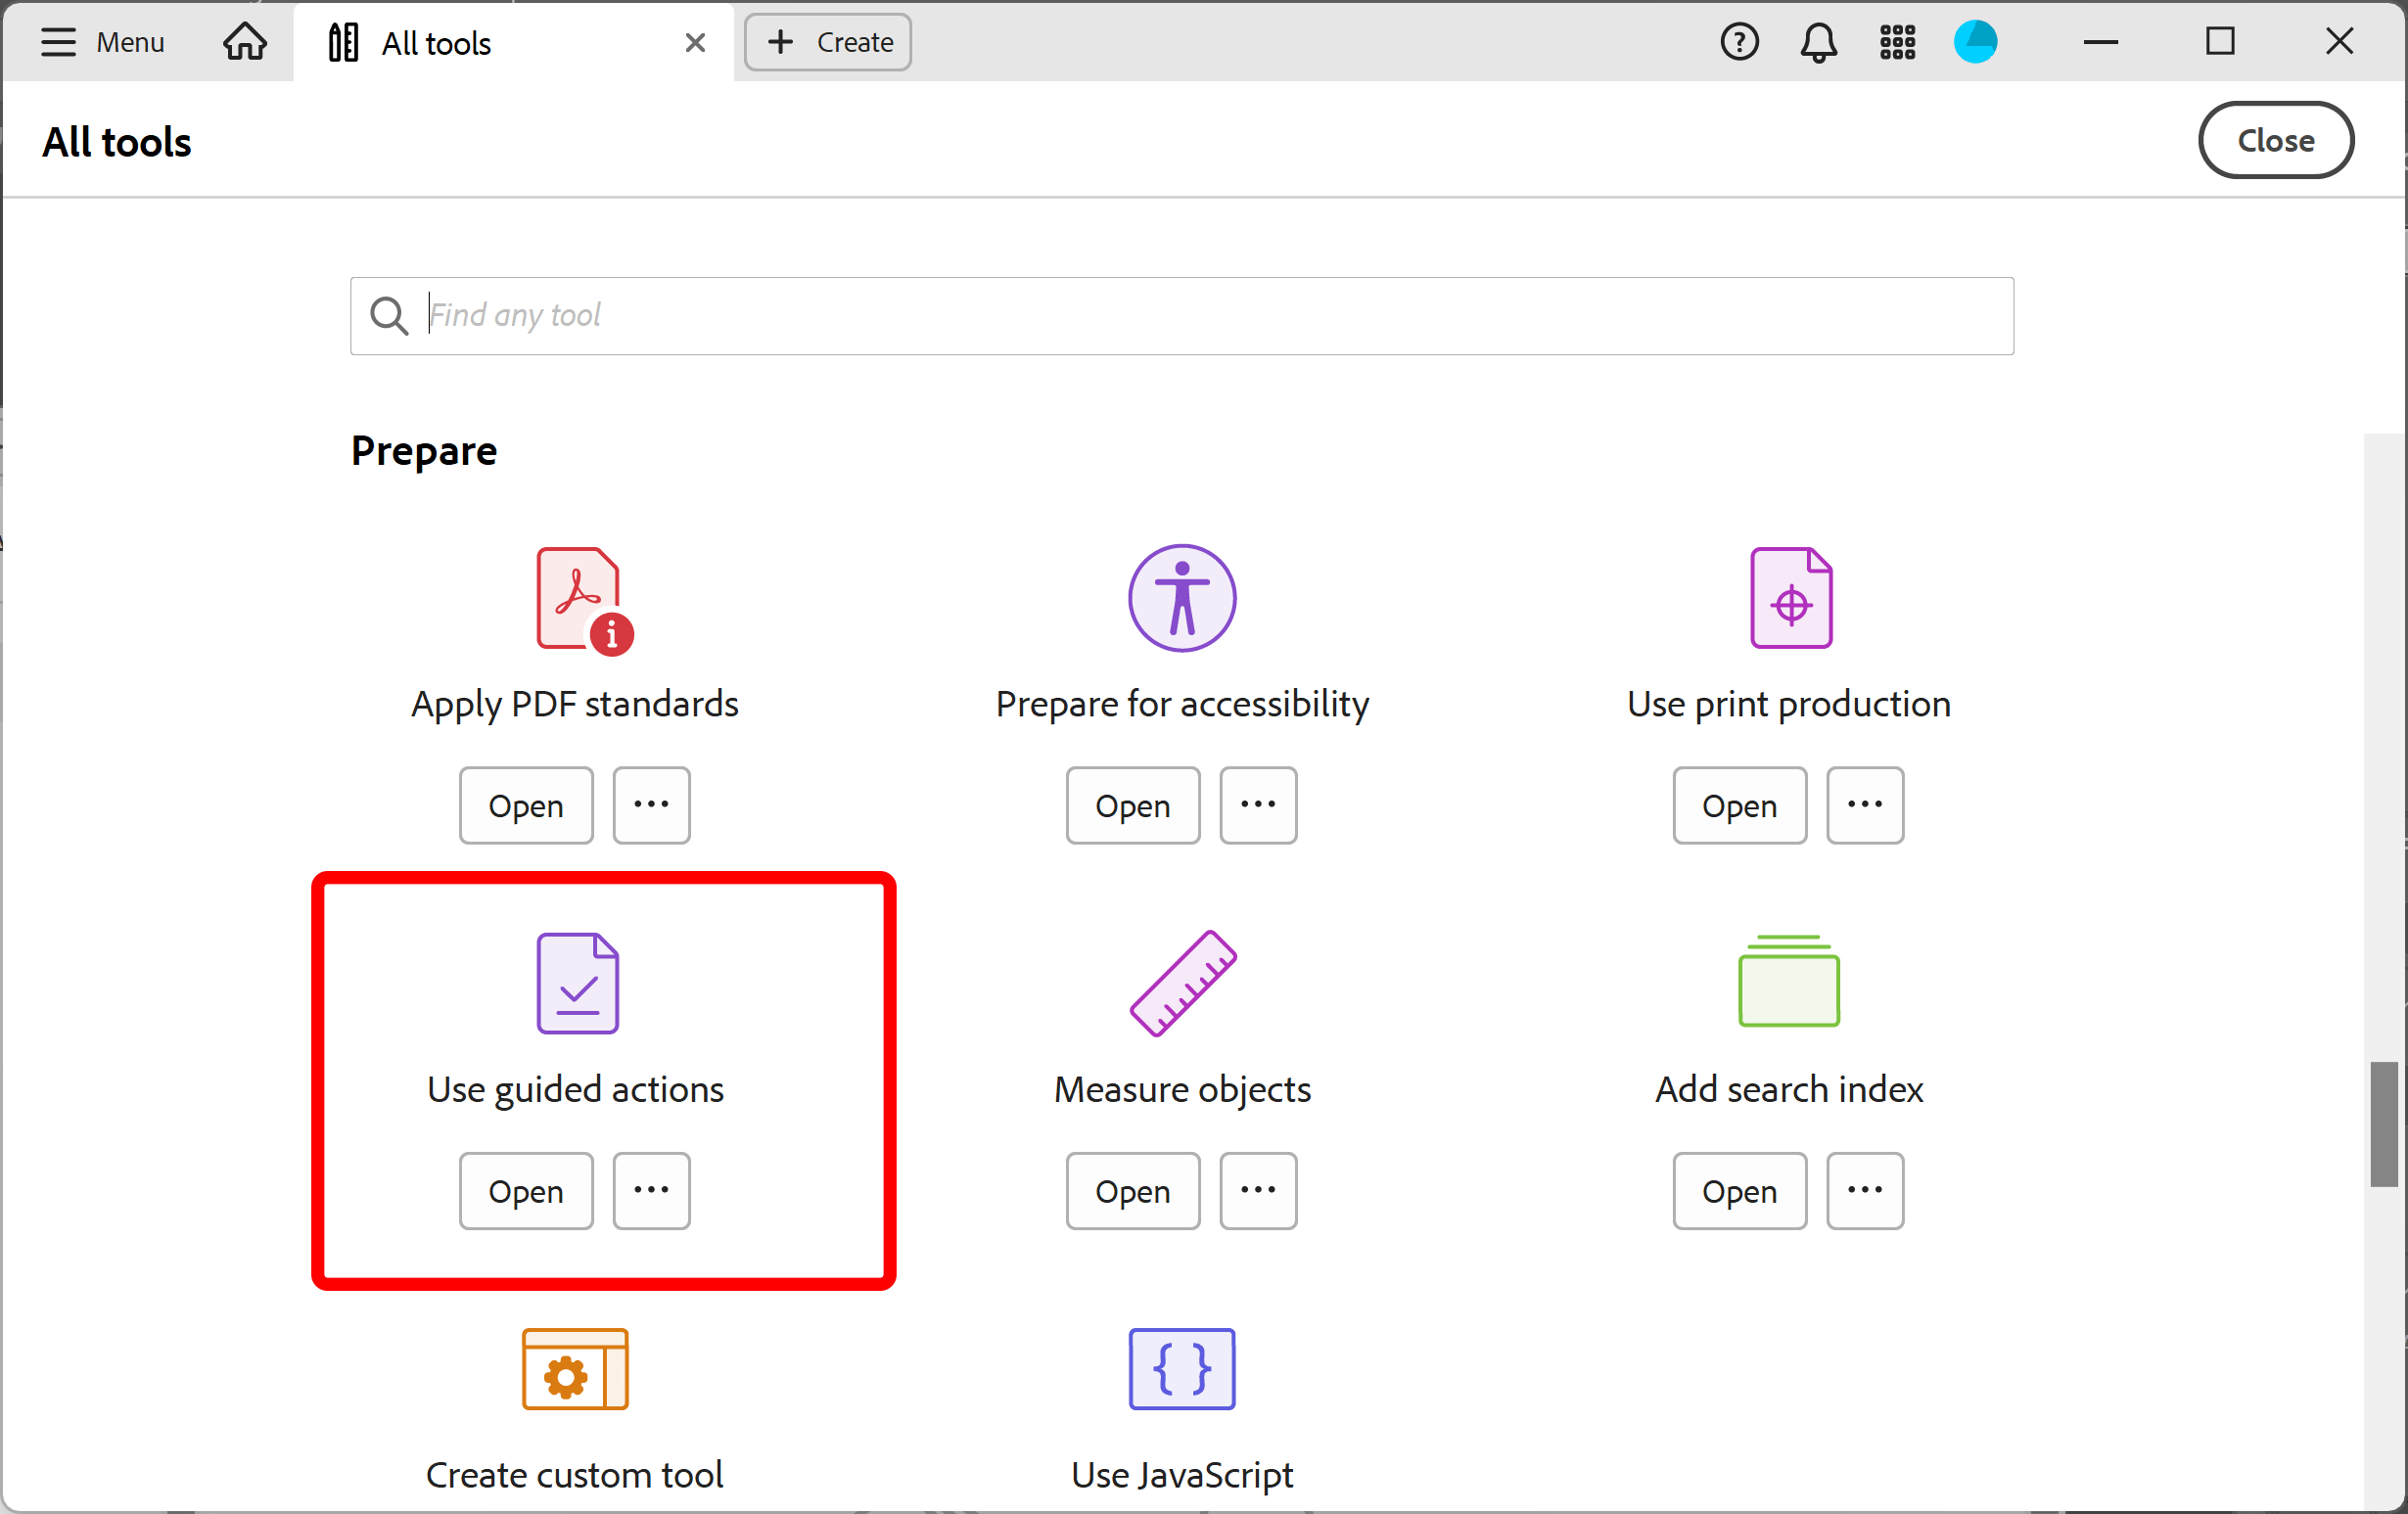
- If you are using "new" Adobe Acrobat, then show all tools and double-click on "Use Guided Actions" tool icon to open tool controls.
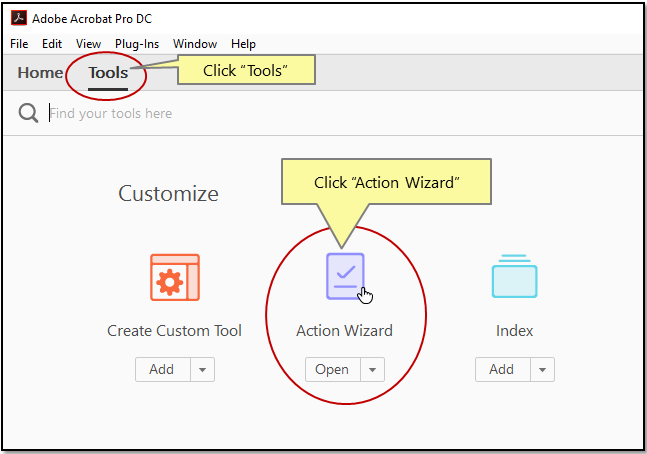
- If you are using "classic" Adobe Acrobat, then select "Tools" panel located on the main Acrobat Professional toolbar.
- Double-click on "Action Wizard" tool icon to open tool controls.
- Step 2 - Create New "Action"
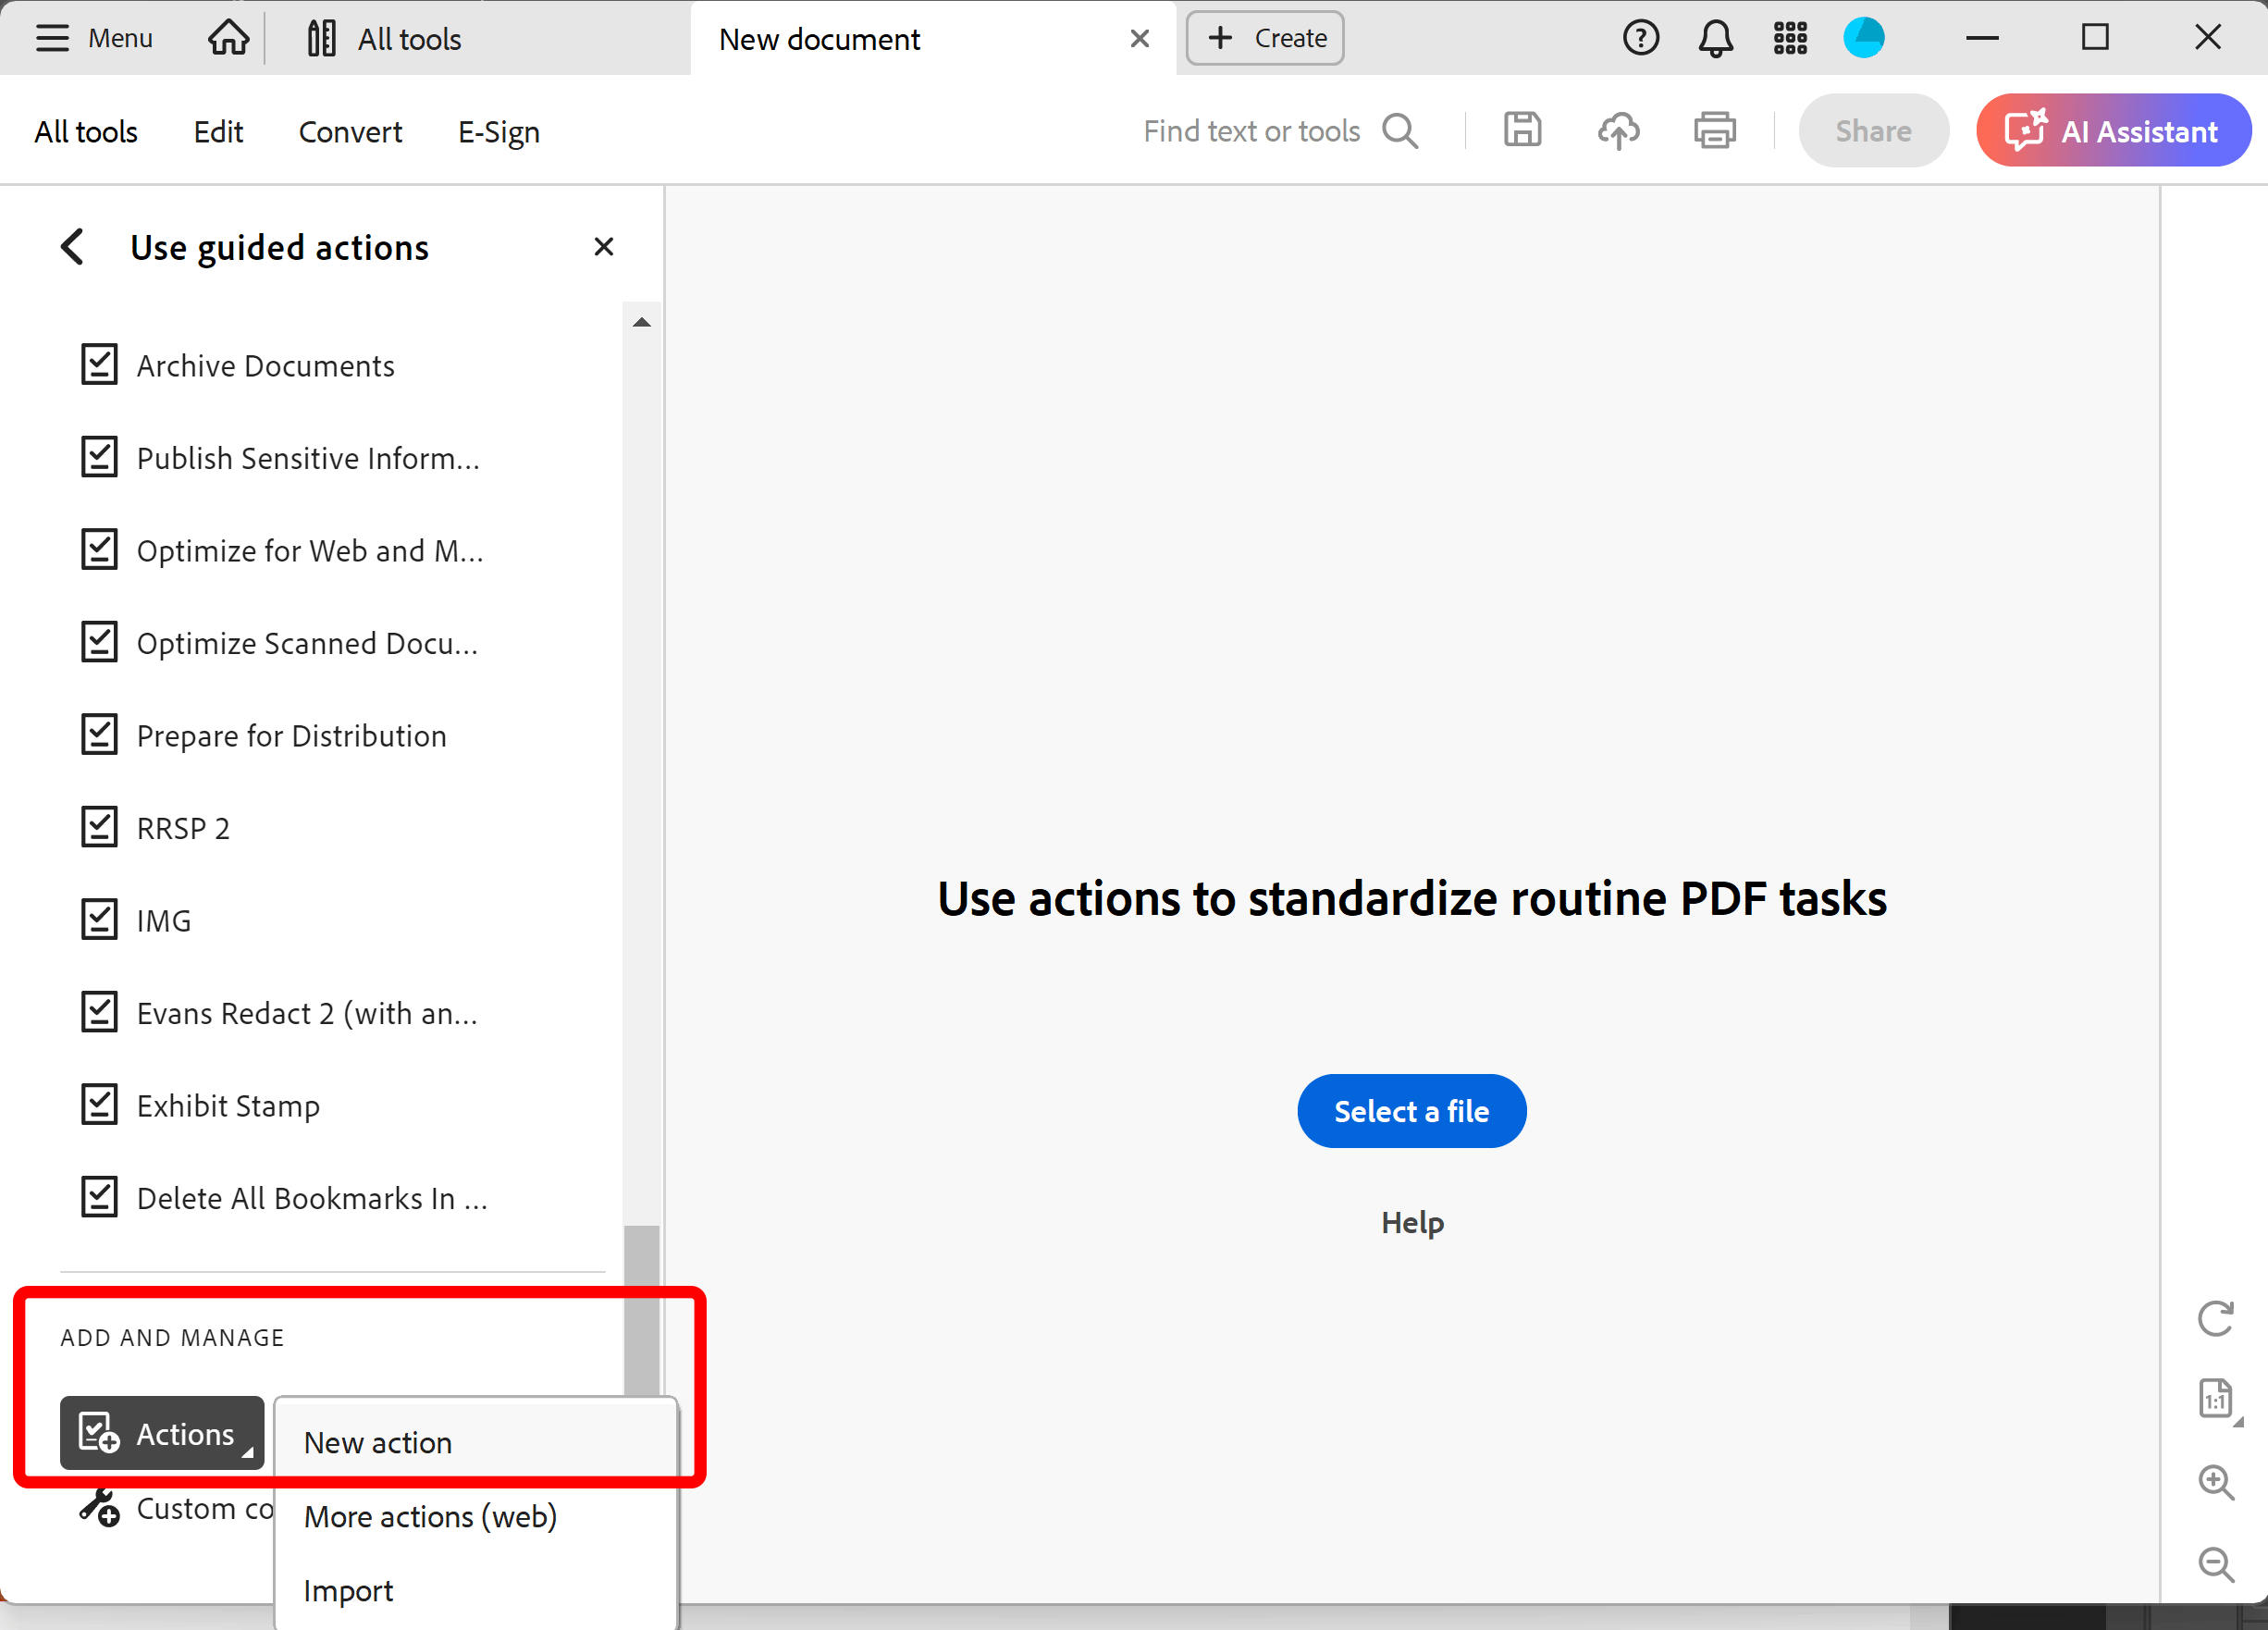
- If you are using "new" Adobe Acrobat, then click on the "New Action" icon to create a new "action".
- If you are using "classic" Adobe Acrobat, then click on "New Action" icon on the "Action Wizard" toolbar to create a new batch processing "action".
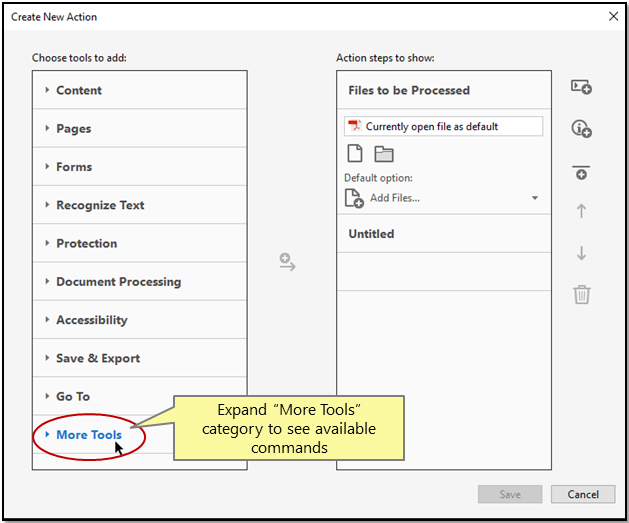
- Step 3 - Expand the “More Tools” Category
- Click on the “More Tools” category to see the list of available commands.
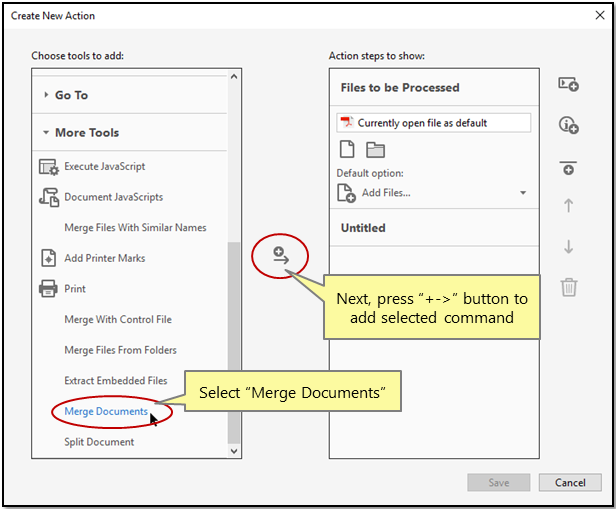
- Step 4 - Add the "Merge Documents" Command to the Action Steps
- Double-click on the "Merge Documents" command or press "+->" button to add it to the list of action steps.
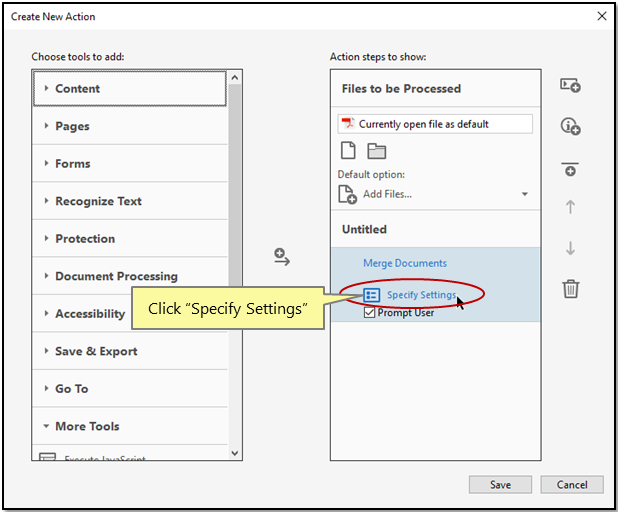
- Step 5 - Click "Specify Settings"
- Press "Specify Settings" button in the "Action steps to show" box.
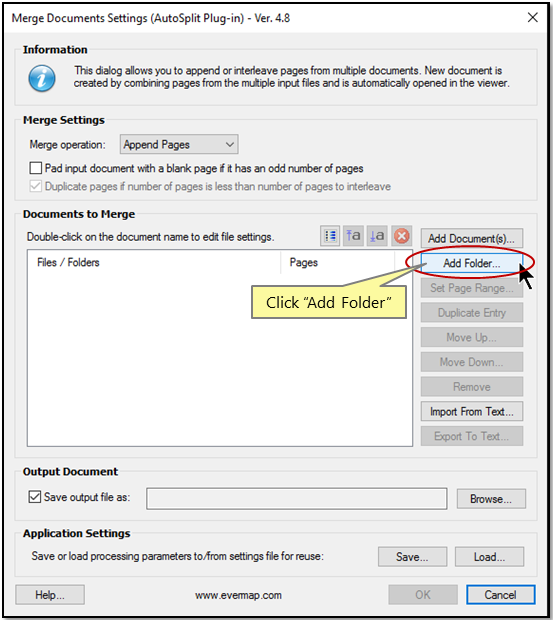
- Step 6 - Click "Add Folder"
- Click "Add Folder" to specify an input folder with documents for merging.
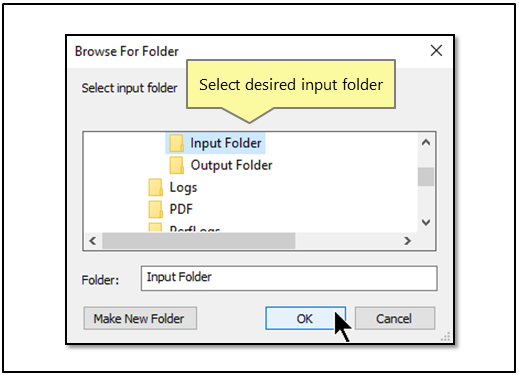
- Step 7 - Select an Input Folder
- Select an input folder - all files from this folder are going to be used as input.
- Important: Files can be added or changed in an input folder at any time prior to running the action. The input folder does not necessarily need to contain any files during the action creation.
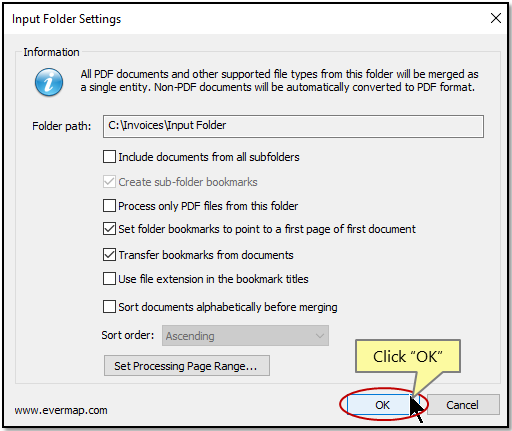
- Step 8 - Select Processing Options
- Optionally, select desired processing options.
- Click "OK" once done.
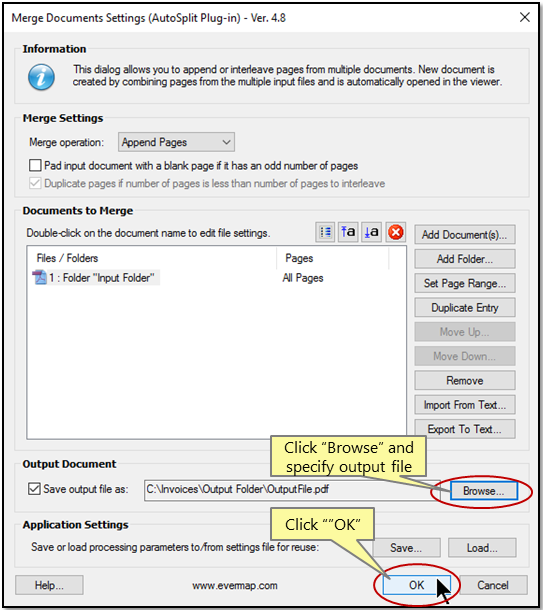
- Step 9 - Specify the Output Folder
- Click “Browse” and specify the output file that would contain merged documents.
- Click "OK" once done.
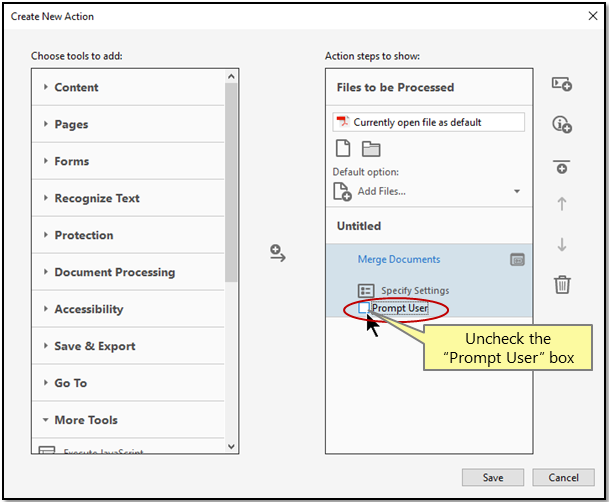
- Step 10 - Uncheck "Prompt User" Option
- Uncheck "Prompt User" option (otherwise this command would always prompt for settings when executed) and press "Save" button.
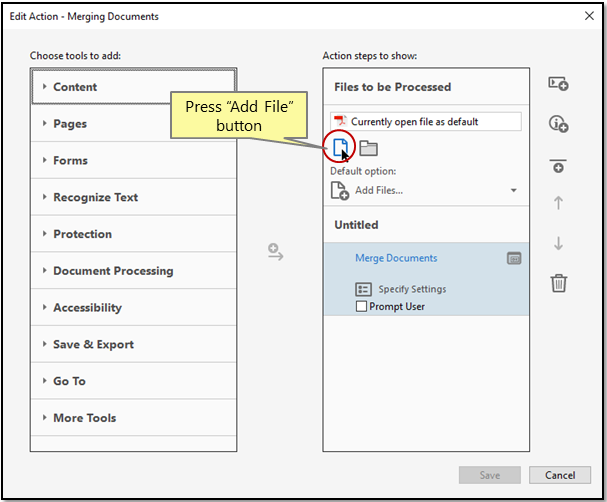
- Step 11 - Press "Add File" Button
- Press "Add File" button.
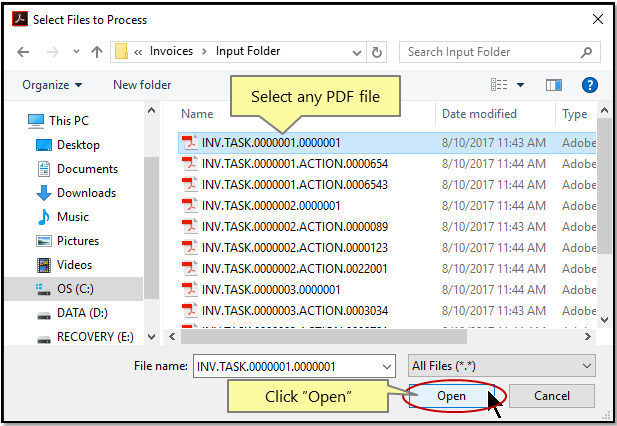
- Step 12 - Select Any PDF File
- Select any PDF file and press "Open" button. Select a single PDF file. The file is not going to be used for any processing. It does not matter what file is selected. It is just a stub file to execute a document merging command that requires an input file as any other Action Wizard command. The "Merge Documents" command has it own selection of input and output files.
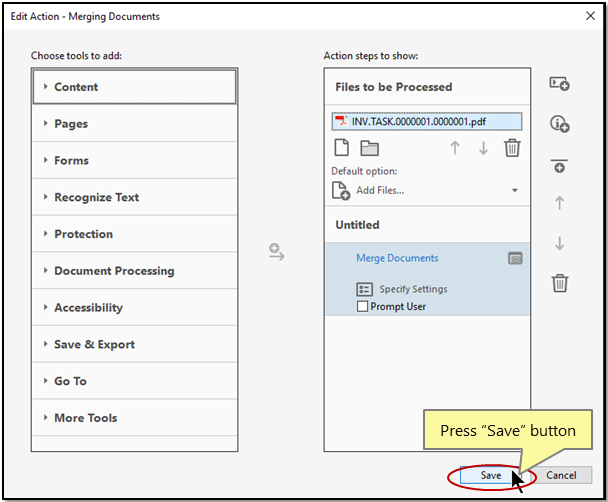
- Step 13 - Press "Save" Button
- Press "Save" button to proceed.
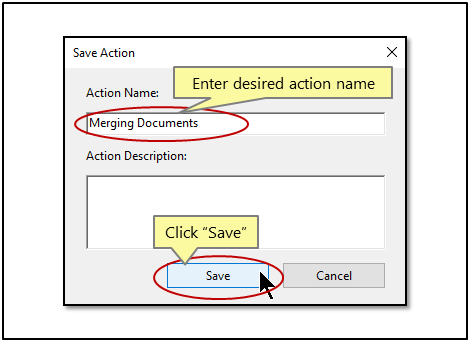
- Step 14 - Enter Action Name and Description
- Type desired "Action Name" and, optionally, type description into "Save Action" dialog.
- Press "Save" button to save the action.
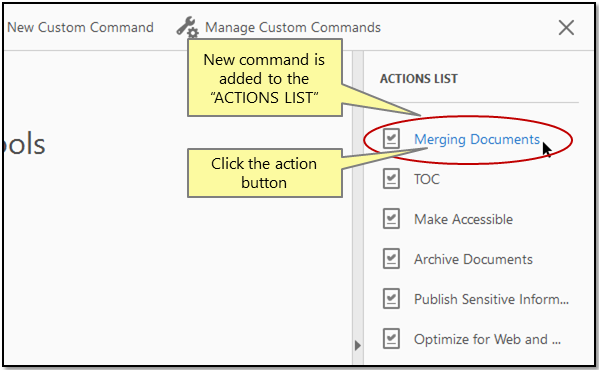
- Step 15 - Select Action For Execution
- Now you should see this new action added to the "Action Wizard" toolbar.
- Click on the action in the "Actions" list to execute it.
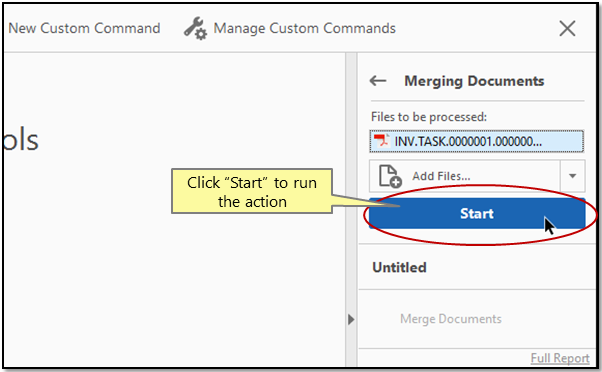
- Step 16 - Start the Action
- Press "Start" button to execute the action. All files specified in "Merge Documents" command are going to be merged into a single output file.
- Click here for a list of all step-by-step tutorials available.