Post-processing Output Split Files using Acrobat JavaScript
AutoSplit plug-in for Adobe® Acrobat®
- Introduction
- After a split operation has been carried out by the AutoSplit™ plug-in, it’s possible to execute additional processing on the output files using Acrobat JavaScript code.
- The plug-in provides the ability to execute user-defined Acrobat JavaScript scripts on each output document. This allows you to add a wide range of custom processes to the document splitting process – for example, split files may: have additional text added to them; be sent to a default printer; or have cover pages added from another document.
- JavaScript is the cross-platform scripting language of the Adobe Acrobat family of products that includes Acrobat Professional, Acrobat Standard, and Adobe Reader. Through JavaScript extensions, the viewer application and its plug-ins expose much of their functionality to document authors, form designers, and plug-in developers. This functionality includes the following features, among others:
- Modify document properties
- Insert, delete or extract pages from another PDF file
- Add watermarks, or header/footer
- Add comments and notes
- Add or modify form fields within the document
- Create reports
- Add links and bookmarks
- Visit the Adobe website for additional information and resources related to Acrobat JavaScript programming.
- Input Document Description
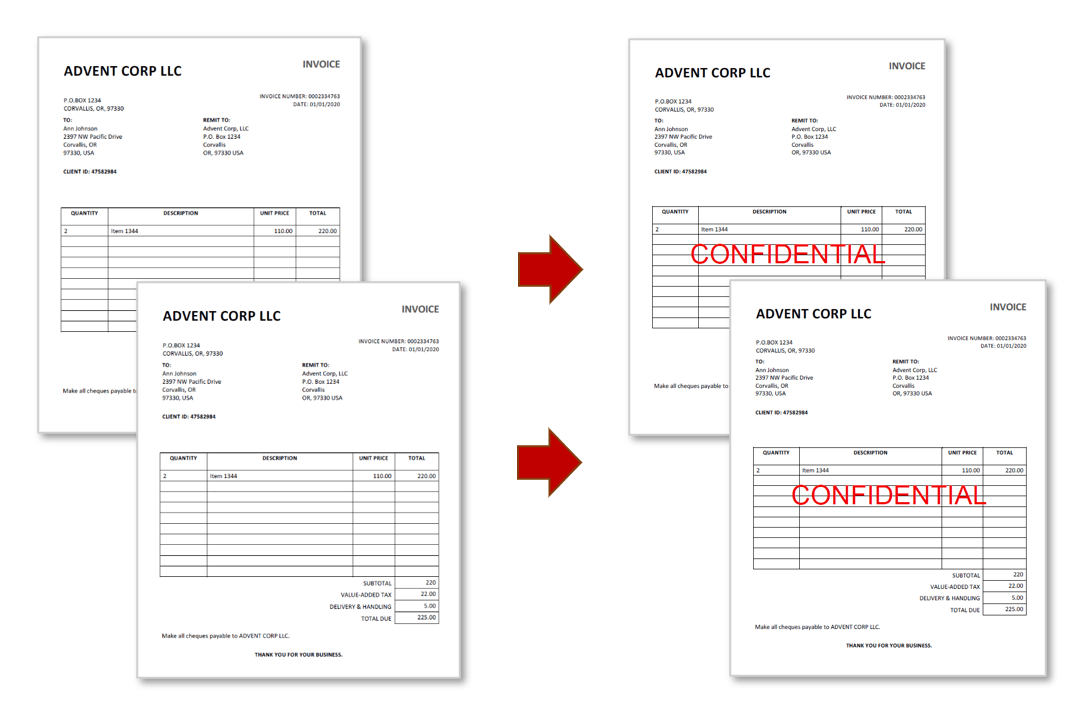
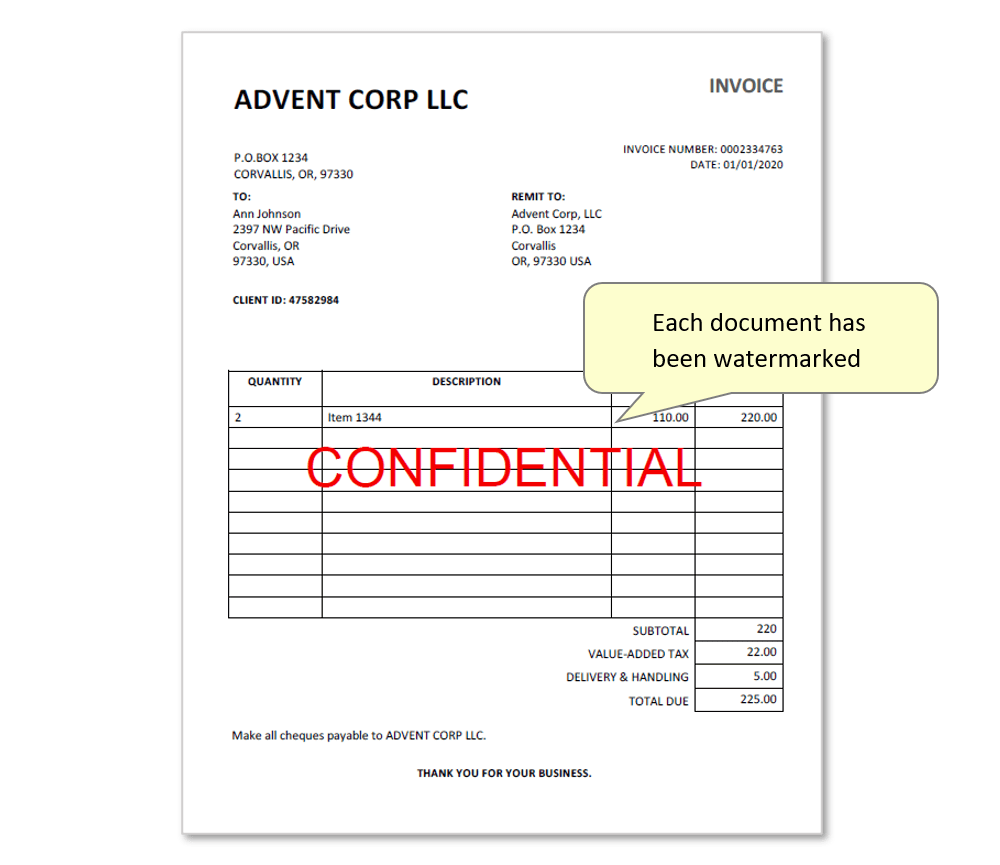
- To demonstrate how post-processing may be configured, we will carry out a basic splitting operation and instruct the plug-in to add various document modifications after the splitting procedure is complete. The first example shows how to add a text watermark to each output document. The input document is a PDF file containing six combined single-page sample invoices, which will be split into six separate documents. These files will be watermarked with red "CONFIDENTIAL" text written across the center of the page.
- Prerequisites
- You need a copy of Adobe® Acrobat® along with the AutoSplit™ plug-in installed on your computer in order to use this tutorial. Both are available as trial versions.
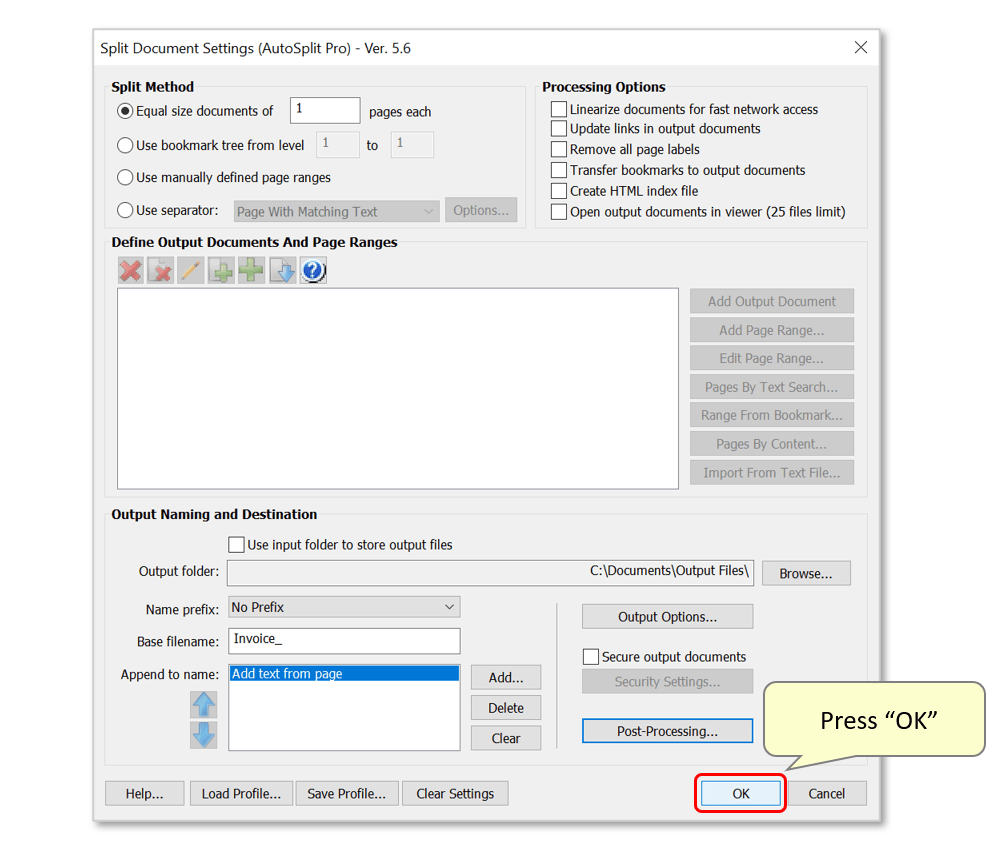
- Step 1 - Open the "Split Document Settings" Dialog
- With the file that is to be split open in Adobe Acrobat,
select "Plug-Ins > Split Documents > Split Document..." from the
main menu to open the "Split Document Settings" dialog.
[⚡ How to locate Plugins menu in Adobe® Acrobat® ⚡] - Step 2 - Configure the Splitting Method
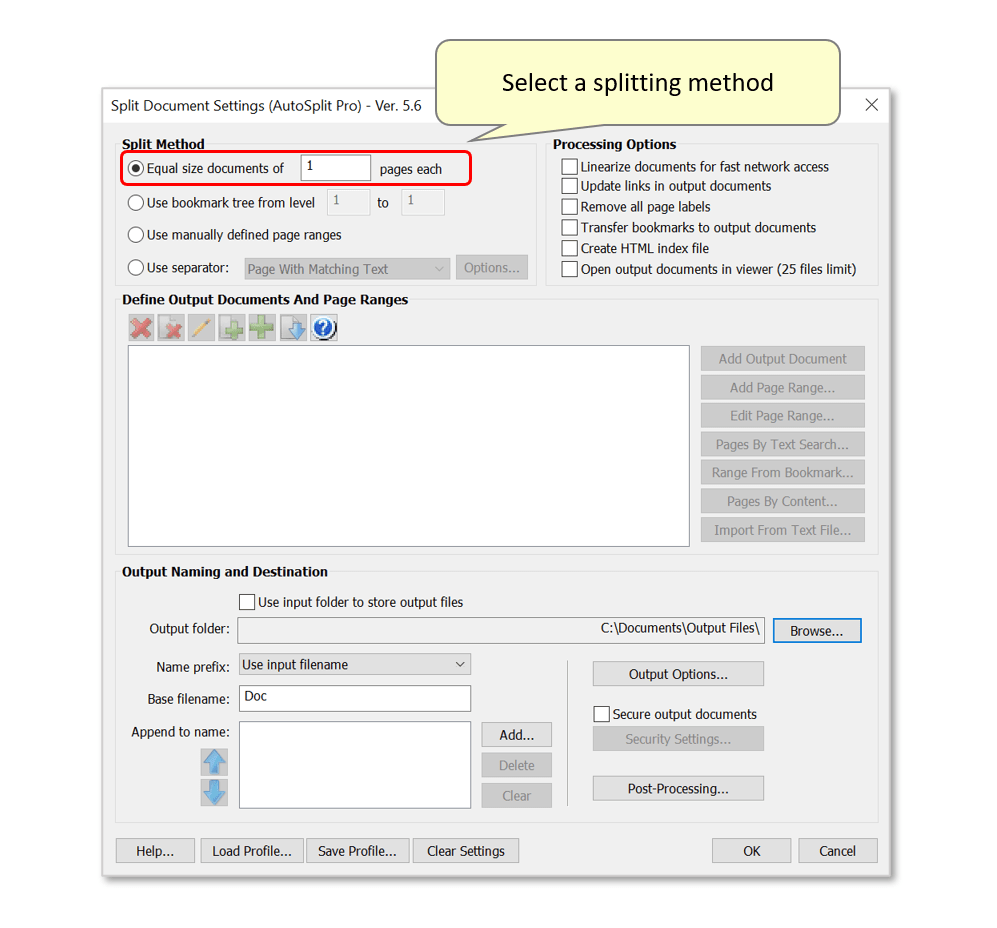
- Select a splitting method from the "Split Method" list. In this example, we use the "Equal size documents of X pages each" option. By default, this is set to "1" page-long documents. Click here for a list of splitting tutorials explaining different methods for separating large documents into individual files.
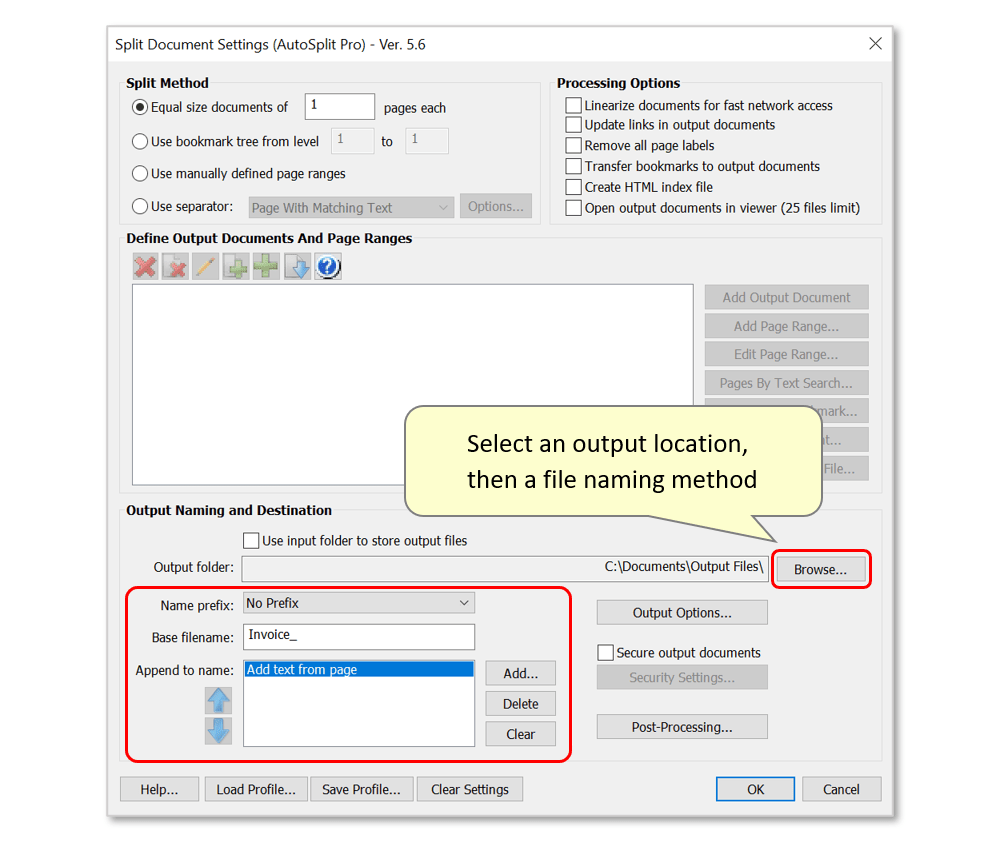
- Now specify an output location for the split files via the "Browse..." button. Also configure a file naming method using the naming section. AutoSplit™ offers various ways to name output documents - for example, by extracting text from a specific page location or by using a text search. In this example, output files will be named using "Invoice_" followed by the customer name that features within each document.
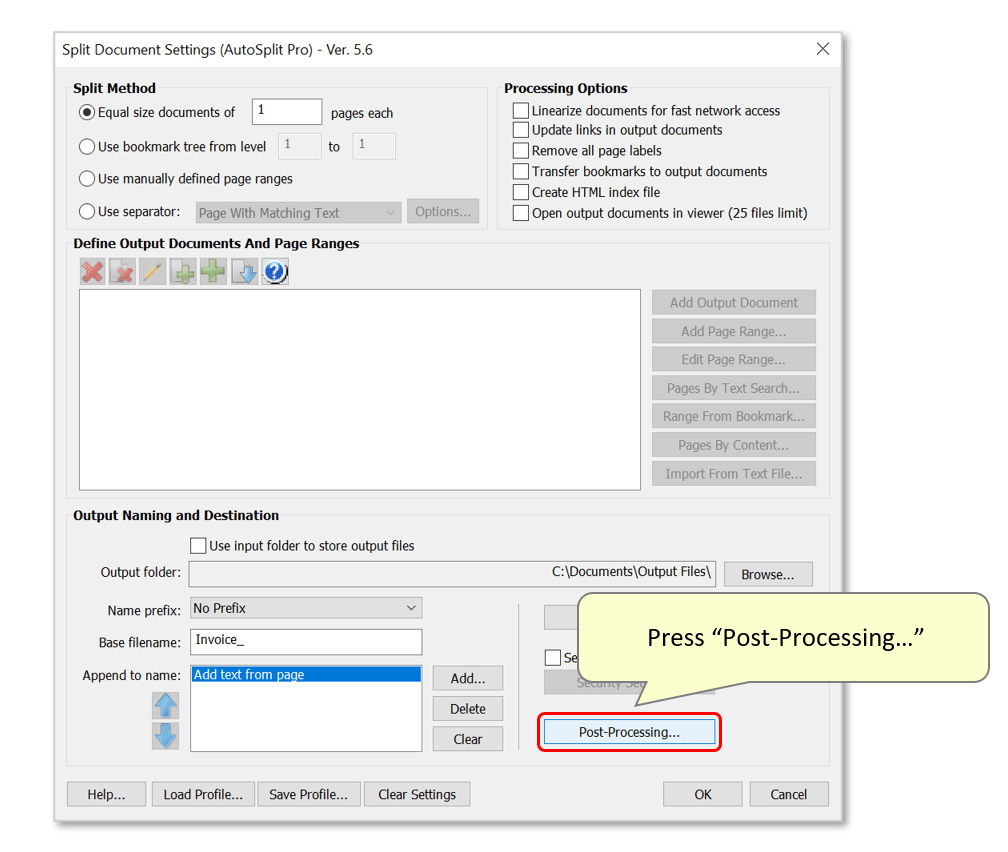
- Step 3 - Open Post-Processing Options
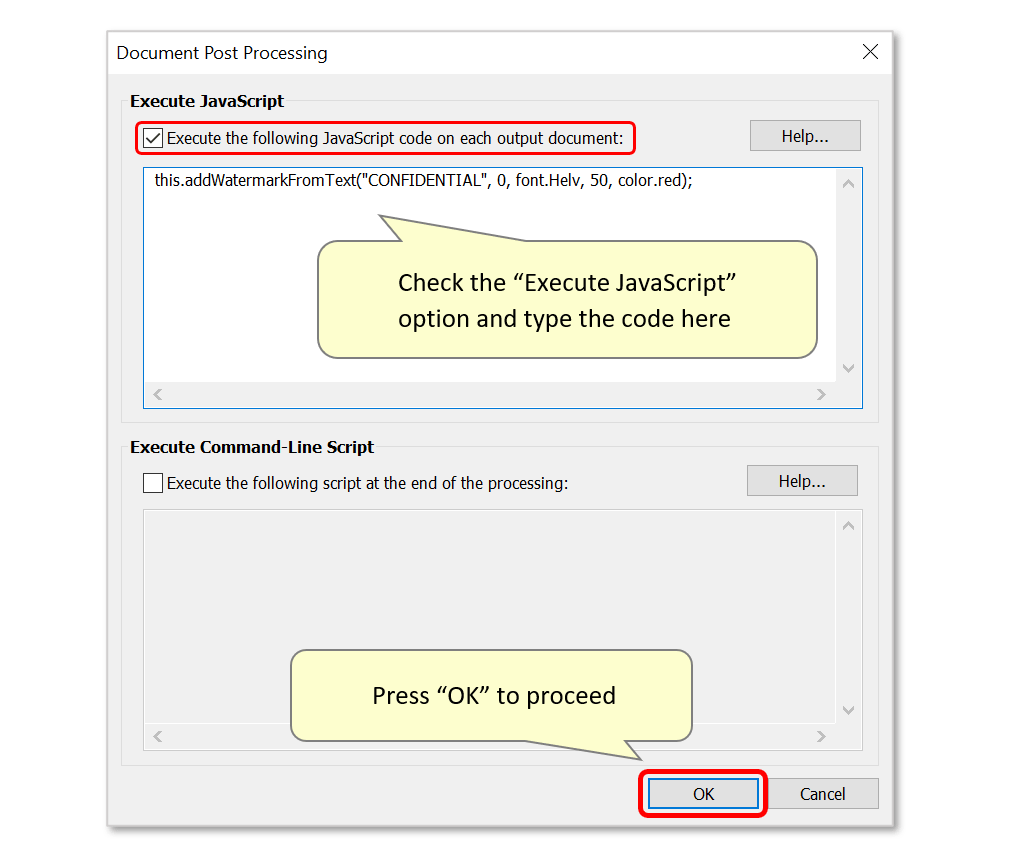
- Press the "Post-Processing..." button to open the "Document Post Processing" settings dialog.
- Step 4 - Type JavaScript Code
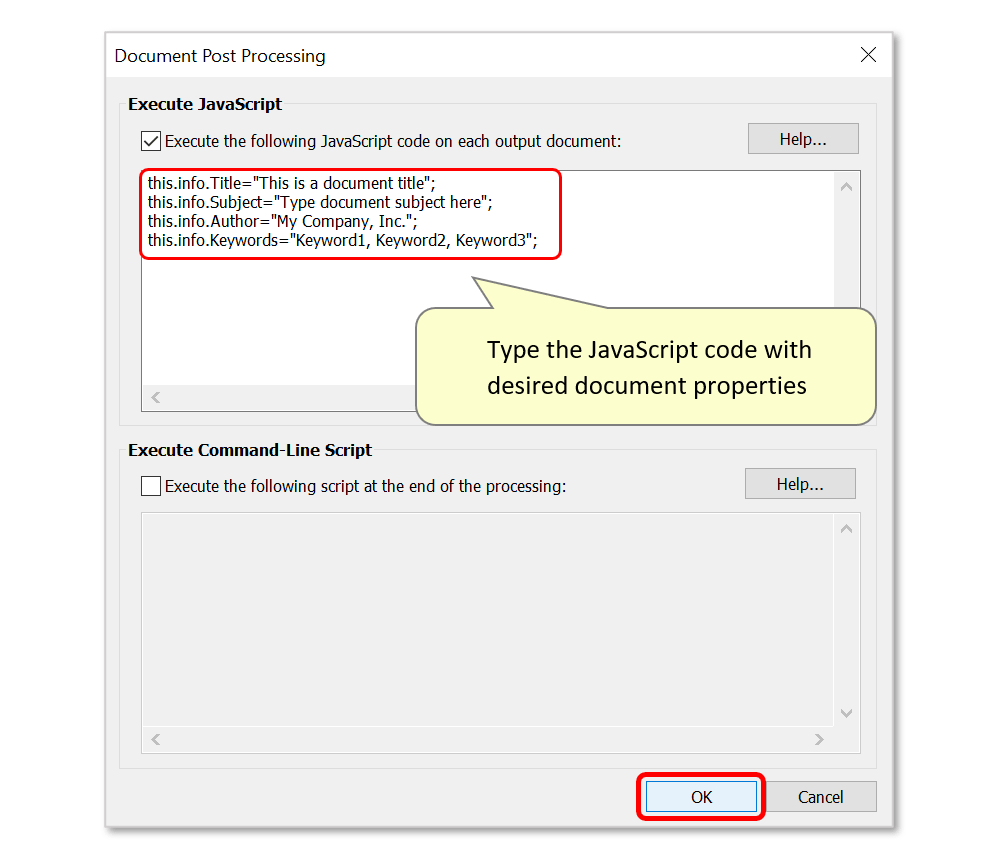
- Check the "Execute JavaScript" option, then type the desired code into the box below.
- Here are some examples of what can be done with JavaScript:
- 1. Add a watermark to the center of all pages of the current document (e.g.: "Confidential") using a specific font:
-
this.addWatermarkFromText("CONFIDENTIAL", 0, font.Helv, 50, color.red);
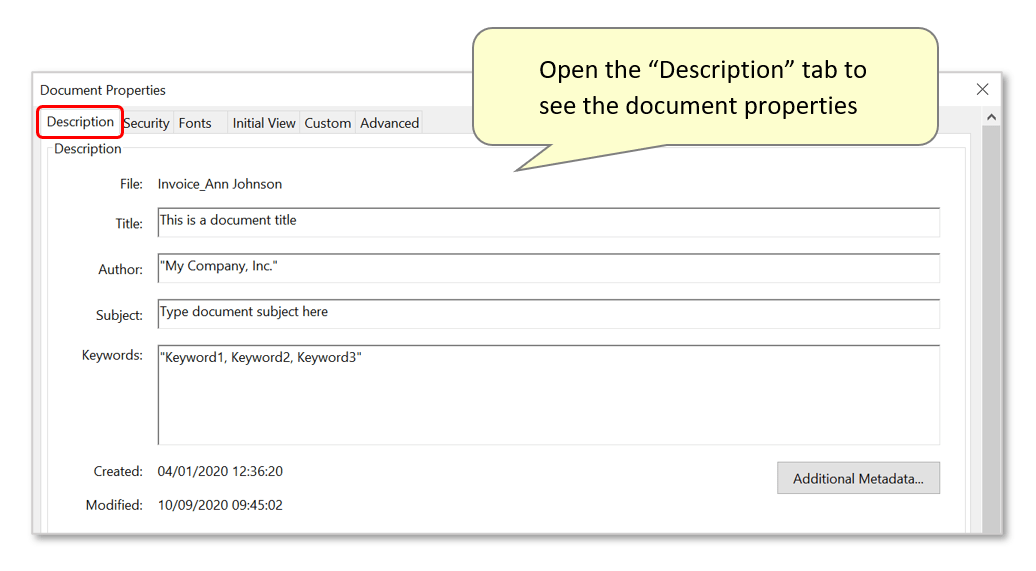
- 2. Specify document properties ("Title", "Subject", "Author", "Keywords"):
-
this.info.Title="This is a document title";
this.info.Subject="Type document subject here";
this.info.Author="My Company, Inc.";
this.info.Keywords="Keyword1, Keyword2, Keyword3";
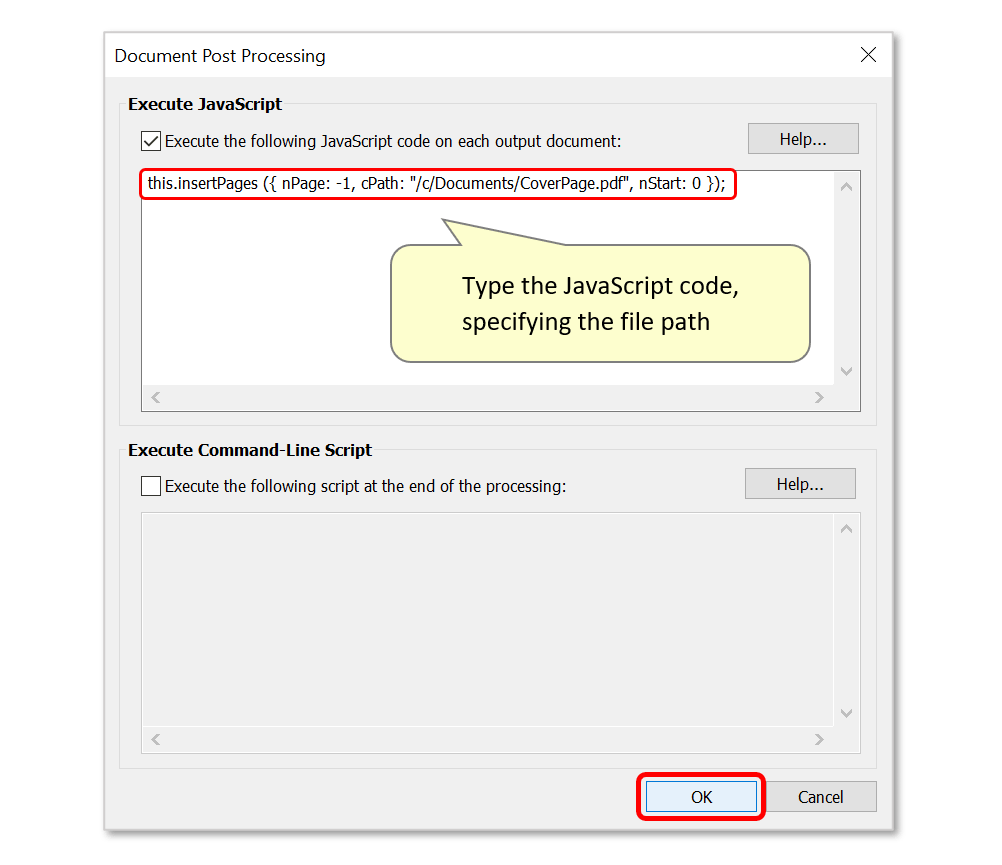
- 3. Insert a cover page from another document:
-
this.insertPages ({ nPage: -1, cPath: "/c/Documents/CoverPage.pdf", nStart: 0 });
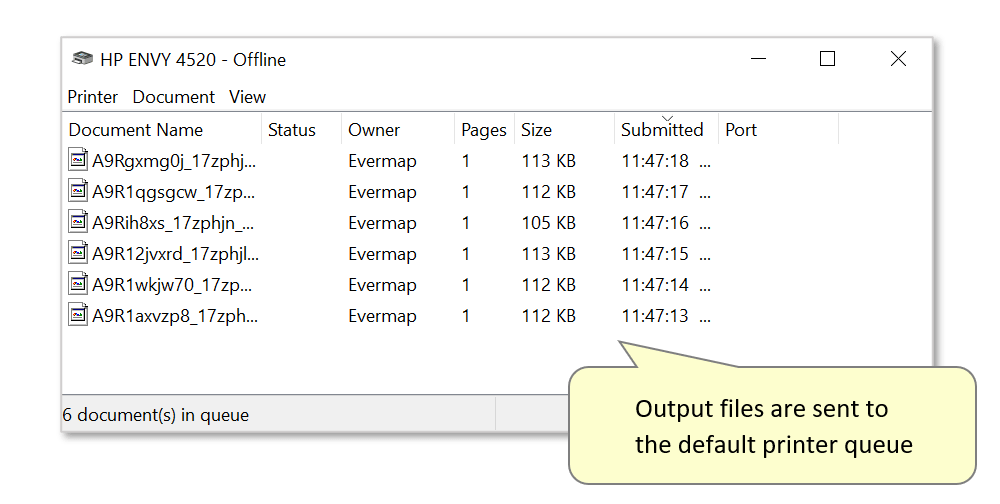
- 4. Send documents to a default printer:
-
this.print({bUI: false, bSilent: true, bShrinkToFit: true});
- See all of these script examples demonstrated below - first we will demonstrate option '1': using the following code, a watermark will be added to all output documents ("CONFIDENTIAL"):
- Step 5 - Split the Document
- Once the splitting operation has been fully configured, press "OK" to proceed.
- Press "OK" again to confirm the procedure.
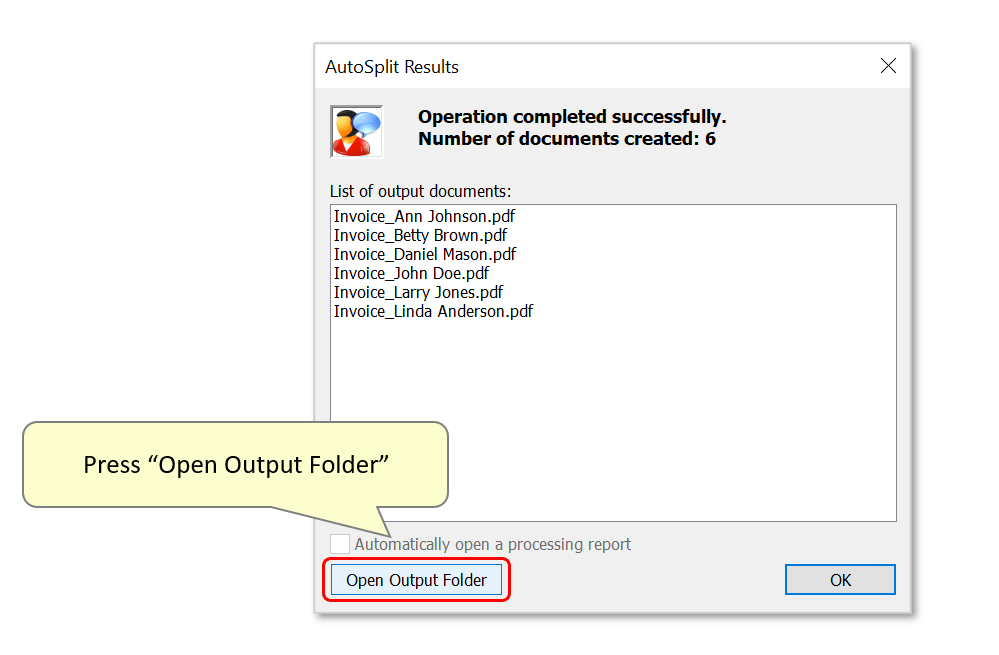
- Step 6 - Check the Results
- A results dialog lists the output files that have been created. Press the "Open Output Folder" button to view them.
- Open an output document in Adobe Acrobat to check it.
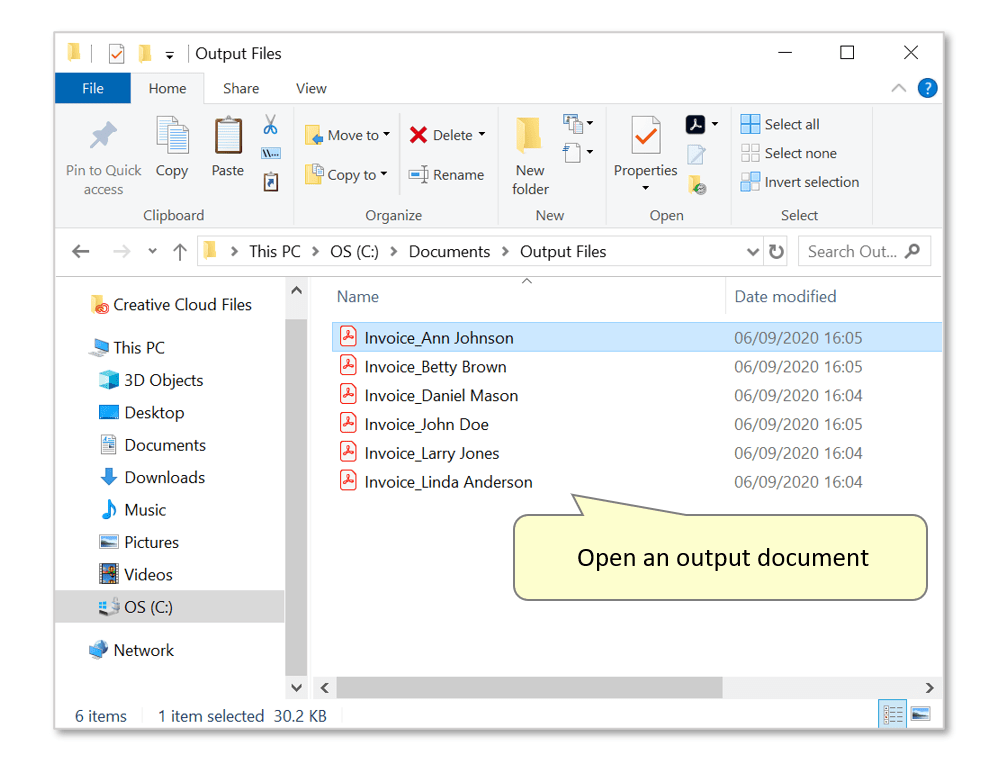
- In this example, each output document has been successfully watermarked.
- Example 2: Using JavaScript to Add Document Properties
- These sample lines of code can be used to add document properties to output files. They may be useful for adding metadata information to the documents.
- Edit the text within "..." quotation marks according to your document's requirements, and run the split operation.
- To view document properties in an output file, open it in Acrobat and select "File > Properties...".
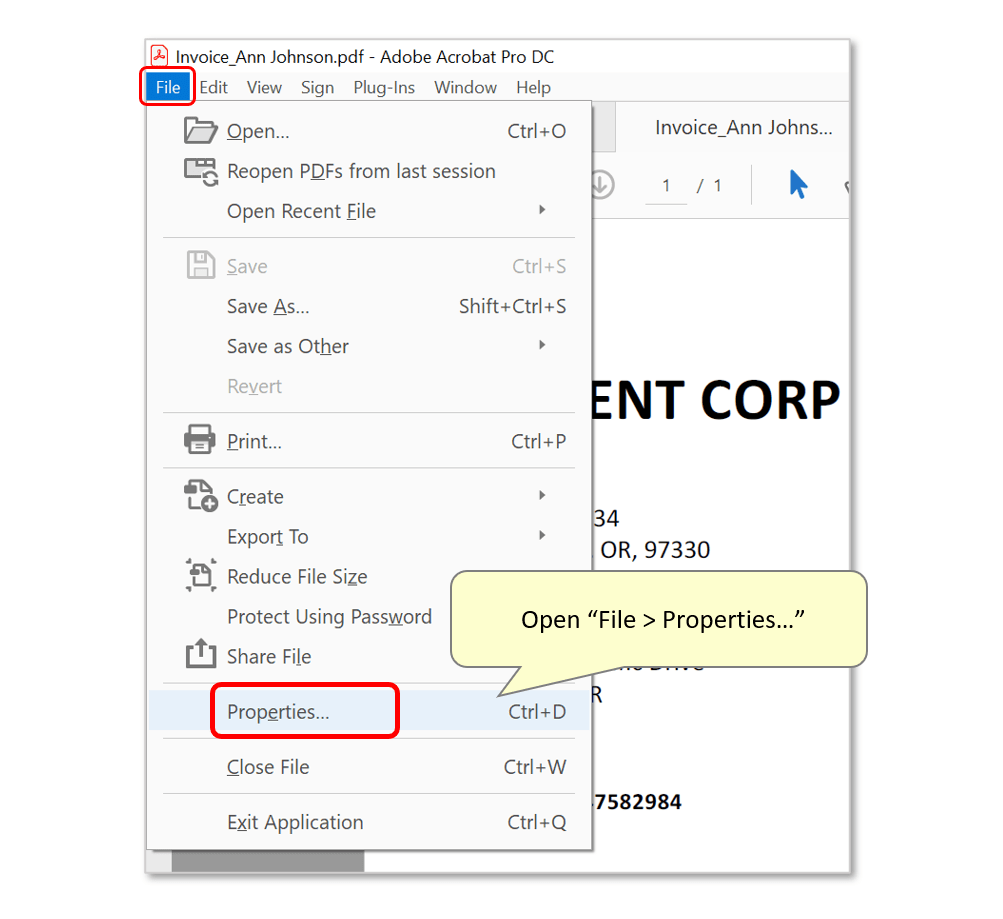
- Open the "Description" tab. All document properties that were added via the JavaScript code can be seen here:
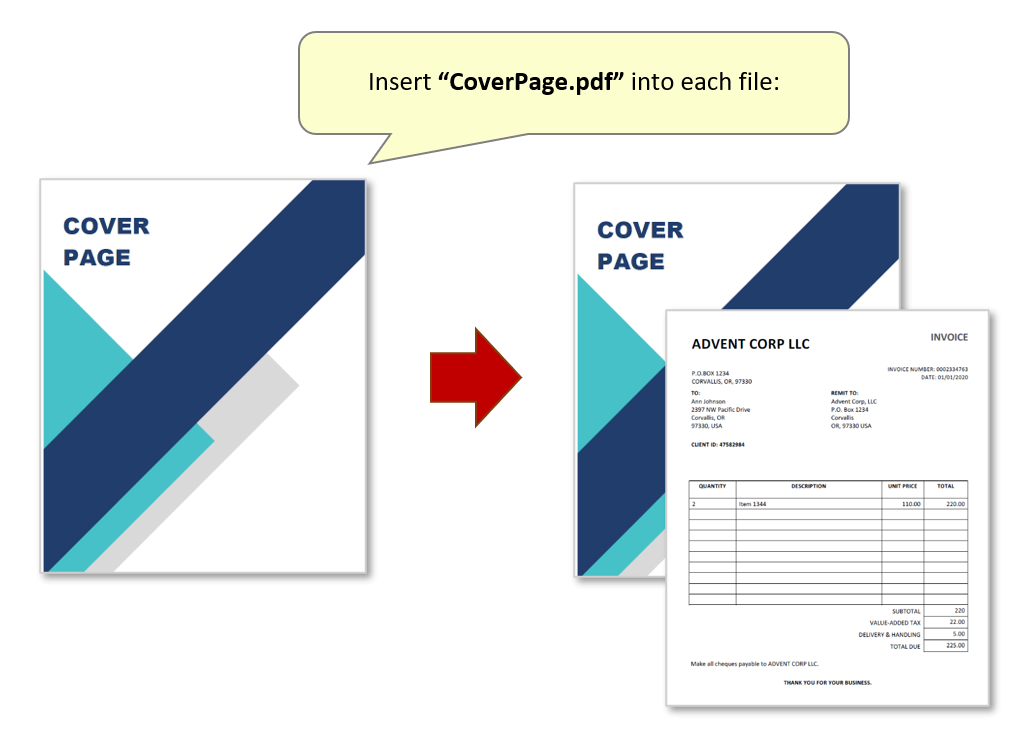
- Example 3: Using JavaScript to Add a Cover Page
- The sample script shown below can be used to insert a cover page into each output file. The file path is specified within the code so that the plug-in can locate the file that is to be inserted.
- Using this script, the "CoverPage.pdf" document has been inserted at the beginning of all output documents.
- Example 4: Using JavaScript to Print Output Files
- This script can be used to send output documents to your default printer:
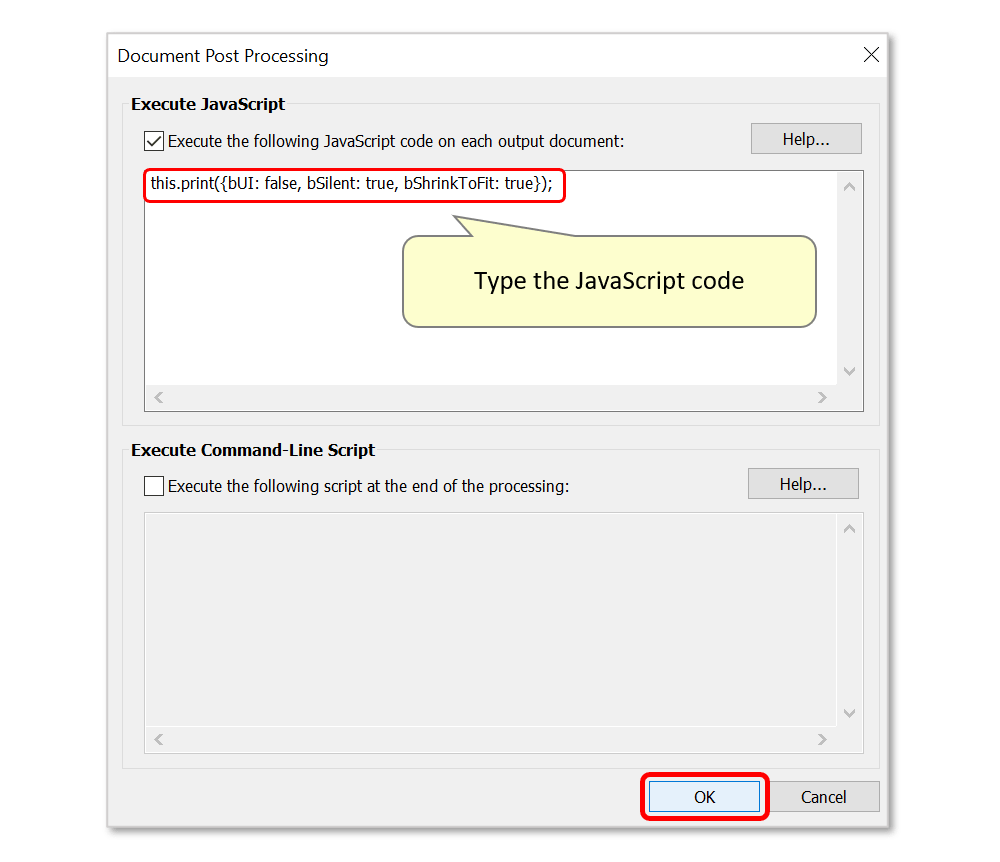
- Once the split operation is complete, the output files will immediately be sent to your default printer queue.
- Contact EverMap technical support at tech@evermap.com if you need help writing a particular custom post-processing Acrobat JavaScript script.
- Click here for a list of all step-by-step tutorials available.